Excellent write up. This is all invaluable information and also a good read!
Very methodical. I’d be useless faced with the same tasks. I’d put a nut and bolt “somewhere safe” and lose them
It’s certainly daunting, particularly when dismantling it all in the first place because the end goal just seems to keep getting further and further away.
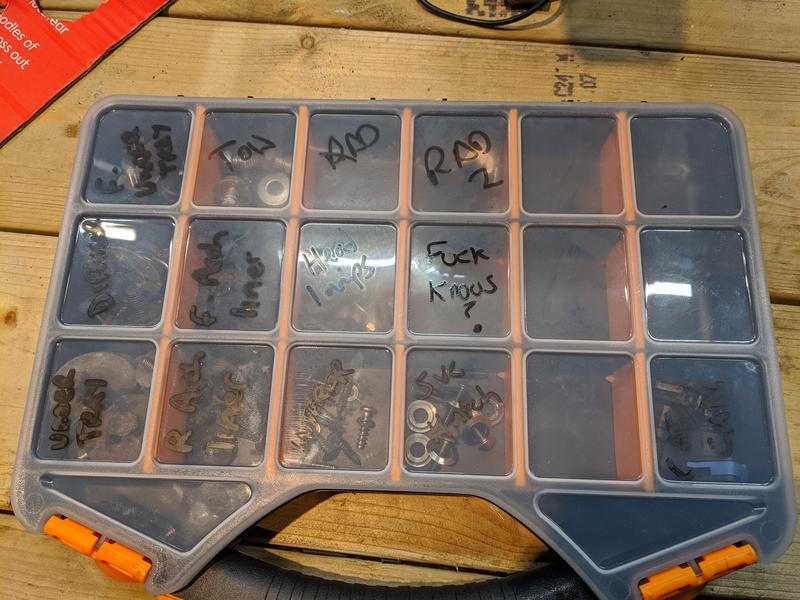
Little things help though, labelling wiring and sorting/storing fittings in something like this:
The diagrams on deroure are also invaluable, honestly wouldn’t know where to start without those - plus it gives me part numbers of stuff I need to replace when I cock it up!
Some progress/milestones achieved this weekend so far, will get my next update put together later tonight with any luck.
More updates, on babysitting duty tonight so good opportunity to sort through photos and get myself caught up. It’s been a hectic few days, sorting out jobs on the Lotus in the odd 30min slots so progress a bit scatter gun but some pretty nice milestones have been ticked off and suddenly everything is coming together.
Still no progress on the AC pipe, but that can wait till last now as it can be the last thing I do before the clam goes back on really.
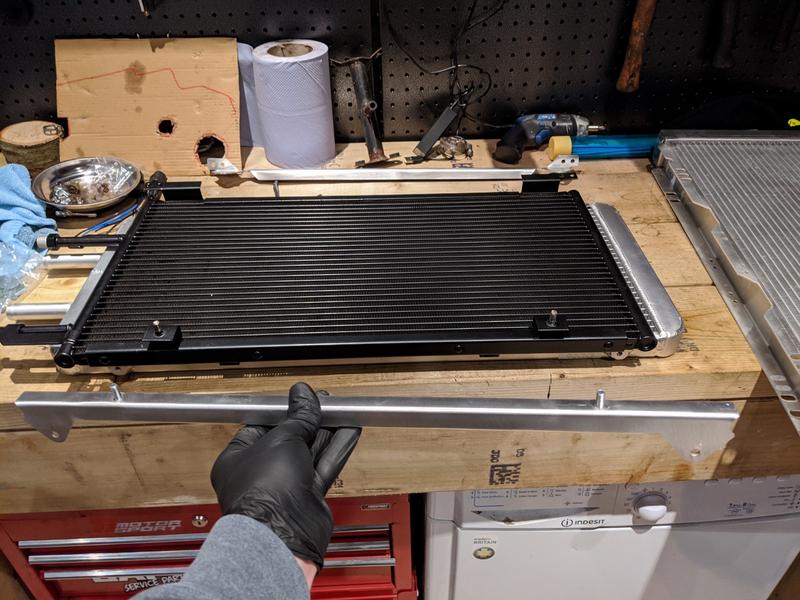
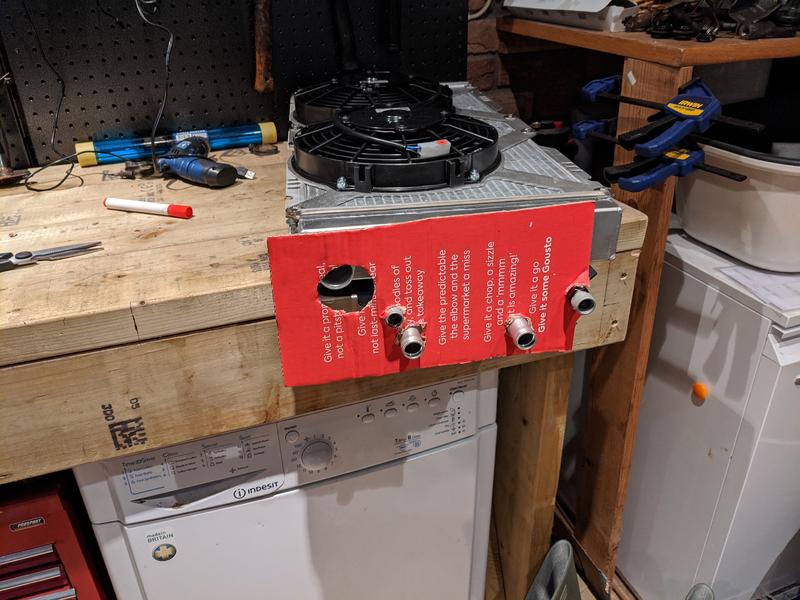
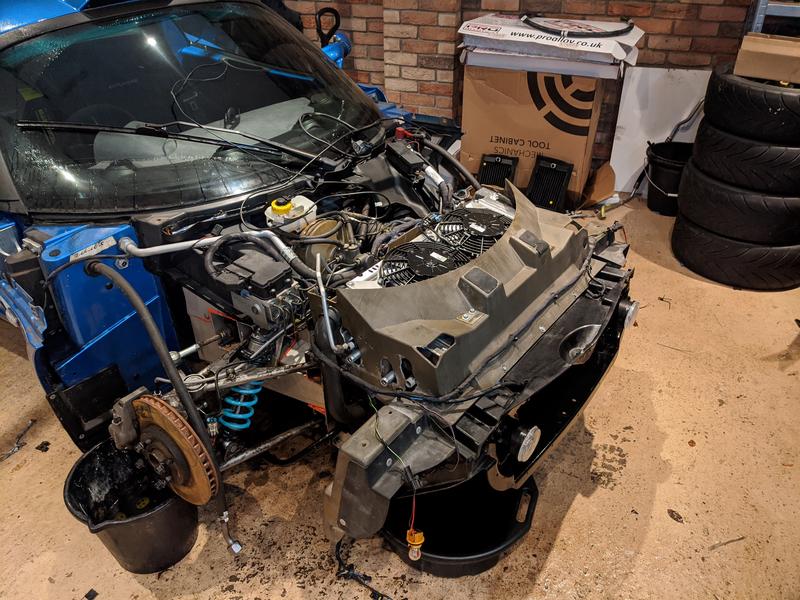
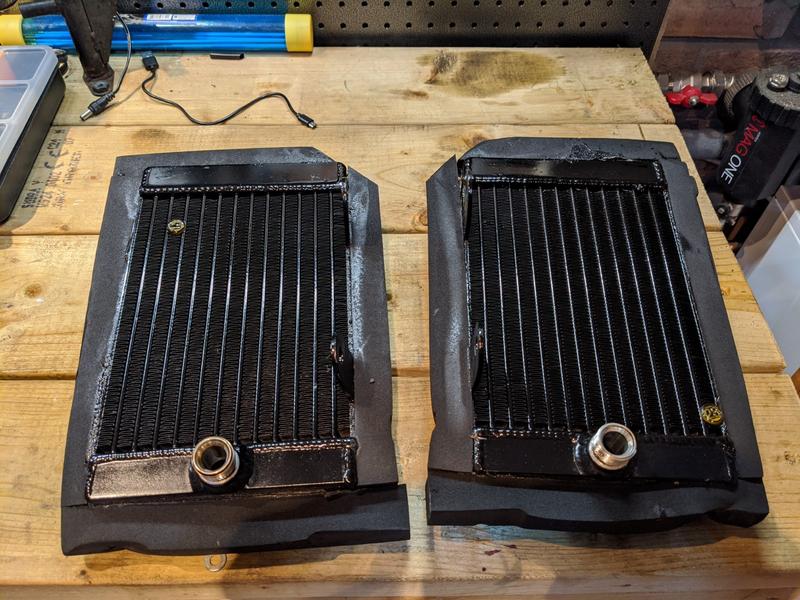
With the radiator shroud off the car, I could build up my stack of new radiators and plan out the modifications to the shroud before fitting it all together and dropping it back on the car as a complete unit.
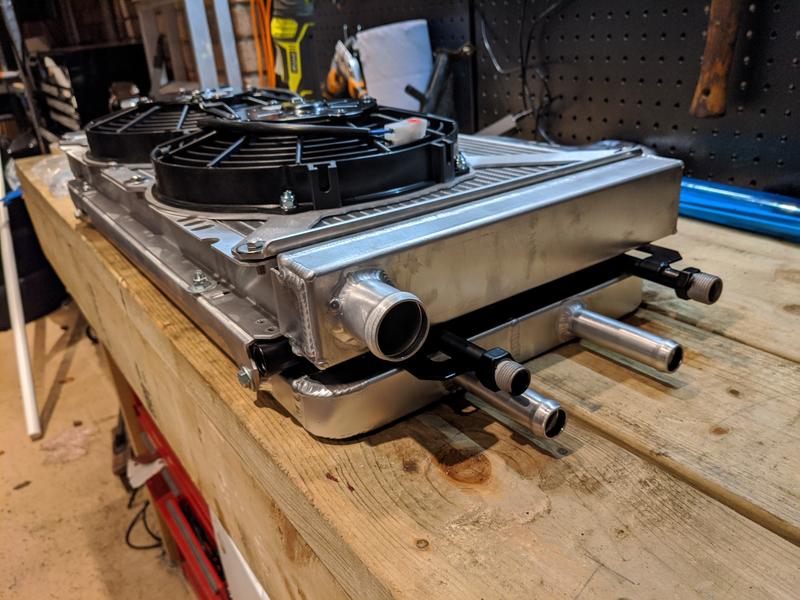
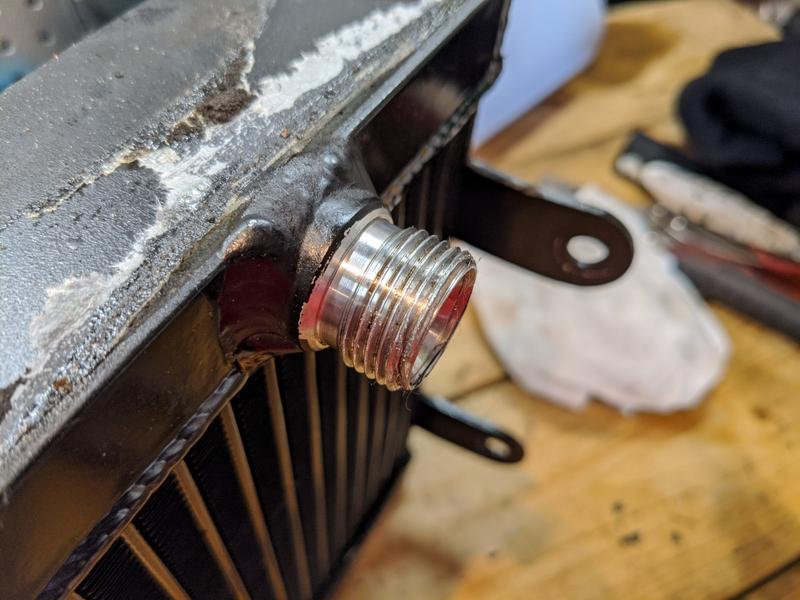
The Pro Alloy kit comes with some brackets which are specifically intended for coexisting an AC condenser with a radiator and a charge cooler pre-rad. The only instructions that came say “these are unique on each side, so get them the right way around”, with no guidance as to what “the right way round” actually is ![]()
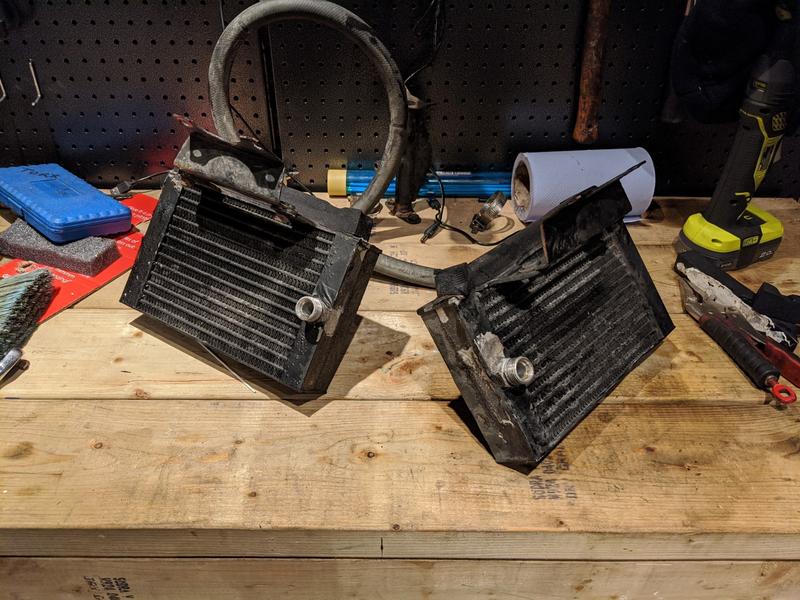
The AC condenser also came with some brackets which were riveted on. It looked like these needed removing so that my charge cooler bracket could replace it, but I wasn’t 100%. Luckily where instructions/documentation is lacking - support from Pro Alloy is fantastic, answers to emails within an hour or so confirmed that the AC condenser rivets needed drilling out and the brackets binning.
Once this hurdle was cleared, it was just a case of stacking the rads and figuring out how it all went together. Seemed pretty straight forward but no obvious clues still as to what the “right way” was. I figured I had a 50:50 chance so just cracked on.
The new twin pull fan setup came on a laser cut bracket which bolted to the top:

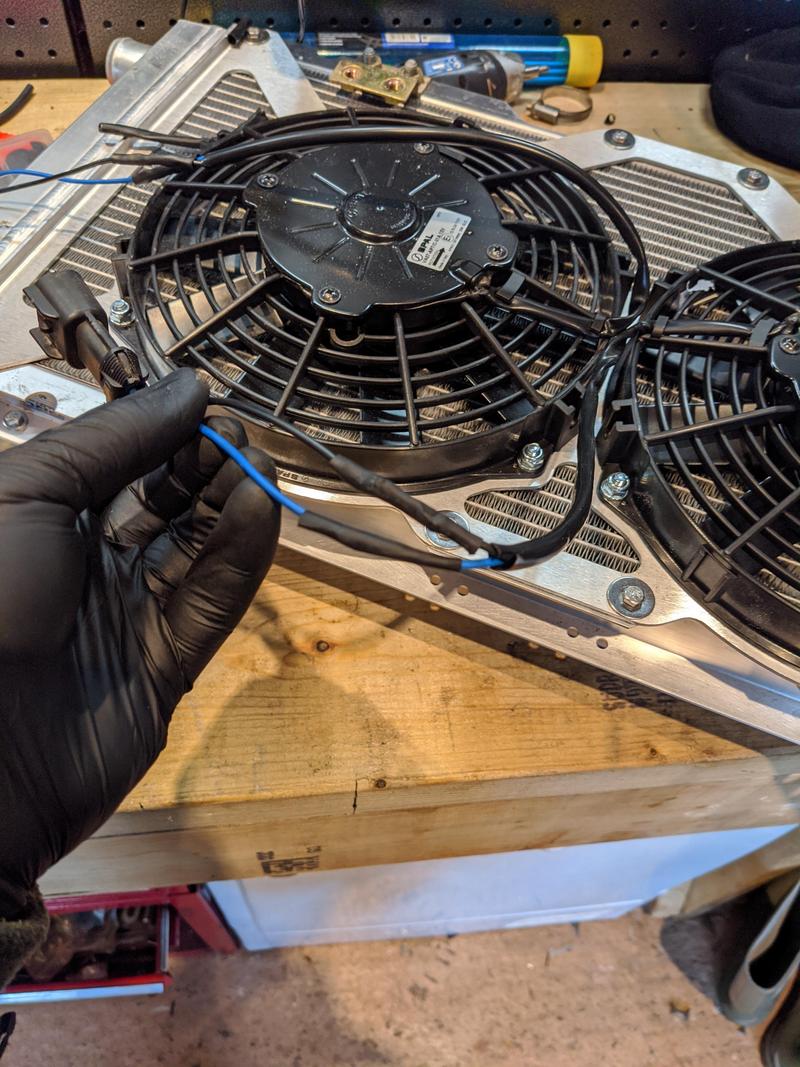
Next up I had to chop the connectors off the old fans and solder them onto the new setup. The polarity here will influence the direction of the fans, I did a test run with a battery and joining blue to blue and black to black blows the fans in the correct direction, but apparently the polarity and colour coding on the “car side” can be a bit random… some people report putting it all back together and finding their fans blowing wrong, so need to make a note to test this before clam goes on!!
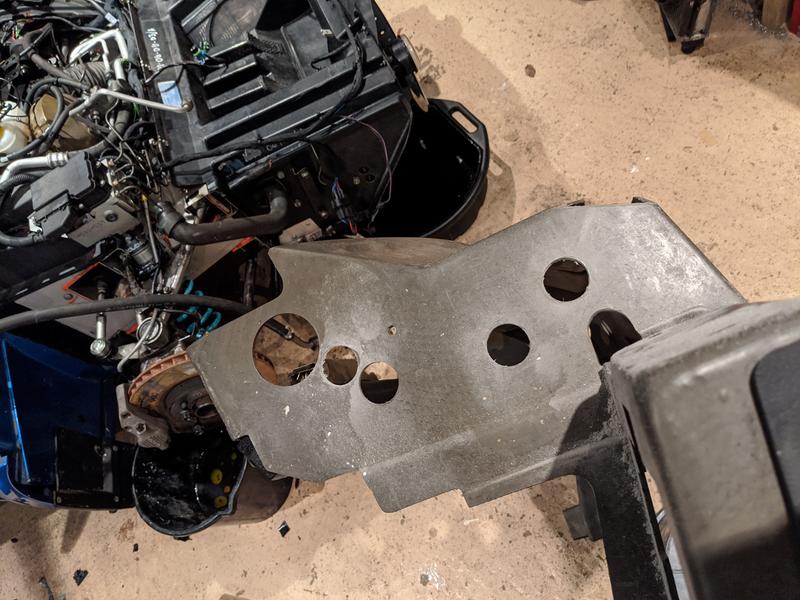
The next step was to figure out where new holes needed cutting into the radiator shroud to get the extra hoses through. Made up a quick template using the original rad hose and AC hose outlets as a reference:
…which led to:
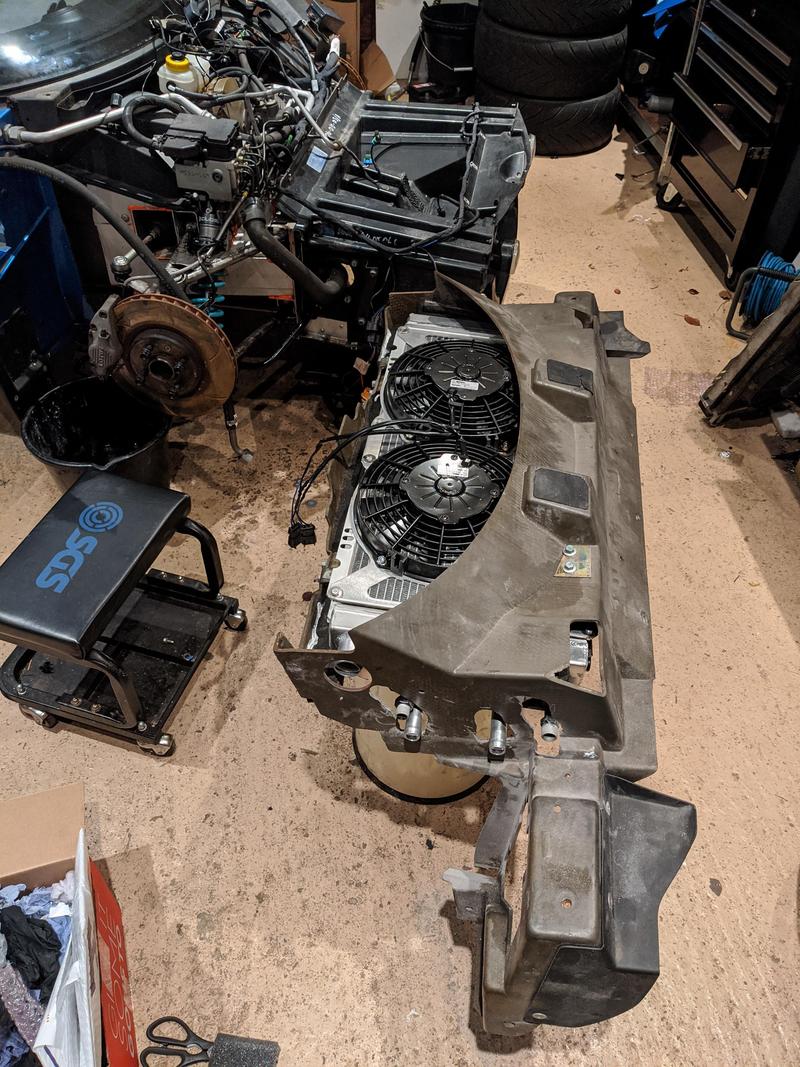
Unfortunately it was not destined to remain this tidy. I later went onto find that fitting the rads back into the shroud required a fair bit of angle and pivoting so the holes ended up enlarged by quite a bit. It would have been quicker and cleaner to just cut out a massive void to take all outlets, it’s not like this shroud needs any real strength.
Fitting back into the shroud made me realise what was finally meant about putting the brackets on “the right way round” and guess what, I’d got it wrong. The summary is that the back of the radiator needed some bolt holes clear for fitting to the shroud, and they were occupied by a stud on the “wrong” bracket, so had to dismantle it all and swap them round.
The OEM rad is covered in foam strips to stop air from escaping round the sides of the radiator. I ripped those off and copied onto the new rads, and used some extra sponge to fills some gaps.
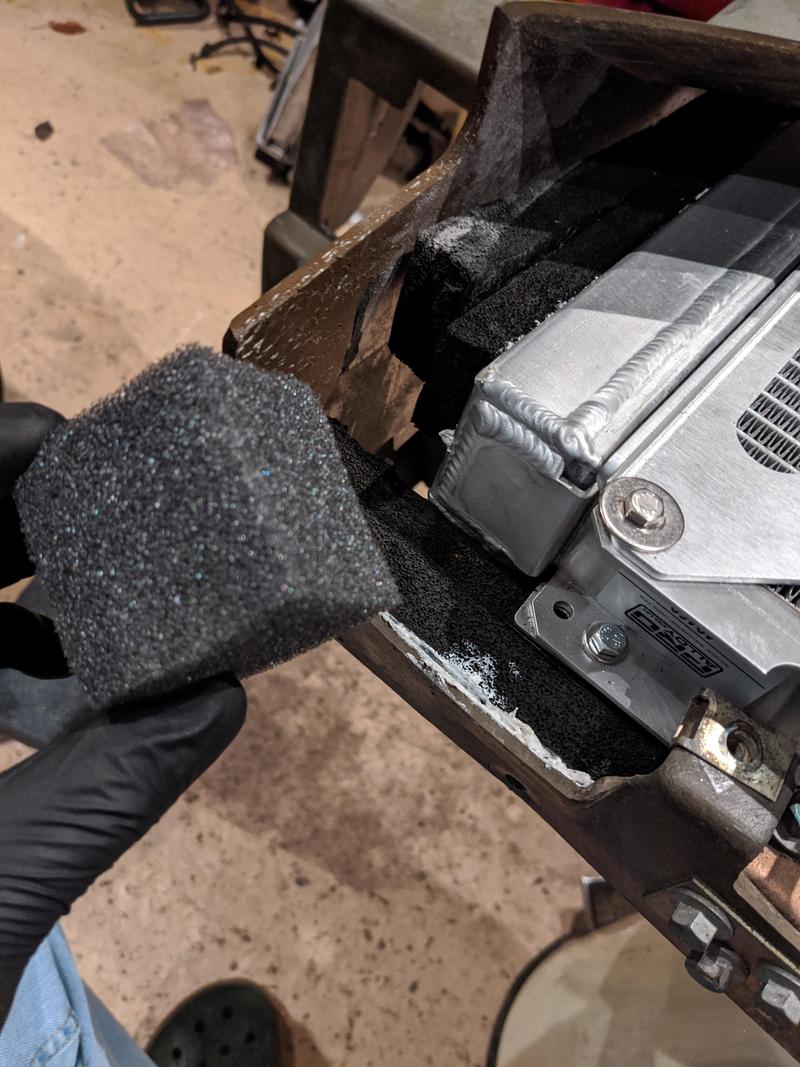
It’s pretty airtight round the radiators now, better than the stock arrangement - every little helps but I’m not entirely convinced my adhesive will survive the heat/airflow stresses so it might all just fall off and rattle around behind my grill… we’ll see.
Here we have a bit of a milestone, rads and shroud fitted back to the car!
I spent a bit of time reminding myself where all the wiring had to route to supply the driving lights, horn, light clusters, etc. The oil coolers aren’t back on yet as they could do with a bit of tarting up.
Easily the most daunting part of the charge cooler install is running the coolant hoses down the sill. A few posts ago I posted the following diagram which had to options for routing:
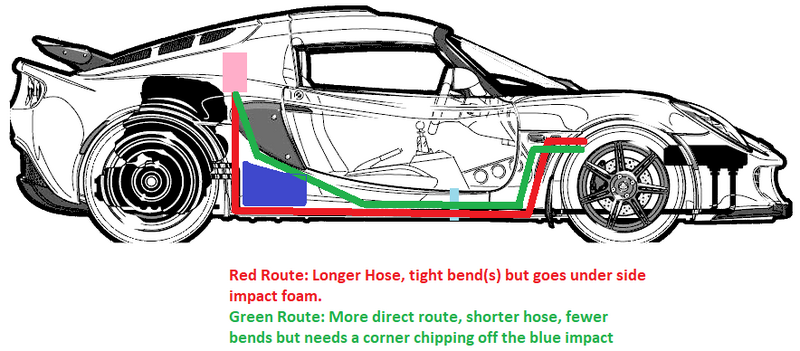
I decided to go green because:
a- It’s the most direct route, requires less hose and “gentler” bends.
b- It’s the only route I could find first hand experience/advice on… so I know for sure it’s possible.
The first thing to do was hack a hole through the side impact foam at the back. Luckily removing the sidepod provides great access:
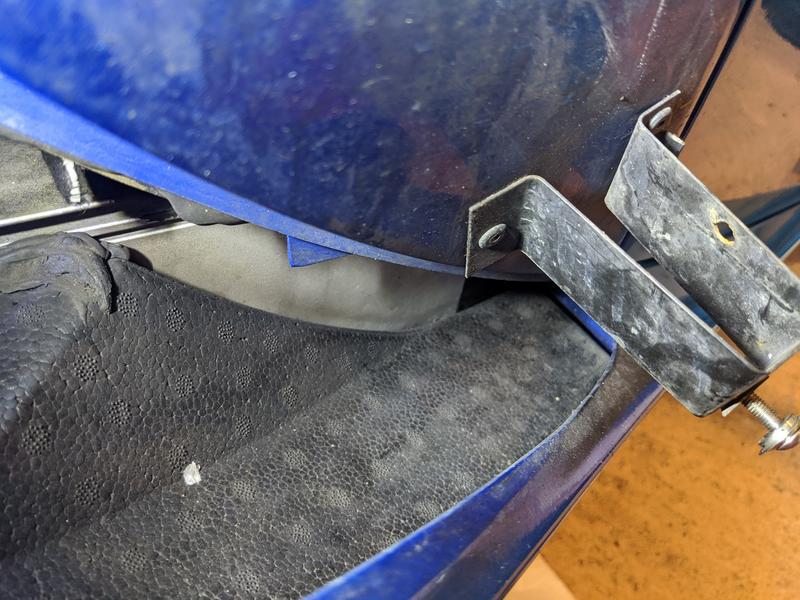
You can see the foam in question, forming the “floor” of the sidepod.
I started hacking away at the front edge of it with an array of screwdrivers and chisels, and it didn’t actually take too long at all.

The main issue is I didn’t manage to recover hardly any of the dislodged foam… so it’s down in the sill somewhere, but I imagine it’ll work it’s way out eventually through the “red route” of the diagram… or stay there forever, who cares.
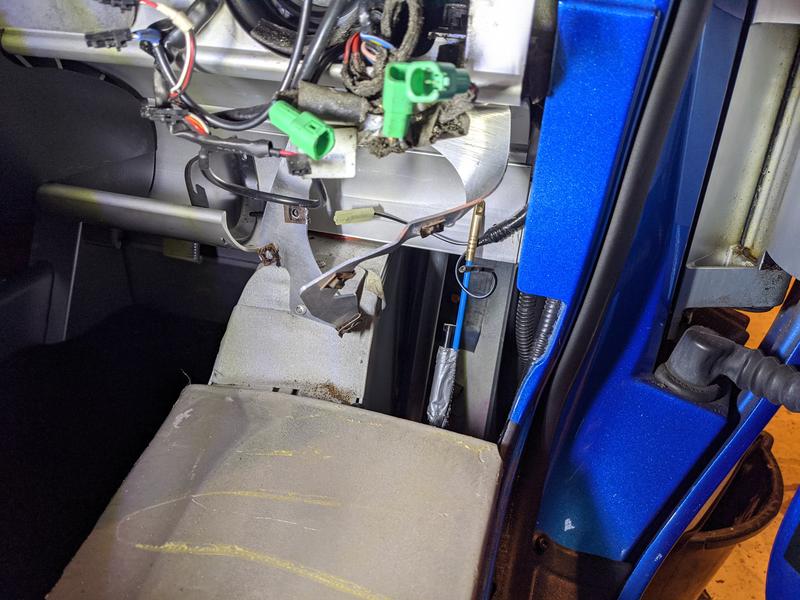
Once I proved to myself that two lengths of hose could make their way down into the sill (very tight), I started thinking about the strategy for pushing/pulling the hose through. I could either go from the front of the car and try to fish the hoses up through the hole in the foam, or push the hoses through from the rear and figure out how I get them out of the front later. I went for the latter.
Using some wire-fishing-pole things that electricians use to feed cables behind walls etc, I poked some string through to the front of the car, tied it to a length of hose and then got pushing/pulling. As it turned out, the string was pretty much useless and I did pretty much all of it by pushing. Eventually it popped through into the access hole in the cockpit. (no picture of this, but here’s the end of my fishing rod for reference)
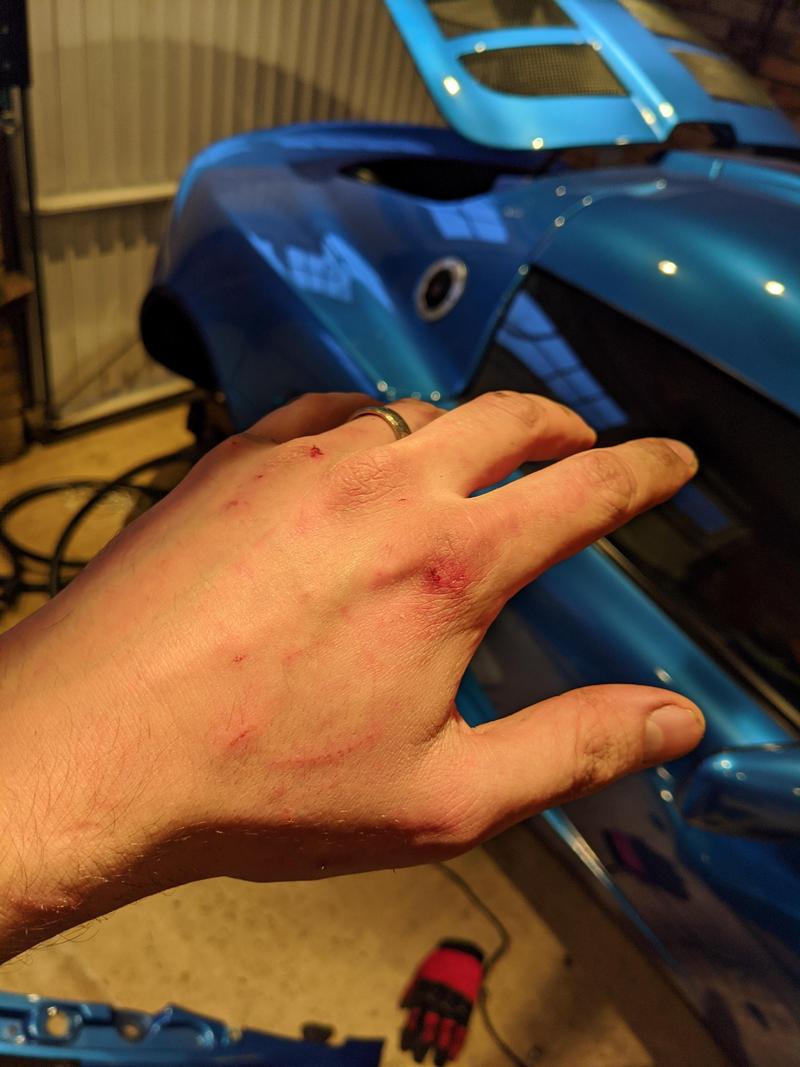
The second hose was a bit harder, as obviously the channel was now more congested but it really didn’t take long. The biggest issue with this job was injuries to my hands… the inside of the sill is like a meat grinder with unfinished edges, bits of rivet, clips and potentially maybe even a rodent of some kind just taking chunks out of me any time I went in there.
The wifi endoscope I got at Christmas has really earned its place during this work, really impressed with it and wish I’d bought one sooner!
With both hoses ‘available’ in the car interior, I felt quite relieved - as this was pretty much the hard part done! The next/final part will be to drill holes in the front of the sill, fit the grommets and then try and poke the hoses up through them. The positioning of the holes needs to be well thought out, as I’ve got oil cooler lines and AC pipes back there and I need to both avoid damaging them, and find a route that I can use.
Couple of other bits of tidying up involved the brackets holding on the driving lamps, they really rusted away on my old Elise so required a bit more of a refurb but these were sound, so I gave them a quick coat of hammerite spray and will XCP them up once dry:
I noticed one of my lenses has a stone chip too, so might replace that before the clam goes on.
Next steps are:
- Get the hoses out of the sill and connected to the pre-rad
- Reconnect main rad once new jubilee’s arrive
- Top header tank up and bleed out all the air. After disconnecting the HVAC, rad and a bunch of hoses I think I’ve lost more coolant that I first realised so might take some time
Once that’s done, I can turn my attention to the rear of the car. Intercooler needs to come off (minutes of effort) and the chargecooler fitting with header tank. Before it goes on I’m going to lift my cam cover and check for wear on my intake cam lobes. This wear was a bit of a thing on some 2ZZ engines, no confirmed root cause but I later found (after selling it) that my old Elise suffered quite badly from this and it was the same 2006 vintage.
Oh, and finally between all this we bought a new daily:

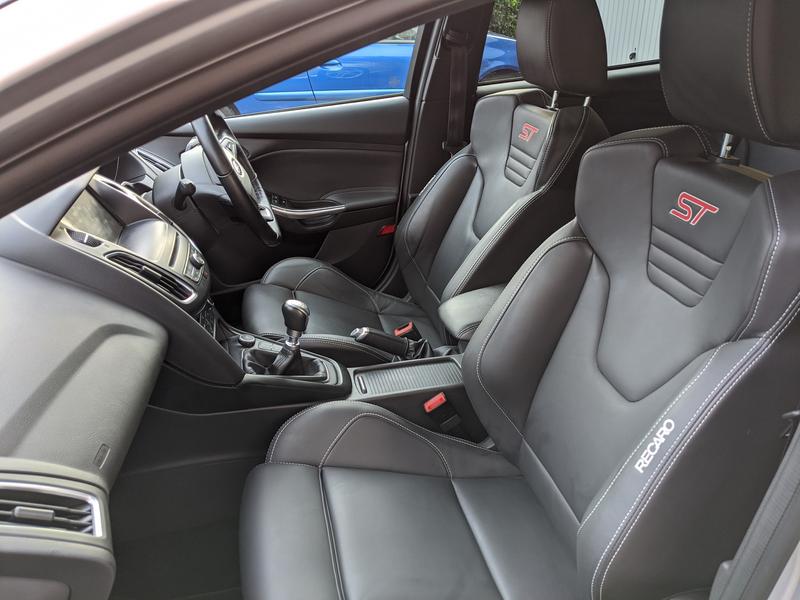
Focus ST-3 Estate, baby is getting heavier and the car seat was getting more and more awkward in the back of the 3dr Civic. It’s got a fantastic spec, gadgets everywhere (but the Ford SYNC satnav is awful). Nice to have a bit of torque back in the daily fleet too, after the Type R and Clio182 it was becoming a bit exhausting ![]() 182 is now also up for sale, hint hint.
182 is now also up for sale, hint hint.
Great write up. Enjoyed reading about your pro alloy exploits!
More bedtime reading. Thanks. Like the new motor👍
Glad you’re enjoying gents, I enjoy writing - a job like this feels hectic (and painful) when doing it but I know I’ll miss the constant source of tinkering once the car is done, so reading these threads back that I write lets me re-live it from time to time.
If somebody else enjoys reading, then that’s just a bonus ![]() On a serious note though, I honestly don’t think there’s a single detailed write-up of an Exige CC install out there, a couple of decent VX220 ones but there are some key differences. Hopefully people can actually find this useful and inject a bit of bravery to do the work themselves.
On a serious note though, I honestly don’t think there’s a single detailed write-up of an Exige CC install out there, a couple of decent VX220 ones but there are some key differences. Hopefully people can actually find this useful and inject a bit of bravery to do the work themselves.
Seeing the trouble you went through I’m so glad proalloy fitted mine, well it was their test mule and it is hardly a surprise they had it for a while!
I read through a lot of your early chargecooler posts when scraping for info, I certainly wouldn’t want to be doing the R&D on this kit in the first instance! In fairness though, the kit does seem well put together and other than being time consuming it’s really not been too difficult yet. Most of the time I’ve spent on the car so far has also been HVAC related, so can’t really blame the CC for that entirely.
If my posts deter somebody else from having a go at this install then that would be a shame, it’s well worth taking on if you’ve got a basic tool set and some patience/time. I’m rather enjoying it!
Oh a little nugget that I often hear/read speculation about. How much weight does a CC setup add?
I’ve now got all of my “OEM” components off the car so I can work out the weight penalty delta. Assuming that the 5l of coolant spec from Pro Alloy is correct, then the total weight gain will be 13.55kg. I might shave a little bit off once the hoses are trimmed down to their final length.
9.85kg of that is from the hoses and the coolant, the rad stack itself adds around 2kg and the chargecooler/header tank/pump adds about 1kg between them.
In raw bhp/tonne terms that means that on a 260bhp baseline that I need to gain just 5 usable BHP to retain the same power:weight ratio. If Pro Alloy are close with their 20bhp claims, then obviously this is a fairly strong net gain (even though I’m doing this for tracktime longevity and not headline figures). Obviously power:weight is only part of the equation, so I will be aiming to lose that 13.55kg from elsewhere on the car in the longer term anyway.
I’ve got the pig-iron standard wheels, so there’s an “easy” if not cheap way to knock 10-11kg right away. New battery and then we’re already there without anything intrusive.
My 2004 model with aircon weighed in at 932KGs with pro alloy kit, with a race battery and ultra light 240r wheels.
Dunno if thats of any significance!
Yep that sounds about right. When mine was on the scales last year it was 935kg with OEM intercooler, big battery and fat wheels.
So you’ve gained the 14ish kg of Chargecooler, but ended up 3kg lighter through the wheels and battery… the maths add up. Nice turd on the morning of the trackday and it’s pretty much an S1.
When I weighed mine the last time when it was at its lowest weight it was 880kg with AC and a full tank of fuel, a lot of carbon went in to getting it to that weight when you consider the car still had AC, huge brakes, accusump, gearbox cooler etc.
The list of carbon was;
Roof
Boot lid
Diffuser
Rear Wing (large curved reverie one)
Splitter
Seats
Front access panels
Doors
Door cards
Sill covers
Side scoops
Centre console
Add in the 240r wheels, race battery, proalloy tank and removing all the interior panels and carpet, that was everything that saved weight (I left the stereo and front speakers)
Good info that, I can imagine a huge proportion of your savings as come from will be the boot lid and spoiler - it’s unreasonably heavy as I found when swapping out the old twin-struts for the newer single one.
I’m not “into” carbon fibre as a rule, but the boot lid is one area I’d consider it even if it just got painted laser blue to hide the weave ![]()
Roof, boot lid and the outside of the doors were painted to match the car, all the other parts were lacquered carbon.
The big saving were all the external parts plus the seats, but you’d be surprised how much the door cards weigh, I think somewhere I posted most of the weight savings as I went along. But even each access panel was 500g lighter, making an overall saving of 1kg for 2 of them
Sounds amazing! Got any photos in a thread somewhere? Your car sounds like quite the project.
I fitted the roof etc in 2011 and the doors in 2012 or 13, think all the pictures were in photobucket so they might not work, I might have some I can uplaod
I’ve found an AC guy!
He’s about an hour away, has a mobile van with recharge kit and basic fittings / pipe benders to make up replacement lines. He’s going to come take a look on tuesday, potentially taking my damaged pipe away but he sounds confident he can sort it for me.
Result!
It’s update time:
This week I’ve finished off the hose routing through the sills, where I left it the hoses were available to grab via the interior cubby hole but had no route into the front clam/radiator area.
Using the endoscope I mapped out a few candidate locations for drilling. I had a choice of having both hoses come out on top of each other on the far edge of the sill, or split them up and run one down the inside and one down the outside. I went for the latter option.
I did a diagram that may/hopefully help other people in future understand where the other plumbing runs in the sill. The AC ones are the ones to watch, as they immediately kink off to the outboard direction and ‘hog’ the centre channel of the sill:
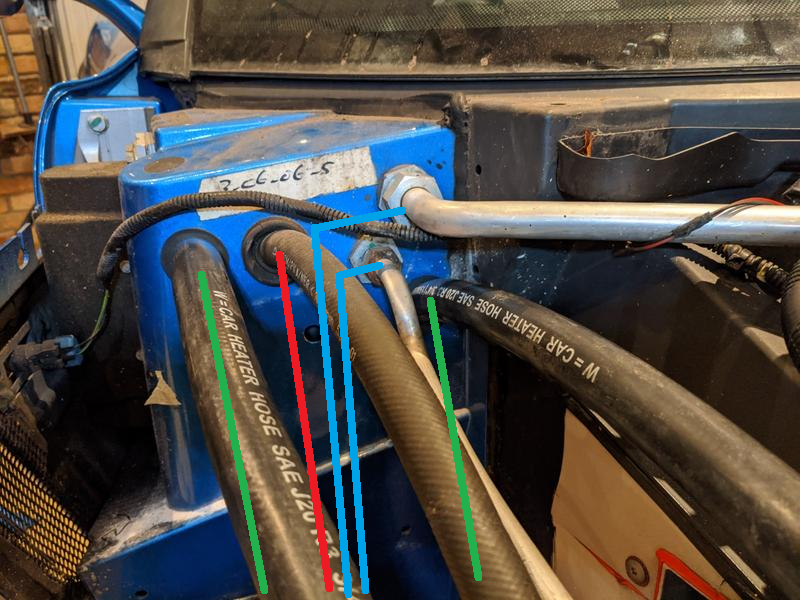
Green Lines = New CC lines
Blue = AC lines
Red = Oil Cooler Line
So at first glance it looks like the area beneath the two ally AC lines would be a no-go zone, but actually due to the kink it’s really clear.
After a couple of pilot holes for the endoscope to peak through, I ran the 35mm hole saw through and then dropped some string down to drag the hoses out into freedom. They aren’t too snaggy, I can add more slack if needed by pushing from the back and then pulling from the front - so allows me some room for adjustment once the clam goes back on.
Inside the sill I put some edging on a sharp-ish edge on the door hinge mechanism, pictured here:
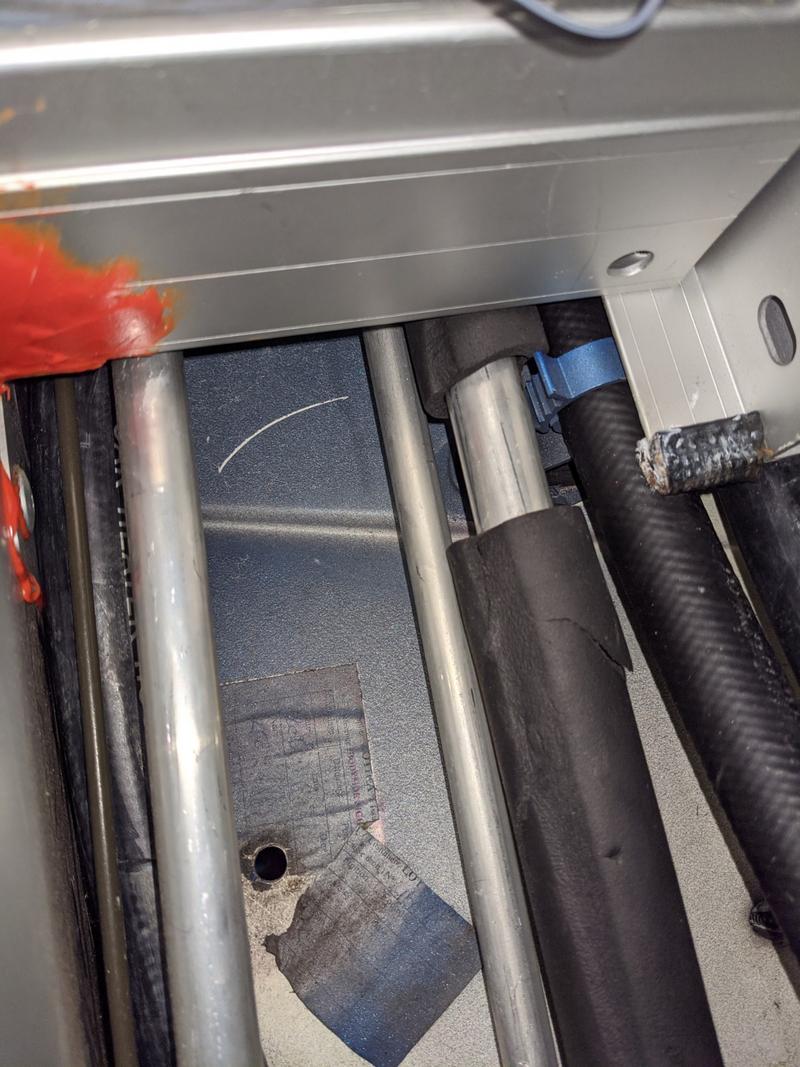
You can see my CC lines here, one on the far left snug behind a brake/clutch line and one to the far right of the oil cooler line. AC hogs the centre bit.
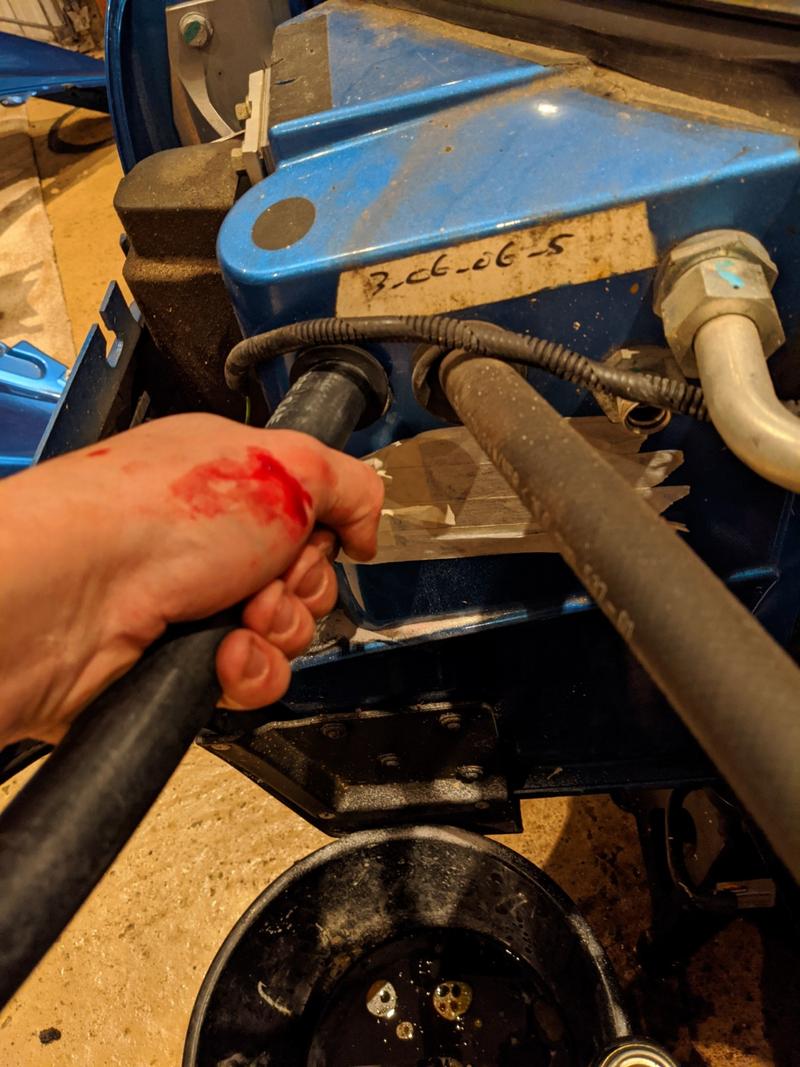
It was a really triumphant moment when the hoses came through, by all accounts the hard part really is done. My hand isn’t just for show, it’s completely fucked from doing this job.
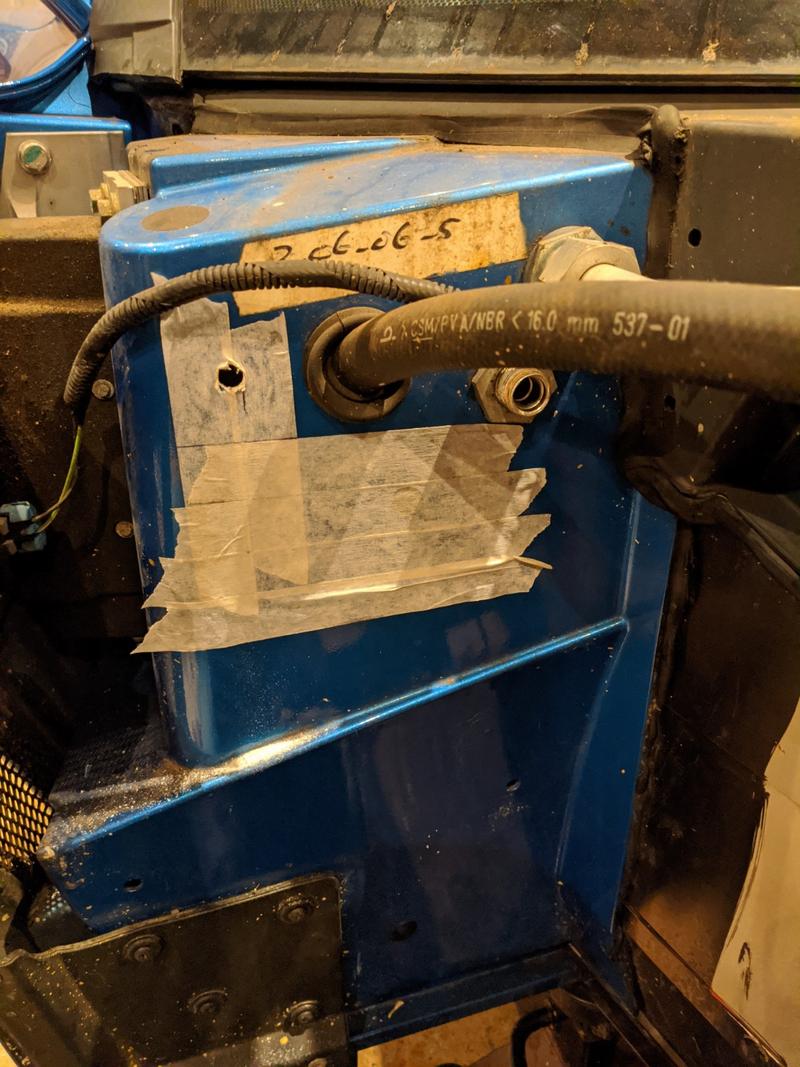
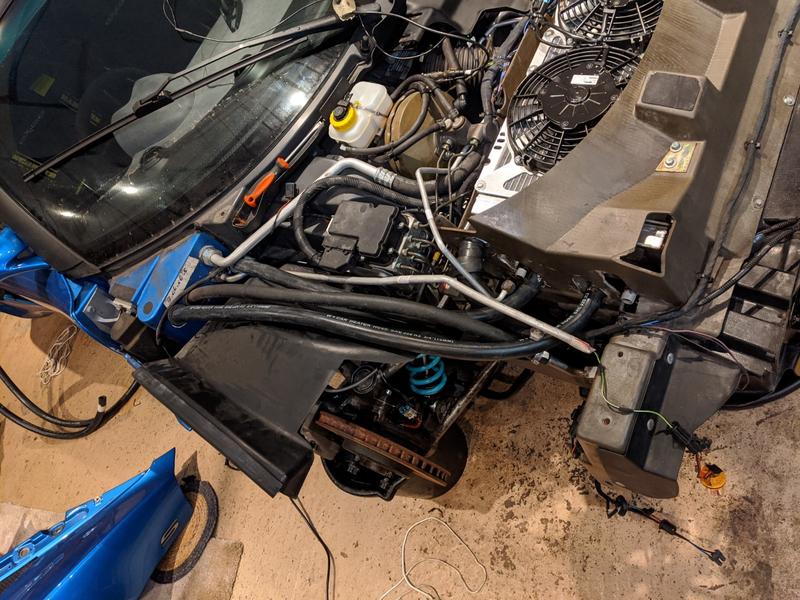
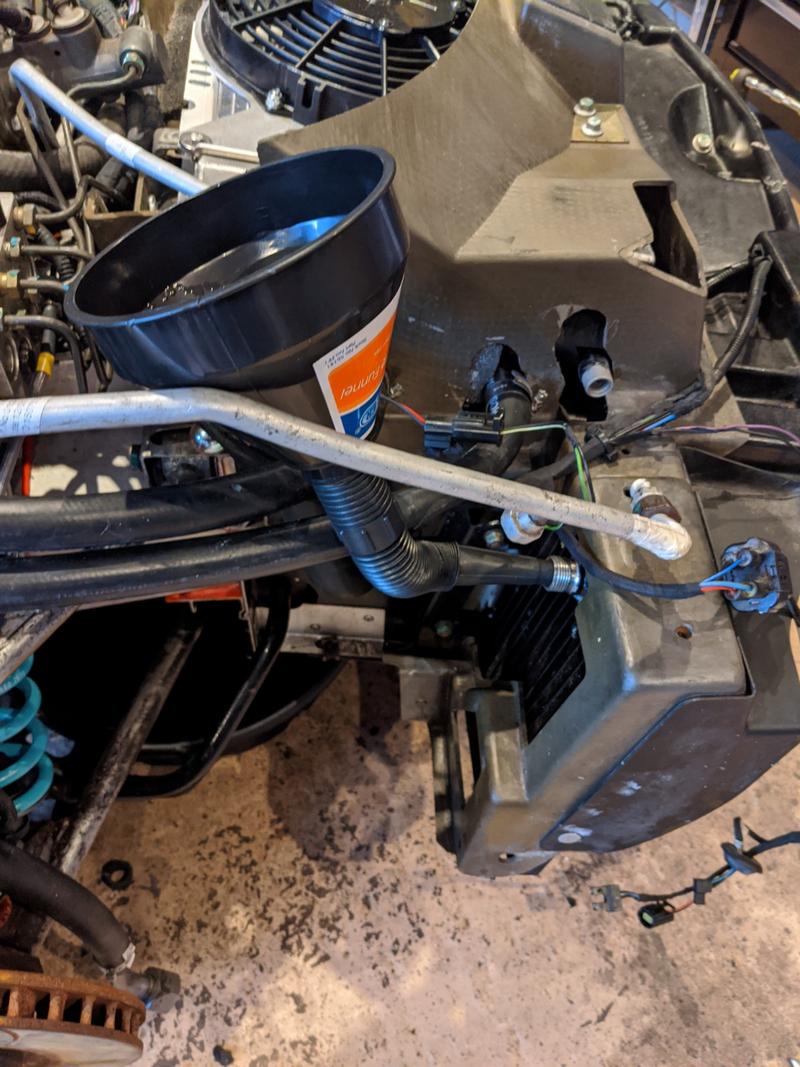
Following this I got the chargecooler pre-rad plumbed in, and re-attached my engine coolant hoses with new jubilee clamps ready for the coolant refill.
Next up was to re-attach the oil coolers, should be an easy job but I tarted them up a bit first:
Unfortunately, I noticed that the thread on the NS one was a bit damaged. Very soft aluminium and looks like I could have damaged it during storage whilst the other work is going on. I tried to slowly/gently thread the fitting back on in the hope it would clean it up - but it just made it worse.
Luckily a fellow owner removed his oil coolers a year or so back and offered his up for a generous price so I had a backup. I collected those last night but after a chat with a local engineer decided to have a quick go at cleaning up the thread on my cooler.
It actually cleaned up really well, so after gingerly attempting to put the fitting back on - I think I can declare it fit for service once again. The fittings seal on the inside via a taper and o-ring, the threads are just used to clam that in place. I’ve put a bit of threadlock on it just because it makes me feel a little better - but it seems on square and flush.
That does leave me with two oil coolers I now need to get rid of ![]()
I did also consider a backup plan of simply bypassing the NS oil cooler and “downgrade” to a single cooler setup. Not just to be cheap, but because some communities feel the OEM twin cooler setup will over cool the car in most instances. They do work off a thermostatic plate but it doesn’t close completely meaning there’s always a steady trickle of oil through the cooling circuit. I monitor my temps and I’m fairly happy with them, but do agree that they take a bit longer than usual to heat up. Perhaps I’ll come back to this plan if my fitting doesn’t stand up to a few bar of oil pressure!
Other updates for the week:
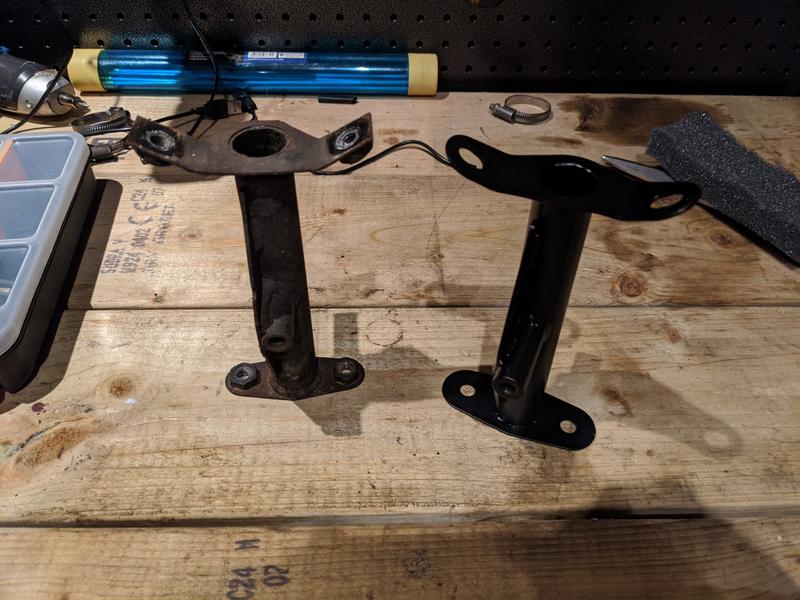
- Fitted a new tow post, it came powdercoated and it’s been generally coated with XCP. You can see the old one is still acceptable, but it’s starting to rot from the inside - so now is as good a time as any to swap it.
- Checked my intake cam lobes.
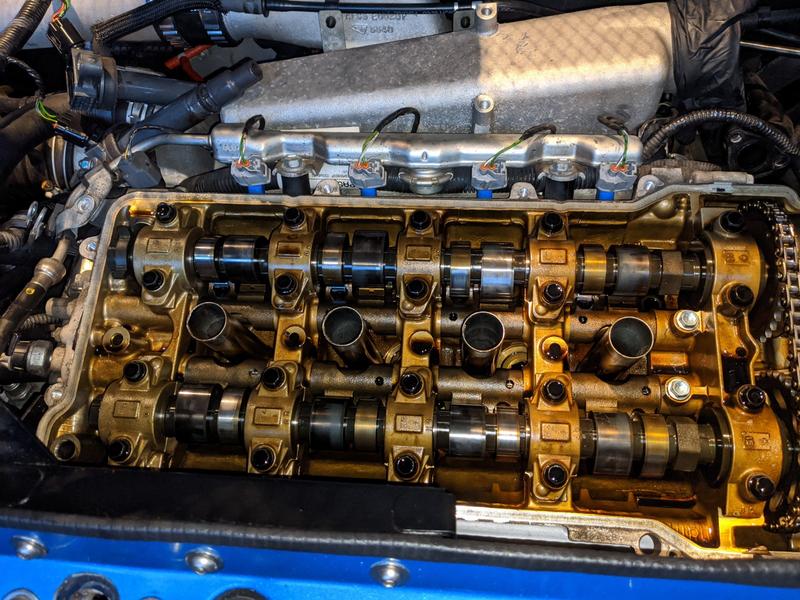
The 2ZZ has a bit of a known issue with the high lift intake lobes wearing(wiping?). The root cause seems unknown, it does seem to be more prevalent on US cars which suggests a batching issue perhaps but there are other theories including:
- Over cooled oil (see above)
- Poor usage, ragging before warm, etc
- Poor oil feed onto the Cyl3 lobe (the one that generally goes first, but not always)
Although I’ve got no concerns with how my car drives, I wanted to check this as I never did on my Elise - and after selling it on, the new owner had a pretty bad engine failure on track. The root cause of that is still unknown as he just swapped the engine out, but a basic inspection showed the cam lobes to be HEAVILY worn, so may have contributed especially if the rockers got damage too as a result.
As for my Exige, it seems like the cam is OK for now. No signs of wear and all looking fairly tidy.
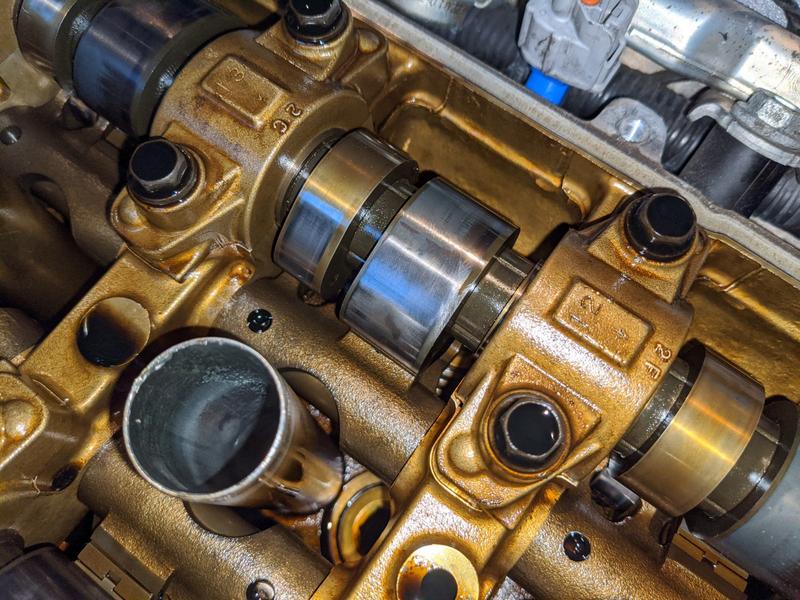
Whilst in there, I replaced another known 2ZZ issue - the lift bolts. Admittedly the lift bolt problems seemed to have been resolved by Toyota before Lotus ever got their first shipment of engines, but it’s still worth checking as they cost pennies. The lift bolts in their original design were more stubby and through standard use could eventually snap off, making you lose the ‘lift’ element of VVTLI but also making recovery a PITA. The revised versions are pointy and spread the load better, apparently.
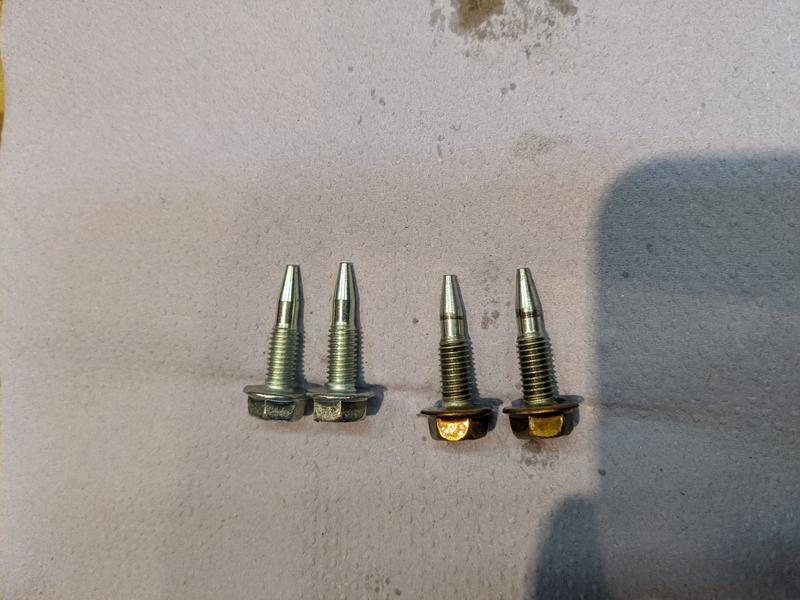
You can see the slight wear marks on the old ones removed - this is normal, but is what ultimately could lead to the old design completely failing. As you can see my (2006) engine already had the new design, so this was probably fine to leave alone, but like I say - pennies.
With the cam cover buttoned back up, I’m now ready to attach the chargecooler unit and fill both engine and CC system with coolant. I’m awaiting some engine oil so I can do a quick oil change before I kick off, as I lost a fair amount to removal/refitting of the oil coolers.
Oh, on that note - I wasn’t sure what would happen if I started the car with the oil cooler circuit effectively empty. I’ve “primed” the system the best I can by pouring oil into the top of one of the coolers - and I’ll give the engine a good few cranks without the coils connected to hopefully redistribute pressure again.
Small AC update, I’ve got a mobile regas engineer coming on tuesday to check out my mess. He’s got kit for making pipes at the road side, so he’ll either sort me out on the day or he’ll take my pipe away to get a proper replacement made. We’re also toying with the idea of swapping it for a rubber one too to make routing a bit easier. If he can sort a replacement out on the day, we’d really like to thoroughly test the AC system, so getting the car running properly before tuesday is my next goal.