2006 Exige S

Well first casualty of the installation… AC condenser wasn’t coming out without a fight so I’ve had to butcher it and one of the pipes to extract it.

Pro Alloy do a condenser which is about the same price as I can get an OEM one for but not sure about the pipe yet, might have to get one made up if I can’t source one. Dealer list price for one is far too much…

Where abouts are you in the UK [mention]Fonzey[/mention] ? I have a spanking new condenser on my car that isn’t used. If your local I can come yo you . Or you to me and we can extract it.

Hi Andy, Selby so just up the road from you I believe?!

Very kind offer, I assume you has it replaced then decided to delete anyway?! I’d happily come liberate it from your car but it might be a bigger job than anticipated. To get it out I think we’d also need to drain/remove your rad and chargecooler pre-rad so maybe one to think about?

I have new ones in stock ( same as those supplied by pro-alloy)

Still available with 10% discount until tomorrow morning using the code MINCEPIES2019

I completely forgot about that.

You are correct, I replaced then it failed elsewhere so I gave up.

[quote=seriouslylotus post_id=238528 time=1577885993 user_id=3313]
I have new ones in stock ( same as those supplied by pro-alloy)

<LINK_TEXT text=“https://www.seriouslylotus.com/aircon-c … and-europa”>Air Conditioning Condensor Elise S2, Exige S2 and Europa</LINK_TEXT>

Still available with 10% discount until tomorrow morning using the code MINCEPIES2019
[/quote]

Cheers Dave, will get mine out tonight hopefully to fully evaluate the damage. 90% sure I need a new one.

[quote=andybond post_id=238529 time=1577886665 user_id=27847]
[quote=Fonzey post_id=238527 time=1577885827 user_id=31614]
Hi Andy, Selby so just up the road from you I believe?!


Very kind offer, I assume you has it replaced then decided to delete anyway?! I’d happily come liberate it from your car but it might be a bigger job than anticipated. To get it out I think we’d also need to drain/remove your rad and chargecooler pre-rad so maybe one to think about?
[/quote]

I completely forgot about that.


You are correct, I replaced then it failed elsewhere so I gave up.
[/quote]

It’s a shame they’re not more accessible. Based on my experience with my clam this week I’m fairly confident that a pair of hands could get your clam off in 30mins or so - but that would still leave the radiator shroud needing to come off, and although I’ve not done that yet I’m pretty sure that means detatching the oil coolers (hence losing some oil), draining your rad and chargecooler… and well it’s just going to be a lot of work and mess.


It’s a shame because I’d much rather help you recoup some money than send even more to Pro Alloy (sorry Dave :lol: ) and as an added bonus I could probably nick the pipe that I need from you too :twisted: It’s a lot of work though, I wouldn’t want to put your car through it unless you otherwise had an excuse to take the front end apart! Really appreciate the offer though.


I’m probably stating the obvious by posting this, but obviously I now have my clam off. I did it over a couple of nights just while I waited for a spare pair of hands to help lift it off. All in all it was probably 45-50mins effort total though, doing it all from memory from the last time I did one (Elise) in 2017ish.


Thought it was a good opportunity to play with timelapsing too, video here: https://www.youtube.com/watch?v=Sccxo5HOv0Q


Once off I quickly made a mess of my AC system (as above) and then moved onto getting the stainless brake hoses fitted.


I’ll aim to refill the fluid and bleed next week, so then my car is kinda mobile again. I can back it out of the garage and park it in straight again, now the clam is off I shouldn’t need much access to the NS of the car so I can give myself more room to get the rest of the chargecooler install done.

The video is very entertaining. Did the bloke in the check shirt just happen to be passing?

1 Like

:laughing: No that’s my neighbour Geoff. He’s a bit of a petrolhead himself so often shows an interest and is always keen to lend a pair of hands! He came along to the LoT Croft day last year as a passenger, think he very nearly caught the bug but so far has been able to resist. He suggested that we collaborate on a Caterham/Westfield build which sounds rather tempting :mrgreen:

Don’t forget to copper slip every bolt on reinstall, also fit a stainless tow post and heater resistor pack as well if they have not been done.
When I redid my install, I also closed off any gaps with foam so all the air from the front went through the rads and didn’t escape where there are gaps. This only was required when I ran the gearbox cooler via a laminova to keep the temps below 100 on track

Cheers Ade, stainless tow post is on the list. Mine looks pretty good for a 2006 with no signs of external corrosion, but you can see it’s starting to rot from the inside out. It also feels like stainless tow posts seem to have got really expensive since I bought one for the Elise… Can’t remember spending more than £50 on one, but some are knocking £85 now!

Heater resister pack/fan speed pack is the same thing I presume? Never touched it on my Elise and mercifully it never failed on me, but I shall be sure to investigate it here.

I’ve retained the original foam from the radiator which I’ll use to close off the gaps, have some spare material I can use too if needed. Good tip!

As for copper slip, that’s standard in my garage - and I’ve got a set of stainless fasteners to go back in even though all the ones that came out look mint.

If you find that you do need a heater resistor pack, I have those as well :crazy:

Cheers Dave, might have sourced a condenser already a bit cheaper than new so should be OK on that front.

As for the resistor pack, that looks like a good solution - jesus wept it’s well buried though, and will require removal of at least one more, maybe two more AC pipes which probably means more carnage (and cost…).

I’m sort of tempted to leave it alone, and dig it all out later but I know restless hands will get the better of me before the clam goes back on.

Is it easy to identify if the upgrade has already been done? I strongly believe my clam has been off before, but nothing obvious has been fixed/uprated. Tow post, brake hoses, radiator - all the obvious items are still the originals so perhaps the heater pack has been done already…? Wishful thinking I’m sure.

:thumbup:

Fairly busy weekend on the car, still taking stuff apart which is a bit depressing - pile of parts and fixings is getting bigger and bigger, panic slowly starts to settle in! :open_mouth:

First up I did a mini rebuild on the rear calipers, the main piston seals are fine so left those alone (but have some spares now in my kit for later) but the boots that cover the slider mechanisms needed swapping.

Nothing to report here really, nice easy change - good kit too from the big red brake company’s ebay shop.

Next up I started stripping down the radiator shroud on the car. When I did the radiator on the Elise I was able to largely leave this in place, just loosen it to slip the radiator out. This time round I’ve already got a 2-layer rad with an added AC condenser and when it goes back in there will be a third tier in the chargecooler - so not a chance in hell of getting it in. I also will need to modify it slightly, so much easier off the car.

To get it off I needed to detach a bit of loom wiring and the twin oil coolers.

This got delayed for a bit because I needed to add a 30mm spanner to my collection to undo the hoses. Luckily these hose fittings are fairly new due to the Lotus recall on them, so no drama at all undoing them.

Once the oil coolers are off, a few awkward fixings later and the shroud can come off the car with the radiator (already drained it t’other day) and then the rad comes off with a few bolts.

The fans look in decent nick compared to those that came off the Elise, but they’ll be going anyway as the chargecooler kit included some new pull fans which will go up top instead.

As I already butchered the AC Condenser I don’t even need to touch this stack now. The replacement condenser is due to arrive next week so progress on this has halted for now, and I’m still on the lookout for a replacement pipe either bought or made.

I commented before on the fan speed resistor pack, it’s a recommended preventative maintenance item but it’s a bit of a pig to get to… but I decided to get stuck in regardless.

Out needed to come some more AC components (luckily came out without damage), some coolant hoses and a few brackets etc. Then I needed to pull a square peg out through a round hole, at the expense of some knuckle skin. Eventually the unit came out.

That is the underside of the fan blower unit and is a ‘resistor pack’ that provides the three different fan speeds in the cockpit. These are one of those “it’s not if, its when” failures and it could effect one fan speed, or all of them and losing the ability to demist in one of these cars is not cool. As I’m removing AC components to get to it, it just made sense to do it now even if I really wasn’t looking forward to it.

The resistor pack sits literally on the car floor in an area that takes rain water and it simply can’t drain away, so this thing is submerged for much of its life… failure is inevitable. You can see the pins are very rusty, but I’ll be cracking it open this week to see the damage inside.

The ‘fix’ for this is a replacement/relocation kit that Lotus provided on later cars and as a response to warranty claims at the time. It blanks off the previous vent on the blower unit and puts the resistors actually inside the unit to protect them. It also used proper resistors rather than just the rusty nails that are apparently inside the current unit. I’ve not ordered that yet, so once again work is halted. [mention]seriouslylotus[/mention] expect an order coming in shortly :mrgreen:

The car is now (hopefully) as dismantled as it ever will be, from now on I should be cleaning stuff and bolting stuff back to the car… but it looks pretty scary in the meantime :slight_smile:

Impressive progress!

Cheers Andy, though I struggle to view it as progress whilst I’m still taking bits off! The fun starts now though (hopefully) in the rebuild.

Dave has already bunged my new resistor pack in the post, cracking service as always [mention]seriouslylotus[/mention]

He really is a good egg. I have ordered stuff late on an afternoon and its here first thing the next day

Only problem is, normally when I run into a part that needs replacing- it buys me a few days break from the garage. With Dave and his efficiency I need to be back at it again by tomorrow :imp:

Good work!

Update time before I forget what I’ve done…

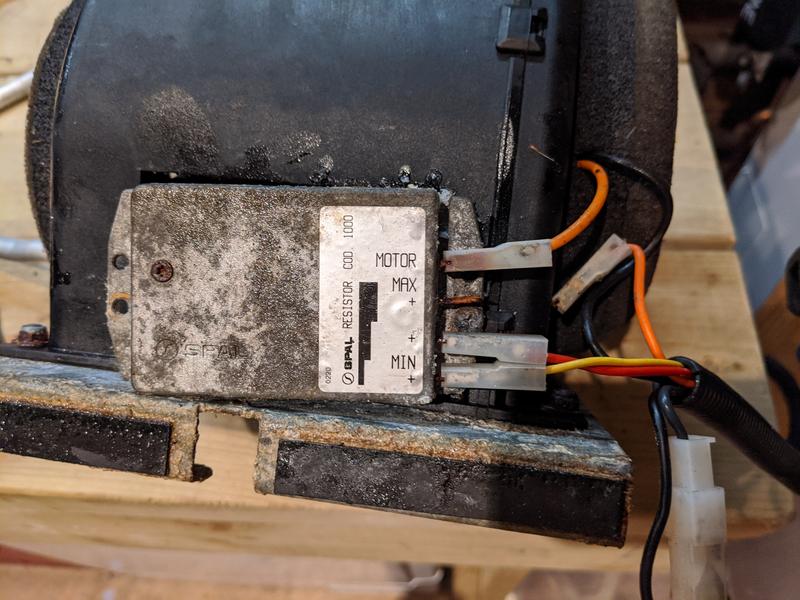
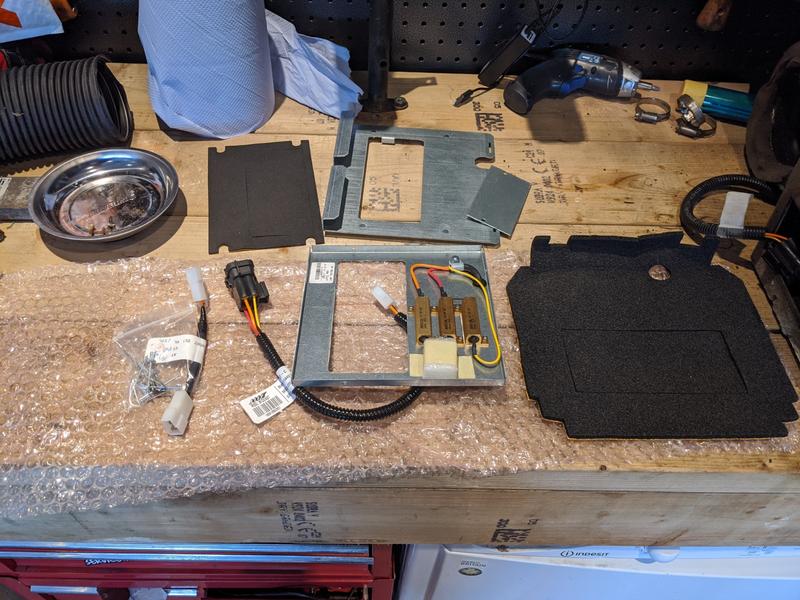
I last updated with the HVAC unit out of the car and awaiting arrival of the updated Lotus modification kit which will relocate a new resistor pack out of harms way.

This arrived about 14 hours after I ordered it - top work SeriouslyLotus.

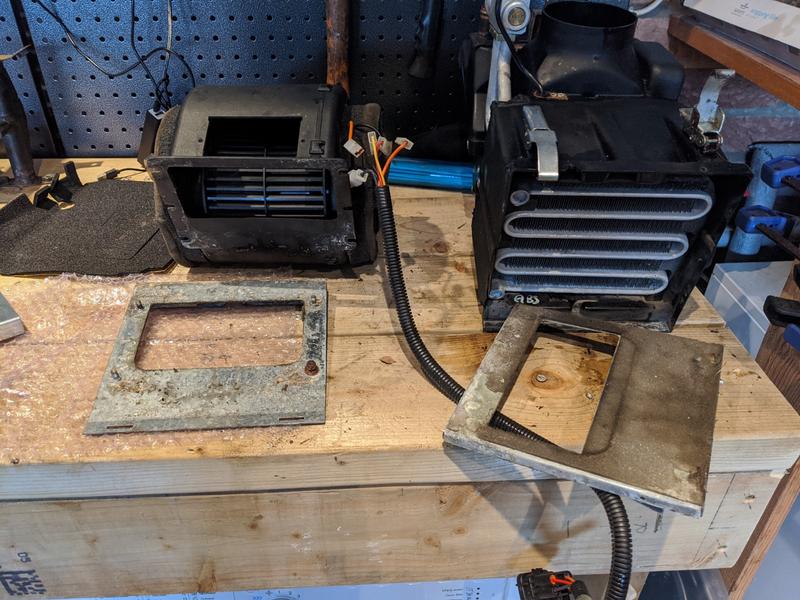
The kit replaces the two interfacing panels on the blower unit and the HVAC box, and the resistors are hidden up high INSIDE the HVAC box once done. All of the self-adhesive foam stuff you can see is to make a good seal between the two units to minimise heat loss I guess, but also will stop water ingress too. The OEM foam on the unit was way past its best.

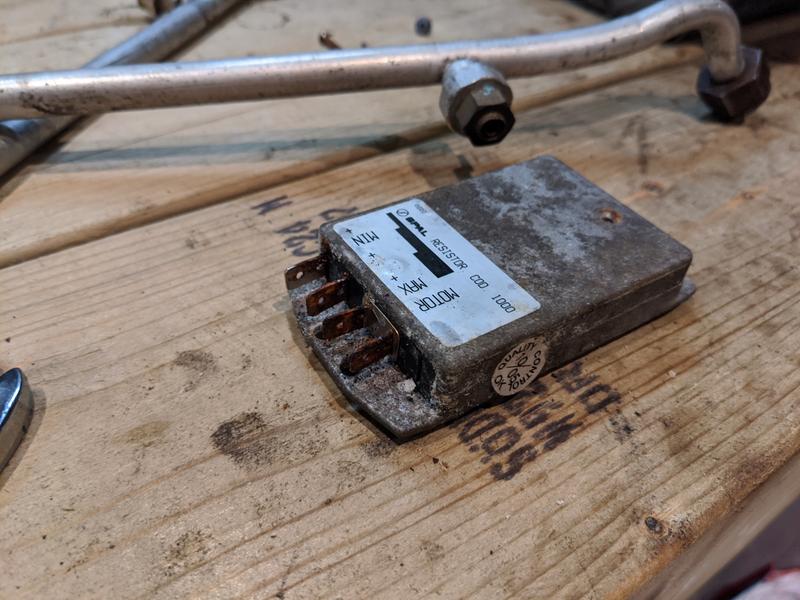
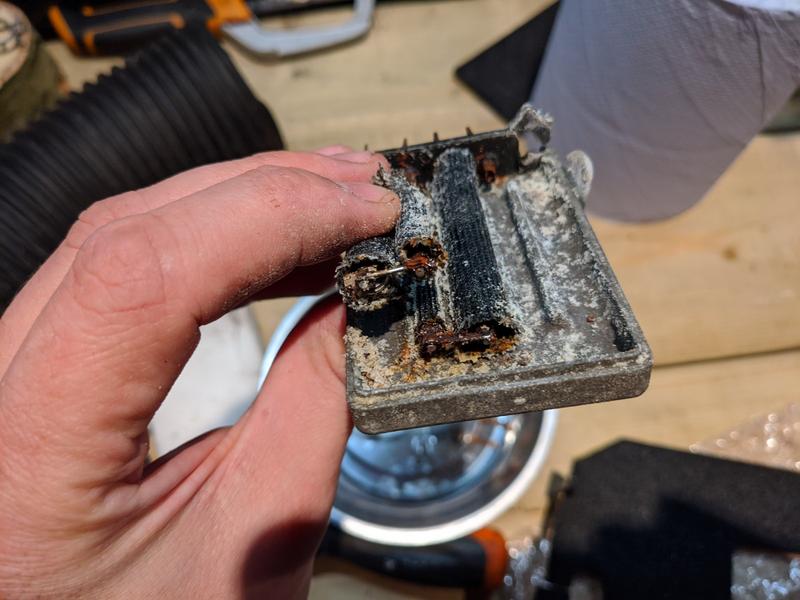
I actually opened up the old resistor unit, it was looking a bit sorry for itself in there - but in its defence, was still working at time of removal.

First job was to remove the faceplates from each unit. Fan blower one was bolted on and HVAC unit had some rivets that needed drilling out.

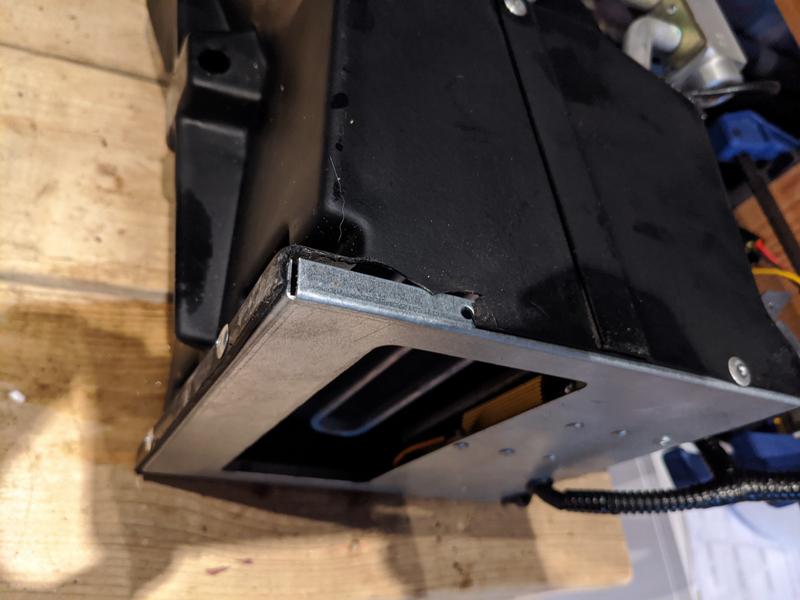
Note the HVAC box missing a chunk out of it, I didn’t do this and the chunk of missing plastic was nowhere to be seen - so I’m assuming that this broke upon initial construction and has always been like this… unlikely to be helping the efficiency of my heating/cooling system!

I “repaired” this with some sealant.

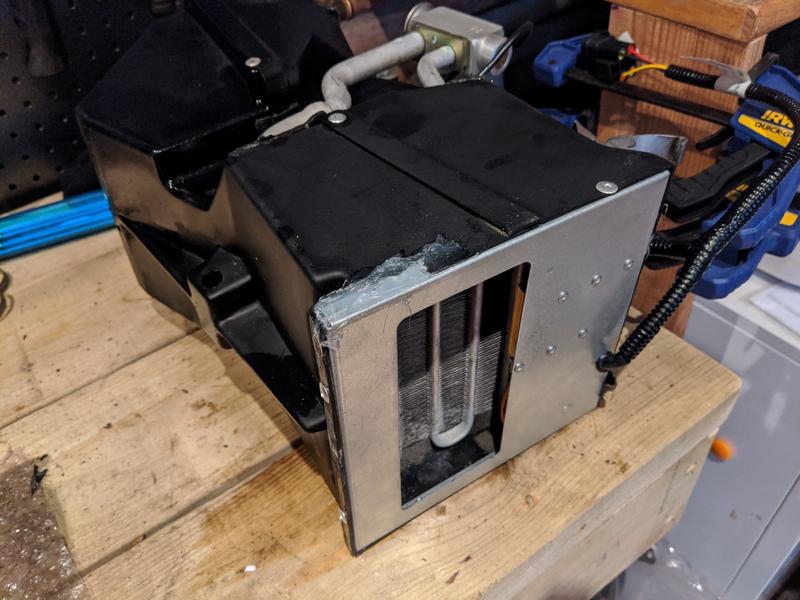
Mocking up the foam fitment

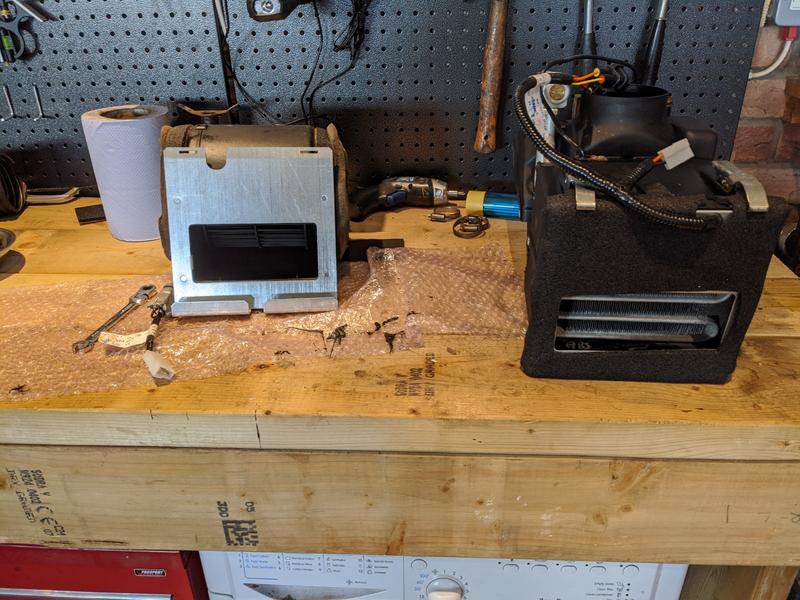
Once together the unit looks like this, I cleaned it all up and replaced some rusty fixings - doused the relevant bits in XCP rust prevention ready for re-installation

In this form it’s too big to go back in the car, the gap it needs to go through is about 70% the size of it, so you need to drop down the fan blower first and tuck it in under a ledge, then drop one end of the HVAC box in and pivot it down… massive pain in the arse as you’re having to hold various wires/hoses to one side… oh and there’s an AC drain pipe that needs attaching to the bottom all at the same time.

Before tackling the refit, I cleaned out the base of the HVAC “cubby” and drilled some drainage holes. This isn’t just me randomly drilling into my chassis, but Lotus released this as a service bulletin in 2007 - all cars should have 4x 6mm holes drilled in specific spots to prevent the build up of rain water in this area.

I sprayed the holes with a zinc primer I had lying around, then coated again in XCP. I still need to clean the holes up underneath the car and give them some protection from that side too.

Link to the TSB for anybody reading and considering the same work: https://www.lotustalk.com/attachments/tsb-2007-01-drain-holes-to-hvac-floor-pdf.153907/

I got the HVAC unit refitted and got to work plumbing everything back in, from my notes I needed to:

  • Reconnect HVAC thermostat wiring
  • Reconnect HVAC diverter flap motor wiring
  • Reconnect the AC hoses (x2) with new o-rings into the HVAC unit
  • Refit brackets (x2)
  • Refit AC dryer unit (whatever one of those is)
  • Reconnect wiring into AC pipe
  • Reconnect coolant hoses into HVAC (x2)
  • Reconnect face vent blower hose
  • Reconnect Brake Servo vac line
  • Reconnect Brake Servo fluid line
  • Reconnect fan-blower wiring

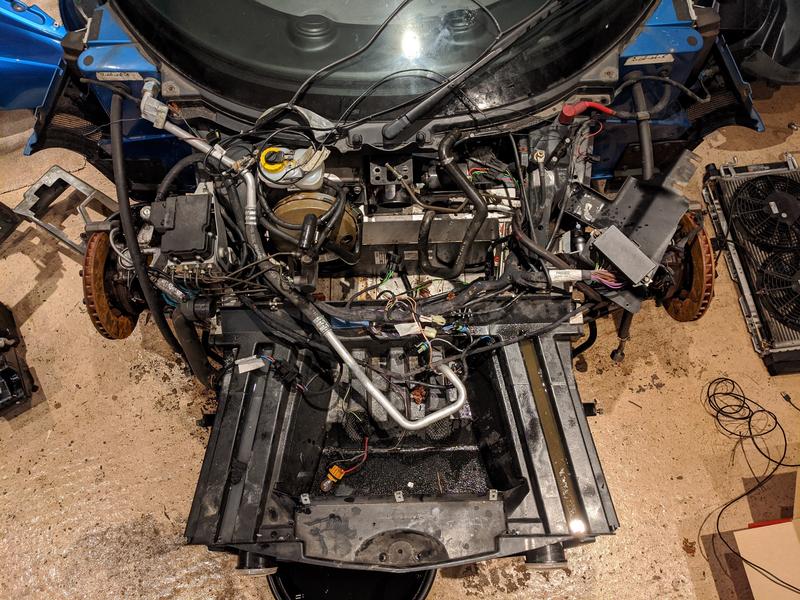
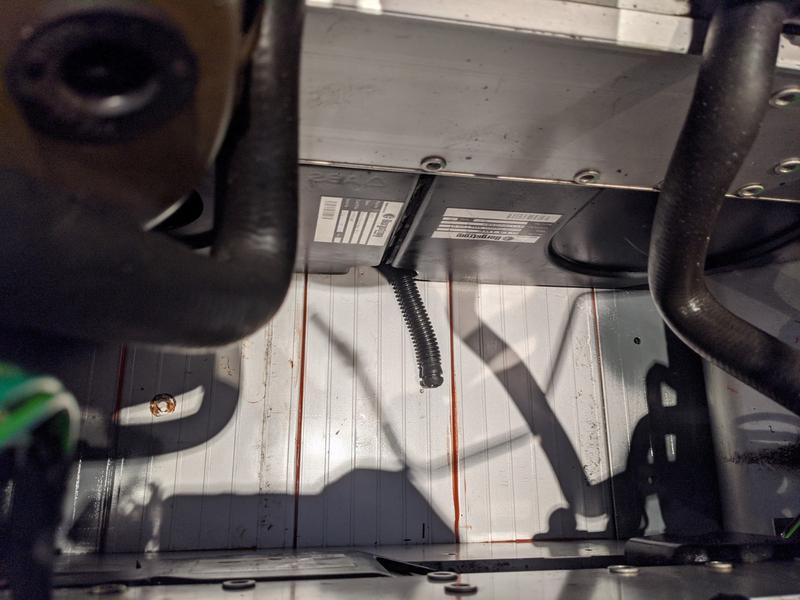
This is the view from the top down after re-installation. You can’t even see the top of the HVAC unit that I’ve refurbed which gives an idea as to how crammed with stuff this area is…

Once done I reconnected the car battery and had a play with the fan settings with the car powered up. Obviously I have no heat or AC right now, but I was able to confirm that I’ve got 3 fan speeds and all the divert flaps work properly to get air to my face/feet/windscreen. Happy days.

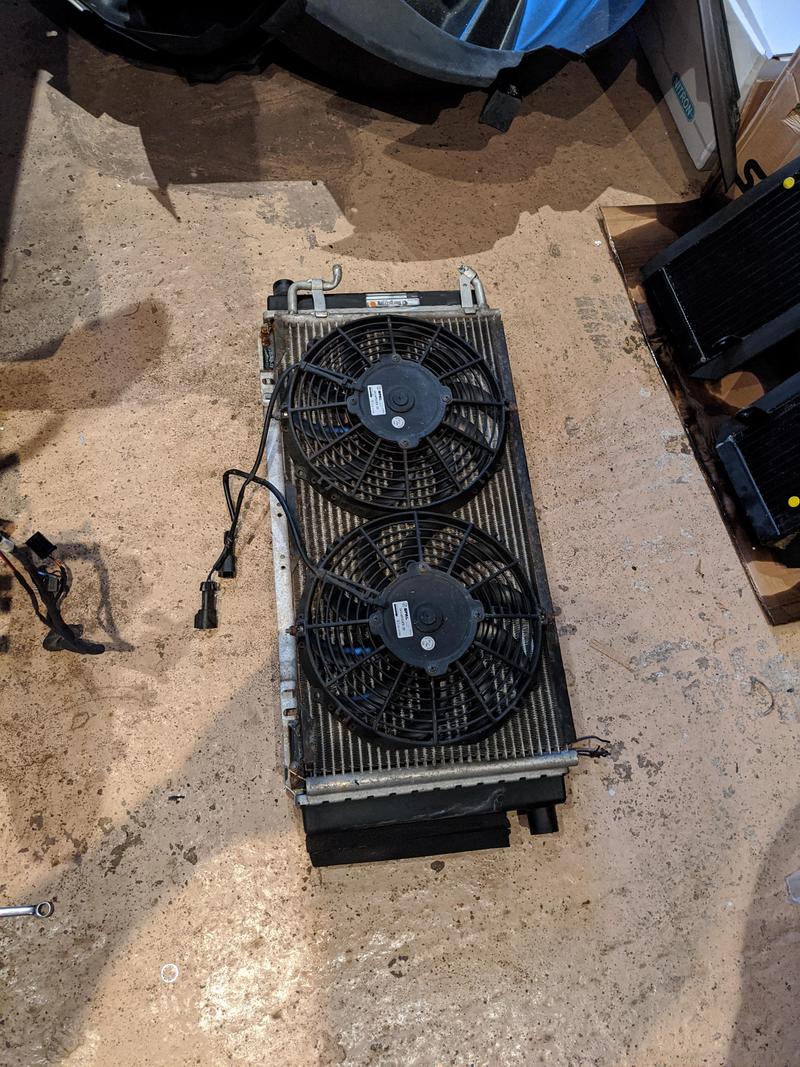
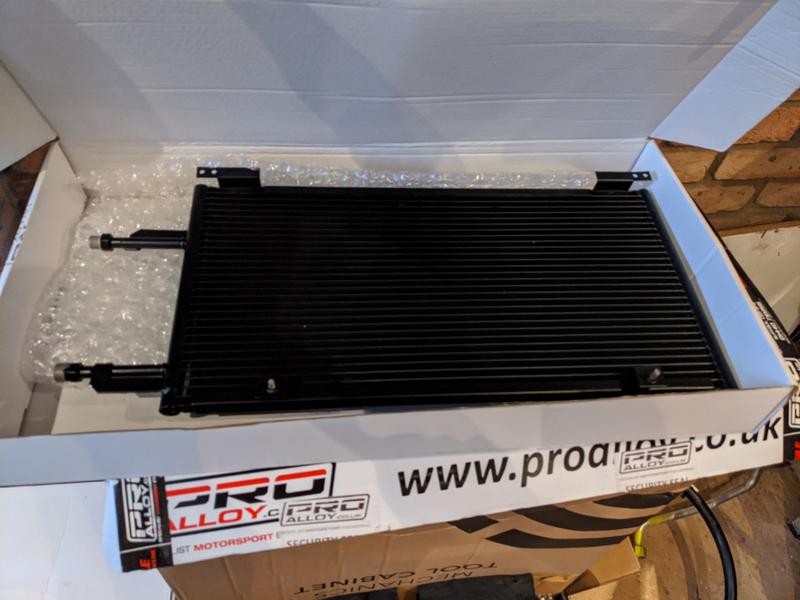
Whilst all this was going on, I got yet another Pro Alloy parcel - replacement AC condenser. I was lucky enough to pick this up “second hand” but still brand new in box. Somebody bought it then sold their car before having time to fit it. Small saving over new, but small mercies after paying the amount I have to Pro Alloy recently…

So the next chapter will be building up the “radiator stack” and fitting back into the car - then I can refill coolant, bleed and at least test the heater is working without leaks etc.

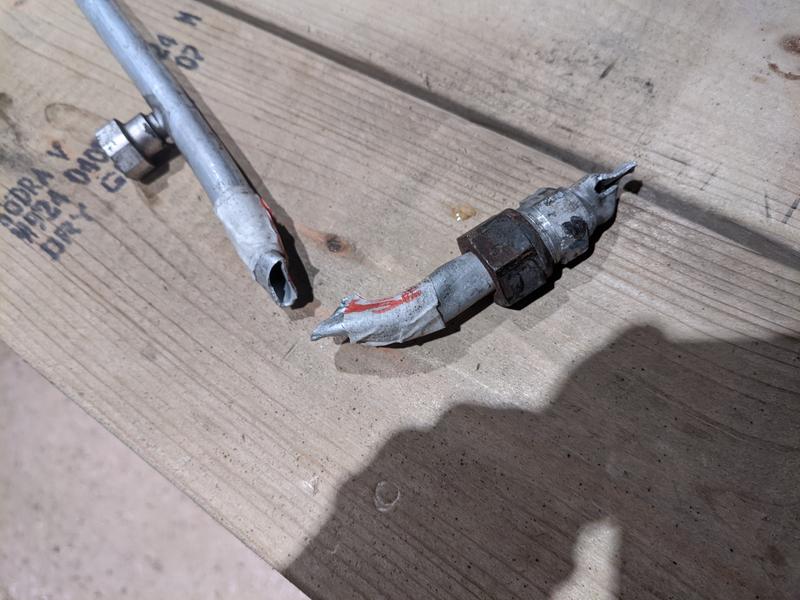
I’m STILL on the hunt for an AC Pipe repair before I can think about a regas. This is what I broke:

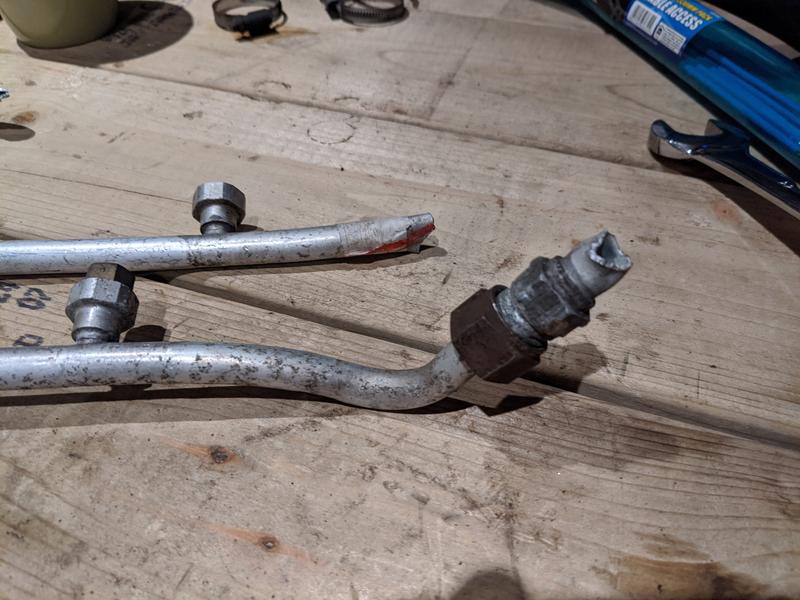
As you can see, the condenser is still part-attached into the threaded attachment which simply will not move. I had a fellow Lotus enthusiast (Thanks Hugh!) volunteer his pipe from when he deleted the AC in his Elise… but guess what, he had exactly the same problem but avoided breaking the pipe:

So my options are:

  • Successfully remove the condenser end out of Hugh’s pipe and use it as it
  • Use Hugh’s unbroken pipe as a template to get a new one made up

I’m leaning on the latter, as trying to liberate his pipe will probably just result in two broken pipes which may make replicating them a bit harder to get exactly right. I’ve contacted all the local hydraulics places and nobody will touch AC but I’ve got the details of one place 45mins away, and I’ve e-mailed a specialist who do mail-order replacements so I’ll chase them up this week.