2006 Exige S

Those are precision persuaders!!

I got my first major parcel for the winter this week.

Nitron Clubsports. Yummy.

This is a bit of a big moment for me, I’ve been tinkering with cars for years and have never to date bought a set of suspension brand new! I normally just scoop up whatever is floating around on eBay/Forums and although that’s done me fine, I’ve never had the opportunity to really pick and choose an exact model or spec.

So far they’ve just had a wipe down with an oily rag and have gone back in their boxes. I’m going to do a bit of cleanup on my wishbones first before they go on.

I did a full refurb on my Elise because they were in considerably worse condition than my Exige wishbones, but I’ve still got a bit of surface rust creeping through. Plan is to dab on some Bilt Hamber Deox stuff (amazing stuff), then probably give them a light dusting with their zinc primer and then coat in XCP rust prevention or something like that. Will do it all on the car, because if I take it off - I’ll end up going the whole hog again with balljoints, bushes, powdercoating etc. No time for that this year and it would be wasted effort on this ~20k mile setup.

They look in fine form! Will transform the car.

I had my nitrons rebuilt and they damp beautifully now rather than the crashness that I had before

Yeah I’m looking forward to it.

I had my Elise on Gaz Mono’s - seriously underrated dampers IMO. But even so, the standard bilsteins on the Elise were fantastic for road use, the car was really effective on ‘realistic road conditions’ but I’ve found my Exige bilsteins to be a bit too crashy. I’m not sure if the Exige just uses stiffer springs or different dampers completely, but it’s not quite as good on the road as my Elise was. These should let me have my cake and eat it, even if the track performance upgrade is negligible - I know I’ve got scope for future improvement and tuning.

By the way, do you think you’ve got enough plug sockets?

It’s a little excessive eh.

Previous owners wasted the garage as a half-arsed attempt for a home gym so I guess they needed enough sockets to power their treadmill and tanning bed or whatever it is you have in a home gym.

Can’t say I’m complaining now though, means more room for gadgets :nerd:

I’ve got a bit of progress done on the car over Christmas, just 30mins here and there.

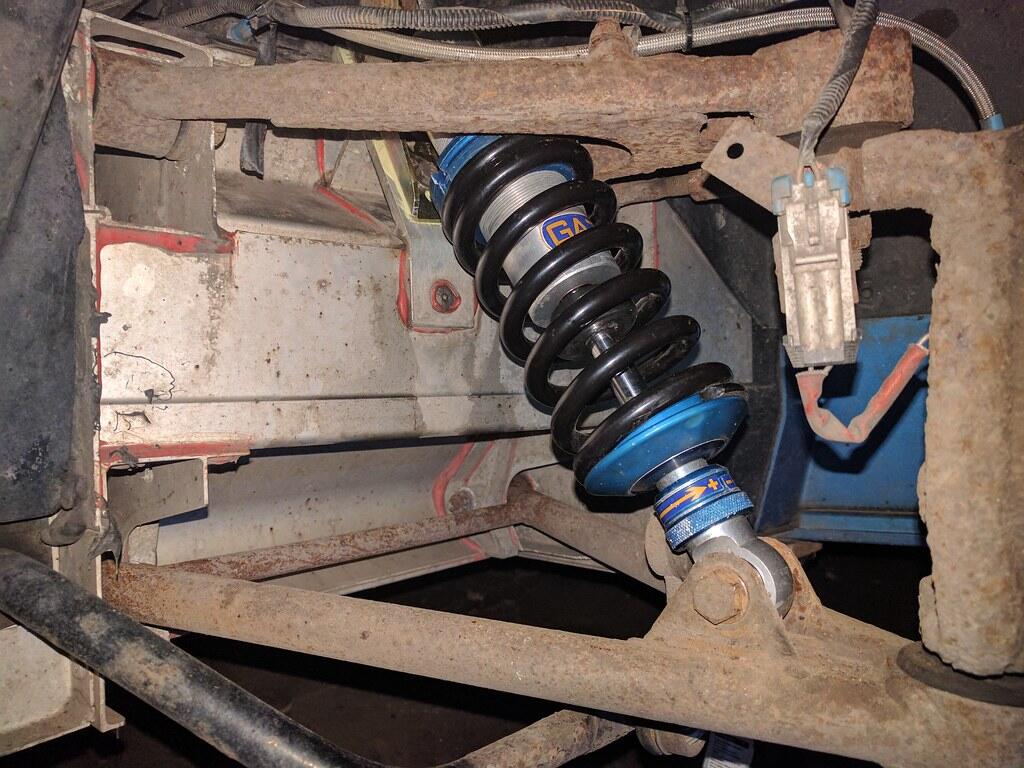
I got the car up on all fours and took the old Bilsteins off. They’re still in really good nick, so I’ll box them up for now and decide what to do with them. Some new spring seats and a dusting with some yellow paint will get them looking mint and at only 20k miles they should have plenty of legs left in them. Maybe a good upgrade for an Elise owner out there somewhere.

For contrast here is how my Elise looked after 40k odd miles…

On my Elise thread (around here: Lotus Elise 111R - Page 8 - Readers' Cars - PistonHeads UK) I went to a lot of effort removing them all, stripping and re-painting with brand new bushes, balljoints, hubs and various other goodies.

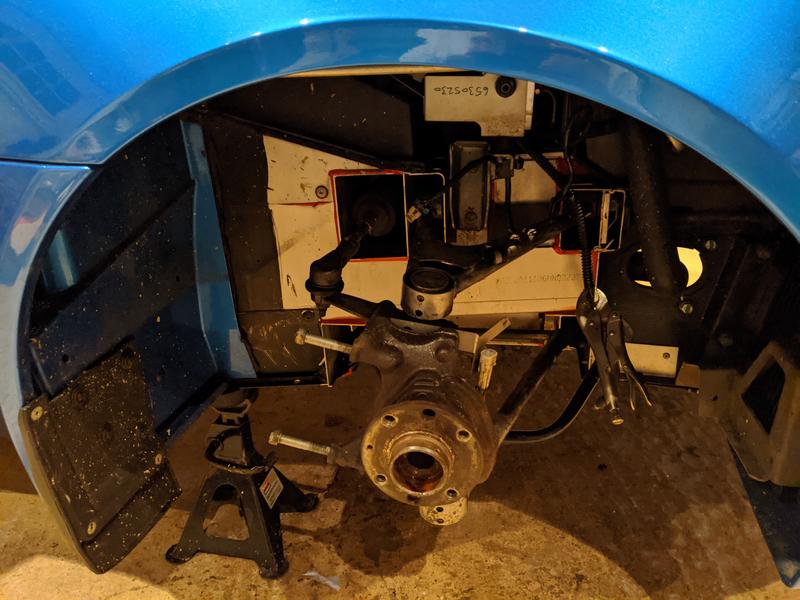
I’m not quite ready for that yet on the Exige, the bushes and balljoints all feel good (apart from the track rod ends, nicked boot means they’re up for the chop) and so doing a full refurb would be a bit of a waste at this point. Instead, I’ve soaked the worst bits in Bilt Hamber Deox and wiped the lot down with XCP rust prevention to buy me another summer or two before the big job is needed.

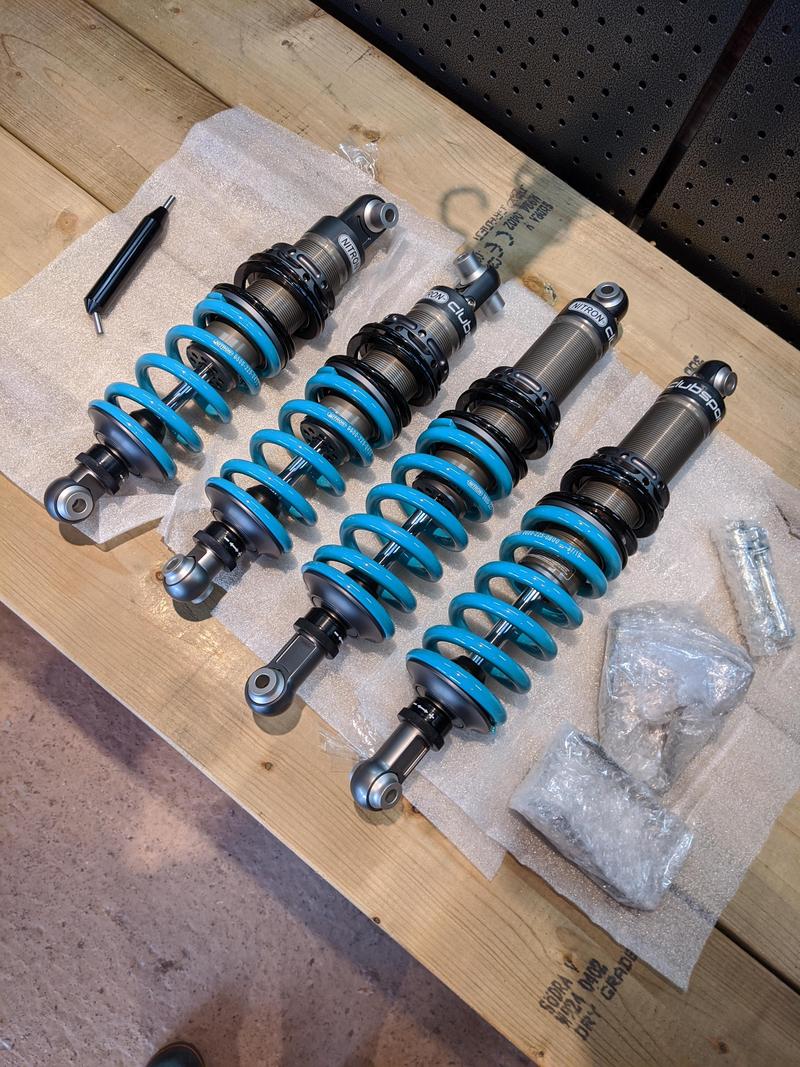
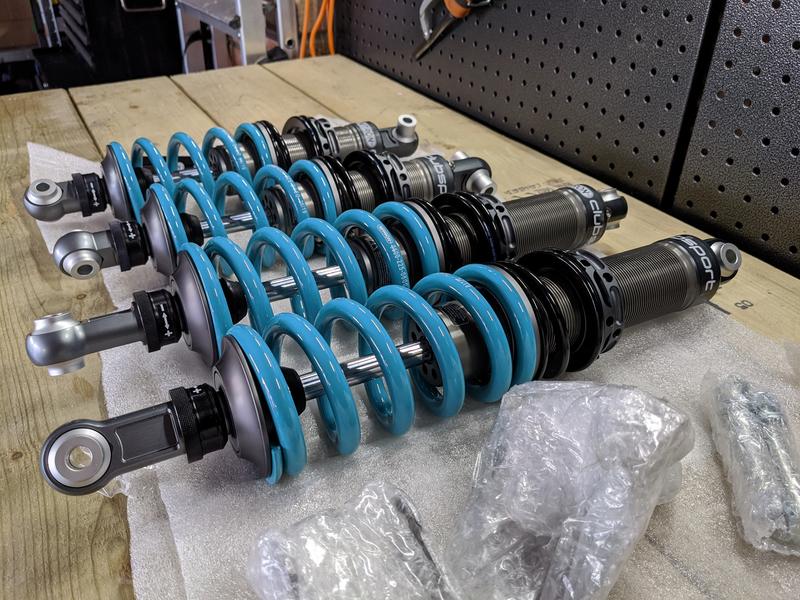
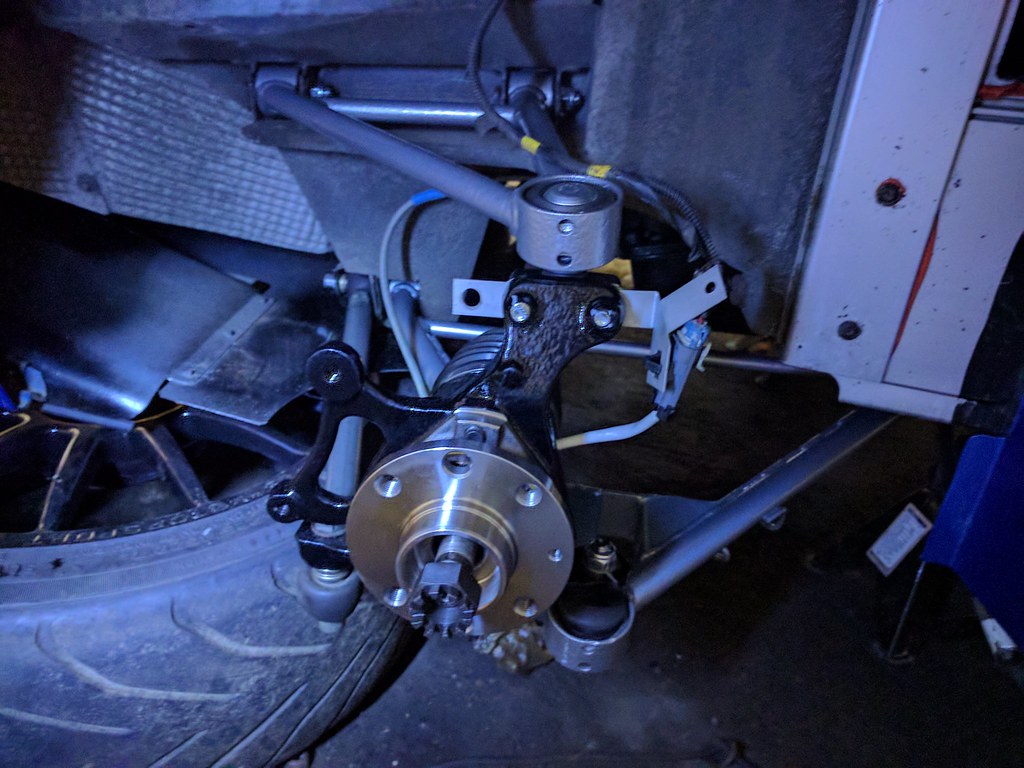
Eventually I had to stop looking at the Nitrons, so went ahead and bolted them up.

Everything fits without drama, as expected. I’ve wiped the threads and coils down with XCP to hopefully keep them nice. In addition to the shocks I threw some new TRE’s on the front and replaced all of the ABS shims (camber shims that are used to hold the ABS wiring harness) with stainless items and replaced the hub-steering arm bolts… earlier cars had a few failures here, so it’s worth changing them for the later 10.9 grade ones for piece of mind.

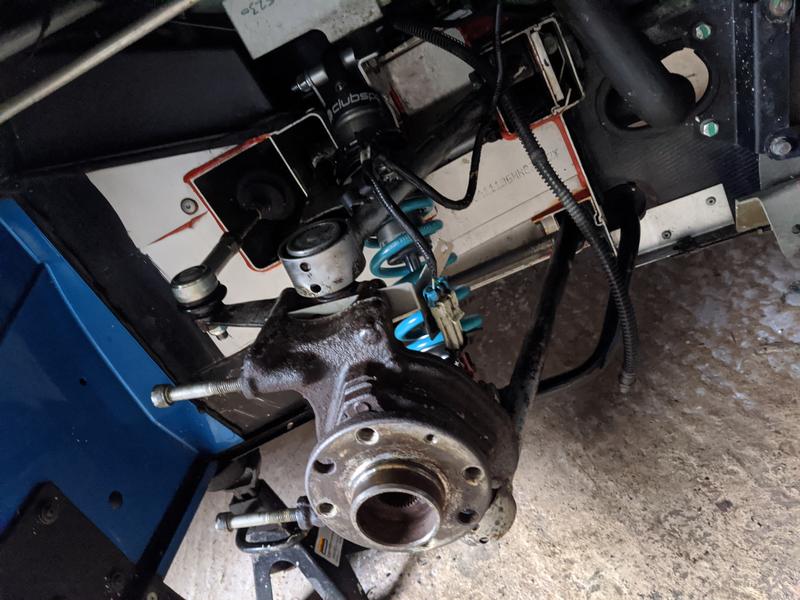
Also in the rear I removed the rubber brake hoses and replaced for some braided steel HEL ones I had. Can just about see it peeking in the background:

I can’t do fronts yet whilst the clam is on.

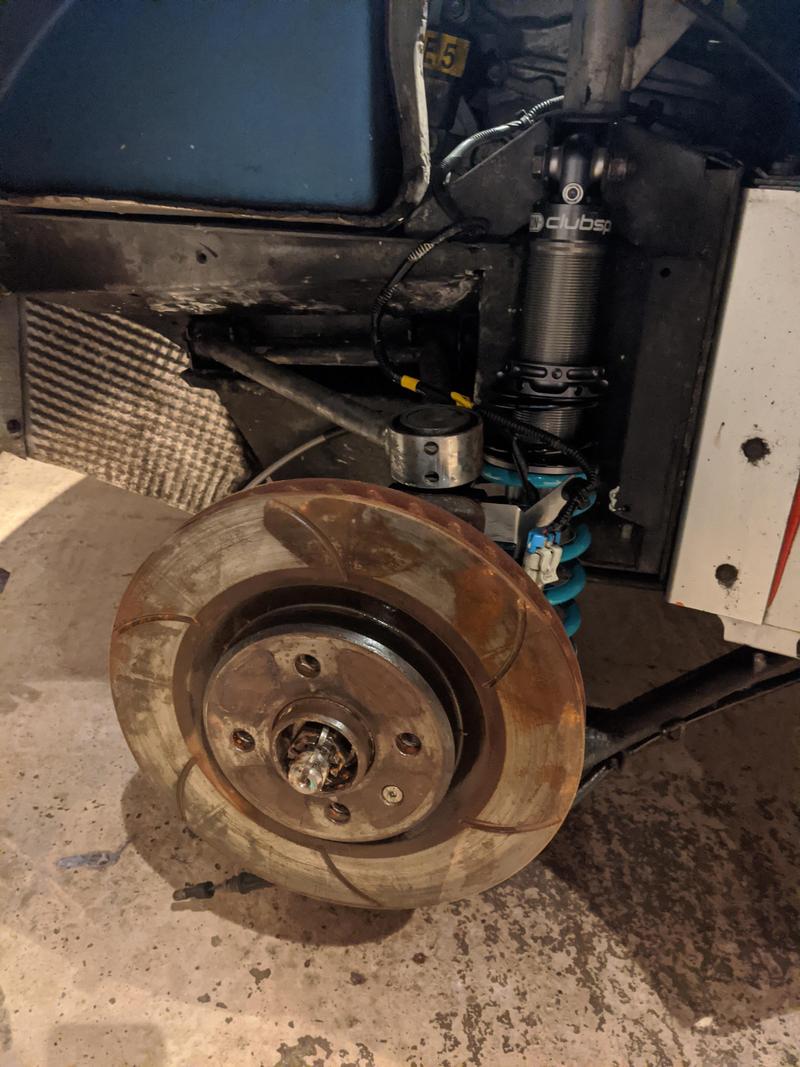
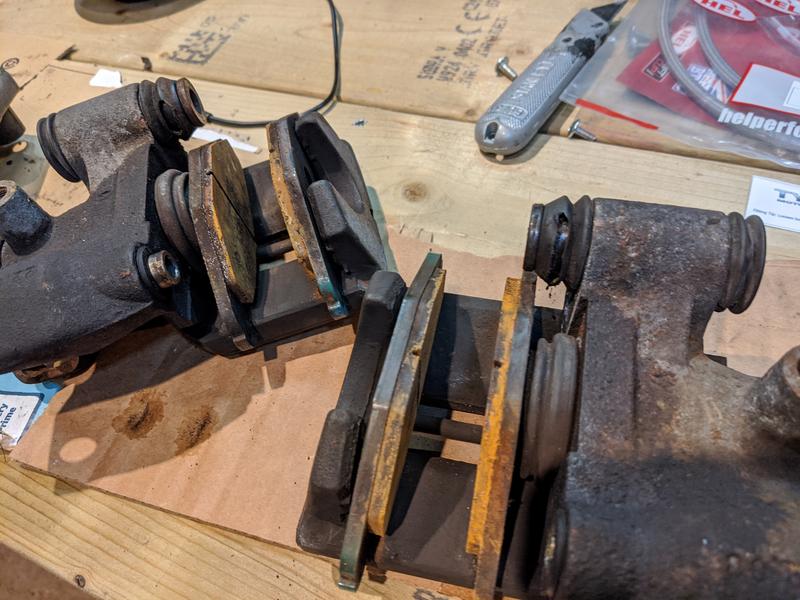
As for the brakes, I’ve had them all up on the bench for a nosey. It seems that I’ve chunked through a good bit of brake pad this year during my track antics. Before my trackdays started I put in some almost nearly new Pagid RS4-2’s (same compound I used and loved on my Elise). After finding the inside of my discs rotten I replaced the discs and got a spanking new set of RS4-2’s just to give me a clean start. The Pagid’s I took off still had 5.5mm of material so they’re in the toolbox for ‘get me home’ pads.

Since then I’ve done 3, maybe 4 trackdays and I’ve got the new set down to 3.5mm already… It’s well documented that RS4-2’s seem to perform worse and worse once they get below the half-way mark so the days are numbered on these. I’ve put the old 5.5mm deep ones back in for now till’ I decide what to do.

My Elise never really consumed pads at anywhere near this rate. I’ve done a lot (8.5) trackdays this year and 5000 total miles so perhaps I’m expecting a bit too much - but my Elise seemed to go on forever on the same set of pads and I did similar numbers of trackdays back then too. Perhaps the extra 5-10mph at the start of each braking zone is having an exponential effect… or maybe my driving style (more likely) needs adjusting. Either way, I think I’ll consider some big-boy pads that are perhaps a little more track focused at the expense of my disc life or day to day usability (noise/dust/etc).

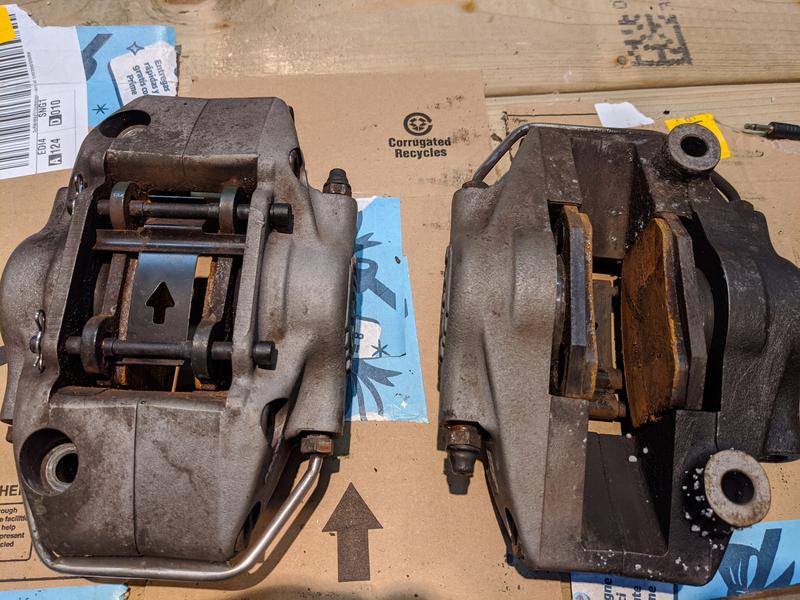
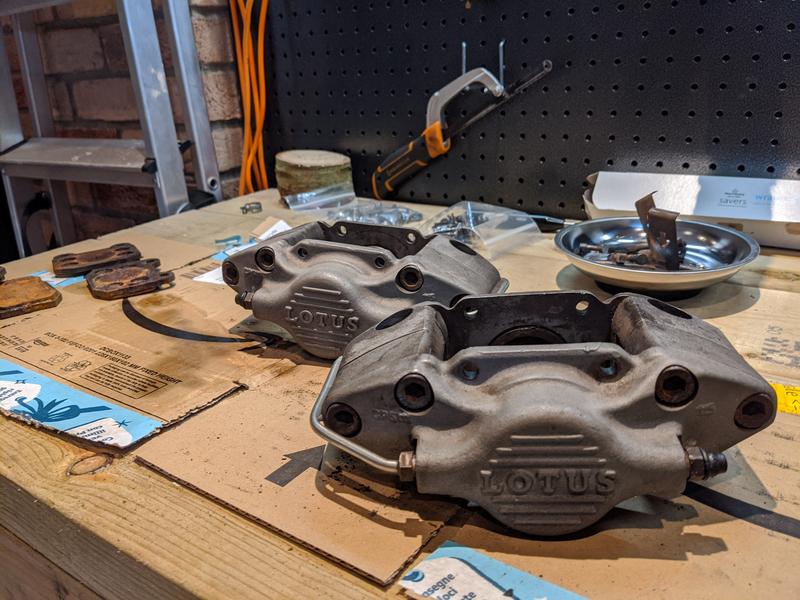
With pads and pins out I gave all four calipers a good cleaning, and replaced the anti-rattle pads in the carriers.

As with the wishbones, these calipers with their ‘unfinished’ look often start to look crusty after a few years but these ones are still looking great - so they can avoid the hammerite treatment for this year.

The rears however have splits in the inner-slider boots. Nothing major but I’ve ordered a refurb kit so I can swap these over and give all the sliders a good clean.

All pistons and sliders are moving nicely, so overall a healthy setup.

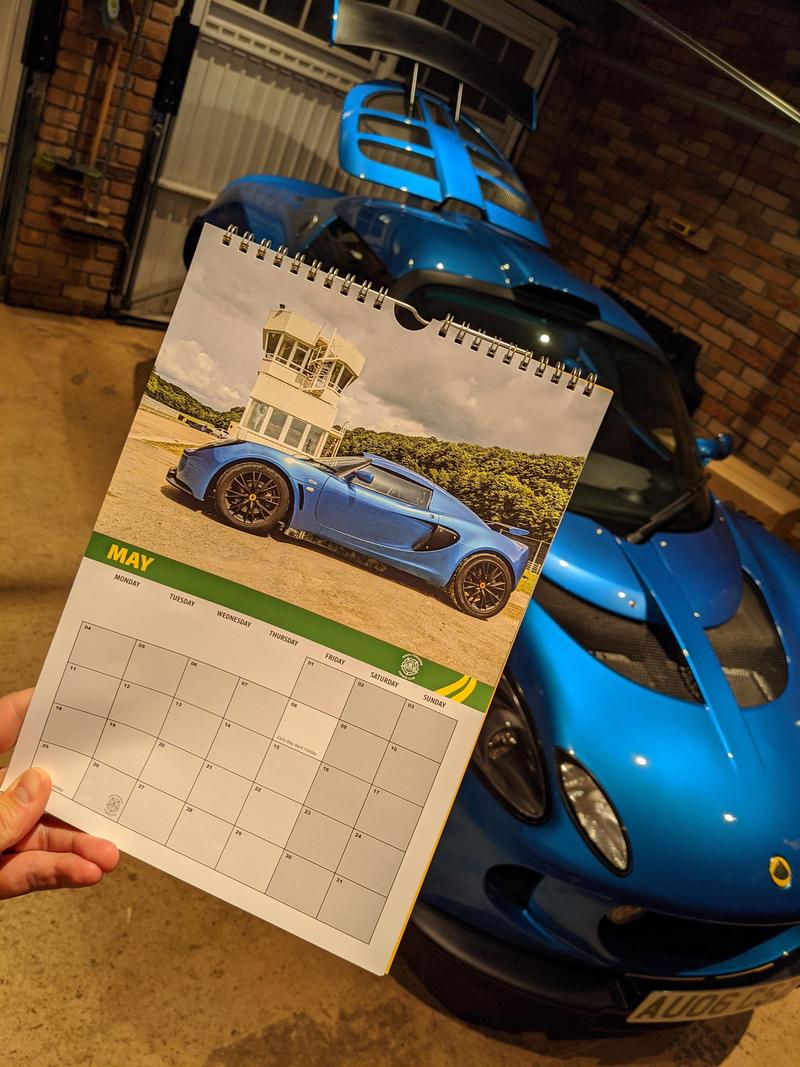
Somewhere between that lot I got a nice present from the North Yorkshire Lotus Owners Club in the form of our 2020 club calendar, and a particularly nice choice for May…!

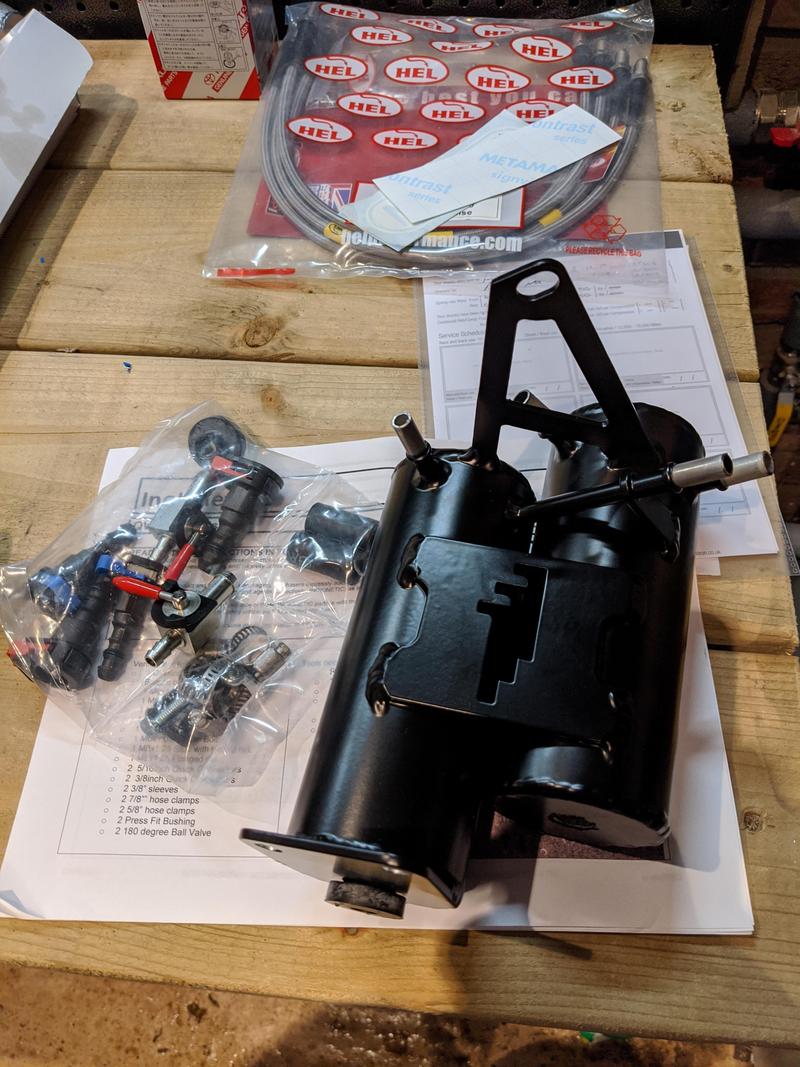
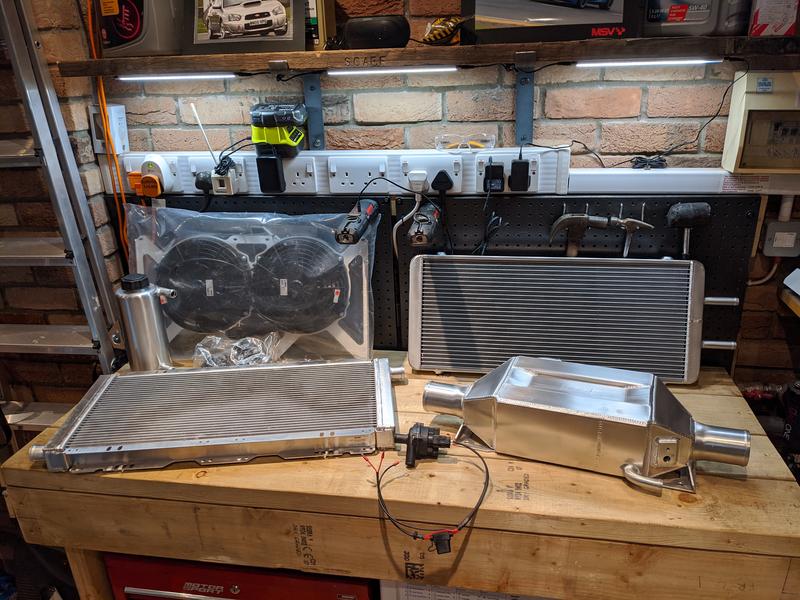
That’s about it for now, got some new goodies to unbox and then it’s time for the clam to come off… more updates to come soon.

Top job.

Another quick update, something I forgot to post but is worth sharing.

I inherited a used Sector111 (now inokinetic) catch-can earlier in the year which had developed a fault. A loose baffle internally was causing a rattle. I’d been in touch with inokinetic about it and they told me to ship it over to them in the US once my car was laid up for the winter and they’d take a look. I posted it early in December and by mid-month I had a brand spanking new one in my possession. Top service!

Finally with a clear workbench, I could unbox my other goodies for the winter:

ProAlloy Chargecooler kit. Anybody who’s read the thread through will note that I’ve spent a fair bit of time and effort (but critically, not money!) on reducing my intake air temps through auxiliary ducting to my intercooler. I will stand by my opinion that this is a legitimate way to mitigate the inherent problem with this car and I would recommend anybody who tracks an S2 Exige to do the same if they’re not prepared to go charge cooling. My ducting was never realistically expected to replace a chargecooler upgrade, it was just something to keep my fingers busy last year and now I’ve got the opportunity to pay for and fit the ‘proper solution’, it’s time to get cracking.

Main downsides are weight and complexity (and cost…), complexity in terms of it’s a pretty simple system but there’s just more wiring/plumbing to potentially go wrong. Upsides are that IATs should remain acceptable regardless of ambient temperature as the system is much more efficient, and the radiator component is housed in the front clam so no issues with heatsoak from the engine bay. ProAlloy claim a 20bhp power hike from fitting this alone but I remain sceptical; my aim is to avoid losing power after a few laps - not outright gain it… but a bit more midrange shove wouldn’t go amiss if it happens to turn up :smiley:

Also you may notice a new engine radiator in that lot. This is part of a bundle from ProAlloy that will allow the engine coolant, chargecooler coolant and aircon radiators to all coexist in the radiator shroud.

Obviously the front clam needs to come off for this, but my first job has been to figure out the hose routing from the back of the car to the front. The kit comes with instructions… but they’re more like a parts list than a real guide to fitting. As my car has front mounted oil coolers and aircon, my side sills are already pretty congested - so it should be fun finding a path! I’ll update hopefully in a few days once I’ve figured that out.

Once that’s figured out, I’ll finally get the clam off and get started on my job list.

New kit looks great!

There is a clear route for the pipework. Mine is exactly the same as yours in terms of twin front coolers from the factory. aircon rad, rad, and water to air rad for the charge cooler.

Cheers Andy, thanks to your input and input from Chris who fitted your kit - I’ve actually got a rather intimate view of how your setup worked out :laughing: So you’ll be my template.

I know there is a clear route in there, already been in with an endoscope - will update once that process is completed fully - its just more obstructed than a car which wouldn’t have oil coolers and AC (obviously).

Chris routed your hoses up through the rear impact foam (so you can see your hoses in the sidepod area), this is the most direct route so requires less hosing (weight) and will make life easier for the pump - but there’s another route that would take me under the side impact foam and into the engine bay from the bottom. Probably means an extra few feet of hose and a sharp 90’ turn on it, and the rear exit is very, very narrow - but I’m at least going to explore it as an option. If it doesn’t work out, then I’ll spear through the side impact foam and emulate your install fully.

Wow that charge cooler is a work of art, the quality is fantastic.
Look forward to seeing this fitted & feedback on track regarding no loss of power.

This is on my 2020 upgrade list for sure. :thumbup:

Cheers Dean, yeah the kit looks great. It’s clearly evolved over the years and I believe ProAlloy are now making their own cores in-house which apparently caused them issues a year or two back with ballooning/bursting cores(!). Hopefully that’s all now resolved :slight_smile:


I mentioned that I had a couple of hose routes to scout out. There are two pieces of ‘foam’ that block the sill at different points. According to the deroure parts list, the piece closest to the front of the car is just an NVH foam… probably just stops loose rivets from rolling around too much in the sill. Many people remove this completely by spearing it from the front of the sill and fishing it out. I went in for a look with an endoscope (thanks for the Birthday present Mrs Fonzey) attached to a screwdriver.


I found that the foam had a couple of perforated cut-outs already in it, so I poked those through and then joined them up using a hacksaw blade to make a gap which I hope is big enough for the two hoses. If not, I’ll just go back in and fish the whole lot out.


I was able to record it via the endoscope app, I think I must have knocked it off though whilst doing the hacksaw bit as I can’t find that recording anyway. Either way, you get the point - and I need a bit more work down there to expand the hole out a bit further and we should be good.


<LINK_TEXT text=“https://www.youtube.com/watch?v=q_BkK2C … e=youtu.be”>https://www.youtube.com/watch?v=q_BkK2Cw_-U&amp;feature=youtu.be</LINK_TEXT>


With this front bit of foam dealt with, I’m now left with the rear piece. This is less of a sponge, and more of a hard styrofoam type stuff and is listed as side-impact foam. It’s a slight wedge shape and effectively blocks off the bottom of the sidepod.


There is however a route under it, which some other hosing passes through already. It’s very tight, but there MIGHT be a chance I can get the chargecooler hoses through it, but it would mean two sharp 90deg turns, one to get the hose inboard and the other to get the hose upwards towards the header tank.


The most direct route is to chip off a corner of the foam (or tunnel through it) which would allow the hosing to come up through the base of the sidepod and take a simplified route up to the header tank. This I think is my preferred option, and I know this is how Chris did Andy’s car - so it’s a known-good solution!


This is my diagram to help get my head around it:


The sky blue line just under the gear lever is the NVH sponge foam that I’ve already tunnelled through and the dark blue is the side-impact foam at the back. The pink is the header tank.


If the red route was to work, it would need some 90deg plastic/metal hose joiners as I fear the hose would kink too easily once warm. It would probably require an extra meter or two of hosing (and extra coolant), so weight is worth considering. I think I can do a neat job of hacking the corner off of the side impact foam as it’s sort of accessible both from the rear wheel arch and from within the sidepod.


I’ve got a day or two to think about it whilst I crack on with the front clam, so thought I’d post it up in case the internet has any additional words of wisdom before holesaws come out.

[mention]andybond[/mention] I have a few photos of your install, but not a clear shot at where the hoses enter the side-impact foam. If you find yourself bored around your car in the near future, feel free to whip the OS sidepod off and stick your phone in for a photo :smiley:

All great info [mention]Fonzey[/mention]

I’ll get the OS side pod off this afternoon / tomorrow after work

Cheers Andy that would be ace, I’m pretty sure I know what to expect - but I’m just trying to hoover up as much info as possible!

I’ve found a real lack of documented first hand knowledge of Exige installs of this. Plenty of people have done it, just nobody seems to have written about it (compared to the VX220’s who have a few really good guides for it) so I’ve decided to write this up properly, assuming I get the job done without destroying the car/myself in the meantime.

I’ll post it up here, but will probably also format it for the seloc wiki just because it gets such a big audience for tech guides etc - it’s easily the most useful part of seloc :stuck_out_tongue:

No worries at all. All info is good info! The main reason I took this place on was so we could keep info in the public domain

Ok. So it looks like I am not going to be getting this side pod off without a fight. Top right bolt is soft as cheese and my socket just spins. Other two come out fine mind.

I’ll have a think on how to extract it and buy a new set of bolts for it.

Sorry. Only pic I can get now which don’t help you very much .

:lolno: ahhh Lotus ownership, you go into the garage to innocently help a fella out and you end up with a job that needs fixing.

Sorry Andy, but thanks for trying!!

No worries.

Bloody car…

Is your socket spinning in the cap, or is the whole bolt spinning in the fixing behind? If the latter, you might be able to reach a hand in and grip it…