2006 Exige S

I’ve been maintaining a thread on Pistonheads before I knew Exiges.com even existed. Figured this might be appreciated here too so will copy/pasta it and keep it up to date going forward. Also as it’s written for a generic audience, there are some pretty “duhhhh” comments in it about the Exige :unamused:

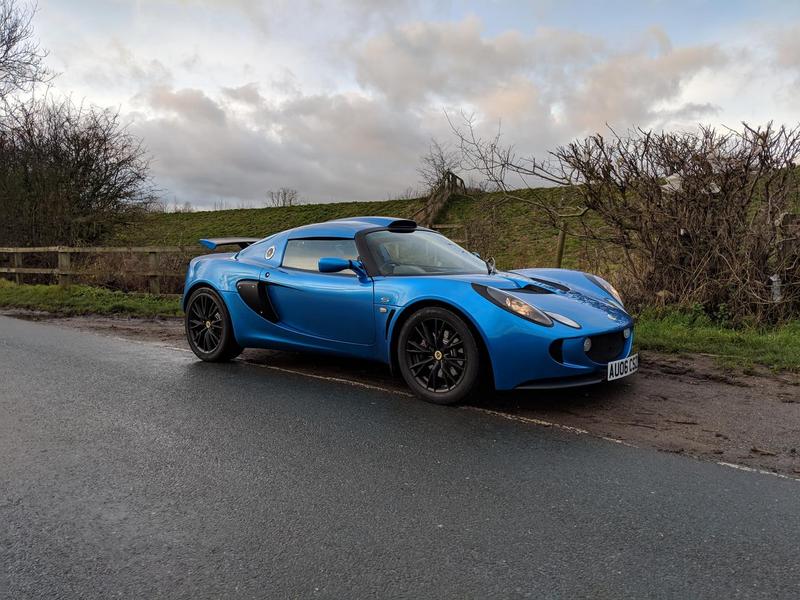
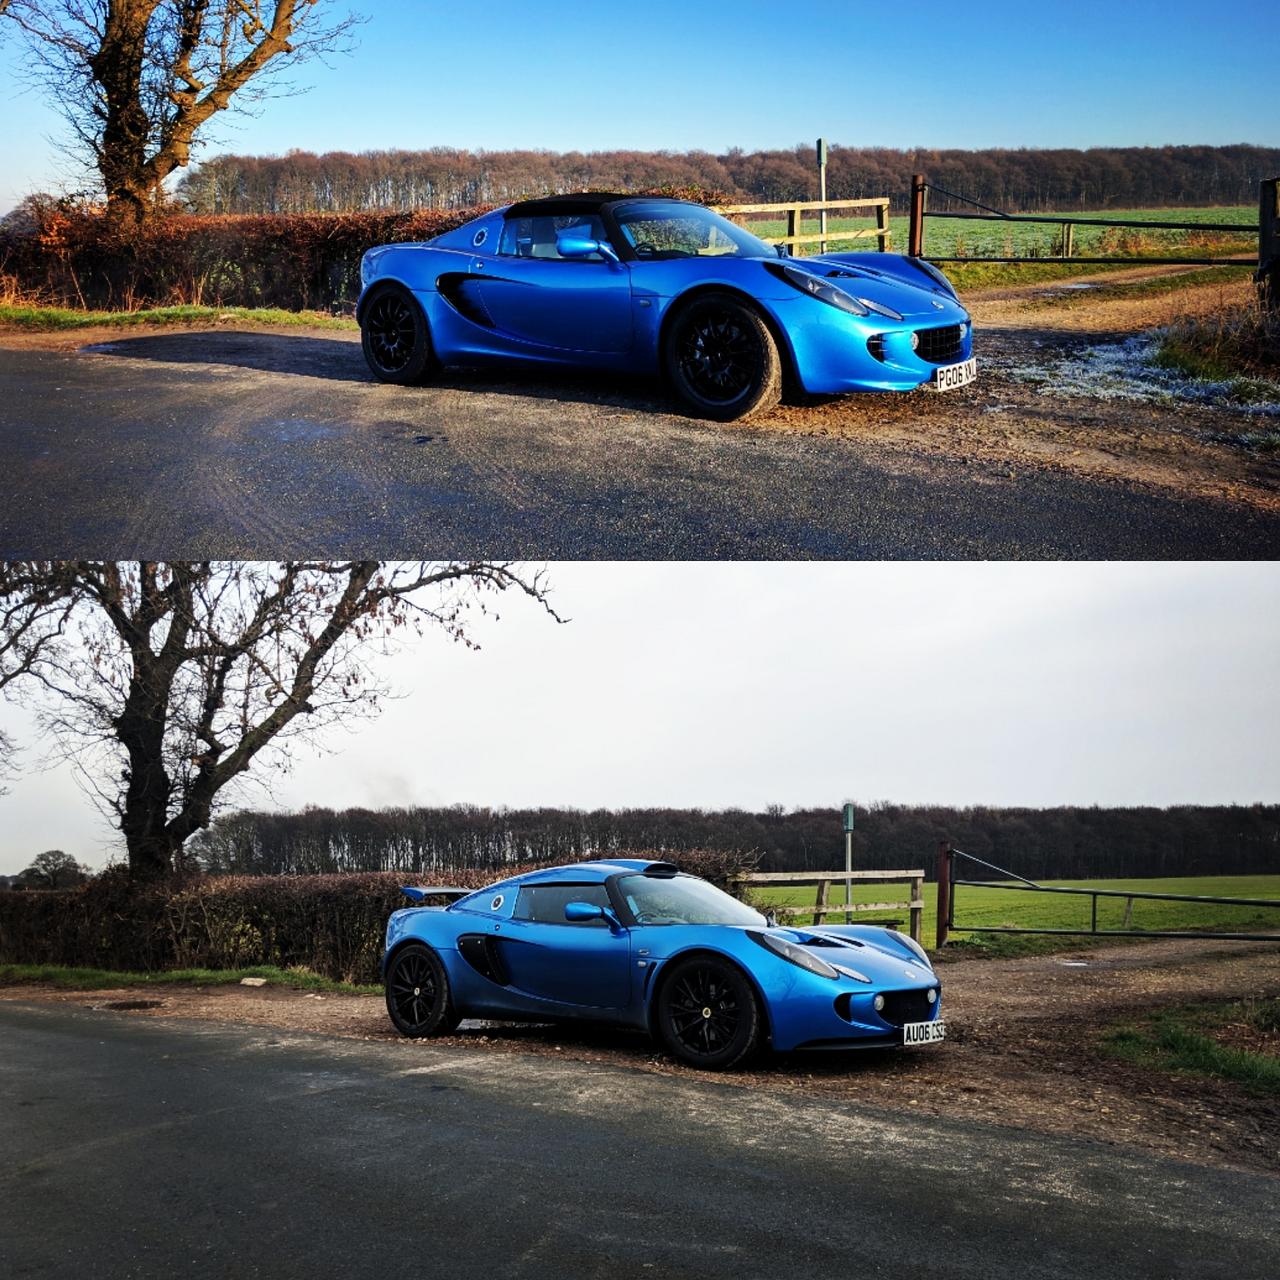
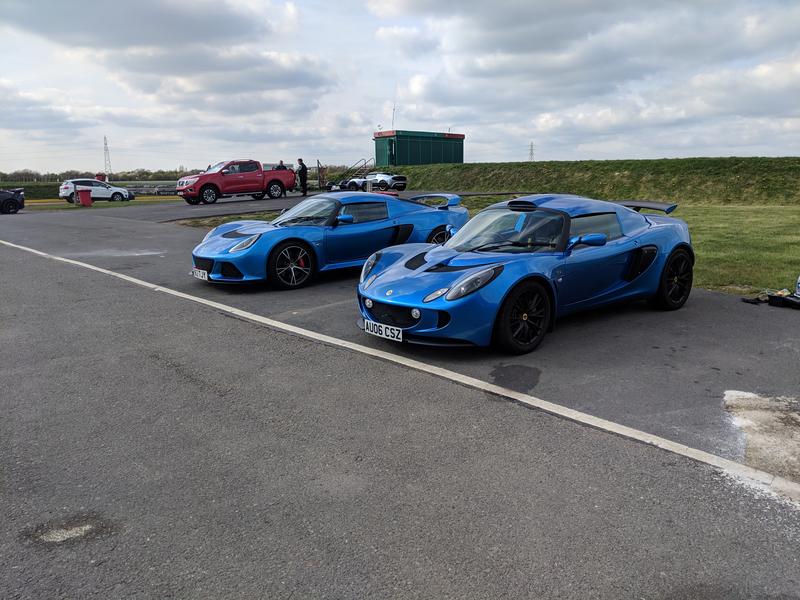
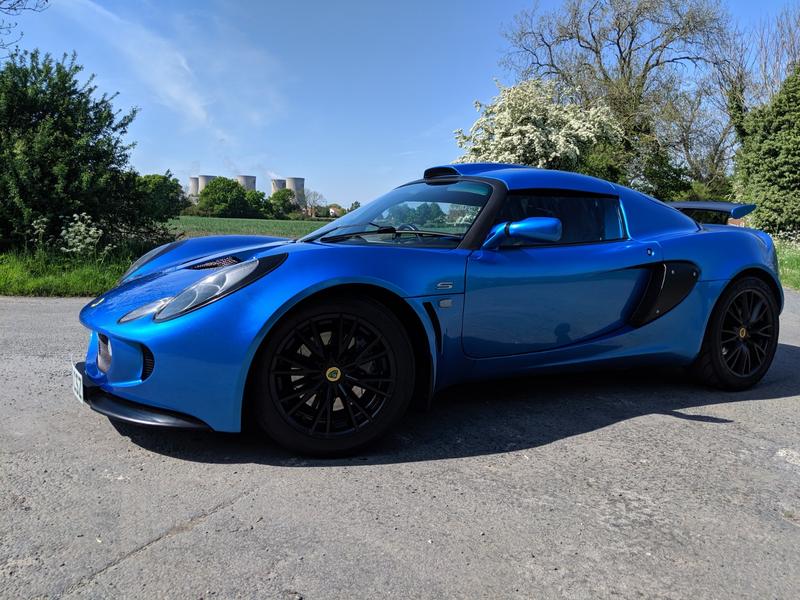
I bought a Laser Blue 2006 Lotus Elise 111R (190bhp NA Toyota 2zz) back in 2016. It was a great car, and I’d have loved for it to be a keeper but it was doomed from the day I collected it, I’d “invested” part of our new house deposit into it so it was always going to be fodder once we were ready to buy another house.

That time came in early 2018, so the car went onto a new owner after I’d had 2 great years out of it, plenty of track time and plenty of DIY servicing/fixing/improving including a suspension refurb, new radiator and front clam repair after hitting a bunny.

I’ll always view that car as unfinished business, so hopefully I can continue where I left off with my new toy.

I did think about some non-Lotus choices, stepping up to Exige budget opened up some new doors including Zenos, Caterfields and even a chubby Porsche or two crossed my consideration… but ultimately it was always going to be another S2 Lotus. The S3 (V6) Exiges are creeping into S2 Exige territory nowadays so I could have stretched to one but ultimately I want a car that I’m comfortable working on, comfortable chucking round a track and the known low running costs of the S2 platform won out for me.

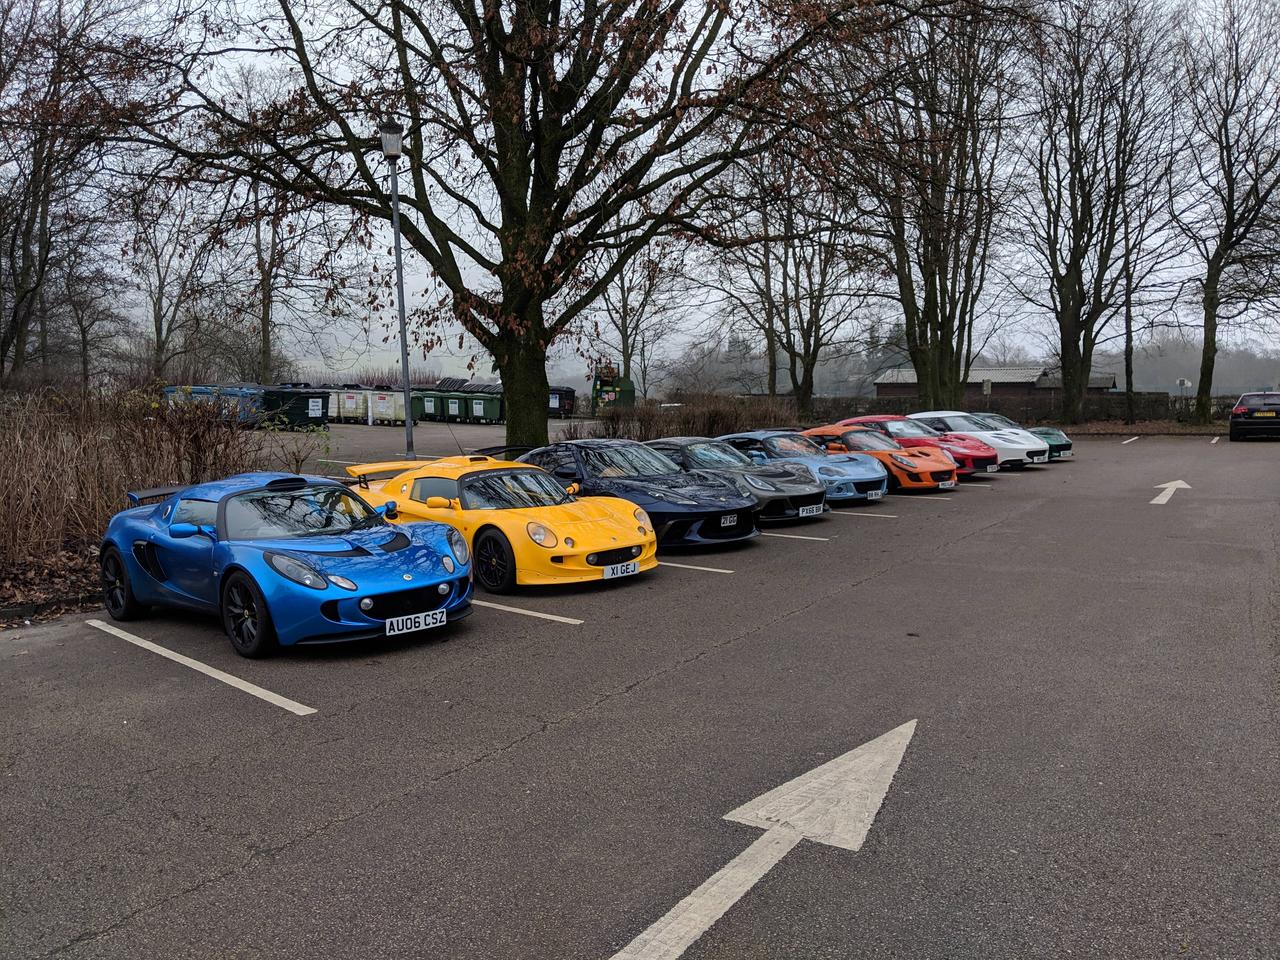
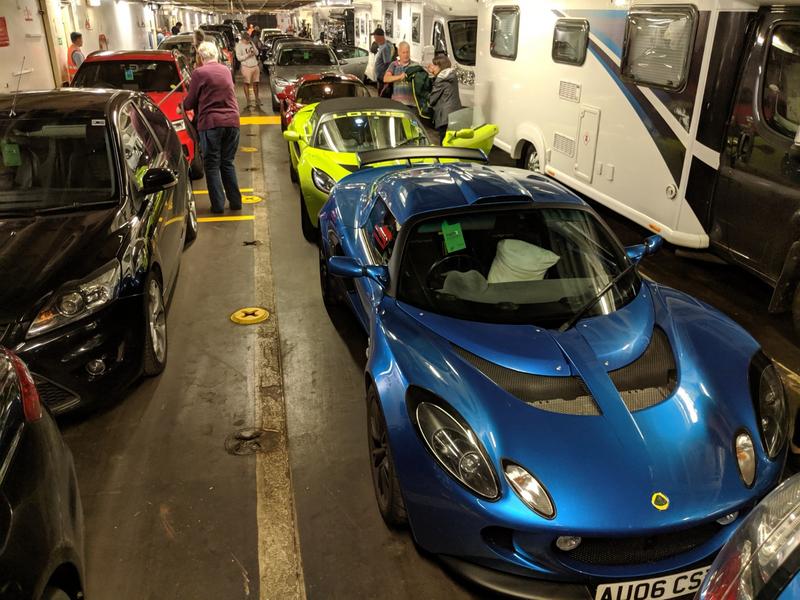
I’d kept my eye on the market and one particular car was loitering around at a popular Lotus trader, priced a bit too high for me initially after just moving house but as winter approached the price slowly came into a reachable range - so I went for a look… and well, the rest is pretty obvious!

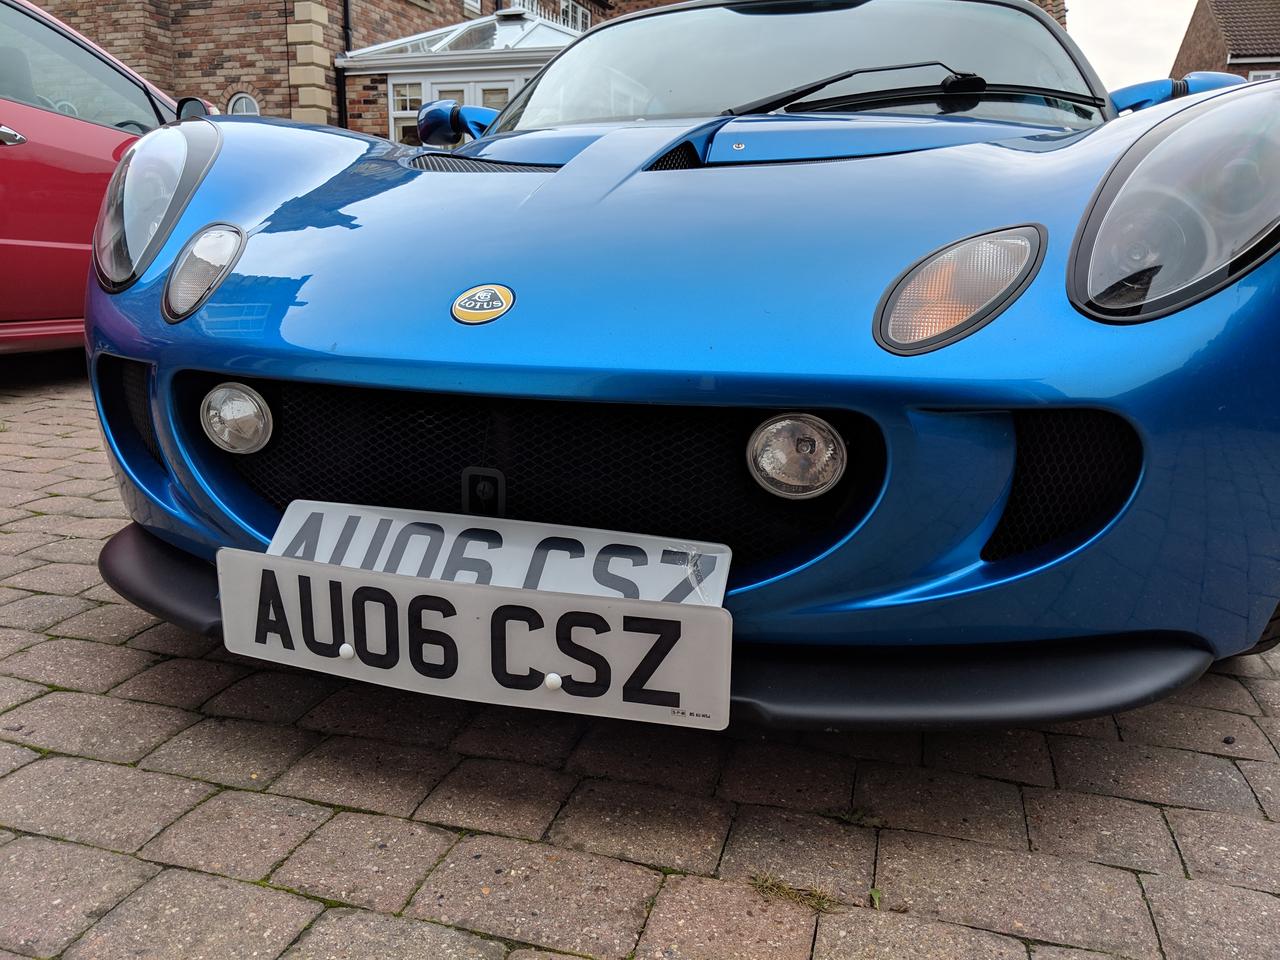
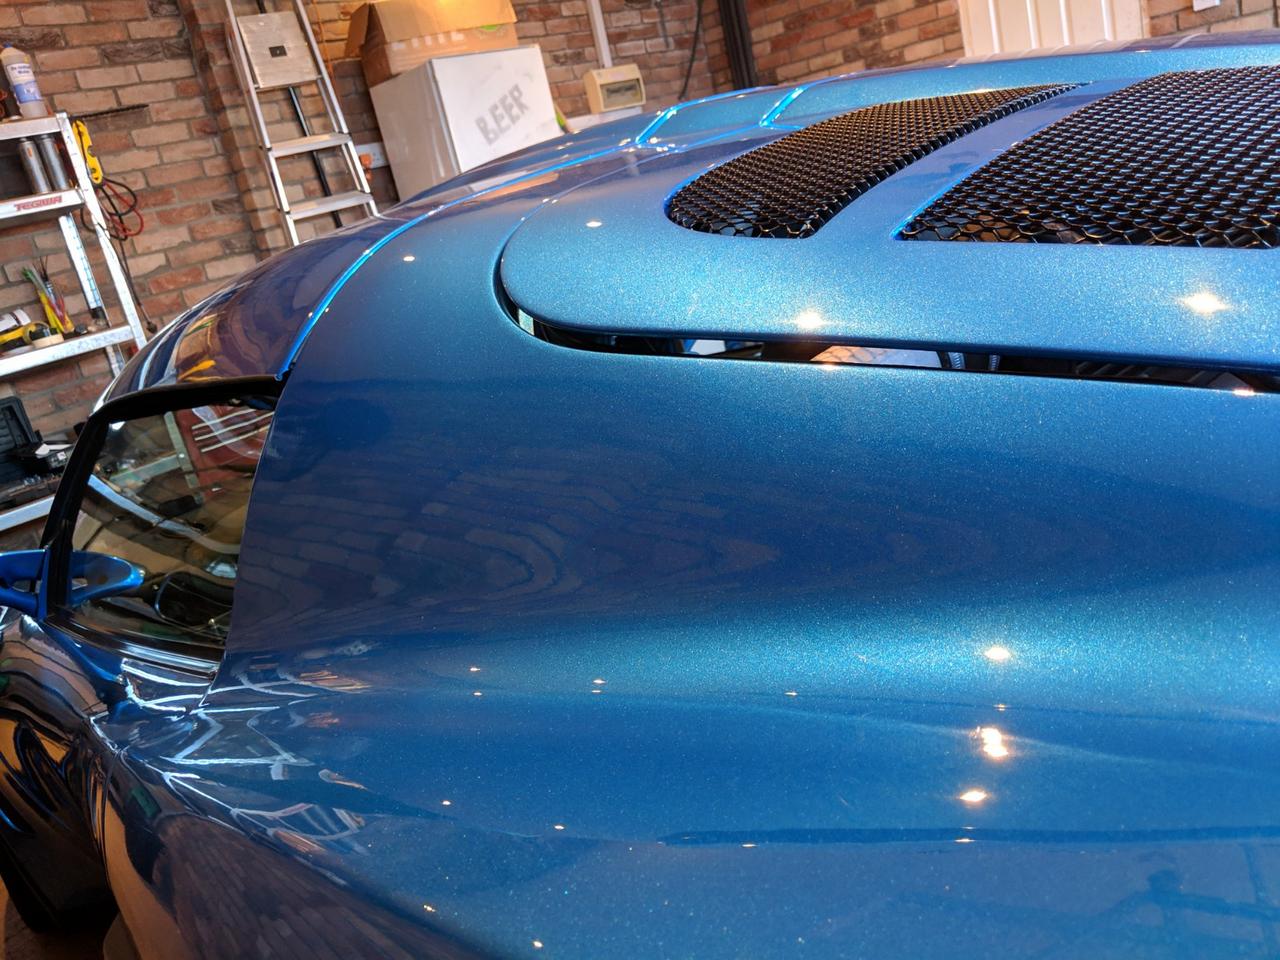
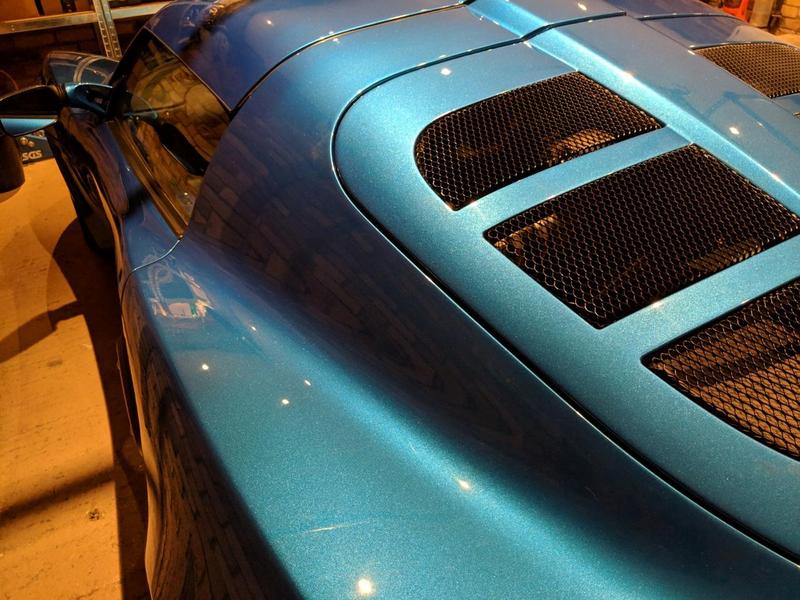
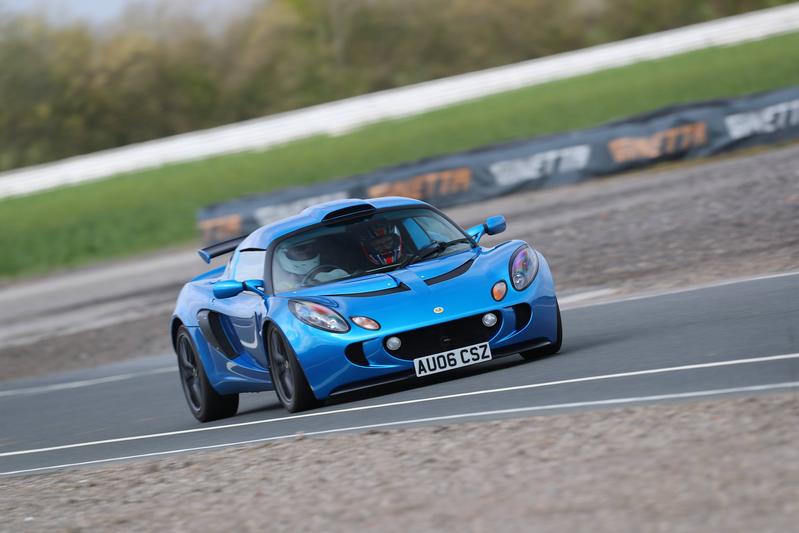
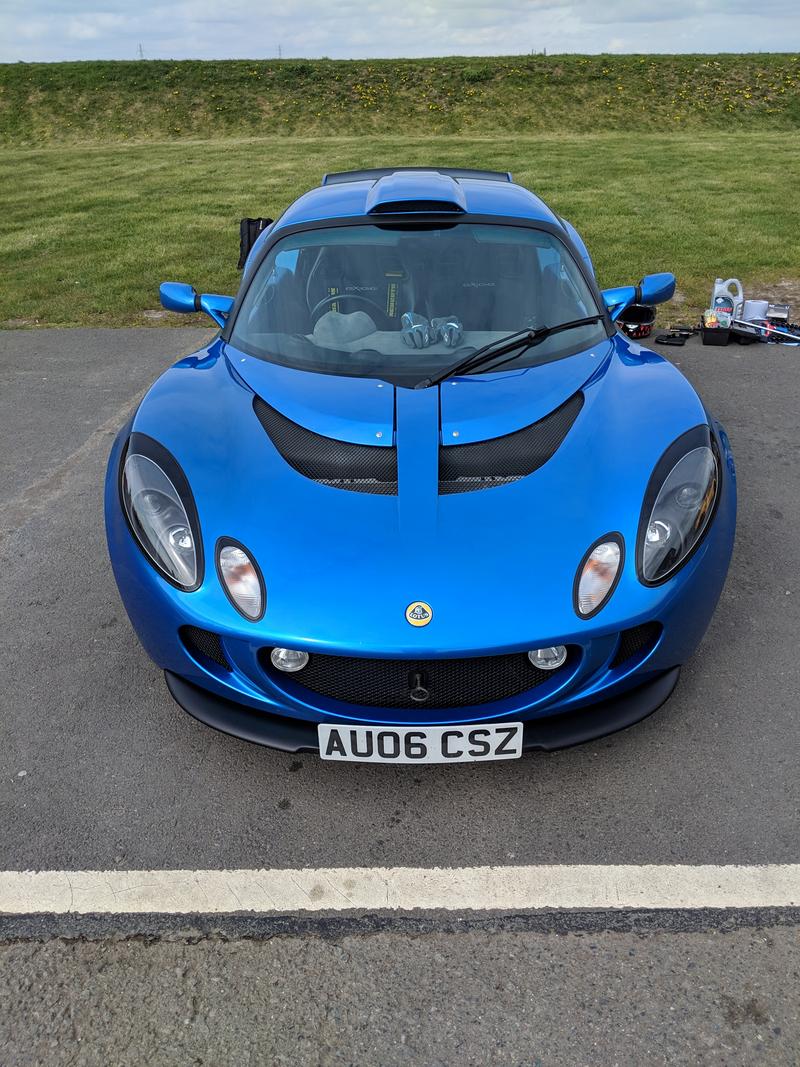
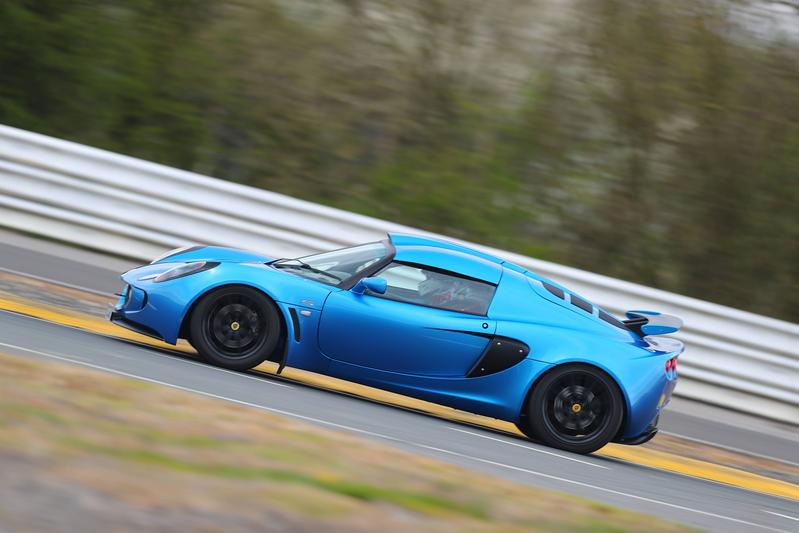
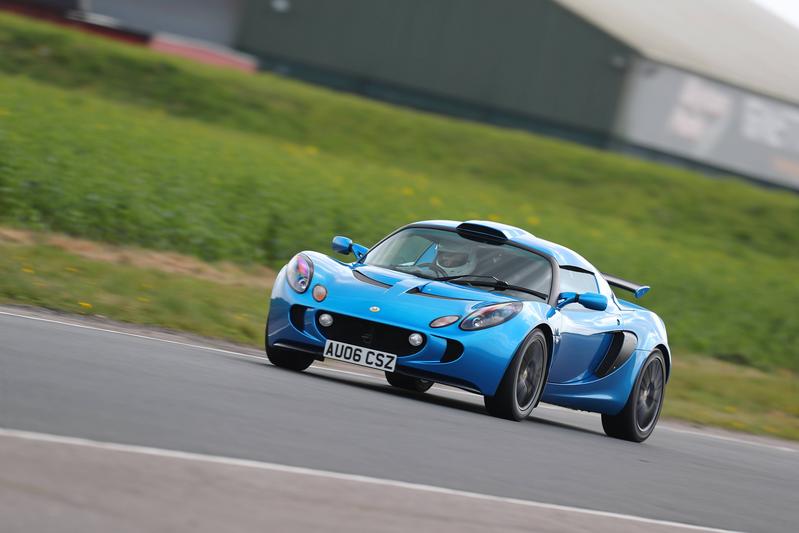
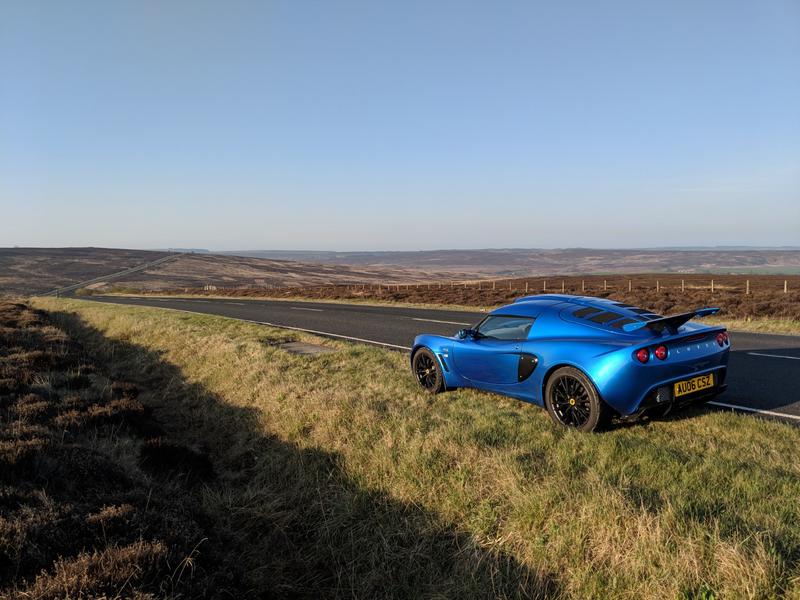
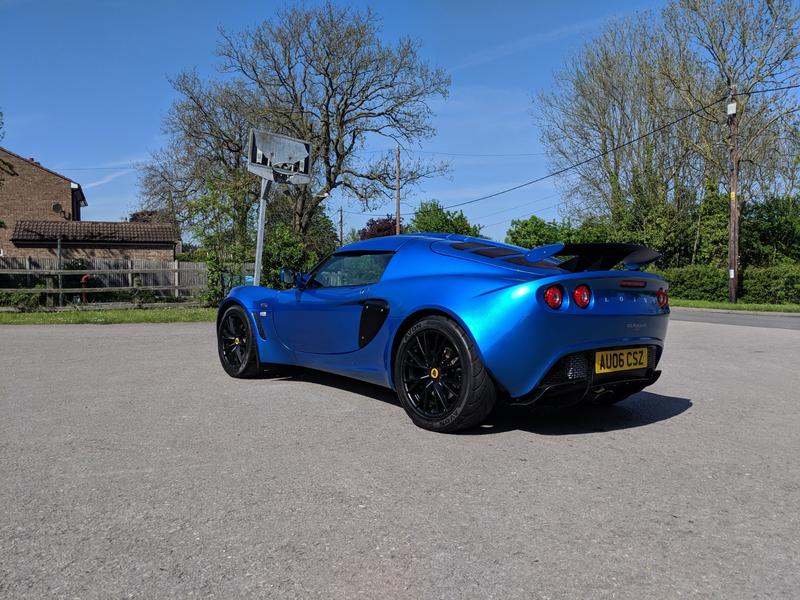
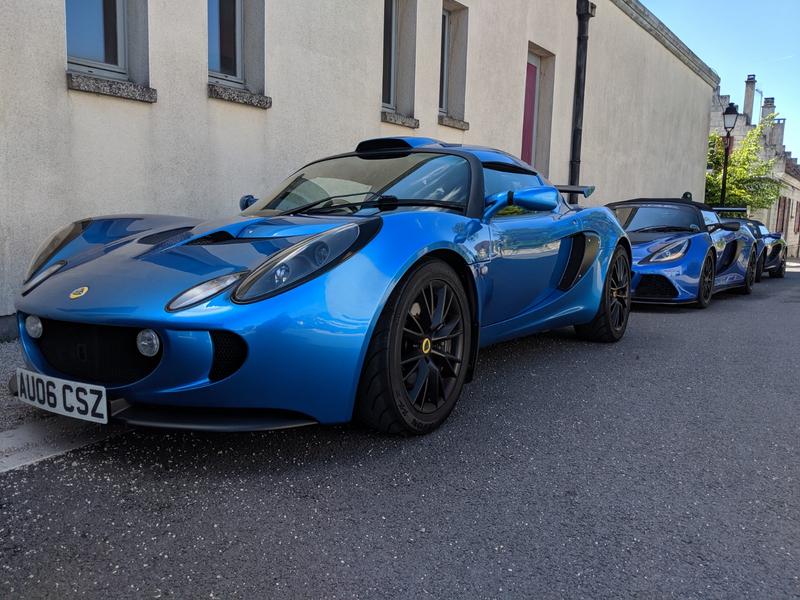
From the ad alone it ticked my boxes, Laser Blue (again!), low mileage (just under 16k) and didn’t look to be particularly hacked up or modified (that’s my job).

Whilst sat with the trader it had a couple of changes:

  • Black painted front splitter, sidepods and rear spoiler
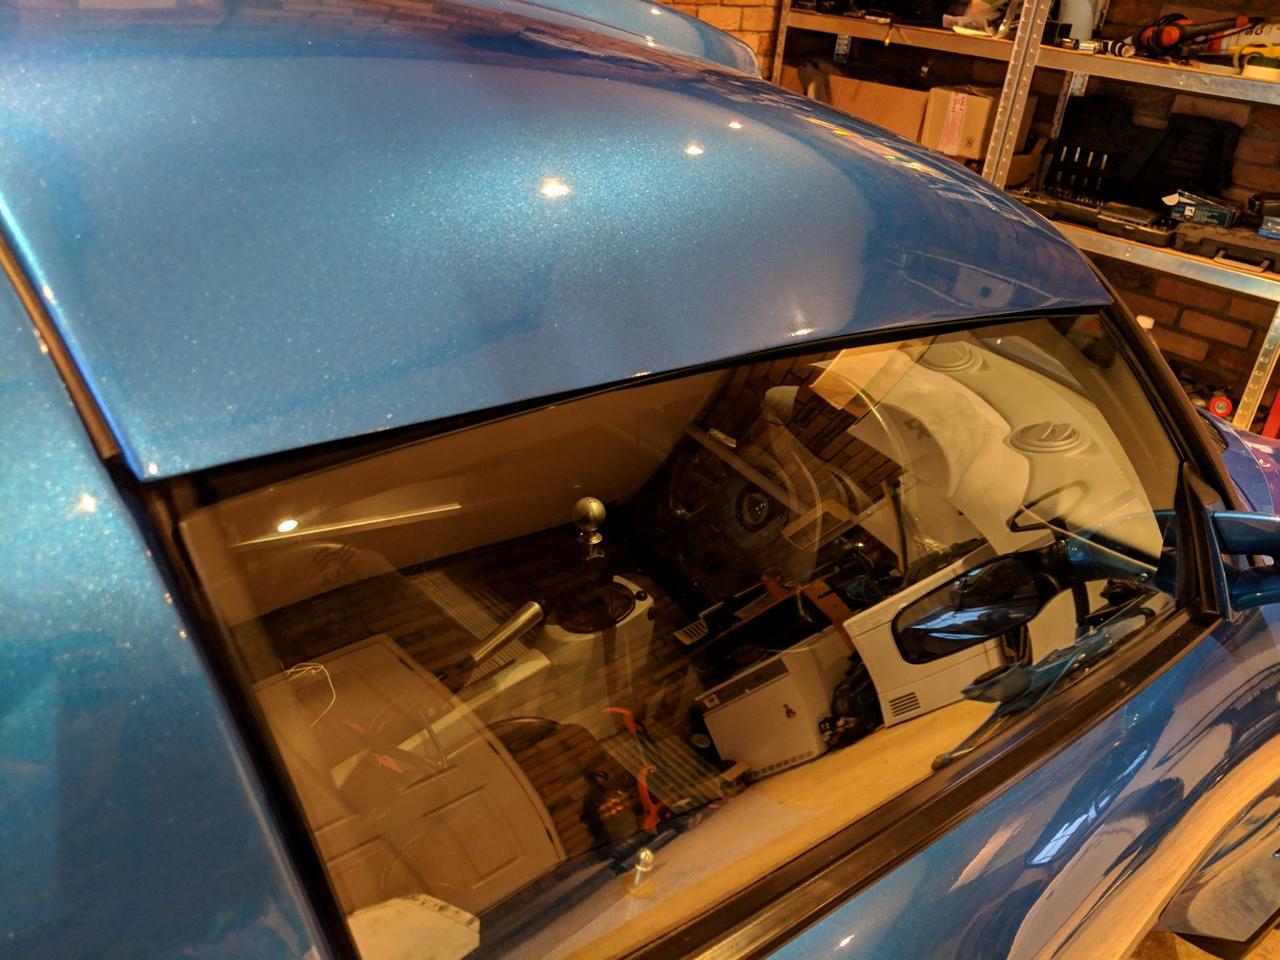
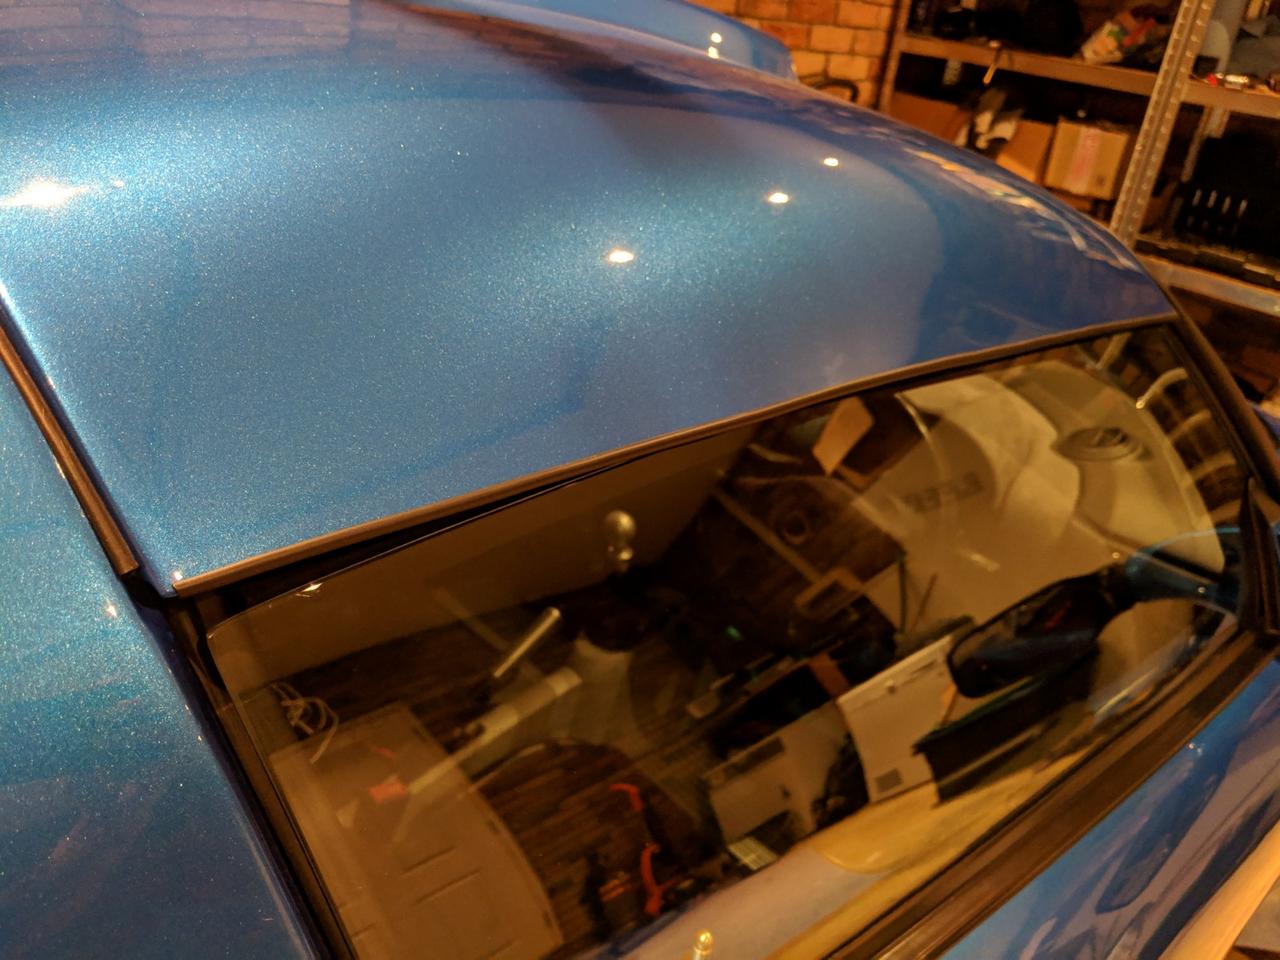
  • Aftermarket “long scoop” roof
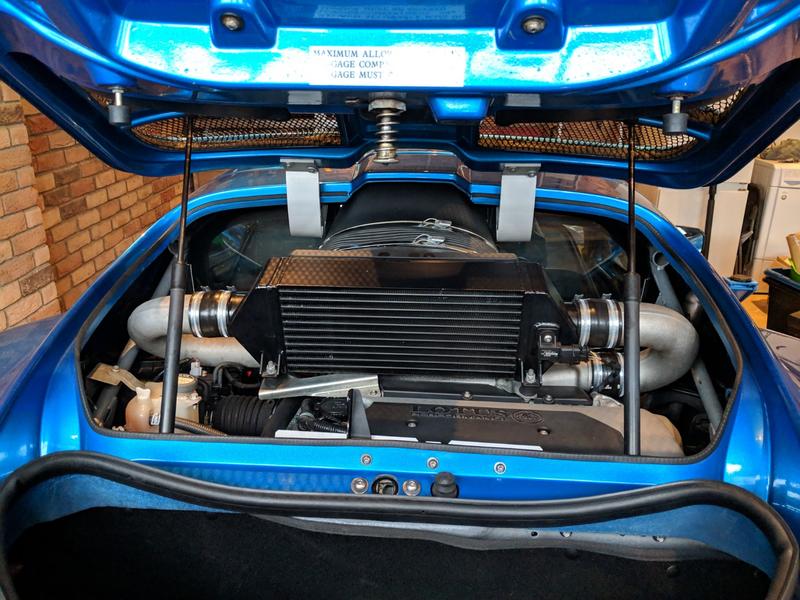
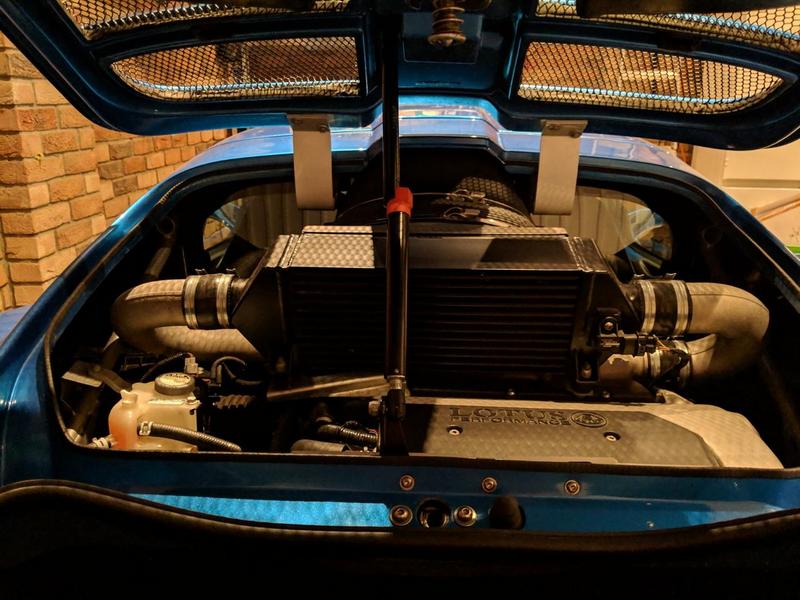
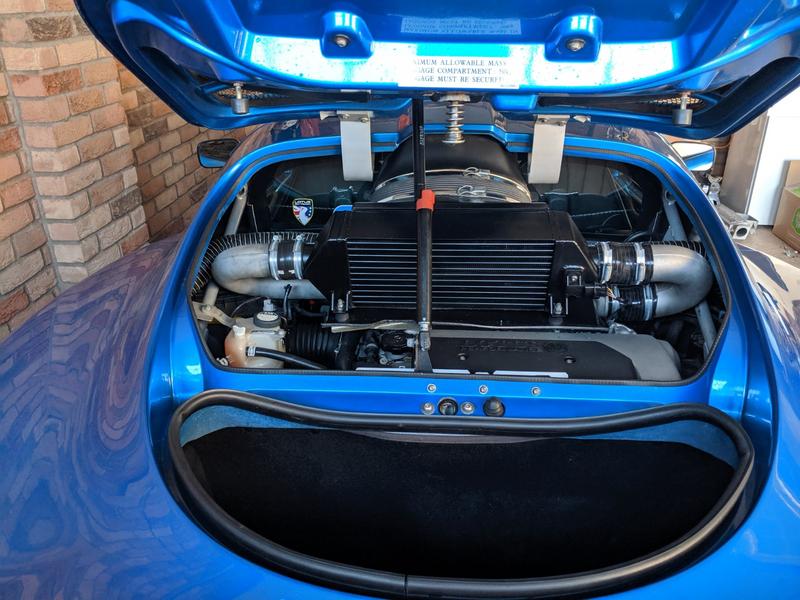
  • 260bhp upgrade, offered by Lotus as a dealer upgrade but this one has been done with a Spitfire fuel pump and 550 injectors (rather than the Lotus 440cc ones) and it has a Lotus reflashed ECU.

Other details on the car are Avon ZZR tyres, it has the factory Sport and Touring option packs which I can never remember what included what but the general spec of the car is:

Electric Windows
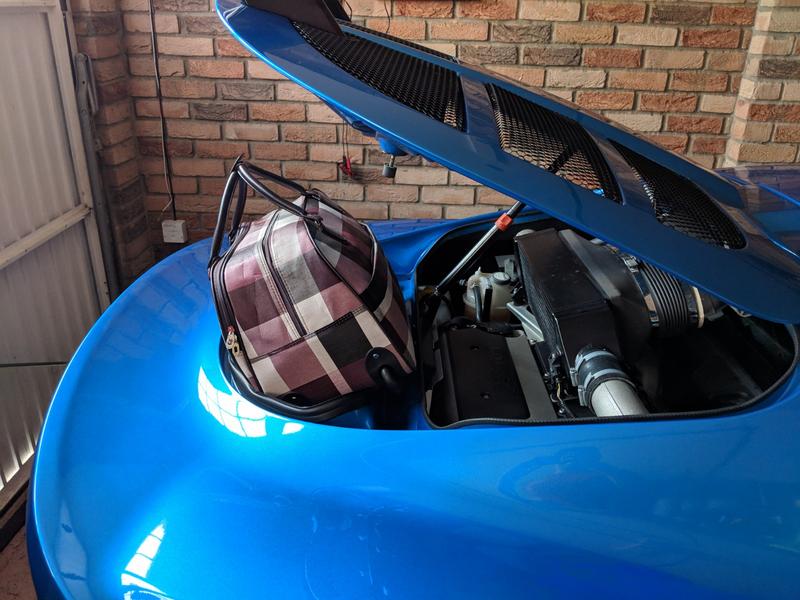
Aircon (and it works!) *
Carpets
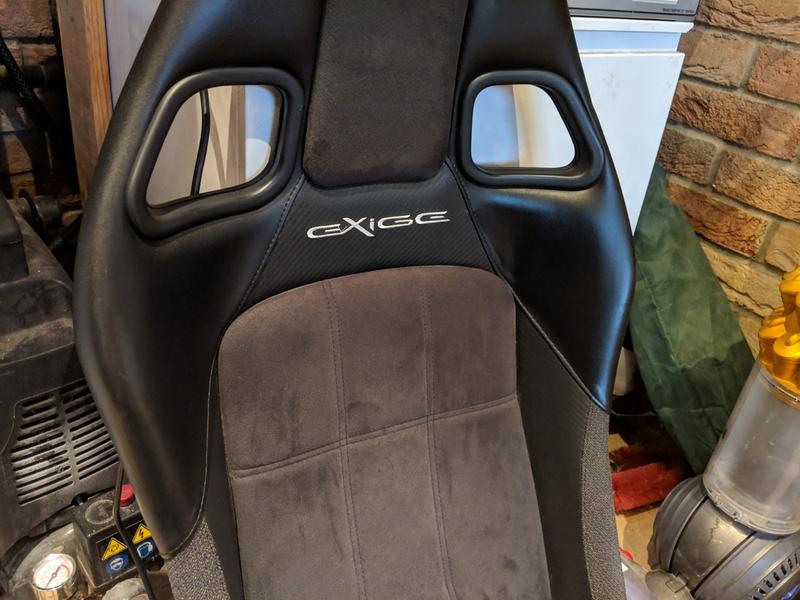
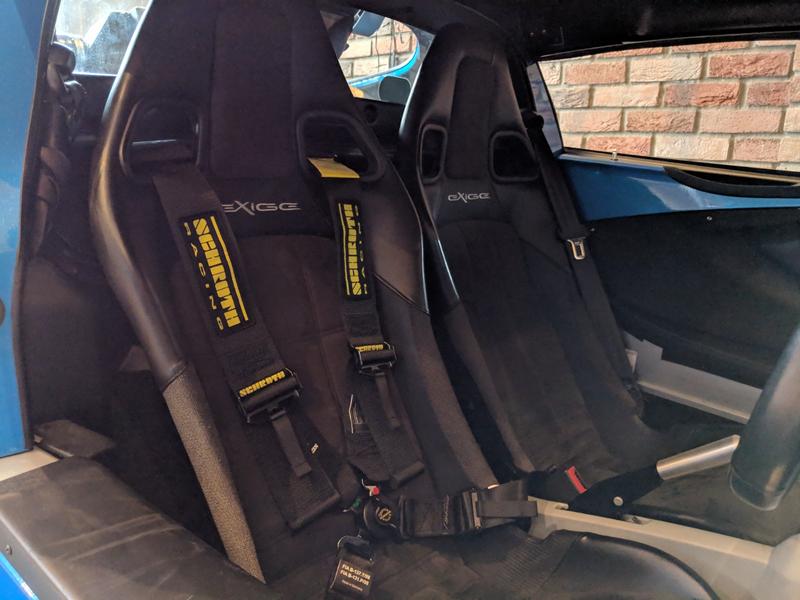
Probax seats with harness cutouts *
Harness Bar *
Traction Control *
Twin oil coolers *

“*” all stuff the Elise didn’t have.

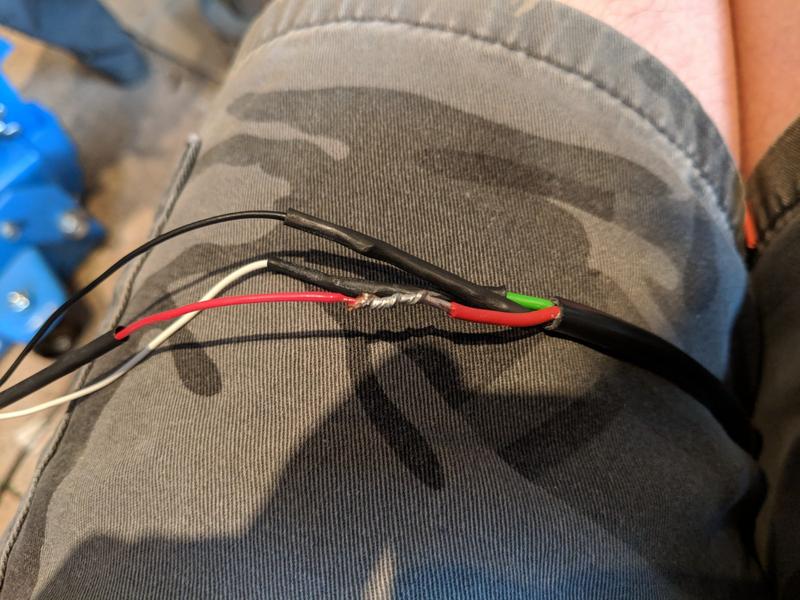
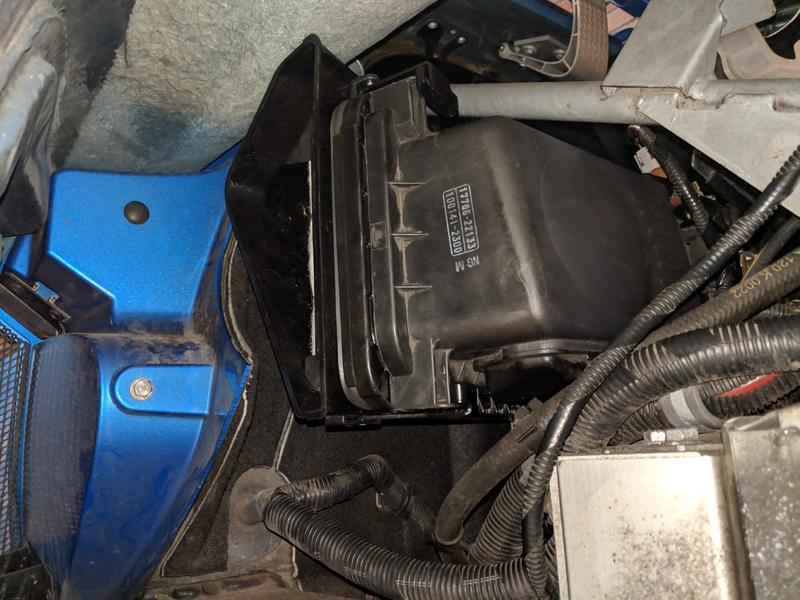
The oil coolers were subject to a Lotus recall in 2014 as the crimped connectors were failing and spraying oil everywhere (nicely positioned in front of front wheels too!) but I had the paperwork to show this had been done. The other paperwork was all in order, I can’t find any record of this car on forums/clubs etc but it’s generally only done a couple hundred miles per year for most of the last decade. The only notable item in the history is a new supercharger fitted in 2012, no idea if these are a weak point or what - but the car had 9k miles at the time, so seems strange.

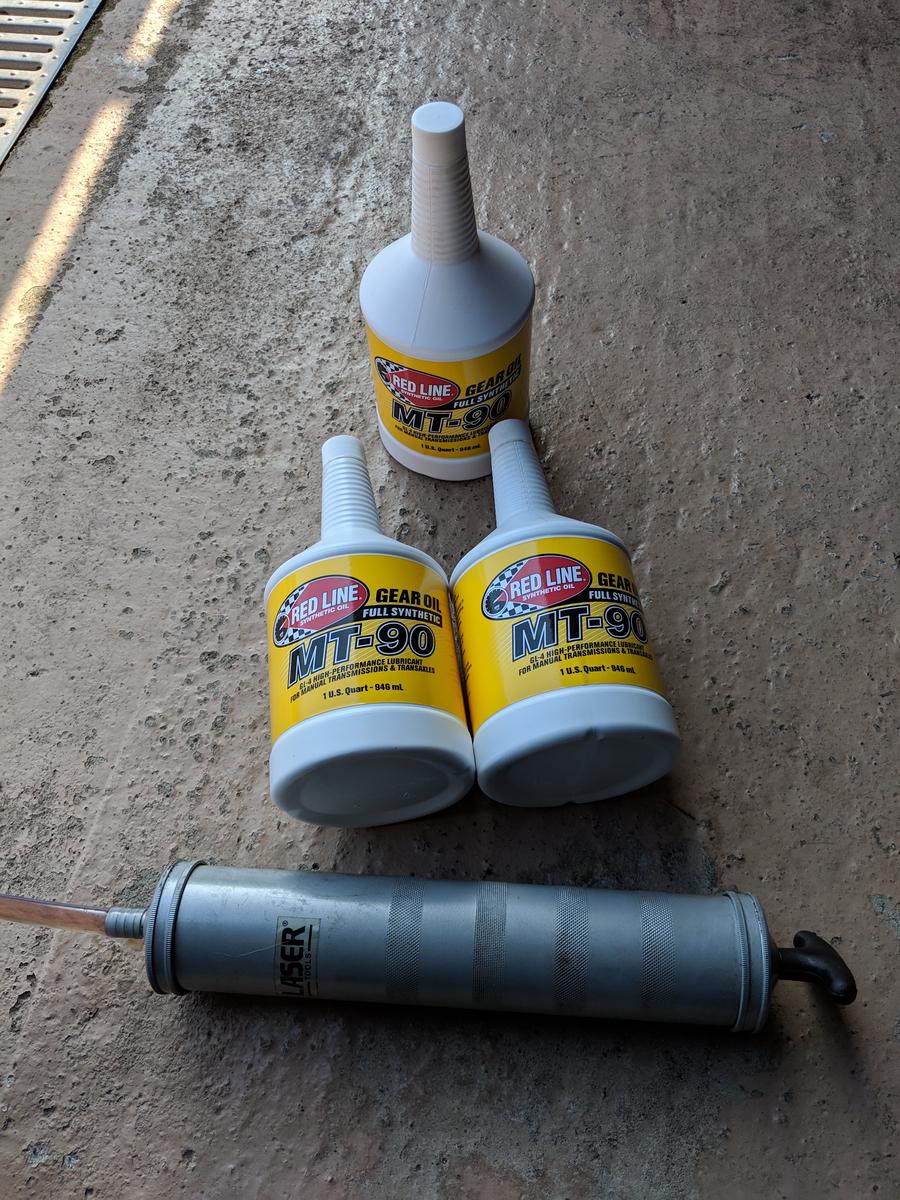
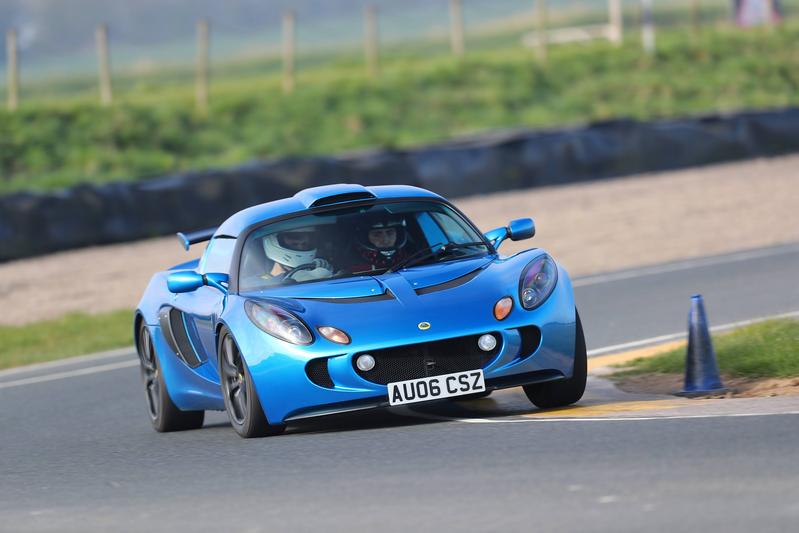
I test drove the car on a pretty wet day, so not ideal but it was clear (if the stats weren’t already obvious) that this was a big boy step up in performance from the Elise. Aside from the performance I noted a really slick gear change on the Exige compared to the rather vague one on my Elise, I guess this is just down to the low mileage but I’ll keep my eye out for any obvious modifications which may have contributed.

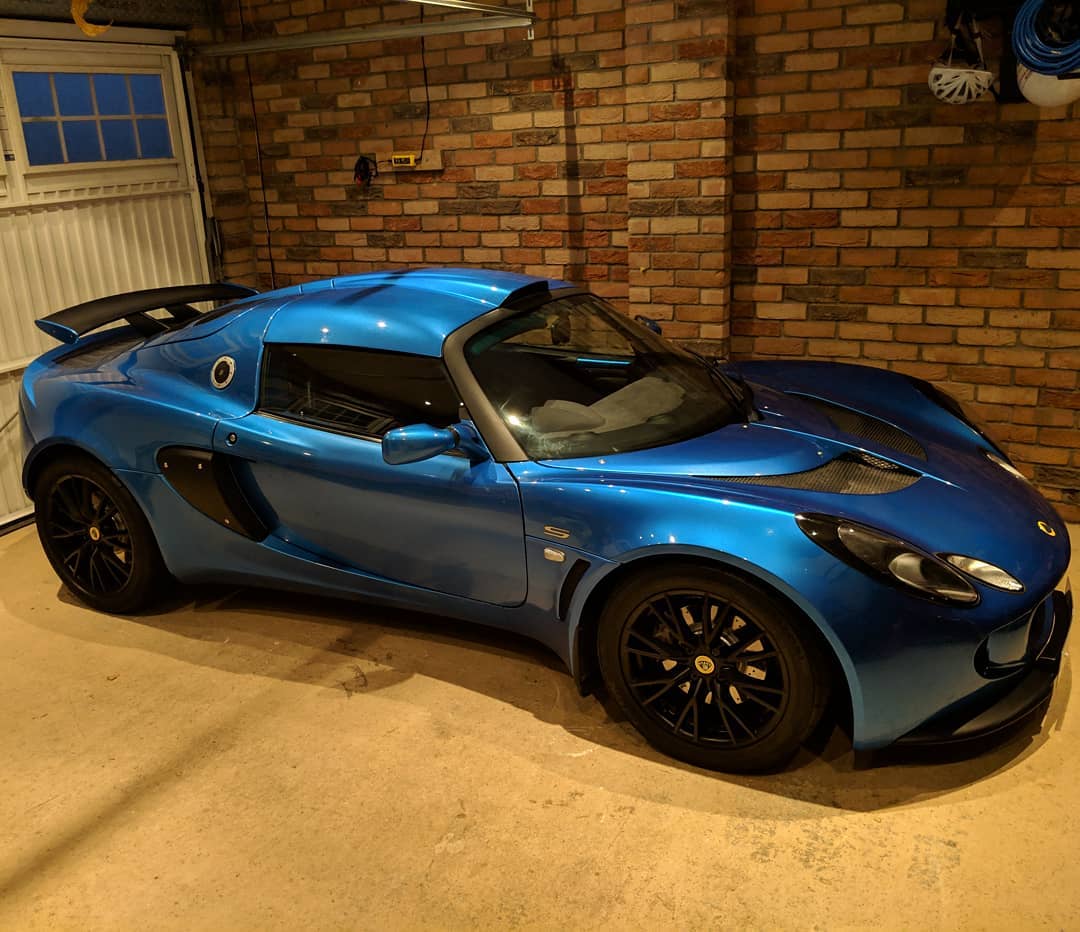
The car needed a touch of paint before we completed the transaction, the rear clam had a bit of a crack in the gelcoat typical of a car that’s had a little bumper brush in a carpark but that’s now sorted and the car is settled in the garage at home! Happy days.

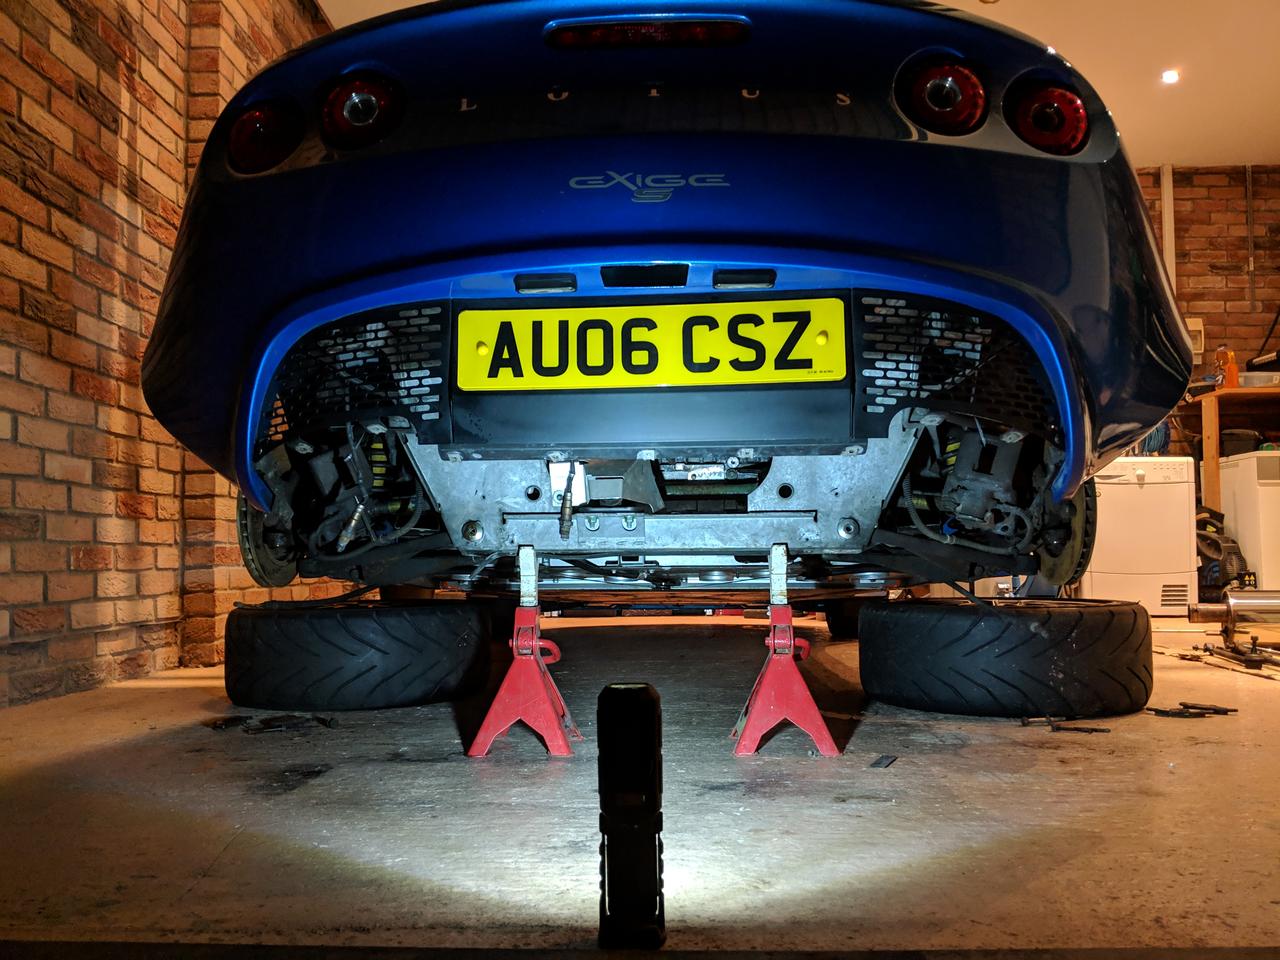
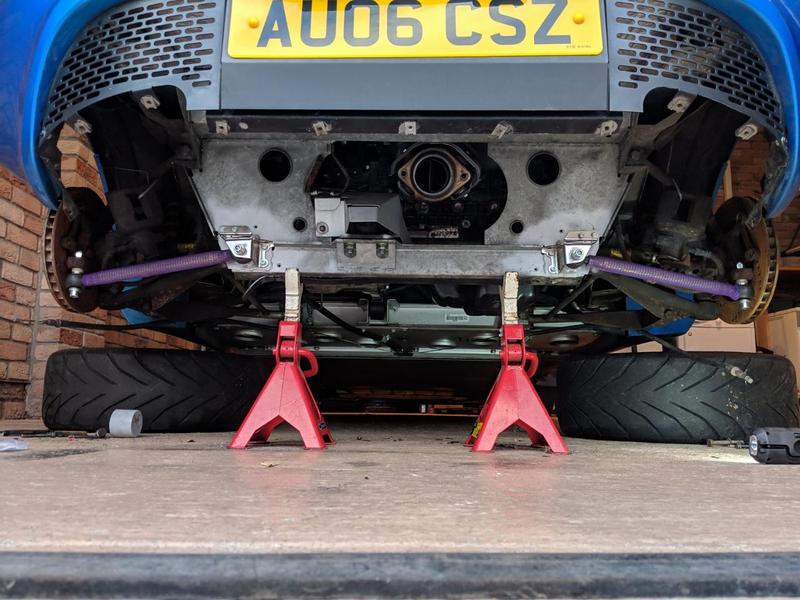
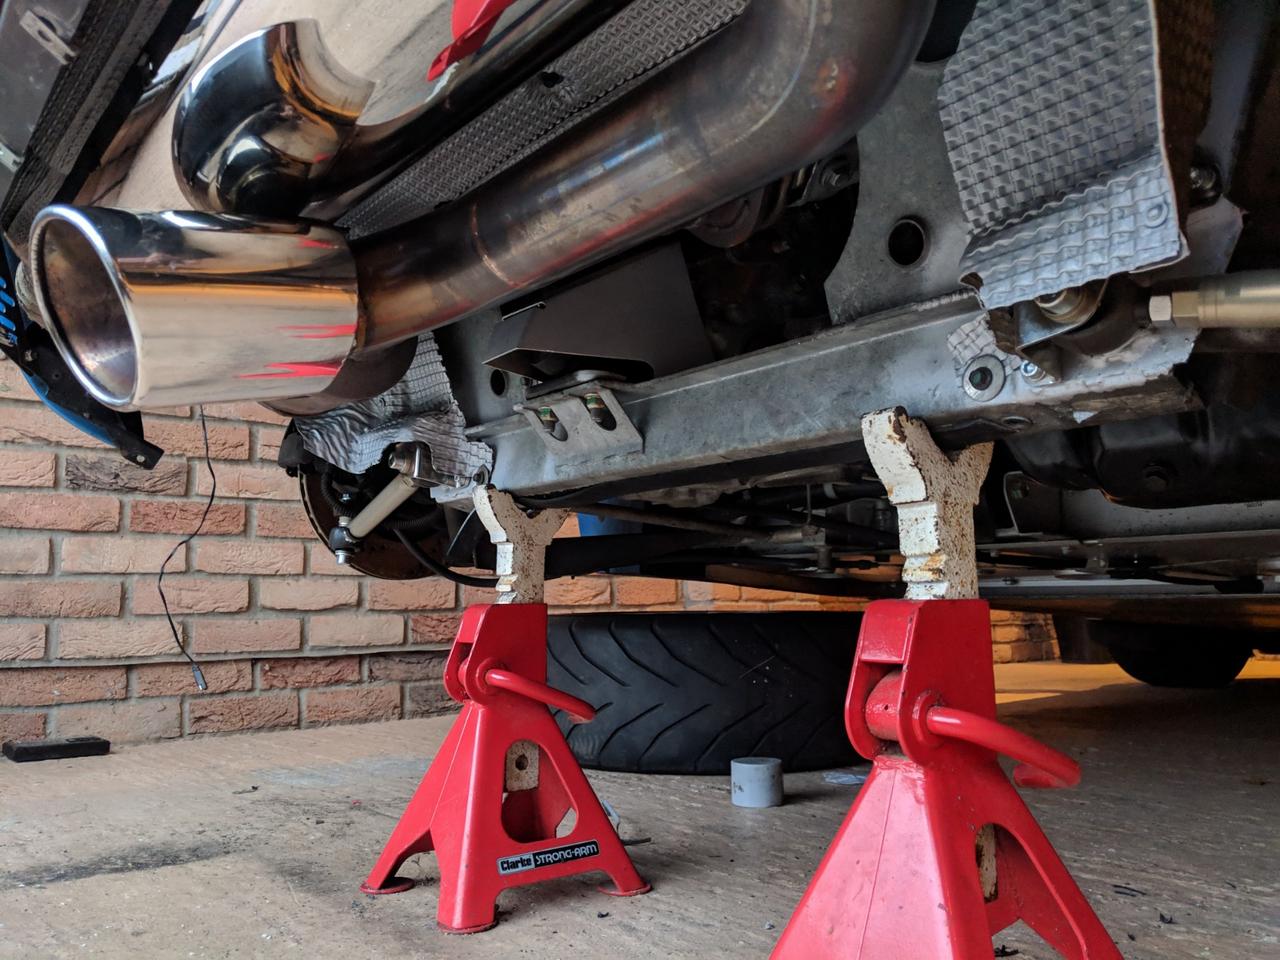
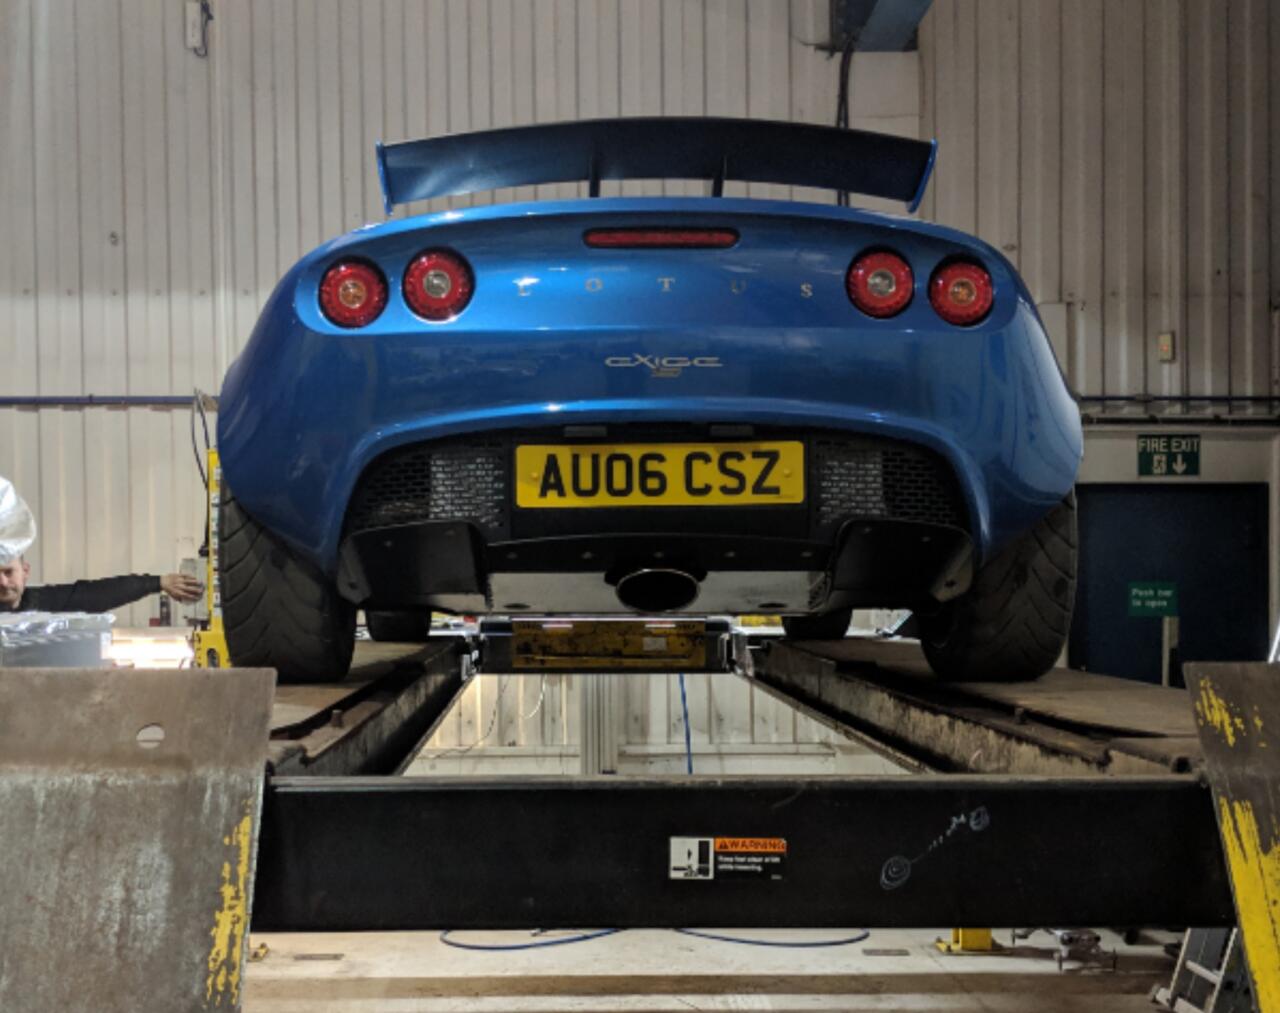
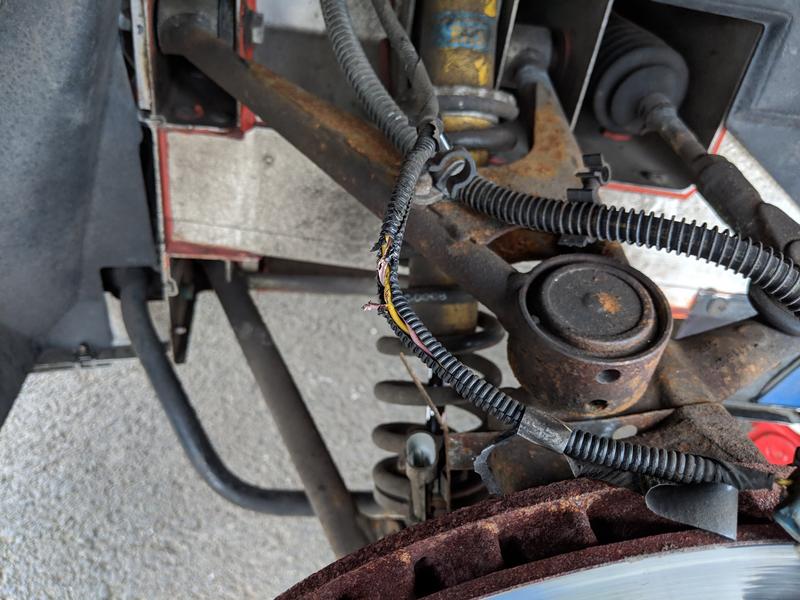
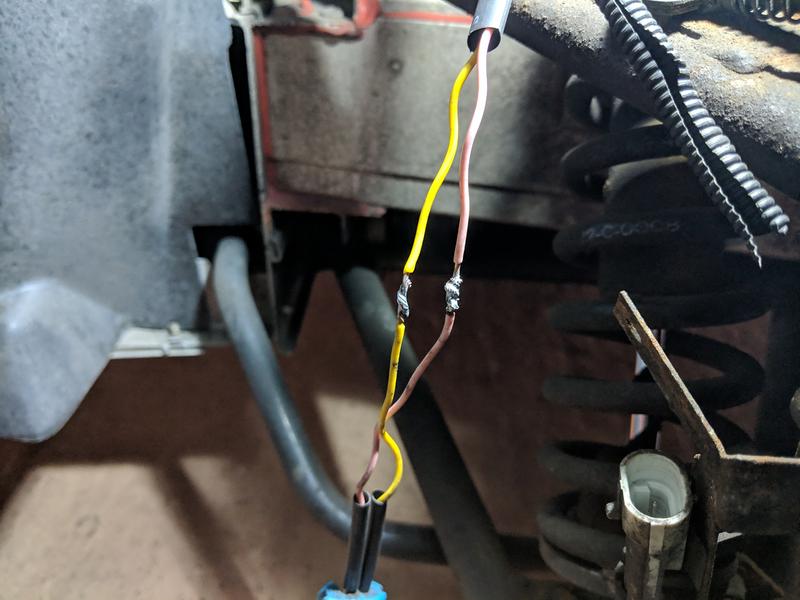
I learned a fair few lessons with the Elise, spending money where it probably wasn’t needed being one big one so I hope to learn from that and get this project off to a strong start. I’ve already had the car jacked up for a poke around, mainly checking for any issues that a test drive may not have identified but also on the lookout for any sneaky modifications (none found yet, but I learned this lesson after buying a load of Whiteline goodies for my “stock” Impreza and then jacking it up to fit them, finding the car already had the entire Whiteline catalogue on it )

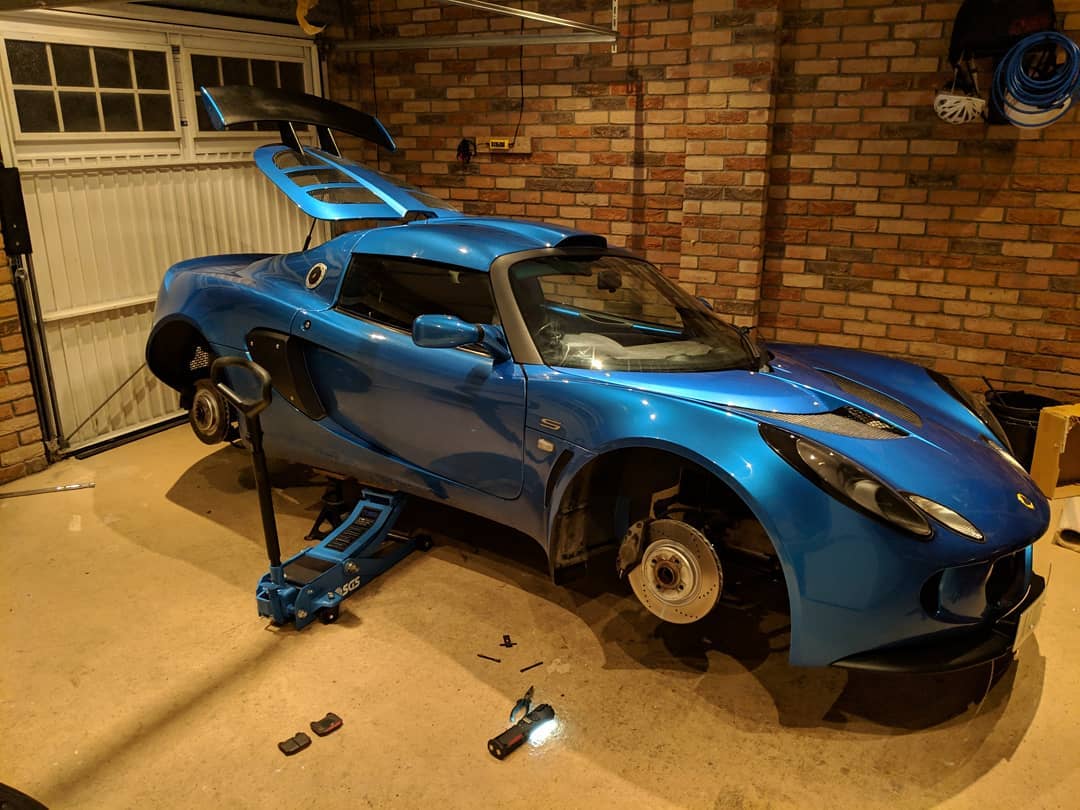
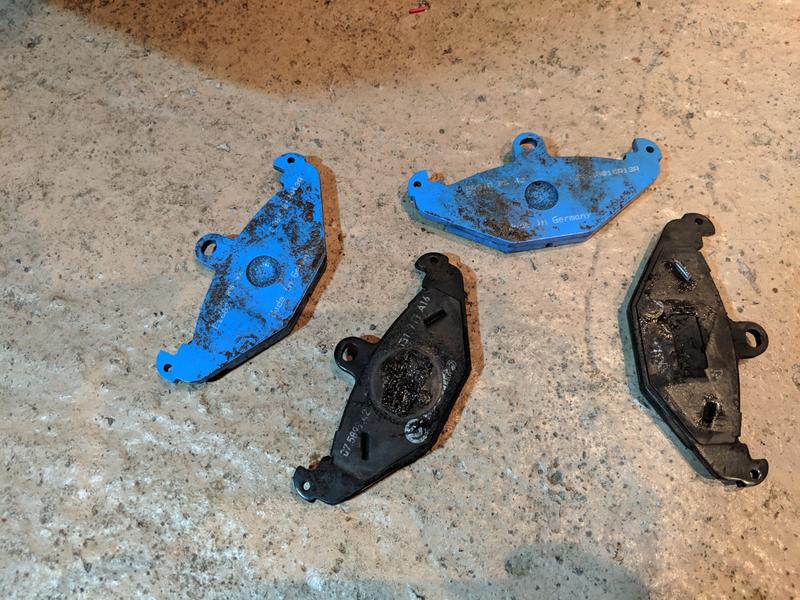
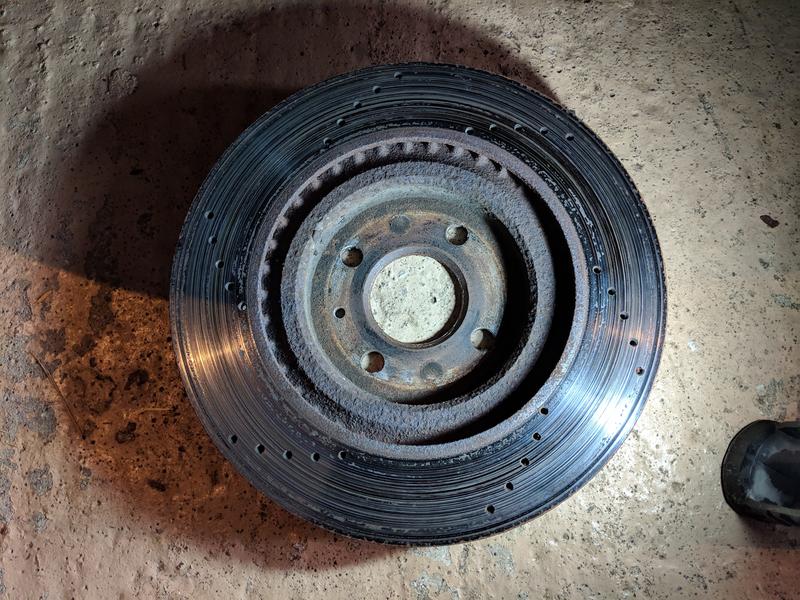
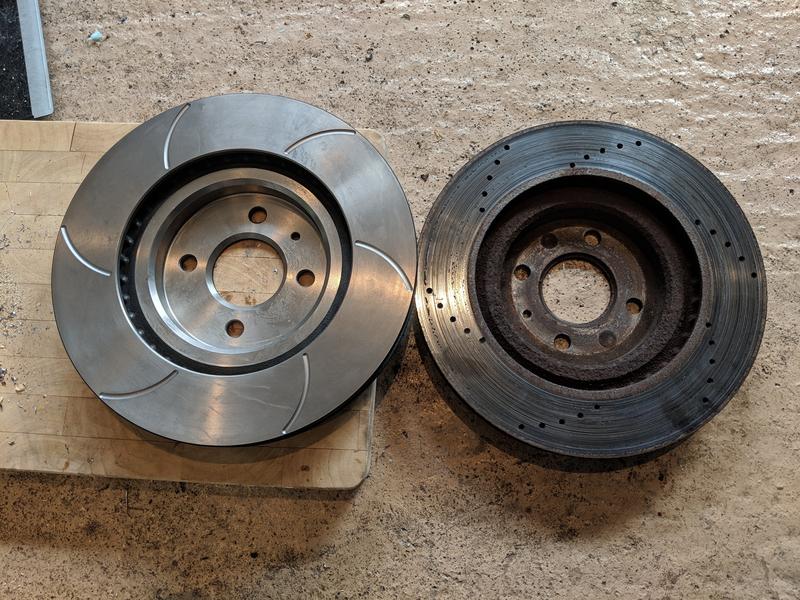
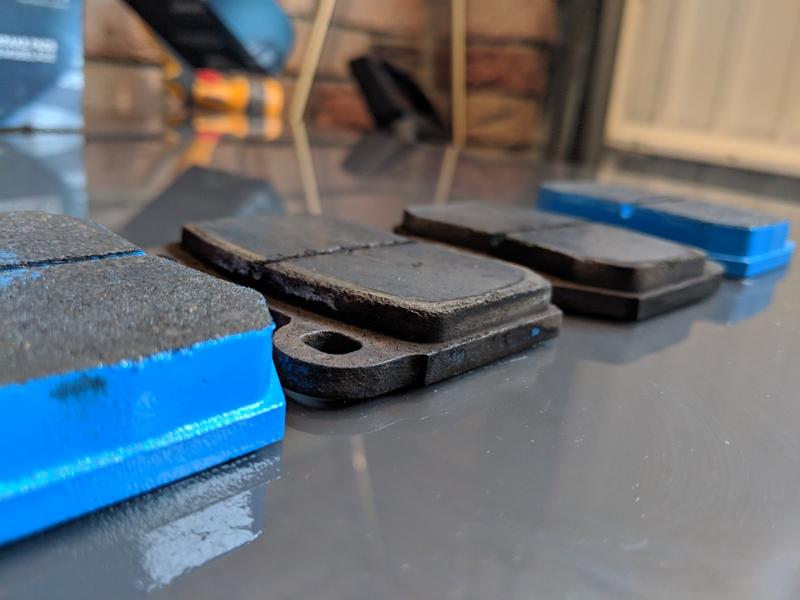
Inspection suggests that the car is fitted with EBC red stuff pads - they’re new to me, but so far don’t seem to be squealing or dusting too much so that’s 2/3 tests complete. If they can survive a few laps without fade then I’ll keep hold of them till they die.

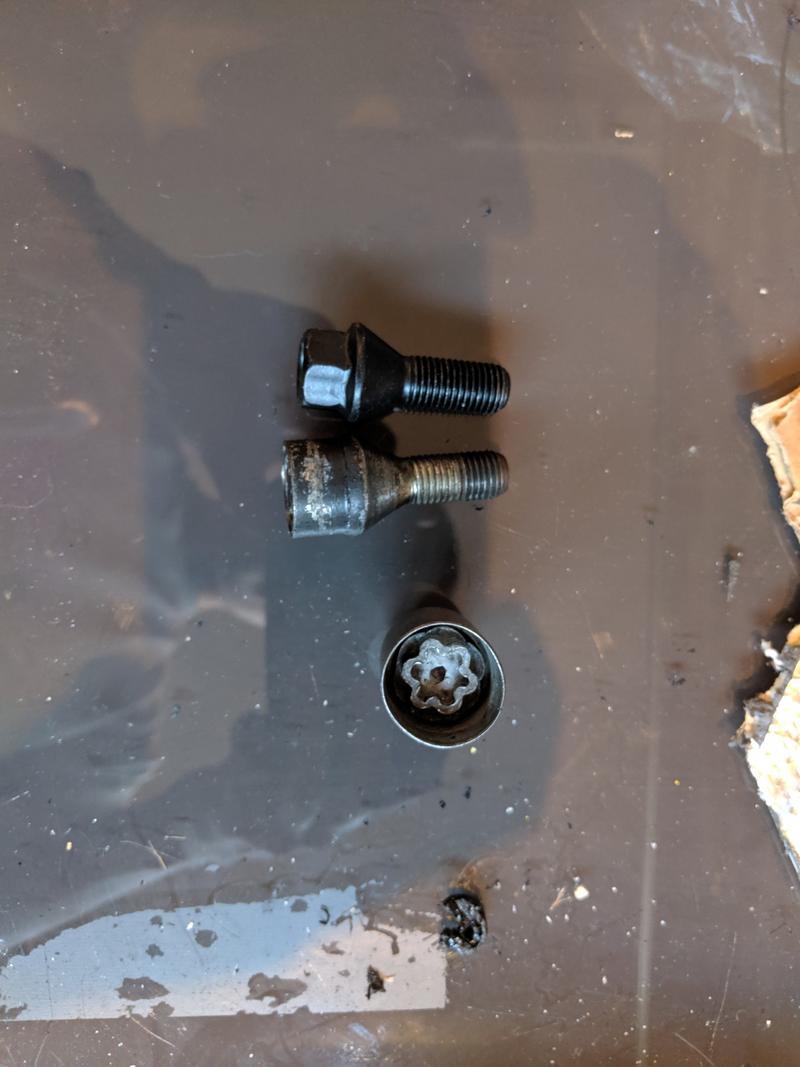
Whilst the wheels were off, they got a clean and seal (freshly powdercoated, so now the ideal time to do it)

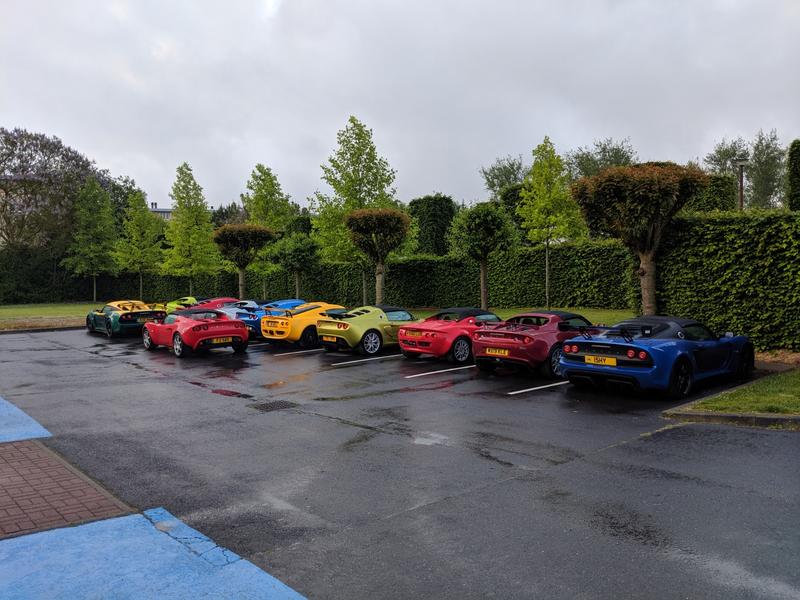
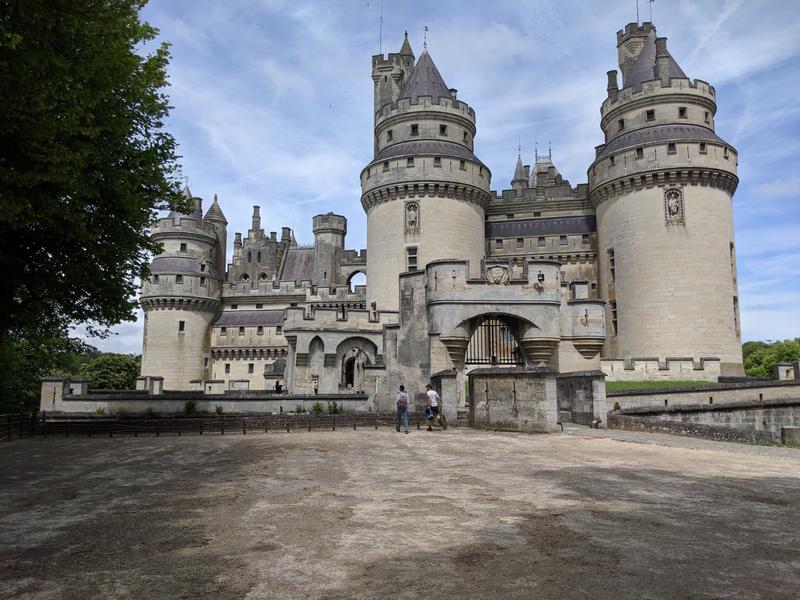
… and that’s about it so far. I have some plans already, two trackdays already booked one of which is a trip to France in May so I have some prep work to do:

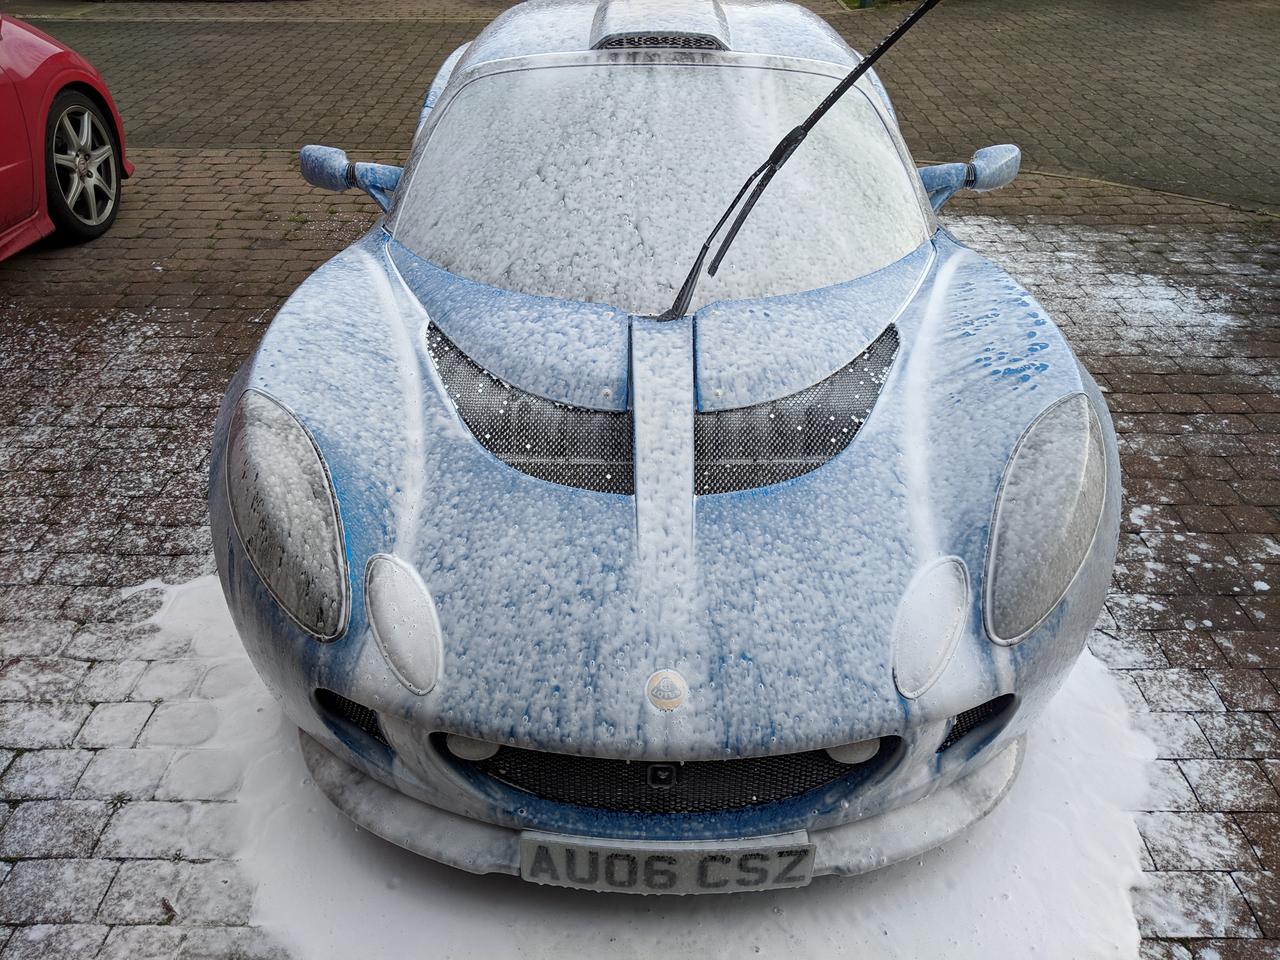
  • Give it a good going over with the DA and get it waxed up
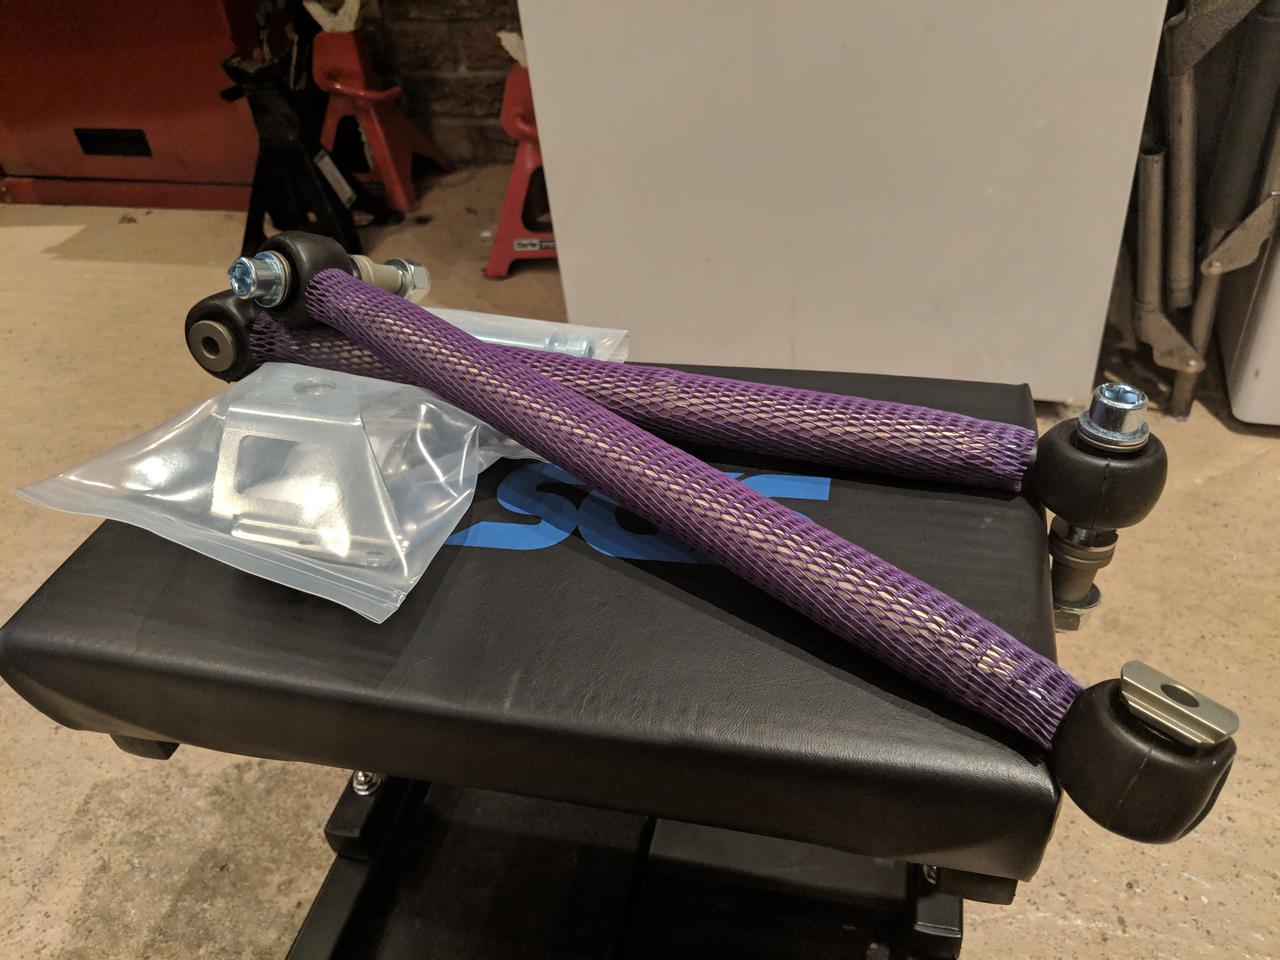
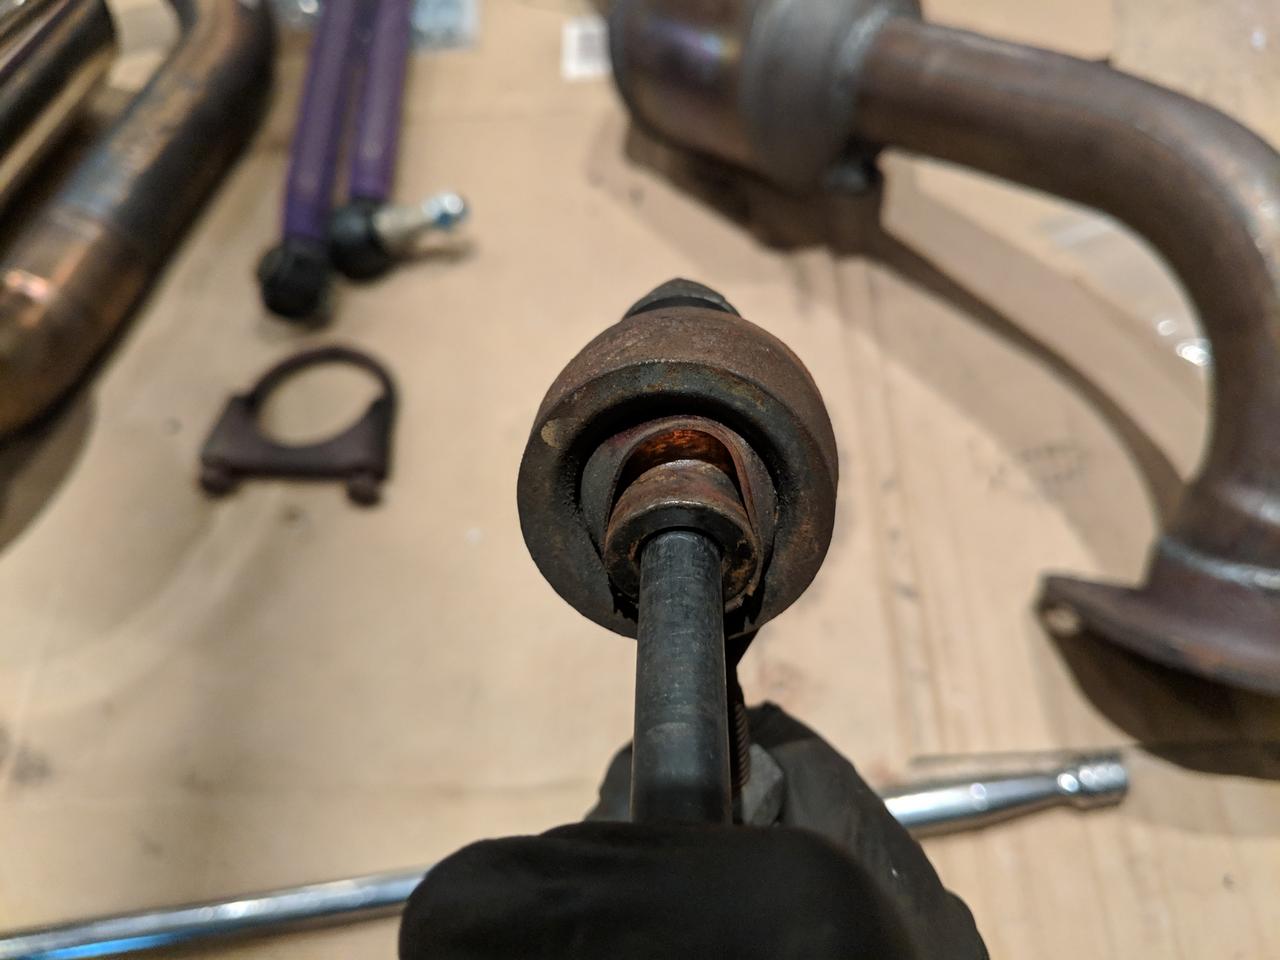
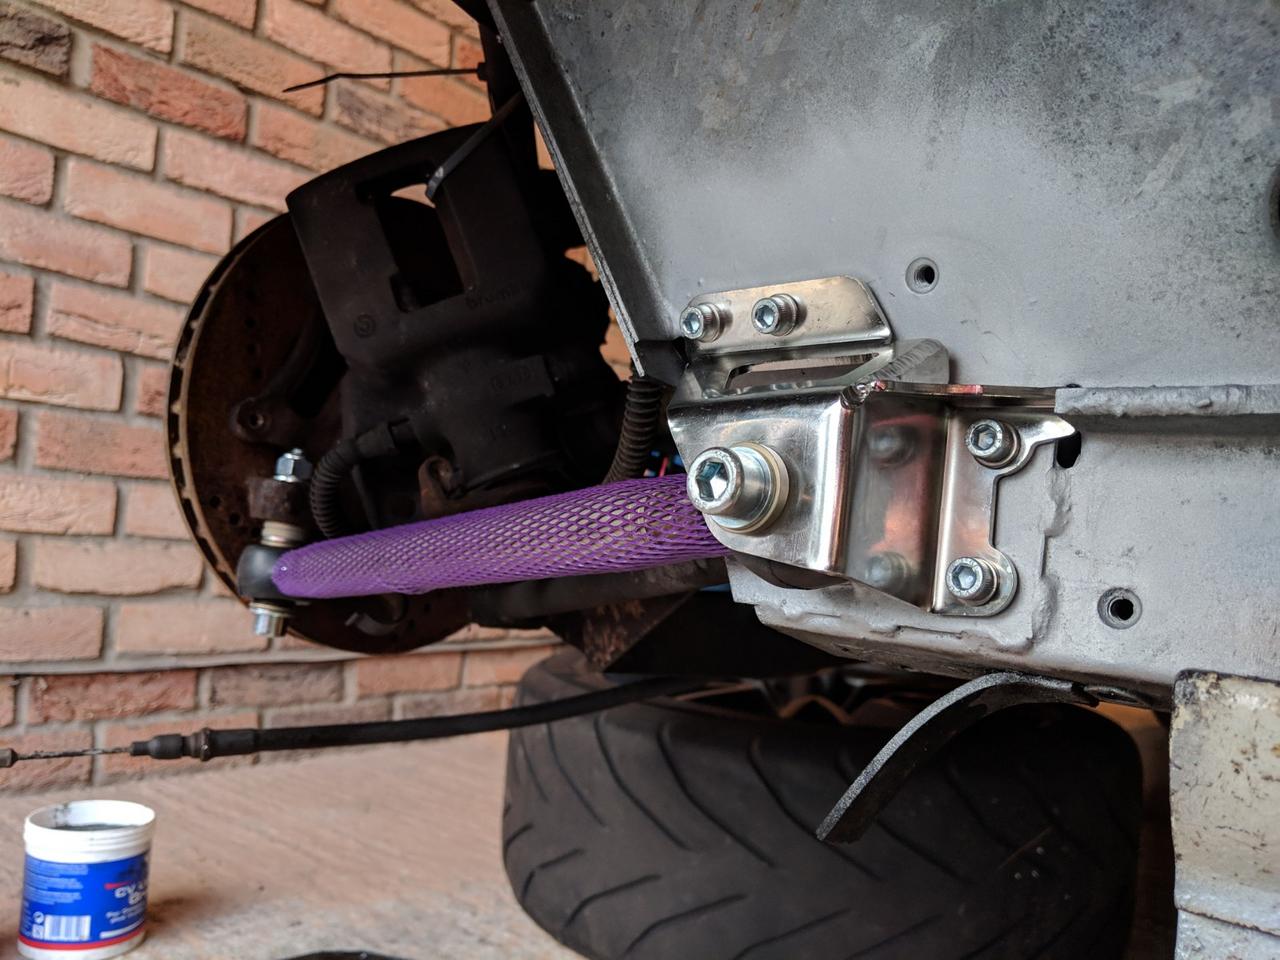
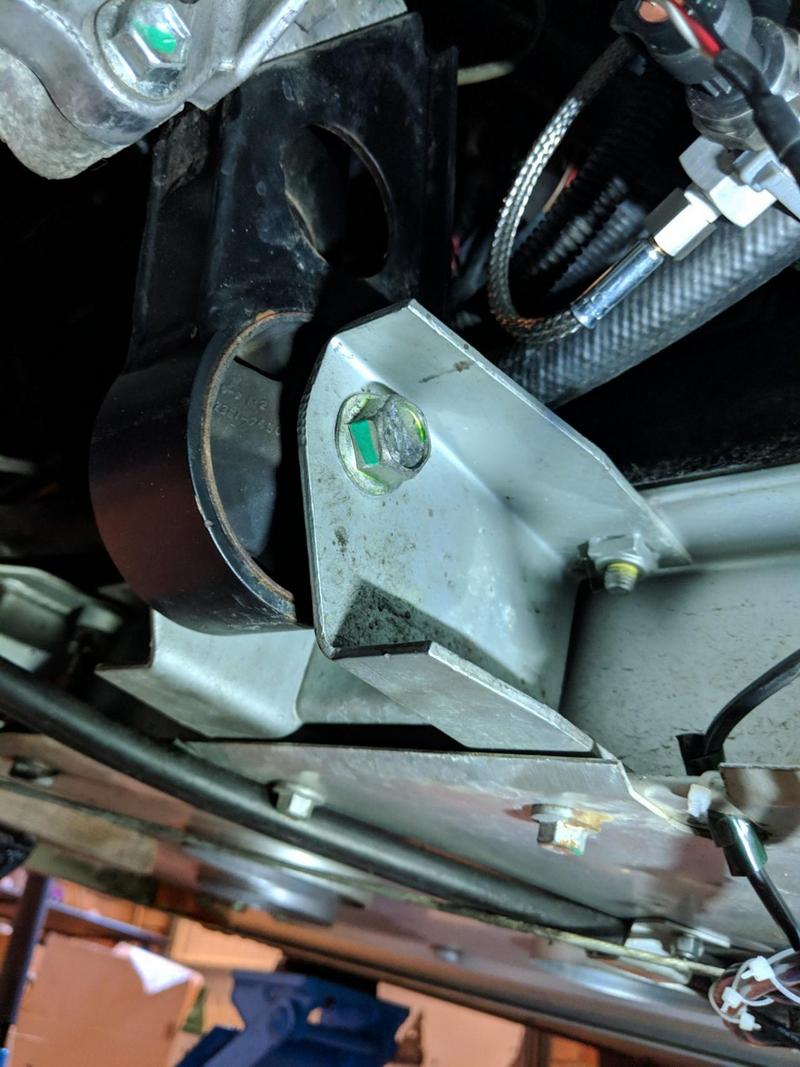
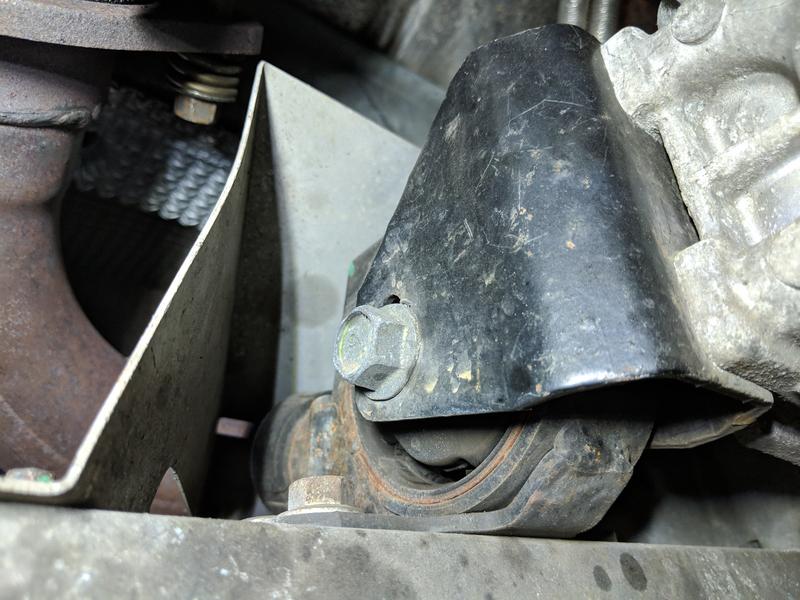
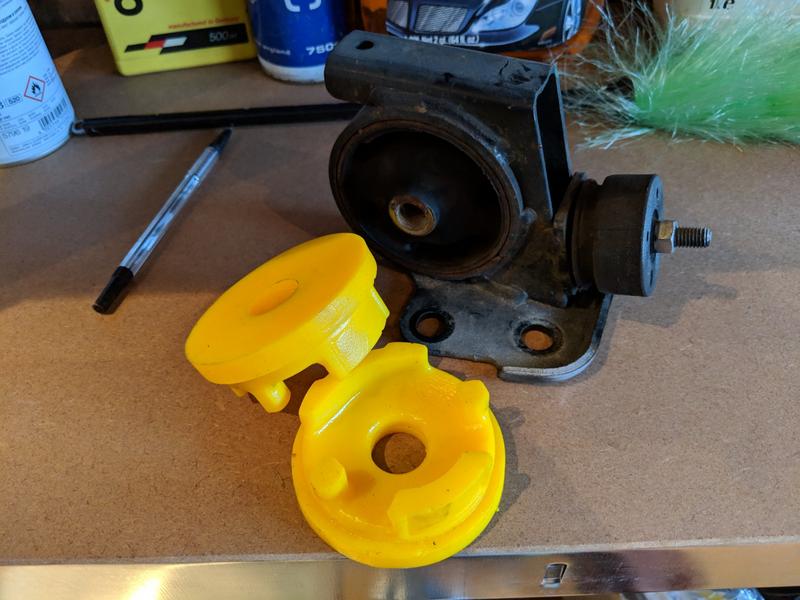
  • Change the toelinks to Spitfire jobbies - both a known failure point on the Elige platform with sticky tyres, but also an MOT advisory.
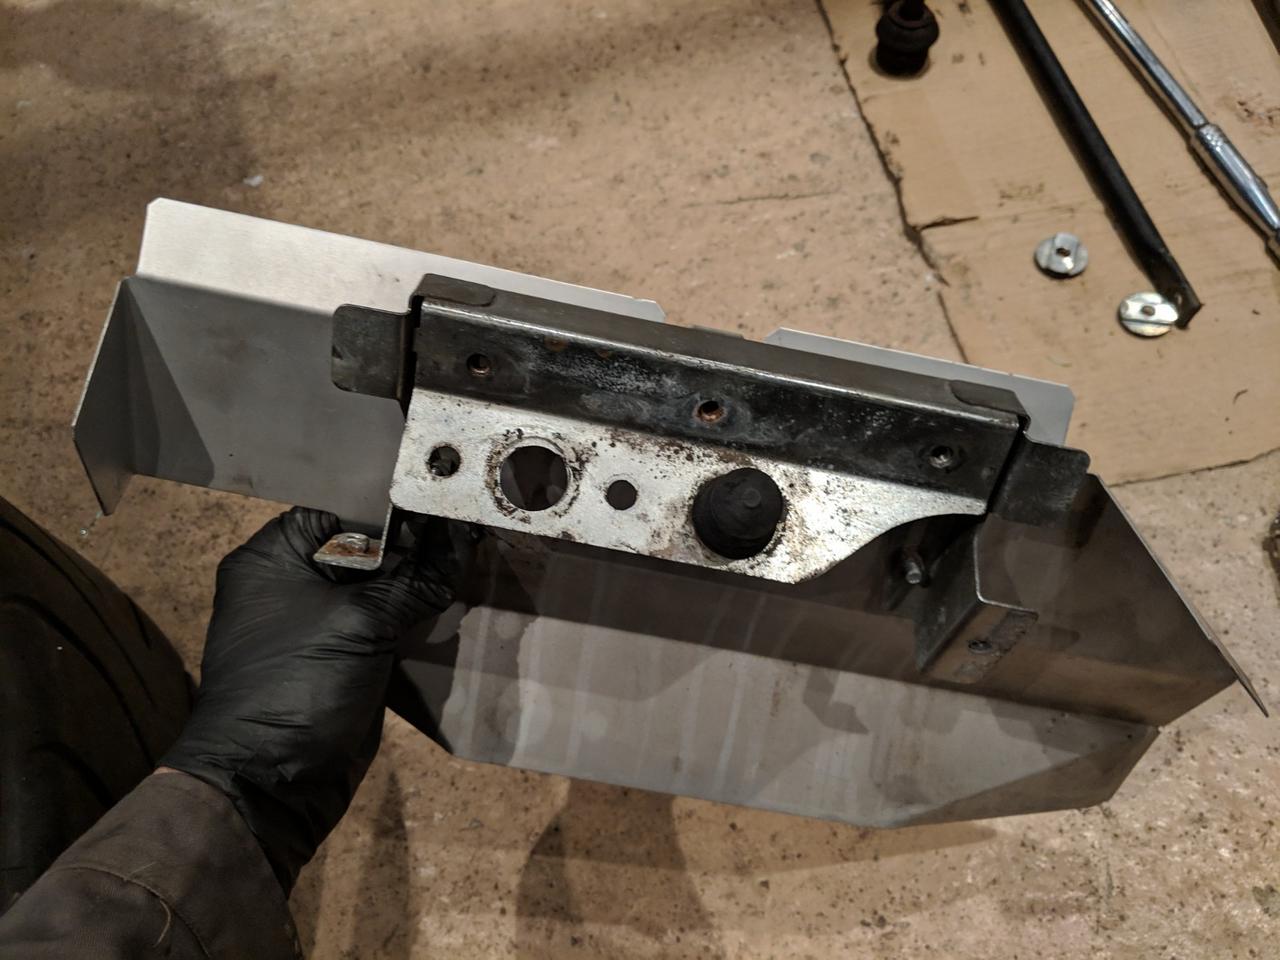
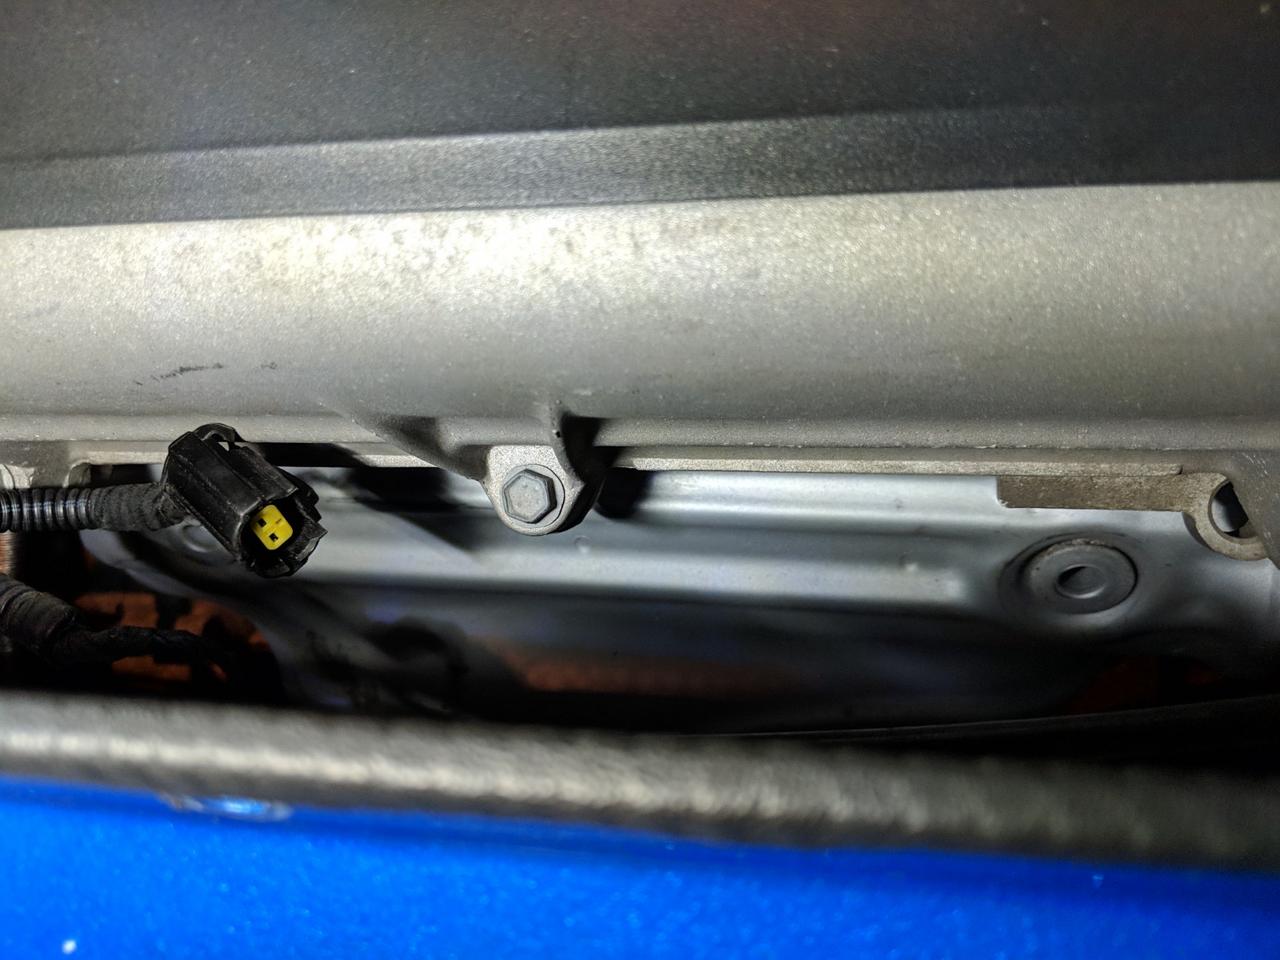
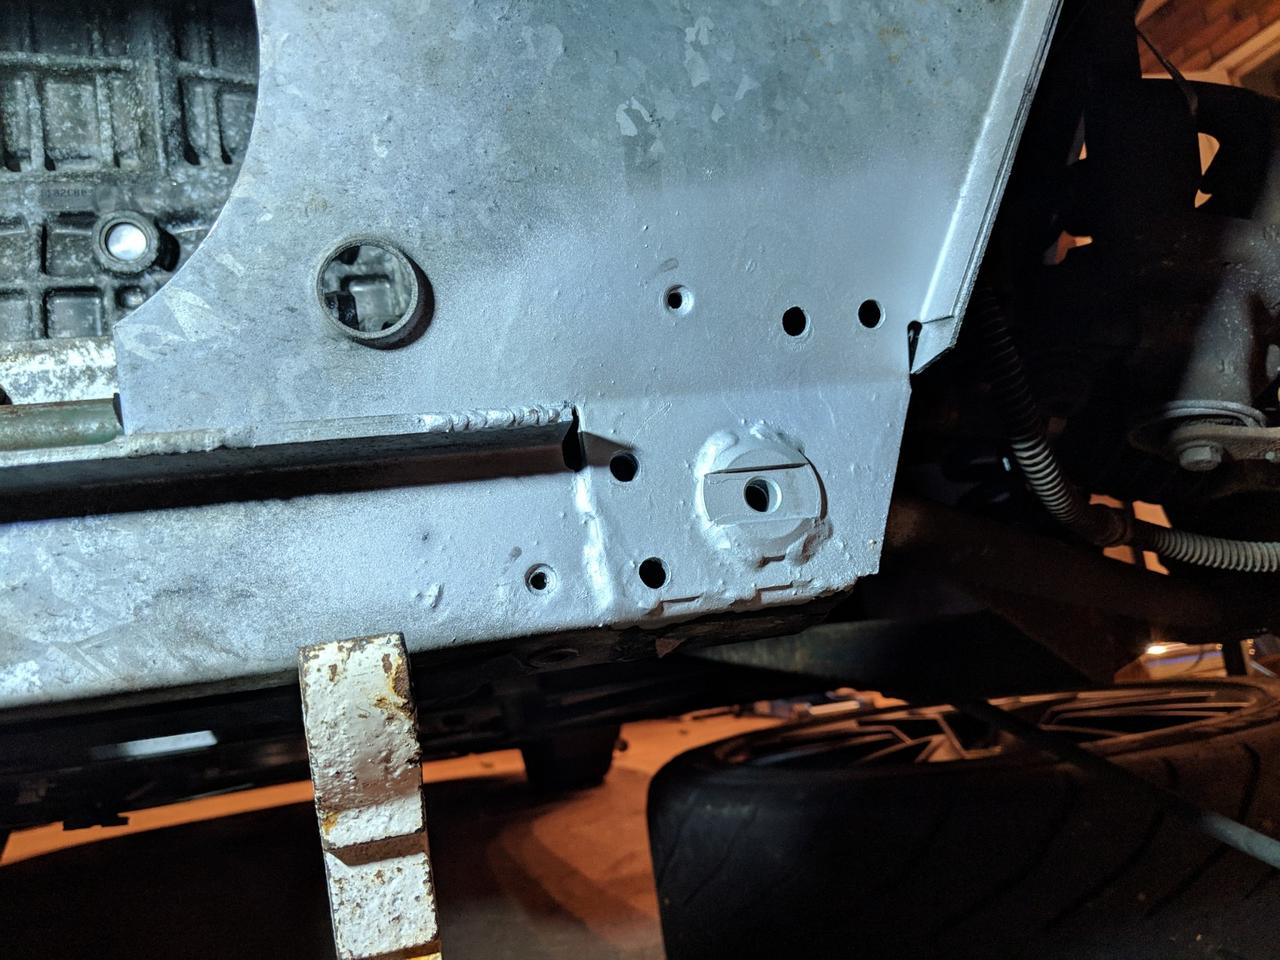
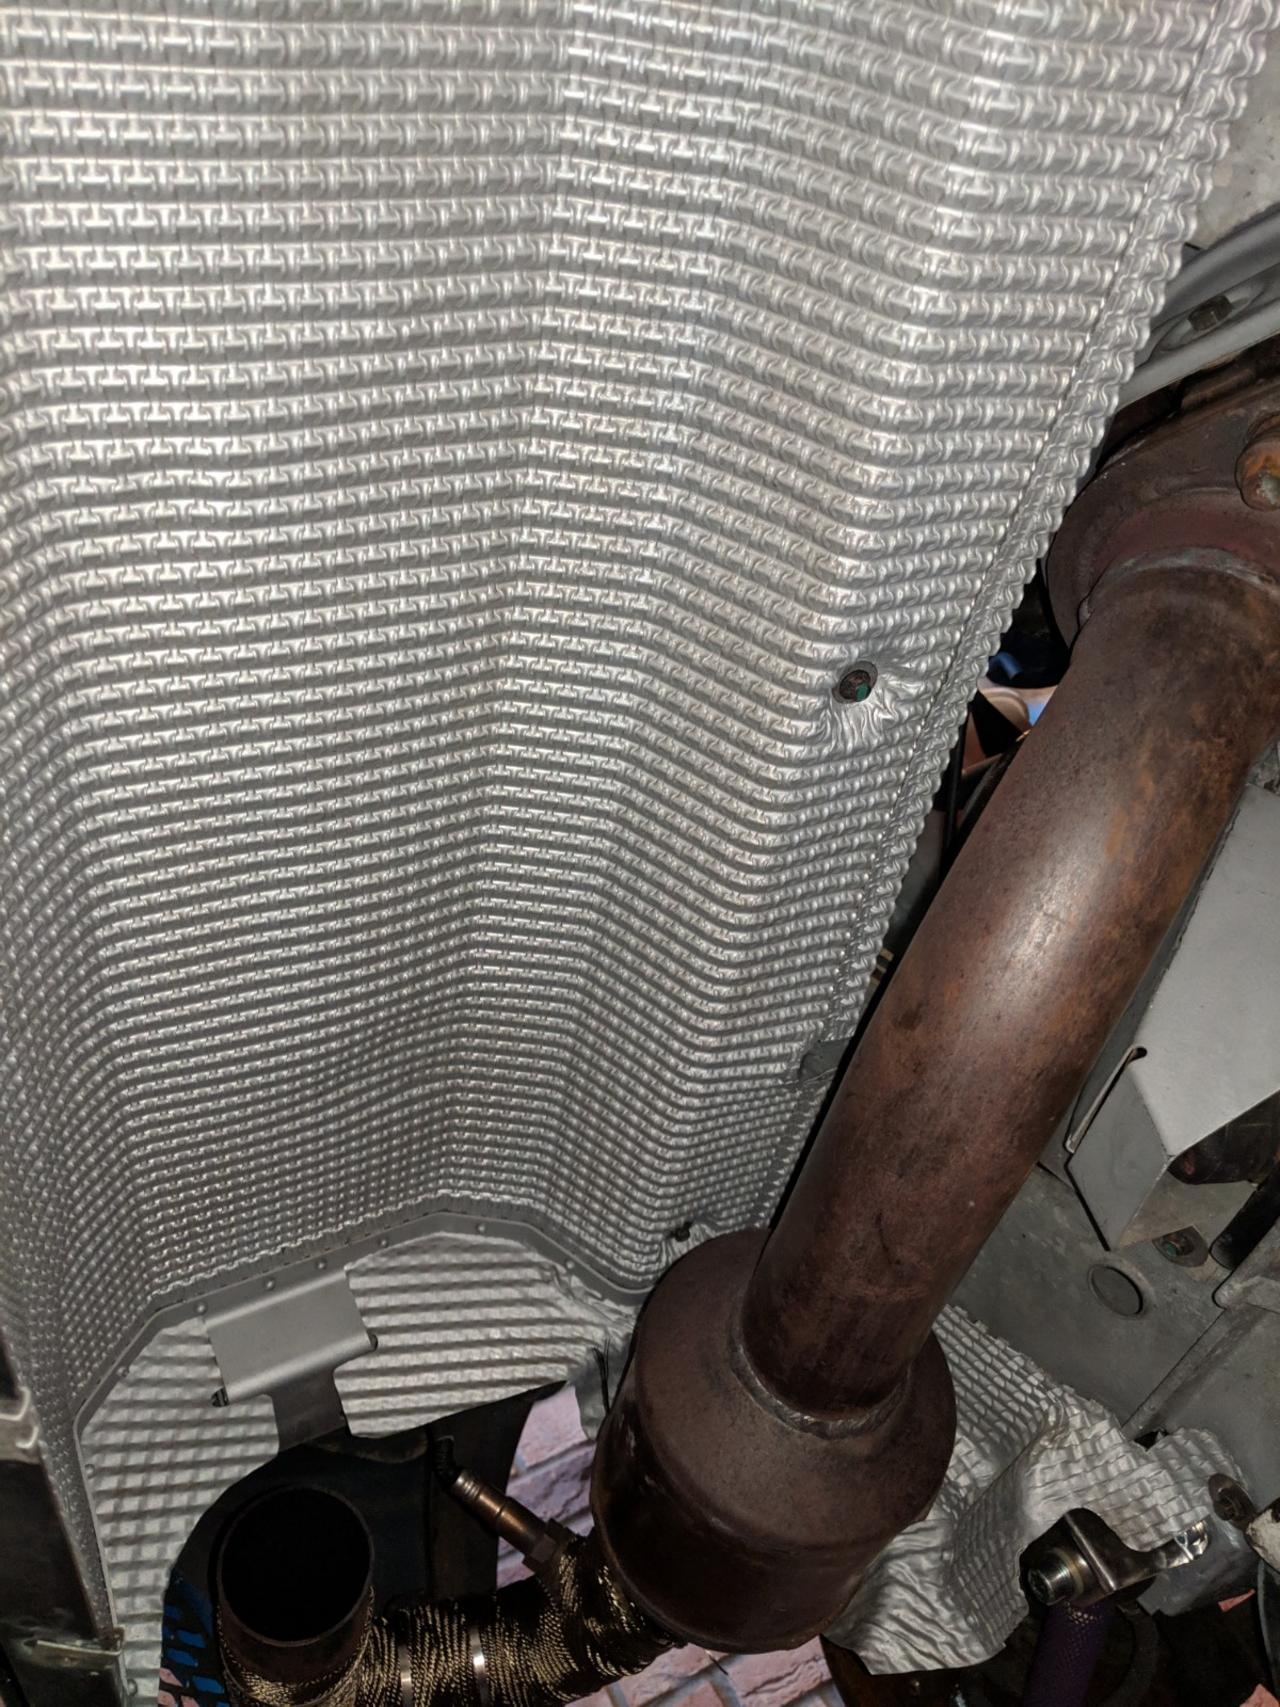
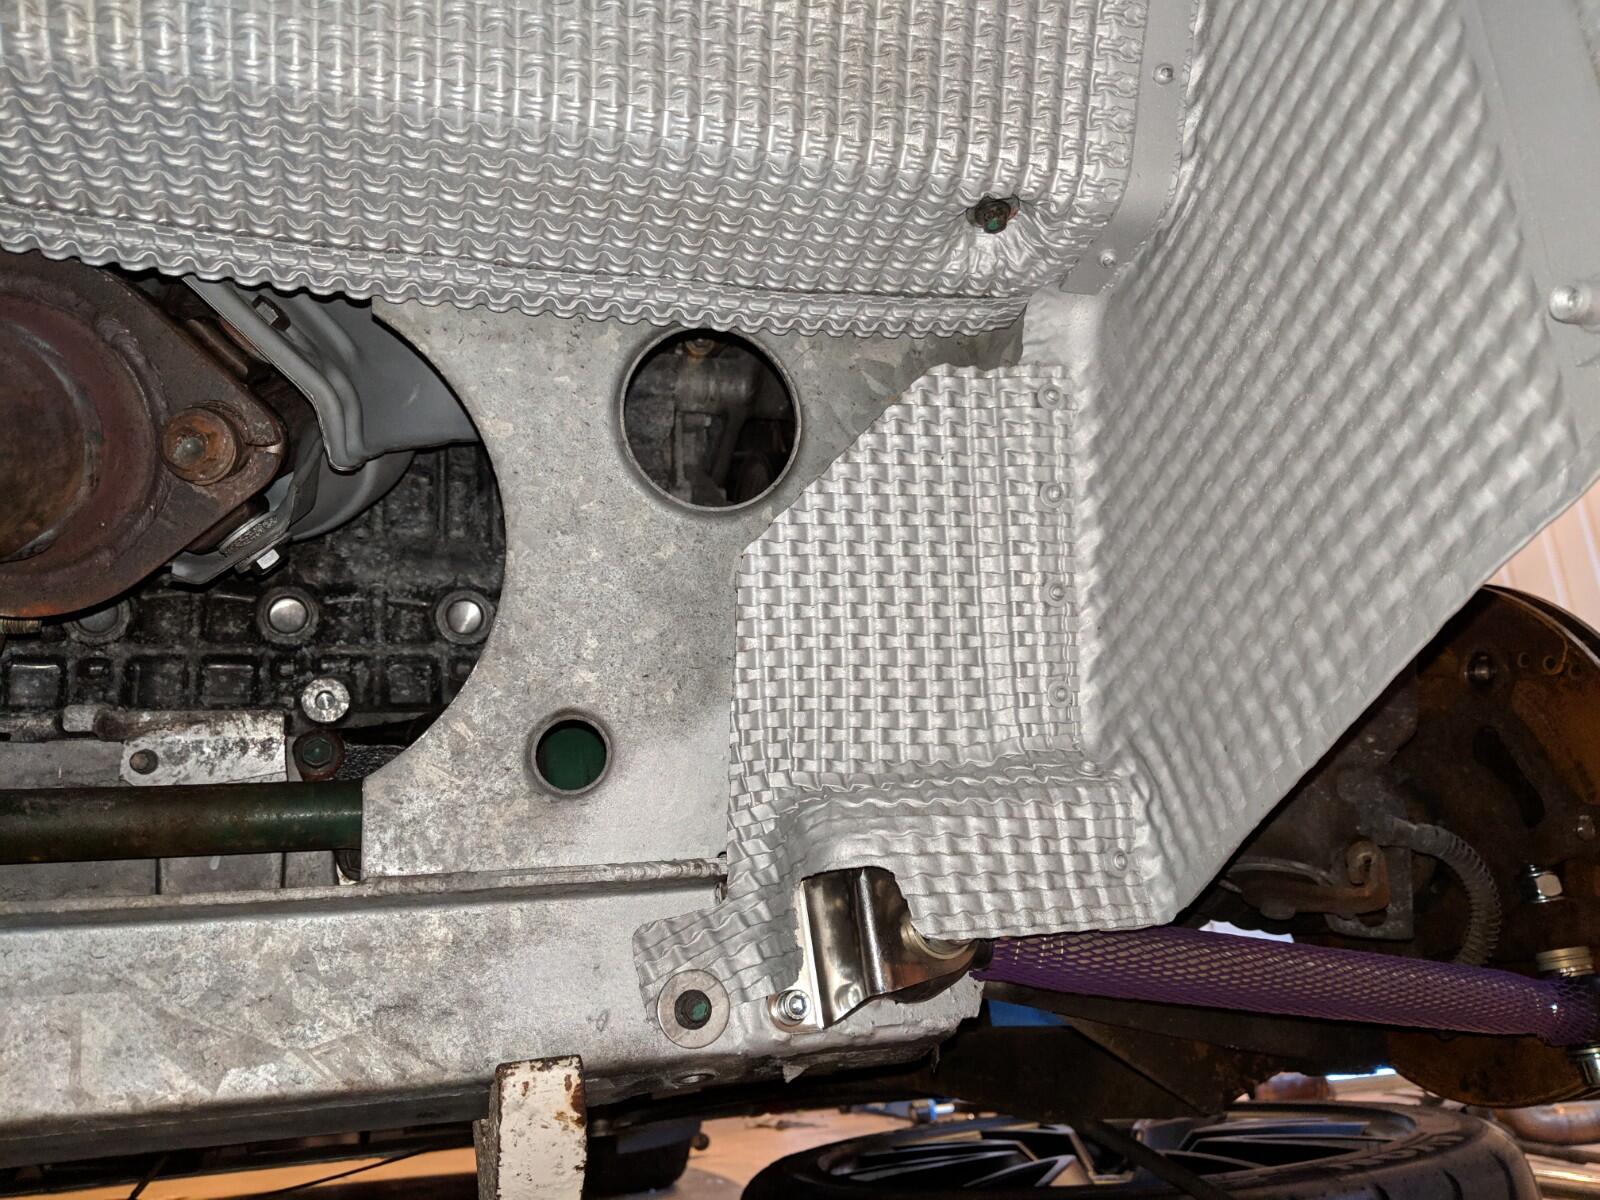
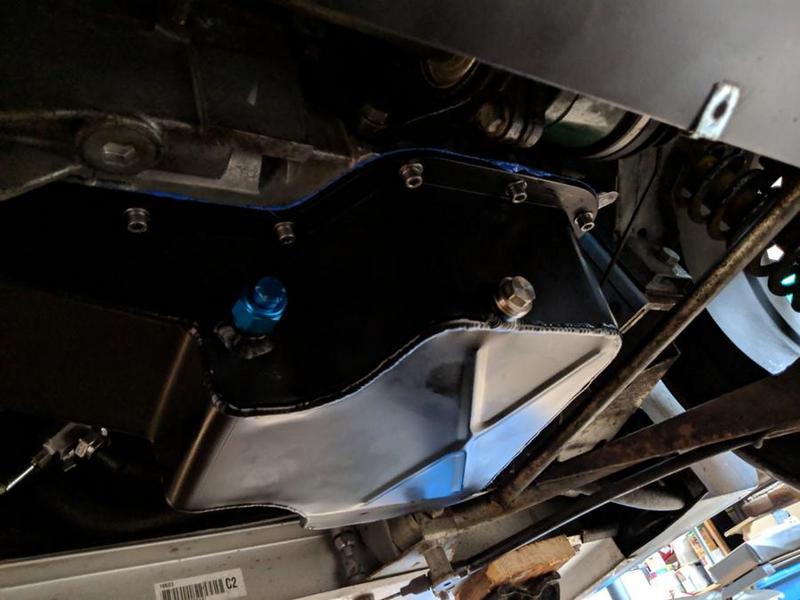
  • Fit a baffled sump - known weakness of the 2ZZ with sticky tyres
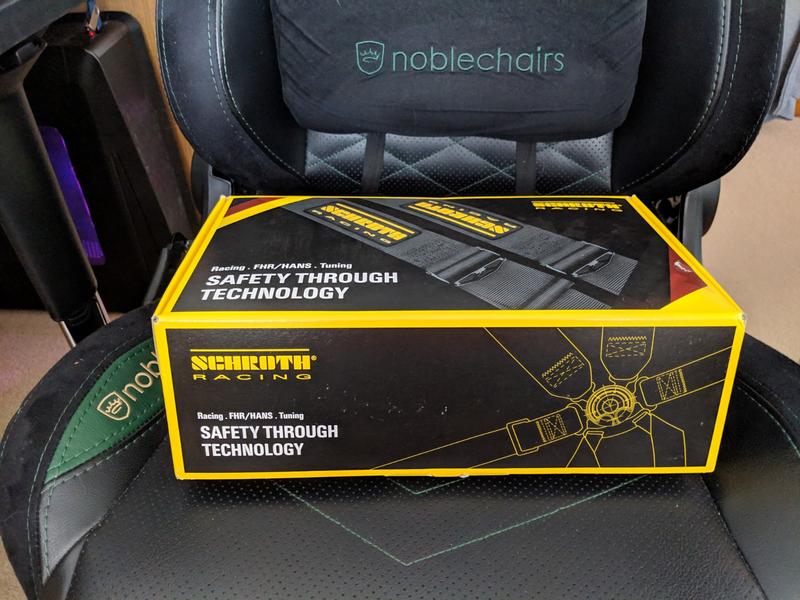
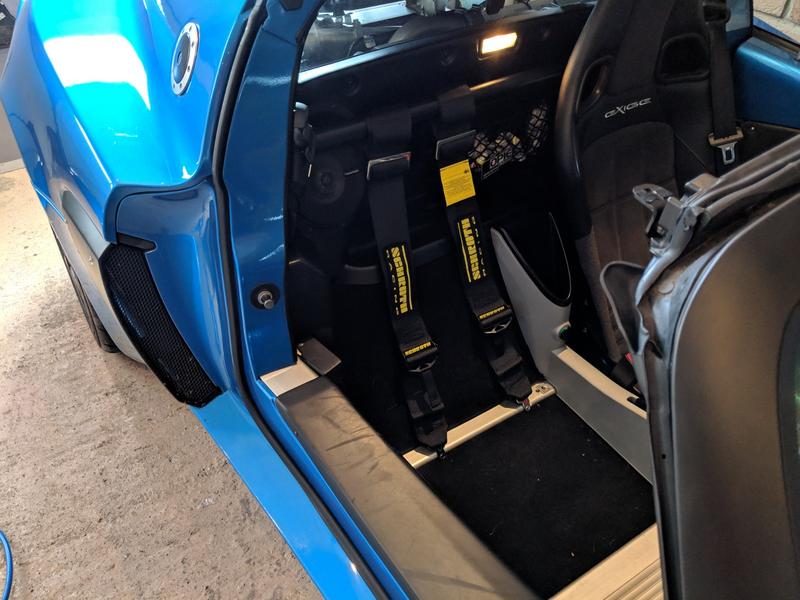
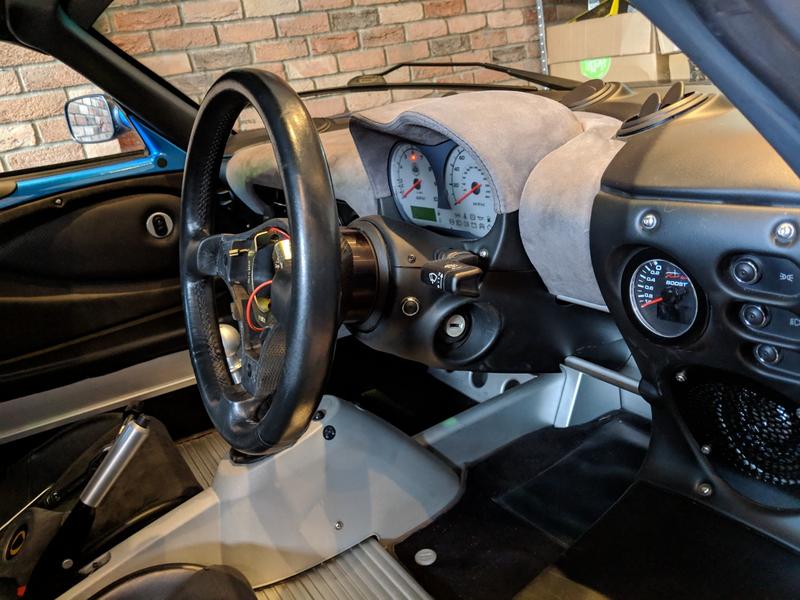
  • 4pt Harnesses, maybe
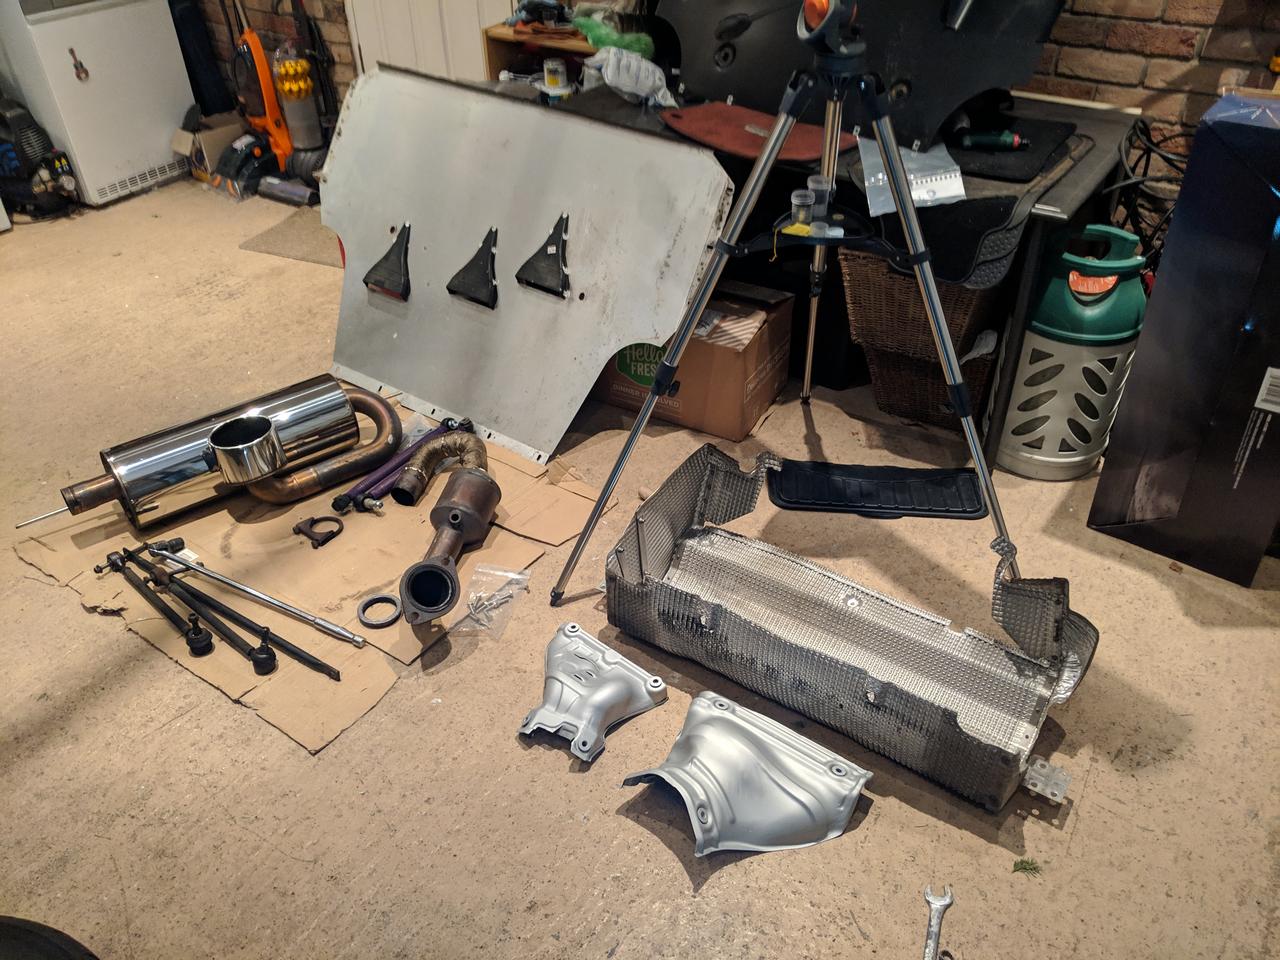
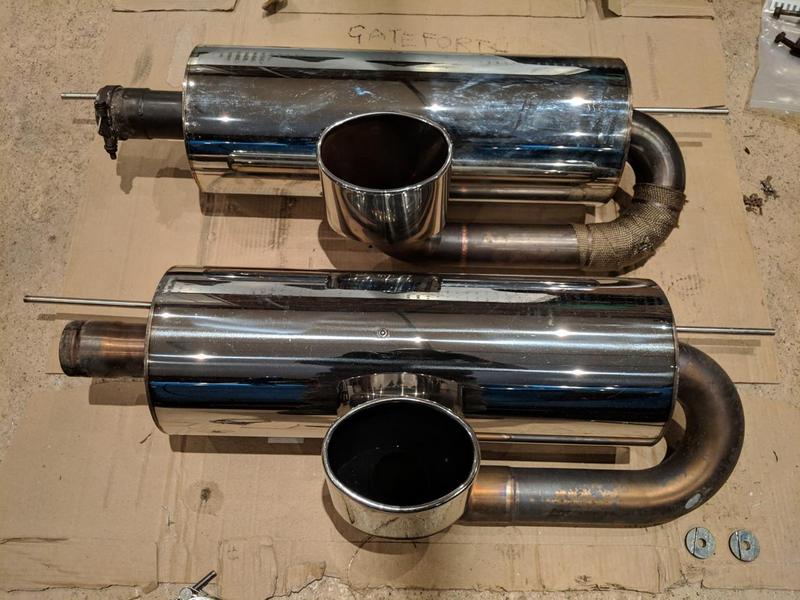
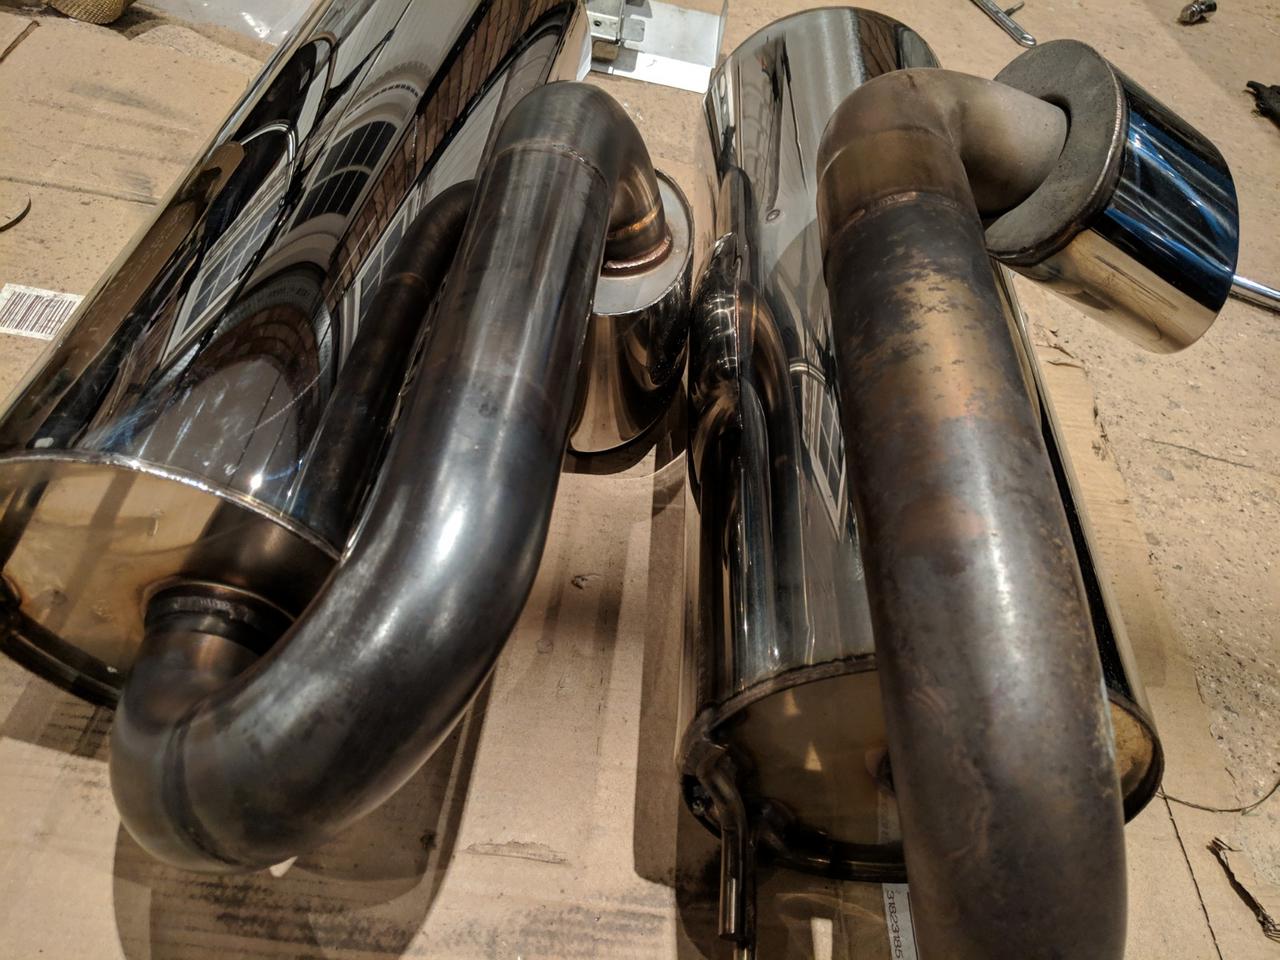
  • New backbox, maybe - need to figure out if this Lotus Stage 2 one will indeed fail the trackday limits. [This was later identified as a 2bular, not Stage2. It was too loud though so gets replaced later]

Some longer term stuff I’m expecting to need doing at some point:

  • Front Clam off and replace radiator (plastic end caps are known for failing)
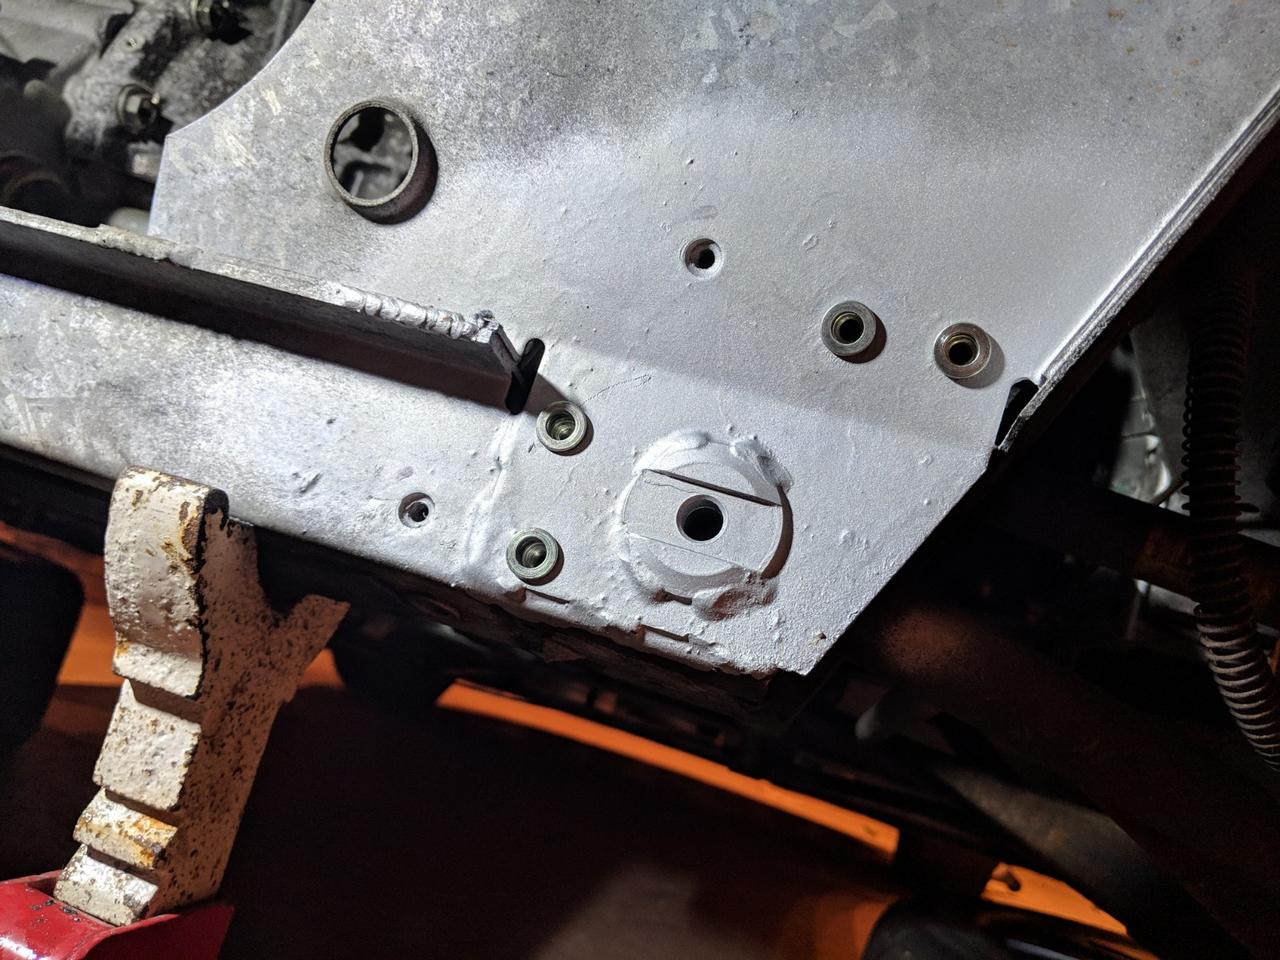
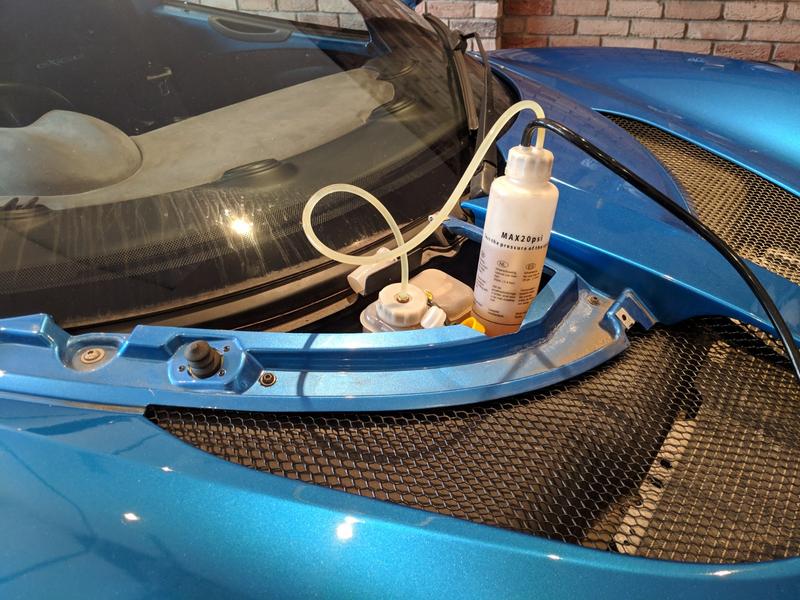
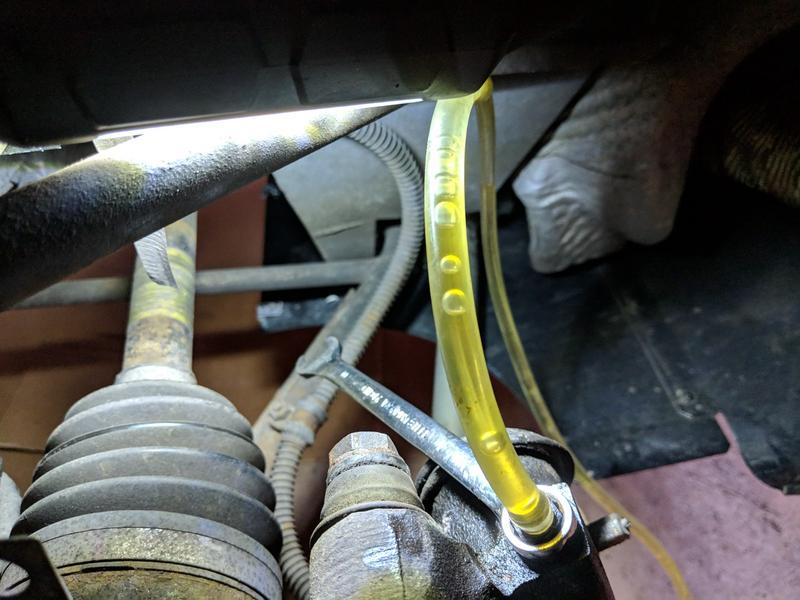
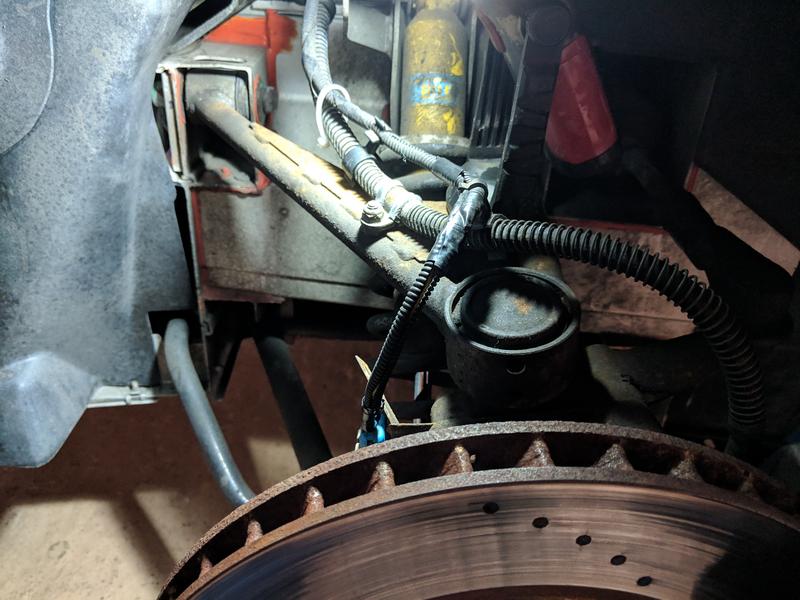
  • Use this opportunity to fit braided brake hoses and replace any rotten steelworks under the nose.
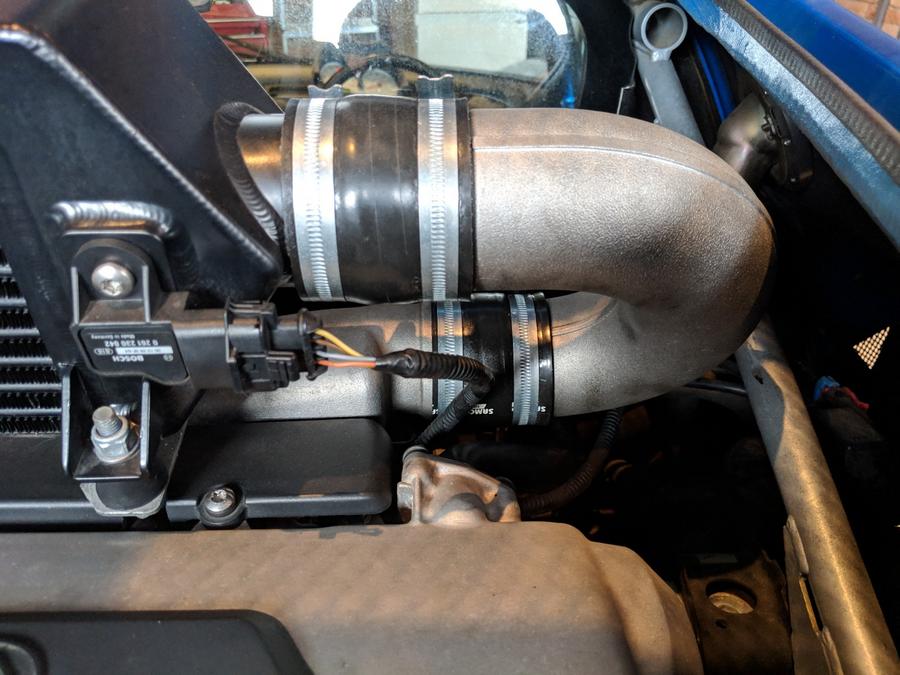
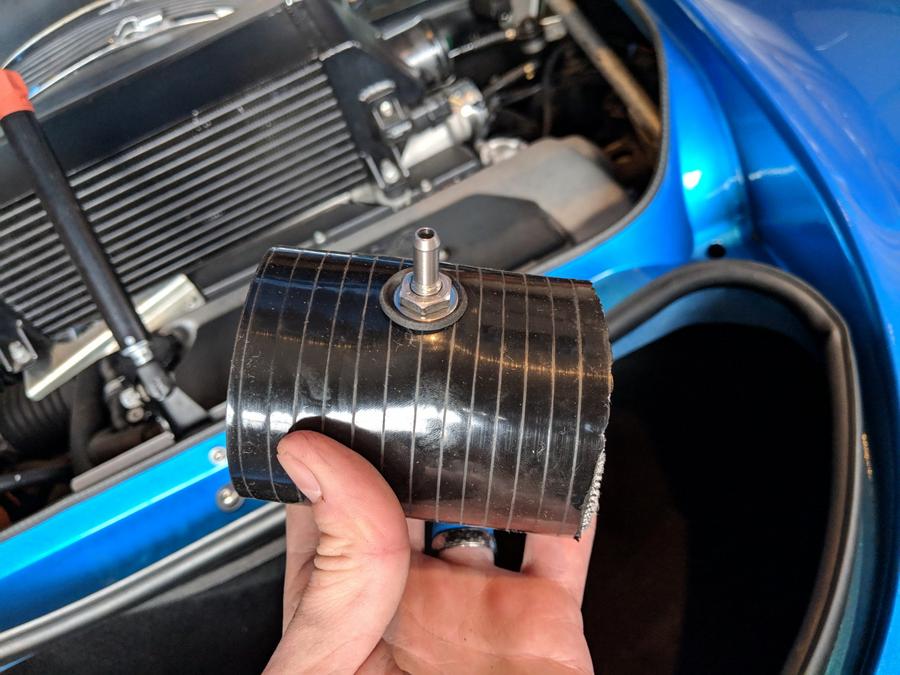
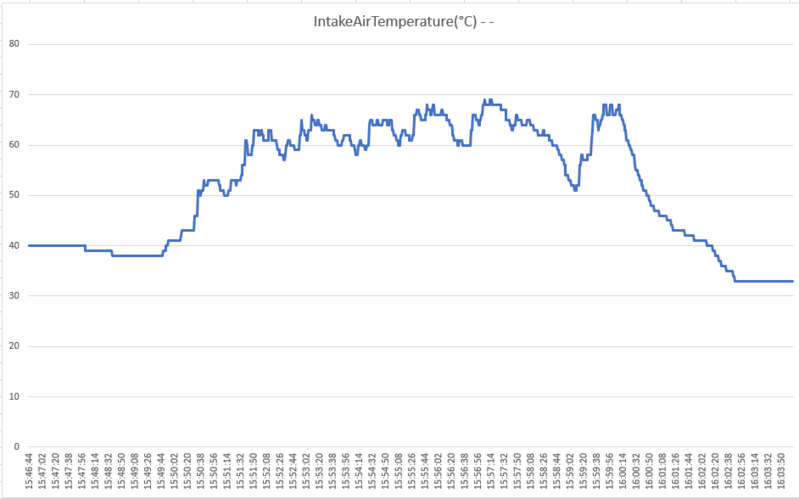
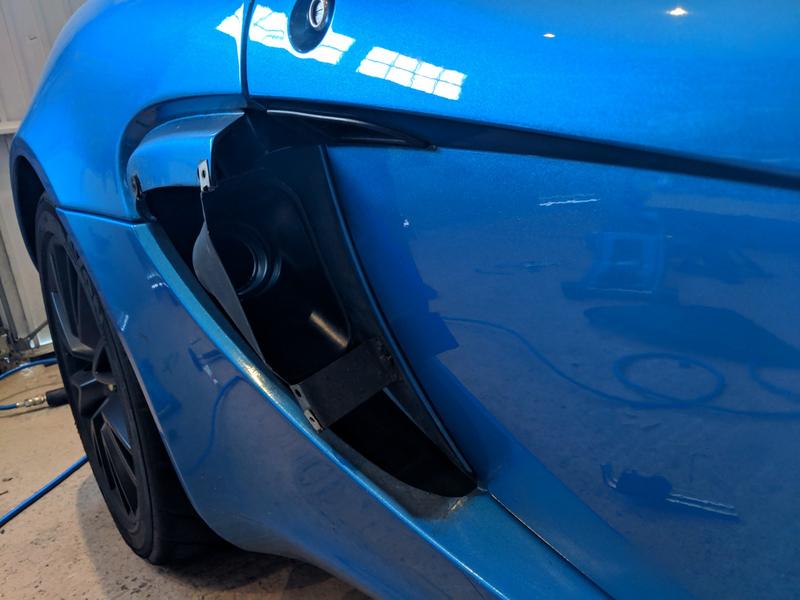
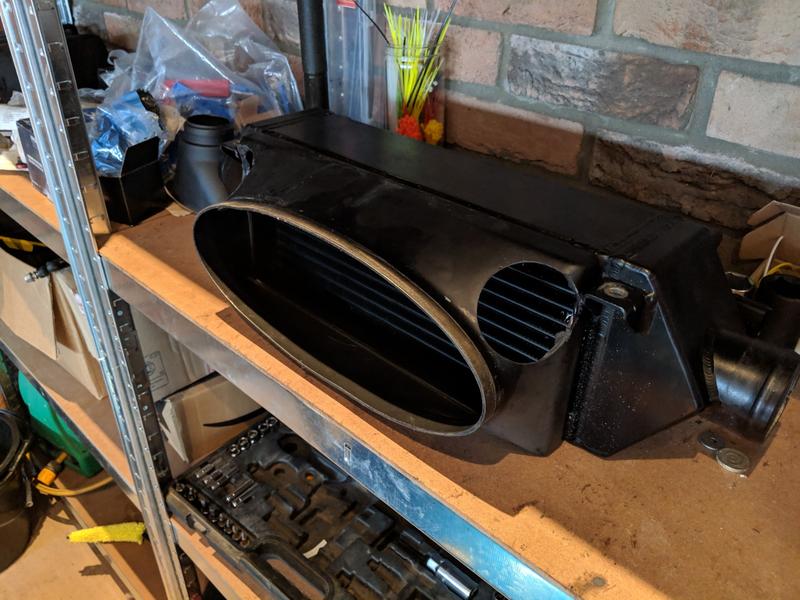
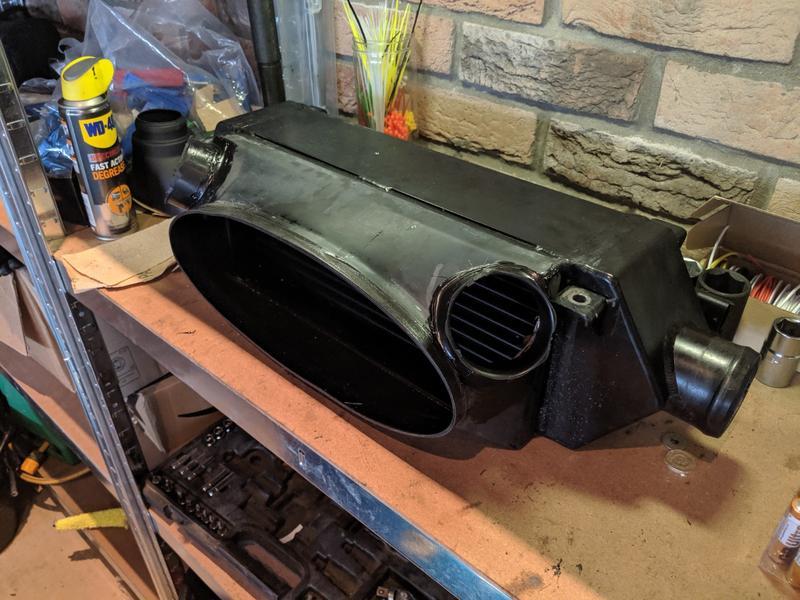
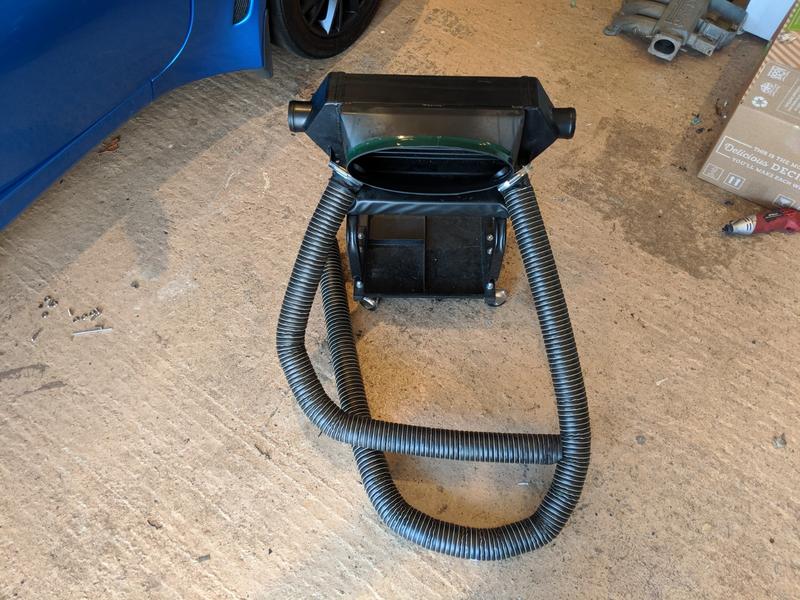
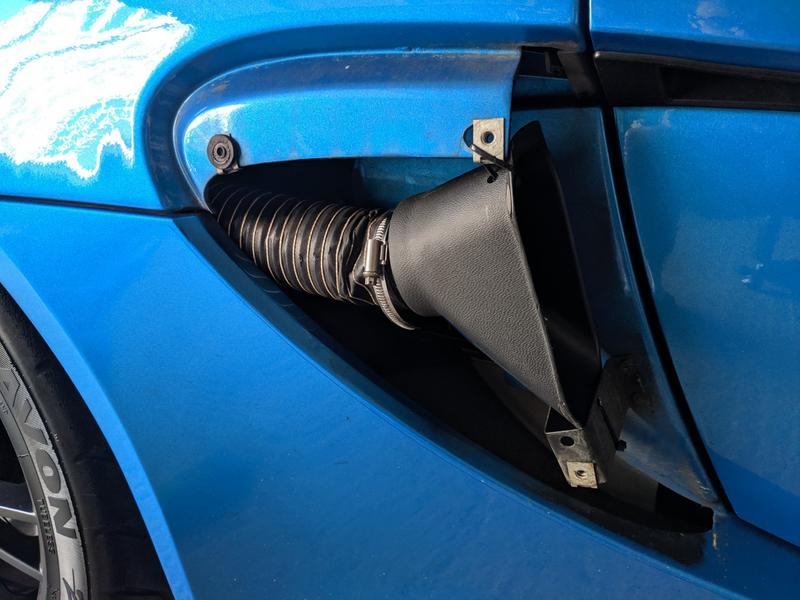
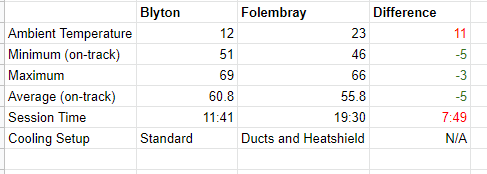
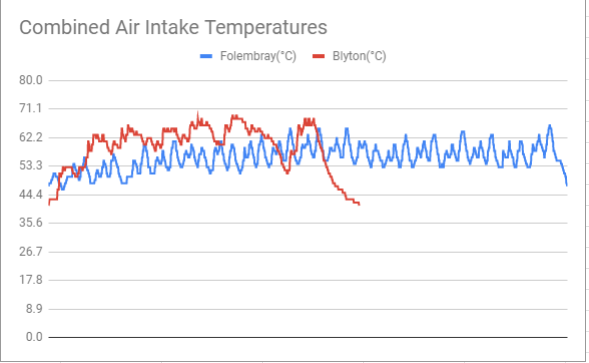
  • Monitor and address airflow to the intercooler, these cars are known for bad heatsoak and poor airflow to the intercooler - but there are a few options ranging from a bit of hosing through to a fill chargecooler setup.

Ultimately the C64 gearbox fitted to this car is very close to it’s limits with a car running the 260bhp Lotus upgrade, so chasing power isn’t going to be on the agenda and I really don’t think it’ll be needed. The car feels ballistic compared to all of my previous reference points (400bhp Impreza being my previous quickest car, and I think this Exige would have it beat). The Lotus factory update also has the 440cc injectors running close to maximum, so the fact my car has 550’s gives a little headroom which may push the gearbox over the edge with the wrong supporting modifications! That said, if/when the gearbox does fail there are uprated options which may open the floodgates further… let’s see how that goes though eh.

Hopefully I can get out for some better pictures in the next few days, but on a technical note I’m going to try image hosting on instagram this time around so this thread may have a bunch of broken links… sorry about that in advance, I’ll figure it out. But for real time updates - feel free to follow @k.townend. It’ll be all car stuff, no baby photos or pictures of my breakfast - promise.

Well it wouldn’t be a Lotus thread without a couple of problems :smiley:

Nothing major, yet - but it’s happily given me something to tinker with the last couple of nights.

First up, the bellows connecting the intercooler to the roof scoop kept popping off. Refitting was a nightmare, you’d get one side on and the other would pop off.

It looked like IC shroud had some 12 year old double sided tape on it, so I whipped the intercooler off and got the shroud cleaned out and re-applied some tape.

This allowed me to reinstall much easier, I’m not sure the tape is load bearing at all but it helps installation significantly. Got it all refitted and got the massive clip back on. Job done.

Next issue was identified on collection day, but required a part from Lotus. I feared the worst as part supplies from Lotus can be difficult at best, but luckily the trader got hold of one and it’s on its way now.

The issue is the central locking, clicking the Cobra ball-bag arms/disarms the alarm as expected but it is not unlocking the doors. The prime suspect is the CDL unit behind the dash, apparently always failing and should be an easy fix - so I’ll update either way once it arrives.

Aside from this bit of tinkering, I’ve been all round the car now (and under it) and I’m pretty happy with what I can see. Sump gasket (or lack of, sealant is used on these cars) is weeping a tiny bit but that’ll be replaced with a baffled job before spring arrives. Oh, one of the exhaust heatshields appears to be missing too. It pretty much rotted off on my Elise so I replaced it at the time with DEI wrap, so I may do the same here.

I re-read my 111R thread last night and the condition of the suspension and brakes is a thousand times better on the Exige, I can’t believe how rusty the undercarriage of my Elise was before I refurbed it all.

Back to the project, festivities aren’t halting progress as I got a nice package from Christopher Neil Lotus t’other day containing a new CDL unit.

This is installed behind the dash binnacle under some foam under the dash surface. They’re technically replaceable without moving the dash, you can stick a hand in through an air vent, unplug the old one (leaving it in situ) and plug a new one in and just ram it into the foam. I wanted an excuse to spend time in the garage so I had the dash top off anyway to do it “properly”.

Cleared out a bit of muck and tidied some rough edges up (foam padding where panels had rubbed, maybe this reduces NVH a bit?!?! (it didn’t) )

This is the hiding place of the original.

When I took the dash out of my Elise (can’t remember why I removed it… rattle hunting I think?!) I took a load of bits off that didn’t need removing, and I clearly didn’t learn my lesson as I did it all again this time - so this is a message for future Fonzey for whatever it is you’re dismantling next:

THE BLACK DASH TOP DOES NOT NEED TO COME OFF, YOU DON’T NEED TO FISH THOSE THREE CRAPPY SELF TAPPERS OUT OF EACH AIR VENT. IT’S A TOTAL WASTE OF TIME.

I’m happy to report though that the central locking is now working as intended. Happy days!

I finally managed to get the house emptied of family members today after Christmas so got myself busy in the garage to unwind a bit… I’d ordered a new aux belt just before Christmas in the SeriouslyLotus sale, and was amazed when the poor Fedex guy banged on my door at 07:30 Christmas Eve!

I decided to change the aux/supercharger belt as there’s no record of it being done, and it’s supposed to be a 2 year/20k service item. I guess there’s a good chance it was changed back when the S/C was apparently changed in 2012… but that’s still 6 years ago. I get the feeling some service items were skipped on this car due to the insanely low mileage.

I’d never done the aux belt on my 111R, so this was an opportunity to try something new! I was hoping I could get this done with the rear wheel off and arch liner out, but no chance. The rollbar and some environmentally friendly looking canister device were blocking my view and access - so floor was coming off, again. Once under the car I got the pulleys and belt route mapped out the best I could.

Next up was a challenge, this engine has an auto-tensioner with a very stiff shock absorber. The 19mm nut that I’m supposed to leverage was pretty badly positioned near the subframe so I could only get a shallow 3/4in socket onto it and a tiny little 6in breaker bar… No way I could shift it with that!

I had a scoot around the garage and found some metal curtain poles left by the previous house owner… so out came the dremel and a few mins later I had a brushed brass effect cheater bar with a fluer de lis decoration on the end.

Using my new tool I was able to slip off the old belt, I was keen to take it off properly rather than just cut it because I wanted to make sure I had the tools/strength to get the new one back on agan!

This is the first aux belt I’ve ever removed, so I’m not quite sure what to look out for but it seemed fairly cracked on the grooved side with a handful of full-width cracks on the smooth side too.

Comments welcome with regards to the state of this belt, was it a good time to change or is this fairly safe levels of wear?

Final observation was that my new belt was a tiny bit longer than the old one. If I read these numbers correctly, out by 3mm:

I’m sure that’s well within tolerance of the tensioner but I double checked and everything I could find suggested the new belt was appropriate for my car. With the Lotus 2ZZ variations being quite… varied, there are a few belts floating around - but with AC and a Supercharger mine should be the longest one available, I guess.

While the car was in the air I whipped the front undertray off too, it’s one of the few panels I’d not looked behind. I found that the oil hose connecting the front oil coolers was no longer fastened to the underside of the crash structure with the sticky pad/cable tie combos and instead was bouncing around on the undertray. I’d noticed a bit of NVH coming from the front of this car, nothing too concerning as it’s a rattly old Lotus anyway but it certainly wasn’t present on my old Elise. Perhaps this is the source of it, but I won’t be test driving today - too dark and too tired.

The sound I’m hearing is quite hard to describe, it’s not really a metal on metal rattle you’d get from a nut rolling around on an undertray or behind the dash or whatever - maybe closer to two pieces of material rubbing together occasionally. Big bumps don’t really agitate it, but rough roads do. I initially thought it could be the fire extinguisher in the passenger footwell as that’s the region it’s coming from - but all seems secure down there, and is easily isolated when driving.

I went out on Saturday morning to meet a few NYLOC folk at the Buckles Inn as they were participating in a Yorkshire Air Ambulance charity rally. I couldn’t participate on the day due to some other commitments but it was an excuse to get out.

I’d made a minor change to the car too, something I do to all cars that I buy - sorted out a number plate with legal font/spacing but with the minimum 11mm border around the letters which makes it fit the Exige plinth perfectly and sharpens up the front end a bit.

Obviously the run out got the car completely filthy so needed a clean on NYD - perfect hangover cure though and an opportunity to get the whole fleet clean at once (it’ll be the last time it happens) for a photo.

Since then I got my first drive on a properly dry road and so attacked my first few corners. Can’t believe how much grip the car has, which is worrying! Just when I started feeling comfortable with the straight line performance of it it took one humbling roundabout to get me back properly respecting it for a bit :laugh:

Should have some more updates after this weekend. Going to go pick up some toe-links and see about addressing my missing heatshields whilst the back-end will be in pieces.

Onto this weekend, I managed to put a few miles on the car… a little over 500 to be a little less vague!

Saturday started off with a trip up to collect some Spitfire toe-links.

I had these fitted on my 111R too and for anybody not aware they address a known weak link on the Elise/Exige platform in that the factory toe links are sacrificial parts but unfortunately don’t stand up to the test of time and/or sticky tyres and track work. There are many documented cases of failure (it’s not just one of those internet myths) and you can find a fair few of them on Youtube… most of the time the failures are dramatic, scary and expensive!

In addition to the known weakness, the MOT my car had a few weeks ago threw up the standard ones as an advisory anyway… so any doubt or temptation to keep the low mileage originals on was wiped out.

These links are both much stronger in terms of materials, but also put the inboard link into double-sheer with the added brackets that will be mounted to the subframe. My Elise had single sheer inboards but the Exige in fairness was fitted to a brace-bar between the two in-board links to mitigate slightly. Still not enough though it seems.

I collected these from a few miles short of the North Yorkshire Dales, so spent the rest of the day racking up miles just driving about. It was dry but gloomy, so no real great photo opportunities, just time to put miles on the car and monitor for any unknown issues or gremlins.

I did actually manage to resolve a gremlin at the weekend - I think I mentioned before but I had some creaking/cracking sounds coming from the dash. I couldn’t find anything amiss when the dash was off for the CDL replacement but I eventually tracked it down to the “subway shelf” just under the headunit. The subway shelf is a 12" cubby/glovebox replacement which holds a meatfeast nicely - and also when the blowers are on warm it keeps it nice and toasty too. From what I can gather this shelf is not attached “mechanically” anywhere but it is rather neatly clipped into the upper dash section through an slick tongue/groove type arrangement in the extrusions. Very neat, but allows for a bit of movement between the two pieces which was evidently creaking. I resolved by squirting some silicone lube stuff in there - and over the 500 miles it didn’t return, happy days.

Sunday I had plans to go for an exiges.com[!] meet in the Lake District but I was really having second thoughts after Saturday. It turns out my car is quite loud, or maybe not so much loud - but there’s more drone than Gatwick when cruising along which rewarded me with a banging headache on Saturday night. I manned up eventually and stuck some earphones in which helped a bit with some spotify rather than the naff head unit in the car. The drive over was looking promising, dry and bright sun going up the A1 but then as I started the A66 crossing things got real grim, real quick… and it remained like that for the rest of the day :frowning:

There was a great 8 mile stint on the run into the destination (Hawkshead) of very tight but in some cases well sighted 3rd gear type stuff which allowed a bit of fun even in the damp.

Weather aside, the meet was great - decent food and some good company before the boring route home down the M60/M61/M62 in pretty wet conditions.

Good collection of cars including a Europa, GTE Evora and “likesachange” S2 Exige: Lotus Exige S2 - Modified - Page 1 - Readers' Cars - PistonHeads UK

The drive home was almost uneventful, I think I got a bit (very) tired and mashed the gas in 2nd gear coming out of a 30 into an NSL a few miles from home and the back of the car was having none of it - very squirmy and the TC was quite lethargic to come to my aid. I think I’ve started taking liberties with it as until that point it has felt pretty capable if not agricultural and old fashioned in its technique. It was very cold though, wet and I’d been driving a few hours so not at my most alert… but one to keep an eye on in future!

The car is likely going to come apart this week for the toe-links and I’ll get these missing heatshields sorted. Oh, and for anybody interested tank to tank (over 265 miles and 35litres) the car did 33.5mpg.

Some updates from the last few nights:

I got the car rinsed down after the 500miles of crud and got it jacked up into position ready for work. I started off by removing the cat converter and backbox, although not mandatory for a toe-link change it does give better access and it would give me an opportunity to see about replacing the heatshields on the manifold.

20mins of productivity saw the exhaust off, another 10mins had the toe-links removed and I was left with this little pile of stuff.

That photo was actually taken after I’d wrapped the u-bend on the cat, this is to replace a heatshield that rots off of these cars pretty quickly. I did the same on my 111R and it just isn’t worth replacing with standard heatshields because they don’t last. I only wrap the u-bend because that sticks out from underneath the larger heatshield that lines the boot floor. The bend itself is pretty close to the nearside rear tyre and you can feel the rear clam get pretty warm after a run when it’s missing.

I had a trial fit of the manifold heatshields, I could get them into position once the cat was removed but I was having trouble inserting bolts at the fixings closest to the engine, it seems like they’d just rusted over. There’s no way I could get access with a tap, but I did note that the manifold bolts were in pretty accessible positions… so 10 minutes later:

The holes tapped out nicely, the manifold it seems had been fitted with the OEM gasket in addition to some gasket sealant. Not sure if this is standard Lotus procedure but I couldn’t find any reference to it in the workshop manual - so figured it had been removed/reseated previously. I cleaned it all off and got hold of a new gasket for re-installation. I’ll try without sealant and make sure it doesn’t blow.

The replacement manifold shields were like new, really chuffed to get hold of them. I got the manifold re-installed and did the “cat-end” bolts up loosely before venturing up top to finish off.

To access the top bolts I needed to remove the boot catch mechanism with its own heatshield, this will be staying off the car - more on this later.

That gave just about access for my girly hands to get down and fit the final bolts.

That was rather satisfying and relieving. The heatshields are potentially a total non-issue, the car has been running without them after all for god knows how long but I’d concerned myself that it would be clam off to resolve. To get it done, and back to standard feels great.

Between all of this work, I’ve made a start on the toe-links too.

First off an inspection of the old ones, both in-board sides looked like this. Total separation of the boot and dry as a bone inside. It probably didn’t help being so close to an unshielded exhaust manifold - but for 16k miles these look pretty rough tbh. Movement feels a little slack in the off-side one too.

Fitting process is basically offering up the new brackets that come with the Spitfire kit and marking out 4 holes on each side that need to be drilled into the subframe ready for rivnuts. This took a while, I tried with 3mm pilot holes first which went in fine but my next step up (5mm) HSS bits were a bit tired and just weren’t making progress into the subframe. I ordered some cobalt bits in 6mm and 9mm to finish off and upon arrival they tore through. Nice and slow with plenty of lube, as I learned from my Elise.

Unfortunately I only got 4 rivnuts in before my Chinese eBay rivnut tool decided it had enough - stripped its thread and made a good mess of one of my rivnuts too… so job is on hold until reinforcements arrive. Doh!

Whilst waiting around for drill bits, rivnuts, gaskets, etc I addressed something else. My aftermarket hardtop didn’t come with any edging trim fitted which I think looks pretty cool, however I’ve caught my belt/jeans on it a few times whilst getting in/out of the car and I’m a little nervous about chipping the paint or worse, the fibreglass.

I got supplied with some self-adhesive edging trim which I’ve now fitted but apparently forgot to photograph, and I can’t be bothered going back into the garage tonight so more to follow on that! It looks very OEM and was cheap enough to re-do in the future if it doesn’t survive too many pressure washer blasts or 100+ mph on track!

Hopefully by the weekend I’ll be back on all four wheels. I’ve got some more bits arriving this week before I can complete. The toe-links btw seem to be preconfigured to factory toe settings so the car may be approximately driveable without a geo, but I will of course get that done before any significant mileage or track time.

Alright time for an update, been tinkering away an hour or so each night for the past few nights and finally dropped the car back on its wheels today.

I mentioned before that I’d fitted some edge trim on the roof, but had forgot to post a photo - so here we go:

I believe I left it where I’d stripped my rivnut tool and was waiting for a replacement, well that came - it wasn’t much more expensive than the last one but it said “pro” on it so I was in safe hands. I got the remaining rivnuts in without drama, so was then just a case of bolting everything up.

I torqued them all up, with loctite on the inboards and nyloc nuts on the outboard.

It was then a case of bolting stuff back on the car, the catalytic converter and big bootfloor heatshield first:

The heatshield on my Elise was a little ropey around the toelinks and had rotted through so I couldn’t fasten it down. This was still really strong, and a quick brush down and dusting of VHT paint had it looking bang on. The factory shaping of it fits around the spitfire brackets beautifully - so that’s them tucked up nicely away from the exhaust.

Then it was backbox time, except mine would not be going back on the car - through some elaborate backbox-triangle of contacts I managed to get hold of a second hand one made (we think?!) by the popular 2bular which is listed as being a track safe/road option. I know it’s boring, but I needed to quieten the car down a bit for my tastes - but I’ve found a new home for my old backbox, well when I say new home it’s actually kind of it’s old home as it’s going back to Duncan who has been following this thread - the son of the previous owner of my Exige :slight_smile:

Putting them side by side show identical dimensions, and raises suspicion that my old exhaust may be another offering from 2bular - or at least something close.

I had 10mins with the autosol and brought it up a treat, I would have done more (plus the old one) but I knelt on the tube and got autosol all over the place…

It bolted up a treat, and after a few adjustments to get it somewhere near central I got it nipped up properly. It’s fairly common for this size backbox to catch on both the rear boot heatshield and the rear diffuser (both my removed exhaust and the new exhaust in its previous car did exactly this) but by rocking it back on its hangers before tightening up you can get just about enough clearance.

My final task over the last few days was related to the boot strut - I mentioned that the boot latch mechanism wouldn’t be going back on the car and that’s because I’ve bought a new one:

The 2006 Exiges came with a twin gas strut design to keep the boot lid up. Unfortunately the struts were slightly too long and/or strong which pushed up the corners of the boot lid giving a panel gap like this (yes, they came out the factory like this…)

From what I can gather back in 2006, some people rejected their cars so Lotus swapped them to the new design as a warranty change. The new design came in with the 2007 car and had just a single strut mounted to the boot latch mechanism. Luckily it’s an easy retrofit if you can get hold of the parts - which thanks to community favourite Junks… I did :slight_smile:

Before:

After:

And the boot now looks like it’s not half open…

… and that’s about it for now. The car is currently sat in the garage with no floor or diffuser - just want to check for knocks/rattles or exhaust blows over a few miles when it dries up then I’ll have one last torque check before screwing it all back on. That’s a big chunk of my track-readiness dealt with now leaving just a baffled sump to come in a few months, as I’d like to get some mileage from my engine oil before dropping it all…!

Quick update, I took the car to Track Torque to get my work checked over and of course setup some alignment.

I’ve been to these guys a few times now across three cars and have always enjoyed the setups that Craig configures for me. Without adjustable dampers he was limited to what could be adjusted, but at least would get my toe and camber in line.

We took some of the shims out of the hub/upright assembly to add some camber at the rear and minor tweaks to the front and correcting the rear toe that was way out after my installation.

Couldn’t really push it on whilst coming home, it was just starting to snow so it was back into the garage ASAP, but the instability at the rear was certainly fixed.

Stopped by at a familiar spot for a a photograph, shame it wasn’t cleaned!

I’ve been collecting bits and pieces for a couple of weeks now and have started dismantling the car for the next phase of the project. I’d planned to do a single big update at the end but it’s just taking too long, and will end up missing bits or getting the sequencing wrong so figured I’d document to date and then finish off later.

First up the easy bit, spending money:

Baffled sump, oil and filter, gearbox oil and a multi gauge.

I’d wanted a baffled sump before my first track day since the start, and this came with a blanking plug to take a thread for an oil temperature sensor… and what better time to get one of those fitted than before the sump is on the car! That meant grabbing a gauge.

I’m not particularly happy with the gauge, it was a rush job to just get something which would include the 1/8npt sensors for oil temp and pressure which I could test fit and install which ALSO had off the shelf fitment options for the Exige dash. Longer term I’d like to switch to a Spa Designs oil pressure/temp 2 in 1 gauge but this will require an adaptor to be made to allow for a vent fitment… so a job for later.

In the meantime this multi gauge was cheap enough and comes with all the bits to allow me to get this up and running before the sump is swapped. It also includes a boost gauge which I don’t really see much point of in the longer term, but i’ll plumb it in anyway whilst I’ve got it.

Job one was to identify a good gauge position. There are some off the shelf brackets that hang down from the dash but I find them far too low and my knee also blocks them off in pretty much all circumstances. Next option is vent fitment which I much prefer.

I first tried out this position, based on the fact my hands would block the nearer ones whilst on the wheel:

The adapter ring would later be painted black, but this position didn’t work as it was too far away from my face and such the viewing angle blocked off half of the gauge.

Next up was the vent by my right hand, slightly obscured by my hand at 10-2 but much better visibility and actually looks a little more subtle as it’s tucked away in the corner.

Once fitment was decided, it was onto wiring. I hate wiring, soldering and anything related but I’ve had a good go before on the gauge setup for my Subaru. I was looking for wiring for:

Battery +
Battery Ground
Switched +
Illumination

My gauge position was right above the lighting switch panel so surely all of this should be readily available - but a lack of documentation left me a bit stuck and I’m not confident enough to go poking around with a multi-meter to find my own connectivity.

I then switched focus to the head unit, I knew all those wires were available there and so I bought a £3 autoleads ISO adaptor that was simply male to female (a mini extension lead for ISO) which I could hack up away from the car. The pinout for it is well documented, but also when it arrived I found the wires to even be labelled! Idiot proof :slight_smile:

I chopped the wires and crimped on some piggyback spade connectors. Added a blob of solder to each to keep them together then insulated the crap out of it:

Next up I had to extend the gauge wire so it would reach over to the head unit. This was some of my finest soldering to date, but only ruined by the fact I rested the soldering iron on my (plastic) box of heatshrink which managed to weld shut the box which later needed dremmeling open so that I could get into it!

Then the final product, makes my install completely reversible and at no point have I risked damage to the cars existing wiring.

Sure enough I’ve tested it, and I correctly get white illumination on the dial during the day time which switches to amber when my car lights come on to make it less of a glare during the night (and kind of somewhat matches the illumination from the dash binnacle).

On the note of the dash gauges, I have an issue with the car which came up a couple of weeks ago but I thought it was just a fuse issue. The sidelights and dash stopped lighting up. When I finally looked at the fuses and found them to be OK, I googled it and found lots of suggestions that the switch pack module was probably dead. I could hear clicking from the relays so assumed not, but still sent it off for repair.

I got that back this week, and whilst the dash was off it was an easy install back into the car - and it fixed the problem a treat. It seems like the switch pack module and CDL module that I replaced when I first bought the car are cut from the same cloth. Both prone to failure!

I took this photo at somepoint looking like the car has been bombed.

My next phases are waiting for other people, I took the sump to a local engineering firm to have them drill and tap the 1/8npt fitting into it for the oil temp gauge. Hopefully I can collect that today.

The rest of the wiring for the gauges is with an autoelectrician who I’ve asked to extend for me. Clearly the gauge is intended for a front engine car so they have no chance of reaching the boot from the dash. I went to a proper sparky because I can’t be bothered making another 24 odd solder connections but also because I want the wire properly insulating all the way down.

If I get the sump back today, I’ll get the two oil changes done this weekend then it’ll just be a case of connecting up the gauge to the sensors once the wiring is back.

For the boost gauge, as it’s likely to be temporary I’m just going to replace one of the intercooler silicone joins with one that has a boost take off in it. There’s no vac hoses to tee into on this engine layout so this is the next best non-permanent option that I have.

It’s worth just adding a note about the switch pack module that I got repaired. I wasn’t convinced that it was broken initially so I’d messaged Jon Seal (who sold me the car) asking if he had any known good working spares knocking about for me to test. He didn’t, but he did recommend the chap who did the repair AND covered the cost of it as a warranty item which was a really nice surprise. You read so many horror stories about used car warranties on PH nowadays I just don’t really expect anything from them.

I did indeed pick up the sump on Friday so that allowed me to get covered in oil (a few times) over the weekend.

The engineering shop had drilled a 1/8npt thread into a blanking bung that the sump came with which made for a nice fit for my oil temperature probe. I wound this in with some teflon tape and made sure the sump was properly cleaned out.

I idled the car for a bit while I tinkered about to get some oil temp up, then dropped the old stuff… which wasn’t very old at all.

Pictures are few and far between now because I ran out of gloves and my hands were a complete mess, but after dropping the oil I had 12 bolts and 3 nuts to undo on the current sump. The 3 nuts were on studs in the block which needed extracting before the new sump could go on. The new sump has a thicker flange so came with longer bolts (15x) for all fixings.

Once the studs came off it was the painstaking process to clean the oem gasketmaker from the block. This engine/sump combo didn’t come with a real gasket from the factory so you need to sort out your own messy version with a liquid gasket. Cleaning it off took ages, but once done I wiped everything down with a degreaser.

Once cleaned I put a bead of loctite stuff round the new sump and then shuffled into position. Putting it into position without the 3 studs to guide it on was a bit of a pain in the ass but I managed to get it on with minimal smearing of the bead and got a couple of bolts in hand tight. I did find that a couple of the bolt holes didn’t quite line up - off by maybe 1-2mm but with a bit of adjustment I managed to get all 15 in without drilling or enlarging any holes. The torque spec for these is way under the minimal threshold for my torque wrench so I winged it. Hopefully it’s fine

Pictures are a bit out of sequence as you can see the installed oil pressure sensor in the background there, but that came next.

The factory oil pressure switch is fitted just above the oil filter housing and in all the pictures looks dead easy to access - but as my car has the twin front oil coolers, it’s totally blocked off by the pipework so I had no chance of getting a spanner onto it. A trip to Halfords later and I had a tool that I hoped would help.

Sure enough the socket went on (just) and with the 3degrees of angle I could get on my ratchet I (very slowly) took it out.

My plan was to replace this with a remote t-piece and then refit it along with a new pressure sensor for the gauge. I did this on my Subaru and much prefer this approach to screwing a t-piece directly into the block as it seems to add a lot of weight and leverage to a cheap 1/8bspt fitting.

All parts teflon taped in, this adaptor is 1/8bspt male (to go into the block), 1/8bspt female for the original switch and then 1/8npt for the new sensor.

Once fitted, I had a P-clip to mount it somewhere but I can’t (yet) find anywhere obvious so it’s temporarily cabletied to an oil cooler line. This may end up permanent if I don’t find anything better, as long as there’s no weight/strain on the fittings during engine vibration I’m not too concerned.

Both sensors are now easily accessible and easy to check for leaks.

Final job for the weekend was a boost pressure sensor. I found a nice threaded hole on the rollover bar support to mount the sensor itself which was within a few inches of the pipework on the cold side of the intercooler.

I popped the pipe off and cut some spare 63mm silicone joiner up to make some slightly longer joins. This extra length would accommodate a self sealing nipple attachment:

Once refitted I could connect up to the boost sensor with some vac hose. The sensor came with a cheap inline filter, I had one of these fail on my Subaru but to be fair I was running almost 4x the boost pressure that I expect this car to be… so hopefully it’s fine!

I cut up my silicone with a stanley blade that’s a little second hand - so I’ll whip it all off to tidy it up once I know the setup doesn’t leak. If I get any boost leak issues at all like this, I’ll just revert to the standard setup and do without a boost gauge - it’s not my long term goal anyway once I get a decent gauge fitted.

Once installed, I gave the loctite 24hours to cure and then filled the car with oil, including the extra 1litre capacity. I had a particularly frustrating 45mins as I dropped the dipstick into the engine bay and it totally vanished. I couldn’t see it from above or below and spent the full 45mins trying to find it. Eventually I decided to take a wheel and arch liner out for a different perspective to find it sat curled up in the sidepod! Unbelievable how a 2foot pole with a bright yellow handle can vanish like that.

Oh, and I almost forgot - sometime between all that I also changed the gearbox oil.

I still had half a bottle left from my Elise change so I used that to flush it through a bit, then pumped in 2.5 bottles of the new stuff. This stuff stinks, but I’m slowly growing to like it. As with the supercharger/aux belt - this is a service item that I can’t find record for, so at least I can tick it off now.

I did a few mins of oil pressure testing last night, unplugged sparkplugs and cranked it a few times to get the pressure light off and checked for leaks. Everything seems dry, so once I get my gauge wiring (hopefully early this week) I can finish off the gauge install and leave the car running for a bit longer to keep an eye on pressures and leaks.

My social media feeds are filling up with people getting early trackdays in… so going to have to get stuck in very soon!

I finished the last update with the fluids changed and all sensors fitted but I was waiting on an auto-electrician to extend the sensor wires so they’d reach the dash.

While I waited I got on with some other odd jobs.

One of my seats had seatbelt rubbing damage which I did a fairly good job of fixing:

At some point in the last few weeks I made a drunk eBay purchase and got some part worn RS4-2 pagid pads for the rear. I’ve done worse after a few beers on eBay, they have loads of meat left and got them for 25% the cost of a new set. This did leave me needing some fronts though, but a friend and VX220 owner was sitting on some that he was saving for a 2pot rear caliper conversion that he hasn’t got round to yet… so I convinced him to sell me those. I now have a matching set of pads front and back! (Car came to me with EBC red up front and Brembo “oem” at the rear, I’m a bit nervous about mismatched pads on track).

Whilst doing the pads, I took the discs off to address something that Track Torque pointed out to me. The insides of my discs were getting very little wear and hence were rusting up badly:

I addressed this with some sandpaper, cleared the holes out and then countersunk the holes a bit to help them clear dust in future. The caliper inside pistons are free as a bird so I’m hoping some more aggressive pads and a good bleed will sort this going forward.

The final midweek job I did was on the driver seat rails, but got no photographs as I did it in a rush at my Grans house (she has a bench vice, I don’t). I had a little bit of play in the drivers seat, it would rock slightly if manipulated and there’s a documented process of dismantling the rails and squishing them in a vice then rebuilding with grease. I did it, it worked. Yay.

I gave the auto-electrician 8 days, then found he was still waiting on his “supplier” (eBay) for the appropriate wire - so I called him off and decided to sort it myself. Amazon Prime for some 3core 18gauge cable for £12 and was delivered in 10 hours, mental. Sunday I started extending.

Shorts and crocs are NOT suitable clothing for soldering. All was going well until I burned my little finger on the iron, dropped the wire and then instinctively “caught” it with my bare knees whilst the solder was still hot.

I did a tidy job though and got everything extended and insulated fairly quickly, then it was a case of running the wires along the handbrake cable/gear cables through the centre console and into the dash. No pictures here, but I’m sure you can imagine it.

The wires came up behind the head unit through an existing hole, but it wasn’t grommet-ed so I could do to bung some sponge in there or something just to stop the wires rubbing.

You can roughly see where the cables go here:

I spent way too long hoovering and cleaning the interior before putting it all back in. Smells lovely in there too after the leather products used on the seat.

Finally I had a working gauge with all sensors connected:

Day time illumination:

Night time:

I’ve had the car idling on stands for a while, obsessively checking for oil leaks around the new sender but everything seems good.

Last job was to bleed brakes, I put a litre of Mobile DOT4 stuff through it with my eezibleed.

All was going well with loads of air coming out:

I noticed towards the end that way more fluid was going in than coming out… uhoh.

After lowering the front of the car back down, I started getting quite a lot of brake fluid dripping onto the floor. All unions/hoses were dry, no leaks around the calipers this was clearly coming from the reservoir or the booster/master cylinder area under the front clam. I hosed it all down and ran plenty of clean water through to let it dry over night.

Come onto today and the reservoir is still full, pedal has full pressure and everything seems to be fine… I first assumed that the eezibleed had popped a host off somewhere but I can’t find any evidence and it seems to hold pressure fine when I hook it back up. The leading (hopeful) theory right now is that the reservoir cap was weeping whilst under pressure and I didn’t notice it as it wasn’t spraying, it just leaked silently down the side of the reservoir.

I’ll take it out for a tentative drive this afternoon and will check again for leaks. If I never update this thread again, it’s because I died.

If there is something leaking under there, I really fear it’ll be a clam-off job to inspect which I could really do without after all the work I’ve just finished, car needs to be driven!!

A fairly common mod on the 2zz engined Elise/Exiges is to stick some polyurethane inserts into the existing engine mounts to stiffen everything up a bit. The main complaint that these address is the gear shift, when you’re hoofing along the engine moves a lot and the cable linkage struggles with it when you’re doing high rpm/aggressive shifts. I wanted to try this out (though I do feel the shift on my Exige is already much better than my Elise was) but also I was getting some rattling of my Exhaust on my diffuser and the clearances I have are just tiny - so reducing any engine movement should help with that too… right?

I’d resisted the temptation to do this on my previous Elise because I’d had a bad experience in the past on my Subaru when changing bushes in the gear linkage from rubber to poly. It made my gear changes a bit nicer but the NVH was shocking, a well known specialist was convinced my gearbox was about to fail! They were a total pig to fit and I put off reverting for months as a result, but when I finally did it the gearbox was magically fixed!

Reviews of the Lotus setup suggested that I’d get a bit of vibration at idle but wouldn’t notice them when moving. Let’s see about that…


The 2zz has 4 mounts and the front and rear ones can be fairly easily removed and fitted with some powerflex inserts.

Front:

Rear:

I had a few hours on Friday night so got stuck in with the rear, because the internet said it was easiest. I stuck a spare jack under the sump and loosened it off, it was just one big through-bolt then 4 bolts that fixed it to the subframe. It came off easily enough and installation was as easy as popping in the powerflex ones - the original rubber would remain in place, this would just support it.

Getting the mount back in was a complete and utter arse. I’m not sure even now what the problem was, but the bolts just would not go back into the subframe - I didn’t feel they were difficult at all to remove, certainly didn’t get the feeling the thread was damaged or anything but I just couldn’t get the bolts “started” in the holes. They’re completely blind and I was doing it by feel, but access was fairly good and there was just no explanation for it.

Eventually I got out an M10 tap and just gently turned it in as the end was tapered it was easier to get it started. I was able to turn it in the full way with no real resistance and certainly no crap came out with it - but that seemed to do the trick and my bolt would now go in. I wonder if there was a bit of powdercoat from the mount or something blocking the top, but it cost me at least an hour!

The following day I did the front, this was viewed as the “hard one” because the two bolts holding it to the engine were quite hard to access - but I had a shiny new set of “go-through sockets” which sit with a much lower profile than a 1/2 ratchet so this allowed me to get a socket wrench in and got it changed within about 10 minutes! Much easier than the rear.

So without the bolt hole shenanigans I think this job would have been 30mins all in, but ended up spending half a weekend on it. I was eager to test though, and I have to say that I’m impressed.

The car does vibrate at idle but barely more than it did before, and it doesn’t feel uncomfortable - If I ever have a female passenger they may even enjoy it. As soon as the car is moving the vibration is completely gone and the shifts are indeed a lot nicer even at slower speeds. It may be my imagination but the car feels sharper too, like the weight transfer has noticeably come under control.

While I had the diffuser off for the rear mount I adjusted a few bits and pieces to try and help with the rattling but we’ll see how that goes once I can get the car properly warmed up and tested. The rattles I had were fairly easily produce-able with the car warmed up and coming down off-throttle through the revs. Between 5 and 4.5k RPM there would just be a rattle, sounds a lot like under-tray despite them being tight.

Aside from that I had another change to make for my airbox. I did this on my Elise and it’s a pretty standard affair for these cars.

Toyota Racing Developments airbox:

It basically just allows for a larger filter surface area and a slightly bigger opening but is still nicely OEM. It came I believe on the later Cup260 Exige cars so I figured I’d get it to go along with my 260 setup but also I had a 7 year old foam filter in the car which apparently aren’t cleanable? I dunno - but foam filters have usually caused me issues historically so I was happy to get rid.

This is the standard airbox with the wee round opening, this photo is missing the acoustic snorkel that the cars come with to keep sound in check. That would be in the bin.

I remember this job being a complete pain in the dick on my Elise but it went in a treat this time around. The process involves bonding an adaptor plate to the base of the existing airbox which allows the Lotus and presumably Celica parts to merge.

The bracket on the bulkhead is slightly the wrong shape for the TRD item but you can bend it and frig it into position. There are three rivnuts you need to line up, a pair and a single one. I seem to remember with my Elise that I bent the single one and left the duo static as it was just easier - but this gave me issues lining the airbox up with the throttle body. I followed the Lotus service notes this time and bent the duo and this worked much better.

The airbox is on rubber isolation mounts so you get a bit of tolerance for roughly lining up the bolts and then just torquing it down to bend the bracket into position.

Paper filter popped in a treat, and now you can see the new larger entry compared to the old one:

Up top I just needed to blank off a vacuum hose that previously went to some kind of acoustic chamber in the bottom of the old airbox as it was now redundant.

On my Elise this made a huge improvement to the soundtrack of the car particularly on cam. This time round I’ll be honest it barely made a difference, I think removing the acoustic snorkel made 90% of the difference but I’m happier with the filter situation now. Perhaps on my Elise I would have had the same upgrade to soundtrack by just taking the snorkel off, perhaps the TRD airbox is the con of the century - but I can live with it!

Running out of jobs to do now before trackdays start (first one scheduled 6th April) but I would like to stick a 4pt harness in before I go so that’s likely to be the next update.

TRACKDAY PREP WEEK!

Normally I enjoy the buzz of the week building up to a track day as much as I enjoy the day itself, but I’ve been a bit busy on the car this time round.

My intention was to whip the undertray off, spanner check the toe-links and have one more check of the oil fittings I’ve added. This was on Monday night.

Unfortunately I found evidence of a bit of oil weepage from the sump, barely anything - and my original intention upon seeing it was to just clean it up and get a track day or two done then get the car to a specialist for the token yearly stamp and have them refit the sump. This would have been fine as the oil “loss” wasn’t even registering on the dipstick and it had not seeped enough to even break surface tension and mess up the undertray.

However…

I’m very impulsive with spanners, and after leaving and re-entering the garage a couple of times I eventually suited up and dropped the oil (< 500miles worth!).

I am 90% sure the issue was just me being crap, but to cover all bases I wanted to change everything that I did previously which meant a different degreaser product and a different RTV gasket sealant product to rule out any inadequacies of the stuff I used before. Removing the sump was much easier than it was when I took the original off a few months ago, and there wasn’t much evidence of the rubberised “gasket” that the sealant should have formed. It was barely a blue smear on each surface. Hmmm, perhaps I torqued it up wrong and squeezed it all out?!

I went with the same sealant this time as I used on my Elise - as that never leaked. No idea what the chemical differences are here, but the black one is clearly marketed more towards oily environments than the blue one is.

I very much repeated the same process, but with dollops of added patience this time. I noticed that whilst the car was jacked up on an angle that oil persisted to drip out of the engine and onto the block flange for several hours after the oil was drained. This was also the corner where it was weeping, so perhaps between me degreasing and refitting before a smidge of oil escaped onto the contact area.

After draining the oil this time I left the car overnight to make sure any rogue drips were long gone. I also noticed some witness marks on the sump that suggested a casting mark on near the gearbox housing (the problem corner) had possibly prevented a flush fit - so the file came out to sort that.

Beading the black stuff was a lot stodgier than the blue stuff, which gave me confidence even though my hand hurt like hell afterwards!

Both times I’ve done a sump previously I’d felt rushed to get the bead onto the sump and get it bolted up, but after reading a few forums etc it seemed that it was fairly normal to leave the sealant for 15-20mins before fitting it anyway, so I took my time properly this time and was confident that I got it bolted up with practically zero lateral movement to smear the bead. I followed a very strict torquing process that Ed China would be proud of, and felt pretty comfortable with the end result.

If this leaks, it’s off to a garage!

Due to all my patience, cure time and other stuff (like having a job) this took up most of the week and I finally got it finished and topped up with oil today. I only had time for a quick 12 mile test drive but no evidence of leaks, so stuck the undertray back on and cleaned the car.

Next job happened inbetween all that, waiting for cure times and such. This was the installation of my new 4point Schroth ASM harness for the driver seat.

The car already has a harness bar in on the factory mounts, so was a very quick install. I had originally intended to remove all of the trim, remove the inertia reels and tidy all the 3point stuff out but I just couldn’t be arsed inbetween all the sump stuff. For now I’ve cable tied the 3point out of the way, and depending on how annoying I find a harness on the road I always have the option to fit a coexistence kit and keep both in at once.

The car is definitely looking the part now! I can’t wait to try these, I’ve never driven with harnesses before and through both of my previous track cars had real problems keeping myself held in. CG-Locks were a great compromise but hopefully this is next level.

I’ll admit to feeling a little uncomfortable with my trial fits of the harness, very claustrophobic when it’s done up properly and I seem to be struggling to keep the lap belt down too. I’m aware that I should be tightening it up first, then doing the shoulders last - but for me to get the shoulders tight enough to properly pin my upper back into the seat, I end up pulling the lap belt up a little bit. I know that’s bad, so I need to have more practise and adjustment before Saturday.

So there we go, car cleaned - sorting out my travelling toolkit and supplies then I just need to rehearse some gopro positions and we’re all ready for Blyton on Saturday. Fingers crossed the car behaves, oh and good weather would also be nice!

TRACKDAY UPDATE


Well both the car and myself survived, so the day can only be classified as a success!


There were some niggles however, so i’ll go through the day in roughly chronological order and outline my plans afterwards.


Weather was heavy fog when I woke up, so it was a slow trundle to Blyton. I misjudged the journey and arrived far too early, but no harm done. A few miles from Blyton I came to a temporary traffic light for some construction, I had my first “on boost” pull of the day as the light went green and felt the car was maybe a little flat… nothing too drastic, but something niggled in the back of my head to say that wasn’t as fast as it should be.


The fog was so thick at the circuit you couldn’t see the track from the pits, so was expecting a delayed start but there was a miracle turnaround during the briefing and it was bright sun from that point forward. Happy days.


Approx. 35 cars booked on for the day so the circuit was quiet for most of it. I’ve attended a load of LoT days now so I’m fairly used to the usual audience, but special shout-out to SeriouslyDave and his 311 - absolute monster and had some real presence about it. Wish I got some pictures, but I’m sure we’ll meet again…


I got on track for my first ‘hot’ session soon after the sighting laps and had a steady run around. My mind kept imagining this flat spot at around 6k rpm, not enough for me to jerk forward like with a proper misfire and not enough for my passenger(s) to notice, but I couldn’t shake the feeling I was missing a bit of response.


After a couple of sessions I was just checking over fluid levels etc and I noticed an intercooler hose join was ever so slightly on an angle and not flush to the supercharger. I straightened this up and this brought the car back to life! The car felt much sharper and I was almost 10mph quicker coming into the bigger braking zones than I was before! In fact this change combined with dropping a passenger meant I was just rubbing the limiter in 4th at the end of the Lancaster straight, I’ve never been over 4th gear in any car around Blyton and I’m tantalisingly close in this!


Spot the difference


Mid morning I had my first and only real drama, I noticed the ABS light come on after a warm up lap so came straight back in to “reboot” the car and check for codes. Nothing shown, I went back out and decided to check the brakes with a bit of anger. Sure enough, a lap later I had a massive lockup going into the penultimate turn which luckily has the “Eastern Circuit” as a run-off zone, and I was well into that alternate layout before the car slowed down! In addition to this, the T/C kept kicking in with the car doing about 30mph in a straight line… problem.


Sheepishly coming back into the pits, feeling the eyes of every S1 ABS-less car burning into me we had a quick look around the car and it took a friend 30seconds to identify the problem.


The wheel speed sensor wiring had escaped its p-clips and the front nearside wheel had burned right through it. Thanks to Deggles’ Jack and 3M tape this was bodged in a few minutes and was back on track without drama for the rest of the day.


As I started pushing on a bit, I was starting to become a little concerned with the brakes. I wasn’t getting fade in my relatively short sessions, but they were just very inconsistent. Sometimes I was pulling up too soon, other times barely making the corner and in general they didn’t feel great or confidence inspiring. I have a couple of theories, and will be exploring both.


  1. With the harness in, I can’t get my seating position right. Either my legs are comfortable or my arms are, not both. I feel like with my arms at the appropriate distance that my legs are too bunched up and I have real problems catching my knees/thighes on the steering shroud or the wheel itself. This had an impact on my braking because over the last few years I’ve bullied myself into rev matching on downshifts and I actually felt it was fairly adequate on my Elise. I told myself soon into the trackday at Blyton that I should just stop trying as it was messing up my braking all the time, but it’s a difficult habit to shake.


  2. The insides of my brake discs were very corroded when I bought the car. I cleaned them up a bit with wet/dry and I hoped/assumed a couple of trackday sessions would clean them up the rest of the way. It turns out, it didn’t - and they still look pretty borked on the inside. Whether this would explain my issues or not, who knows - but there must certainly be room for improvement.


    This is them when I first got the car…


    And after the events of Saturday…


    I was following a good friend in his ~240bhp VX220 Turbo and he has a pretty sorted brake setup with AP 4 pots and some 308mm floating discs and it really drove it home when I saw him comfortably braking way later than I was (and I was then only just making the apex!)


    I didn’t let it fluster me too much, I just made a much more conservative approach to braking for the rest of the day and concentrated on other areas - still had an absolute blast and gives me good room for improvement.


    After the IC Hose fix the car pulled like a train all day long. There are lots of Exige S complaints about the factory intercooler positioning and airflow leading to massive heat soak and subsequently loss of power on track. Some stories of NA cars easily pulling away from an SC car after a couple of laps… hyperbole or not I’m not sure. My butt dyno didn’t feel this happening but I was prepared for it, and as such I spent the day “logging” intake temps via my ODB reader. This will form an experiment that I’ll be tickling away at over the summer, to give me something to do and maybe even make some performance improvements for not a lot of wonga.


    You can see the temps here over a session, they don’t get much higher during a session - but this could be because the IC is already heatsoaked. On the road tests I did prior to the trackday I struggled to get the IC temps above 40 degrees. The non-scientific touch test of the hot side and cool side of the intercooler suggested that the temp drop between each side is minimal, compared to the anecdotal evidence of my Subaru setup some years ago.


    A few friends had asked on how I was missing the adjustable shocks that my Elise had. Honestly I’d not thought too much about it until they asked, but in hindsight I certainly felt the car was a little bit wayward through the fast Port Froid section compared to the Elise. I think I was maybe a touch slower through there in the Exige but more because the stiffer shocks feign confidence rather than provide extra grip, I think.


    I had been running the car up till about 2pm with the traction control on, mainly because I wanted to lean on it and figure out where it was kicking in first before taking liberties without it. I found it kicking in a lot to be honest, it didn’t feel too disruptive at first but because of how often I had it flashing away I was increasingly nervous of switching it off! Eventually after brave pill and a good talking to myself it came off… and the car was bloody brilliant.


    I discovered the car had tonnes of grip and although switching the TC off probably slowed me down a bit, I think it’s raised my ceiling considerably for improvement. Where the TC was previously kicking in, I was now getting just enough rotation at the rear to push me round and as a result I was understeering less. This is the single biggest difference between the Elise and Exige, as the Elise just didn’t have the torque to achieve this. I think with a full day without TC I could honestly knock chunks of time off, and on the few occasions that the rear did let go, it was dead easy to collect it without dropping any momentum. The car still spins the inside wheel like the Elise did, but just more often. I think this is what engaged the TC more often than not.


    The only other glitch of the day is that I seemed to have recorded most of my sessions in timelapse mode rather than video recording! I got the final clear session in whilst I was in smooth mode which is good, but I’m a bit disapointed I didn’t get the huge lockup or my many half-moments that got rescued by the TC earlier in the day!


    https://www.youtube.com/watch?v=B1nRQ3C68MI


    The ride home was a bit butt clenching as a good friend had a clutch failure on his S1 Exige which we had managed to just about bodge (was a fluid leak) and get him rolling so I said I’d follow him home in case he got stuck. Problem is, my fuel level was critical and there’s no way we wanted to risk Les pulling into a service station and putting unnecessary gear changes into the mix! So I hypermiled it about 20miles on the red light (which is a bloody lottery on these cars) and once we got to the M180 services I decided Les was bound to make it home, so I peeled off for a drop of fuel… which is all I could afford @ £1.52/litre!


    Car home safe, I’ve had a quick post day inspection and can confirm that:


  1. My Sump isn’t leaking. YAAAAAAAAAYYYYYY, so relieved that it doesn’t have to come off again.
  2. Inside of my brake discs are (still) knackered.


    Oh, and I fixed the ABS wiring properly.


    So my immediate plans are:


  3. Get the discs swapped, not sure what to yet. Some tempting options to go larger and space out the front caliper for some more stopping power or just save money, go OEM and compare.


  • OEM Cheapest (£250ish for a full set)
  • Budget Lightweight with Alloy Bells but OEM Size (£500ish for a full set)
  • 295mm with alloy bells up front and 288mm rear (£900ish for a full set)
  • 308mm with alloy bells up front and 288mm rear, allows for a maybe later addition of AP 4 pot calipers (£millions)


  1. Look into options for either extending steering wheel reach (or reducing the reach, rather) to allow my legs to be comfortable. Either putting a spacer on the OEM wheel or going aftermarket, need to try some out.


  2. Start sciencing with my intake temp data.

I commented that my harness had compromised my seating position in that my legs felt too long when the steering wheel was at the appropriate distance, and that my knees often caught the wheel/shroud.

Solution at first appeared to be an aftermarket wheel that I could bring a bit closer with an aftermarket boss, but after checking through the options I found something that may give me a good reference point for change and is quite a bit cheaper than a new wheel…

It’s an adaptor ring intended for a Lotus Motorsport wheel/boss kit, but by drilling out the threads in some of the holes and using longer bolts I can also use it to simply bring the wheel 30mm closer to me. So that’s what I’ve done:

Before:

After:

In terms of the other cockpit ergonomics like stalks, 30mm seems to be about as much as you would want to go. Other people have gone even further by stacking this adaptor with a removable boss but at that point using your indicators/wipers is going to be pretty annoying.

I can now move the seat back to maximum clicks and still have a nice bend in my arms when resting them on top of the wheel, and knees are now well clear… so it’s looking like a positive start.

If this is too close to me, I know all I need to do is sort/fabricate a thinner adaptor and if this is still too far away - I have options with aftermarket wheels and running with a slight dish etc… so this is a good place to start.

Quick update as I got some new brake discs from Seriously Lotus last week.

As previously mentioned I was talked down from something a little more gucci and I’m happy with the decision. These are slightly better than OEM in that they actually have directional vanes now (Lotus shipped with all four discs orientated the same way, so in theory worse cooling on one side of the car than the other) and the hubs and vanes are painted on these ones which should keep the grott at bay for a short while.

As a reminder, this is why I’m replacing.

Inside of my front discs both looked like this shortly after I collected the car:

I did make attempts to clean them up with a sander and a drill to countersink the holes a bit, but no dice. Not even a day of Blyton got them cleaned up and this is how they looked after the day:

Inspection of the inside pads show that I’ve lost a lot of meat, and wasn’t getting much/any pad transfer on the inside. I had to take even more meat back off the pads with a sander to make sure that they don’t just muck up the new discs too so by delaying this I’ve easily cost myself a premature set of front pads, though the current ones should be good for the next couple of trackdays… I hope.

Discs on without drama, and set about doing some Pagid approved bedding in. Pad transfer seems even so far and the brakes are feeling pretty good, I need to jack the car up and make sure I’m getting some good transfer on the insides too just in the event that I’m not getting enough pressure on the inside pistons (they feel free enough by hand, so hopefully not).

I might get my sequencing of events a bit wrong as it’s been a few weeks.

First up, my car went back to the paint shop which originally prepared the car for sale. I’d noticed a couple of small bubbles in the paint pop up on the rear quarter. These aren’t/weren’t similar to the water ingress/osmosis bubbles that I’ve seen before on many fibreglass cars but seemed to be some contamination in the top or base coats. This was all covered under warrant considering the paintwork on that area of the car was only a few months old.

After collecting the car I had a weekend away with the Missus and we went up to Whitby in the Lotus. My Wife is about half way through a 9 month project of her own so was less enthusiastic about going in the Exige initially but as the weather came round the occasion got the better of her so off we went! :slight_smile:

It turns out the boot aperture is slightly smaller on the Exige than it was on the Elise…

The Sunday of our trip was the day of the annual Easter Sunday Malton car meet facilitated by Specialist Cars in Malton. I try to do this every year, even though it’s much of the same it’s an excuse to catch up with friends and get hyped for the summer season of car related stuff. This year was unique in that I got to set off from Whitby in the early hours and enjoy some of the best roads in Yorkshire with zero traffic. It was bloody amazing, and easily the best road experience I’ve had in a car to date.

I won’t say what my average speed was, but I was able to maintain it for probably 85% of the journey from leaving Whitby to hitting Pickering. Long, flowing and well sighted bends all the way along with some fantastic views.

Over this weekend my brakes got noisier and noisier up front, just chattering around in the calipers is a fairly standard arrangement for these cars but it was just getting worse and worse. I made a note to stick some extra anti-rattle buffers in when I got home. I also documented some irritating rattle coming from behind the passenger seat.

The following week it was the monthly NYLOC meet near York, so went up to that and managed to get the front of the car fairly well blasted by stonechips courtesy of the ‘road dressing’ that the council insist on putting down every year or so. It could have been worse, no broken glass/lights/etc and the chips I got were fairly easily blended in with my Chipex kit - but certainly a shame nonetheless. I always feel a bit more relaxed though after getting my first wave of stonechips, it seems the fear of getting them is greater than the feeling of actually having a stonechipped front end!!

It was particularly annoying as I had the car booked in at the end of April for a correction detail with a friend Dave at Redirecting...

In previous years I’ve generally used one of the May/Spring bank holiday weekends to do this myself on a new car - but this year I really couldn’t be bothered. I would need to stock up on pads/product and then spend a long weekend doing it, so decided to outsource it. I’m glad I did :slight_smile:

Dave did a really good job, will post some pictures in the next few days as I need to get the car out in the daylight for some proper shots. Obviously the car was clean most of the time anyway, but under the harsh garage lighting there were a couple of swirls that Dave sorted out - and the front end was a little bit messy with overspray from previous repairs (I guess) which has clayed up a treat.

Finally back round to the brakes, I had a look and decided that I was going to put some new pads in anyway. As an ongoing effect of my rusty brake discs at Blyton I think I’d also ruined a perfectly good set of pads. These are identical brand/model pads and the previous ones I would say were 75% “full” before Blyton, so the discs have certainly took their toll and I’d have to manually remove even more material to get them cleaned up properly. With a France trip and a couple of trackdays on the horizon I just decided to lob some new pads in now and keep these for emergency “get me home” pads in the toolkit.

Last job was to identify/fix the rattle and also took the opportunity to remove the inertia belt reel from the driver side as the 4point harness has grown on me, and I can see me tolerating the lack of seatbelt for the foreseeable future.

Bulkhead trim out and identified a Cobra branded component rattling around with a spent stickypad on the back. I restuck this to the bulkhead where it should go which happily cured the rattle. I put the bulkhead trim back in with some good bits of foam strip and used proper rivets on the speaker holders rather than the crappy plastic things which has cured a whole bunch of squeeks and rattles (for now), car is actually rather quiet now!

More updates to come, arguing with Yodel about the non-arrival of some parts and a few more tidy up jobs to do before France, and maybe another trackday.

Update time.

Something I was aware of prior to buying the car was a documented weakness of the factory intercooler setup. By all accounts it receives poor airflow, absorbs heat from the engine and as a result on track sessions the cars are believed to not make their advertised power. There are some very dramatic suggestions that in some cases the cars can be outdragged by the NA versions after a few laps - but I’m sure that’s just hyperbole!

The issues mainly are that despite the massive roof scoop, it tapers back to a tiny letterbox at the top of the engine bay and the airflow that it receives is hot air from the radiator anyway!

The established solution for this is to convert the air/air intercooler with a front mounted air/water radiator and charge cooler setup. It works well, in most cases bolting this on will give the car more power immediately and will run all day on track but it’s expensive and a fairly big job to run the extra plumbing to the front of the car. I’m not ruling this out, and almost certainly will go down this route one day - but this update is about a DIY approach to mitigating the problem.

As I commented on my trackday post, I didn’t feel any noticeable loss of power when the intake air temperatures went up but on a circuit which was pretty quiet, amongst cars that already have a huge gap in power (from 118bhp to 420+ !) and driving ability there aren’t many reference points and I’m certainly not a good enough driver to use lap-time as a reference! What I do have though is a few data-sets taken from my ODBII reader logged into graphs during the day which will allow me to have a bit of fun with the car, do some tinkering and maybe make some improvements.

One example session is here:

Key points to note, the session stats with the IAT already at 40degrees and finishes closer to 30. This is evidence of the heat soaking between sessions, obviously. Heatshielding may help here, but I think something more useful would just be an extra ‘warm up’ lap to get some airflow through the core before getting on it.

Once the hotlaps start, the temperature of a pre-heat soaked intercooler range between 60 and 70 degrees at most points, spiking to 70 during the WOT sections of the laps. I don’t know what this means in terms of ECU and timing, I’ve read suggestions on forums that the timing starts to pull back at temperatures above 50 but I have no evidence of this so it’s just speculation. During the cooldown lap the temperature drops to 33ish fairly quickly as the car is still receiving airflow but not making any boost.

Ambient temps on the day were 12 degrees, and when I come back to re-test they will almost certainly (hopefully) be higher than that, so that needs to be considered. For reference I’ve logged a load of road mileage in which the temperature normally settles around 20 degrees and spikes to 40 under WOT. I’ve struggled to find any evidence of heatsoak during road mileage, and this suggests that the IC setup is perfectly fit for purpose if trackdays are avoided.

The plan is to rip off some work that quite a few forum members have done previously, so I can’t take credit for inventing this. Reports are that it does go a reasonable way towards the impact of a charge cooler but will never be a like for like replacement. At 5% the cost, it has to be worth a look though.

The plan is to:

1- Fit a heatshield between the IC Core and the engine

2- Run some ducting from the sidepods into the existing intercooler shroud to get some more (cold) airflow through it

It all gets a bit DIY now, so purists and engineers look away now.

Intercooler off:

Template for heatshield:

500mmx250mm 0.8mm thick aluminium from B&Q:

Fitted the underside with some self adhesive heatshielding that’s intended for the inside of motorbike bodywork to protect against manifolds/exhausts etc. Great stuff, used it before on previous projects. It’s easy to apply, but hard to cut neatly - so makes my heatshield look a bit ragged by the edges:

(painted the top side too)

After a few trial fits, it looks like this:

Next up the ducting:
Some revotec parts:

Trimmed:

Test fitted:

Time to get brave with a holesaw:

The plastic for the shroud is already very delicate, cracks round the corners so I was half expecting to ruin this when taking a drill to it. It held up well though, and I later reinforced the cracked areas with tigerseal.

Some 64mm flange adaptors slotted in and sealed up:

…and some 64mm ducting. Really sturdy stuff with a coiled wire support internally, allows it to be easily routed in the engine bay but also stands up to being squashed and malformed.

Finally the fitted shots:

It looks fairly inconspicuous, can still access the dipstick and any other regular maintenance area in the engine bay.

The main potential downside is of course starving the engine bay of airflow, but there’s still a good portion of the sidepod left open and with the NACA ducts on the undertray and open mesh top there’s still plenty of flow through there. I will of course monitor water temps to make sure I’ve not traded one problem with another. The Lotus 211 format suggests that the side pods are free game for this purpose anyway, more on that later.

My intention is to run this setup at my next trackday and see how the IAT’s look. If this makes negligible or no difference, I will report back as I haven’t lost much other than a weekend of tinkering (which I enjoyed anyway) and this is all fairly easy to cap-off and remove if it causes problems. The reports I’ve read elsewhere look promising though, so would be nice to see a benefit to the effort.

Further changes I could/should make to bolster this are:

  • Replace the sidepod mesh with something more open. This gives significant benefits in accordance with other peoples’ testing as the current mesh is extremely tight. (I thought about a good back to back test for this could be whipping off the sidepods for a session on my next track day)
  • Fit catch cans into the PCV circuit, reduce blow-by residue in the intercooler and maybe boost its performance

Further than that, aftermarket IC cores are available which boast higher efficiency but at that point you’re spending a considerable amount towards a charge cooler setup. There is also a better version of what I’ve done above which is fitting the 211 Intercooler shroud. The 211 never came with a roof, so obviously no roof scoop so Lotus had to do their own version of this but as they used a custom shroud they could run much bigger hosing. Some members have done this to an Exige and got some fantastic results, apparently.

This has been a fun and inexpensive project! My expectations are pretty modest, already preparing for failure - so anything noticeable is a bonus!

Aside from that, I ‘nearly’ broke my locking wheel nut key. It slipped slightly and the outer shroud of it deformed. It feels like I’m walking on ice with it now so intended to replace the locking wheel nuts. As my other nuts were rusty and mining anyway I figured I’d just buy a set of 16 standard nuts in black and have done with it, but the Lotus parts’ vendors wanted a decent wedge in return for it. I did some digging and found the wheelnut fitment to be shared with a load of BMW cars which opened up my options considerably. Bought 16 of these instead.

I considered a stud conversion, but couldn’t find a setup to match my threads in the hub with a small enough nut head to fit in my wheels.

Finally I got the car out in the sun for some post-detailing shots.

France Update:


Last weekend I took the Exige to France with the North Yorkshire Lotus Owners Club (NYLOC) for a few days driving around and a trackday hosted by Lotus on Track at the Folembray Circuit.


Before setting off, I grabbed a new head unit from Halfords to give the missus something to listen to (this is a mechless jobby with bluetooth for Spotify etc).


It’s pretty good actually, the Pioneer App for it is naff - but works natively with Android Auto which I had good experience with from my old Leon Cupra commuter. It’s also a shade lighter, so race car points for that.


We took the Hull -> Zeebrugge ferry on Friday evening and met a bunch of the NYLOC’ers on the boat for beer. They had an exploratory route through Belgium planned for the Saturday but we decided to have the day in Bruges instead. Nice parking (nice wide spaces) at the Central Station and easy walk into town - for future reference, oh it only cost 3.50 for the day too.


Our accommodation was a couple of hours from Bruges and would be our hub for the weekend.


Somehow we avoided rain pretty much all weekend whilst on the road, but we got a few doses of it at the hotel… my window seals are really a bit naff.


Sunday was a castle day:


This was the first real test I’ve had of the A/C since getting the car. It was really quite warm but the A/C soldiered on, very pleased to have it but was having real soft-top envy all weekend!


Finally Folembray day, weather was dreadful at breakfast but had a miracle turn-around.


I didn’t take any pictures at the circuit other than this one, had other things to be doing!


The circuit was great, it looks a bit lame on videos to be honest but there’s a good bit of gradient on the fast section which always gives a bit of confidence, the hairpins had plenty of space for adventure so allowed for a bit of fun and only the ‘house’ section looked really scary due to the massive curbs and small tolerance for getting the line wrong.


https://www.youtube.com/watch?v=EmJkQDy3LRU


The car was going great all day, the brake issues I had at Blyton were no more and I was driving with much more confidence once I started to learn the track. Still plenty of speed left in the car of course, but looking forward to be back on familiar turf to start pushing on.


I was keen to log some IAT data to test my new air ducts but I had technology issues most of the day, both GoPro and ODB reader causing me issues. I did however manage to log one session successfully.


The initial numbers look a little bit lacklustre but considering the difference in ambient temperature I think it’s a positive start.


The most obvious differences are the gaps between the “stationary” temps and the “on track” temps between Blyton and Folembray. Because the ambient was so much higher I guess this minimised the difference - which bodes well I suppose for the performance of the setup. Because of the ODB issues I had, I didn’t waste further time making some other comparisons and instead will make those in the next month or so when I do another UK trackday.


My intentions are:


  • Run the car with the new ducts blanked off
  • Run again in “Folembray Spec”
  • Run a third time without the side scoops on (to remove the restrictive looking mesh)


    The first two tests should help normalise against ambient temps if done on the same day, and the third test will tell me if it’s worth going for a more open mesh on my sidepods.


    I’ve still got other areas to explore such as the air/oil catch cans to clean up the IC internals too - that may come later in the year.


    Aside from the numbers, the car felt great all day - I did some very long sessions (longest almost 30mins, a personal record) and the car never felt to be under performing significantly. I got to spend some time on track with a fellow NYLOC member who has a “proper” 260bhp Exige in the format of a 260 Cup. It’s running the same power as I apparently am, but also some nice toys like CF inlaid into the clam, LSD, accusump, trick suspension, etc - however was running on road tyres compared to my ZZRs. It was a great benchmark for my straight line pace which seemed on the money.


    In terms of handling, a few members commented on some understeer issues in a few places but I seem to have a very nosey car at the moment with no hints of understeer. The first sign of losing grip I get is usually the rear end coming round on entry or sometimes a bit of a squirm at the back on exit. I know that should be a good thing but I very clearly remember having a nice margin of understeer I could push through on my Elise that allowed me to push on a bit and then steer with the gas a bit if needed. The Exige certainly has more peak pace in its handling setup but feels a bit scarier in practise, so might see about some opinions on that front. The insides of my rears are now completely trashed too, so need some fresh rubber.


    The only other problem to note is fuel consumption, I went through 2 full tanks on track culminating in a bit of fuel surge and ALMOST stopping on track about 90secs before the session ended. At the end of my penultimate session I was showing 25% fuel, but when trundling out of the pits for the finale I was showing 0% and the light was on… I should have stopped there, but I talked myself into the fuel gauge just being a bit too conservative…


    Luckily borrowed a 5L can from a NYLOC member to get me to the fuel station! I think a 5L container of super will need to join me on trackdays now just to make sure I get home OK in the event my fuel gauge lures me into one more session.


    The other NYLOC members took plenty of photos so i’ll get some added to the thread when they appear. Also had Rich of Rich’s Garage with us playing with some Drone Photography and video - so look him up on Facebook for some good content!


    https://www.youtube.com/watch?v=YsRHq14xeeE


    https://www.youtube.com/watch?v=4LrrebIITiw


    Tuesday was a sightseeing day and ferry home. I’m terrible at sea, but had two really smooth crossings for which I’m grateful.


    Thoroughly enjoyable weekend, juices are properly flowing though so need to line up some more track time ASAP.