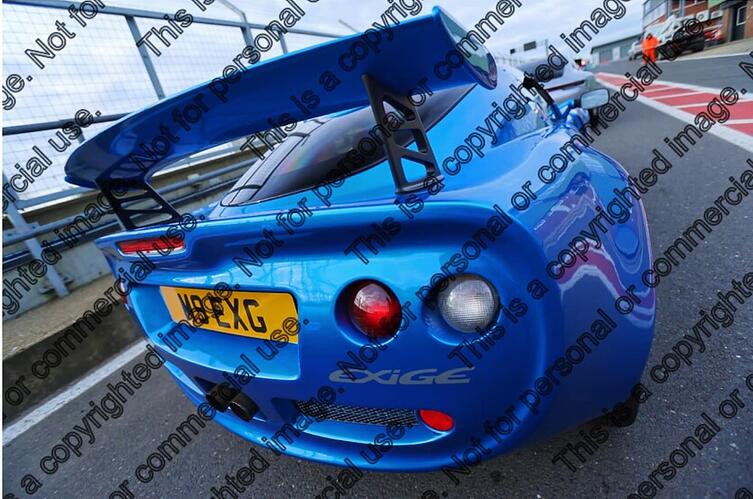
Similar kind of situation when I rebuilt my S1. Mine was more about refurbishment than yours as it already was an Exige to start with. 217bhp VHPD has proven to be plenty for me. Once you finish one bit and do a nice job, you just go onto the next bit and don’t want to slap-dash it as it’ll let the previous work down… until you’ve pretty much nut-and-bolted the entire thing.
What helped was starting with a really good base car, would be a while different thing if fixings etc were all rusted and awful to deal with. I’ll have to put up with the 150/160hp for now and it’s still good fun with that.
Not too much has happened to the car from here. With the move into my first house happening at the end of January a lot of funds and time has gone into sorting that, but I have been able to do a few trips and more exciting things over the past year.
First trackday if the year was at a chilly but dry Donnington. This was the first trackday in 5 attempts where I made it through the whole day! Lack of power holds me back a little around here but had some good battles with an S3 Exige. Touch quicker through the corners and braking but he had the legs to pull away overall.
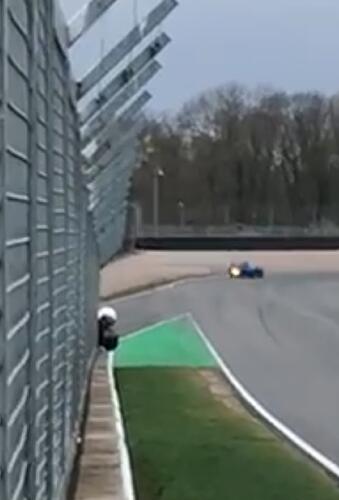
Also discovered my car can throw quite big flames out the back. Awful photo as it is a screenshot of a video but a decent size fireball out the back when you look against the size of the rear clam!
Only small issues I had were that I lost the clutch pedal a bit after the final run, it wouldn’t select any gears unless I put it into 1st to start it. I put this down to old fluid so bled the whole system when I got home. I cable tied the slave cylinder fully closed and got quite a bit of air out if the system. So far no further issues with it and the bite point is nicer and more immediate too. Oh the other issue was running out of fuel going past the first corner and having to coast down to the bottom of Craners. Luckily I was able to pull off and not cause the final few minutes of the day to be red flagged but not my finest moment. Usually I would have expected a bit of spluttering when cornering to let me know it was about to run out, but it gave me no warning and the last few completely clear laps were too tempting! I got a tow backwards up Craners and across the finish line so got a unique view of the track, and thankfully everyone else was packing away so I didn’t have an audience laughing at me!
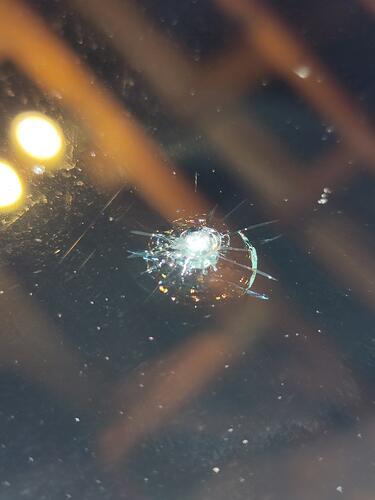
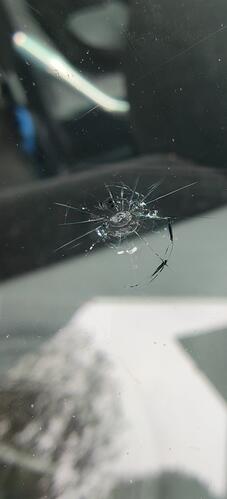
Looking through the photos of my phone I remembered that I also got a nasty stone chip where an mx5 threw a piece of gravel right into my driver’s side view. Unfortunate but you have to accept when going on track.
I initially looked to get it sorted through auto glass but they were either extortionate or wanted to go through insurance. In the end I found Halfords do repairs for about £40 so went with them. It was right on the limit for the guy to attempt to fill it and I obviously didn’t expect it to go away fully, it was more to stop it spreading but it did clear up a lot. Now it just looks like a bug has it the screen and doesn’t bother me at all when driving.
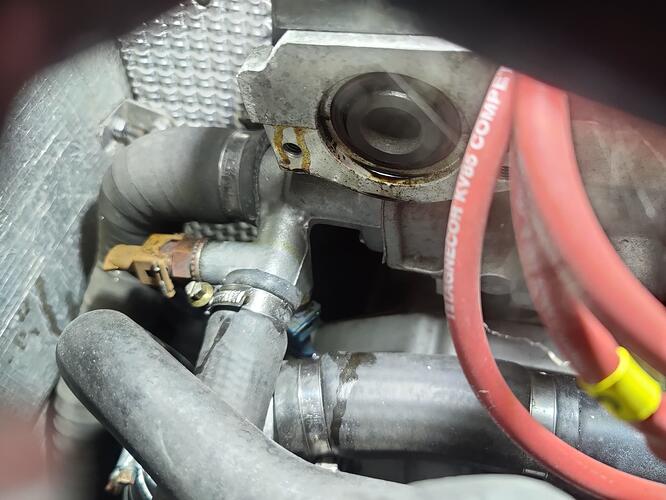
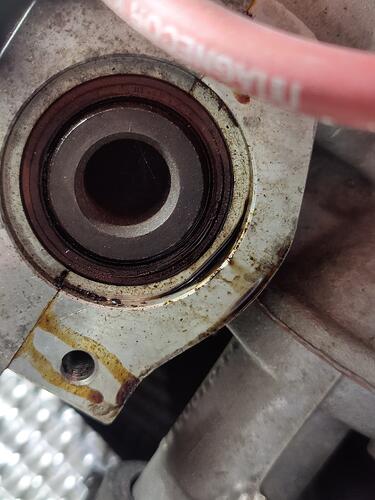
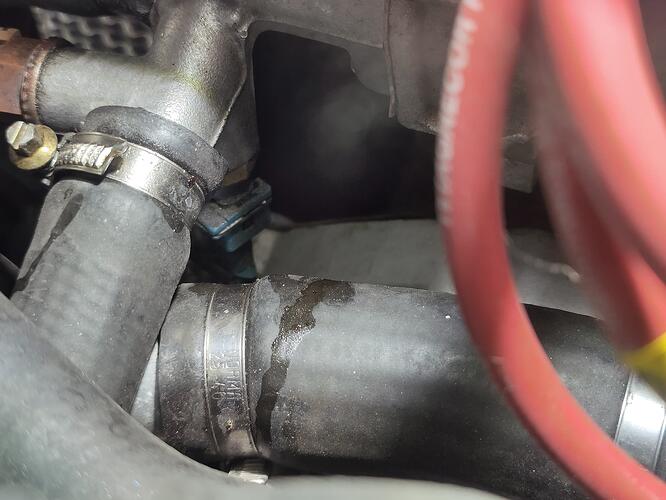
Final thing I noticed was that one of the cam seals is now leaking ever so slightly. Not enough to worry about changing just yet but another thing to keep an eye on.
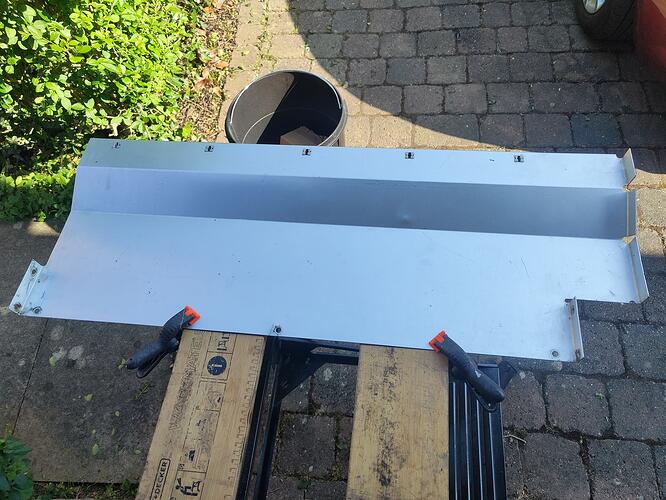
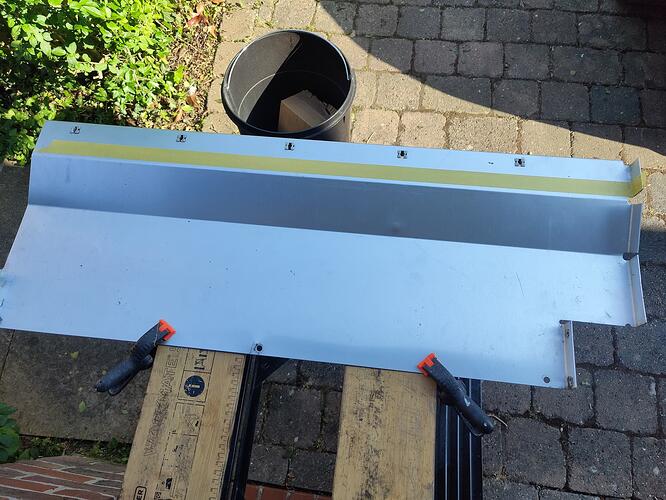
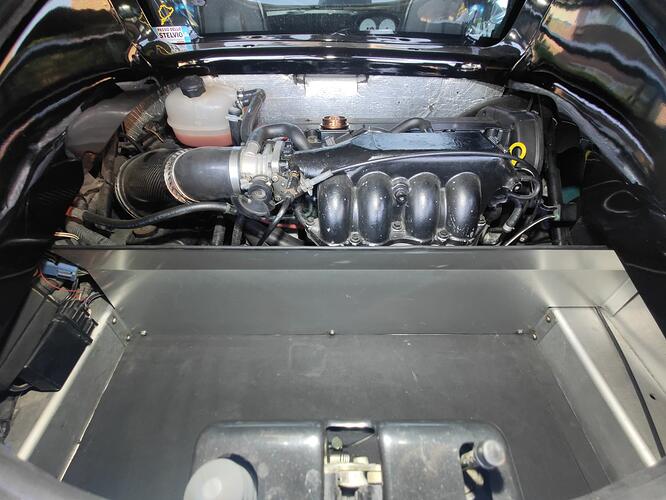
A small mod I had been meaning to do for ages was the boot divider panel. I had bought some aluminium sheeting which I was going to use instead of the Elise boot divide, using the original as a template and then selling it. However, during the house move or another time this piece of sheeting has been lost, so I decided to just chop the original one down.
The Elise panel is too high for the engine bay finisher panels and also has the messy looking boot bag fixings at the top, so I decided to cut just enough off for now still using the aluminium plenum. I’m not sure when or if ever the plenum will be replaced with ITBs but it’ll be no time soon.
I used some tape to mark just above the top kink, leaving a bit of material left to be able to put a rubber edge trim on the top to neaten things up.
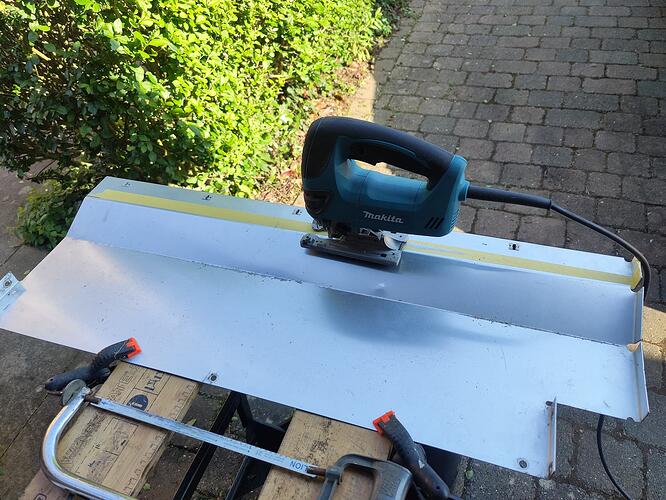
Initially planned to use a handsaw but in the end went with my jigsaw and was very careful to keep it straight.
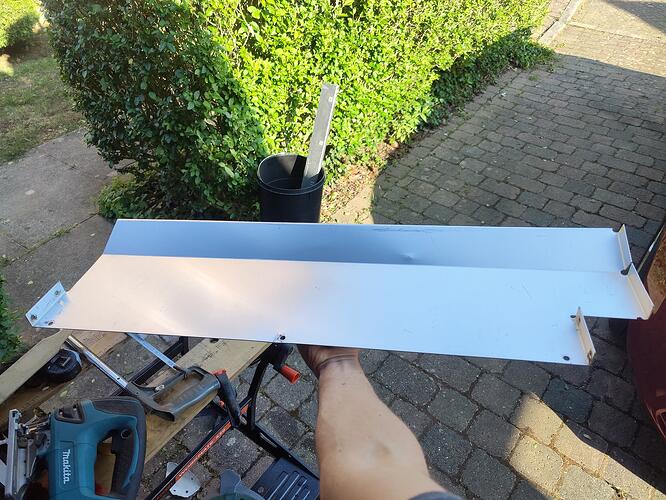
I then gently filed/sanded the top edge a bit and it was ready for the engine bay. There is actually a dent in it where it has had years of hitting against the plenum.
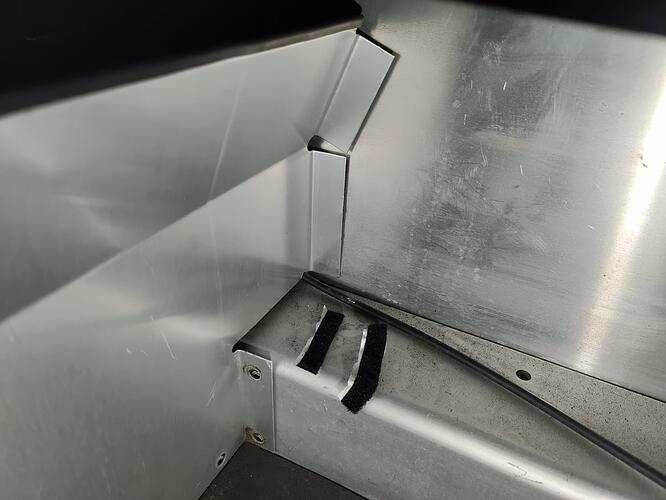
Having the aluminium sheet panels where the Elise ones had been meant I could utilise the tabs on the divider to fix it, using strips of velcro like the OEM method. I also used the hex head screws at the bottom and it is sturdy enough. The divider also helps keep the boot cable as far over in the boot as possible.
Overall I am much happier about putting things in the boot now as nothing is going to fall onto the driveshaft below. The edge trim on the top does have a habit of coming a little loose in places, but a bit of glue or quickly pushing it down when I spot it sorts it.
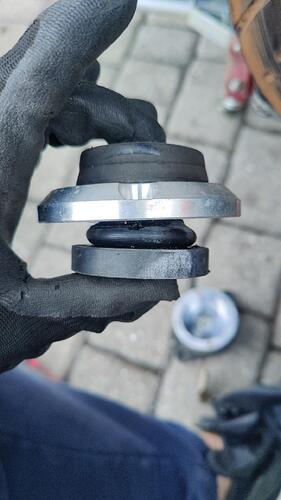
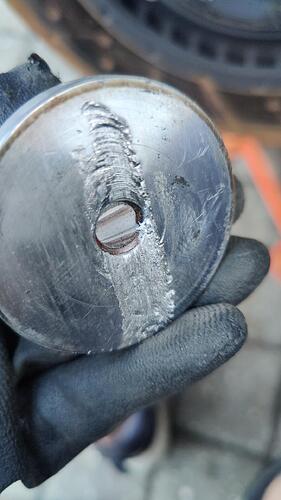
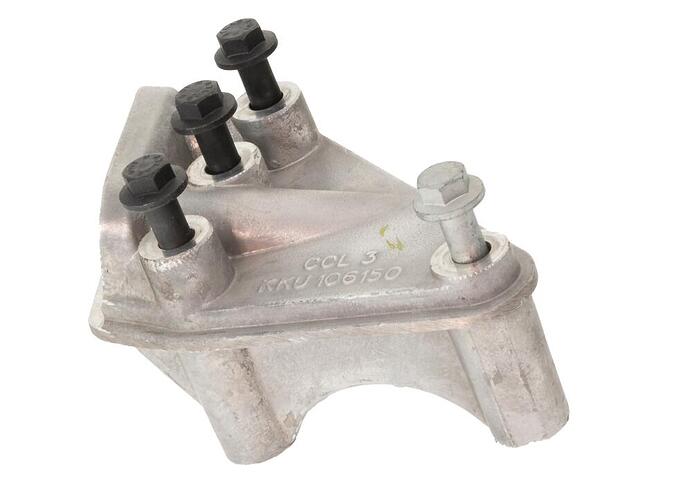
Found more photos of the busted engine mount. This is all the rubber there is inside the mount, squished with a spreader washer/plate.
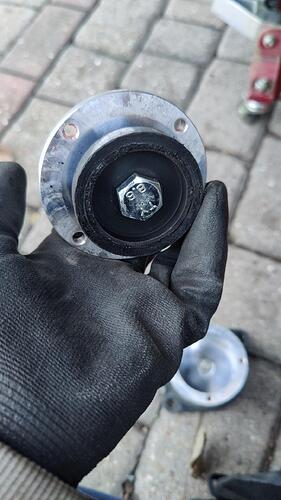
The bolt is also only 8.8 tensile strength, may be one reason why it snapped. I could have gone for the grades up which are 9.8 and 10.9, hopefully the 12.9 I am now using isn’t too brittle.
Another thing I had forgotten was that when I poured the rubber I had the new 12.9 bolt resting against this mounting plate nut inside the unit. This meant that when I first fired the car up there was an awful vibration. This vibration went when the throttle was blipped but I couldn’t live with the vibration. I then realised that the forces must have been going through the bolt, into the nut and straight through the chassis. I then had to dismantle the unit and carefully pull the rubber out, then slice a small sliver off to raise the bolt off of the nut so it was isolated. Put it back together and everything was as it should be.
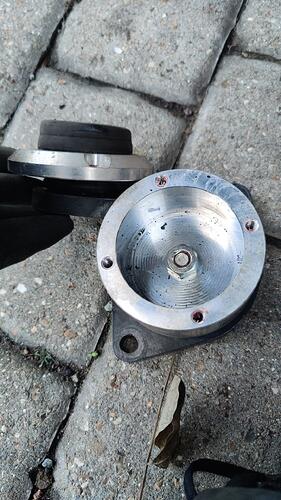
Here is the damage caused by the rocking mount. There were a few sharp edges so I took a wire wheel and ground it smooth so it wouldn’t tear the new rubber.
Bit of a thread resurrection, got some work planned for the coming weeks so thought I’d update through them. In the meantime here’s some stuff I never got around to posting before.
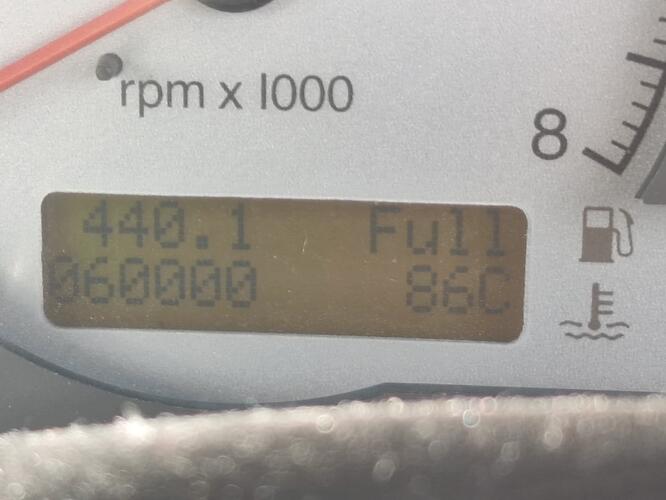
Little celebration that the car clocked 60,000 miles on the siting laps at Snetteron, 1/3 of them miles have now come from me. Unfortunately it’s only done around 2500 miles since that day which was back in March or April 2023
Always nice to meet fellow Lotus guys and give them some passenger laps, house renovation always seems to eat into being able to drive it
No troubles on this track day for the first time in a LONG time!
Another was Bicester Flywheel, shite as a show for aeroplanes (which was the main point of going to this) but always love the environment there, refreshing from the likes of Goodwood. Bumped into a real Exige with very trick gear change system, lovely guy
Few car shows over the summer months, this one being the Harpenden show which ended very wet and with work commitments I got there a little late
This one was nice and local at Knebworth. Good selection of cars but again a bit wet, seems a theme over the last year unfortunately
Now to what’s gone wrong…
Last trackday the car was going great… Until it wasn’t. A downshift from 5th to 4th has somehow made the engine shit itself with no prior warning or indication it would do. I understand certain breakages due to how I drive on track, but I never rev over 6000rpm and always rev match, so I put this down to just age of the engine or mapping issues. The EFI ecu is ancient and I was told it ran lean over 6k, hence my short shifting. I have a K3 emerald to go into it but just never had the funds to sort this.
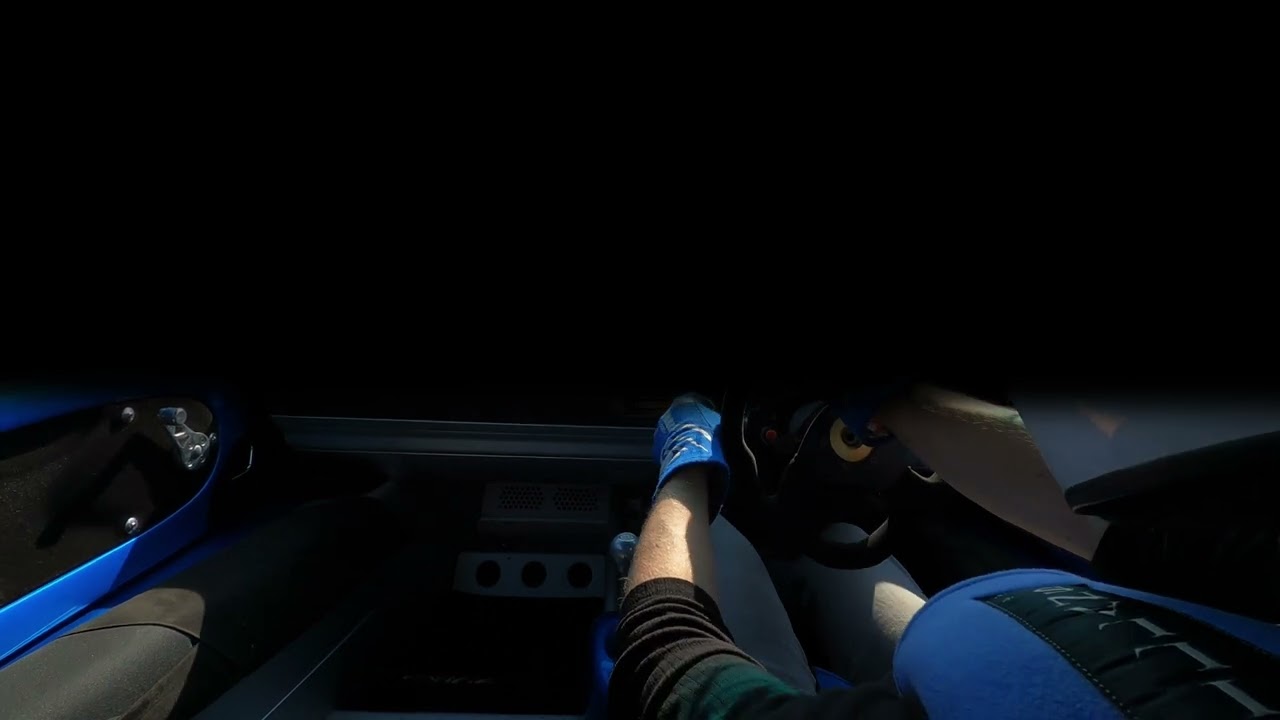
Here is a video of what happened, unfortunately I had to blank the windscreen.
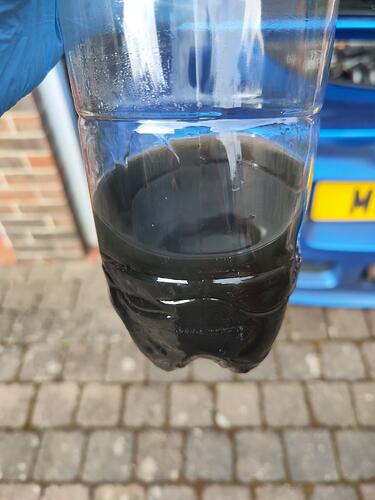
Here is what happened. When downshifting from 5th to 4th the car immediately began misfiring and came to a spluttering halt, refusing to fire back up again. It did eventually fire and I was able to drive a few meters to get a push back into the pits. The coolant bottle was very hot and bubbling away, there are no immediate signs of HGF and may have just been because I had stopped immediately on track and gave it no time to cool down, this is unclear though. The head gasket was done not too long ago by a reputable Lotus Specialist so hoping to rule this out.
From there, I took off the air intake and saw oil had collected in the bottom of the throttle body from the rocker cover pipe. I popped the pipe off to check for blockages and nothing was found, so I placed a rag under the rocker outlet and tried to fire the car up again after it had fully cooled down. The car did fire but was not running well and was very smokey from this rocker outlet. I popped the other pipe off the rocker and same again very smokey out of both and running poorly.
Then suddenly the car began making a loud tapping sound and I shut it off. I was unsure what the tapping was, whether it be a sticking follower or piston hitting a valve but I needed to look inside to have any hope of being able to tell.
In typical fashion for me that was just before lunch and my day was done. It went on dad’s trailer and I drove his back home.
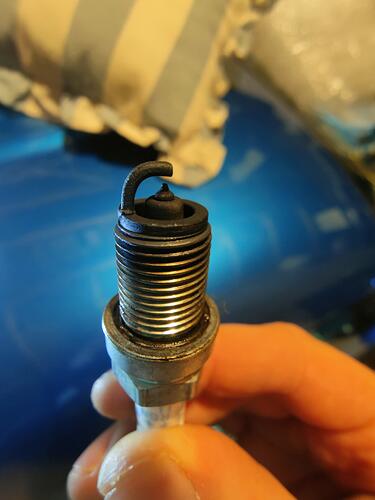
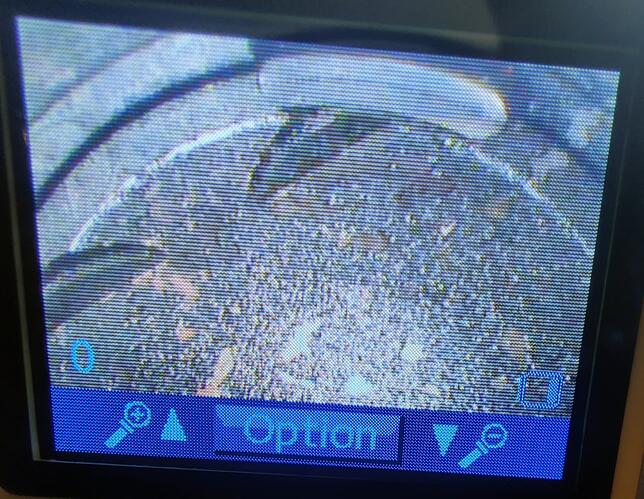
Finding time to look at this has been hard but I managed to get the plugs out and stick a borescope down there.
I’ll replace the spark plugs but there was nothing to my limited knowledge on them to suggest anything foul was happening
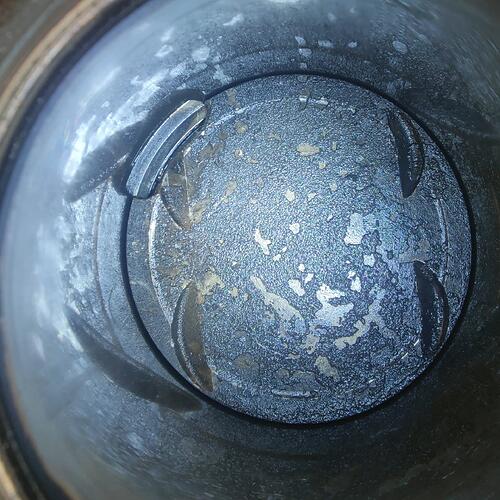
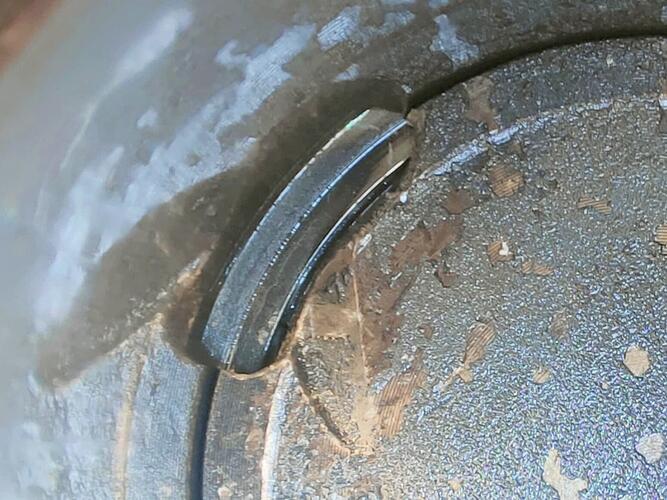
Here however is what I found in cylinder 3. I haven’t been able to get a better picture as the screenshot button didn’t work on the camera, but it appears to be a thin piece of metal resting over the valve pocket, which would explain the tapping sound. Because the tapping sound wasn’t immediate when the engine let go and only started when I was trying to diagnose the problem suggests it is a possible ring or piston top land that had failed on track causing the awful running, then had fired itself up on top of the piston and caused the interference.
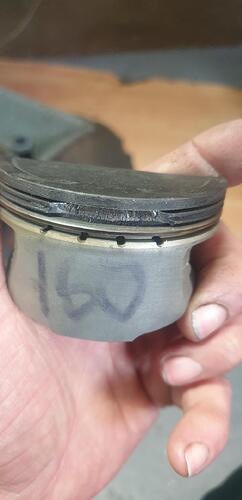
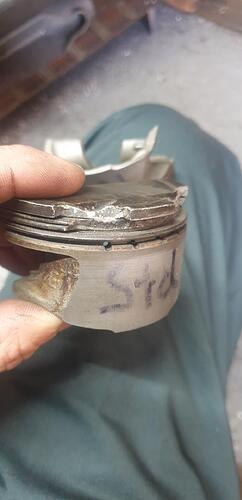
The image confirmed what I have standard pistons which is what I thought, a combination of power and age probably contributed to this kind of failure. The pistons are probably over 25 years old.
Here are a few images of the possible failure it could be.
This confirms that the head has to come off and properly inspect what it is. As my head is a VHPD unit I really hope it has no damage but this certainly points towards a bottom end rebuild
A small extra for the work I’m going to do is the PRT install. I’ve meant to do this for ages due to the laminova oil cooler I want to fit, this failure is now forcing me to finally install it.
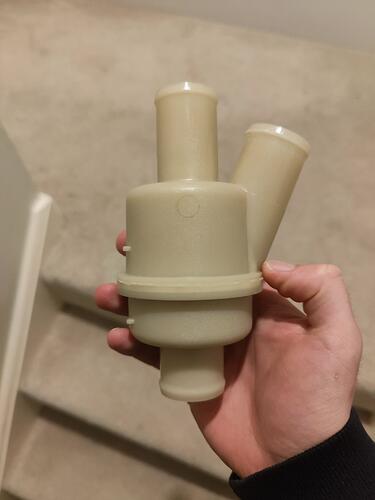
After some research I went for what appears to be a medium spring firmness, 82 degree unit. This is the same spec as the EP one but I picked it up for £17 on eBay. I searched Napa NTH1069 for those interested.
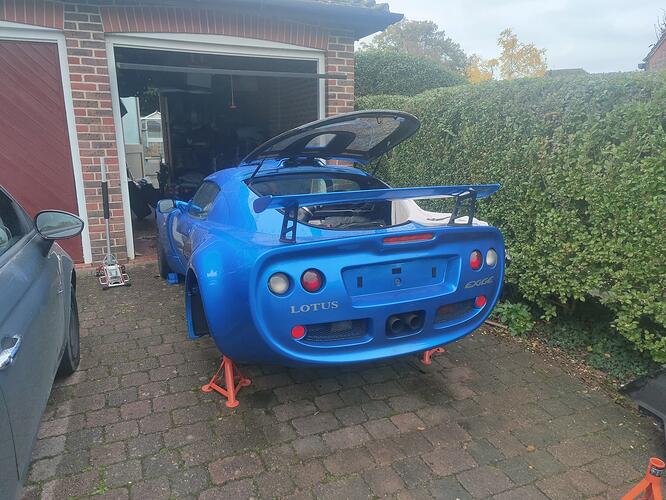
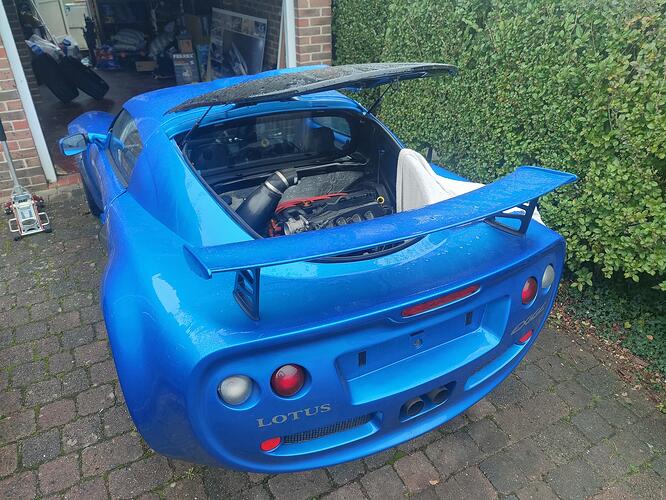
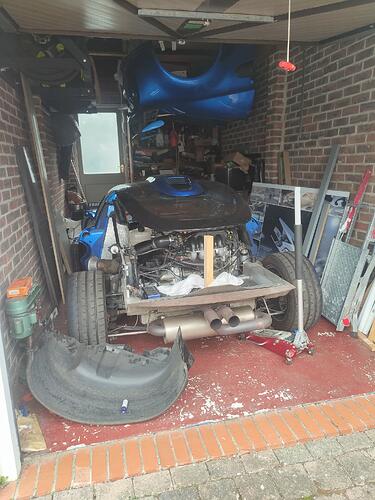
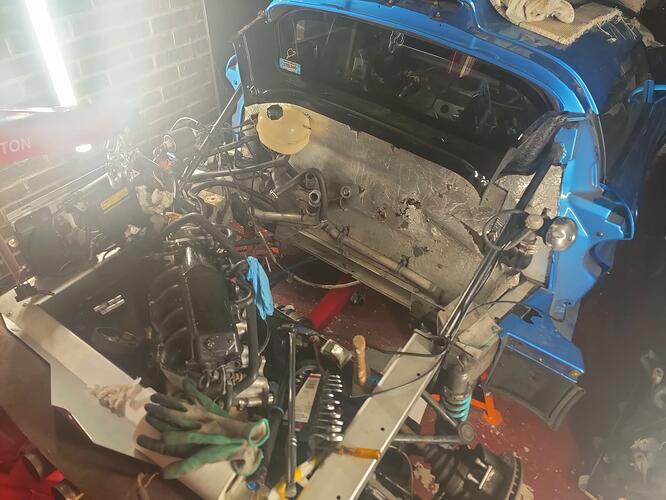
The strip has begun, wheeled the car out the garage and got to work removing bolts and fixings ready to take the rear clam off. Shame I don’t have a double garage for that extra space.
Up on axel stands I took the floor and diffuser off, engine bay side finisher panels off (the bulkhead one stays), wheelarch liners off, clam to roof fixings out and unplug the lighting loom.
There were a few other elements to undo. The air intake came off the throttle body to allow it to slide back off the clam side scoop. I was able to slide the alternator cooling pipe off the RH side scoop without cutting anything, but I imagine this will come off later for access. I chose to leave the sheer panels on the clam so these were unbolted from the longerons, with the ECU backplate unbolted from the LH sheer. The pull chord for the boot latch was disconnected and that just left the final numberplate bolt to undo.
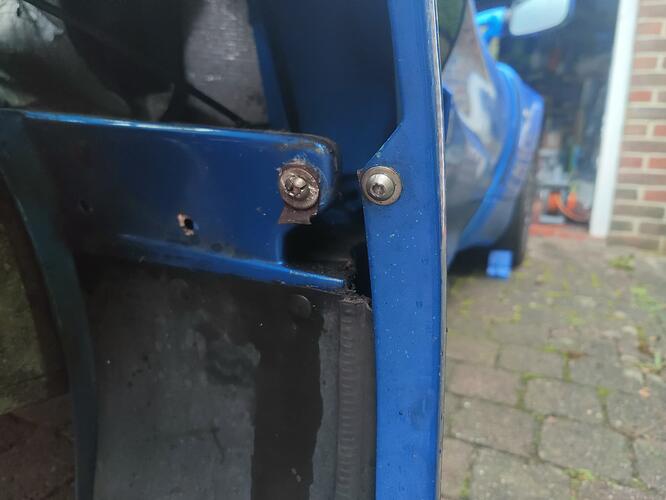
One area that held me up was one of the wheelarch to clam brackets. Both sides were pretty rusty but the LH came apart fine, the RH however was rock solid. The first attempt to undo the bolt twisted the bracket before rounding off the head on the clam end. The sill bolt I was able to get moving, but just ended up spinning in place. In the end I decided to cut the bracket in 2 as it was buggered anyway and deal with it later. I don’t think I’ll re-install these back again as they just get covered in too much crap and rust up. I’ll just put the bolts in the holes to keep aesthetics.
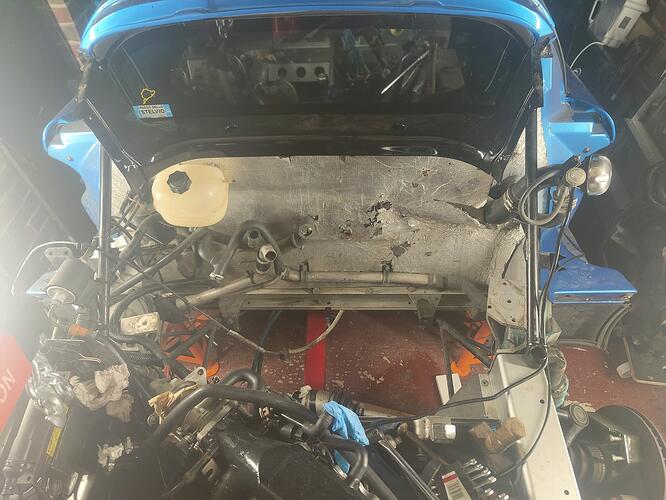
Clam slid off fine and has allowed me much better access to the bits I need to get at. I left the engine cover on the roof (which has the support struts bolted to the bulkhead finisher panel) on for now as the alignment was a pain so ideally I don’t want to touch this, depends how access is taking things off. If the engine needs pulling it’ll definitely have to come off.
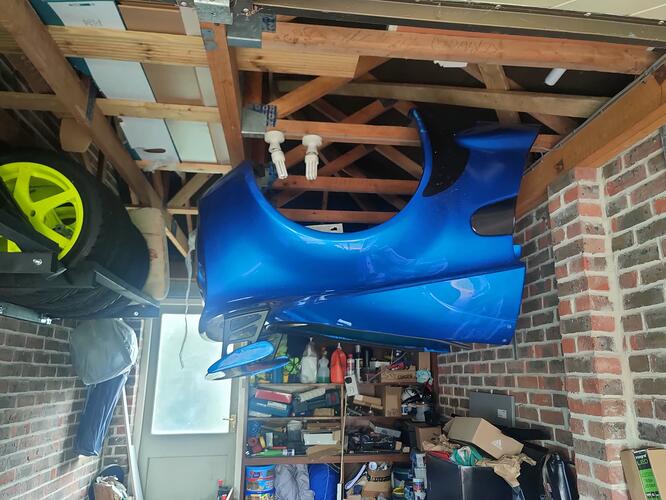
Finally I needed to get the clam out the way, so I used the undersill holes to put screws into the ceiling joists and some rope and bubble wrap to protect the paint to tie up the heavier back end.
I won’t bore with the strip down process as lots of better info and tutorials online for that, but this is what I found.
After taking the head off I found what I suspected, cylinder 3 had blown the top land to bits, exposing one of the rings. What is a little worrying is that I can’t find/see where most of the broken piston has gone. I found a few fragments but nothing that would make up the full section that has broken away. I don’t think the pieces would have gone down as the ring is still there, so it must have gone upwards and out the valves.
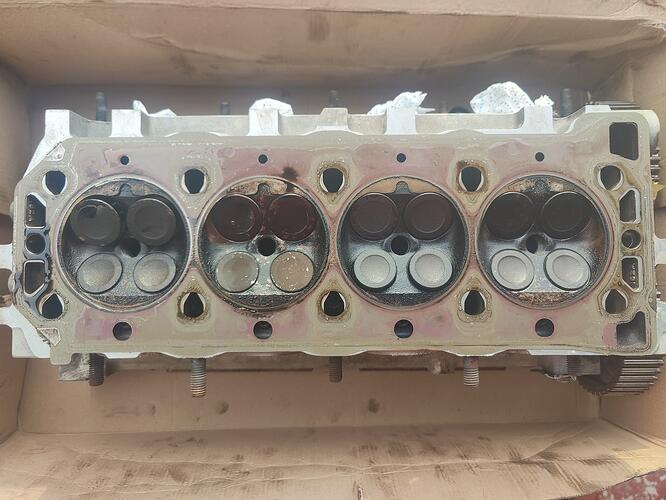
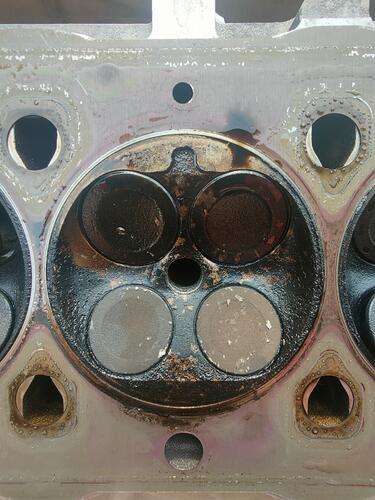
The damage on the valves and combustion area on the head, thankfully nothing too bad and I’ll have to see after cleaning them up whether or not I reuse or replace these valves.
I have always been intrigued about what head gasket I’d been running, finding out it was the Payen MLS gasket with additional shim. I think I will run the head with a new shim and “N series” gasket when rebuilding. The VHPD head is on its limit of being skimmed so the shim will not only add a bit of thickness back but will also help against the head possibly becoming too soft.
So new bits required are forged pistons as I never want to experience this happen again, new liners as I’m pretty sure these are originals and have some scoring. I especially don’t want to reuse them in the broken piston cylinder and after a quick measure with a straight edge a few were right on the limit (3 thou) if not under tolerance on clearance, so they’ll be coming out anyway. Finally new steel rods will go in with new bearings to hopefully bullet proof the bottom end.
I’m not too sure what would have caused the piston to fail because I never take the car above 6000rpm, so unlikely to be rpm related. However, the reason I only rev to 6k is because I was told the engine ran really lean above this, so pinking/detonation might have been a factor too, along with general age and fatigue.
Thankfully the head seems ok which is the main thing and I will tear it down and rebuild it too as I want to flush everything through to remove any possible fragments of piston before I reassemble.
Interesting that the piston has disintegrated!
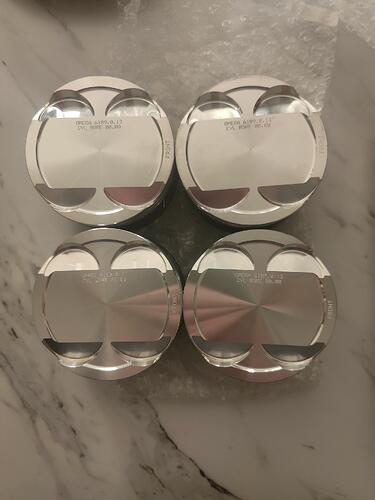
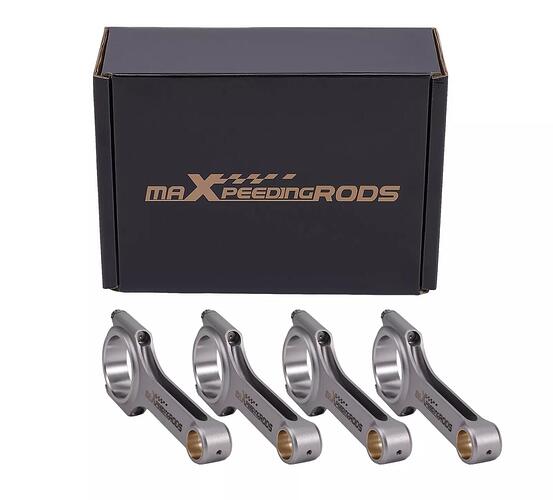
Not much development so far but a few purchases, brand new forged Omega pistons and Maxpeeding Rods.
Along with these I’ve got Mahle Motosport Conrod bearings and Glycol crank bearings as these experience much lower forces than the Conrod bearings. The engine will also be getting new Westwood liners along with all new components for the rebuild.
A final decision I’ve made is to install an Electric Water pump to keep temperatures constant in traffic and some Vernier pulleys to properly time it all up.
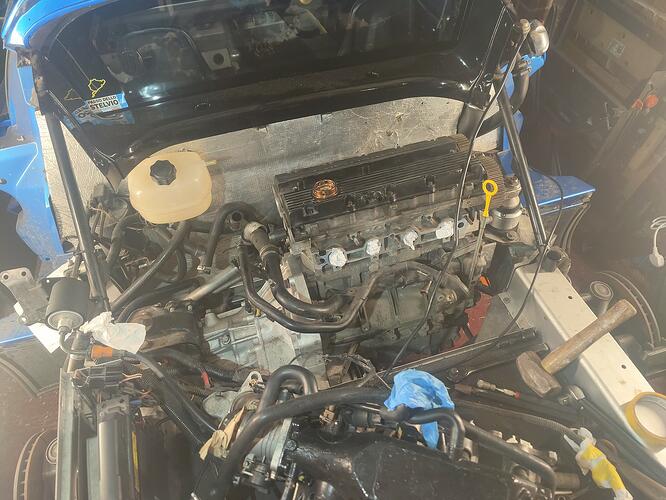
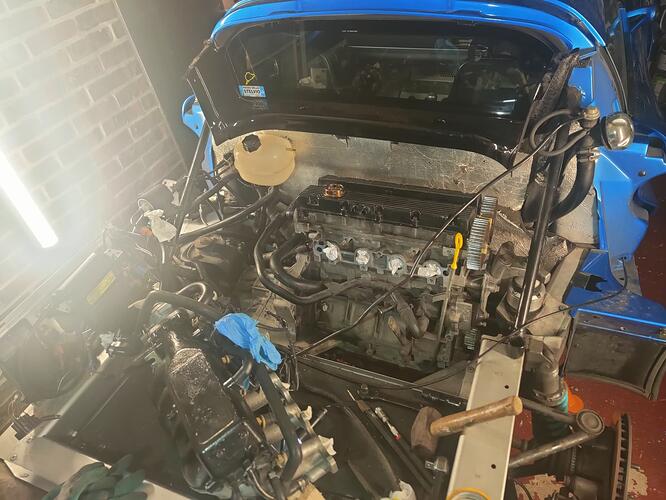
First step to get the engine out was to remove all the ancillaries. This included the exhaust manifold (a pain as it is a solid manifold it only comes out with the oil filter and 2 engine mounts removed), inlet manifold, coolant pipes, earth strap on the gearbox, gear cables, alternator, clutch slave, throttle cable, starter motor, sensors (crank/lambda/coolant temp etc), coil pack.
I had to wait to borrow an engine hoist so this was as far as I could get at the time.
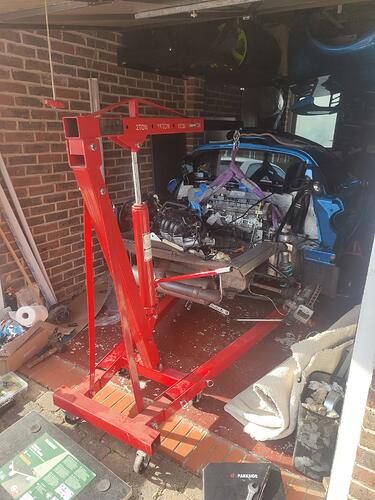
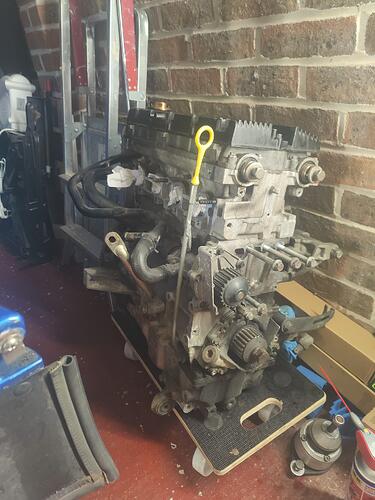
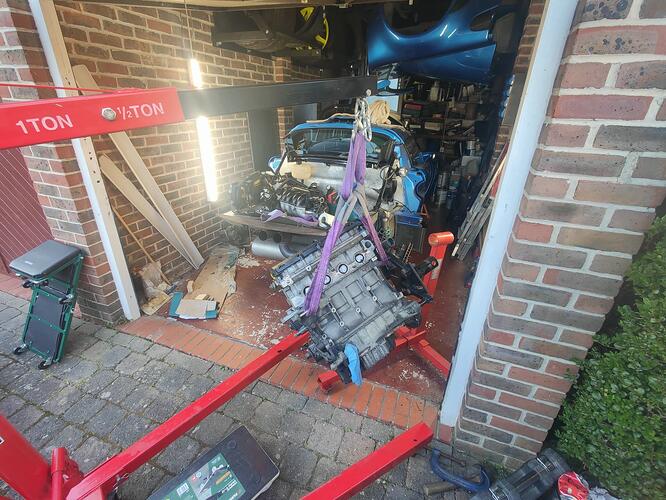
Good progress made finally getting the engine out. Hoist on its longest setting and chain as short as possible due to the limited height of the garage door.
I couldn’t get the car out to allow for more headroom as my garage is at the top of a slope that I don’t think I could push the car back up.
Another reason I didn’t get the car out the garage was because I had to take the top hub bolts out to give room to knock the driveshafts out and I’ve left these bolts out for now.
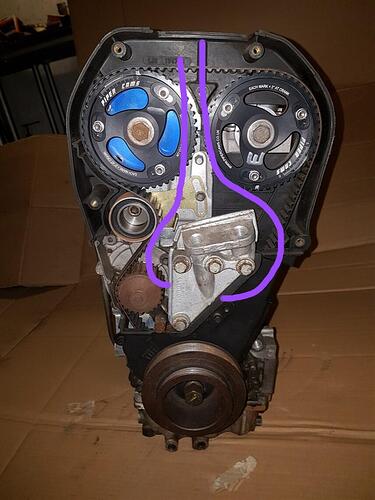
One problem I did come across was where to hoist. The gearbox end was straight forward but I ran into a couple of issues on the cambelt end.
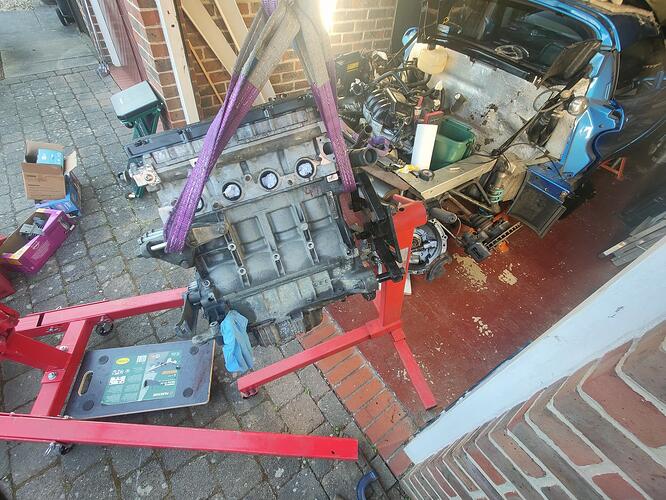
First (as shown above) I looped the strap around the RH engine mount which was nice and stable, but I couldn’t get the clearance past the diagonal chassis brace. I removed the mount and thought it was a good idea to use the alternator mount, however after lifting the engine up again it tilted really badly, should have known better.
The final mount point I used was to loop the strap through the mount that goes into the block. This was strong and kept the pivot point even and straight. I did remove the cam pulleys as I didn’t want the strap to put pressure on them. The engine came out quite easily after this and it was dropped down onto a little dolly trolly thing.
I had to remove the 2 sump bolts and the other bolts between the gearbox and block and slid the box off the spline.
Before mounting the engine on the stand I need to remove the clutch and flywheel as the mounting points lie behind these.
With the engine out I have much better access to plumb in the electric water pump and the laminova. I did notice inside the inlet plenum a large amount of oil in the 3rd chamber from the blown ring land, so I’ll have to split the plenum and clear it all out and chuck a new gasket on.
Hopefully the engine can be fully torn down shortly.
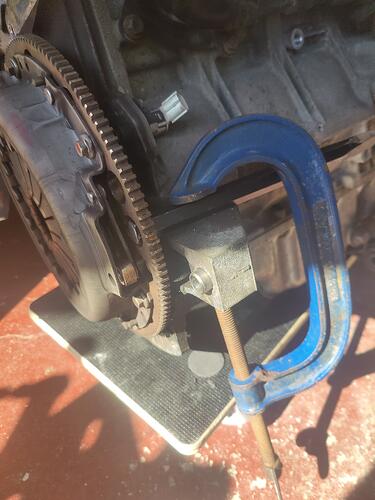
To lock the flywheel and clutch I used a thick chisel and G clamp through one of my TTV flywheel holes. The clutch bolts were easy but the flywheel required more force to overcome 80nm and threadlock, the force wanted to pull the engine over and off the dolly.
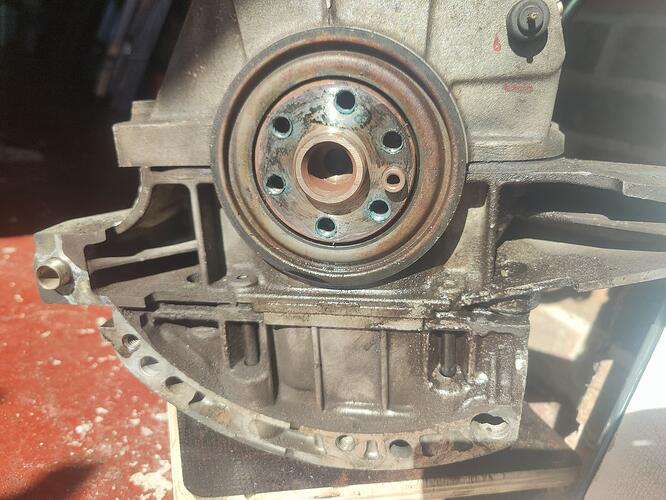
The flywheel also needed gently prising and hammer tapping all around to get it off the crank and dowel. Something has been leaking but the clutch and fly looked dry, so not too sure where and when it has leaked. I have a new crank seal from DVA but I am not looking forward to taking this old one off and putting the new one on.
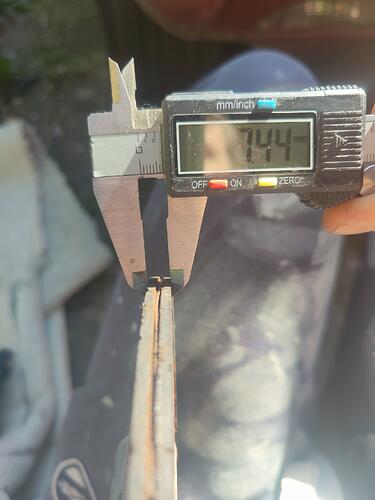
The AP Racing clutch is reasonably new, but I still wanted to check the tolerance out. It averaged around 7.46mn so has plenty left. The service limit is 5.6mn
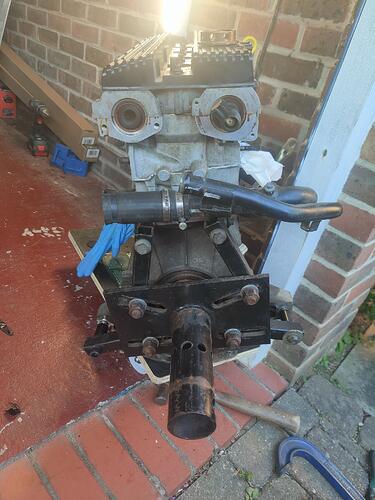
Next I decided to put the engine stand brace onto the engine first as it would be much easier to get the mount points in position this way. I had to use the starter motor bolts for the top mount as they were longer and a combination of what I had lying about for the lower as the locating dowels for the gearbox meant I needed quite long bolts.
I decided to use the alternator bolt again for this lift as it wasn’t as critical for the engine to stay level and the mount I used before was off and I couldn’t be bothered to put it back. The other hoist point was around the mounting plate I’d just fitted.
Due to the funny tip angle of the uneven hoist I slid the stand onto the brace with wheels in the air and then slowly lowered it back down, locking it off with its pin before removing the straps.
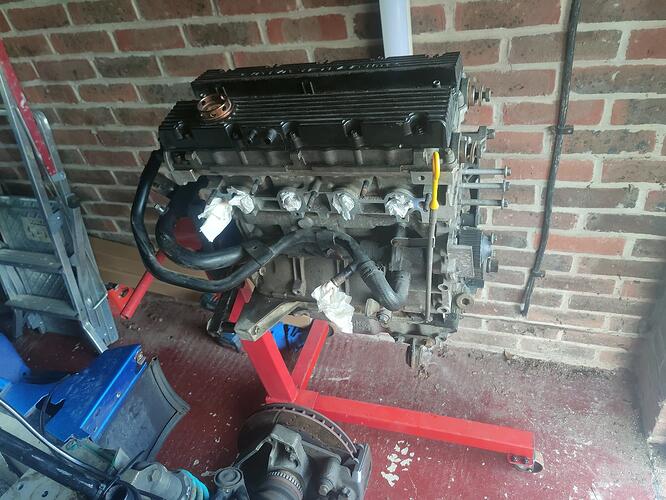
Finally I rotated the engine back up straight and called it a day. Next step is to take the head off, flip it upside down to drain the last of the fluids and then begin the tear down.
