Crikey! Will CL offer any advice on what went wrong?
Think they basically said because Yvo buys his stuff through Holland and not the UK I’d have to contact him.
He sent a very long and informative email back to me explaining how he had done a lot of research into this and basically concluded that there is something in UK road grit that causes the pads to disintegrate. He said no other country seems to have this issue and the “faulty batch” rumours are spread by resellers wanting to keep business. He also pointed out CL clearly state they are performance pads for track or race only (I use on the road for the majority of the time) and that being sintered they are quite an open structure, so water can get into the pad material.
He was happy to file a report with CL but he also said they’d want to know the exact driving conditions/details of the pads (clearly I was driving on the road so that would be case closed as far as they would be concerned) and would also want the pad back. With Brexit and new customs he said to post them back to CL for inspection would be around £50. For pads out of warranty and with no real leg to stand on I chose against taking anything up with CL.
This is due to various EU laws such as TUV and its incredibly expensive to get type rated so they use that as a disclaimer and keep costs down
Be curious if any other UK guys had the same experience with CL pads
So pads sorted it was off to Cadwell, arguably my favourite track. I do like to push my car hard on track, so it isn’t too surprising when the car breaks, this one was my own fault.
A hot July day and a red flag meant I ended up doing basically 2 sessions back to back with a very little break in between. Coming to the end of the second session suddenly smoke poured into the cabin and I could smell a very strong burning smell.
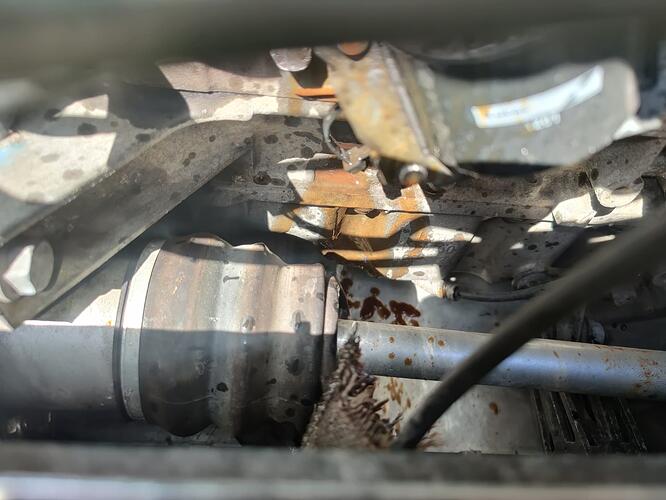
Quickly got back to the pits and popped the engine cover to find this…
Blown CV boot threw grease all over the exhaust and up the engine block. Thankfully it didn’t catch and cause a fire, one more lap without noticing the smoke and smell and it might have.
Clearly the 2 sessions back to back caused too much heat from the exhaust and the old rubber couldn’t handle it. This was the driveshaft I changed earlier in the build that I sourced from Junks. It was new old stock so rubber was probably way past its best.
Unfortunately with no spares that was my day done before lunch time (again). With the snapped gear cable, ECU problems and this blowout, that was 3 trackdays in a row I didn’t make it past lunch.
A lot of the rest of the day was spent under the car wiping all the grease and trying to glue the hole back together to get me home.
Near the end of the day I took the car out for 2 very slow laps to see if the bodge would hold for the journey home, which it thankfully did and it gave me a reason to refresh the boots.
Had the same boot failure on my s1 and have seen it twice at tracks on another Exige and a 340r. Check those boots regularly for damage.
CL have a long history of crumbling or coming off the backing plate so I’d be very cautious.
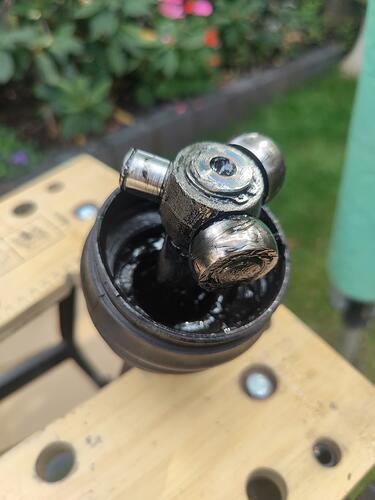
I had to repair the boots and decided to do both inner CVs.
Rather than drain the gearbox again and remove the whole driveshafts I decided to leave the end splines inside the gearbox and remove everything else.
As always the hub bolts were a nightmare to remove, I was surprised the RH side was as that was new when I replaced the driveshaft during the build. Quick drill and Dremel and they spun off.
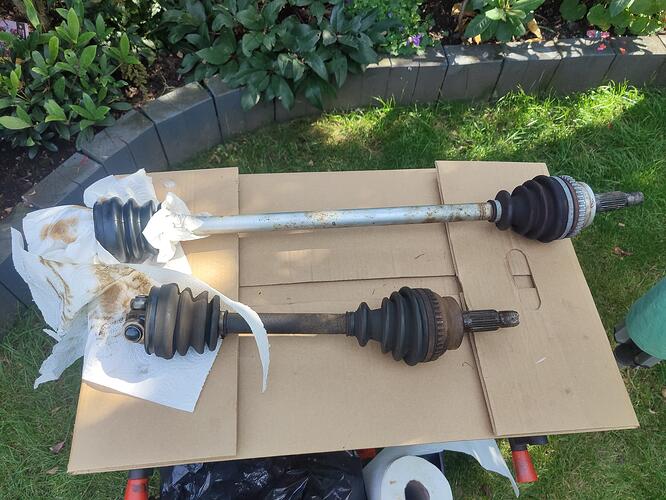
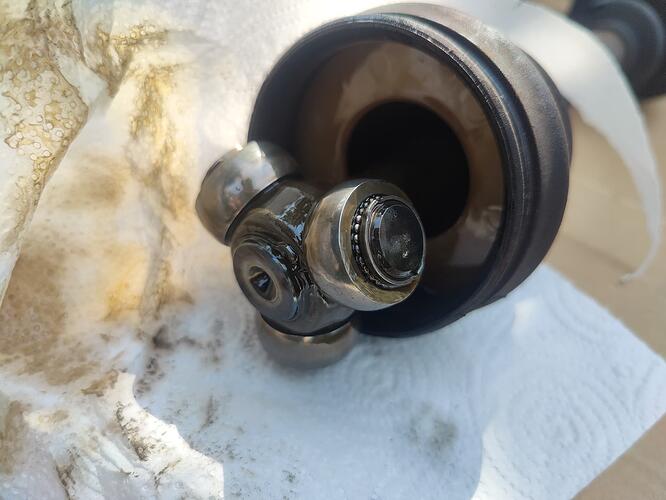
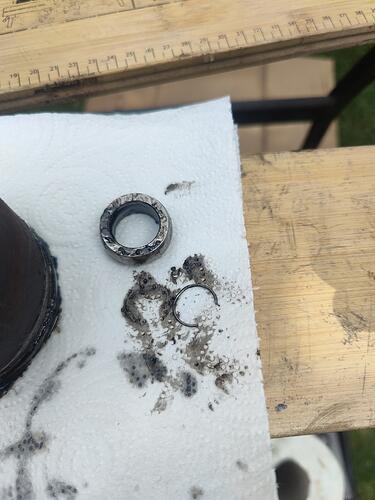
The tripod ends are held on with a circlip, which as I didn’t have the proper tool was a little tricky to remove, I had to use long nose pliers. The first circlip flew off and landed in the flowerbed never to be seen again. Thankfully I kept the old broken driveshaft so I was extra careful with this one and the short driveshaft to retain them. Wish at that time I had my garage and better workshop space.
I made sure to keep the plastic disks that are inside the CVs to reuse them in the new boots. I couldn’t figure out any other way the new boots could go on without taking the tripod off.
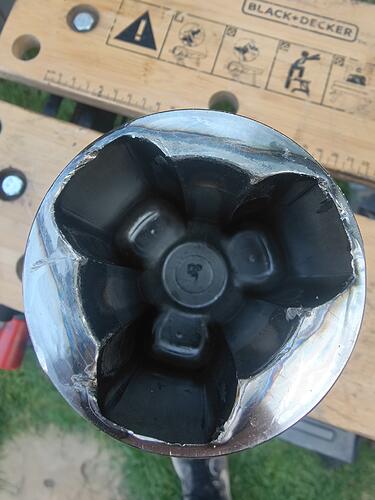
The old driveshaft was definitely broken, with one bearing on the tripod disintegrating when I removed it from the cup. I was planning to keep this driveshaft as a possible spare but after seeing the damage to the cup and how the rod was actually slightly bent (probably from the force when the hub bolts snapped) it was of no use.
I did keep the old but undamaged boots as spares for any trackday mishaps in the future, hopefully never needed. I paid quite a bit for the proper inner CV grease, not sure if people just use the much cheaper outer grease for the inners too but didn’t want a repeat of the same issue if the outer grease can’t withstand heat as well.
I didn’t take any pictures of re-assembly but basically I greased up the tripod bearings after sliding the new boots onto the shaft and added the circlip (with difficulty again).
I then decided to fill the cups with grease rather than the boots themselves to keep mess to a minimum. It came in a caulking tube with enough for 4 boots, so I marked the intervals and squeezed equal amounts into each of the 3 grooves in the cups.
I was a bit stupid when ordering the new boots through EP. They didn’t have their own brand inner boots in stock and not wanting to spend a crazy amount for genuine boots and being impatient I bought 2 outer boots thinking they’d be fine. The issue I had was that the outer diameter is slightly bigger than the inner ones, so when I went to squeeze the metal retention clamps together I was struggling to get it tight enough around the cups. There is a slight groove in the cups that the clamp tightens down onto and I even thought of bypassing this so I had a bit of extra diameter to get it tight. I went through a fair number of these metal clips before I eventually managed to hit a sweet spot where I felt they had clamped tight enough in the groove. So far there has not been an issue of leakage and I have got away with it for now, but this could also be down to the better/proper inner grease being less prone to becoming too ‘unviscous’ and runny, finding a way to escape.
In short buy the right parts for your cars! Don’t bodge as much as I have done ![]()
More on this area soon
It’s a real shame about the CL pads having a history of breaking up as (for me) they give lovely pedal feel.
Do not be fooled by UK road grit story. My Dutch mates who used them on the ring on various cars had the same issues with CL. Can become very dangerous very quickly. 106, 130i, m3, to name a few.
Neglected this thread again, will try and add to this more regularly.
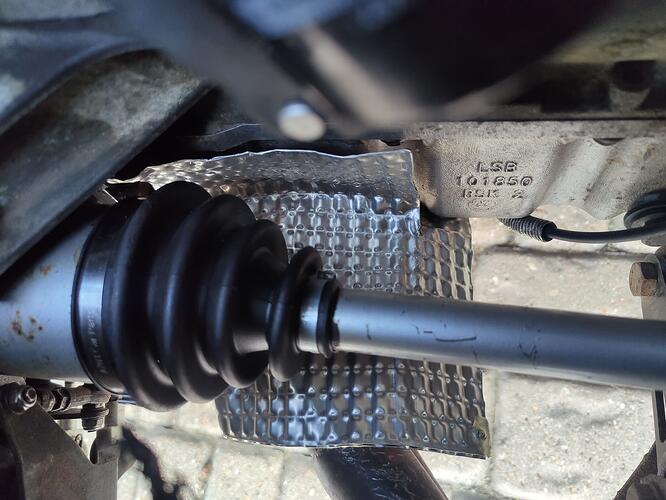
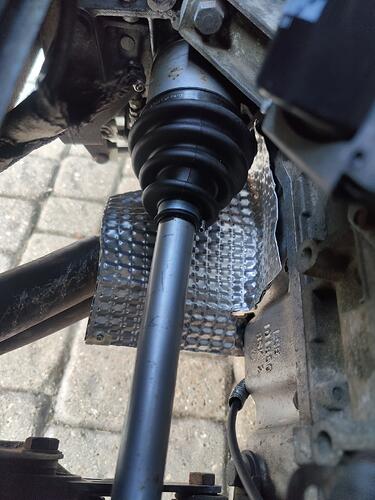
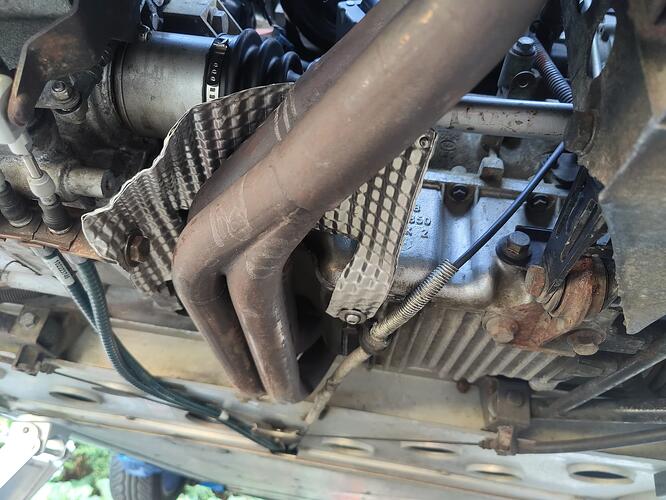
After getting the CV boots back together I decided that even with new boots the likelihood is that the exhaust heat would just cause another blow out, so I bought some nimbus heat shield and looked to see where I could fix a sheet to.
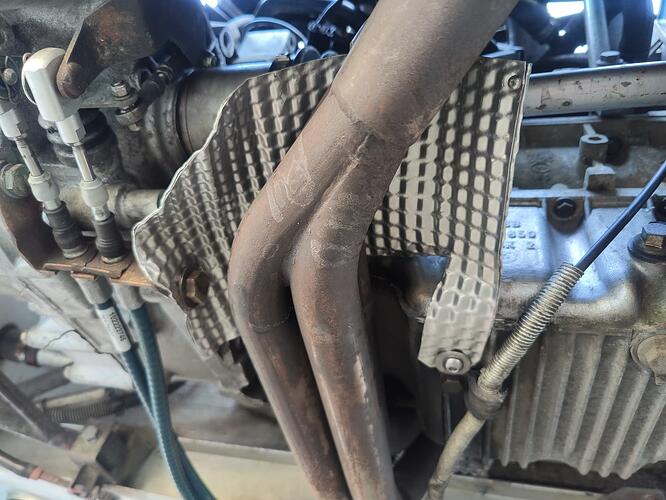
I found a spare bolt hole on the sump and decided to use the fixing for the gear cables as another point. Out came the cereal cardboard and I mocked up a template. I realised I had enough nimbus to double the thickness, so I pop riveted them together as I thought any glue/resin would melt from the heat.
I also wanted to provide some heat protection from the sump which is why the nimbus bends up around the CV. There isn’t much room but the edges stay well out the way of the boot so shouldn’t snag.
After a spirited drive I did a touch test and seems it provides a decent amount of protection, so we’ll see how it holds up. I suppose even if it does go again hopefully the shield should stop any grease hitting the exhaust and catching fire ![]()
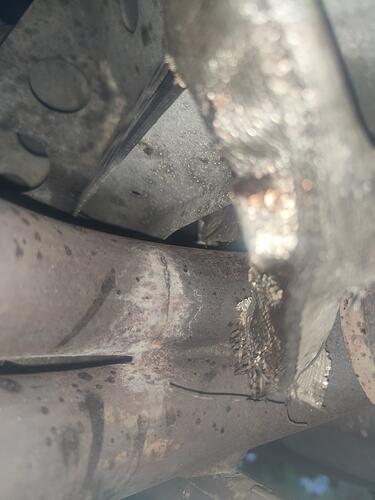
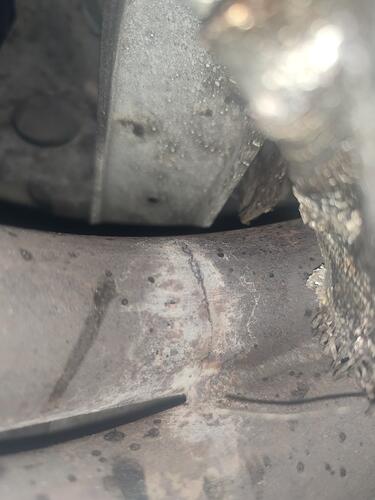
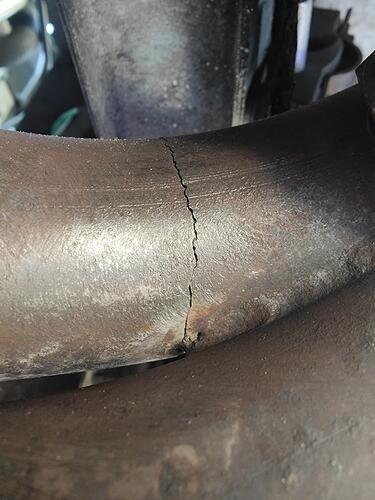
While I was under the car I noticed that my exhaust manifold was a bit discoloured. Upon further inspection, I noticed that there was a crack where the manifold turns to the decat pipe.
The exhaust gas was starting to discolour the subframe immediately above it. I have no idea if this has any effect on the metal but remembering I had some left over aluminium sheeting I made a crude plate over the crack to deflect the escaping gases away from the subframe. I have no photo of this unfortunately.
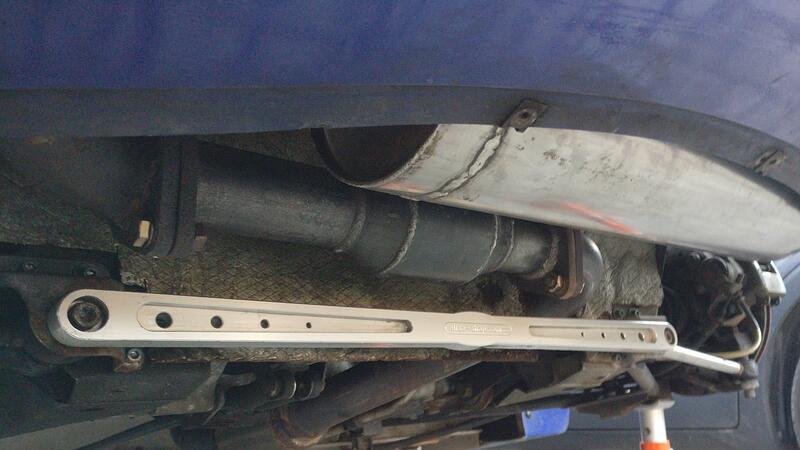
After clearing up the crack it definitely needs welding, unless there is a putty or similar that will fill the gap and withstand the heat from trackdays. What is unfortunate is that to weld the crack the exhaust would need to be removed, which is obviously more involved than just removing a flexi section, which is why it hasn’t been done yet…
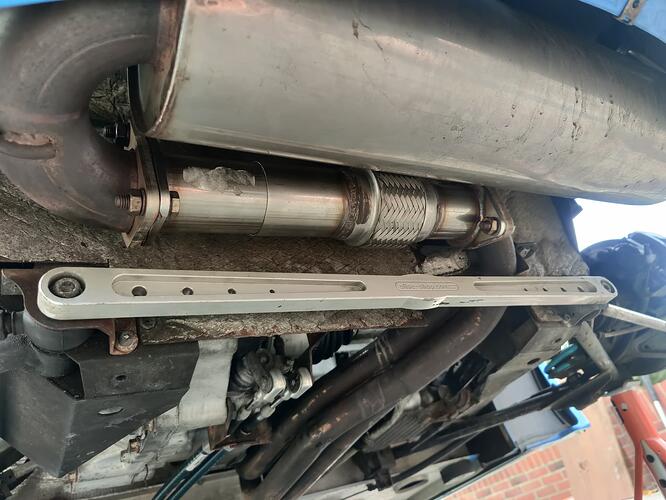
I was aware that solid exhaust manifolds have a tendency to crack more easily, but I was hoping that the stiffer vibratechnics engine mounts would have prevented this. This meant my solid decat had to go.
In its place is an Eliseparts flexi-decat which will hopefully stop it getting any worse and it happening again when I finally get around to fixing it.
After these were fixed I had a good summer of driving and going to shows. No trackdays unfortunately but the reason for that I’ll explain in another post.
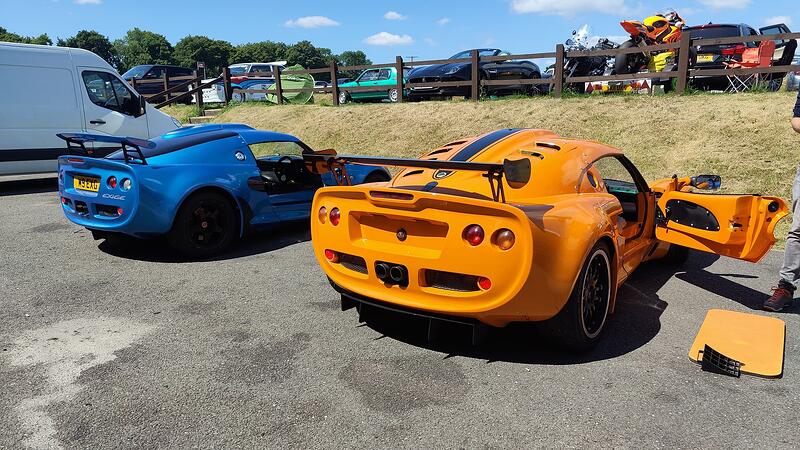
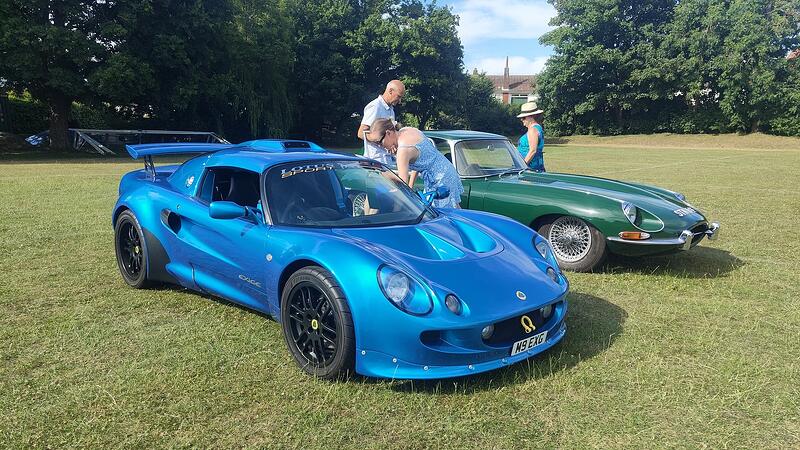
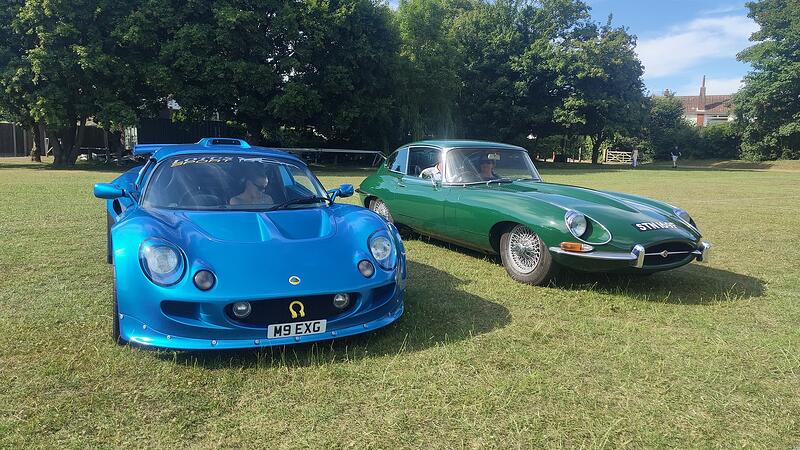
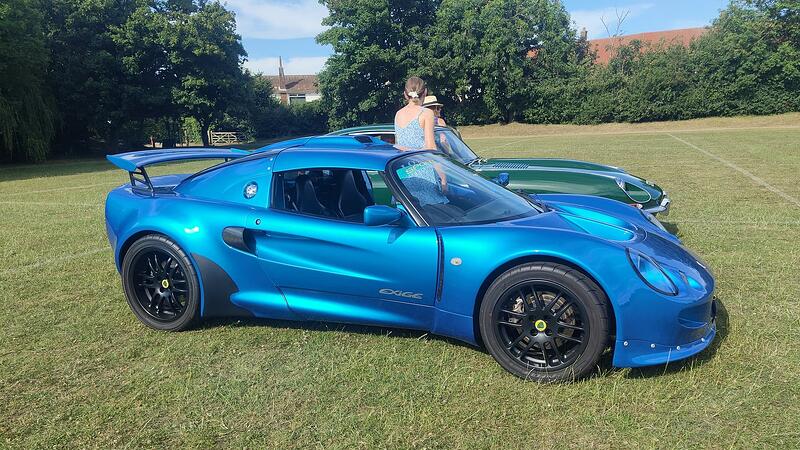
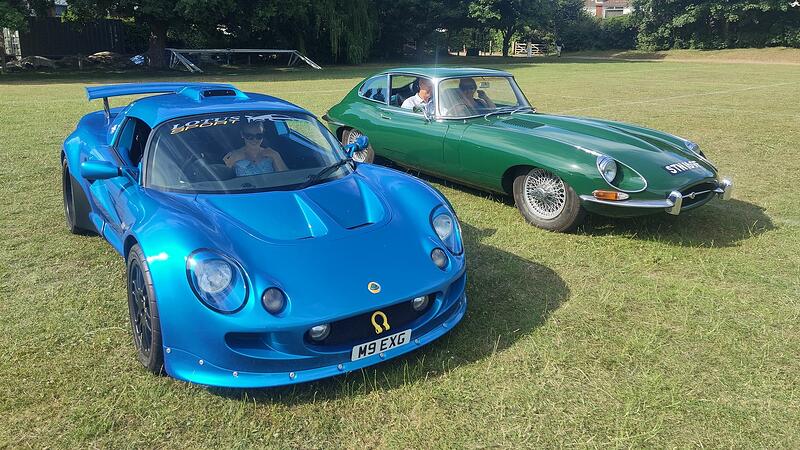
Few photos from Epping’s little car show, was baking that day and dad too his E-Type out too. The car got some good attention which is always nice, they’re not common cars even when there’s fake ones to boost numbers.
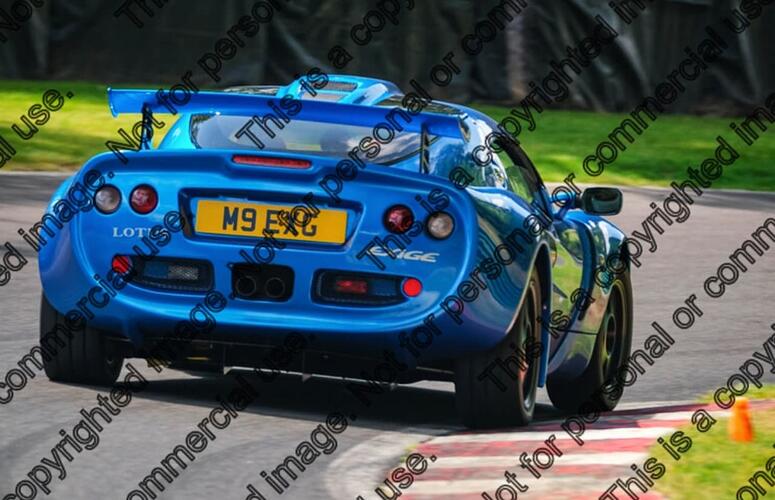
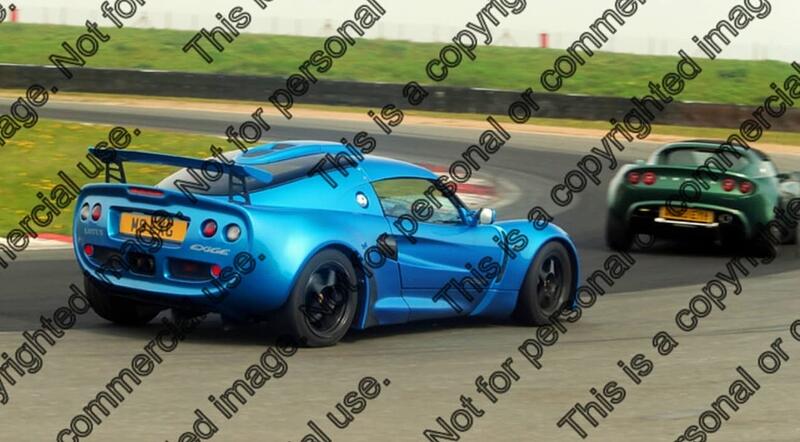
Little action shot from Cadwell I forgot I had saved (before it nearly caught on fire)
Edit, found a few more trackday shots
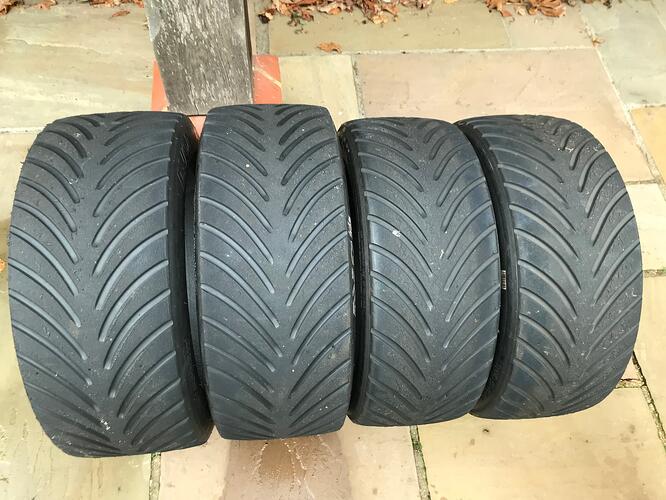
A few reasons why I am now doing more winter/off season trackdays; half the price as summer, not as harsh on the car in heat and the purchase of these
Purchased very reasonably from well known Lotus owner Andrew Hamilton, lovely bloke and great collection of cars in his garage.
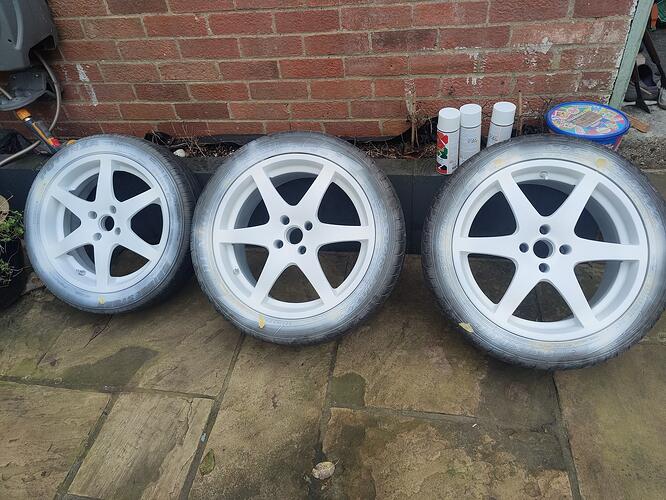
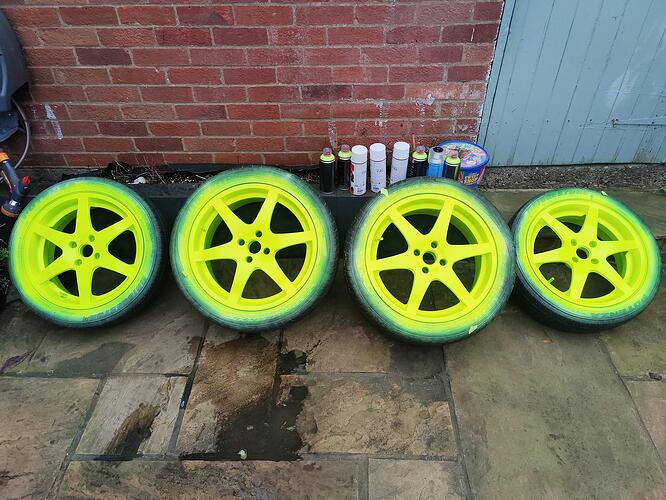
With these tyres I needed new wheels so I went scouting the internet. I originally wanted gravel rally style wheels as I thought these would look pretty cool and quite a juxtaposition on an Exige but finding 16/17" wheels in this style with a workable pcd was proving impossible. After searching high and low for cheap 4x100 pcd that were the normal suspects I found these S2 wheels for £165 for the set! All straight and just in need of a refurb and solved the awkward pcd and sizing issues.
I placed a small sand disk on my cordless drill and gave them a blast over to remove the majority of chips. I then went over with a bright white primer ready for the colour… (Old tyres on them so wasn’t worried about taping them)
I went for quite a bold colour choice, a highlighter yellow. I thought if I’m using the tyres the weather will be dark and miserable, so these should brighten things up and look good against the laser blue too, a bit like the stars on the rally Impreza of the naughties which were my favourite cars as a kid. I sealed them with a can of clear lacquer.
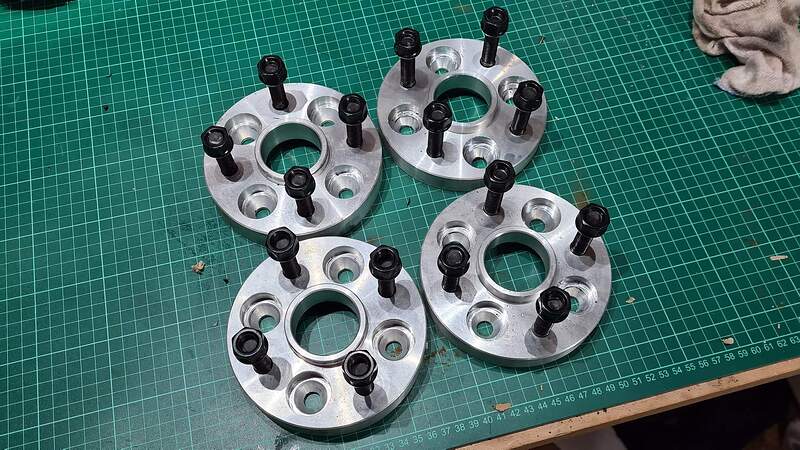
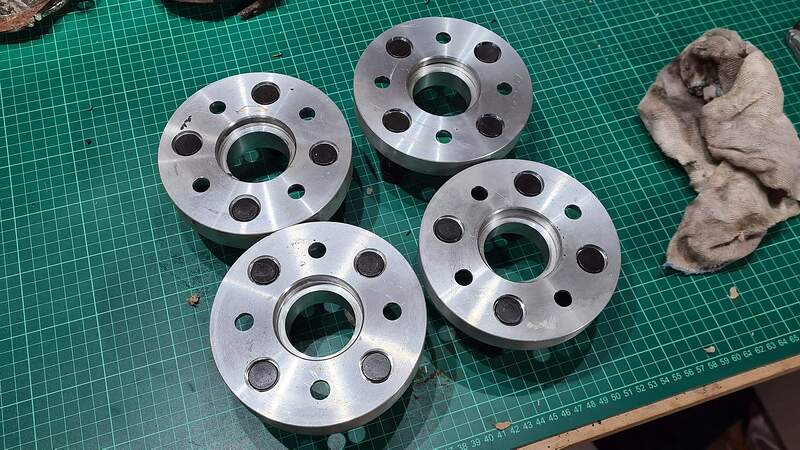
As I was able to source the wheels/tyres so cheaply and did the refurb myself I was able to use money to get some hub adapters. I still haven’t been able to test fit them on the car, but I imagine the extra 35mm offsets won’t be an issue with clearance because of how wide my Exige tyres are on the road and have had no problems.
I now have much more confidence to book winter trackdays knowing I have the best rubber to help keep me out any barriers! So far however the rain has stayed away which I suppose I must take as a positive thing!
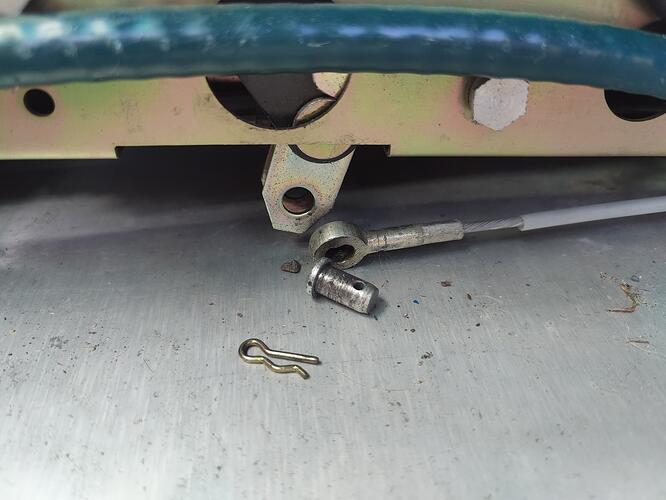
Few other little bits, at Cadwell I randomly lost the handbrake. It wasn’t a problem on that day as I don’t use the handbrake when on trackdays, but I had my MOT soon after so needed to be sorted.
Thankfully, it was an easy fix where the locking pin had fallen out and was under one of the seats. I popped it back in and put the cover back on.
The car unfortunately failed its MOT because of the handbrake due to the cable needing adjusting to lock the wheels a bit better. The cable couldn’t be tightened any more so needed to bodge an extending washer/packer piece to bridge the gap between the bump stop and cable end.
I was lucky enough to source a radio delete panel for the interior. A much cleaner look and I never listened to the radio anyway, so a nice little weight saving too.
Good to hear from you again, James. Car looks very well.
With my new swanky wet tyres I decided to book a cheap December Bedford trackday to be the last of 2022.
The day was a little delayed starting because of frost but then the morning went well and was staying dry. Then on the final run before lunch I kept hearing a clunk on acceleration.
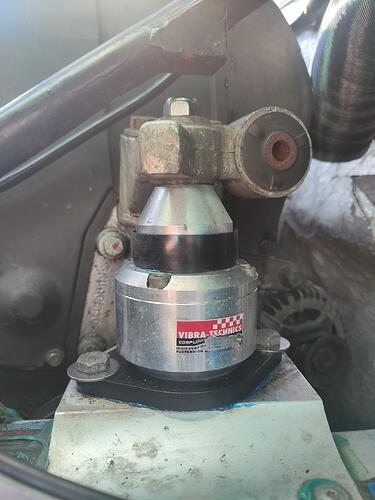
Inspecting over lunch I found that the RH engine mount had snapped and the engine was rocking backwards and forwards.
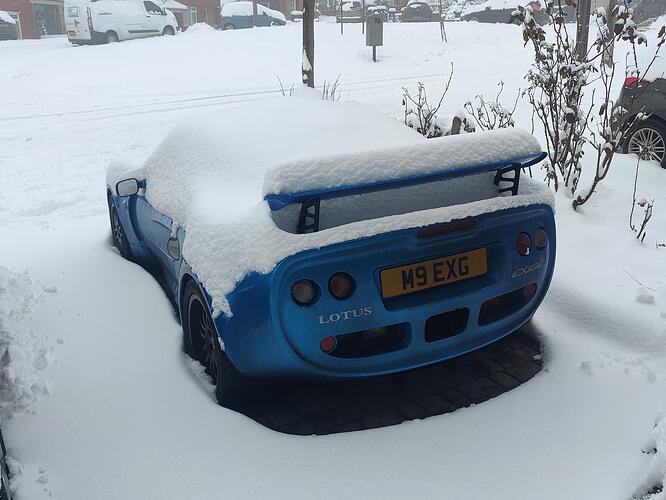
This obviously put an end to my day, making it 4 trackdays in a row I didn’t make the afternoon session. A slow and steady drive home where I forgot the car cover, which went well…
I had to remove most of the snow from the windows and roof otherwise when it melted it would have run straight into the car as my roof still doesn’t have any weather seals on it yet.
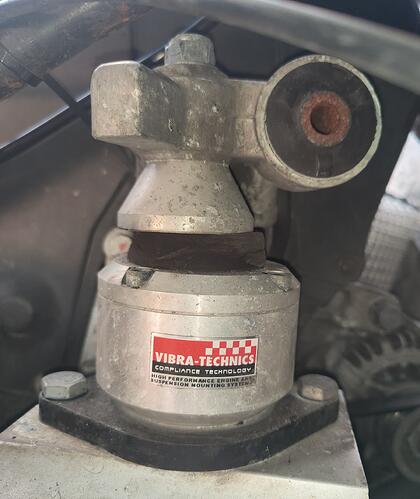
I’m really disappointed in Vibratechnics, forums are full of stories of the main mount snapping and awful customer service. If I knew before then I’d have gone EP when going for mounts.
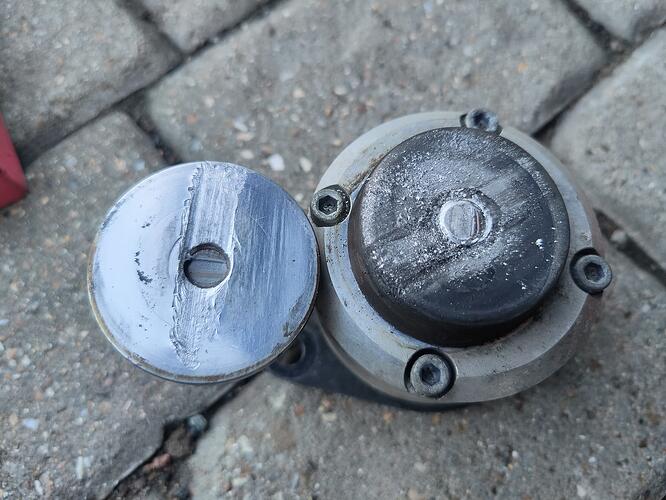
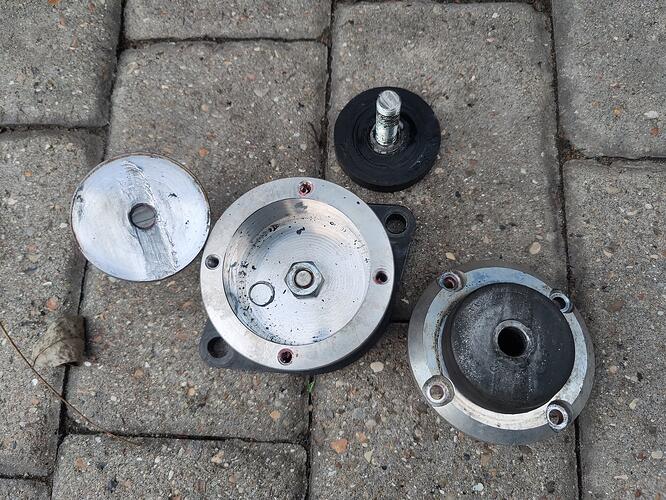
I propped my engine underneath and removed the main mount, really clear what happened here.
Pretty clear what had failed, the main through bolt sheared clean in half.
The rocking back and forward had worn a groove into the top cone piece.
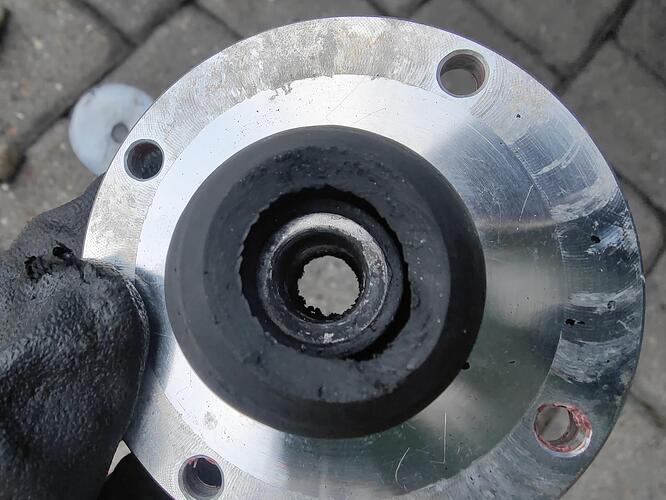
Not only had the bolt snapped, the actual rubber on the inside of the mount had completely split.
Overall, I find the design really poor. I did email Vibratechnics with pictures and a description just to see what they would say and all they replied with was ‘send it back to us and we’ll investigate’. No apology, nothing constructive and I thought it seems pretty obvious what failed so not sure what would need to be investigated. Their attitude annoyed me and the fact they have had many failed units and they’ve never changed the design and plough out the same shite product.
I thought I was at no loss to try and fix it myself and improve their crappy design.
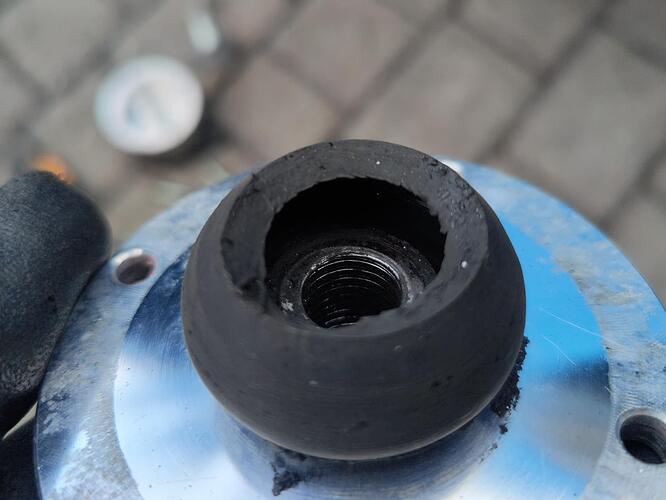
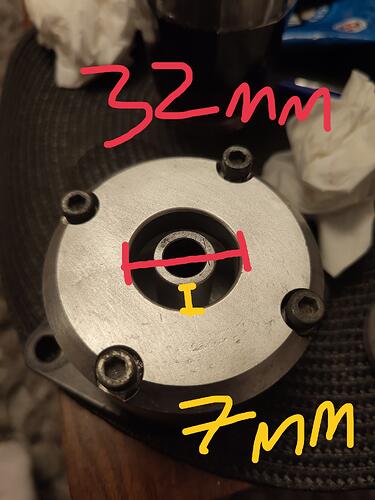
First design flaw I (with help from my Dad) found was the distance between the central sleeve and the cap opening. All the forces are being transferred through this small section of rubber. No wonder the metal bolt fatigues and snaps so frequently.
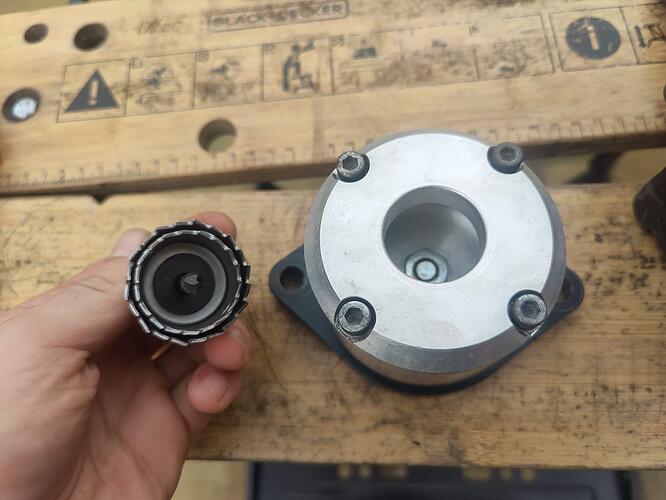
The first modification I did was to open this gap up to allow for more rubber to absorb the stresses. Unlike opening up normal holes I had no initial way to keep the drill centred. I decided to use two hole saw bits together, one that was the same size as the original hole 32mm and the second the next size or two up.
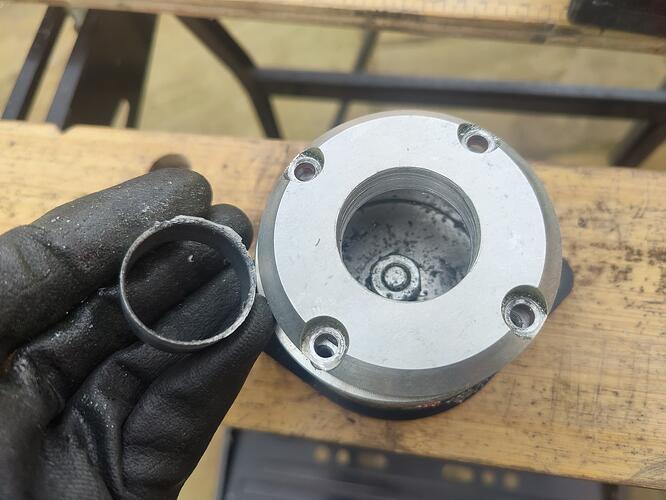
Slowly but surely the shit cheap bit cut through the aluminium. I didn’t want to go too big here otherwise the top part of the rubber wouldn’t be supported.
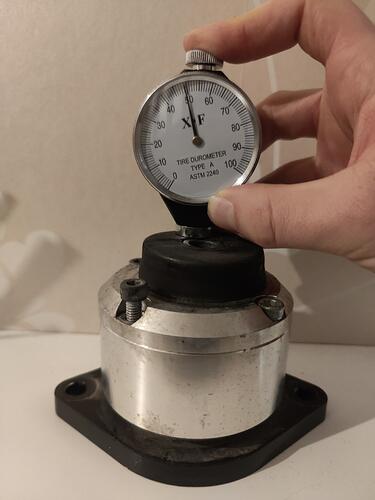
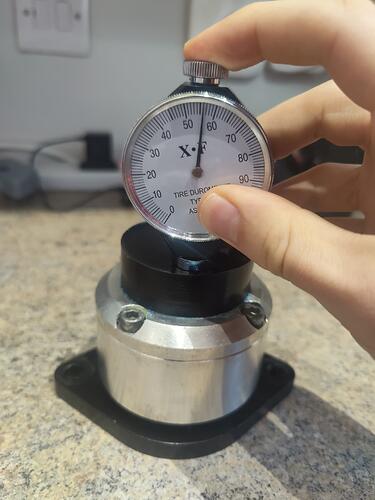
I would have to cast new rubber, so I bought a durometer to measure how hard the PU was. I measured around the top surface of the original and got a mean score of 50.
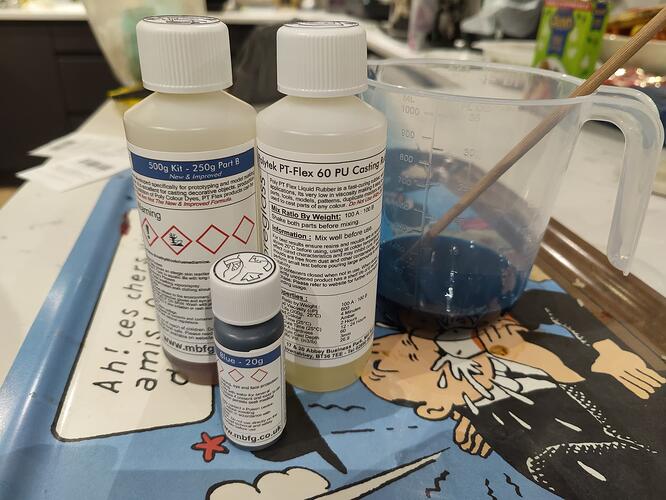
I decided to go a bit harder for the new rubber and bought some 60 PU liquid rubber. I also bought some blue colouring to be a bit OTT.
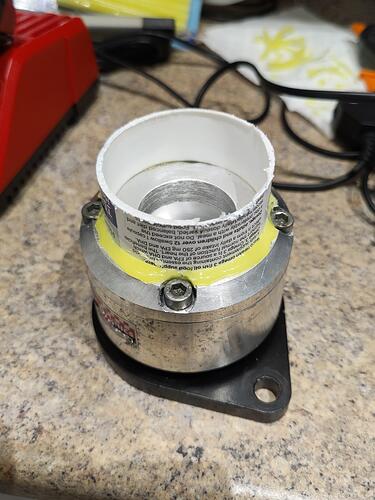
Another modification I decided on was to make the rubber plinth the top cone piece sits on wider, as the cone sat over the edge of the original rubber, which seemed a really stupid design. By making the rubber wider I thought it would help dissipate the loads and forces better through the mount. I searched for a piece of plastic the right size to use as a template, one as large as I could go to still be able to use the fixing screws in the cup. I used a hot glue gun to fix the plastic as this glue would create a seal and be easily peeled off afterwards.
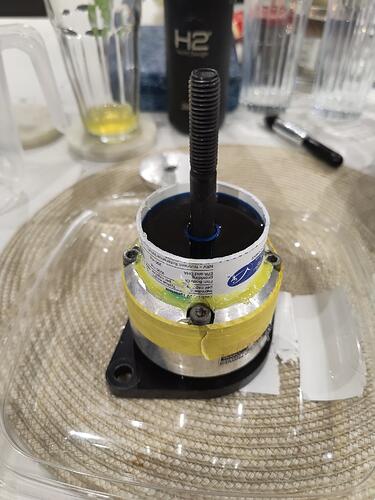
I taped up the gaps and mixed the resin, pouring it quickly before it set. Another difference between the shite vibra and my version was that I filled the whole cup with resin. I also used a much stronger bolt with a proper shank, rather than the completely threaded bolt used before.
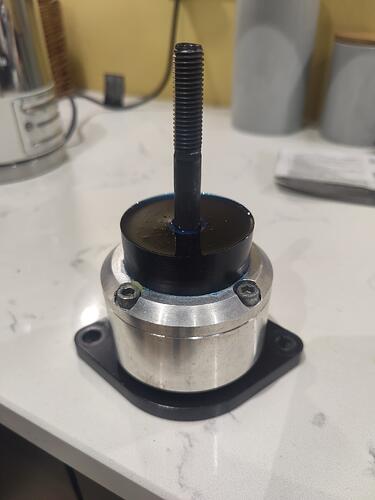
I left the mount overnight to cure. Nothing leaked and the plastic and glue came off easily.
Although I mixed the resins as accurately as could, the durometer reading was 56. Not quite the 60 PU the bottle said but still harder than the original.
As you can see the rubber is now wider than the cone and the whole unit is filled with the rubber, not just the little piece at the top.
I think the top nut is supposed to be 120nm, but I had no real way to measure it as only a ring spanner fit in situ, so I did it as hard as I could and marked the nut and cone. So far the marks are still aligned so must be tight enough.
I’m much more confident in my version than Vibratechnics and at the time of writing this (1 year after) I’ve had no issues with it. It only cost the price of the rubber and new bolt. Don’t forget the anti-corrosion block gel between the mount and chassis.
The vibration is ever so slightly worse than before but only noticeable when idling. The upside is a slightly more responsive feeling at all other times. So far so good and I’m happy to sell my IP to Vibratechnics allow them to actually make a decent product!
Thanks for the heads up on this engine mount. I had been looking as an alternative to the original in mine, but I don’t think I’ll bother now!
Only just caught up with this thread after being away from the site for a few years (Kids get in the way of Lotus stuff FAR too much!). LOVELY job, just top notch work. Be in no doubt that the fit and finish is probably significantly better than any of the original cars!
I went for Vibratechnics due to getting a deal and it was for all 3 components, engine/gearbox/bottom mounts. I would go Eliseparts if you were to get an upgraded part.
Thanks a lot! Everything about this project has had a ‘sod it let’s try it’ attitude and thankfully most stuff has come out ok. Just wish I had a bit more poke but can’t justify any engine mods yet
