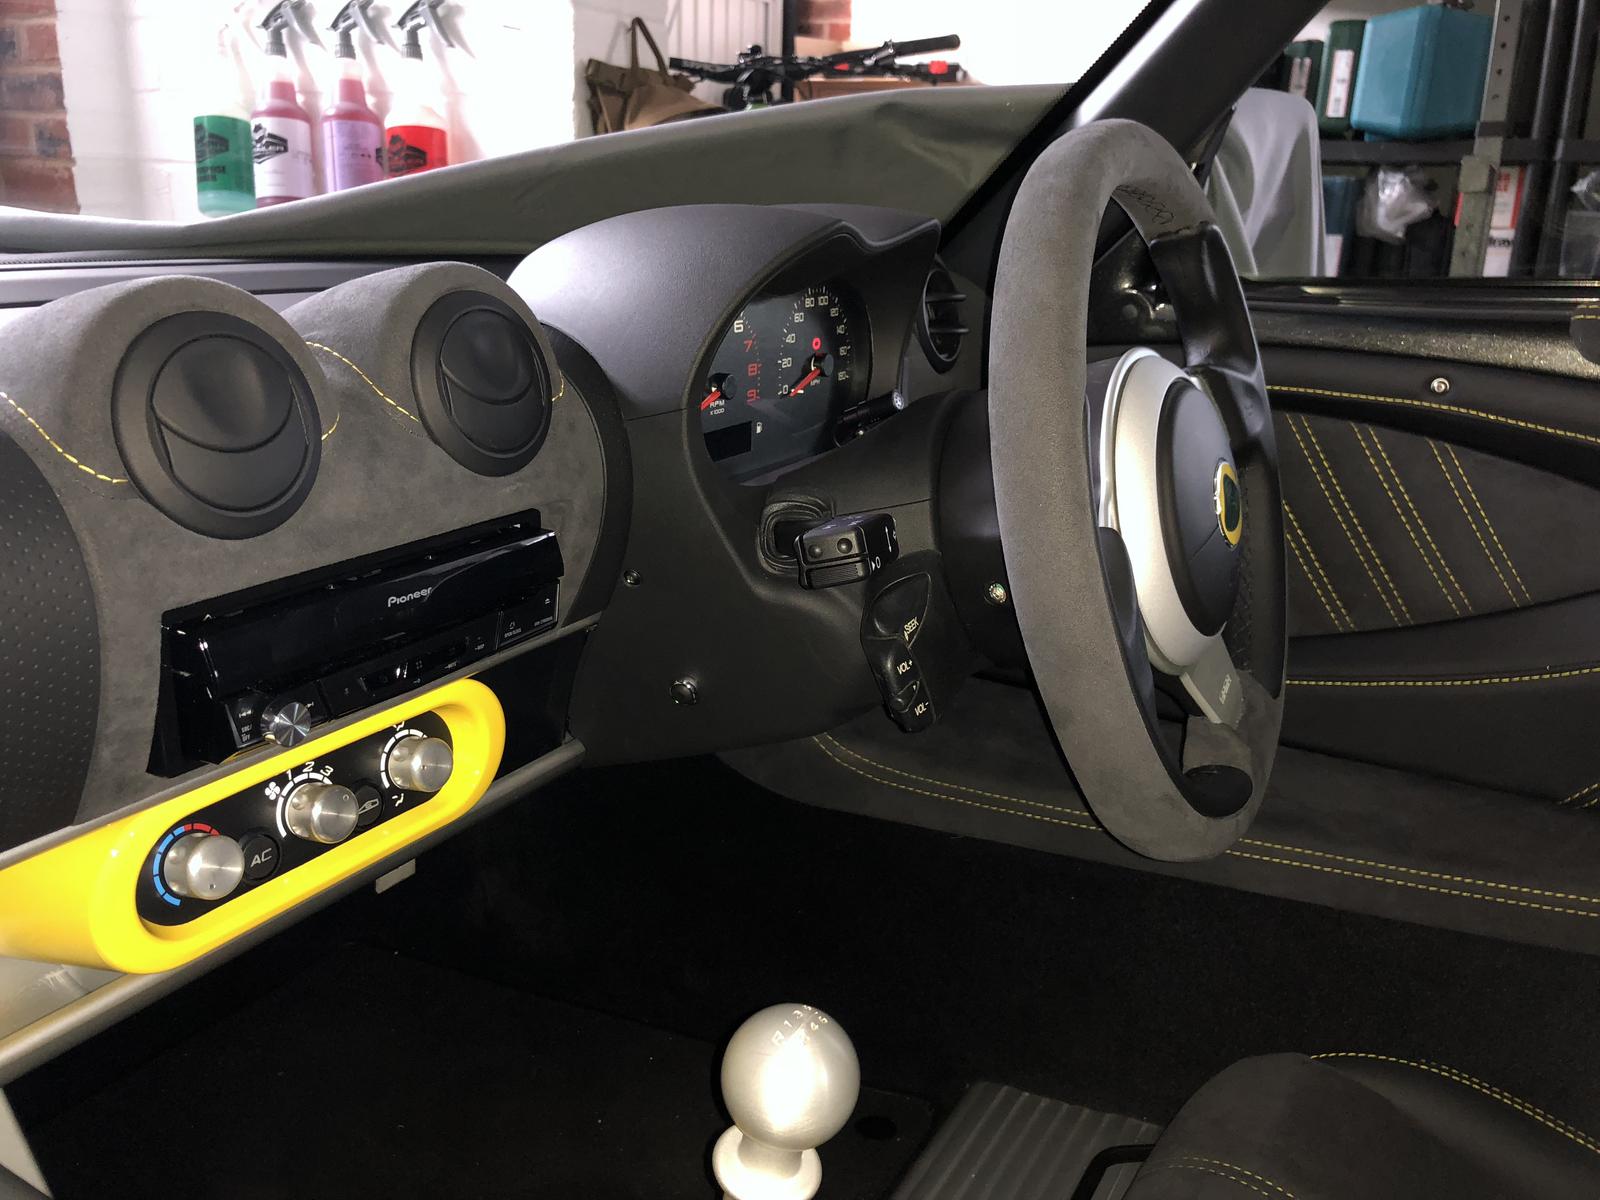
I get Exige envy every now and again. I have it big time on this one! Looks fantastic. I must try and get my car upto spec like yours!
That does look stunning ![]()
That looks stunning!!!
Thanks all, certainly happy with how it turned out, obviously it’s now in bits again as a crack on with the rest of it ![]()
Updates have been a bit slow after getting the car back, a number of reasons work as always these days is silly busy, lots of family stuff going on with a fair bit of cancer about as well as a couple of folk trying to end it all early (so far none from either group has caught death yet) - all added up to a stupid plastic car going to the back of the queue and put into the “I can’t be arsed bucket!”
That being said the car is all over the garage, the interior has been in the living room since Christmas, roof has now sat next to the sofa for 2 weeks and in general there are piles of stuff that means I just have to crack on and stop wallowing - as its not fair on my missues to have all this crap everywhere.
So, car progress:
After an initial install of cabling pre paint I had tested my bargain smartycam I got, it was having trouble with GPS, and strangely after a while started crashing the CAN network… I could have sensors plugged in but as soon as I plugged in the video recorder knocked out the hubs and sensors - strangely still got CAN signals for the overlay so I could still see revs etc coming from the dash.
After trying all I could I rang Aim and they said send it in for repair, I picked it up as new but not from a retailer but they’d still fix for £25 plus parts so off it went. I waited about 6 weeks and it had to go back to Italy, got stuck in customs in and outboound due to Brexit customs checks - Aim were very good and said they would push through to get it back to me.
I kept checking for my bill so I knew it would be on its way, then one day a ring at the door and DHL dropped it off. Aim had fixed for me for free despite not buying from them with no proof of purchase, diagnosed in UK, sent back to Italy for board repair, changed out a bunch of diodes replaced the battery. Only explanation was it shouldn’t have happened here’s the test report and that was that!
Got to say Aim have been really helpful in talking stuff through, happy to talk down to board level and code level - so I’ve become a bit of a fanboy in that sense
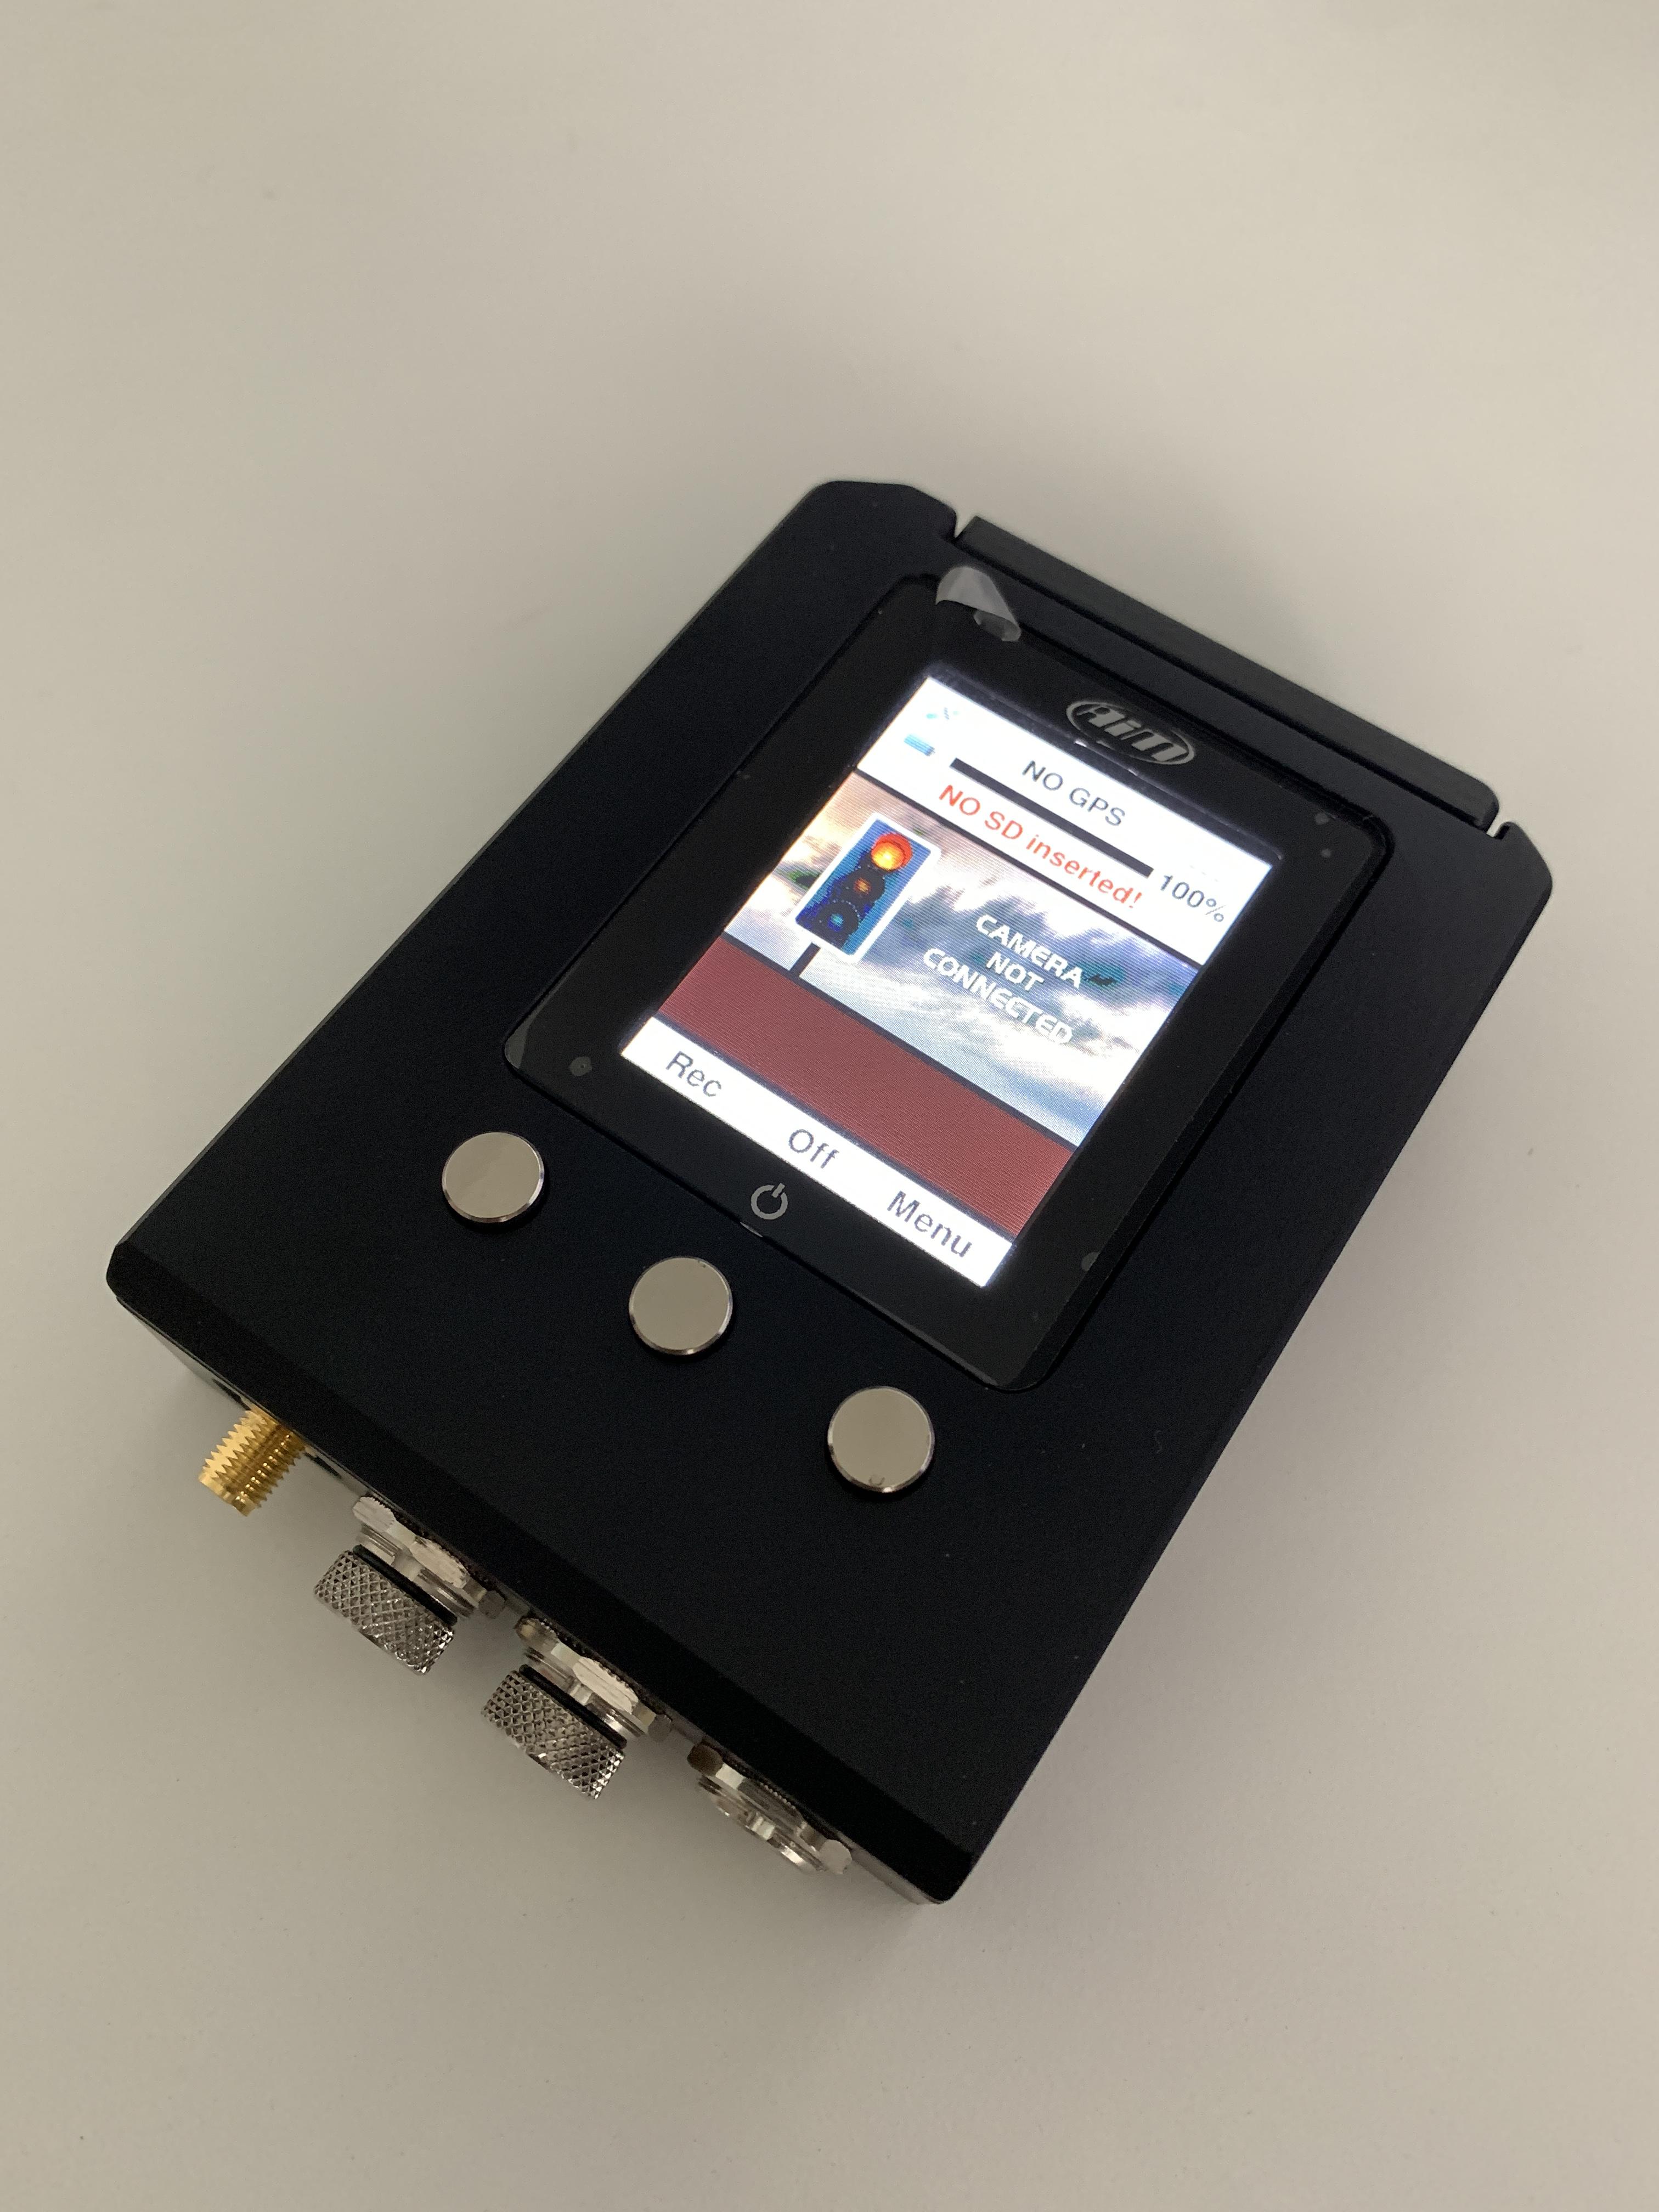
Quick test of dash and indeed all was well!
So all the kit related to the dash that’s going in is this:
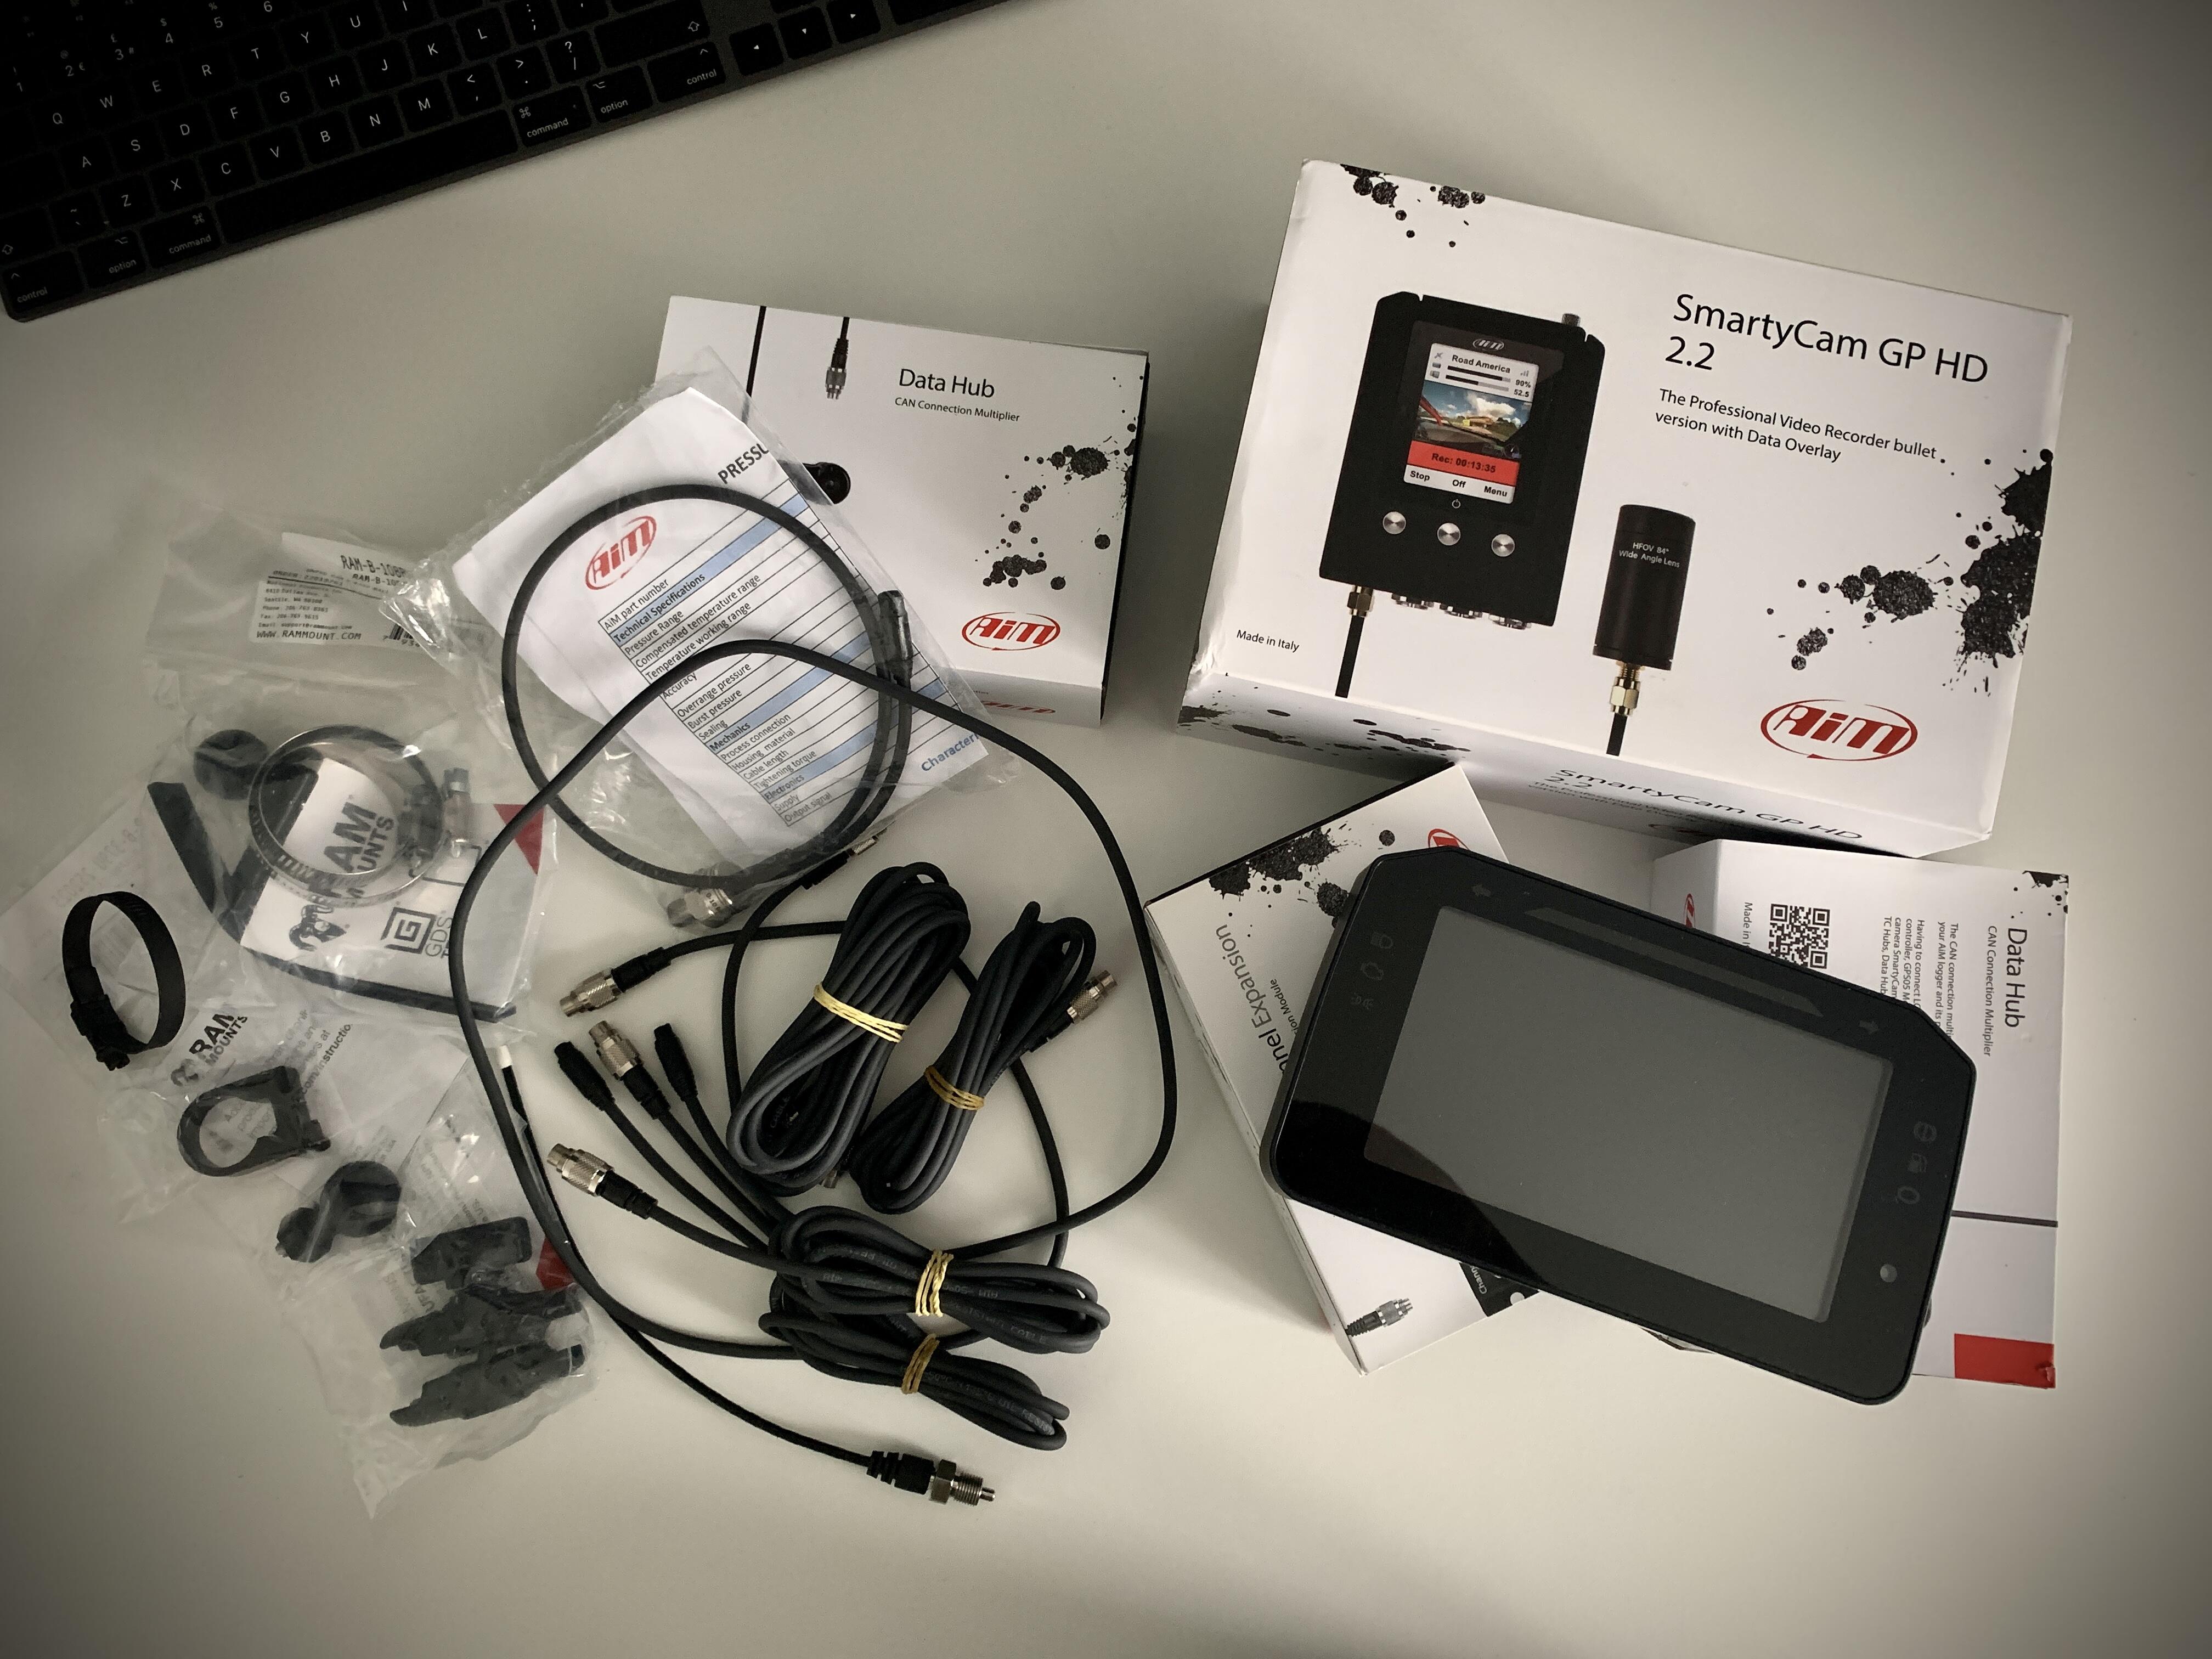
- Aim MX2E dash, with GPS 08
- Smartcam HD GP Rev2.2 with bullet cam and mount
- 2 x Datahubs (allowing one in the dash, another in rear of cabin - discount day on Ebay meant it was the same price as cable)
- Expansion hub (allows for sensors)
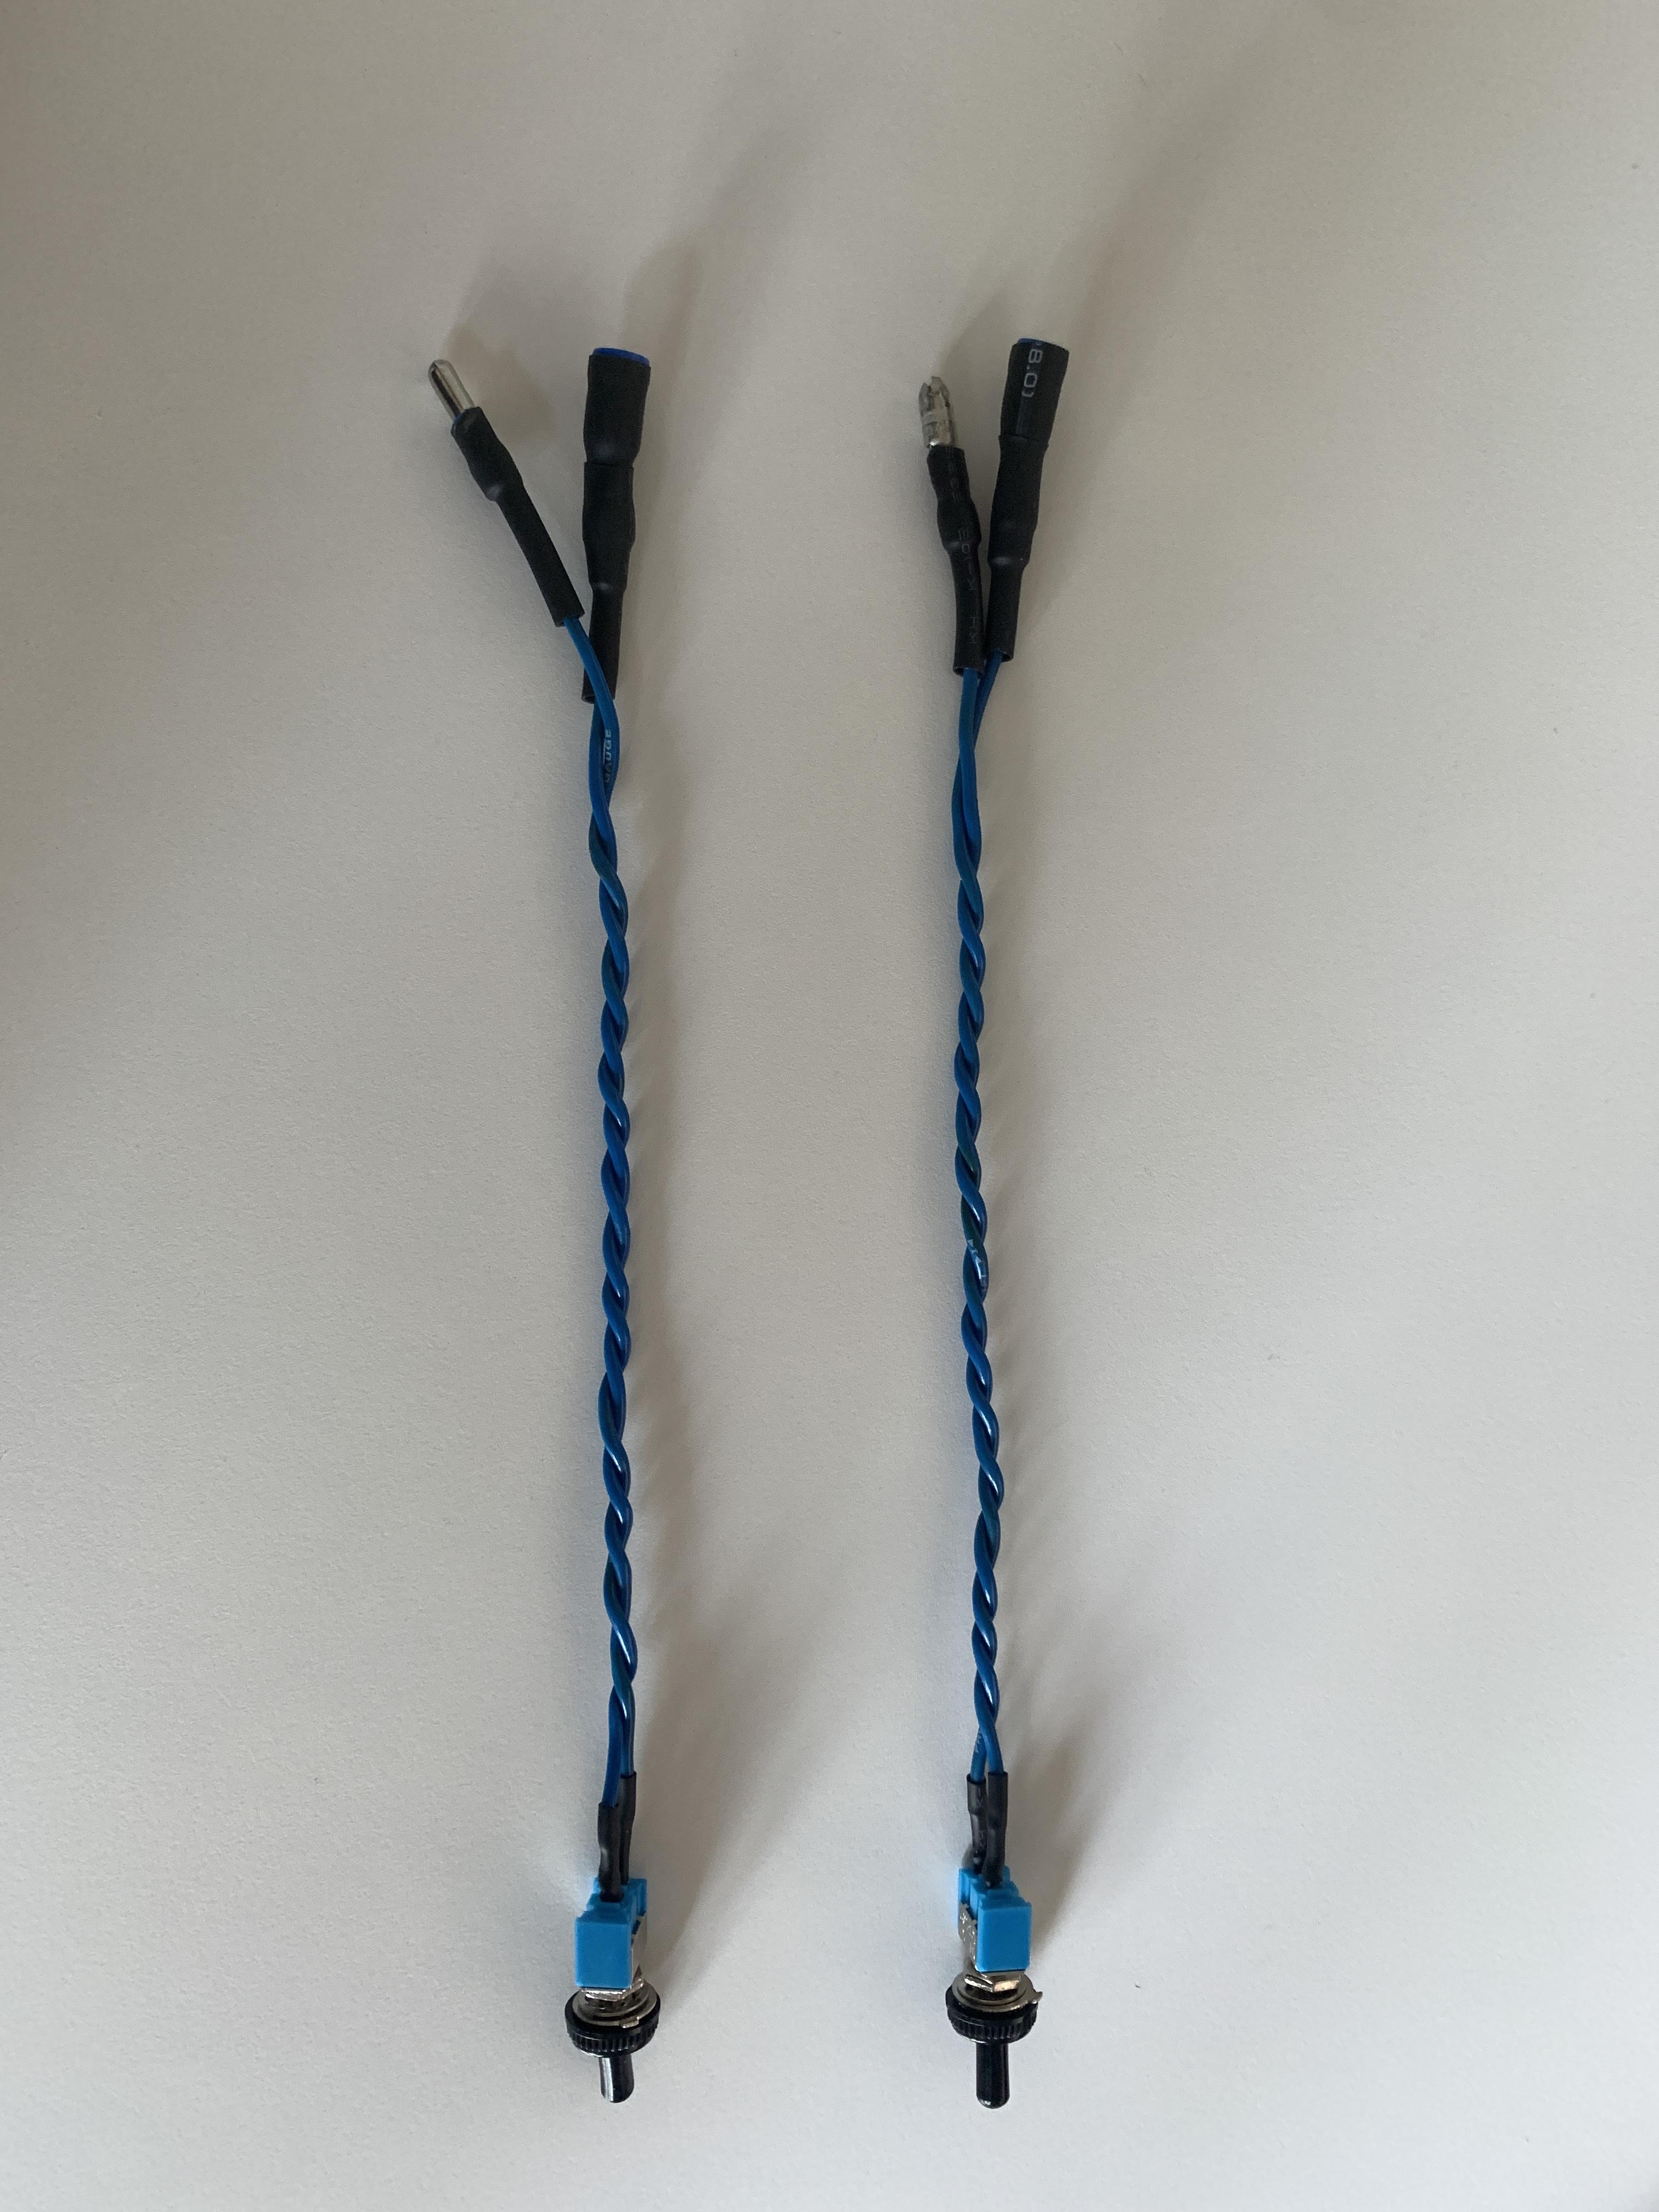
- Engine Oil temp sender
- Engine Oil Pressure sendor
- Various extensions and adaptors
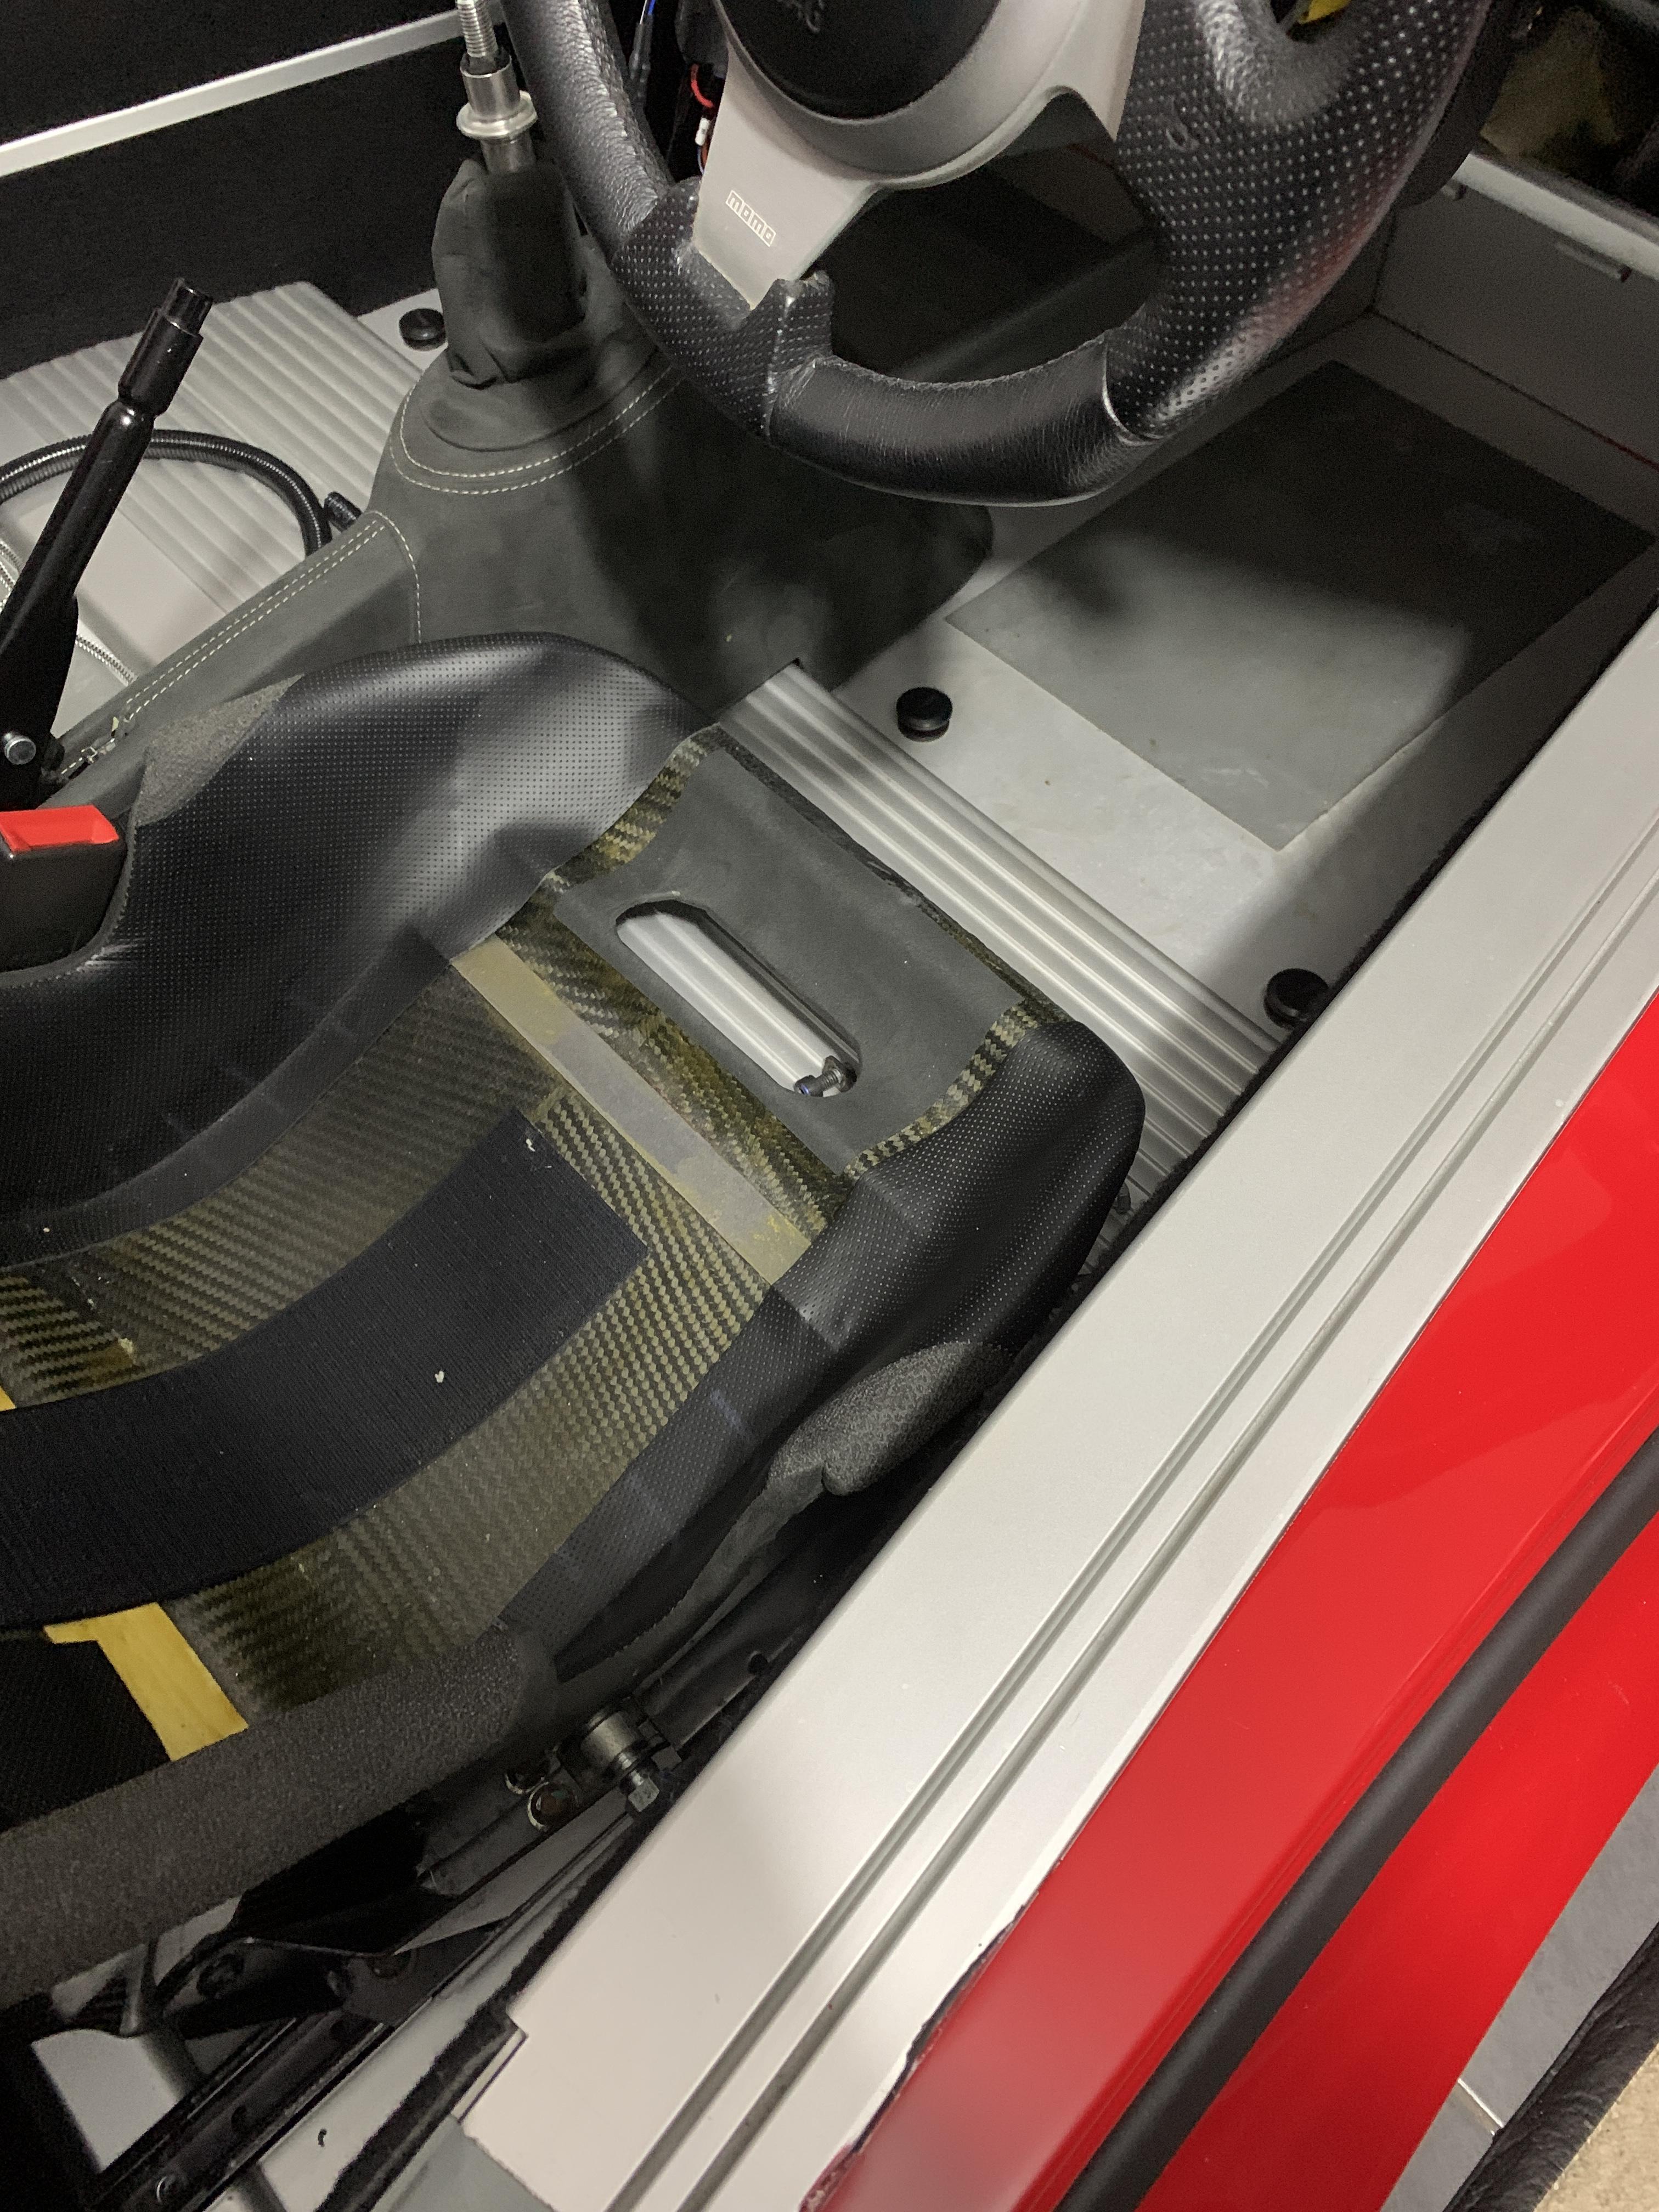
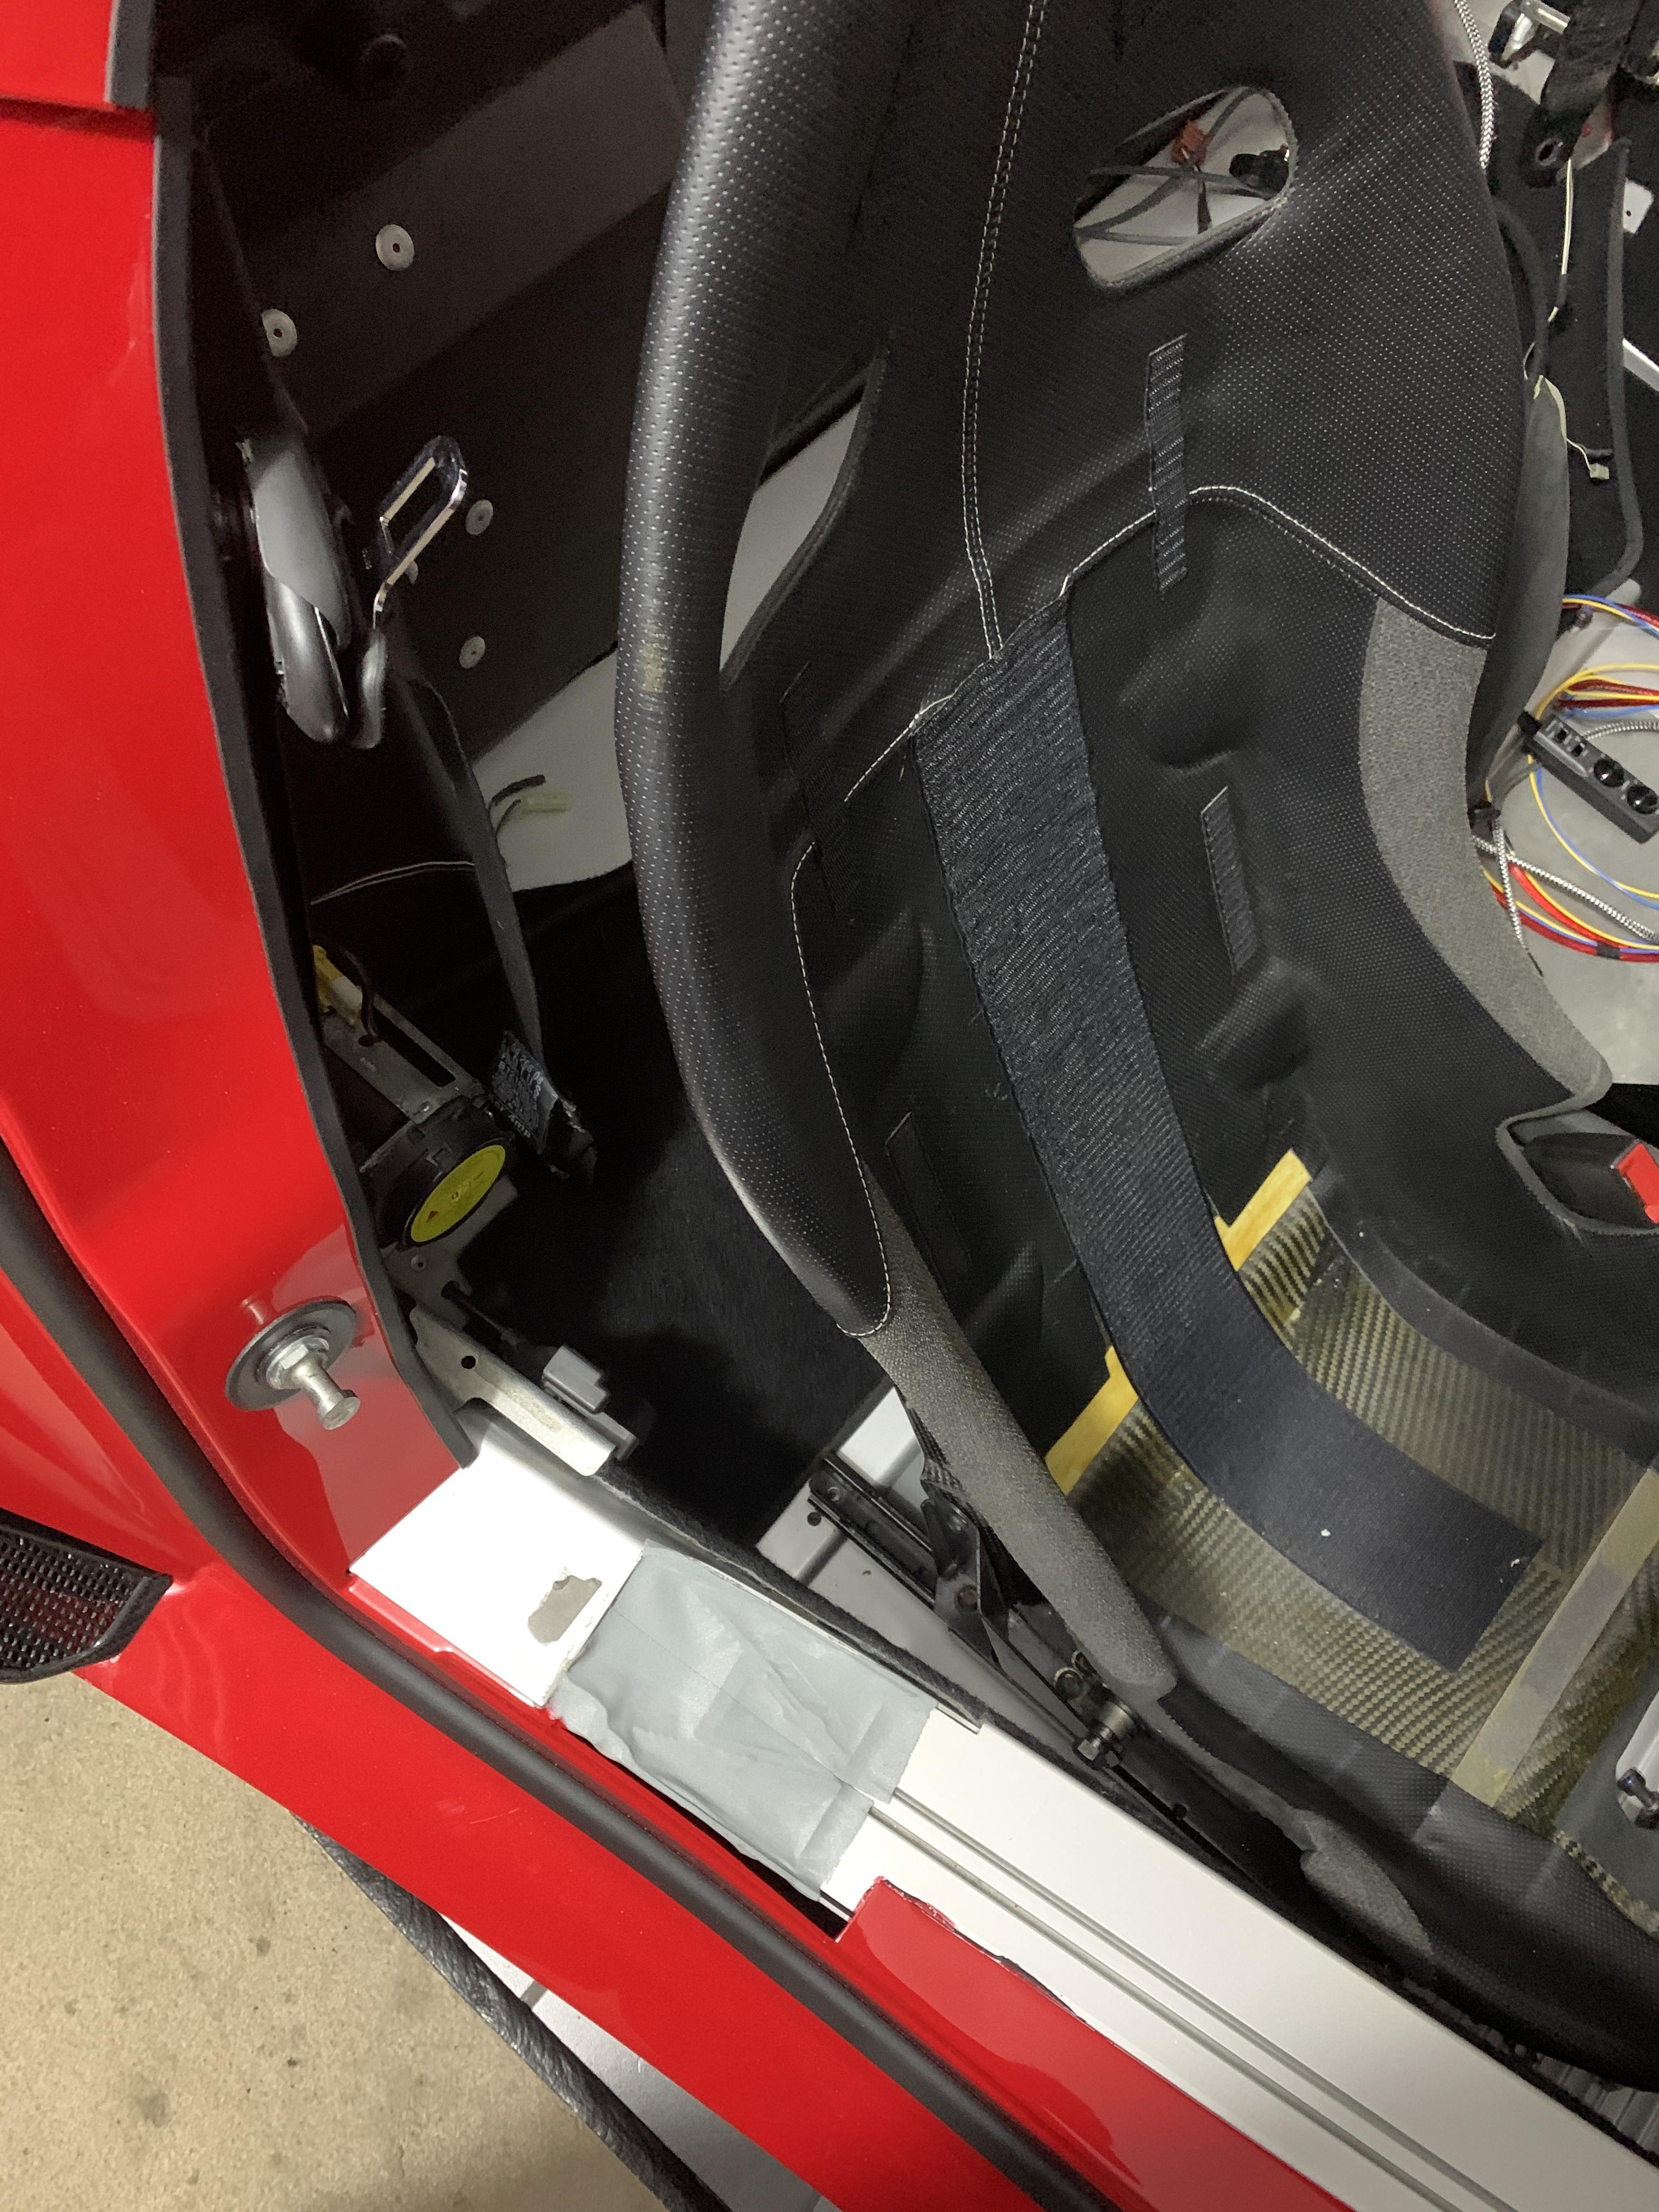
As mention I had already put in cabling pre paint, with audio running through passenger side forthe dash, CAN and video through a small access hold by the steering column
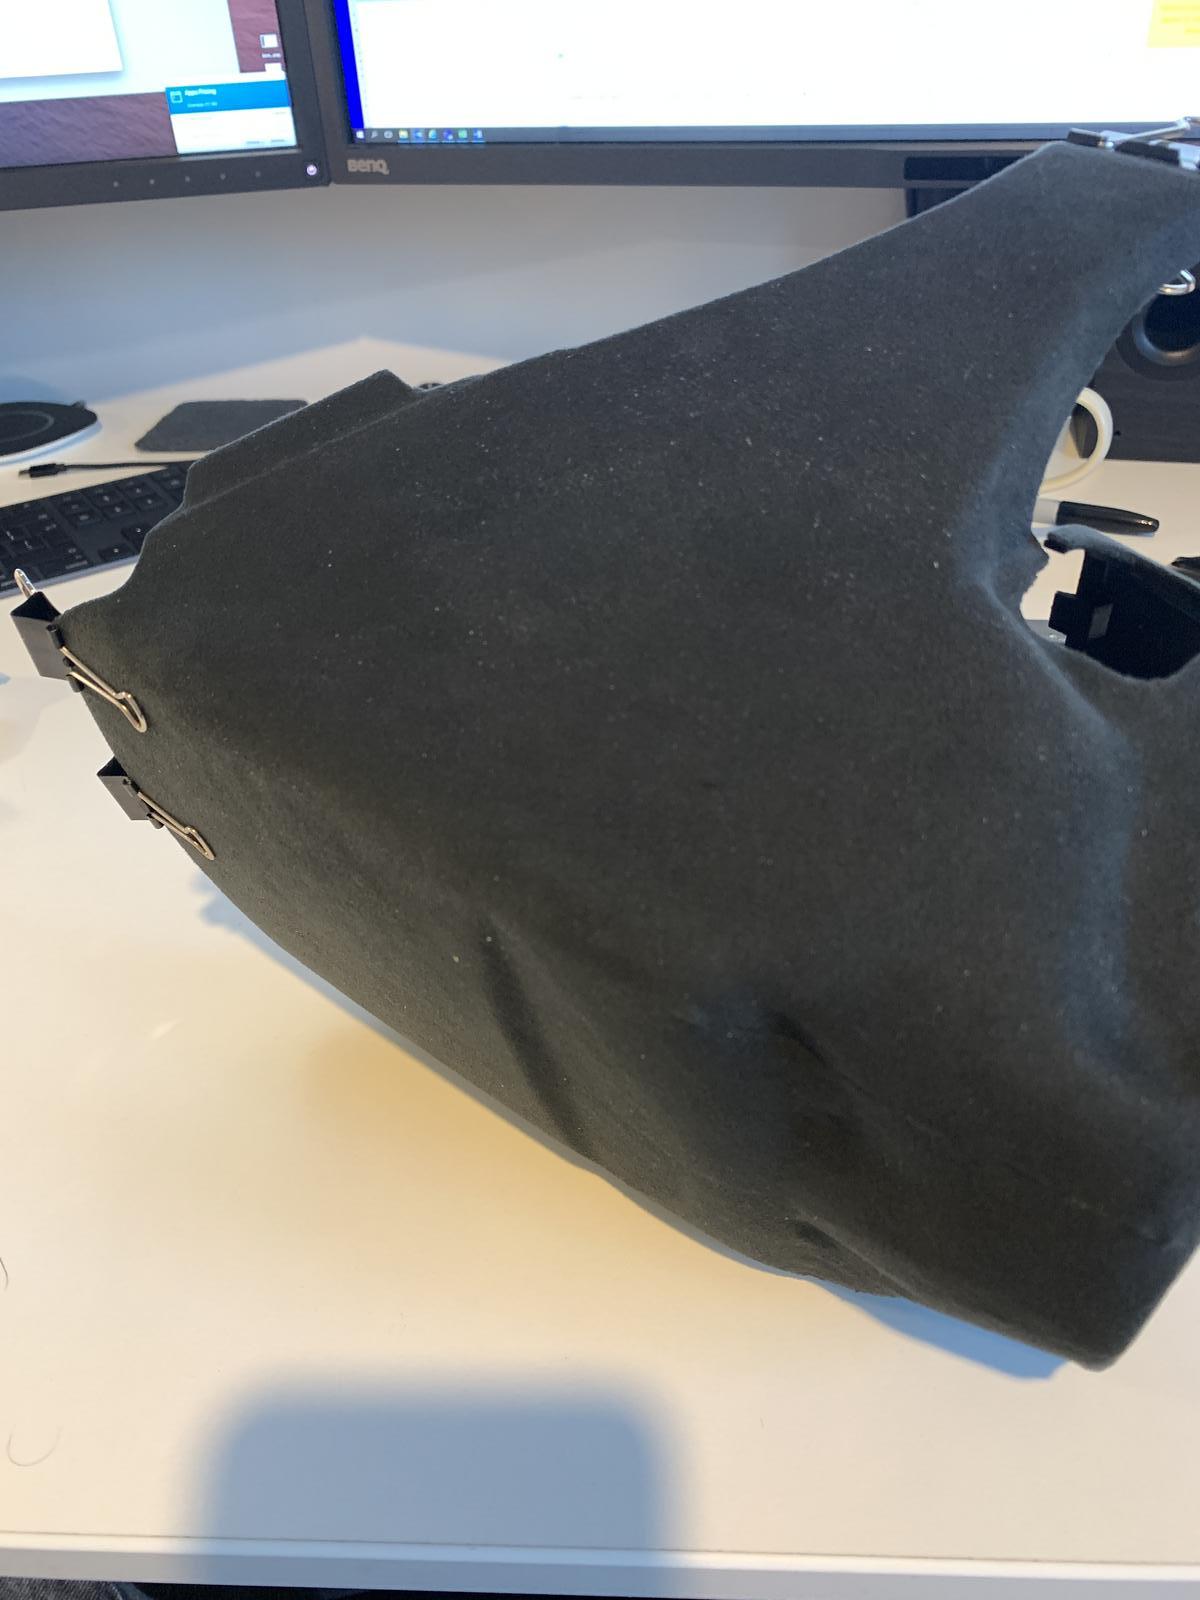
I wasn’t happy with it and I wanted to merge with more of the standard loom, so I ripped it all out again. Looked a bit like this as I started ripping it all back out:
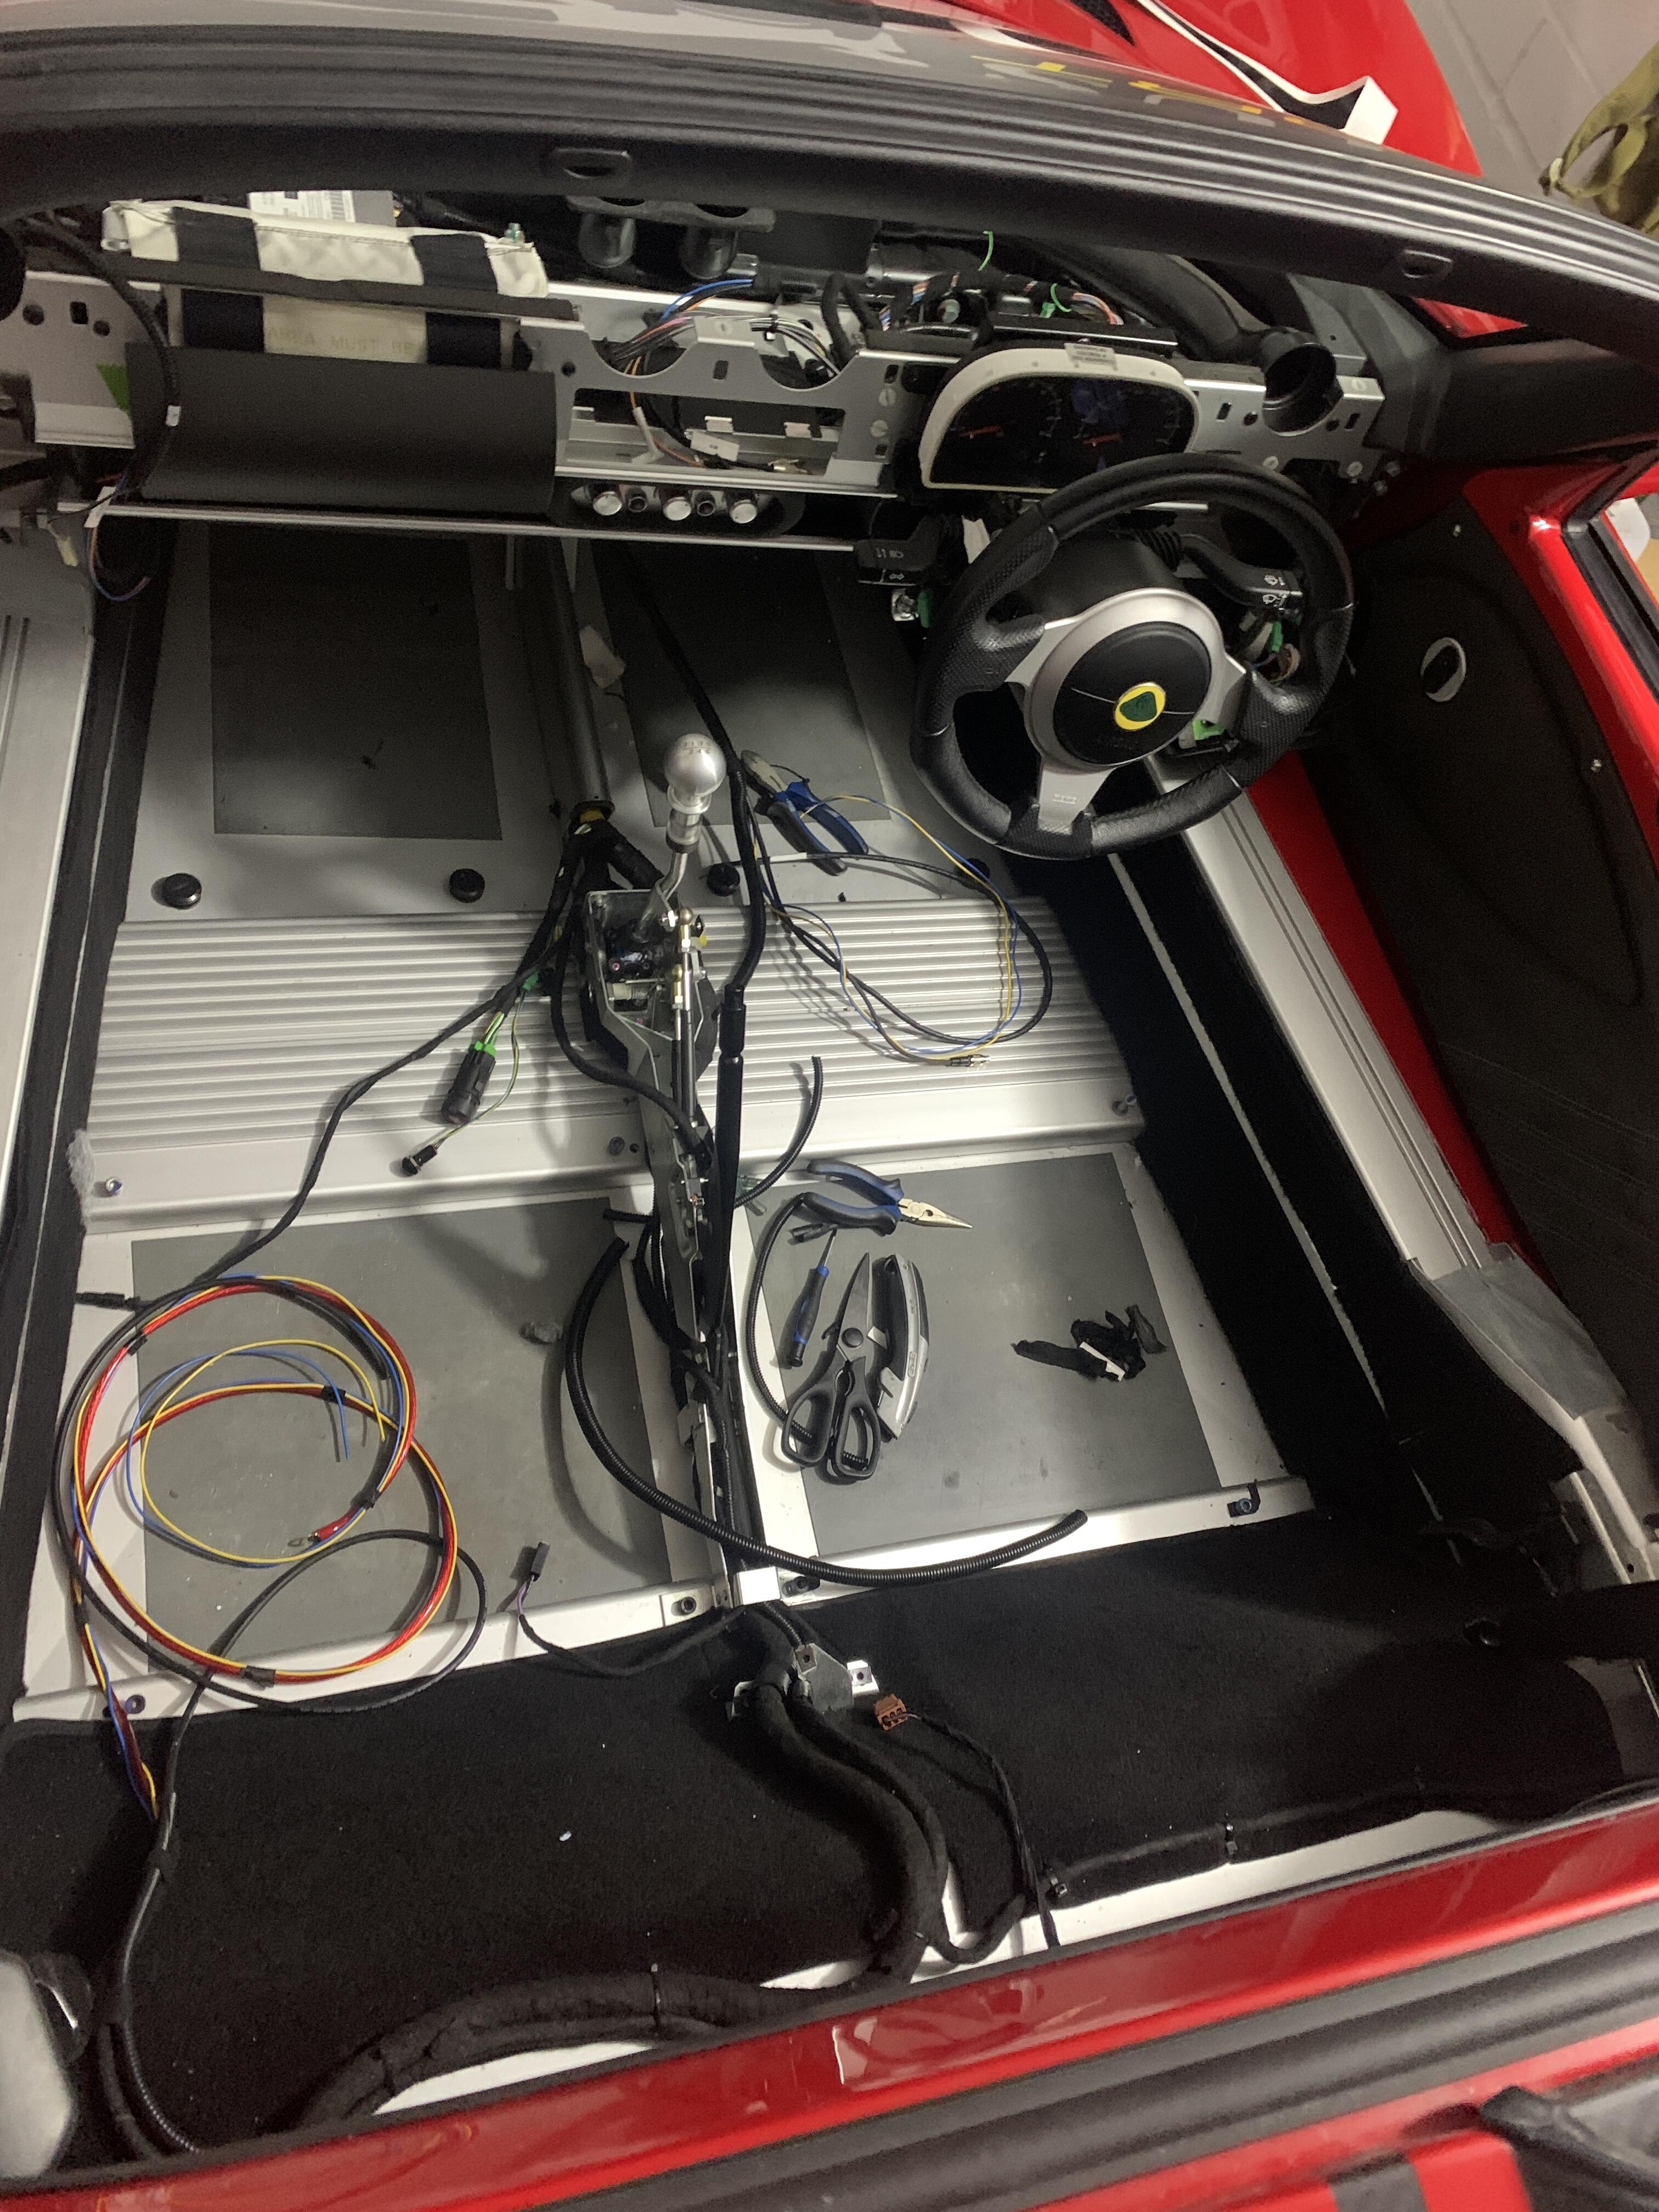
In addition to the dash feeds and feed for camera, I needed rear view camera video and power feeds, power signal and audio for a small footwell sub, reverse signal trigger etc
I did think about going through the sill with this stolen pic (cheers Fonzey )
But with much needed in cabin, I chose to stick going through dash, centre spine and out through existing gromit
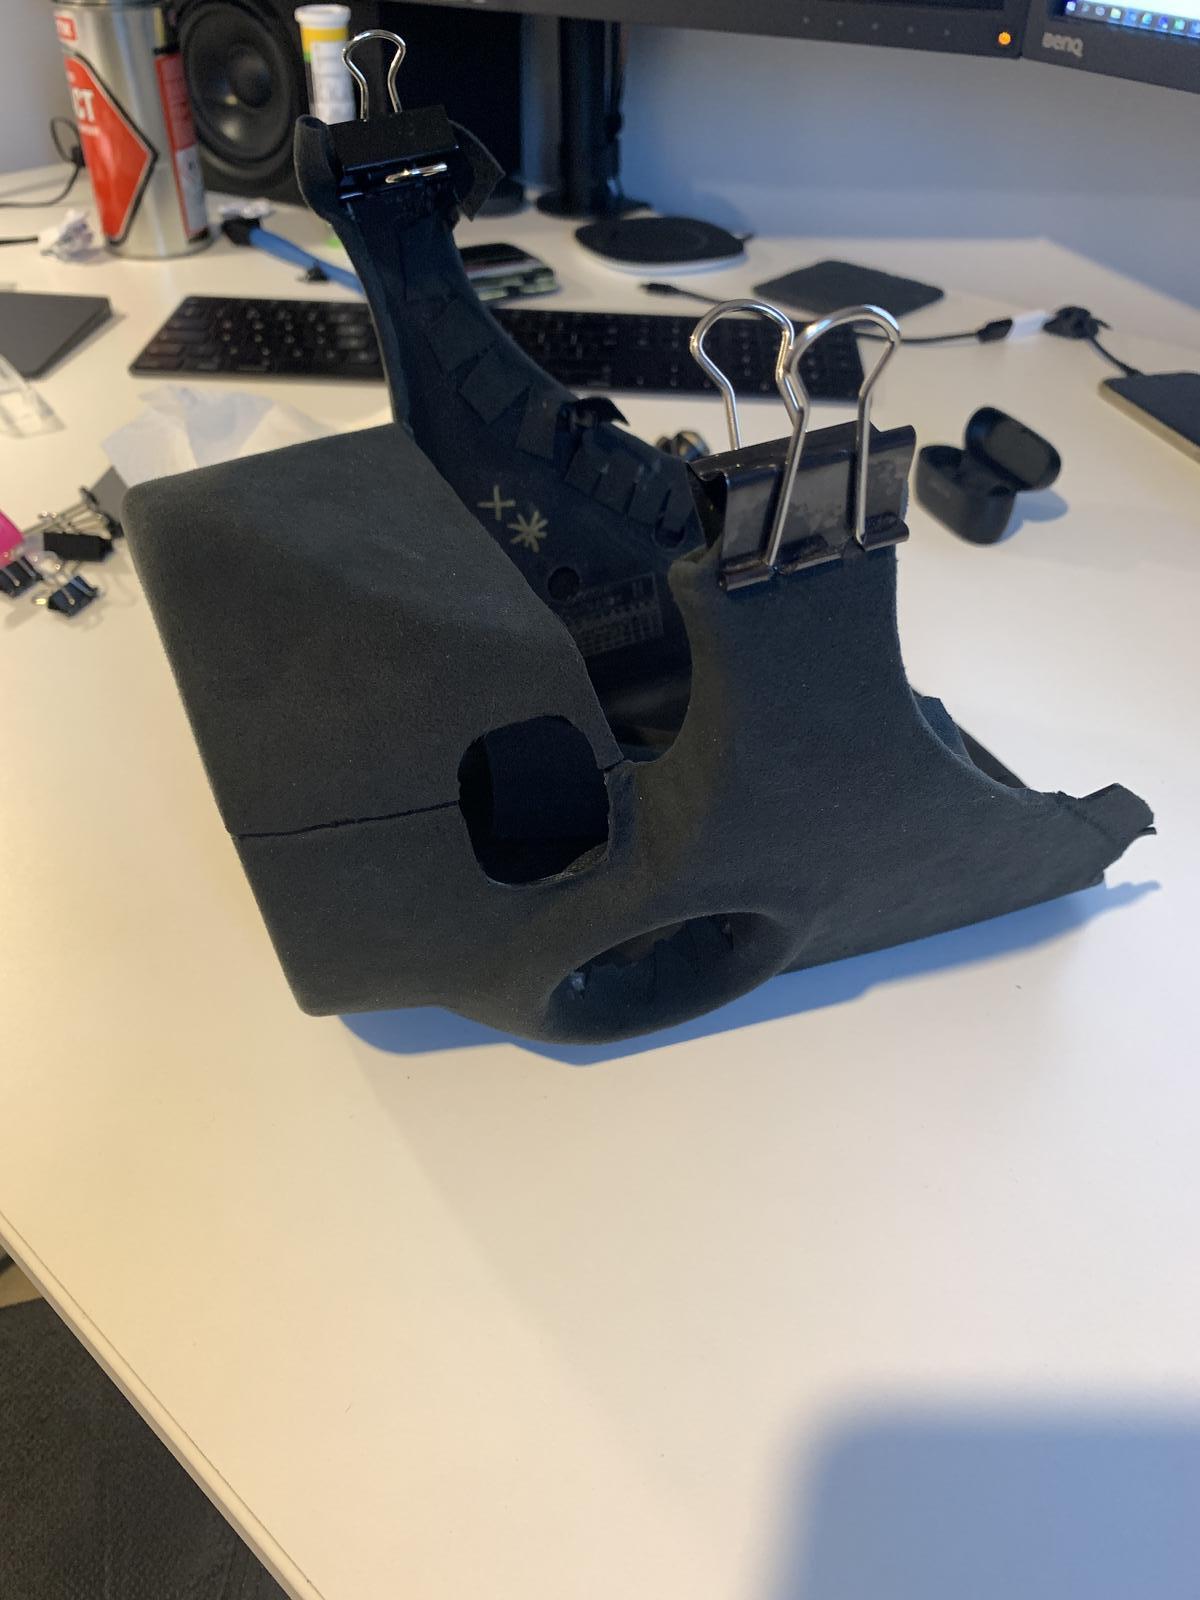
After ripping out all the bits I built up a new look to go through my recently discovered access hole:
This will follow existing wiring so will look factory and obviously I’ll wrap properly
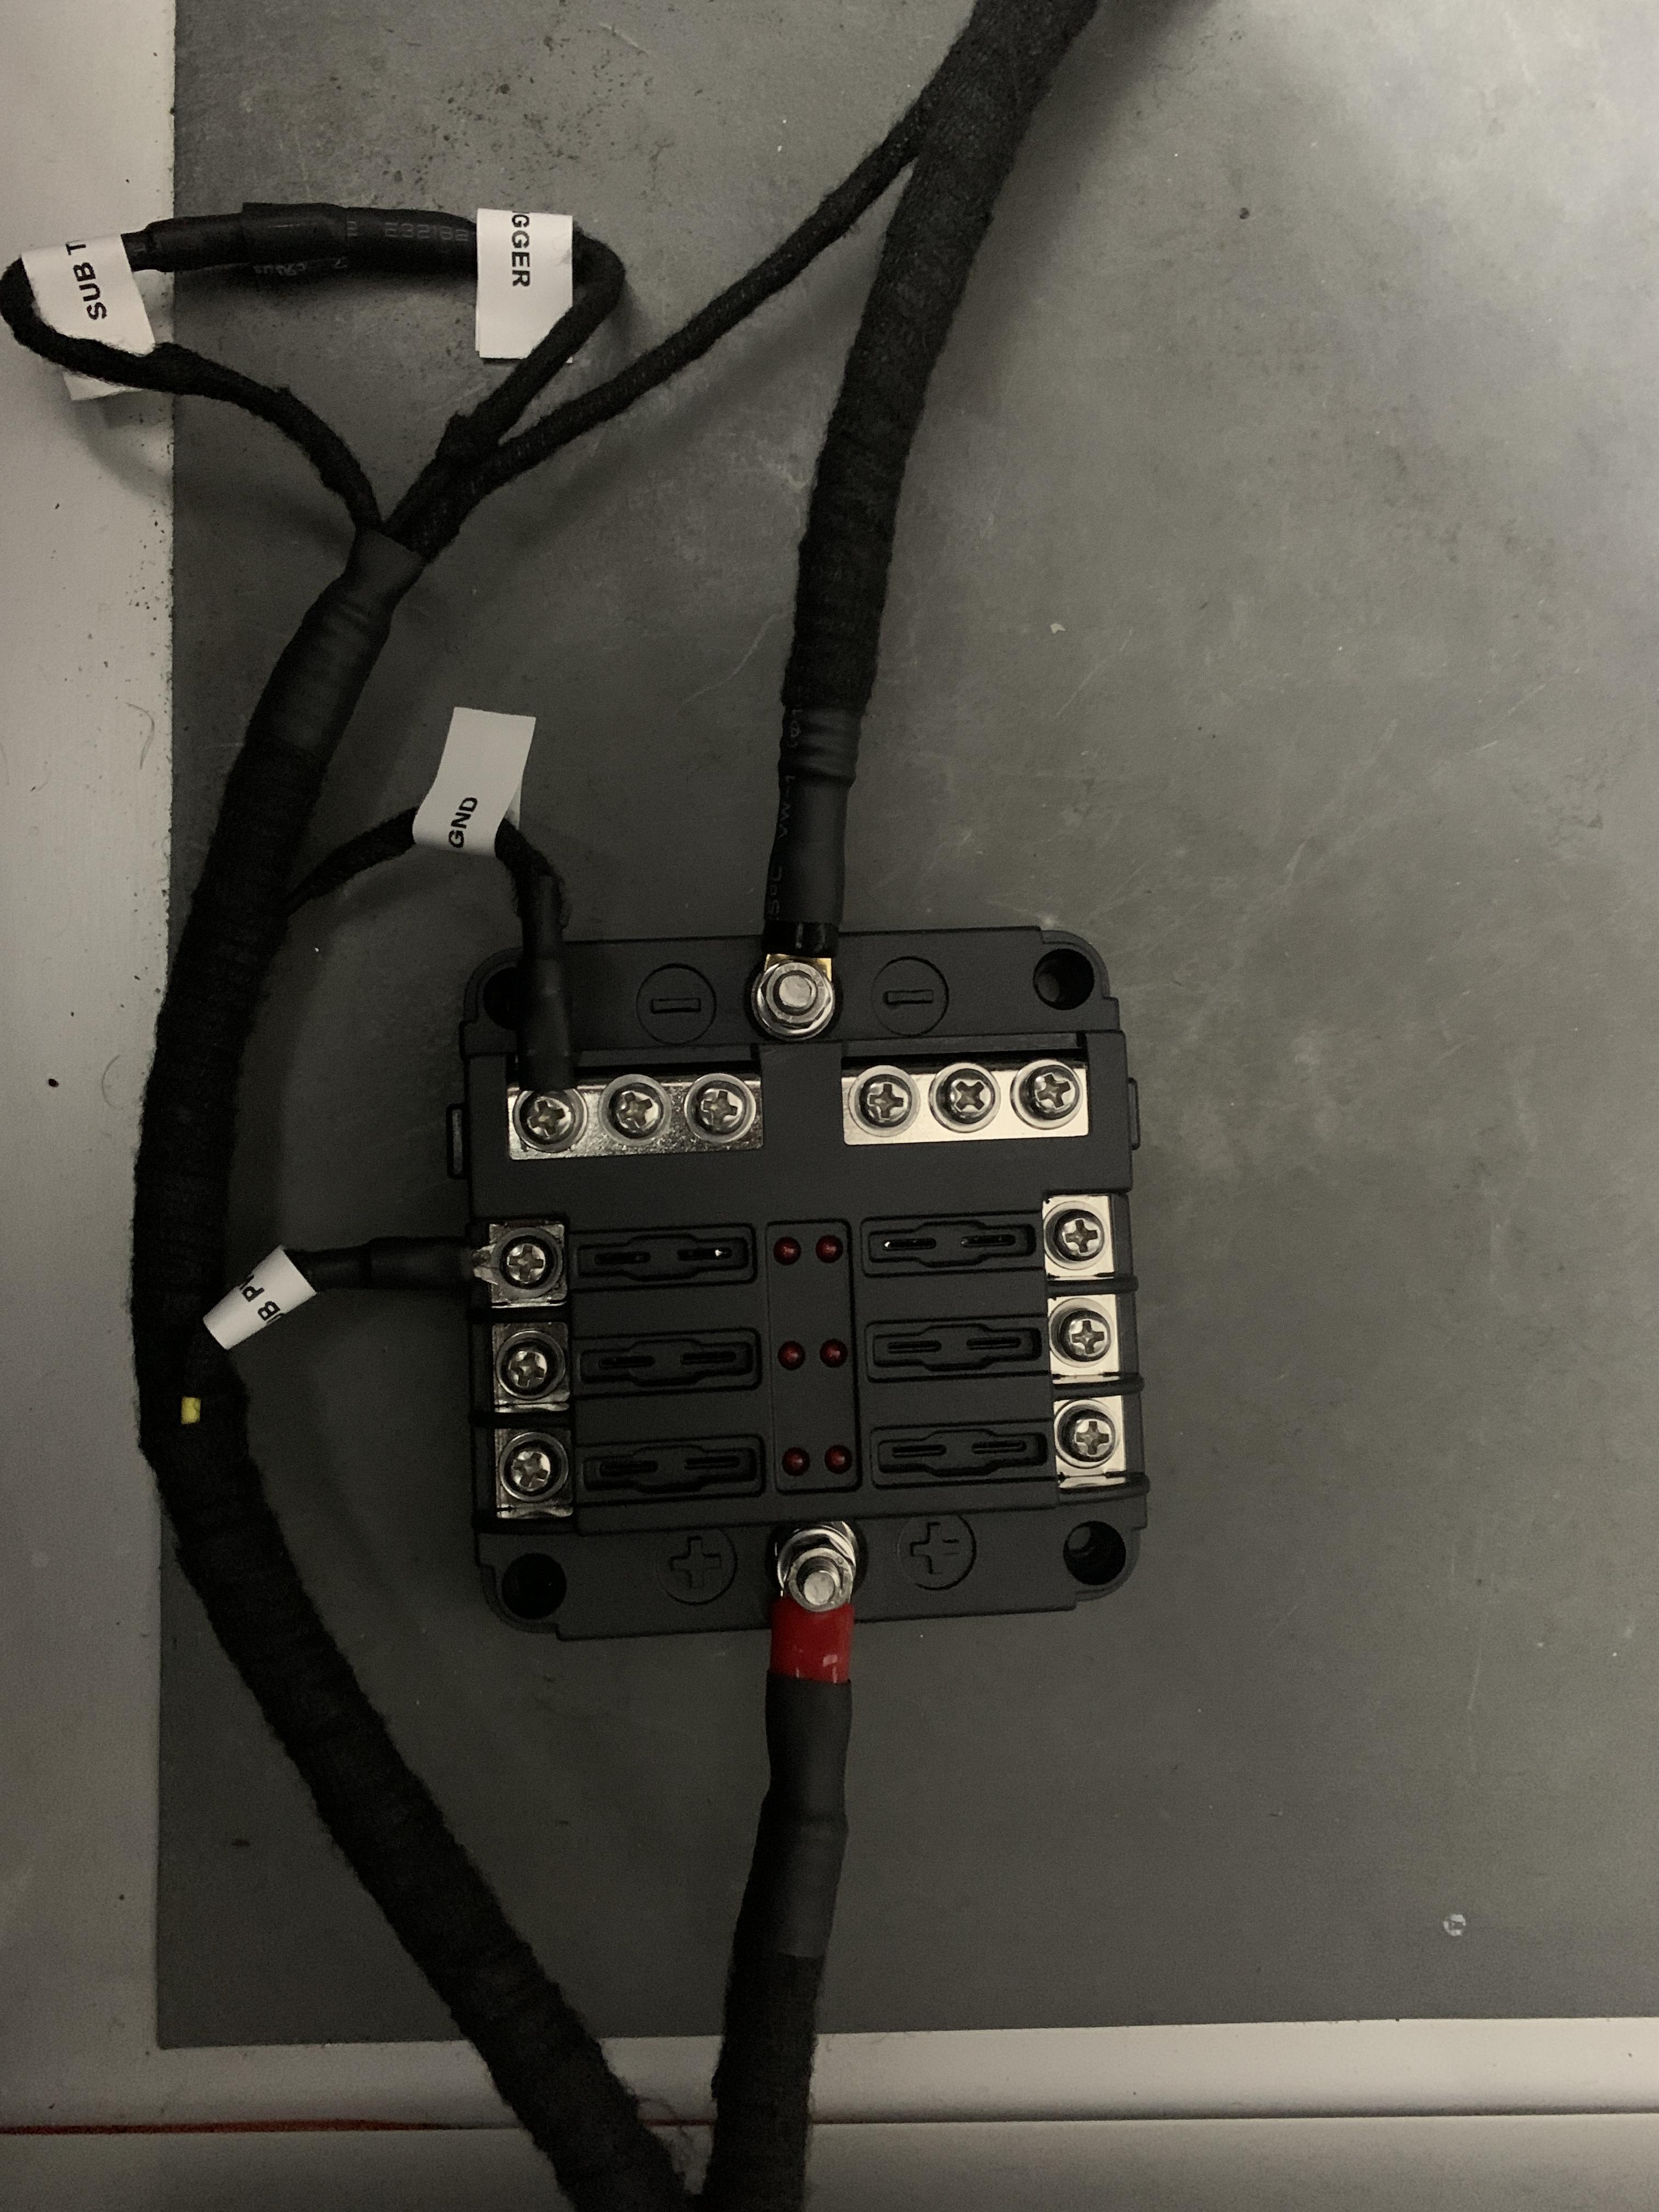
Power will be taken direct from battery and will be given 6 new feeds for +ve and -ve using this
I can then take power out for sub, and any other circuits switching with relays and giving dedicated power now stretching factory loom
Signals will be switched with these switch’s hidden in the cubbys, they will allow switching of sub, rear video (alowing use as rear view mirror on the motorway etc), and foot cam
On the subject of footcam, I picked up these (olfi one.fives) to add to the Smartycam main video so I can create totally awesome videos of me pootling around like a learner driver:
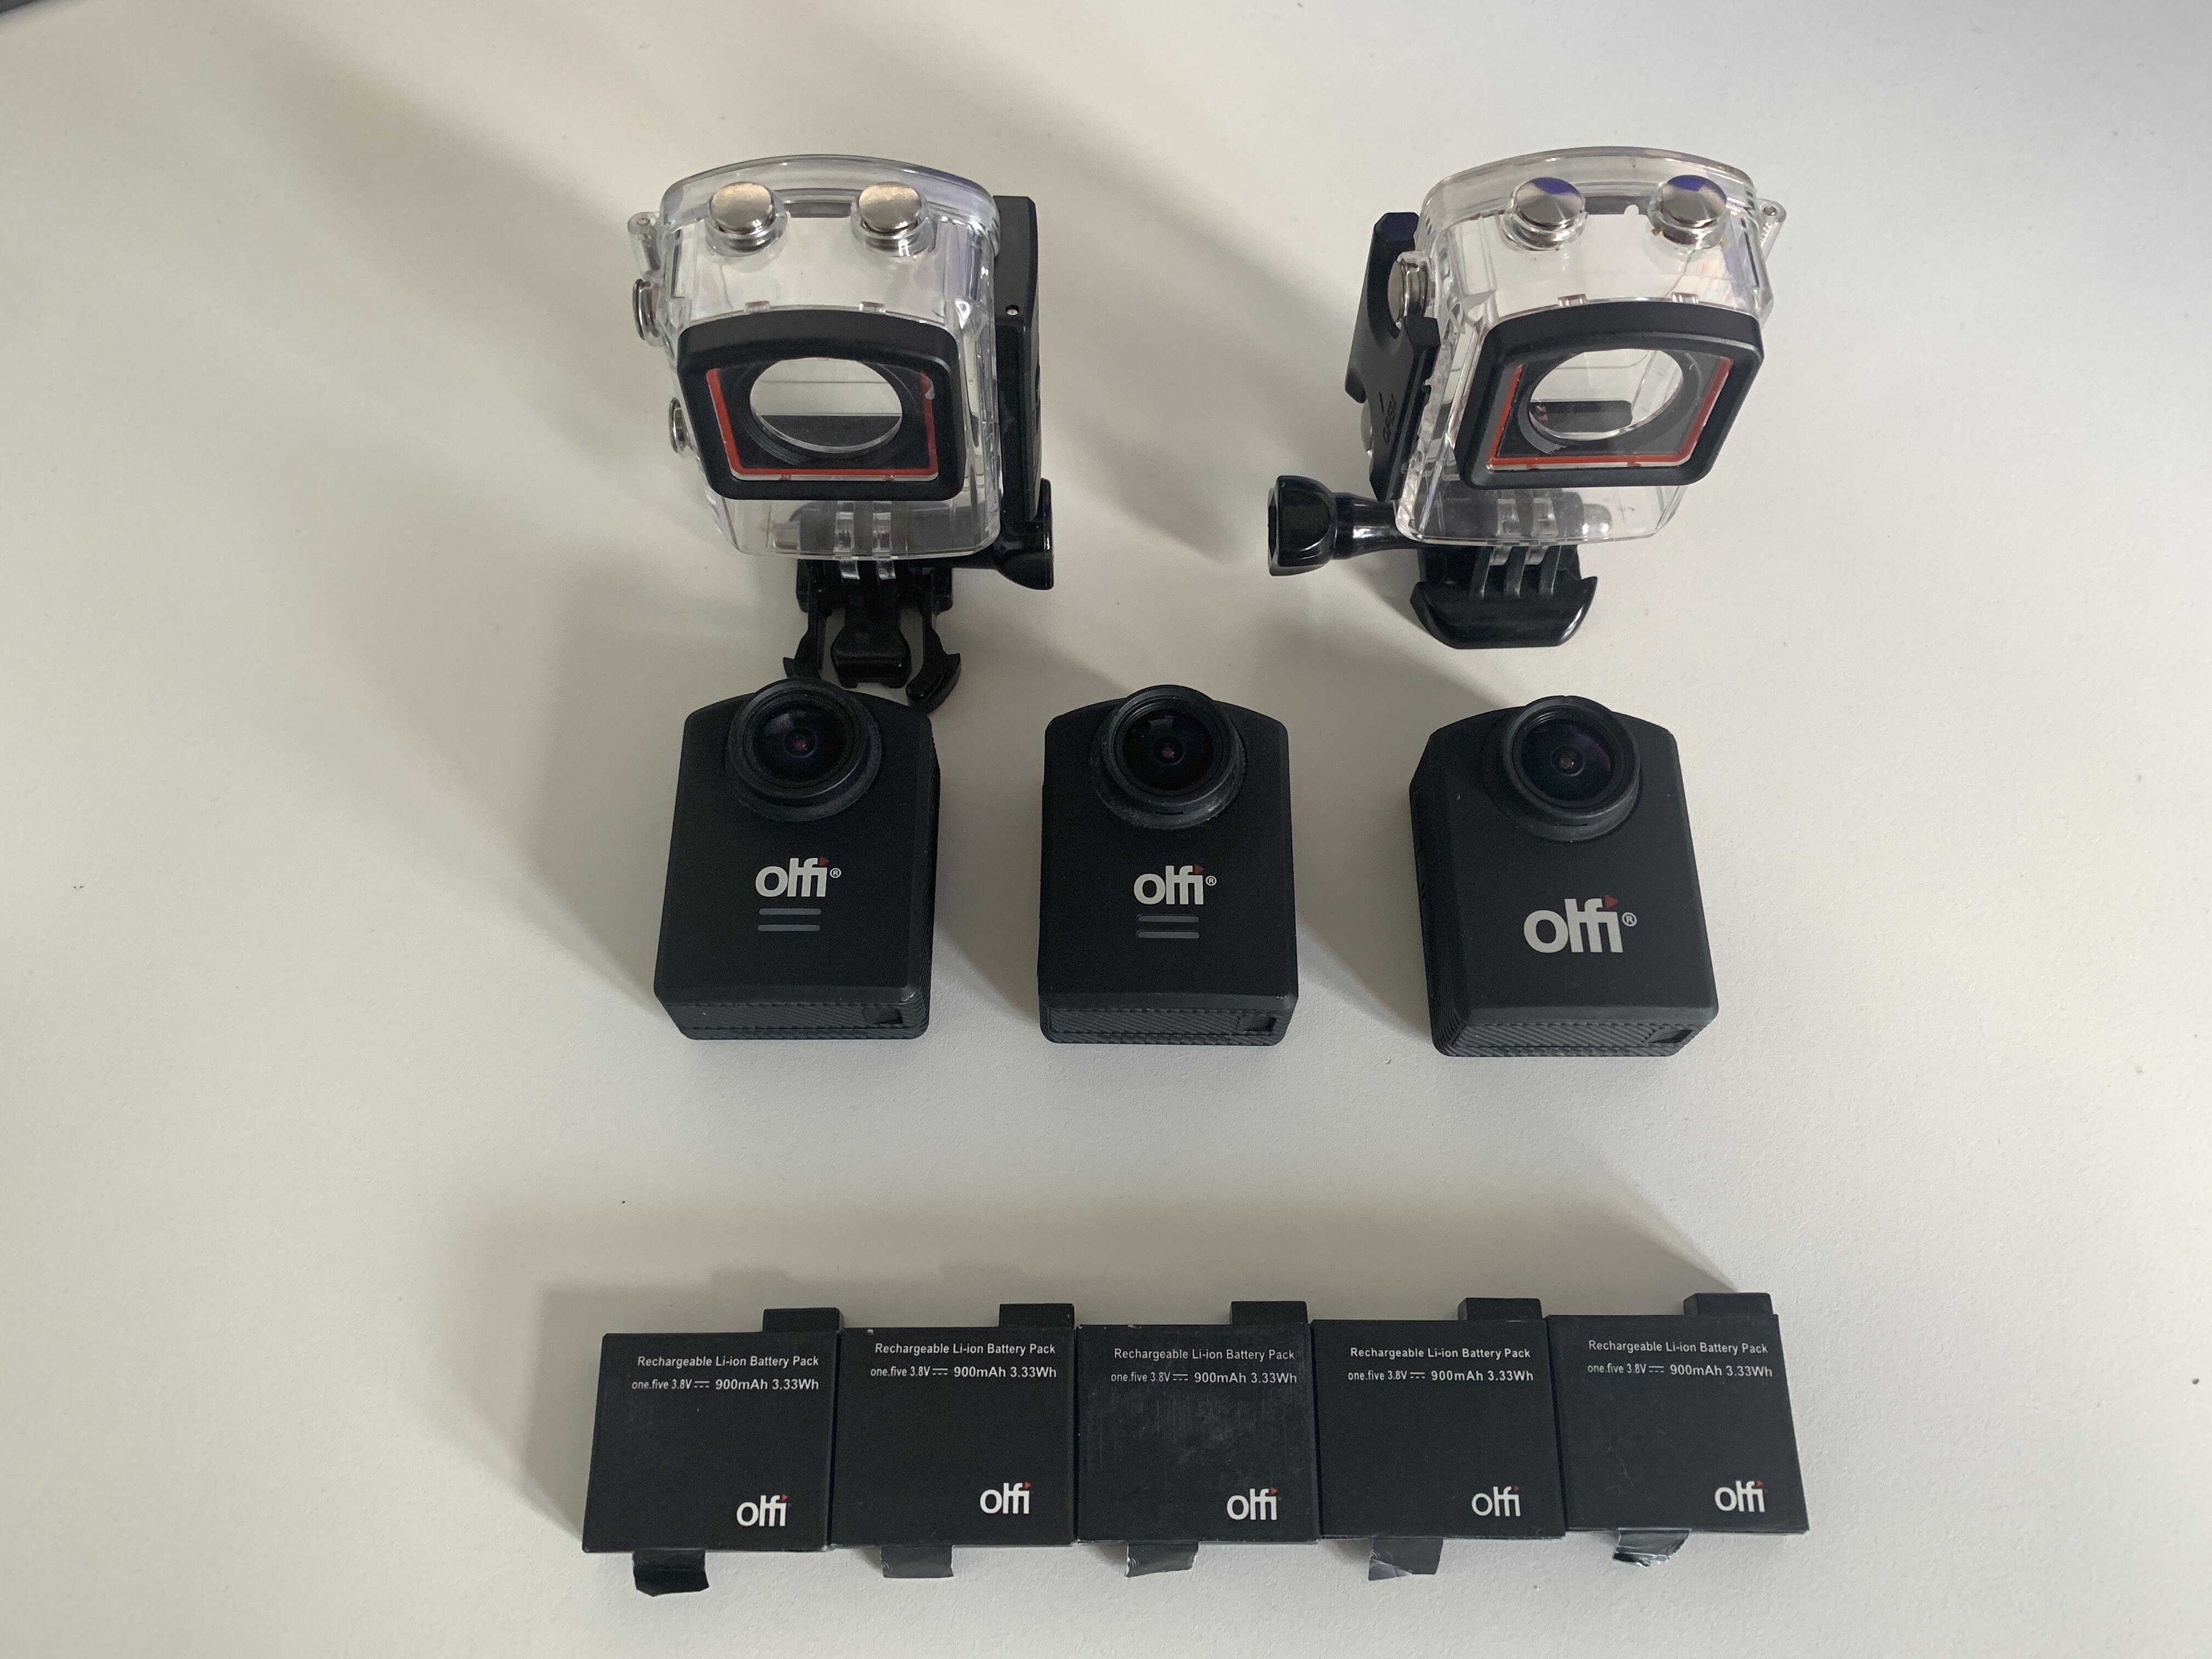
Another ebay bargain, well of sorts - it was the 3 cams for 60 quid - one was DOA, another works but I can’t access the menu. One does work perfectly so I look at is £60 for a 4k camera plus two cases for much less than the new price so still up. With a spare case I can drill one for a USB feed meaning I can switch on and with it set to power via USB, and start recording as soon as power is on I can just flick the foot cam on and off at will.
Main reason for the video is to help me learn, rather than show off (because I am crap so nothing to show off about)
Syncing shouldn’t be too hard as I can see brake and accell signals on the smartycam, so once on a few presses of each pedal should mean a can sync post edit pretty easily
Smartycam bullet cam mount is actually made by RAM, I would have been bitter but with discount it was actually cheaper from Aim than RAM. Anyway it straps to harness bar and mounts the cam between seats

The oil pressure and temp switches, what location are you fitting them ?
Pressure will be taken off replacement sandwich plate, with take off there. Otherwise I would tee off OEM position with extension tube
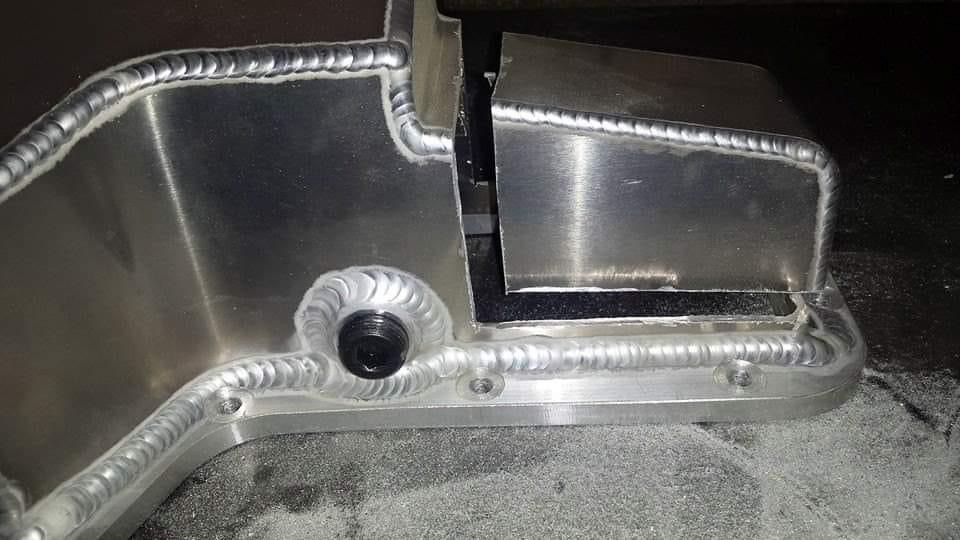
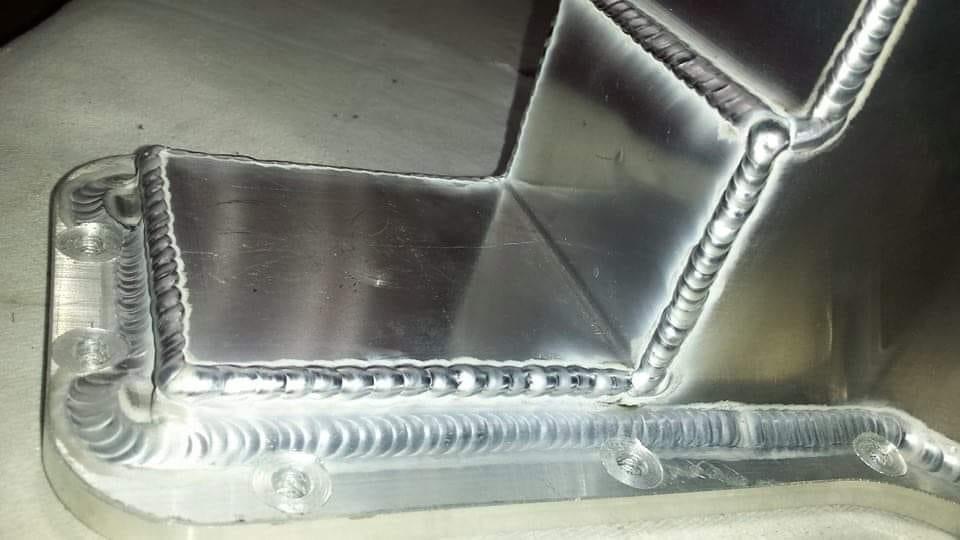
Temp is off sump as I switched to one of Seriously Daves baffled sumps:
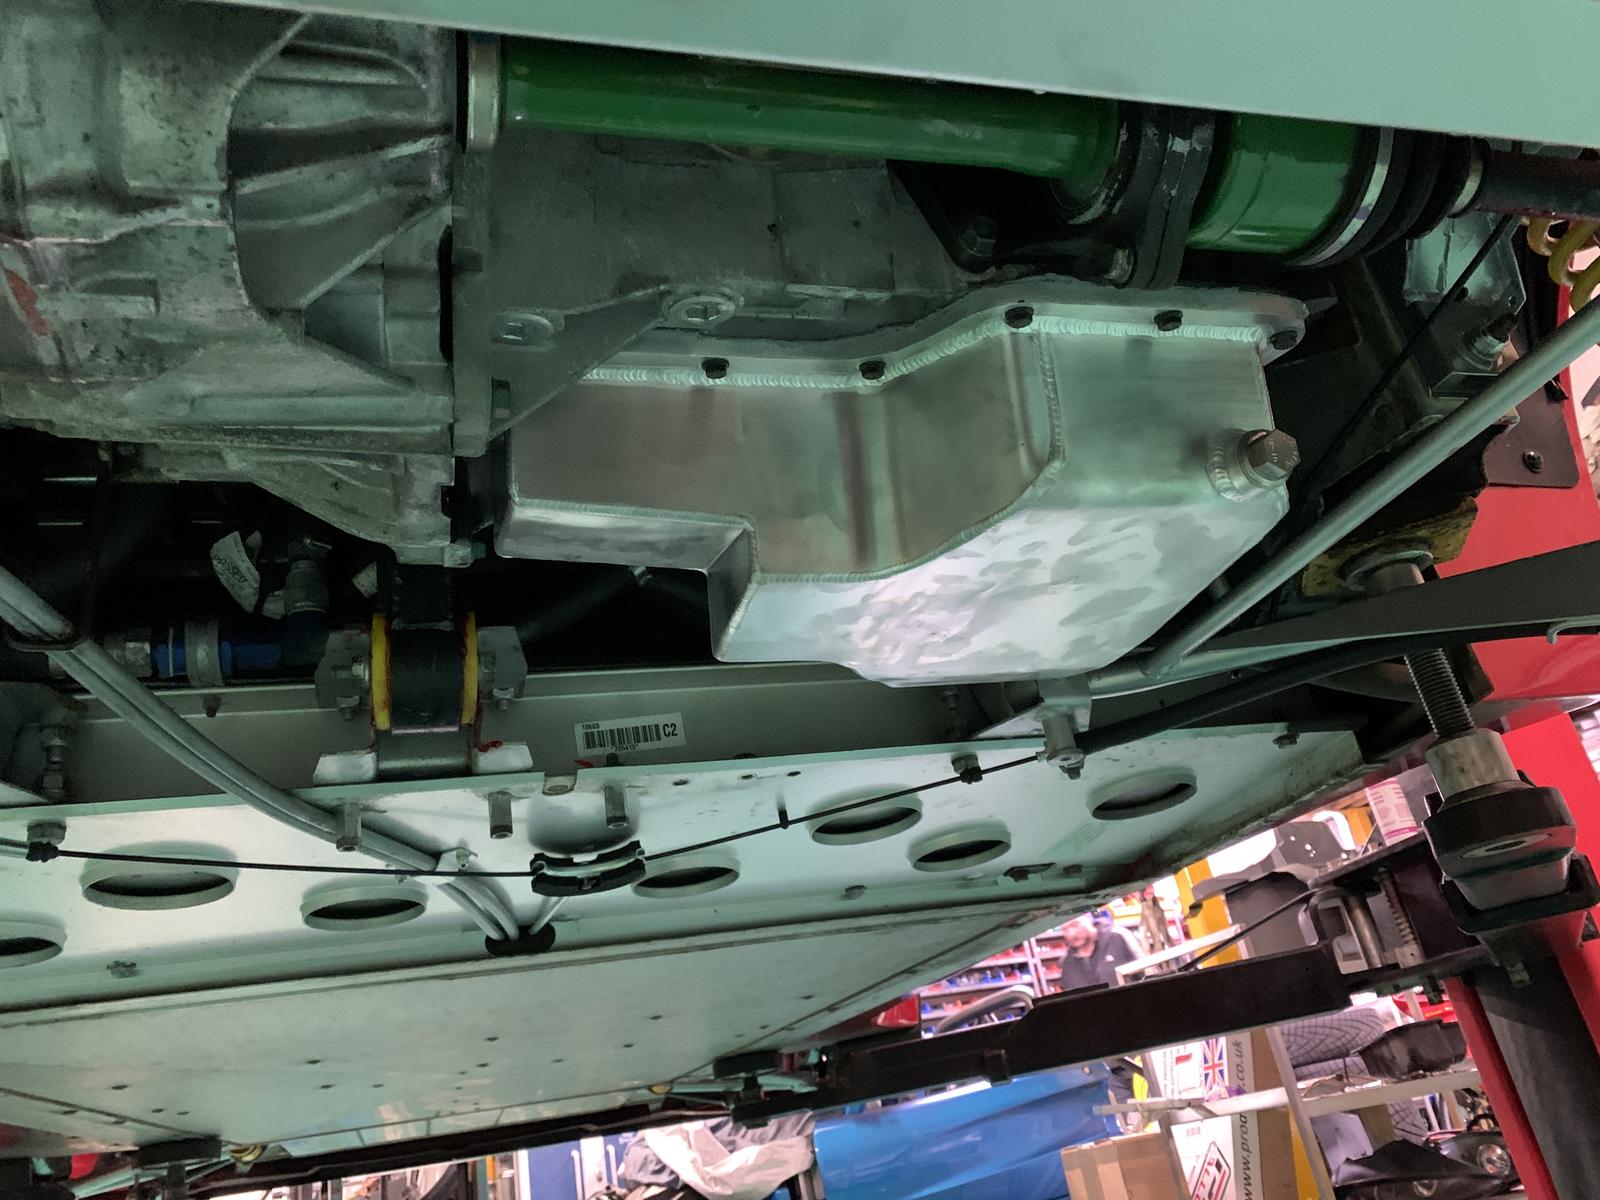
Daves works with the integrated sheer panel thats in the cups without issue so was fit and forget unlike what you have to do with the morroso pan to make fit (not mine but found it while researching sumps)
I’m not totally convinced that wasn’t someone over reacting BTW, but I wasn’t going to risk it
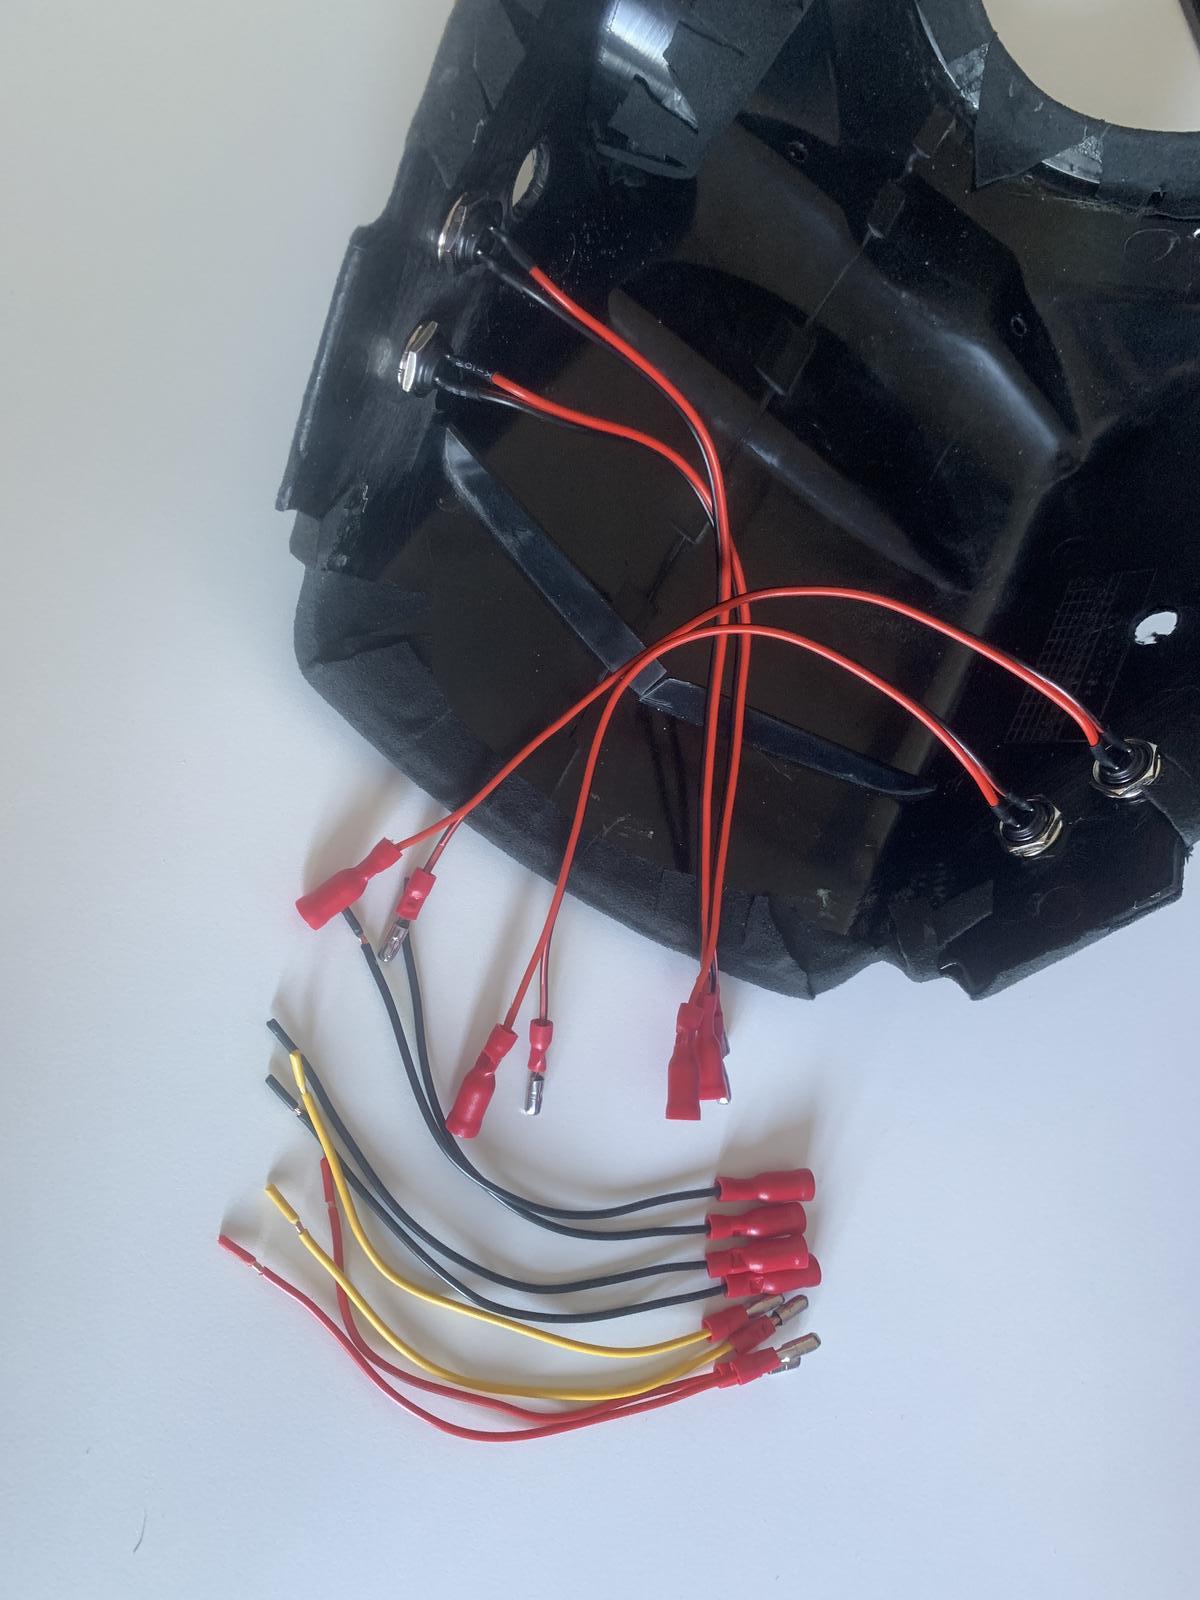
Wiring was fed through the dash and has exited with the switchpack wiring - three clusters of cable meant it all fitted - no fouling on anything steering related, exactly as planned
At the same time I found lots of excess wiring, as my car has airbags they added in the normal non cup loom but left in all the central looking wiring etc, I shortened all that, reterminated and can add back in should it be needed, but I took out a ton of extra bits
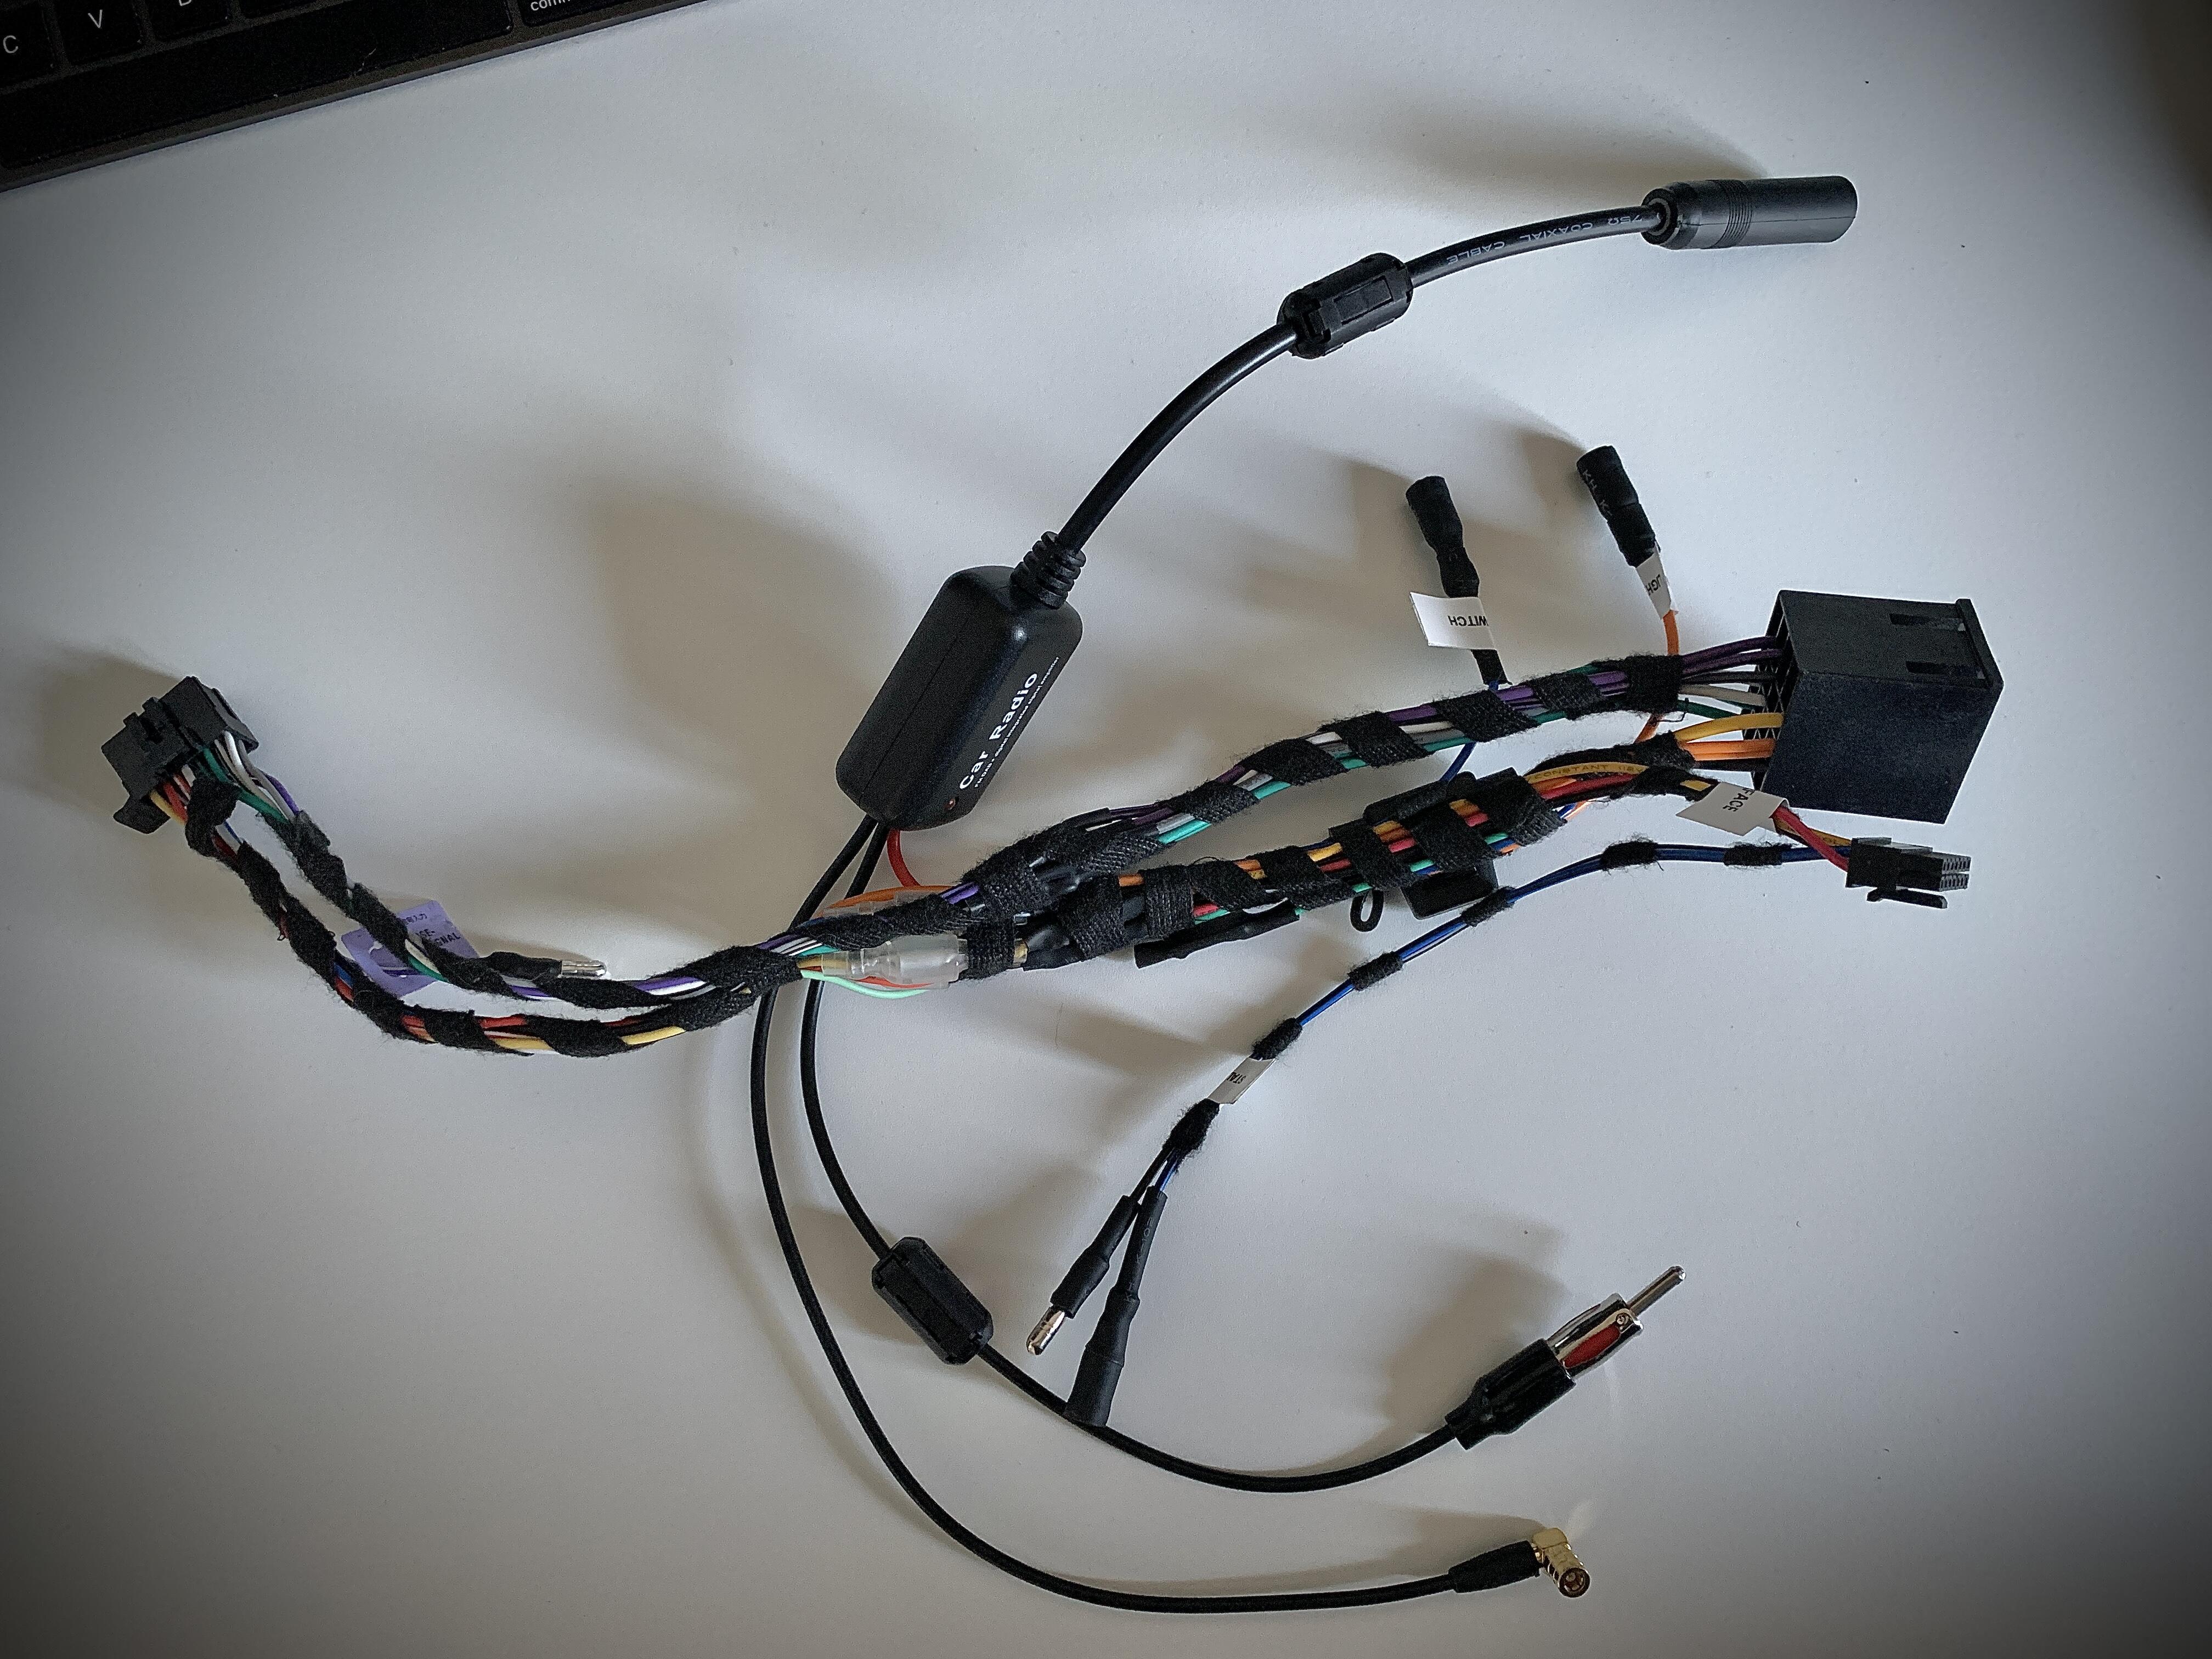
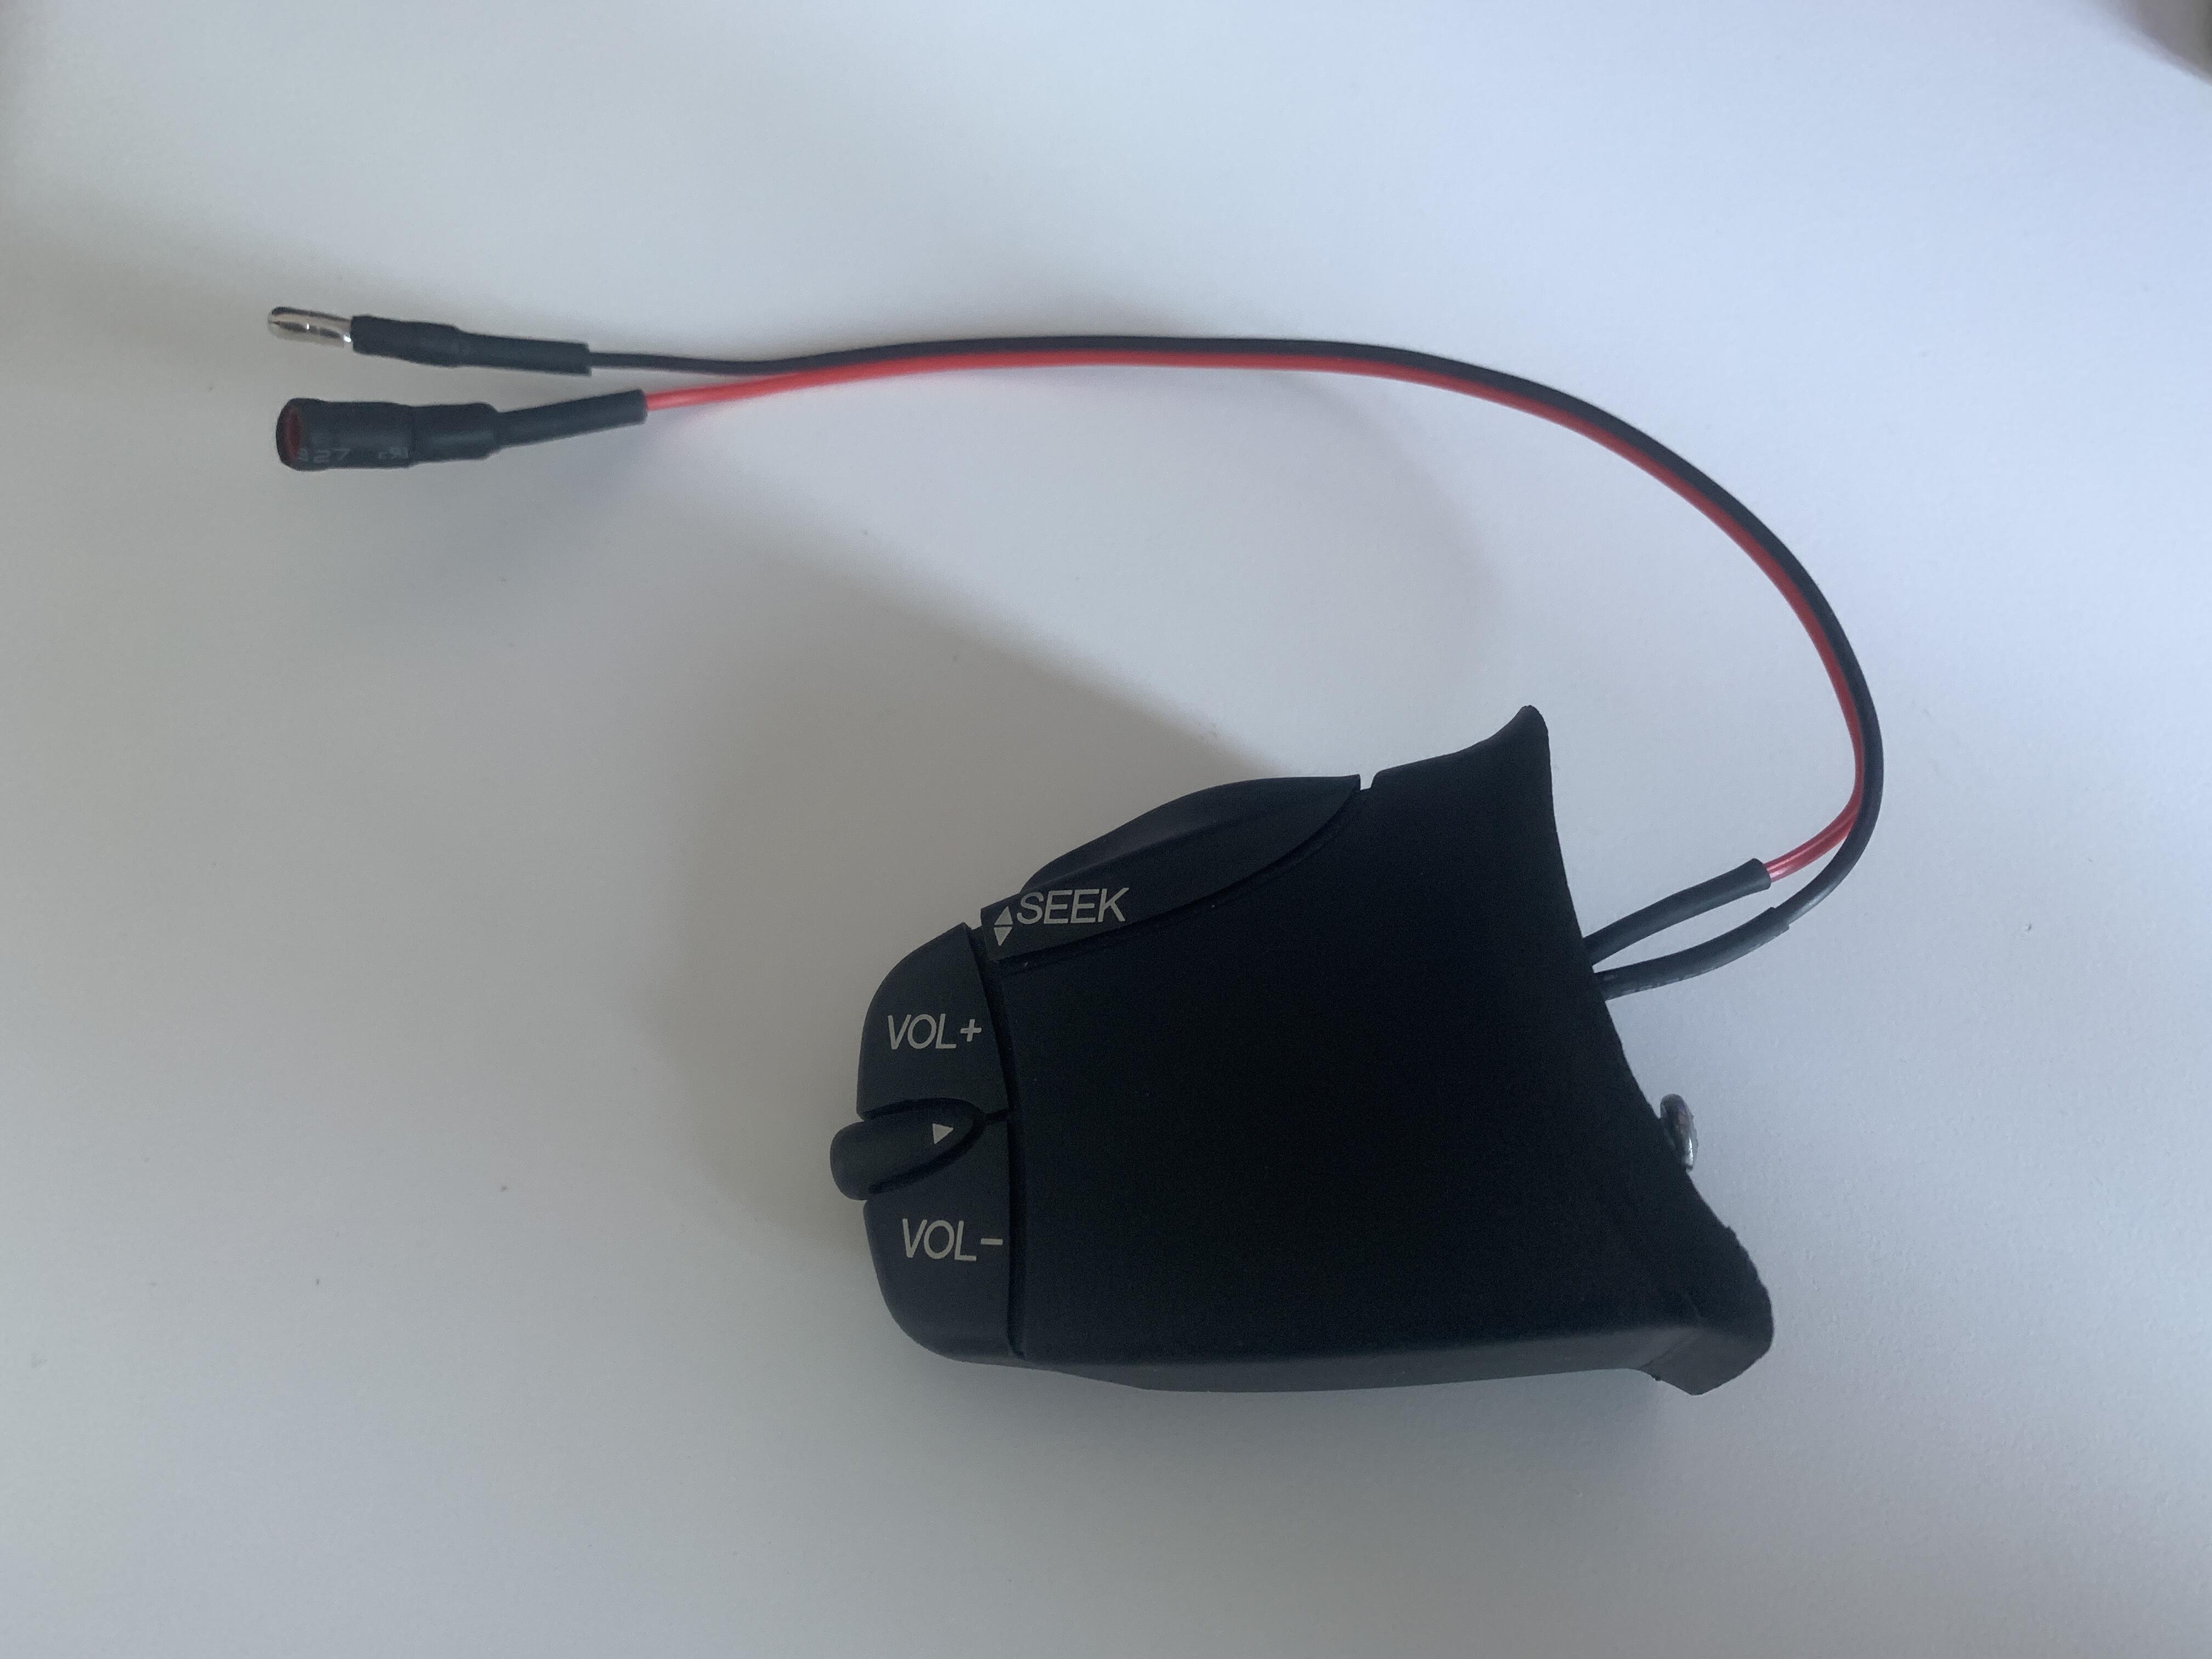
At the same time I started adapting a new loom for the stereo. I am adding stalk controls, DAB splitter, and stereo loom.
As you might have picked up I’ve not got an issue in adding a few things that make life a bit easier to the car, and after 6 of these cars being used from weekend toys to dailys you start adding a few bits. And if you always wear harnesses, often listen to music and don’t have extendable arms then adding some stalk controls for the stereo makes like easier.
If I don’t like I’ll do another version of the shroud with out it.
Here is another example on my 350
With all the looms going together I would have:
Factory ISO Loom > Modified ford loom to integrate stalk control>back to ISO loom> Iso back to Pioneer loom - wilst adding dab spliter and various take offs
Start off with these premade interfaces and some naked ISO blocks:

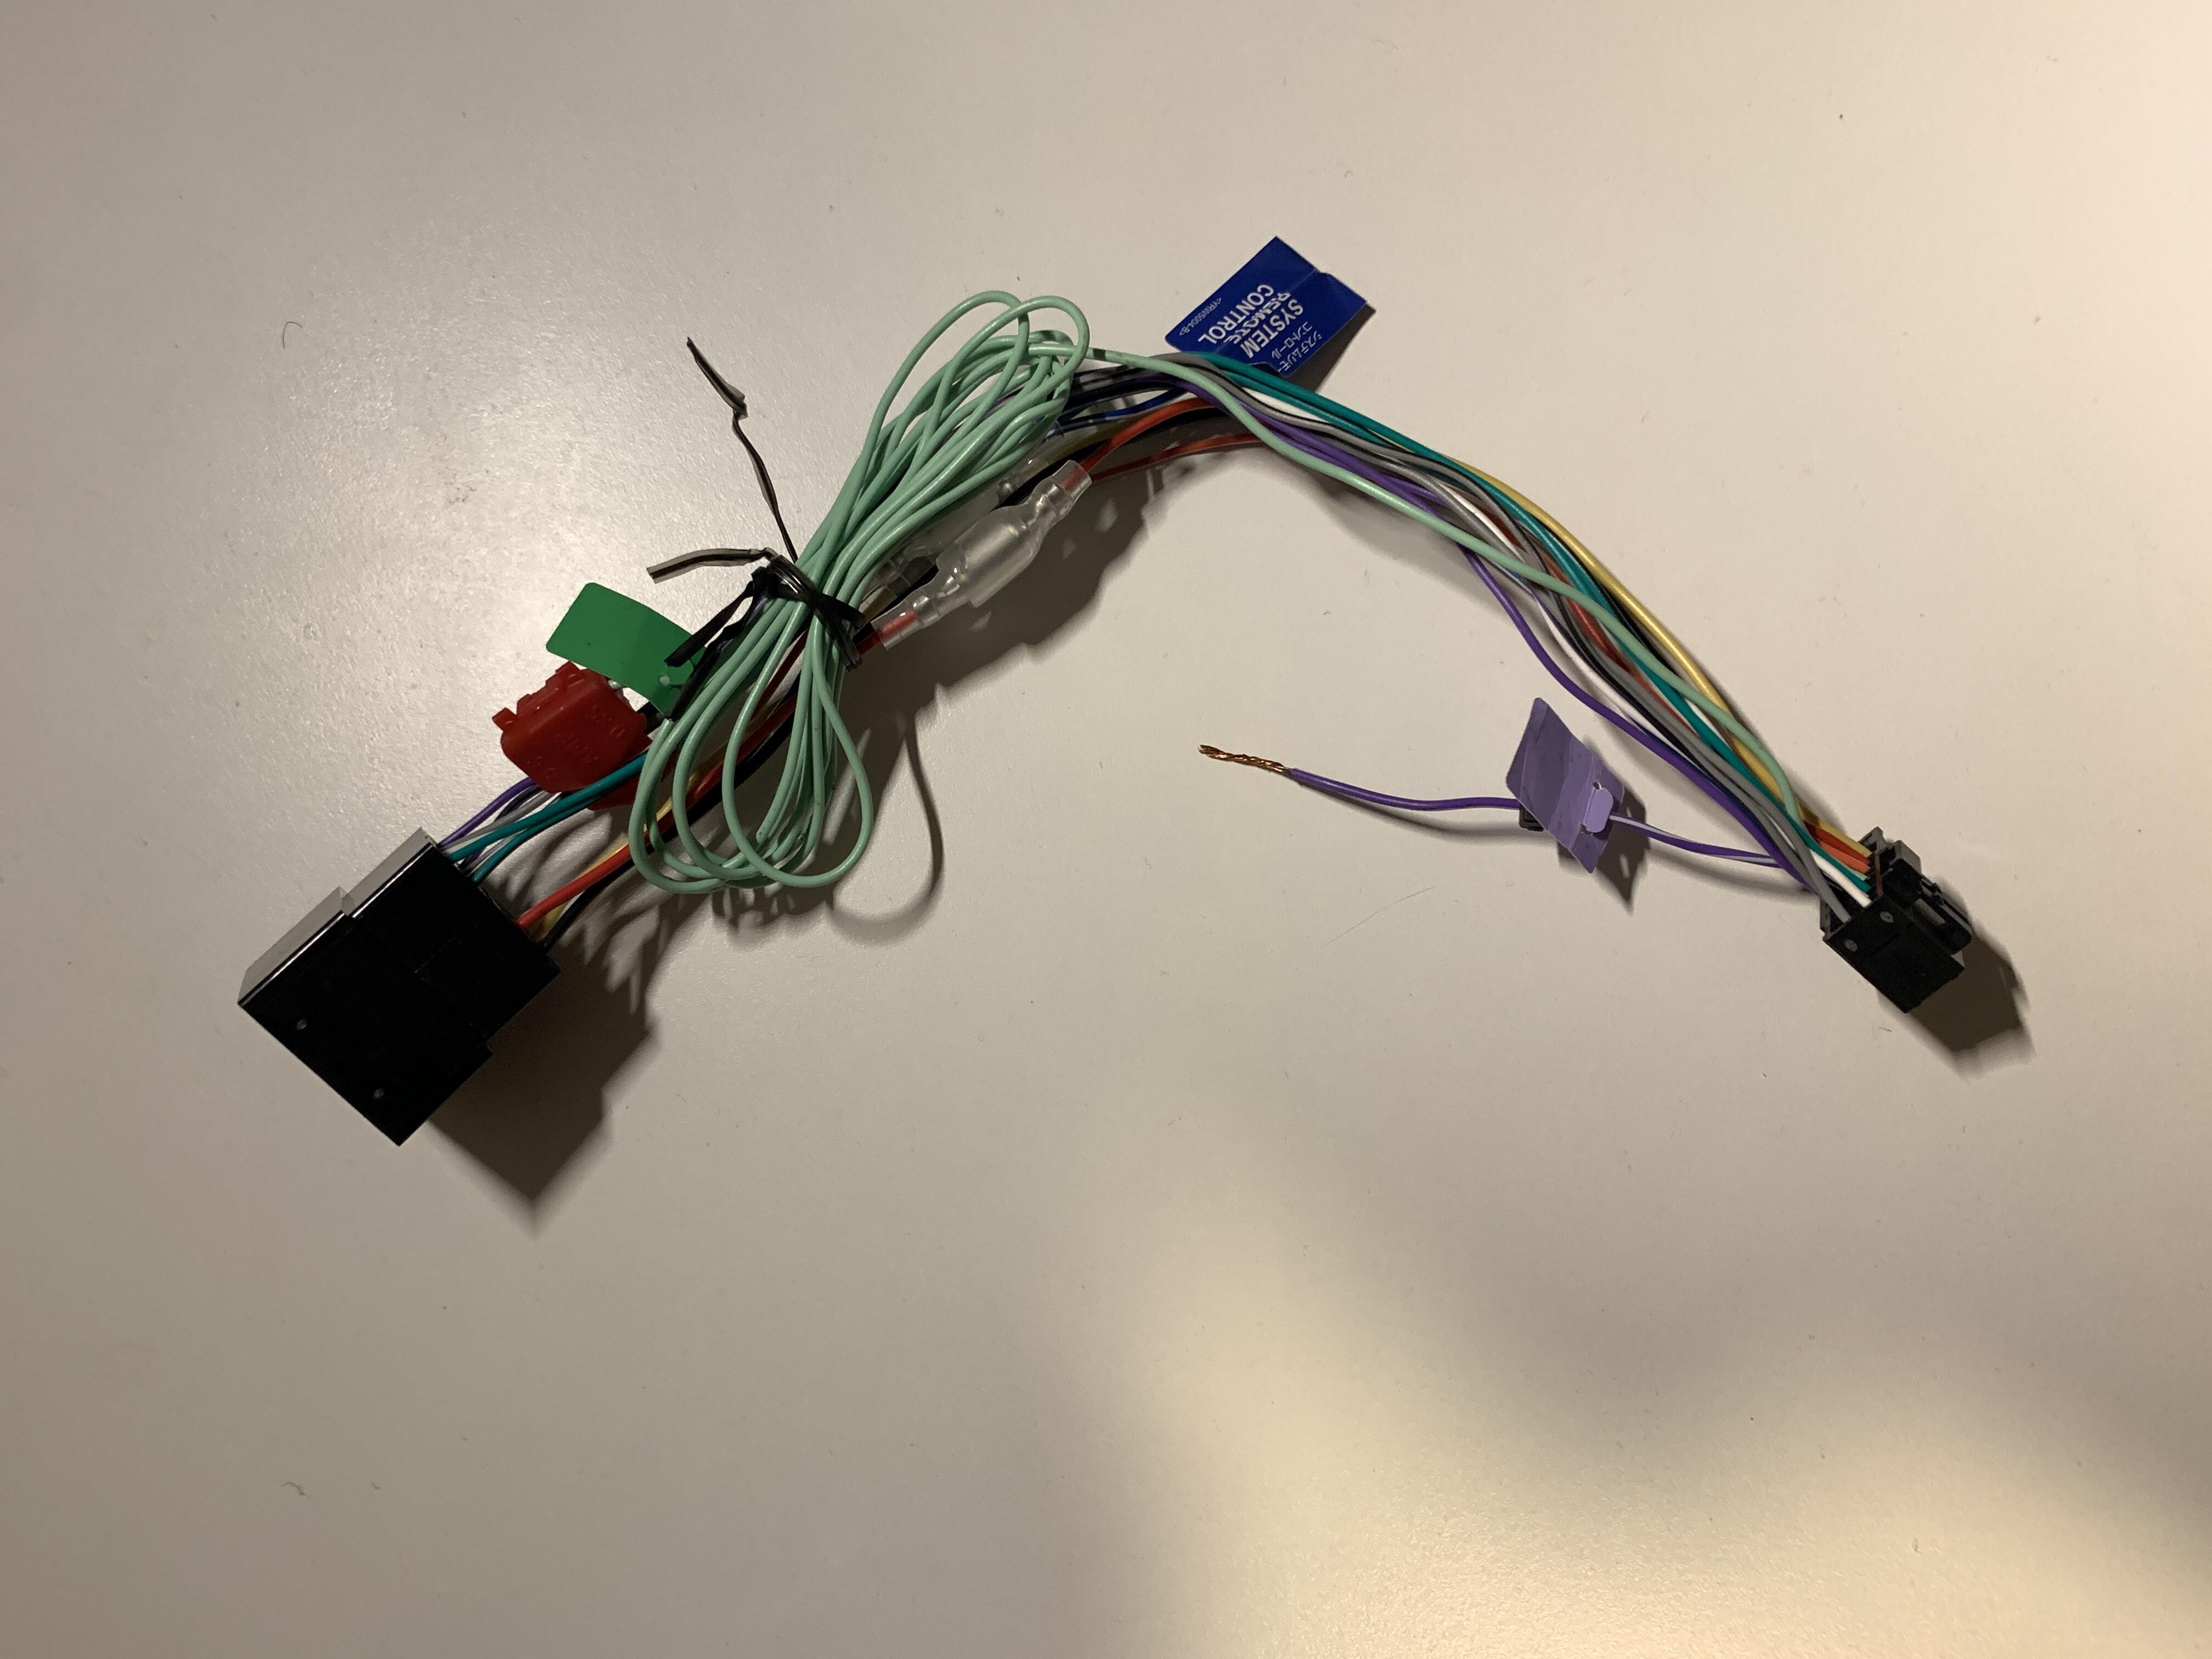
Instead I made my own loom going from ISO to Pioneer whilst adding stalk control box (works on resistance signal for button control), take offs for dash lights (needed for a few circuits later), trigger for sub, rear camera power, reverse signal etc
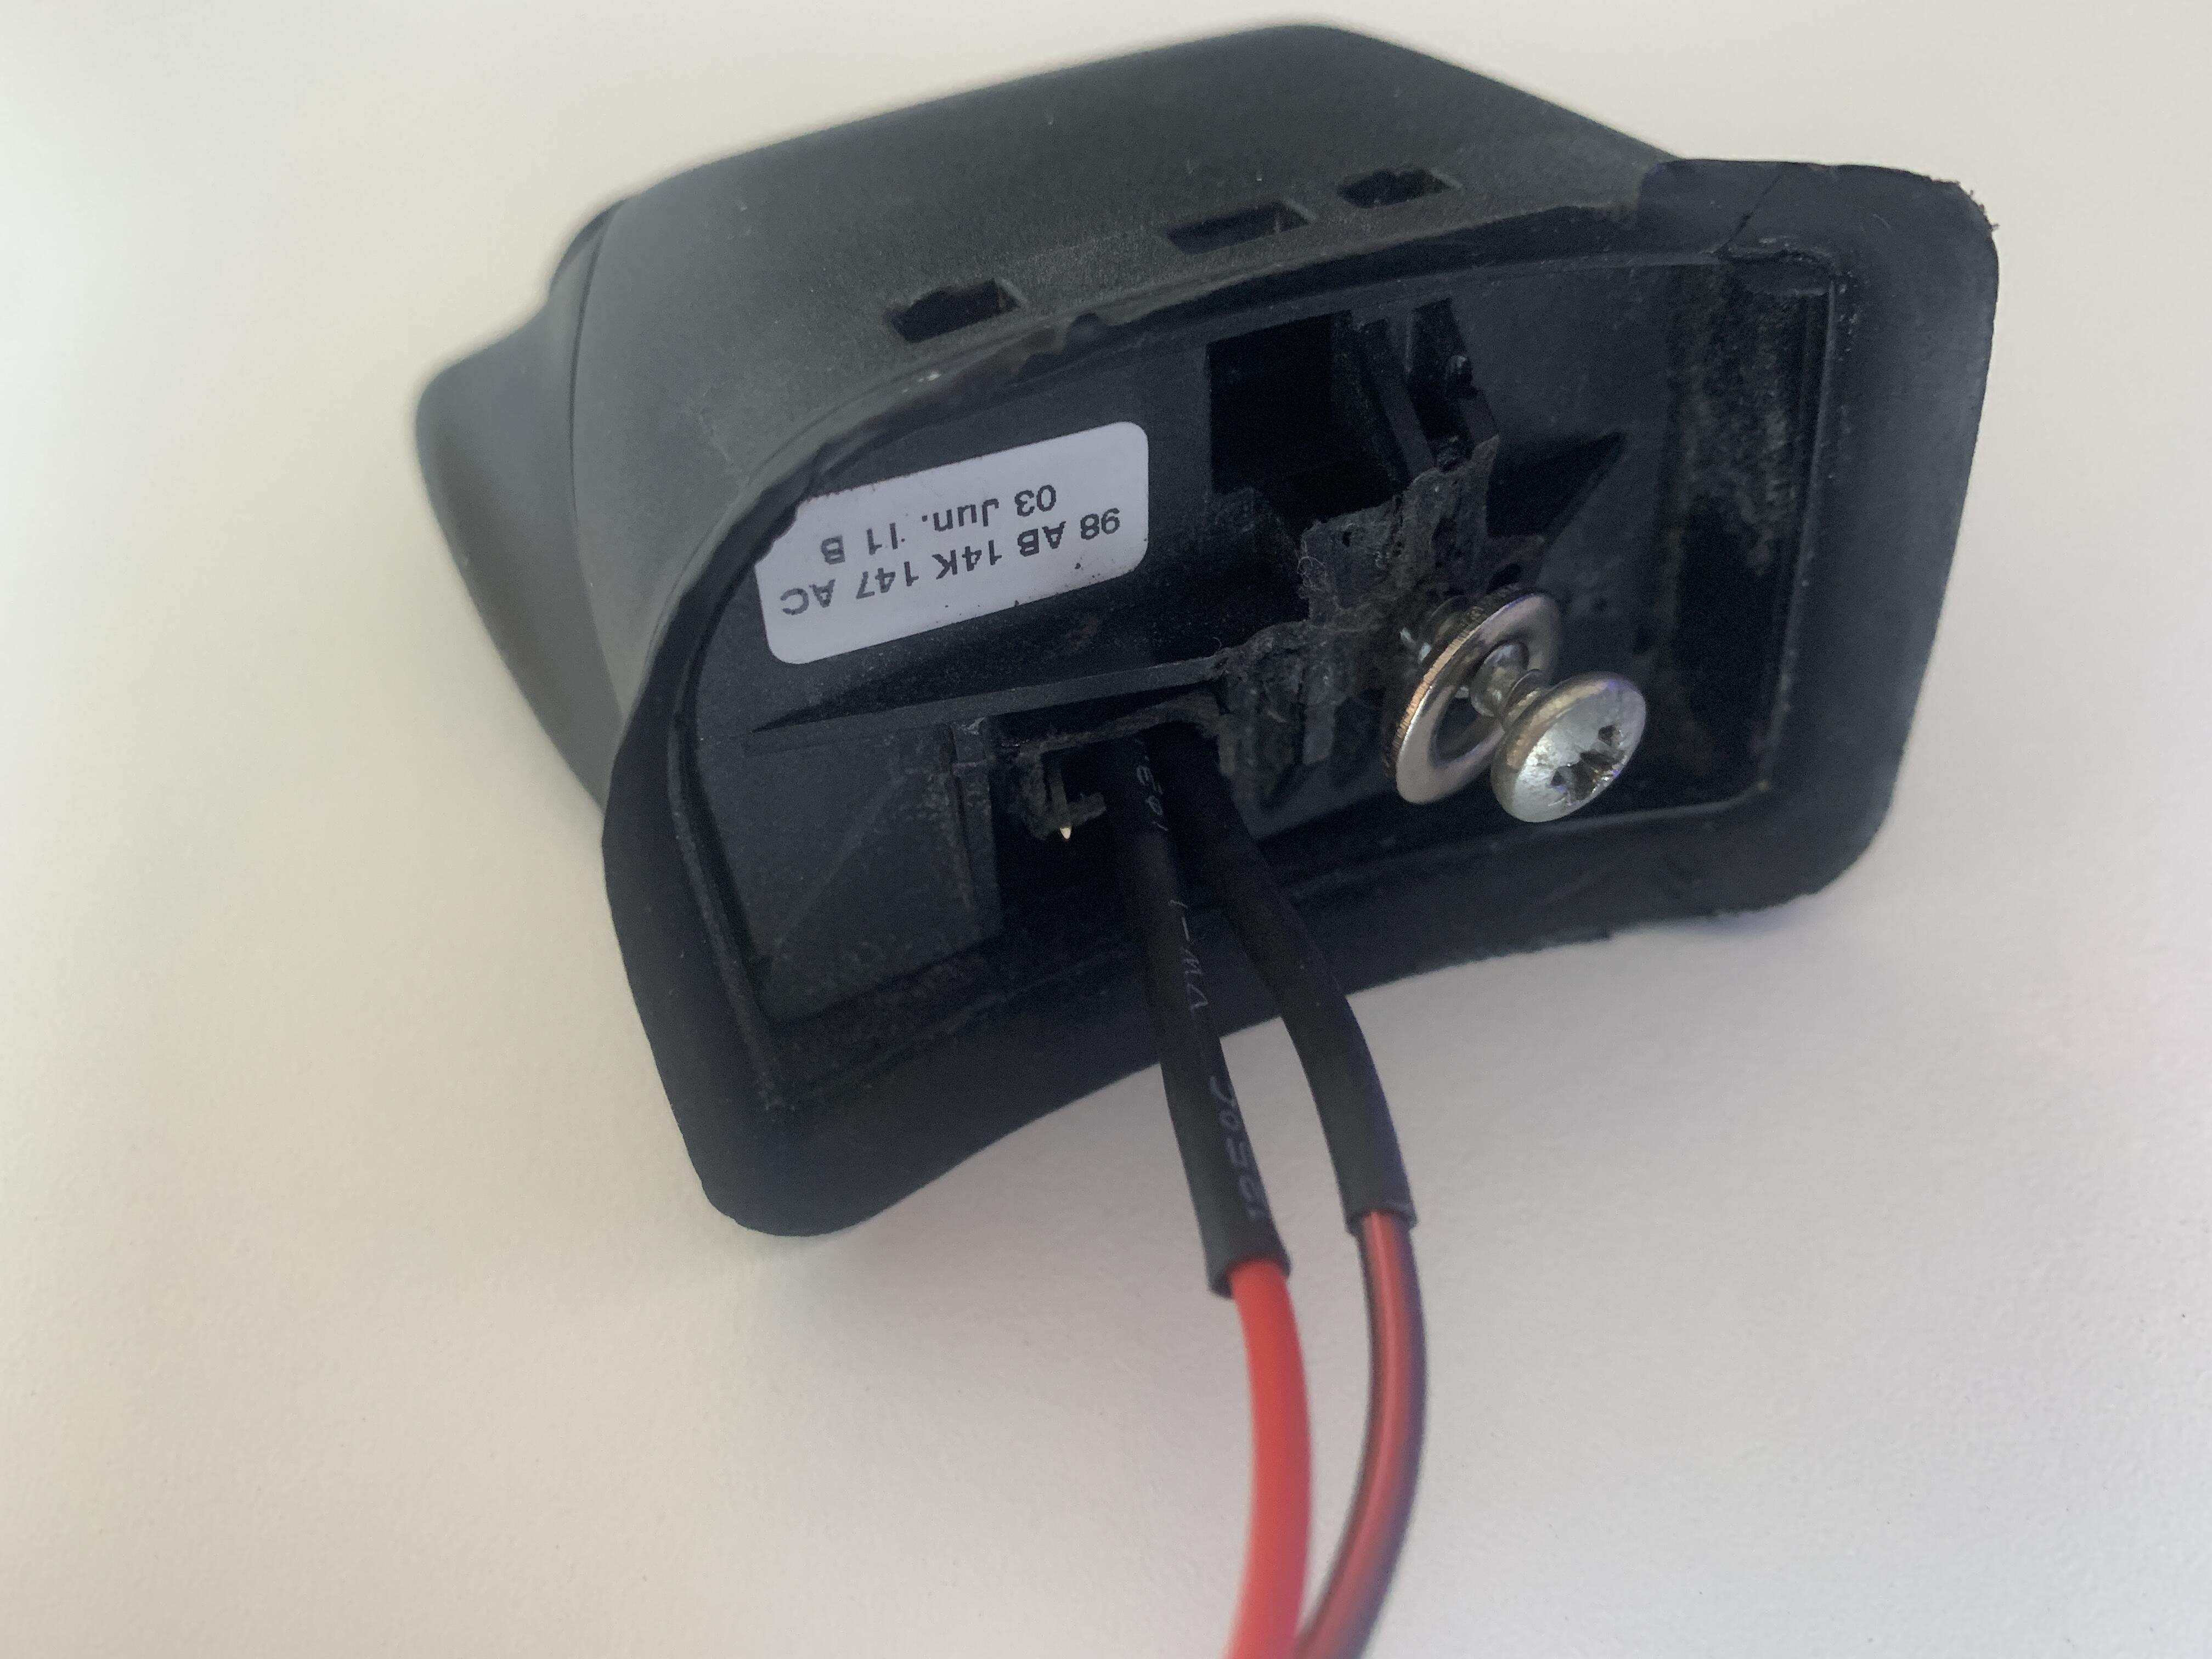
Ford stalk was modified for both mounting an integration with loom
Crikey! Good stuff ![]()
Good update Paul. AIM kit looks great. ![]()
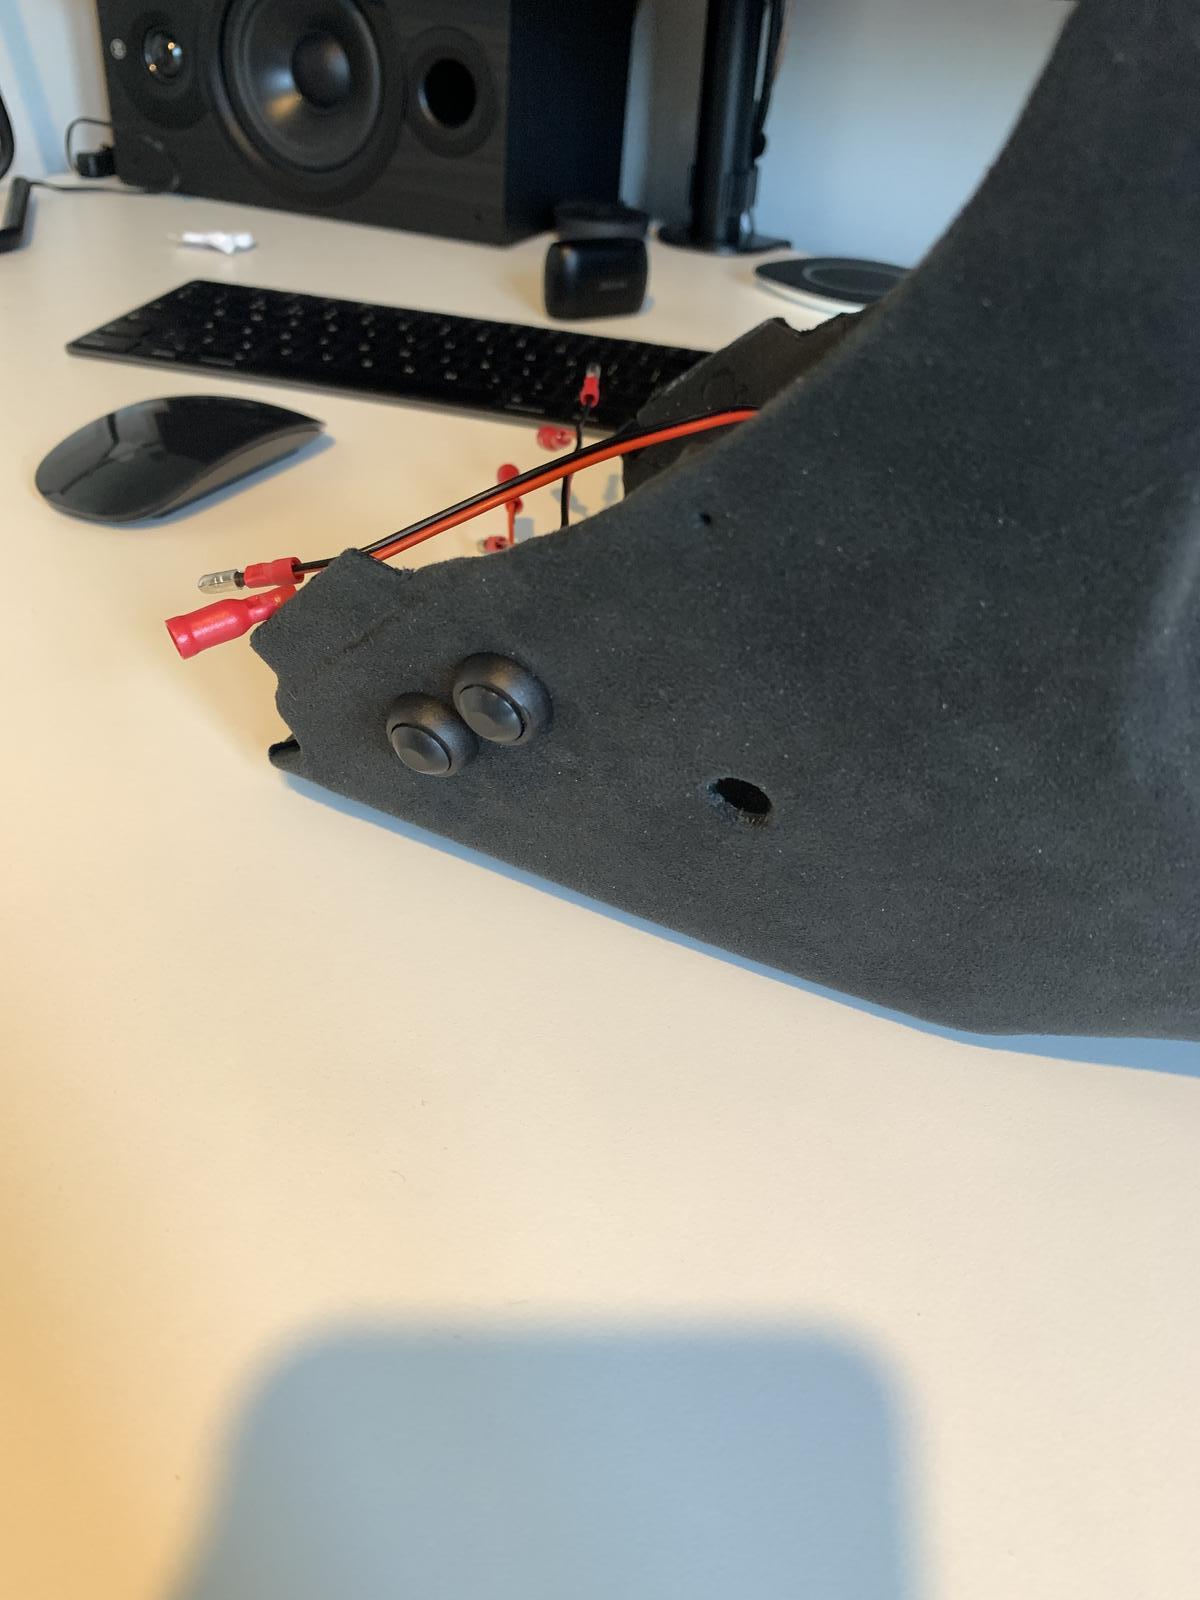
Now that I’d decided to move the switches down for the dash into the shroud, I thought I’d look to building out the shroud on the steering column.
I showed wiring earlier, but I need to create a bit of shelf, access for cabling, as well as adding switches for the dash.
First whack on a load of filler to start building out the side. As its so easy to shape, I just chuck a load of layers on and cut back freehand later
Rough shape, colour makes it look like the radius is sharp on the edge, but it’s the same radius:
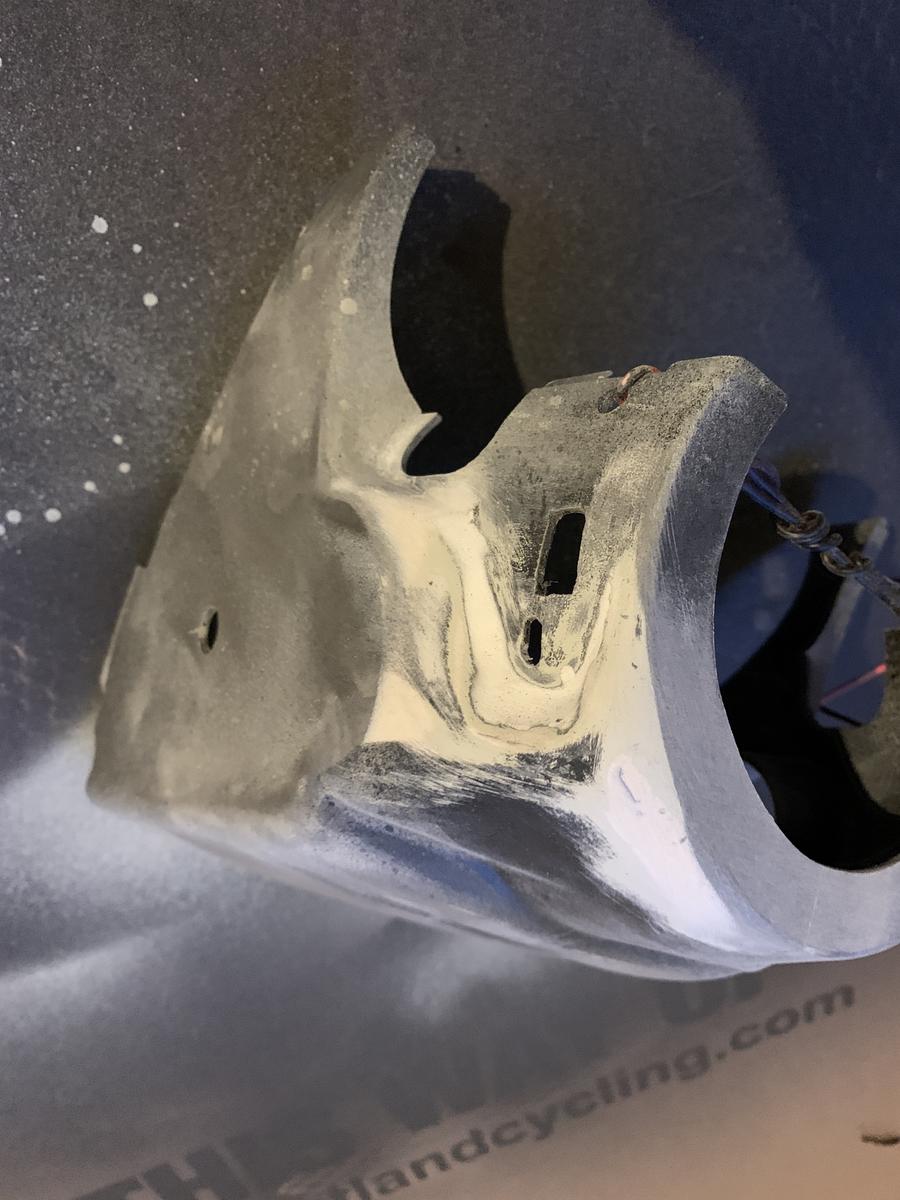
Putty and colour coat for proper shaping
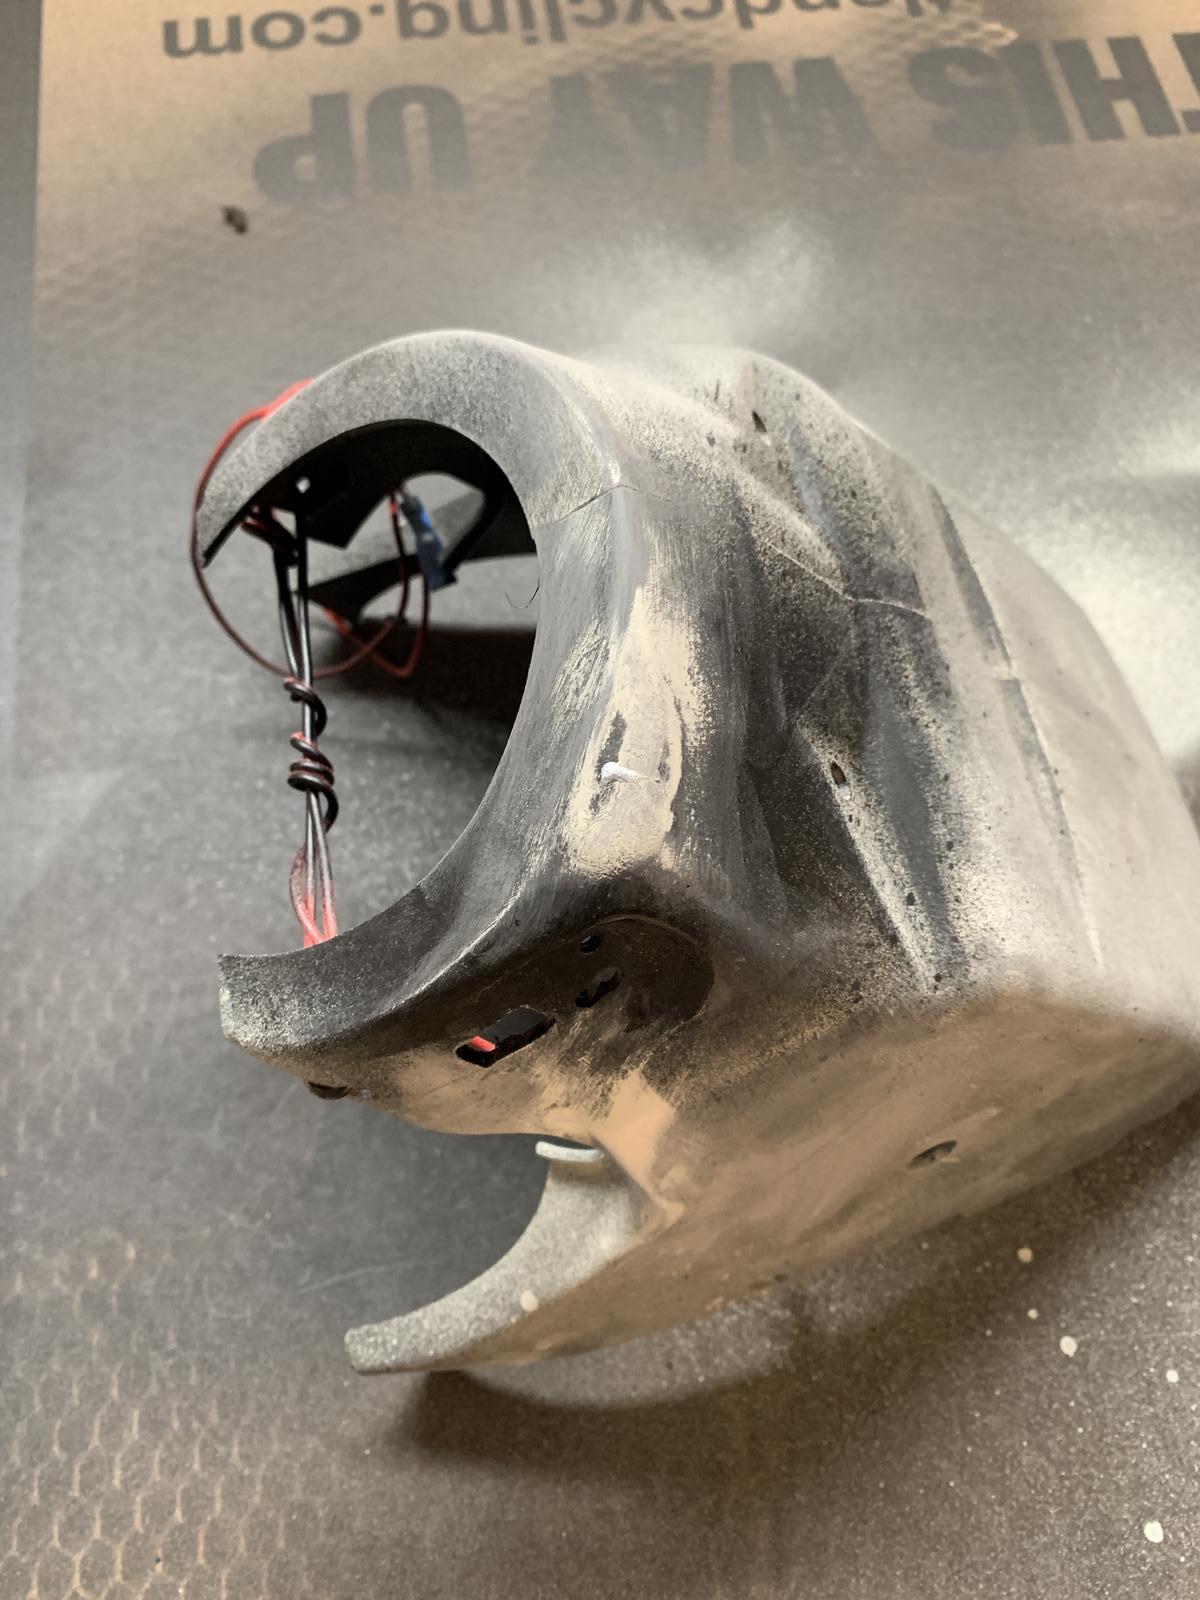
Filler added, Rough sand and offer up stalk
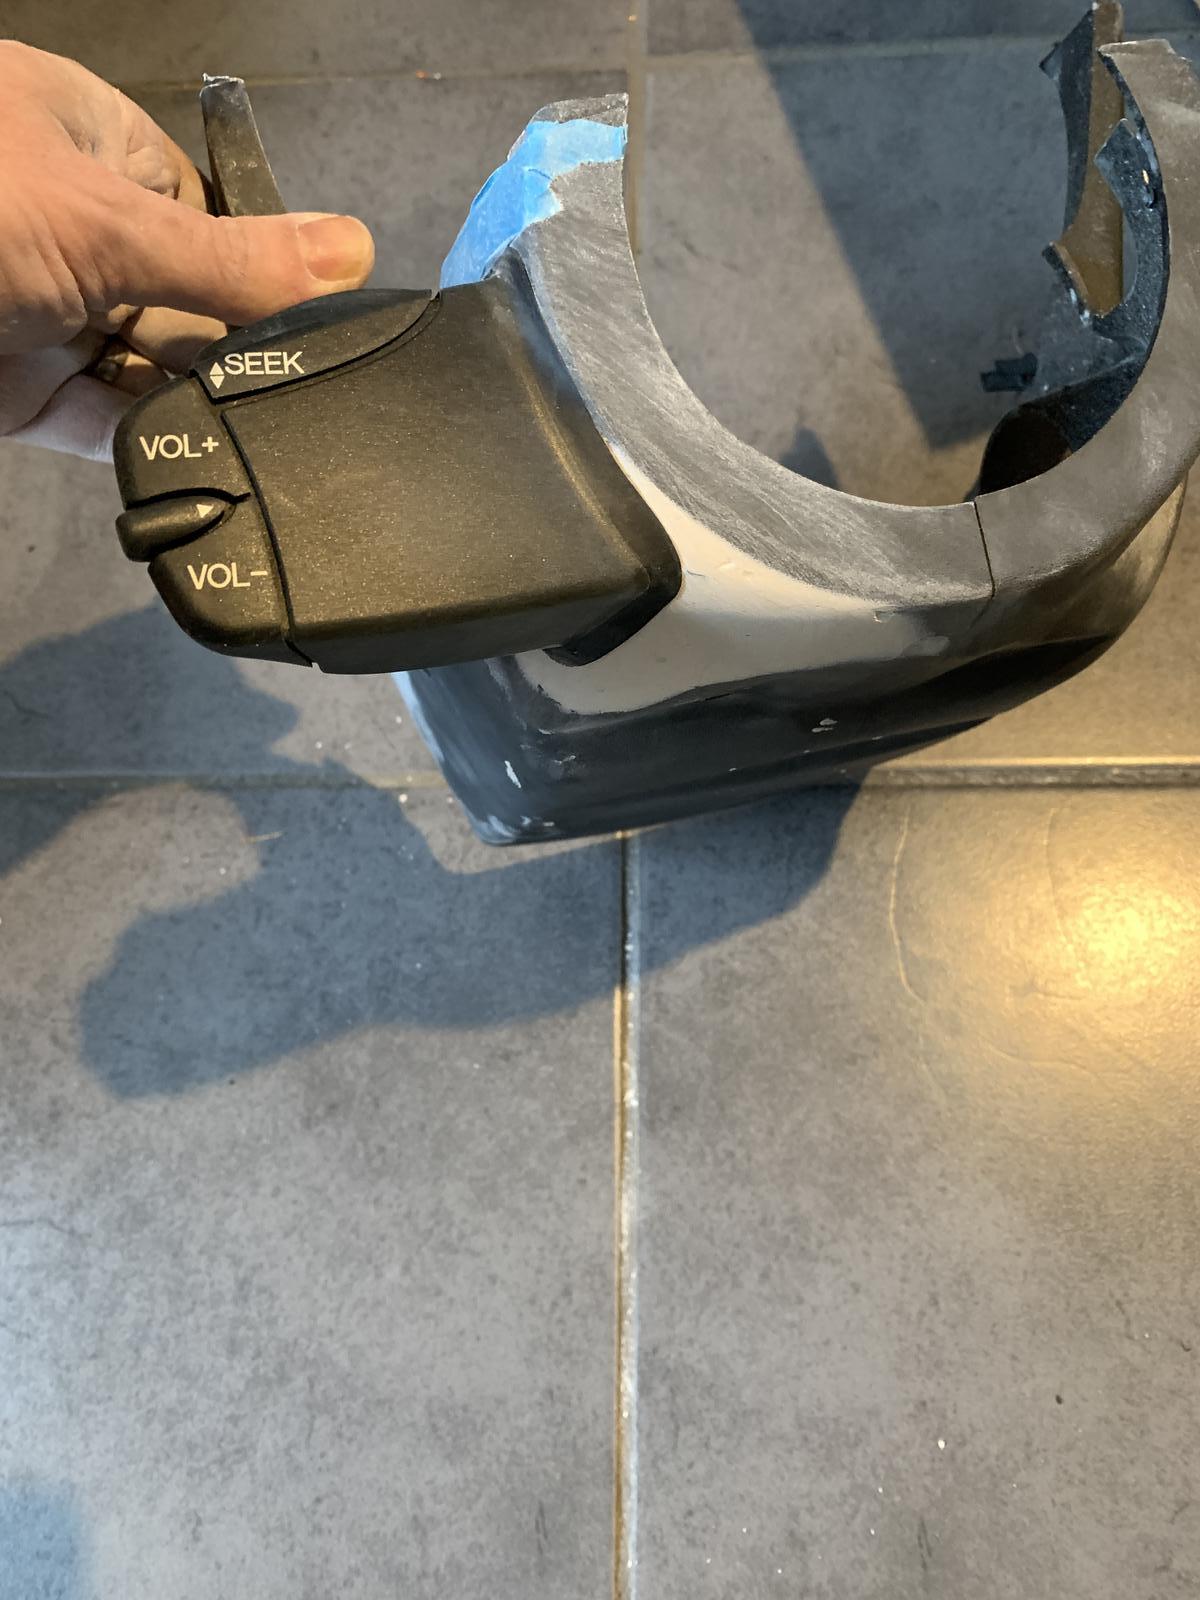
Then on to trimming will fit stalk later, initial trim
Starting to mount properly down
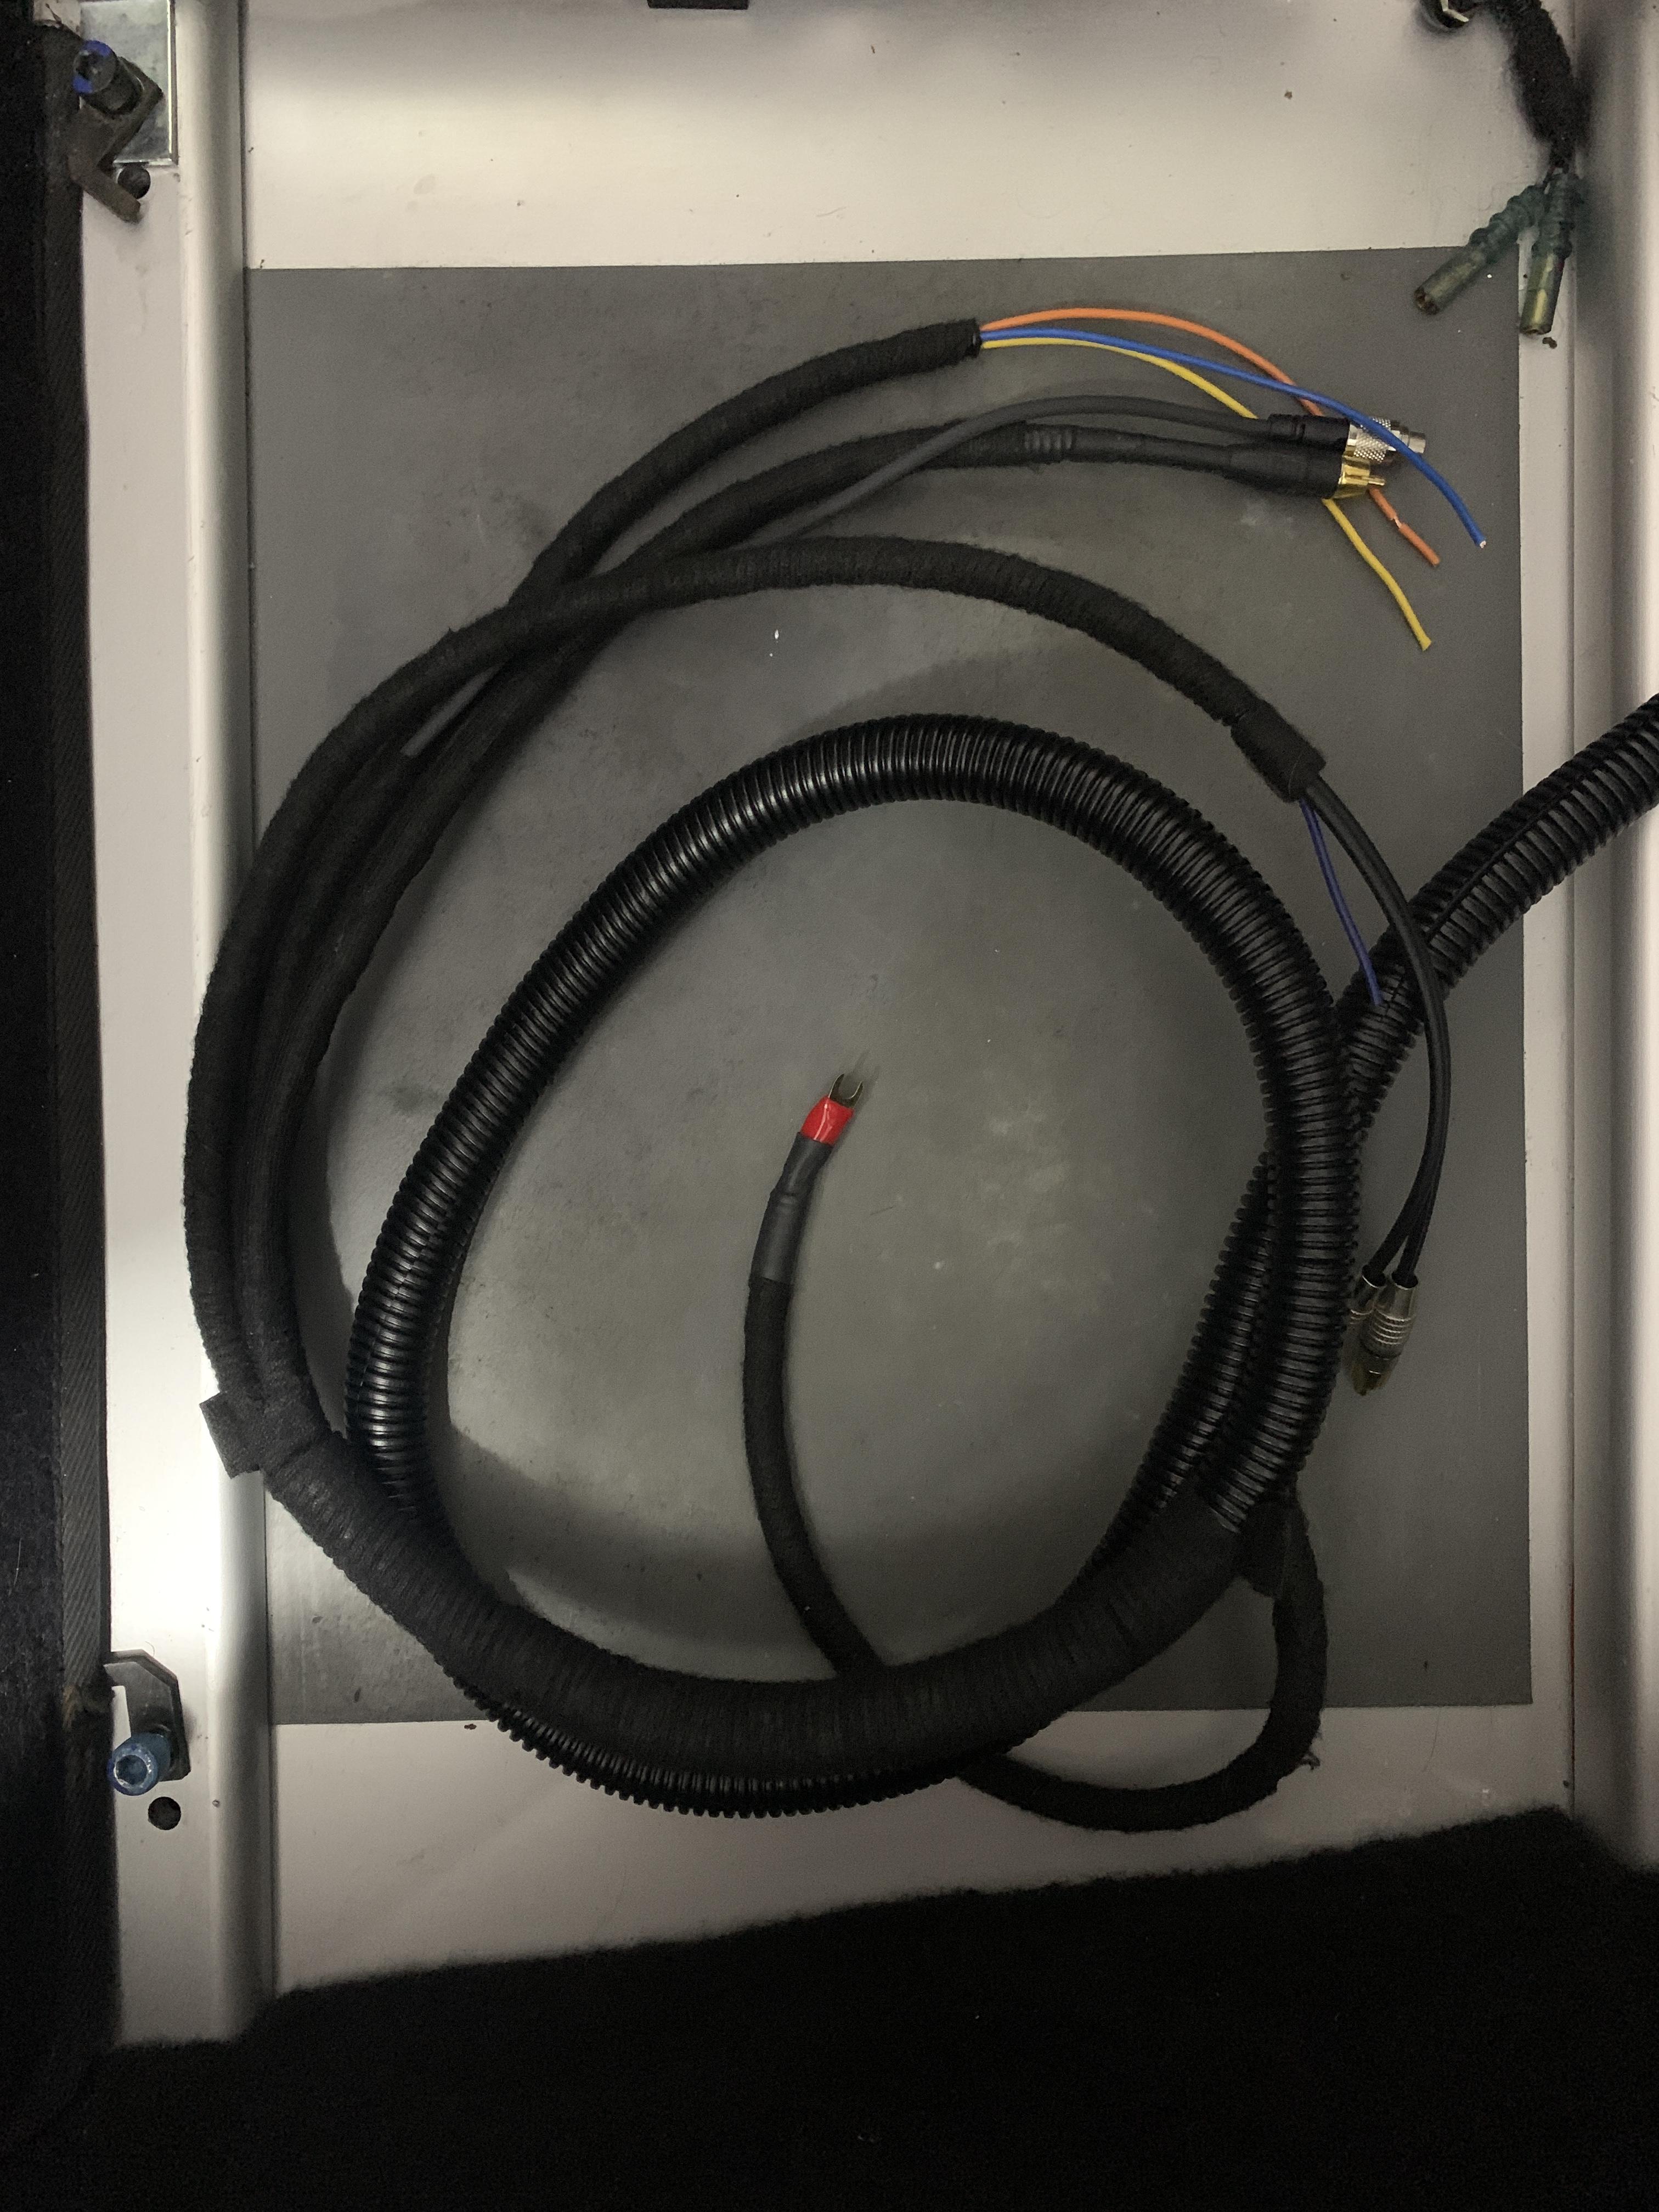
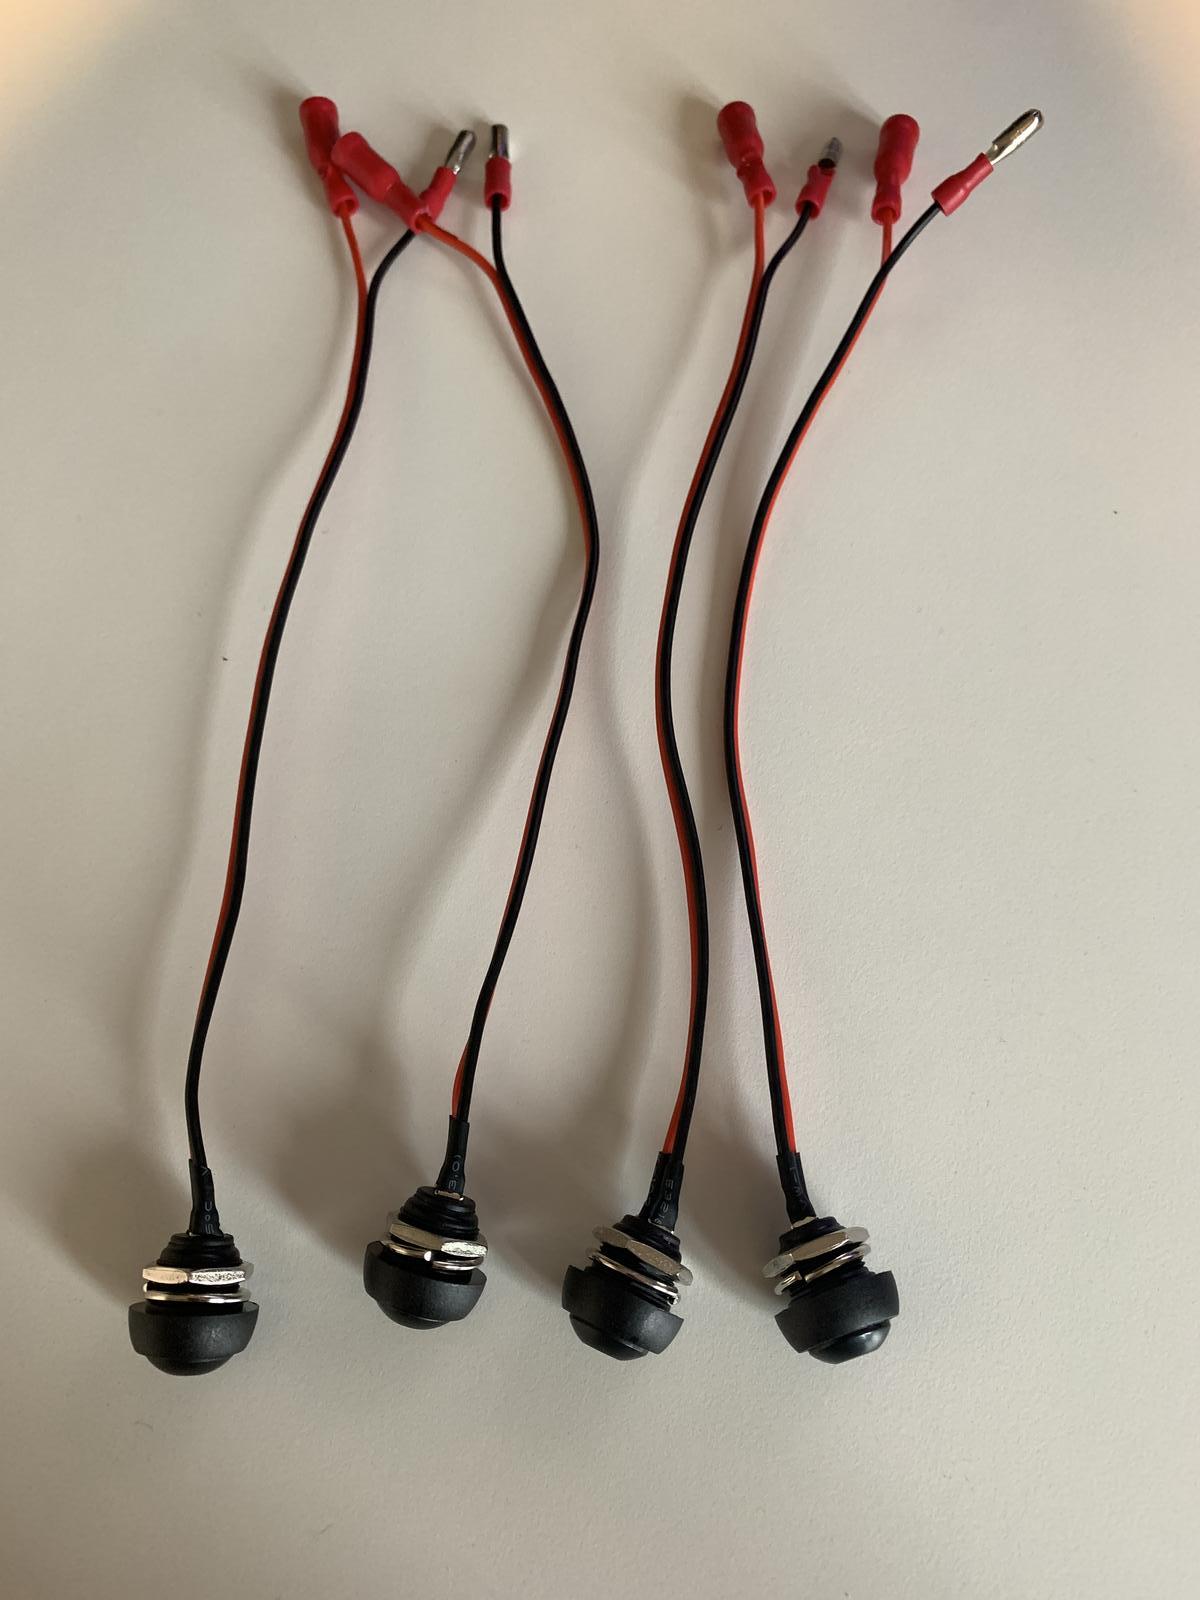
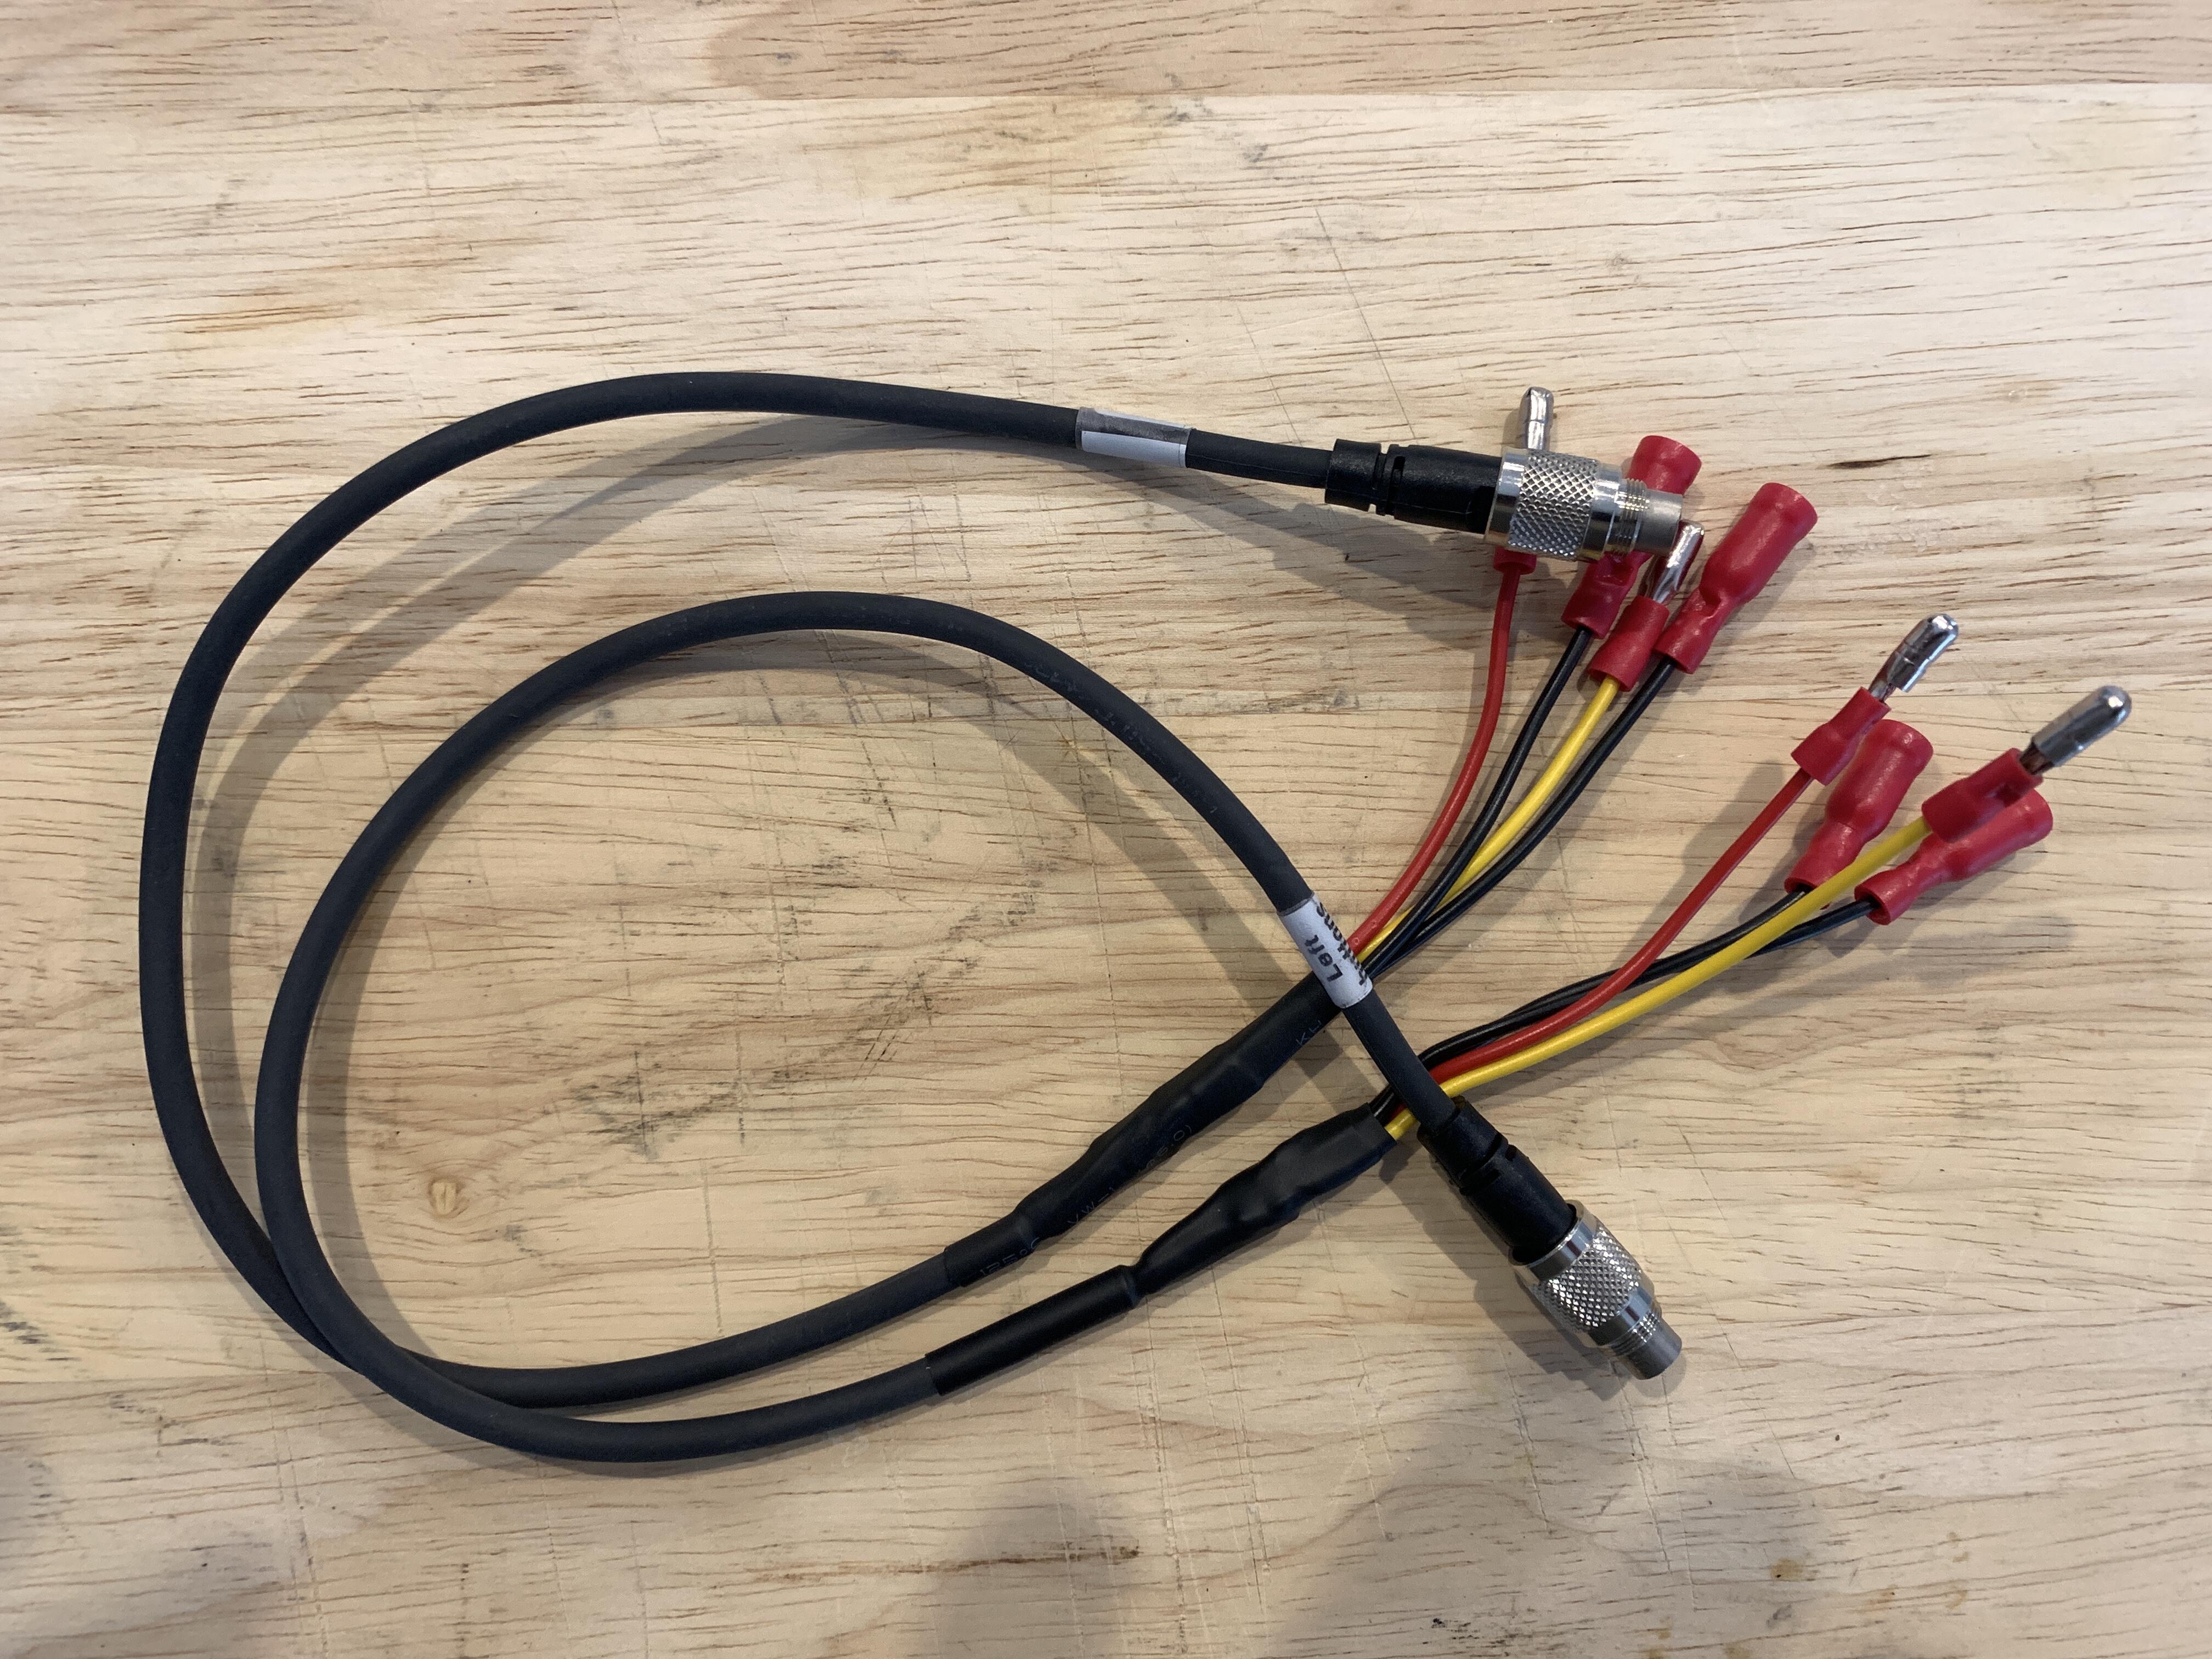
Switches for dash control being put together, will build the other end of the harness later. Pinouts for connection are as follows
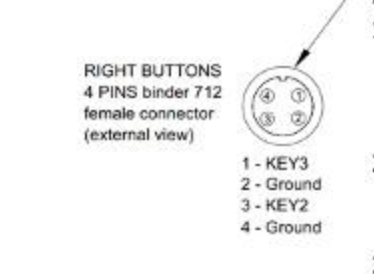
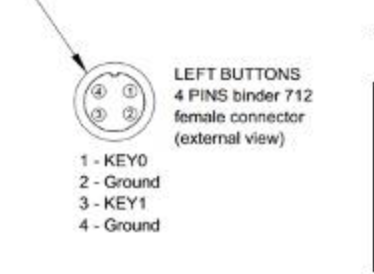
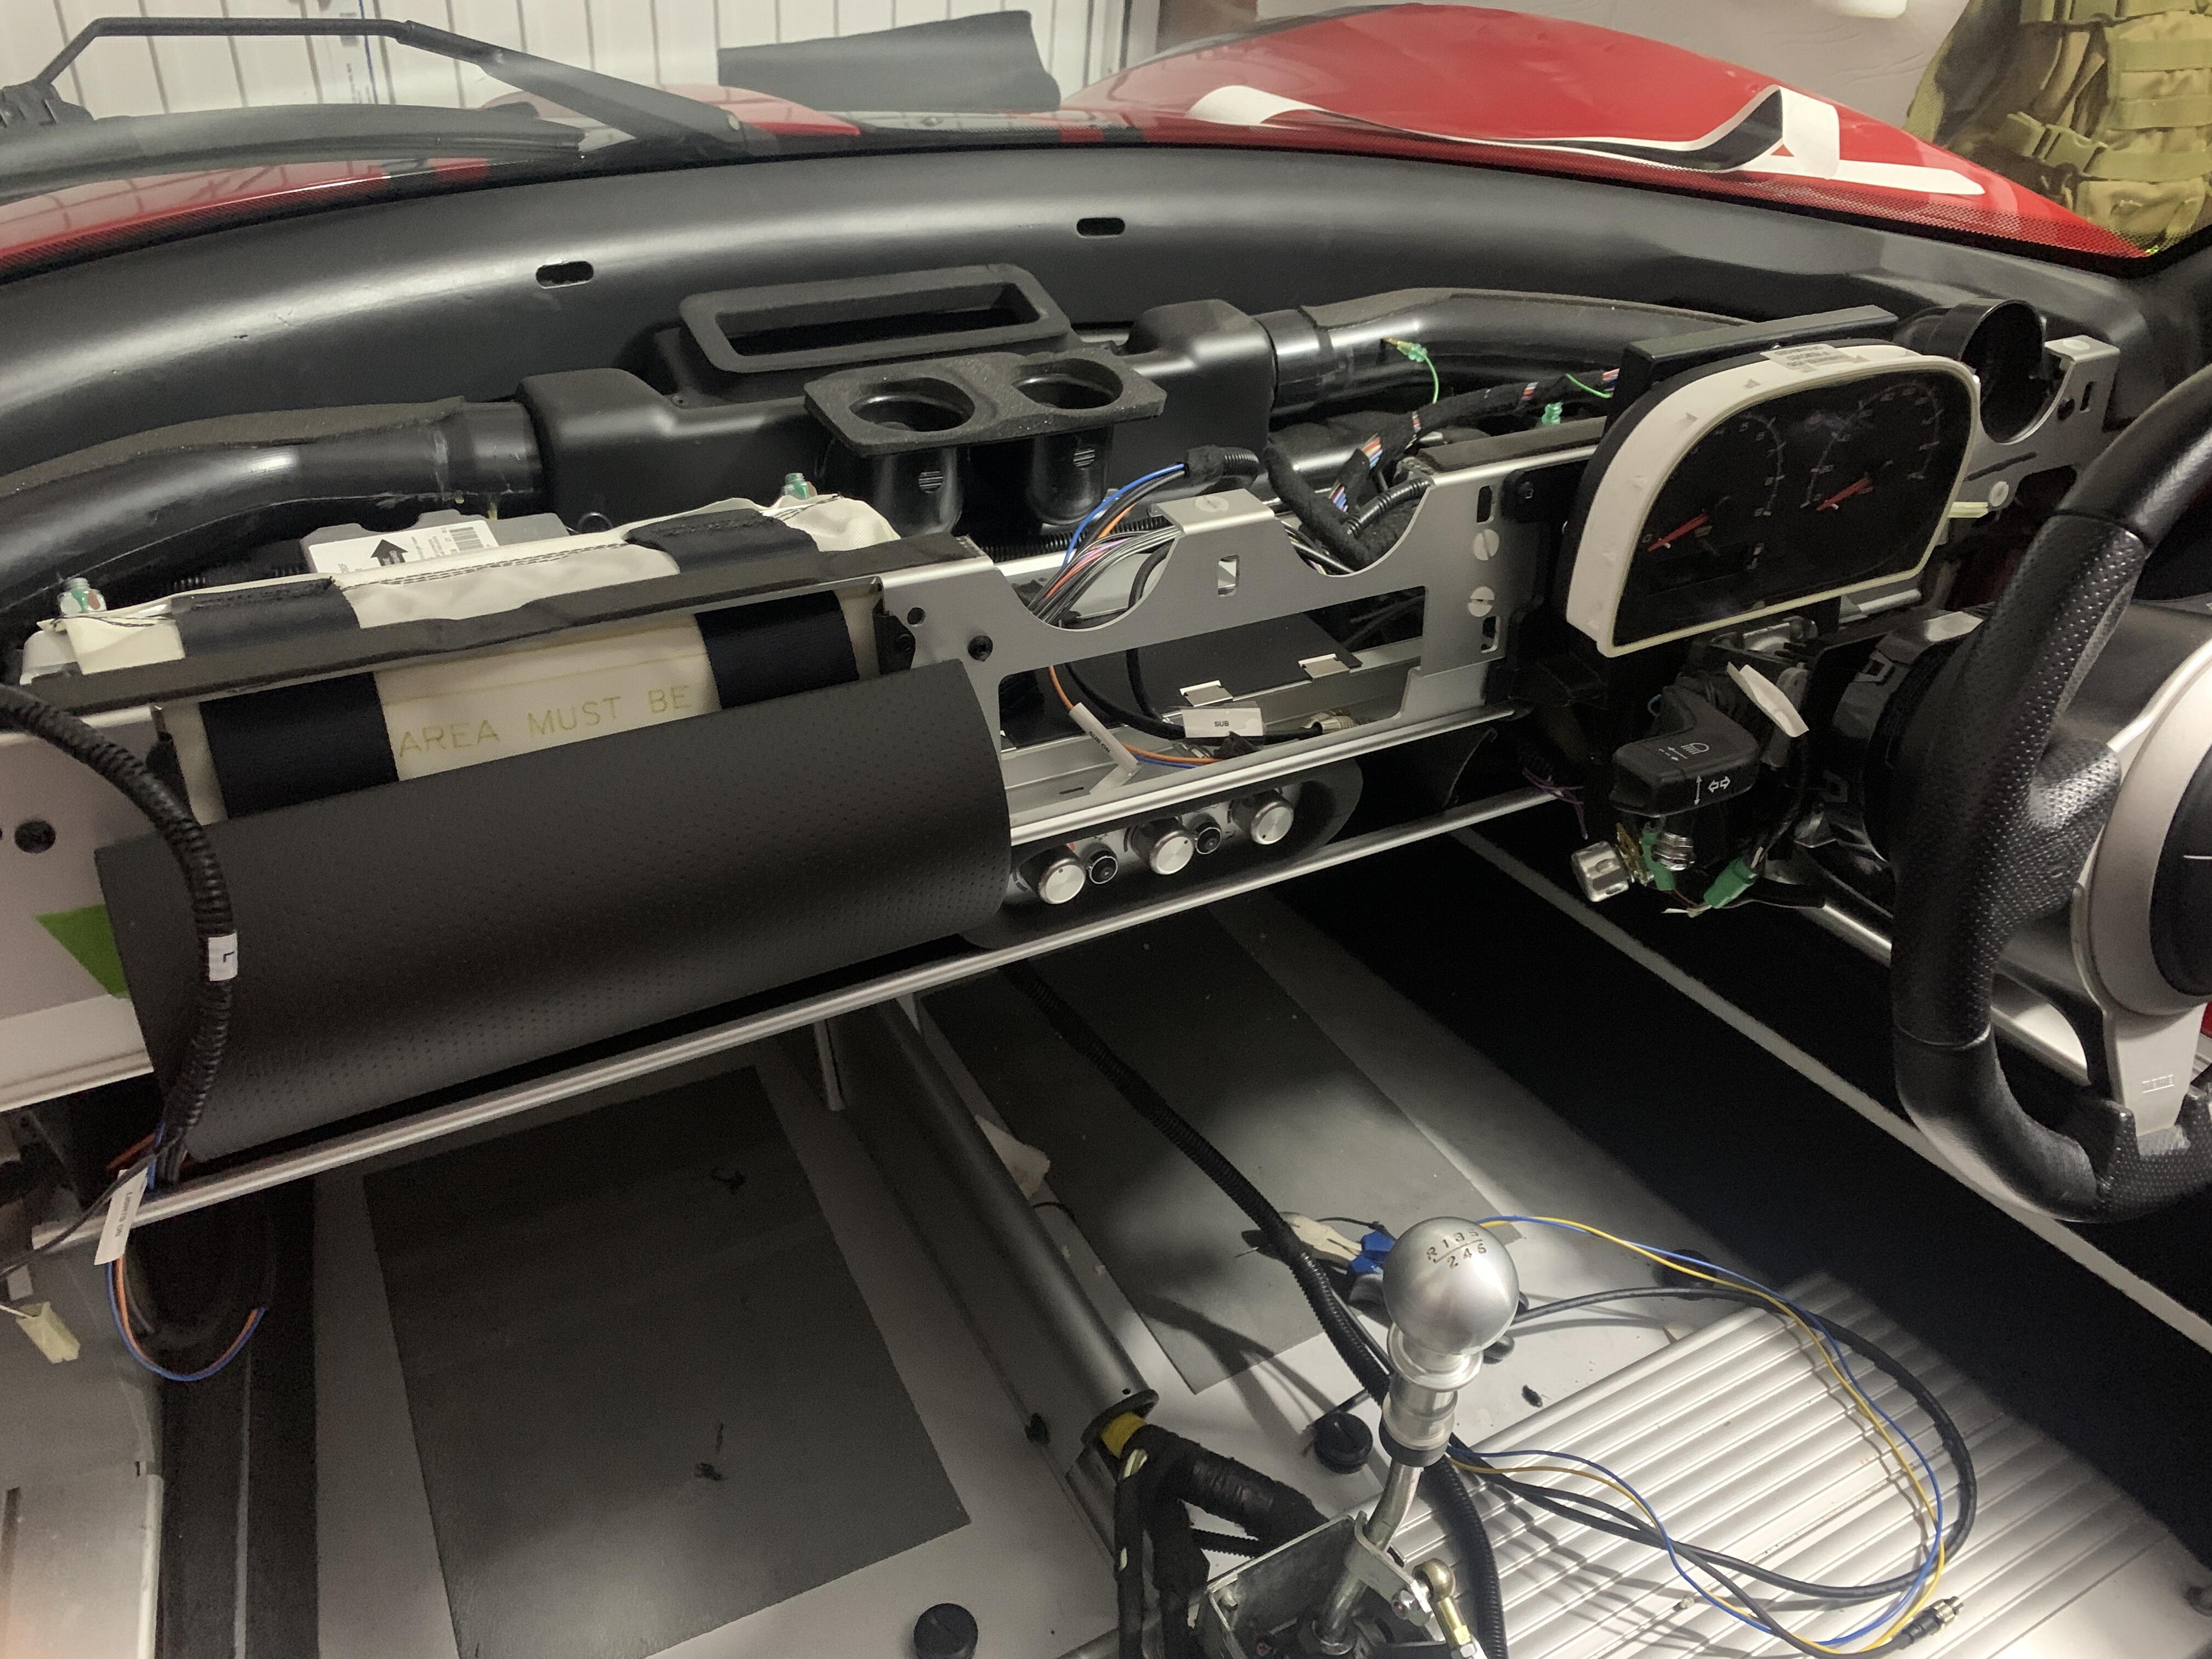
This is what the rear of the dash looks like if anyone wants to see:
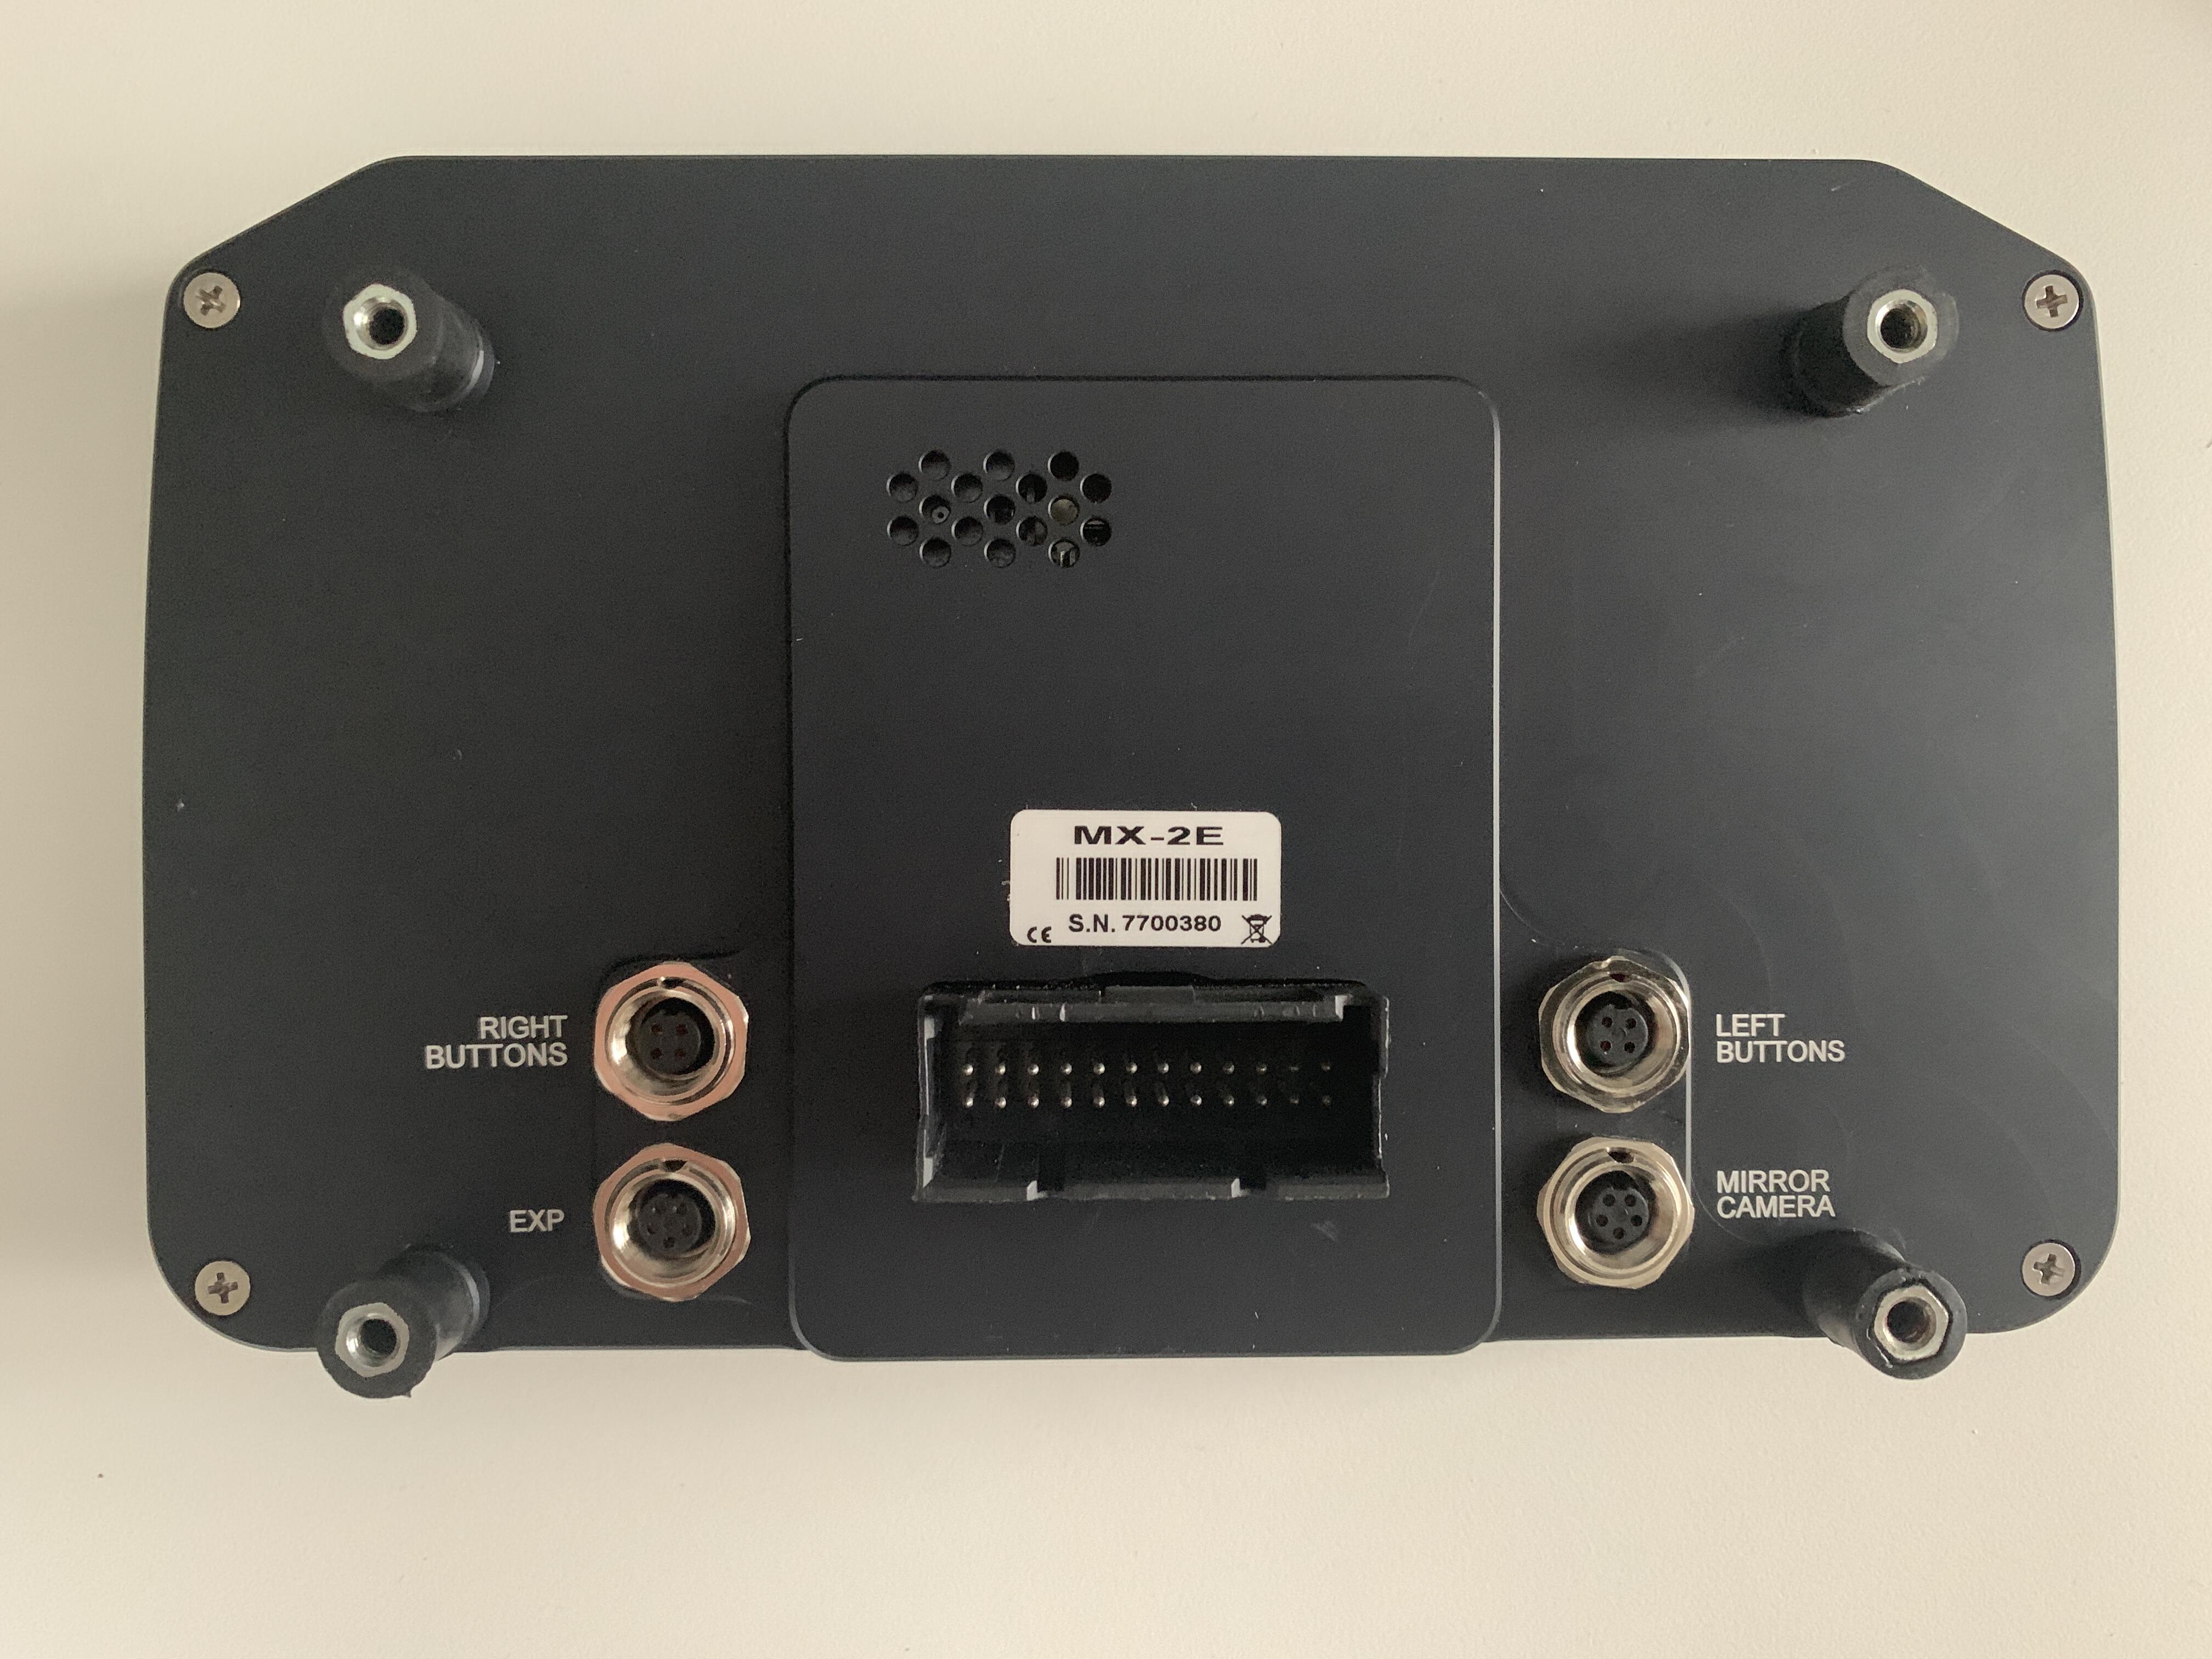
Switches are via Binder 712 4 pin, expansion (sensors, camera, GPS) is via Binder 712 5 pin, and Front and Rear Cameras is via Binder 712 5pin - I’m not using the Rear view via dash as you can’t have it on whilst the dash is on so you can’t use it as a rear view mirror when driving
Switches in the left do screen up and down, on the right, enter and exit
Mounted in the shroud
Wiring Terminated to go from my switches to the 4 pin 712 Binder connectors
Cheers Kyle - I won’t lie, I am having second thoughts about putting it in. I’ve always said I’m not sorting this car for anyone else but me, but having two sets of clocks might look odd - especially with the rarity value of the car. Everything else I can take out and replace with the original factory items, but the clocks are kind of a one way swap
I’ve literally sat in the car for hours in the middle of the night trying to think it through and convince myself either way!
Staggering! Can’t believe how skilled(and brave) you fellas are
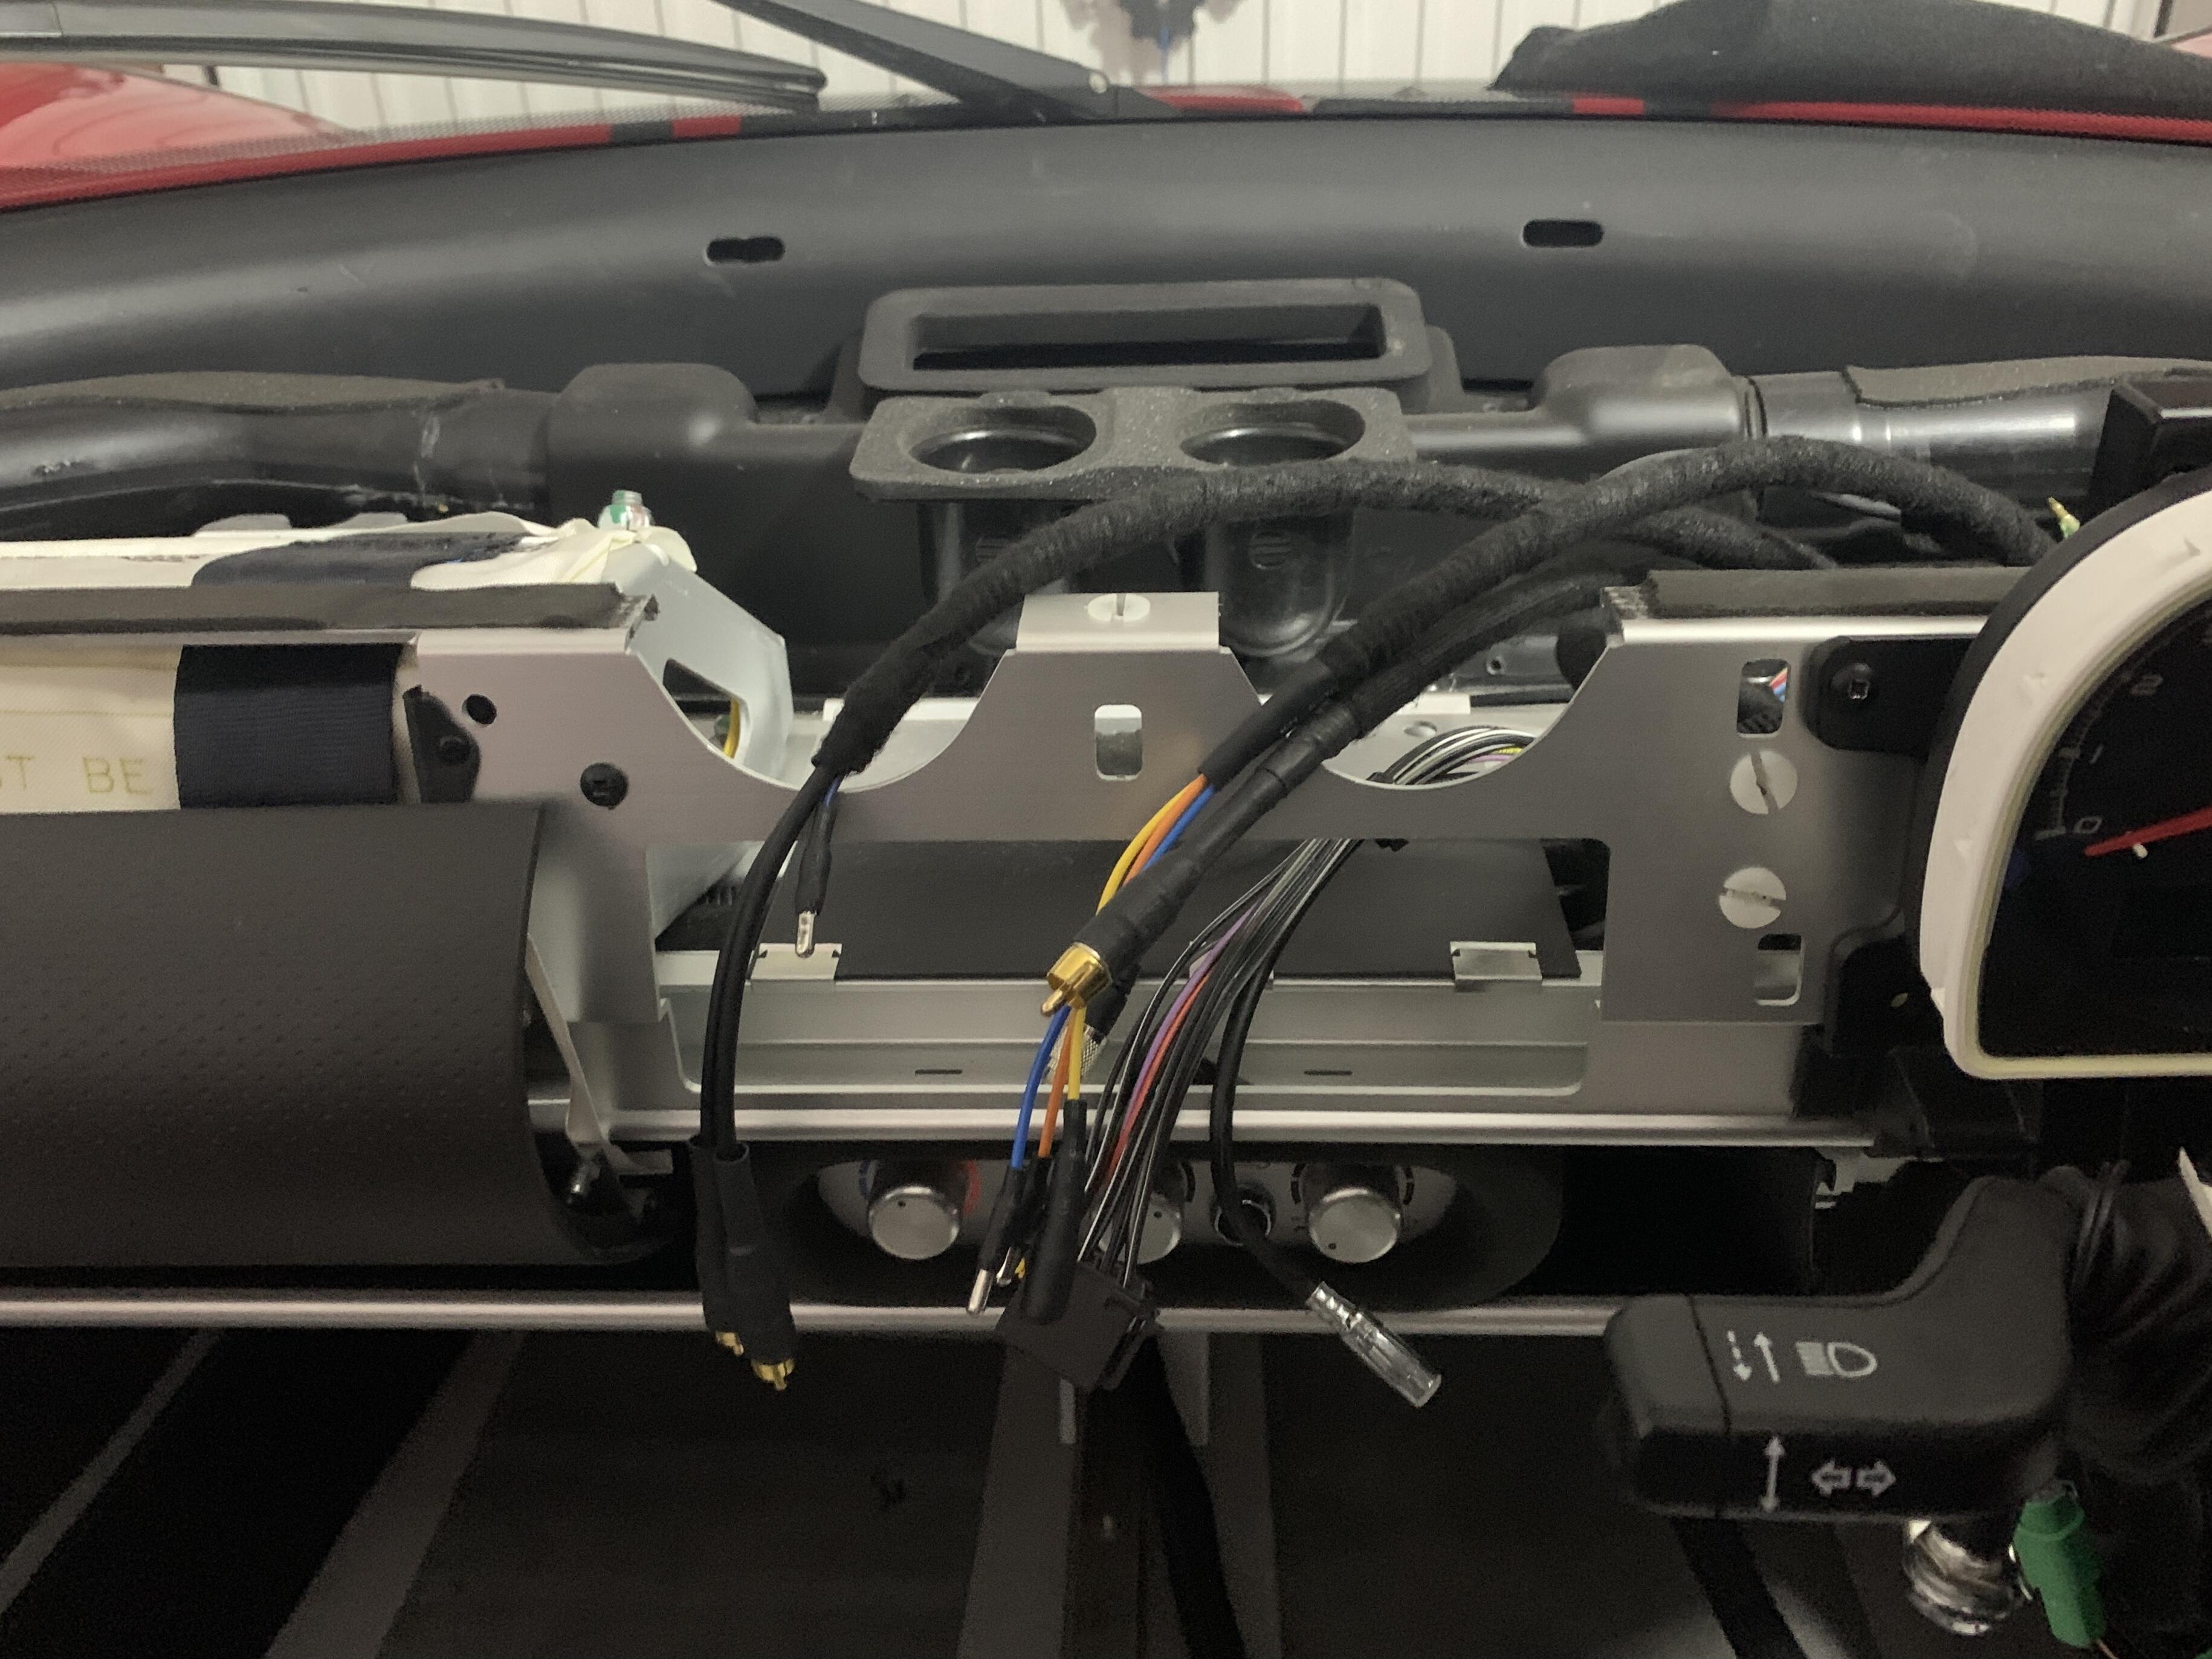
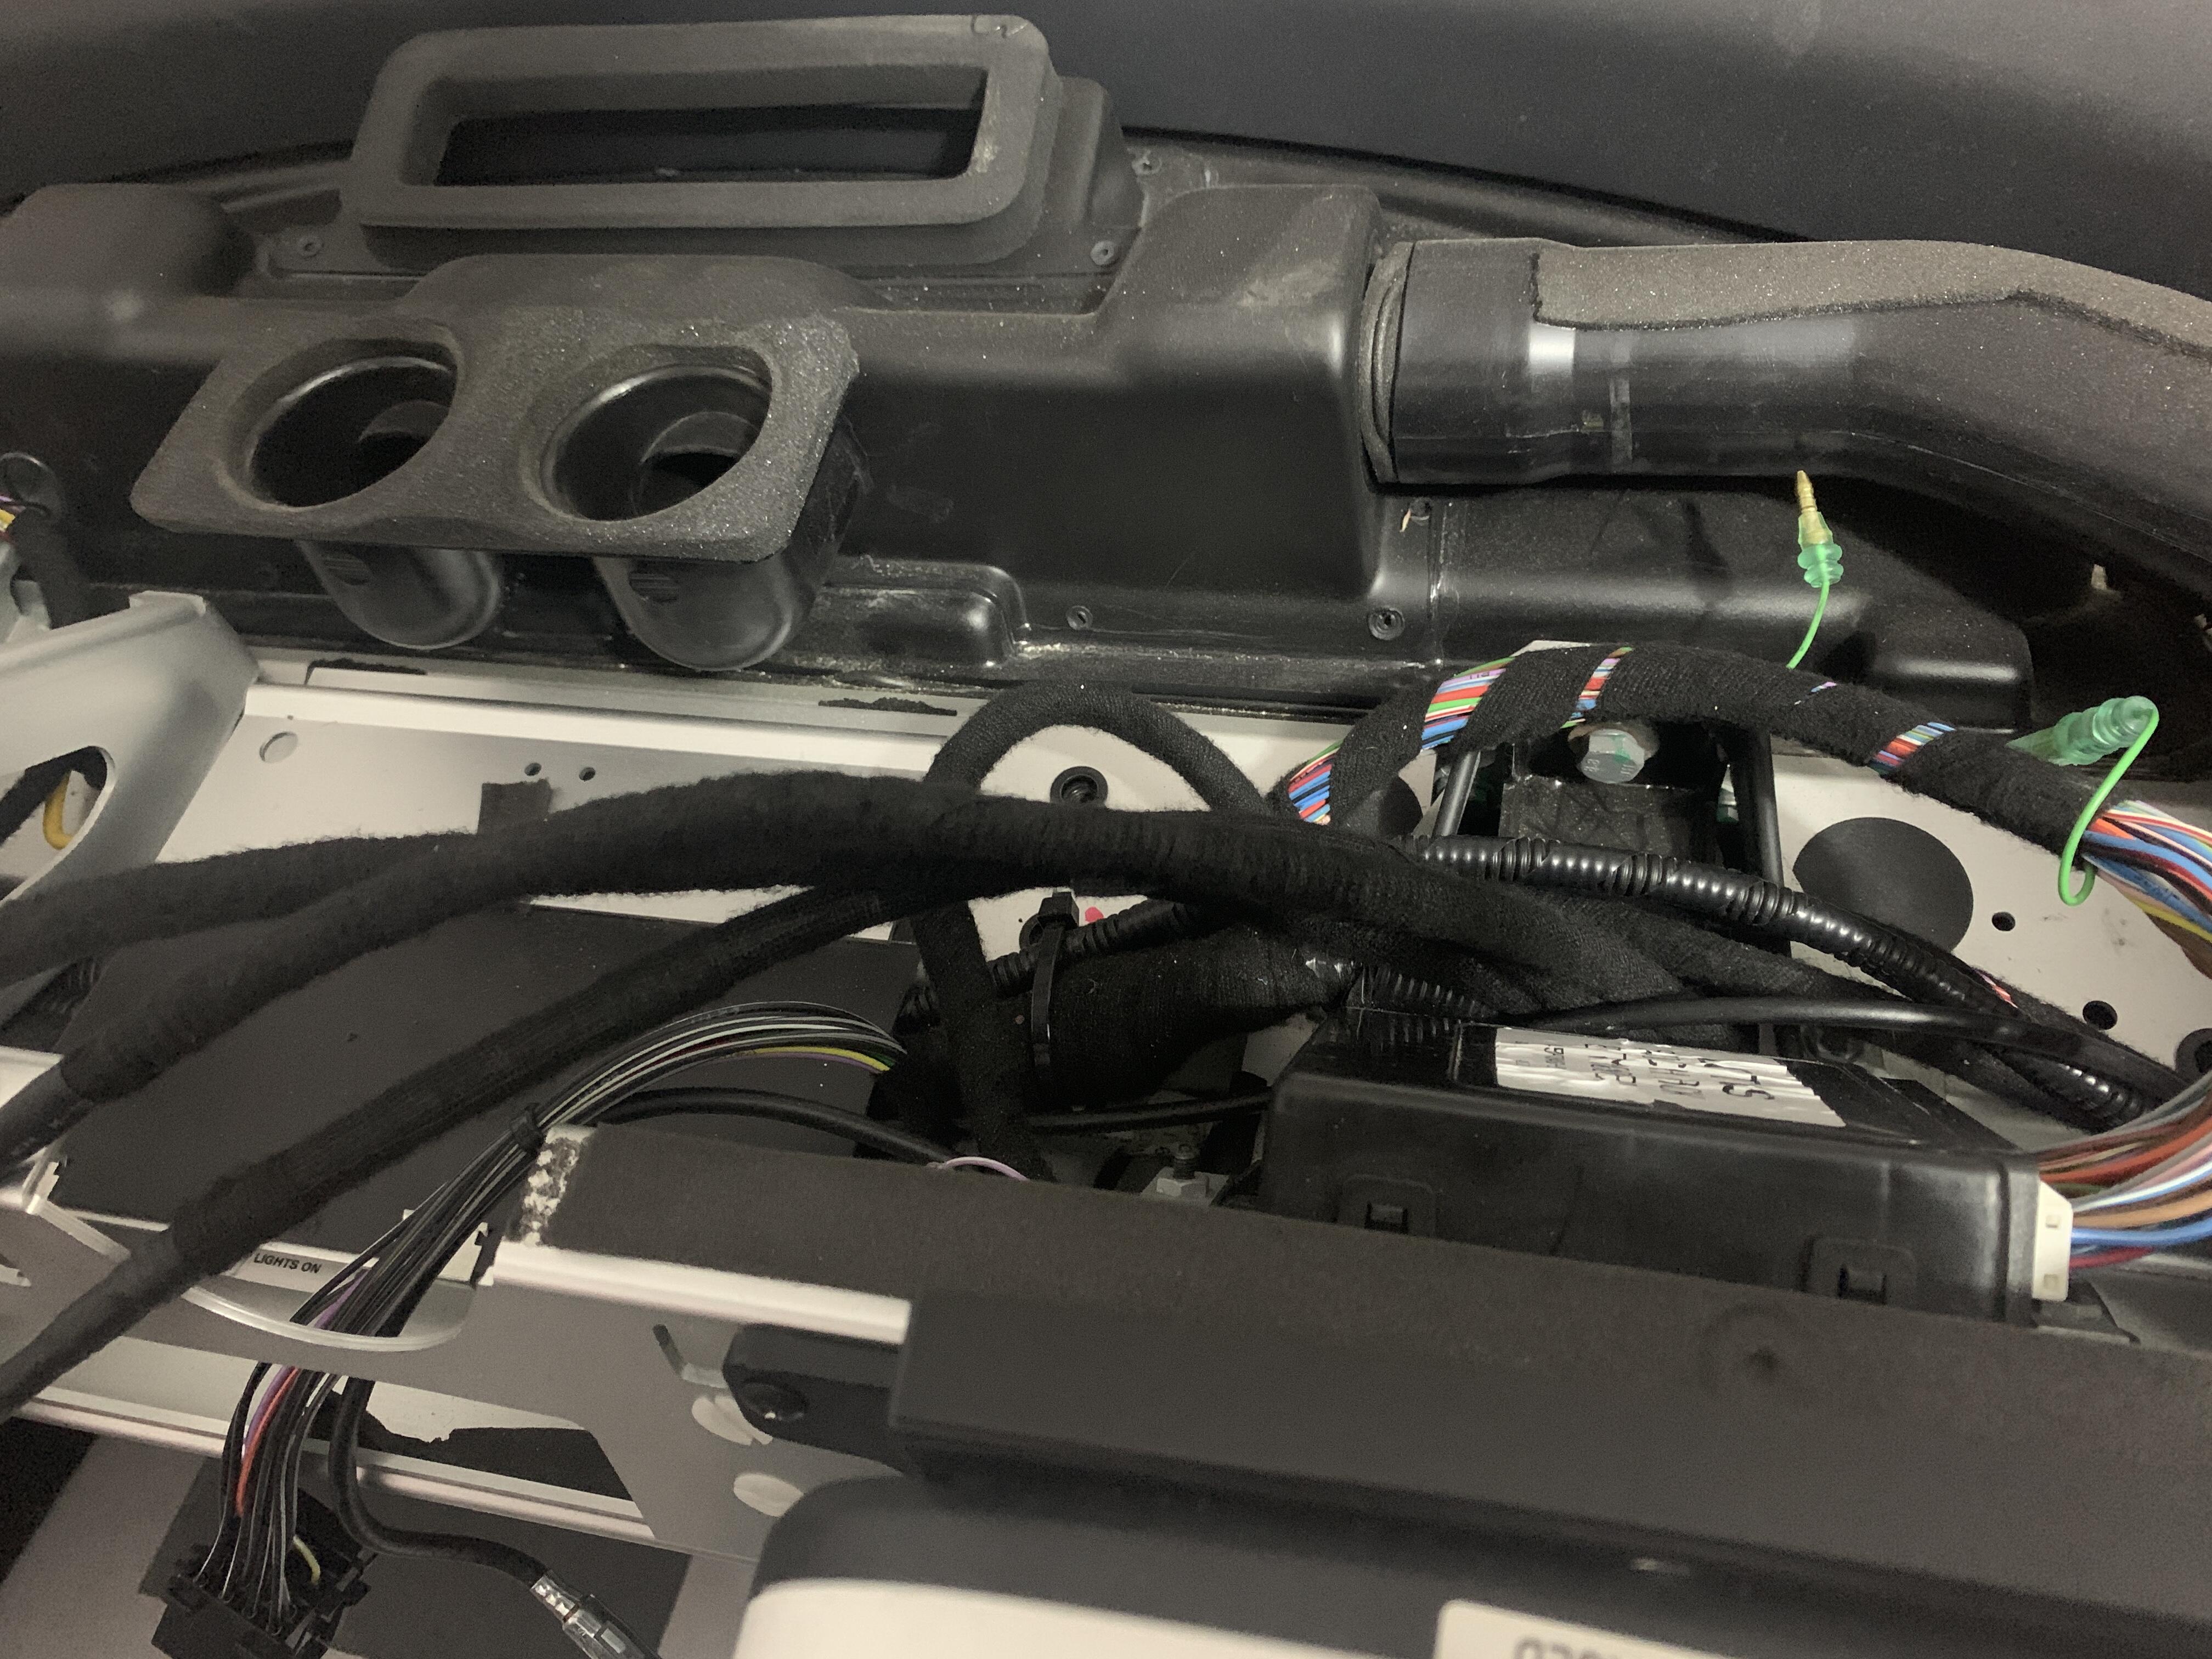
Back to the ever exciting topic of in cabin wiring . If this feels like it is dragging on its because it is, I have installed removed, rerouted this wiring a good 10 times but keep going away and redoing for whatever reason
Cables were all through dash and now taped up to match OEM.
It follows existing wiring that I had already pulled apart so wouldn’t be obvious. Like most wiring I just had to measure up the various take offs spurs would be as follows
- Start at dash
- Break out to underdash for live, remote turn on, dash lights signal,
- Break out of signals to sub (audio, power turn on, remote control)
- Down central tunnel
- Break out for AIM data hub before remerging with power, video feeds and engine sensors into engine bay
Various spurs out of it added
Routed so I can change gear cables later and done! It may seem a really small thing but just having the centre console back in place has made a huge difference, it suddenly feels like a real car again and less like an unfinished POS.
Back to this with a bunch of wires coming out the back
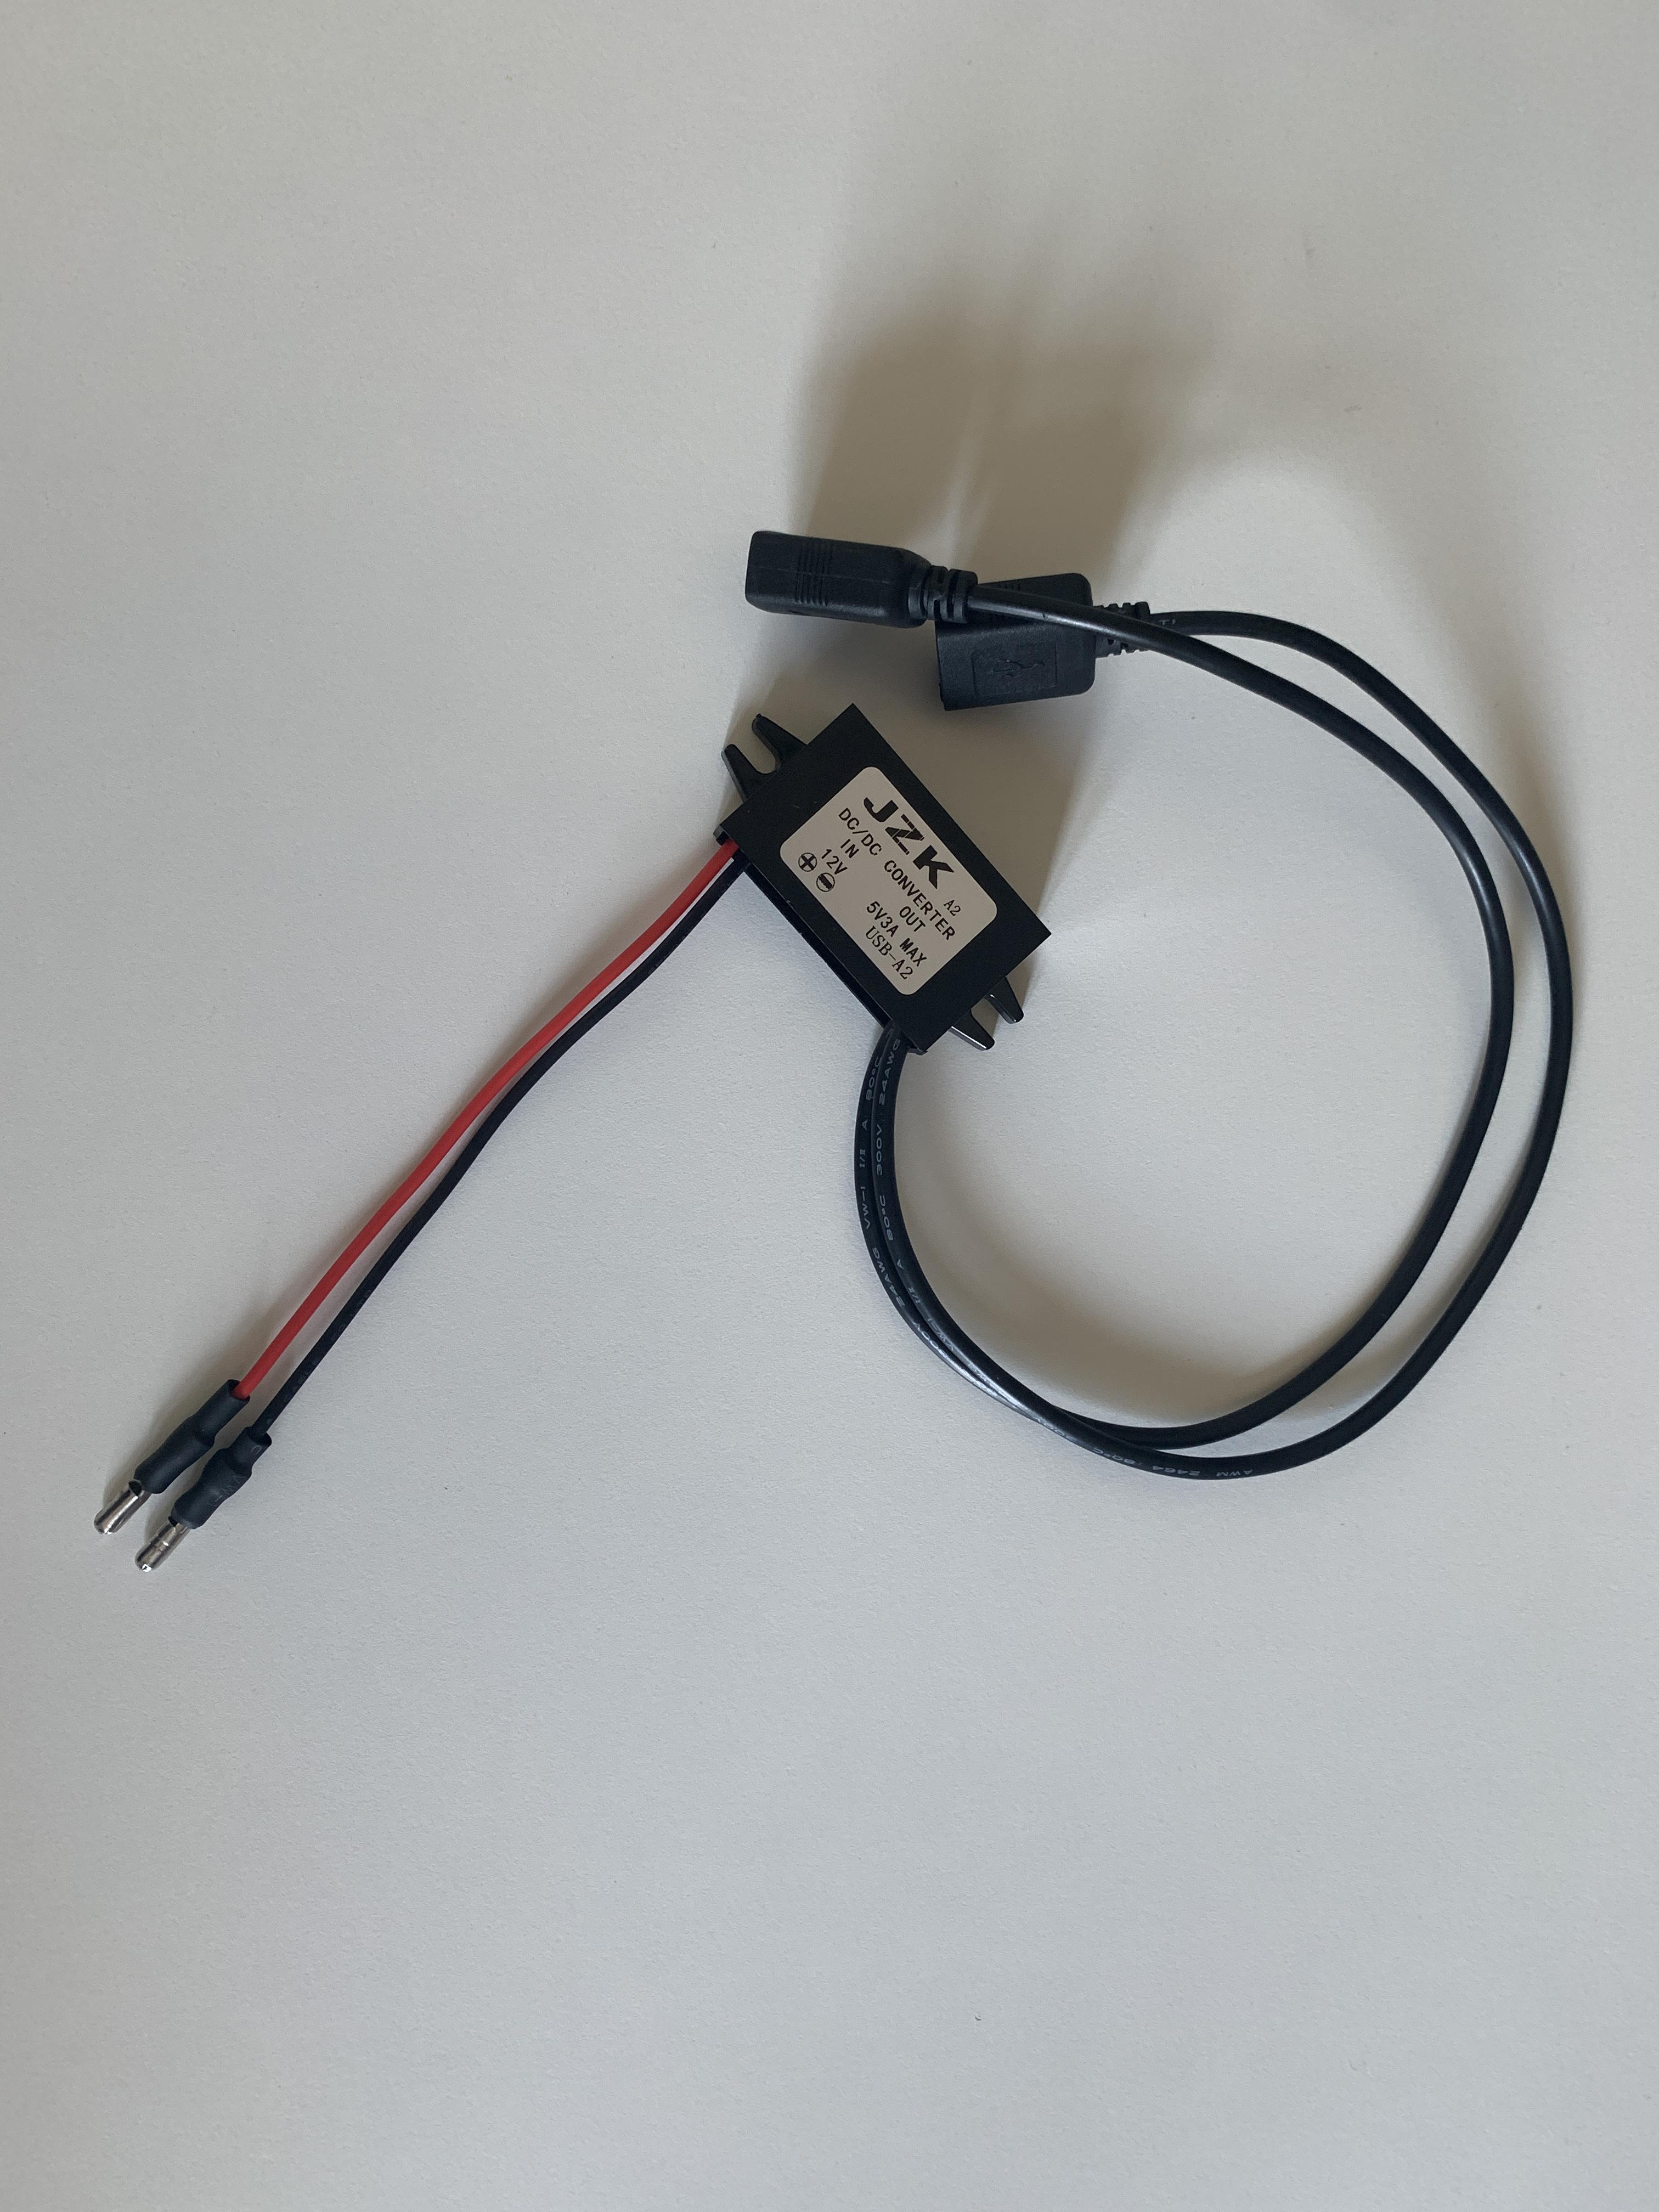
Under the dash I’ll be adding USB power for the camera using this:
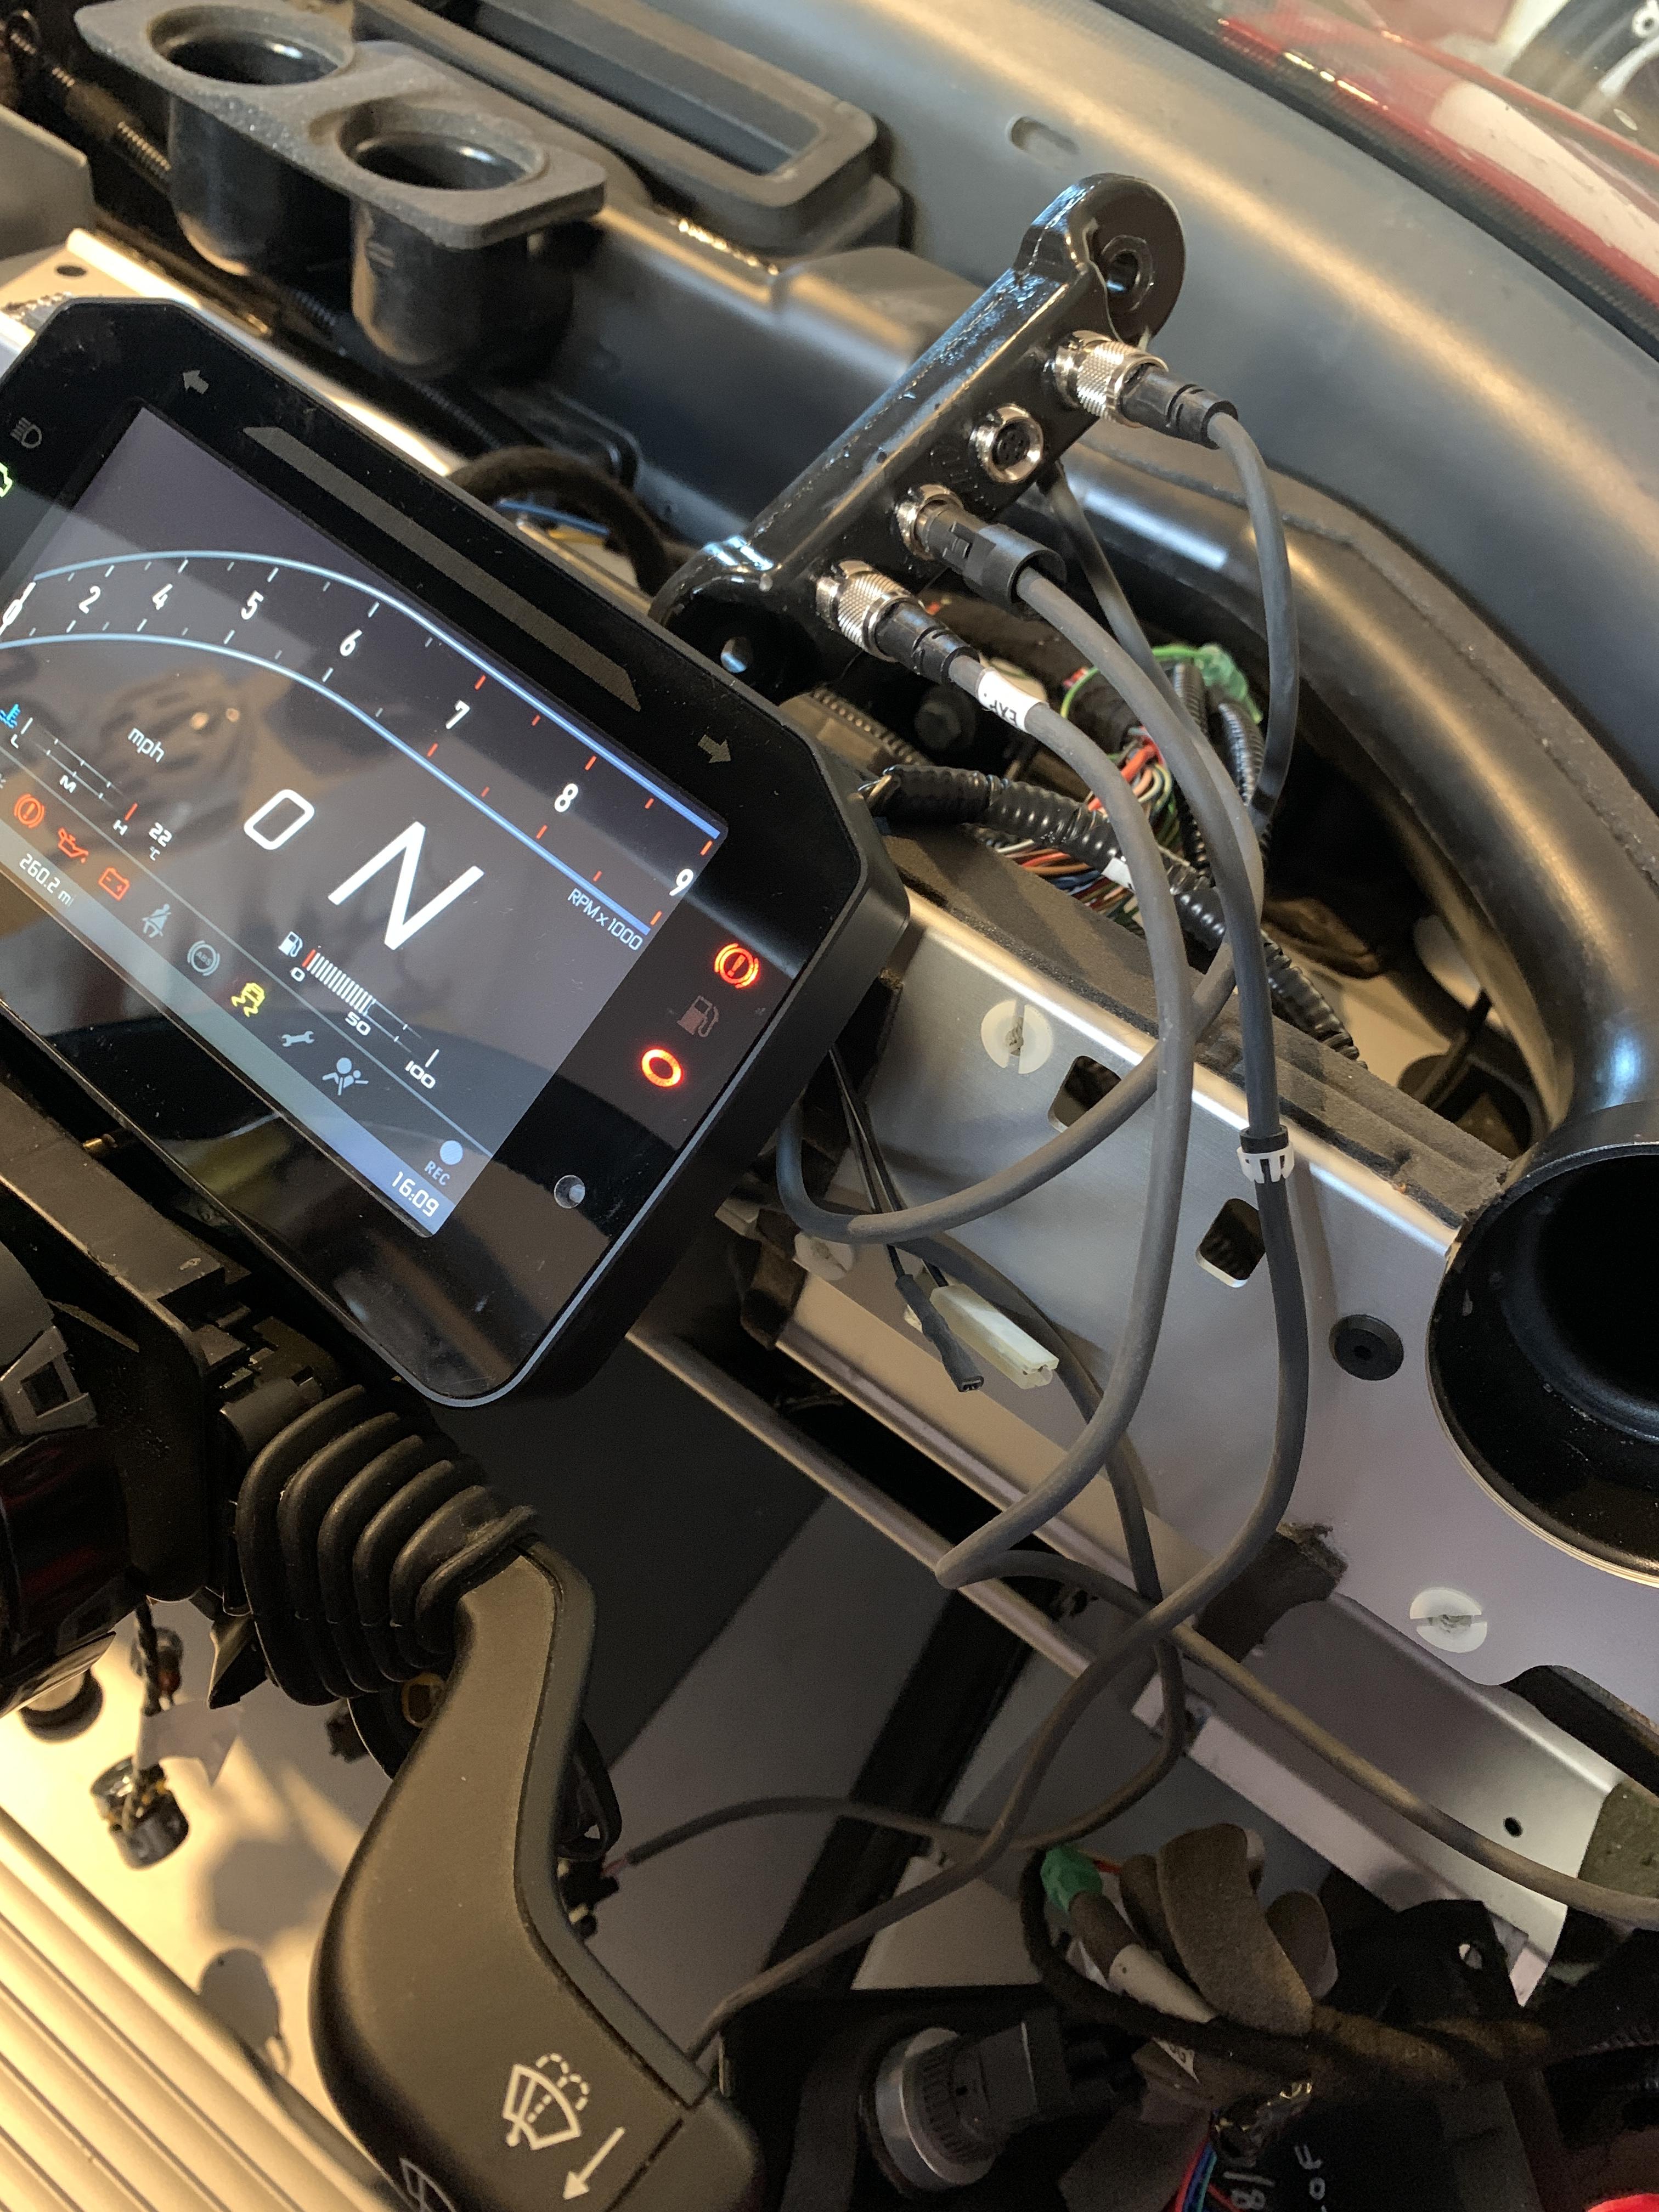
As part of the dash setup I mentioned earlier I have a data hub for the dash allowing splitting of the CAN signal, this allows connecting of the Smartycam to allow GPS send and data overlay, and also the Expansion hub which is needed to add sensors so these have all needed to be found homes for.
First up was the Smartycam record, I have 1m, 2m and 3m cables made up meaning I hade more options made up to place the recorder away from the camera. My first thought was to place the recorder on the treadplate so I could just reach over and switch on and off
But when I placed the seat back in I find out goes really far forward! And if my wife was driving, pulled the seat forward and smashed the box, well that would be another shortcut to an argument!
All the way back then each side of the hip there is space, the inside is take by the centre console but there is space over your right hip
So rear wall area was decided on for SmartyCam - it should be fired by dash, but I can just scrunch around to see it. Most report it fit and forget
Then Datahub was mounted on opposite side of the cabin. I decided to do this in case I had to quickly plug something in, or pull something out - Didn’t seem any harm in keeping it accessible if needed
The expansion hub, I originally mounted in the boot by the battery, routed through engine bay and into cabin. My thinking was it was watertight, and I could easily add more sensors later…
But the downside I figured after putting the cabling in, was it was hidden in the loom for camera power etc, so if I needed to pull the clam - I have to take out the bulkhead trim, pull apart the loom, pull the cable (basically the connector was at the wrong on of the loom compared to normal boot wiring)
So after installing it all, I took it all out again and started again before settling on this, which means I only need to do the normal wiring push through and accusump disconnect to take rear clam off
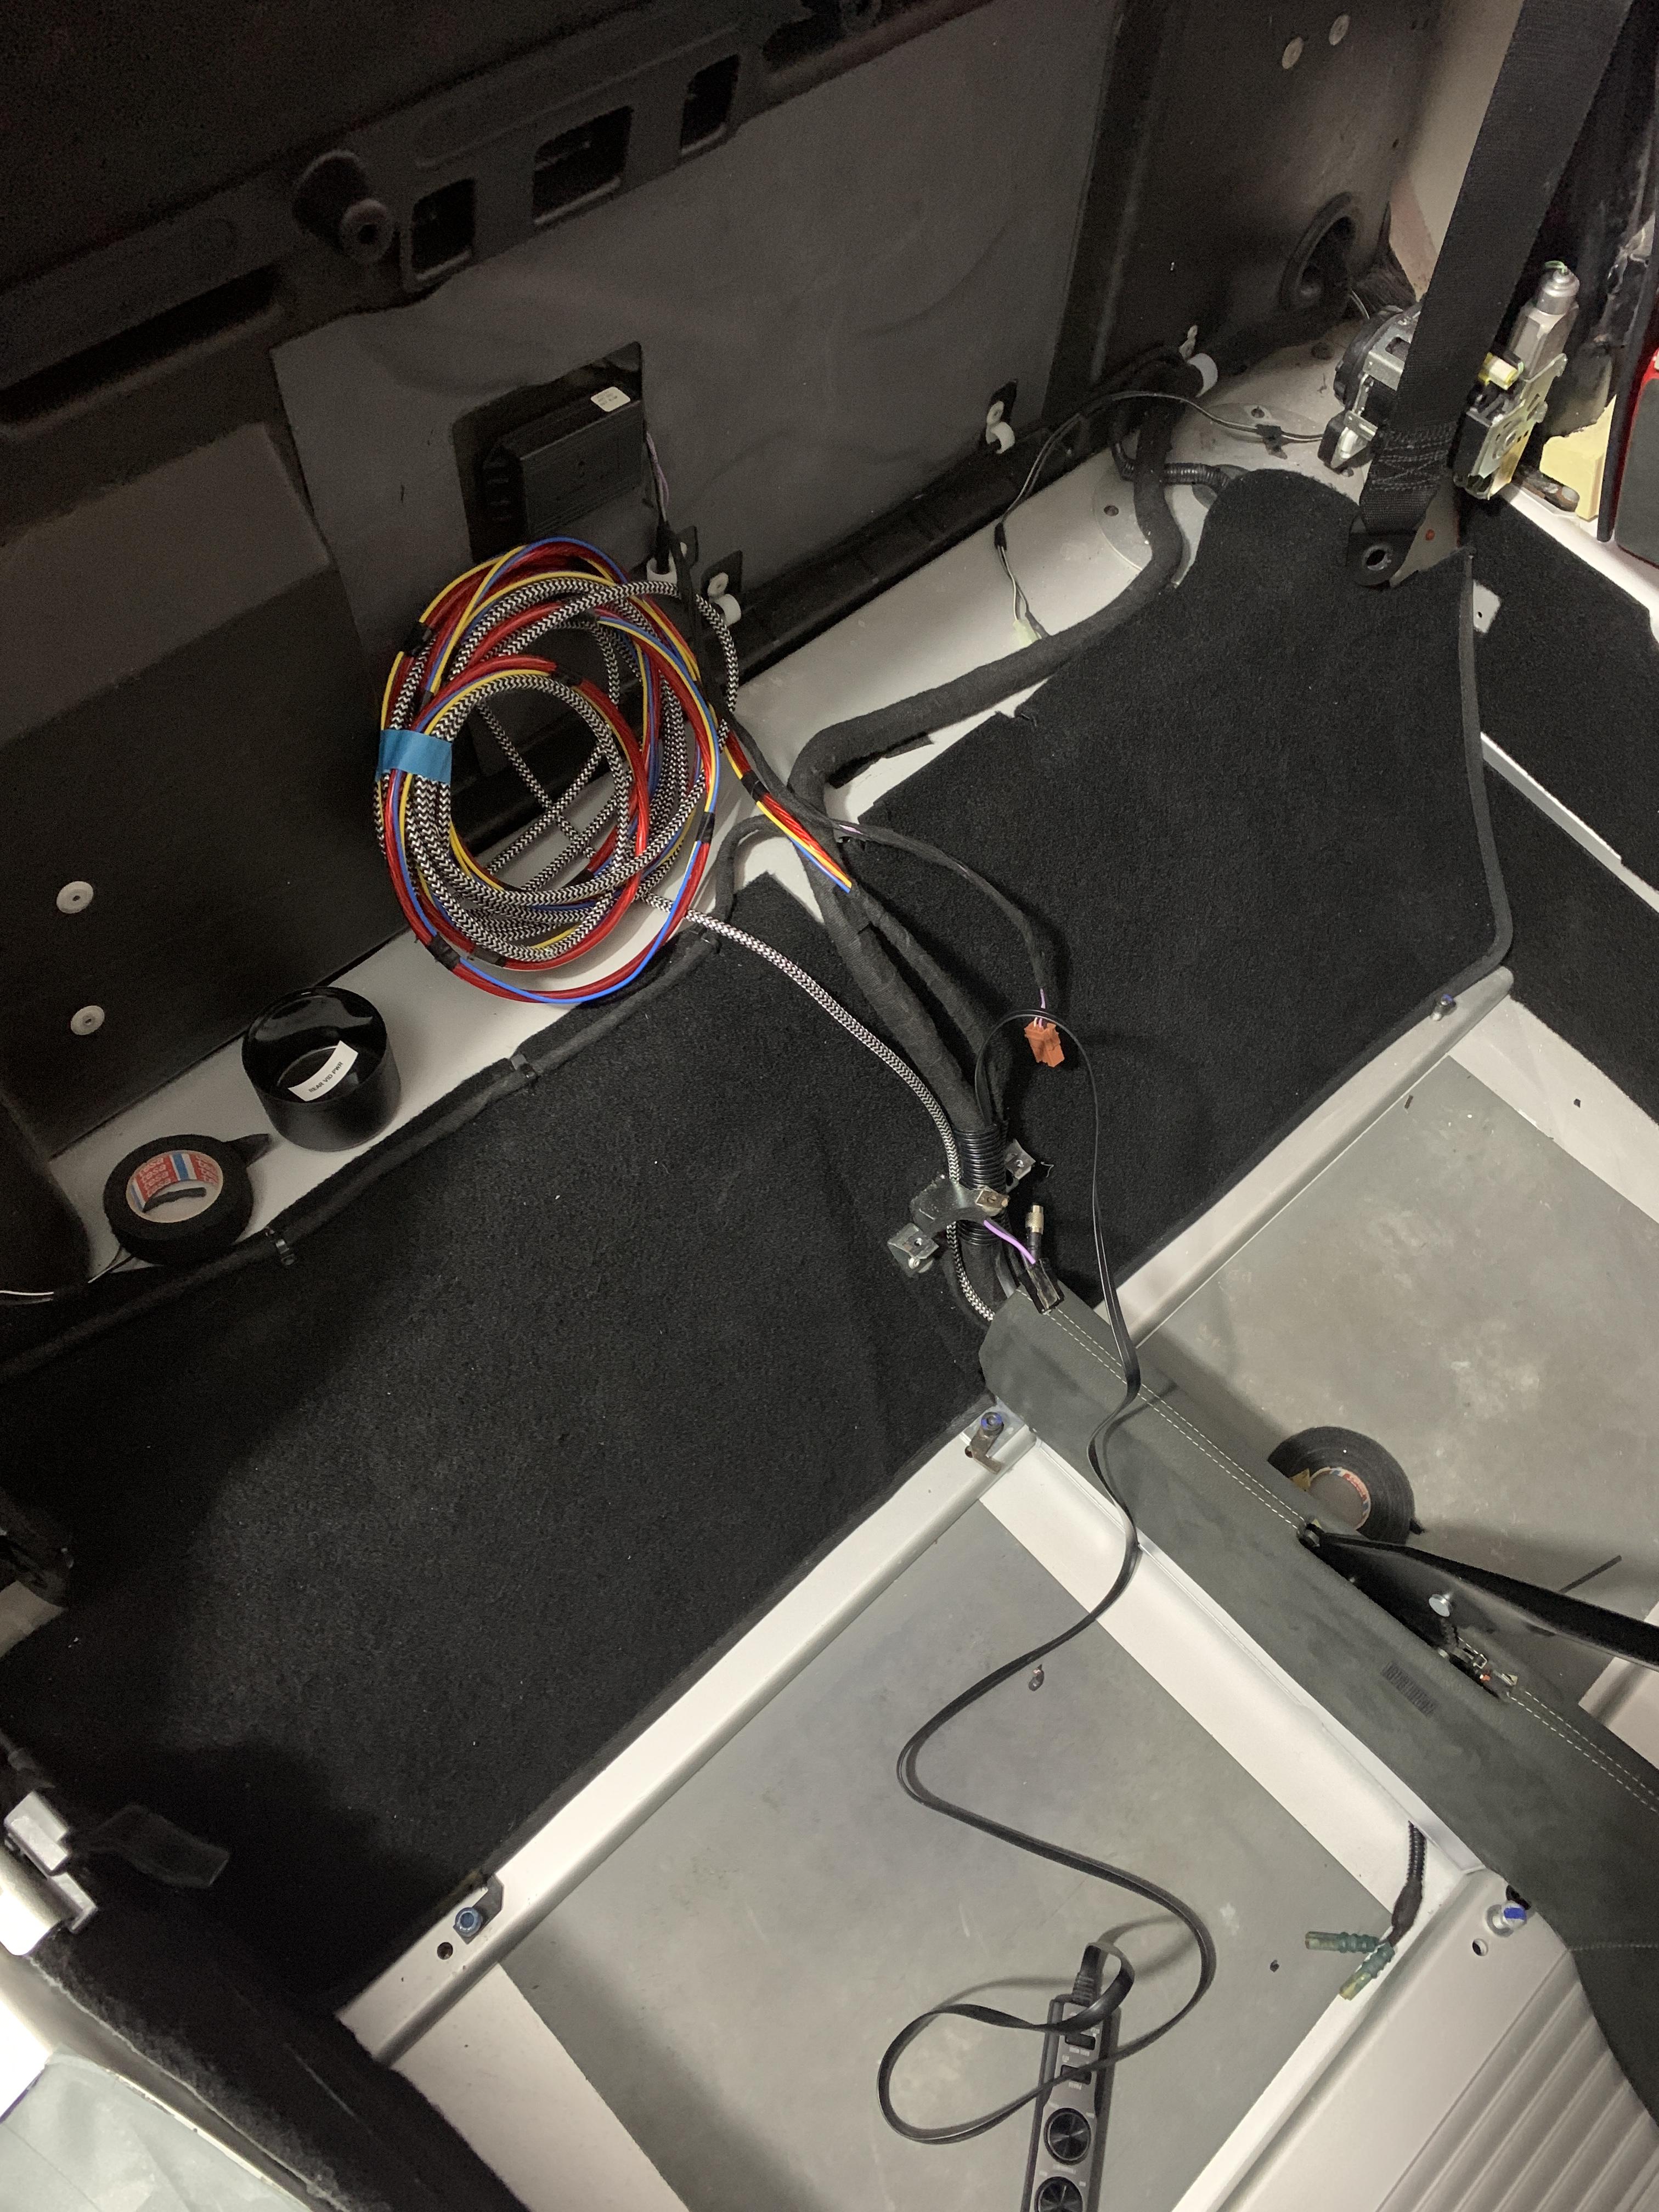
Expansion for sensors is on main bulkhead then sensors go through grommet into Engine bay, Data hub is lower down by passengers left hip
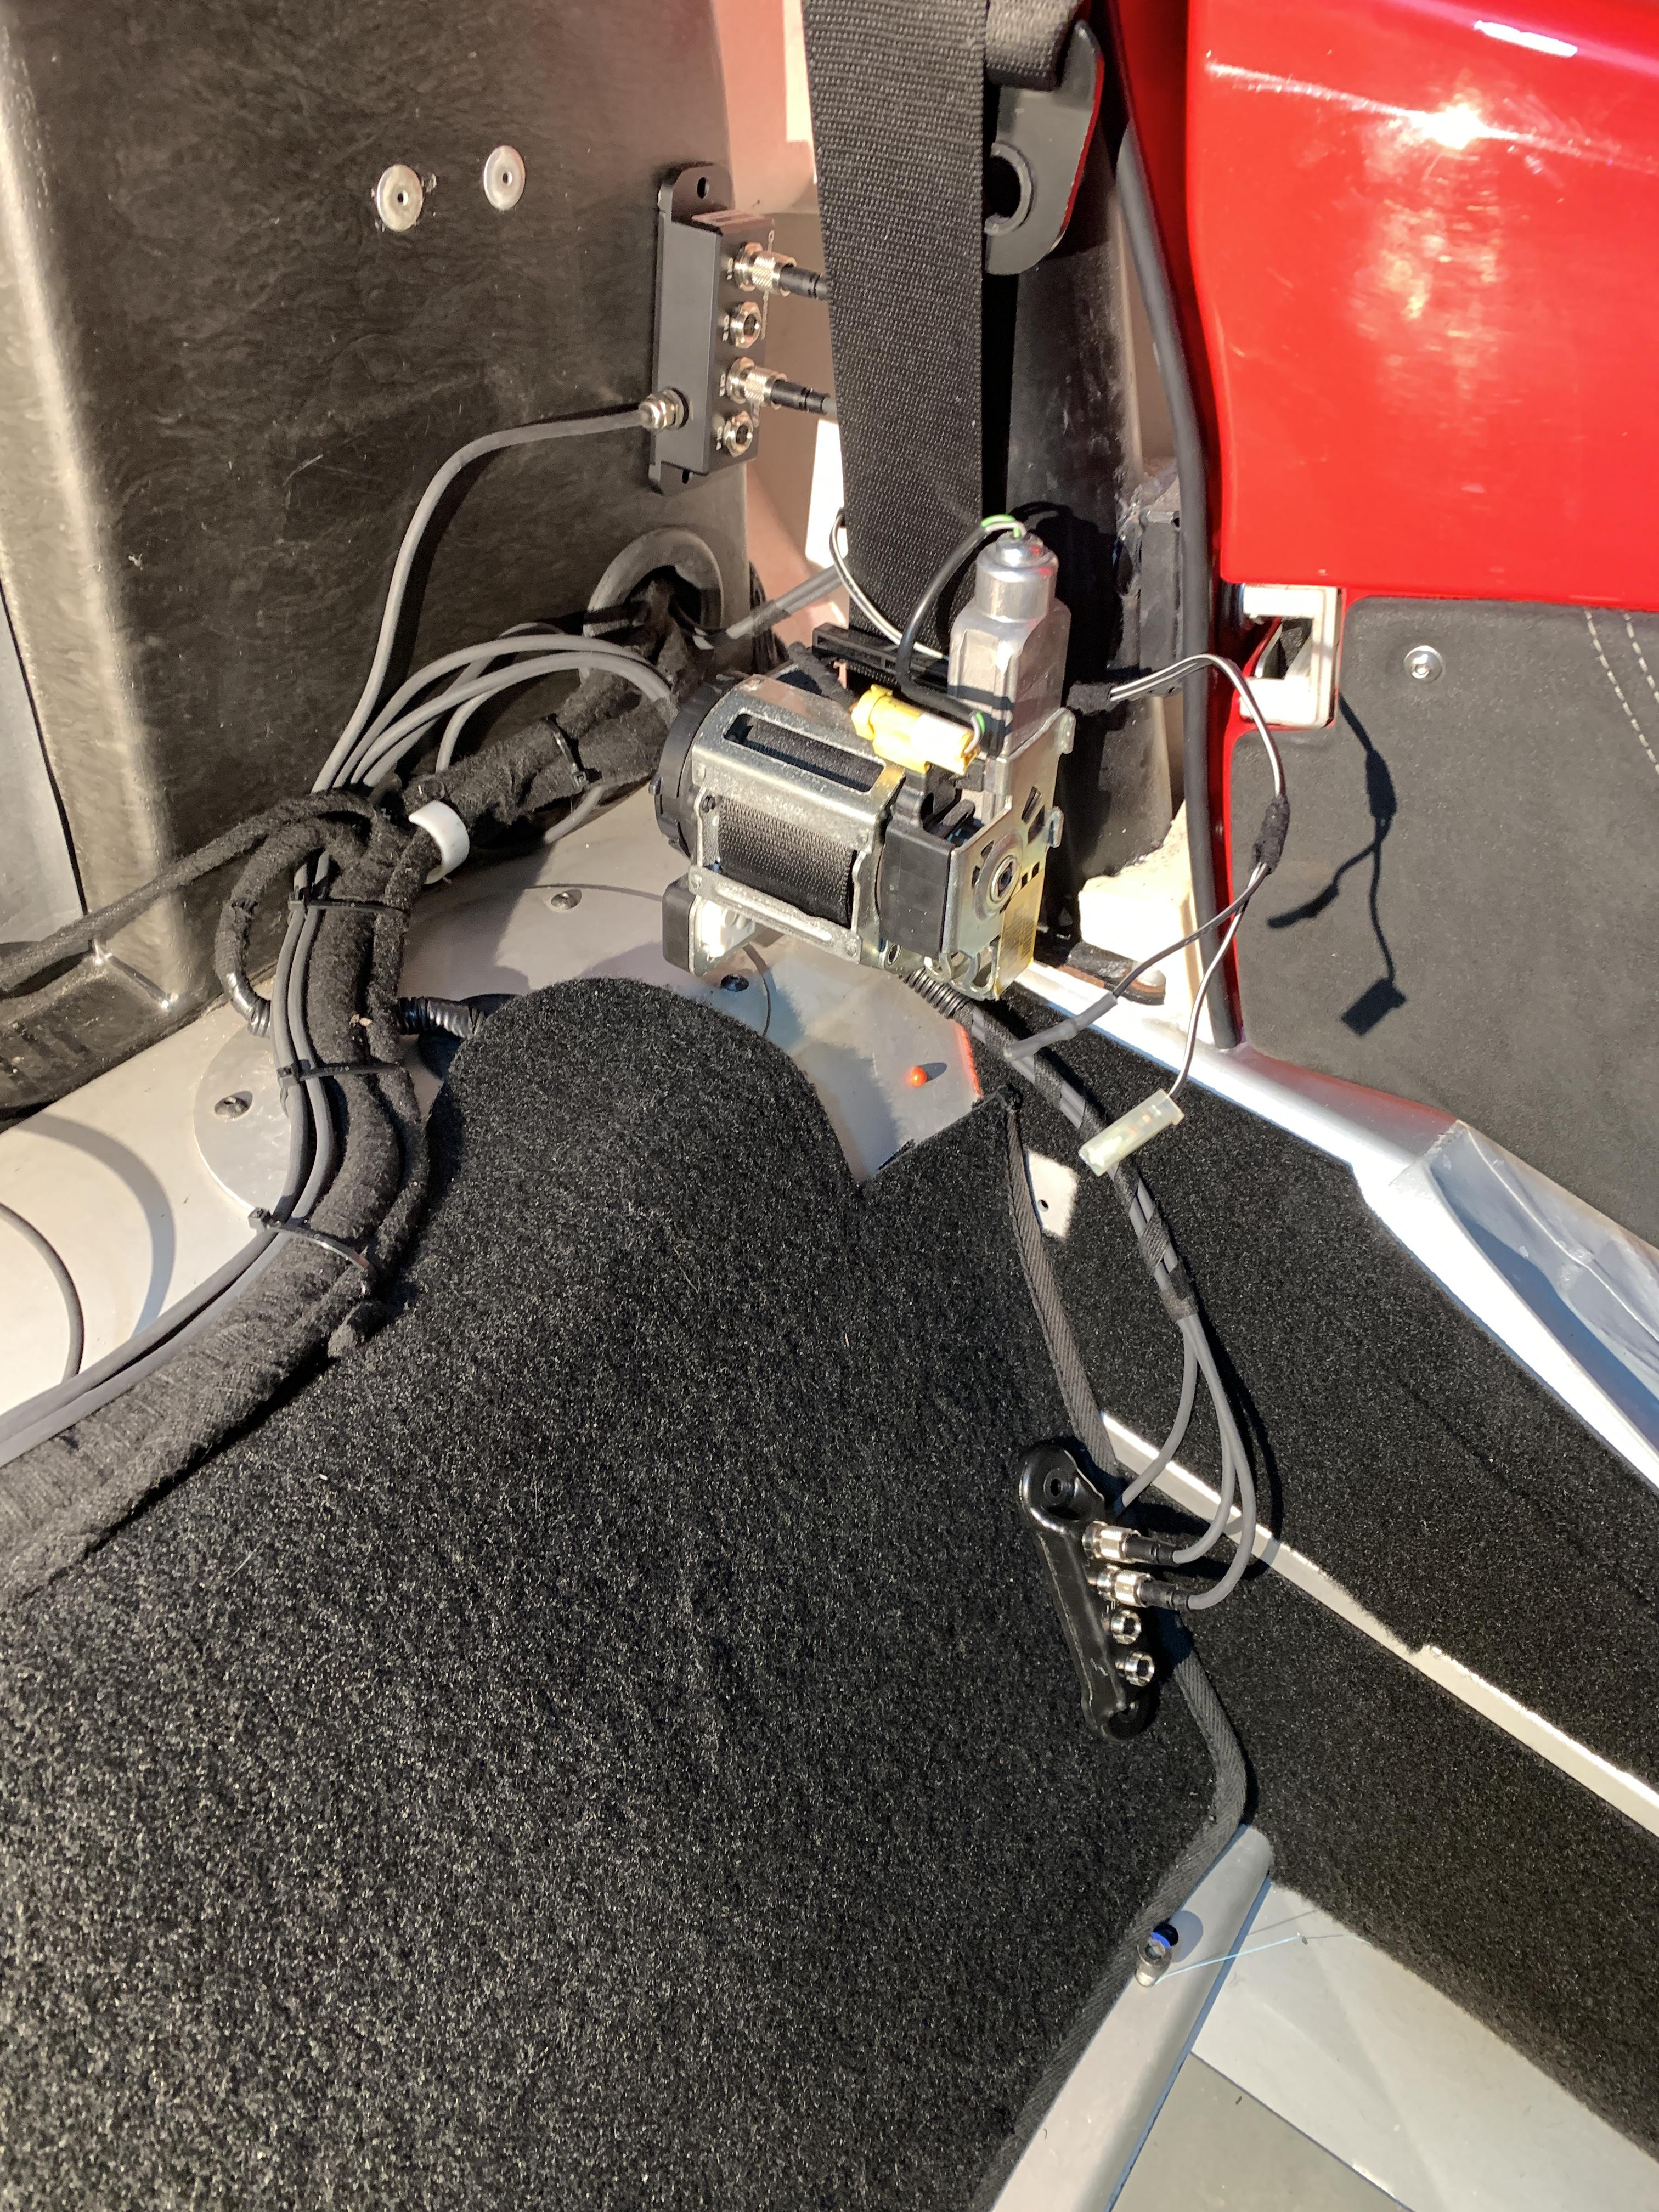
Then both sides with SmartyCam on the drivers side along with sub controls, hubs on passenger side and camera connector routed up to interior light run as they will exit around the same point (not going to follow harness bar, too much risk on cable snagging)
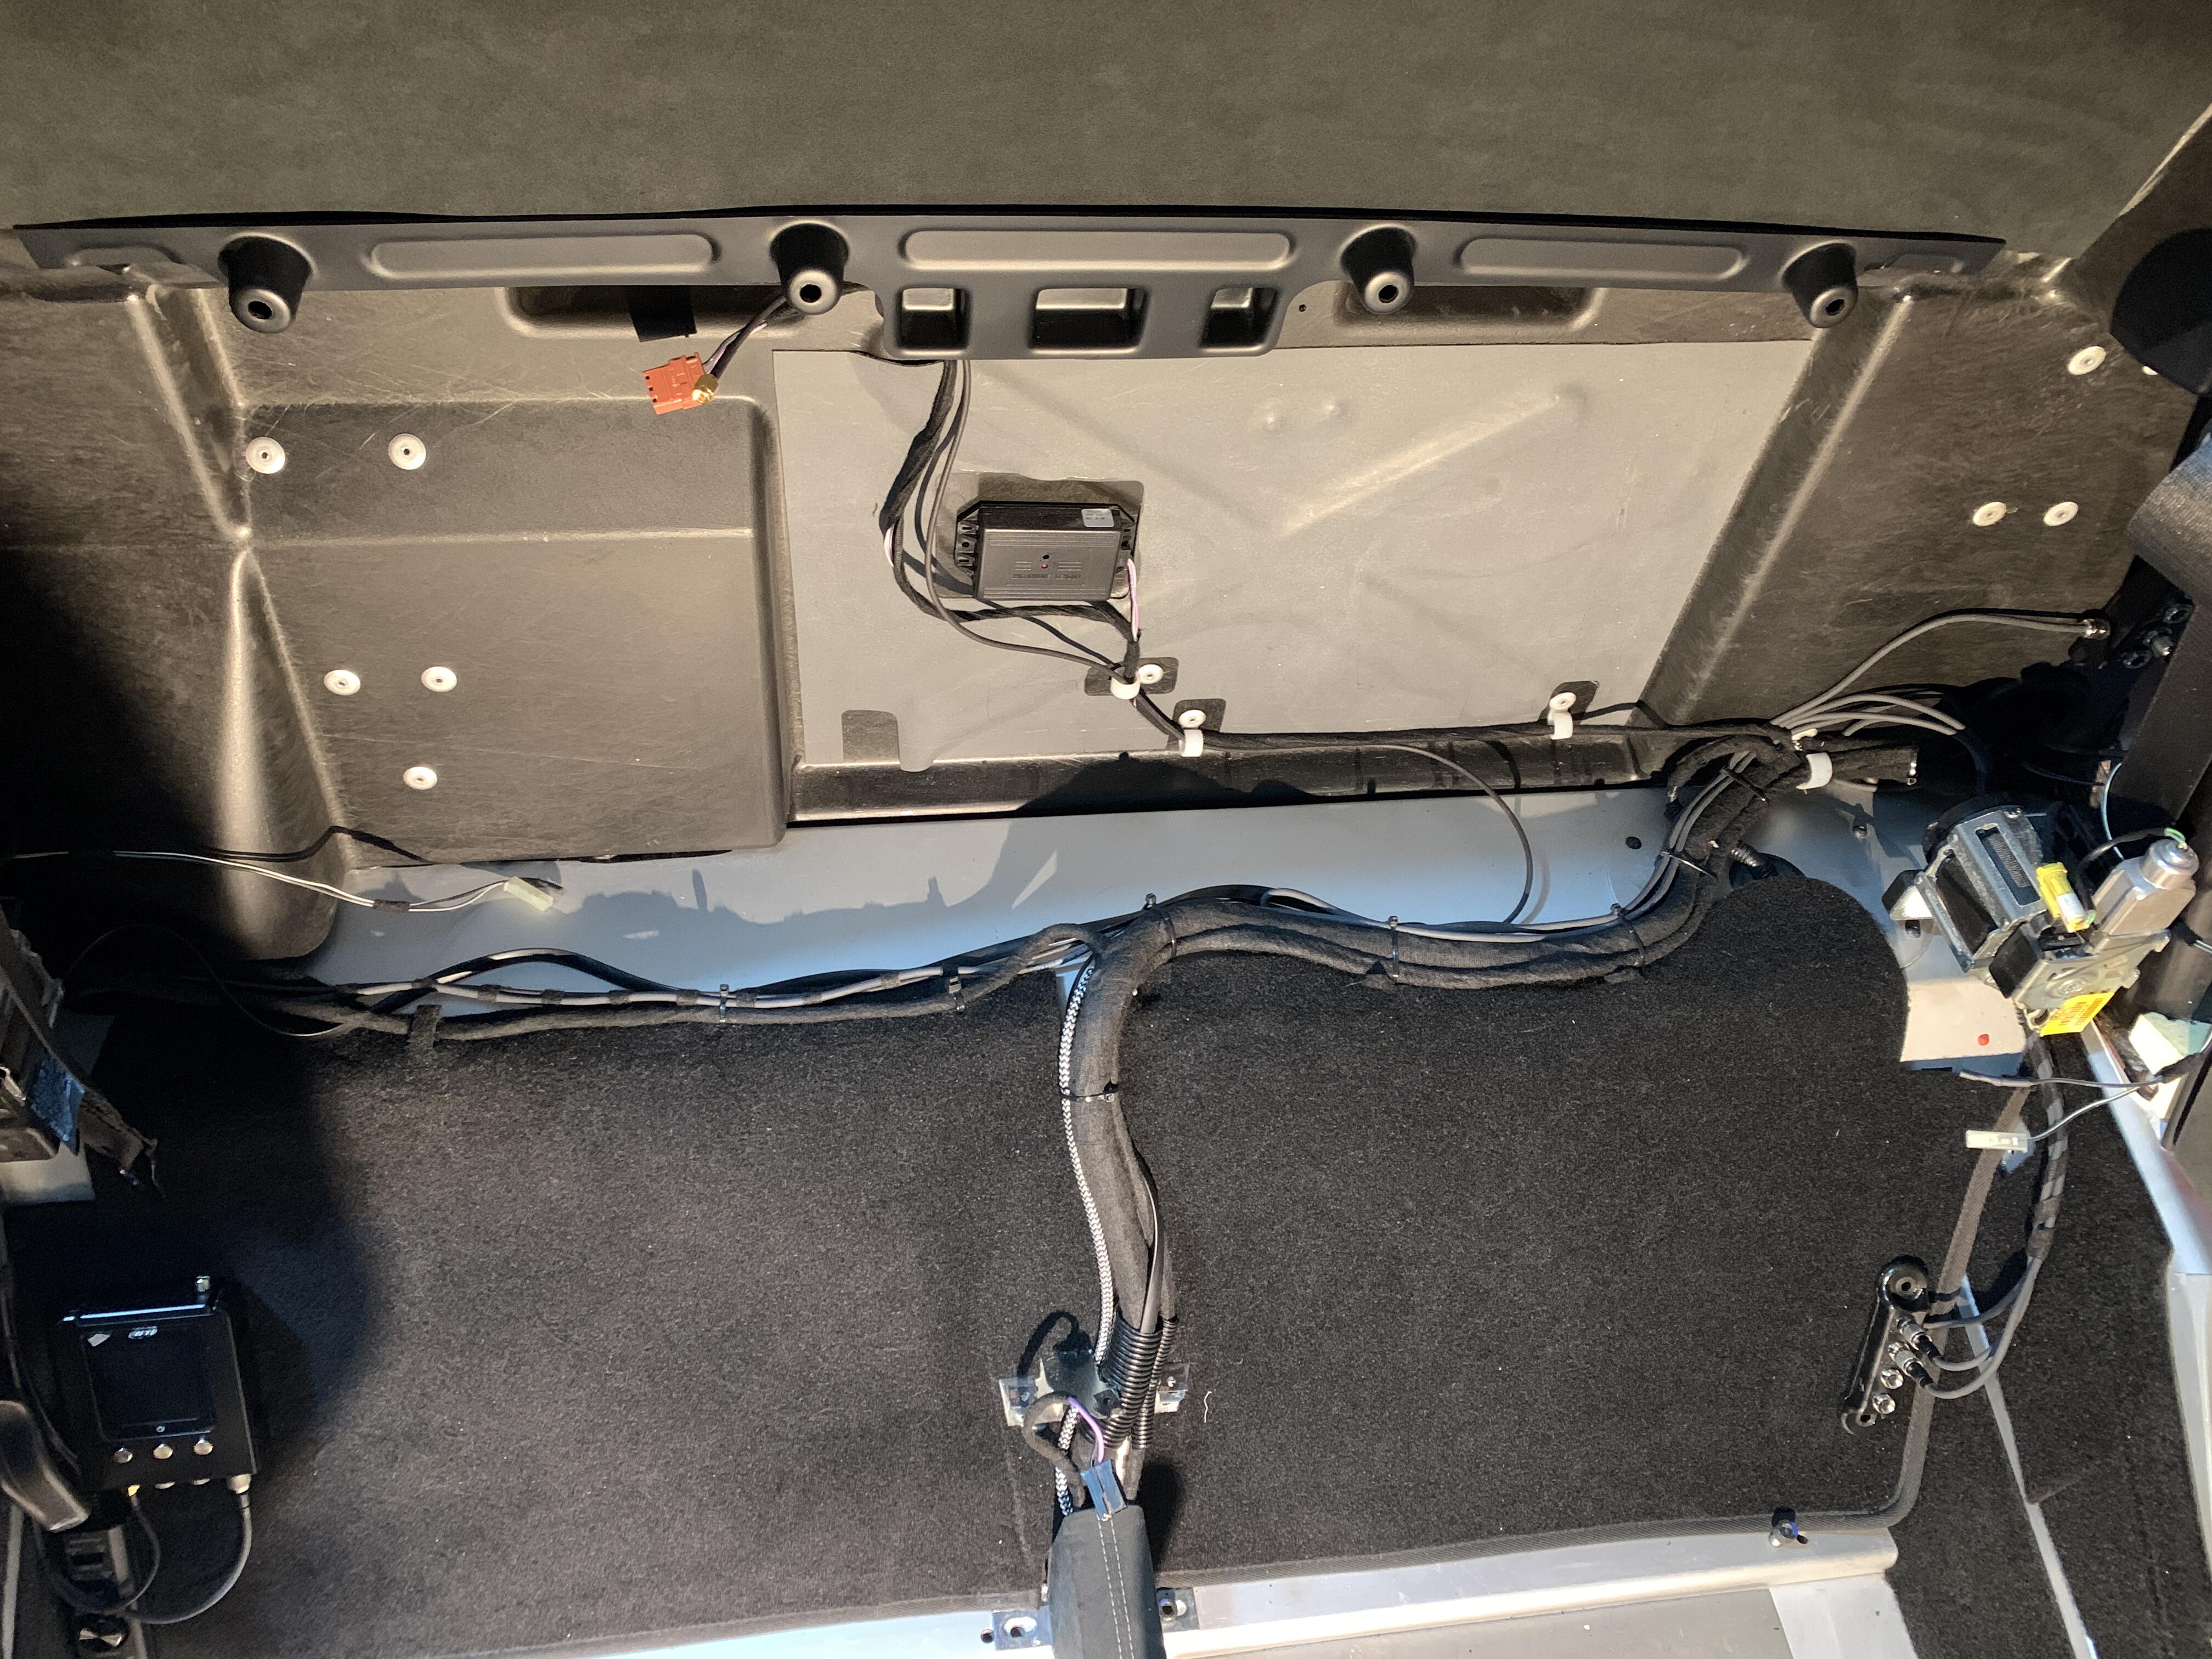
As you can see everything is now taped up and put into position, so keeps the OEM feel even though I hope to never need to look again!
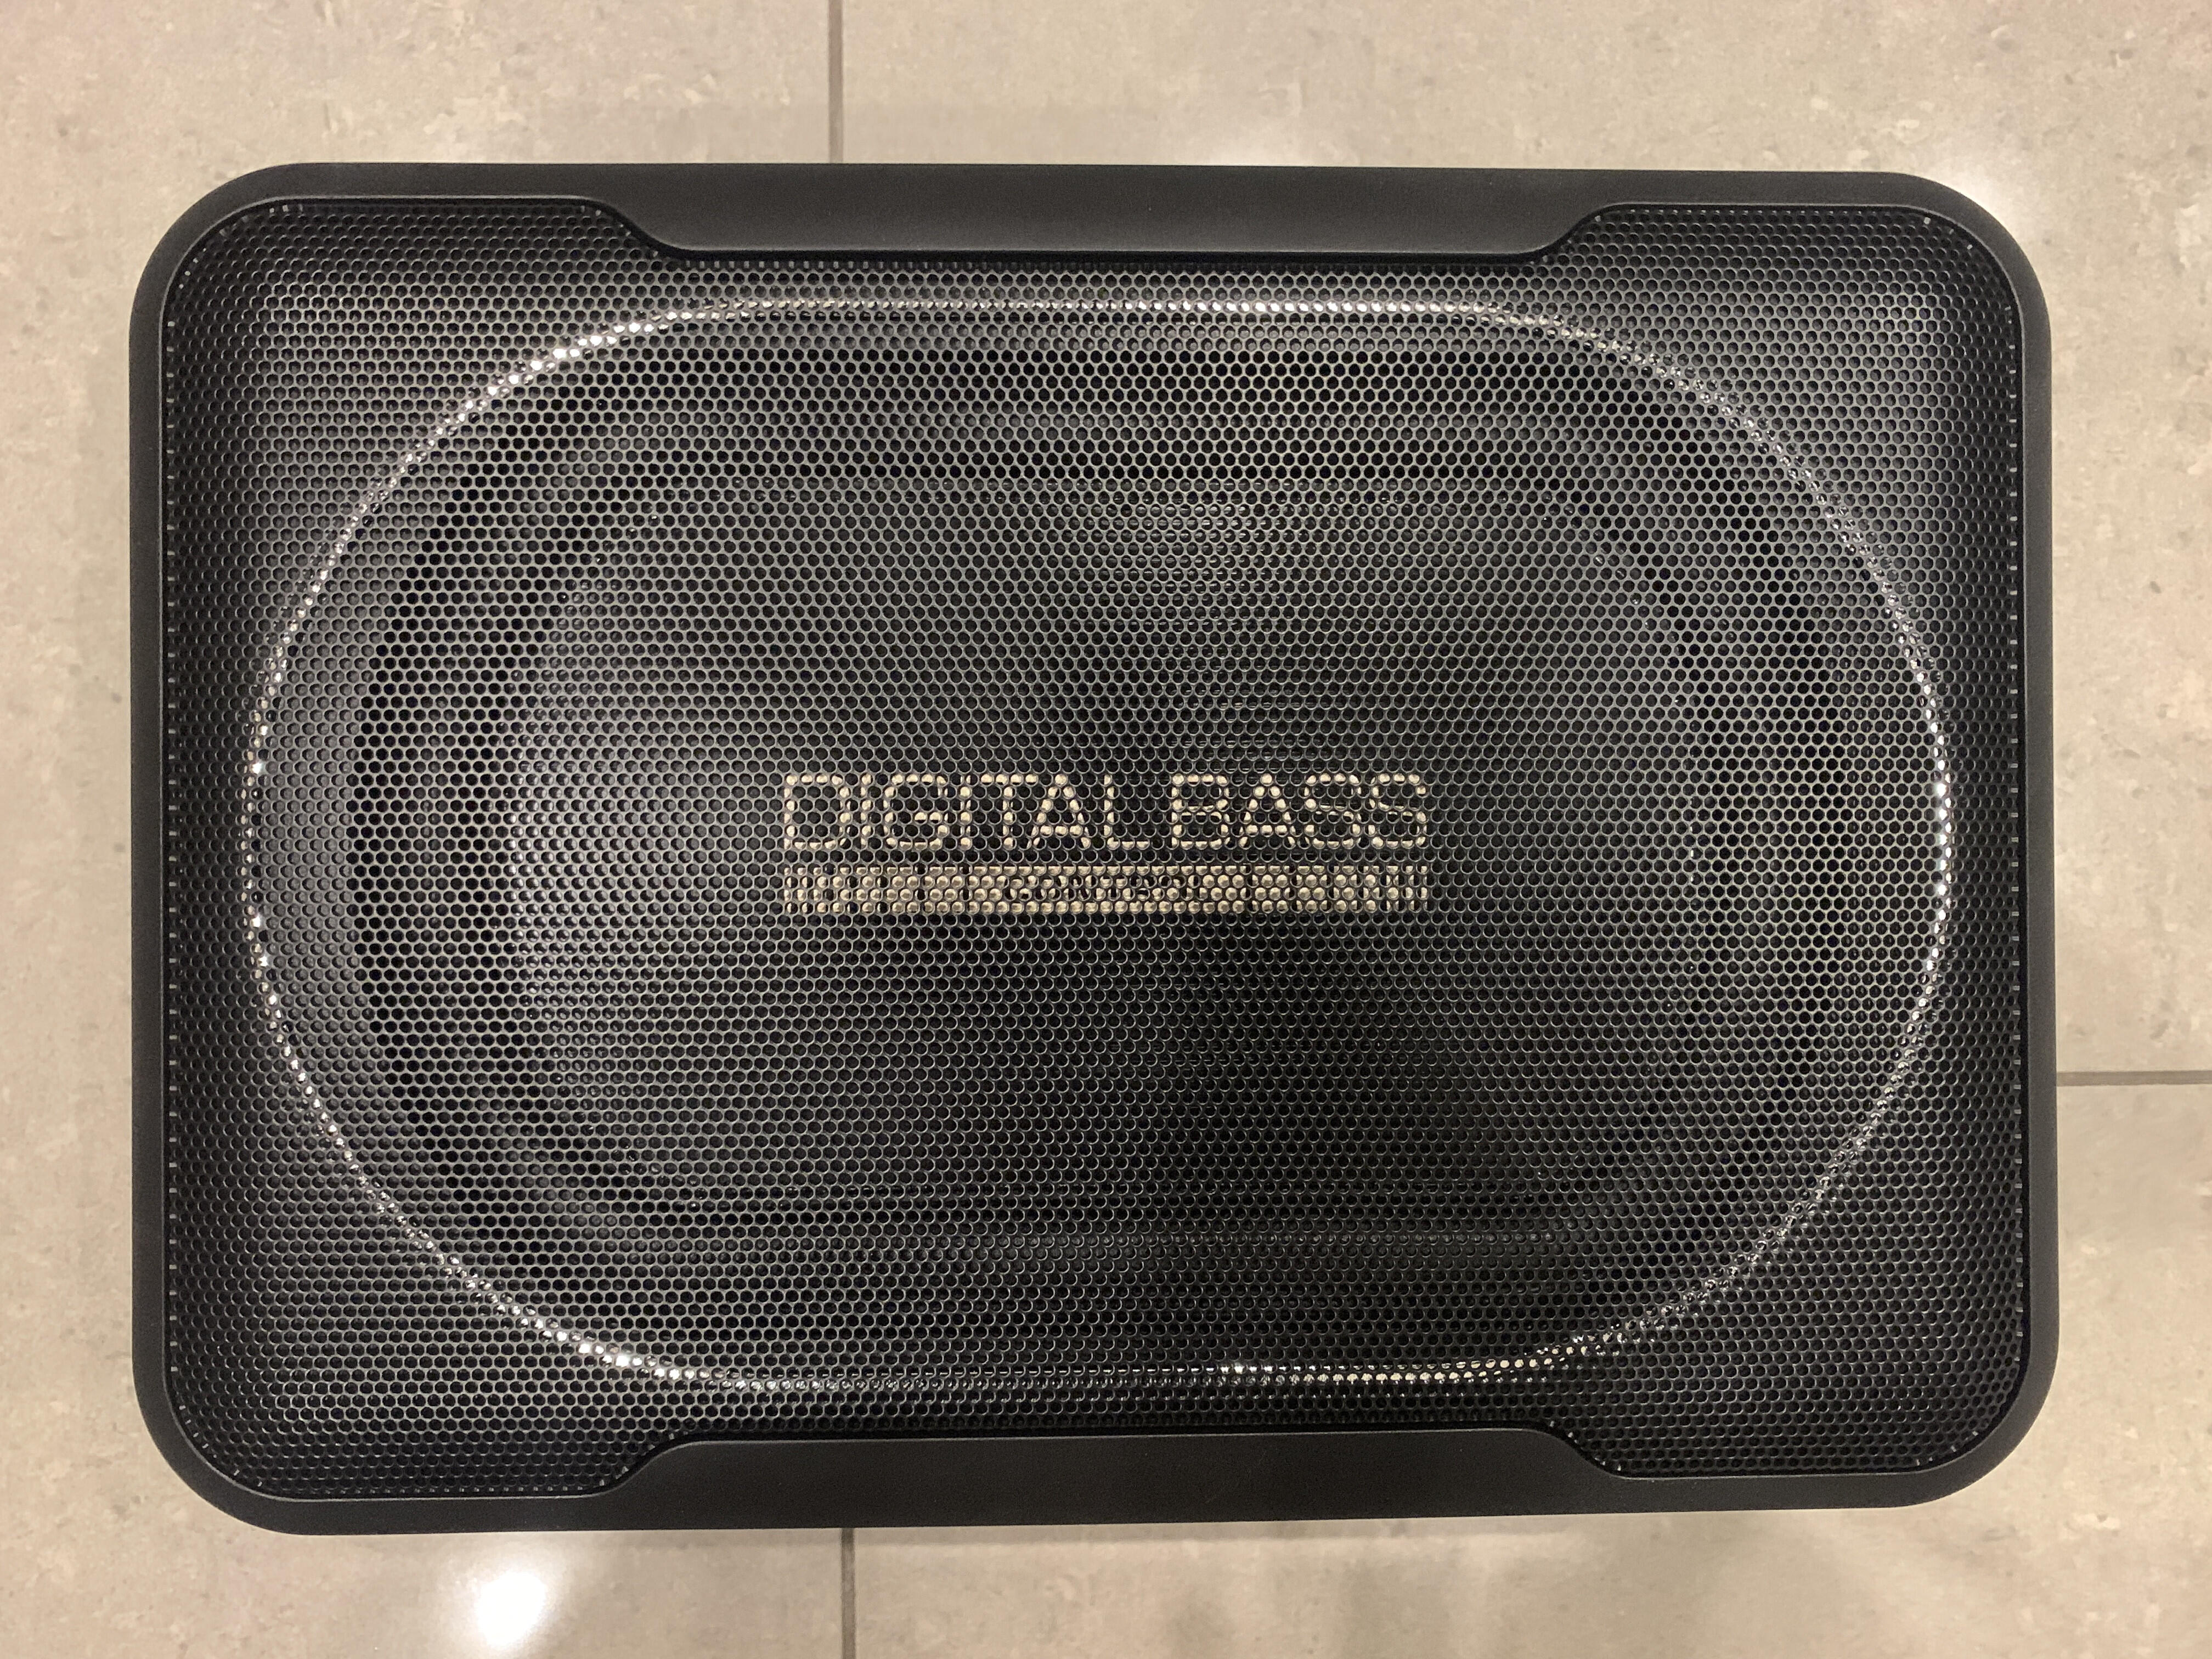
Next up was more tarting up, sub looked like this (small but ugly) - It will be kept in for road, but removed in about 30 seconds for track so no need to get all pedantic about weight
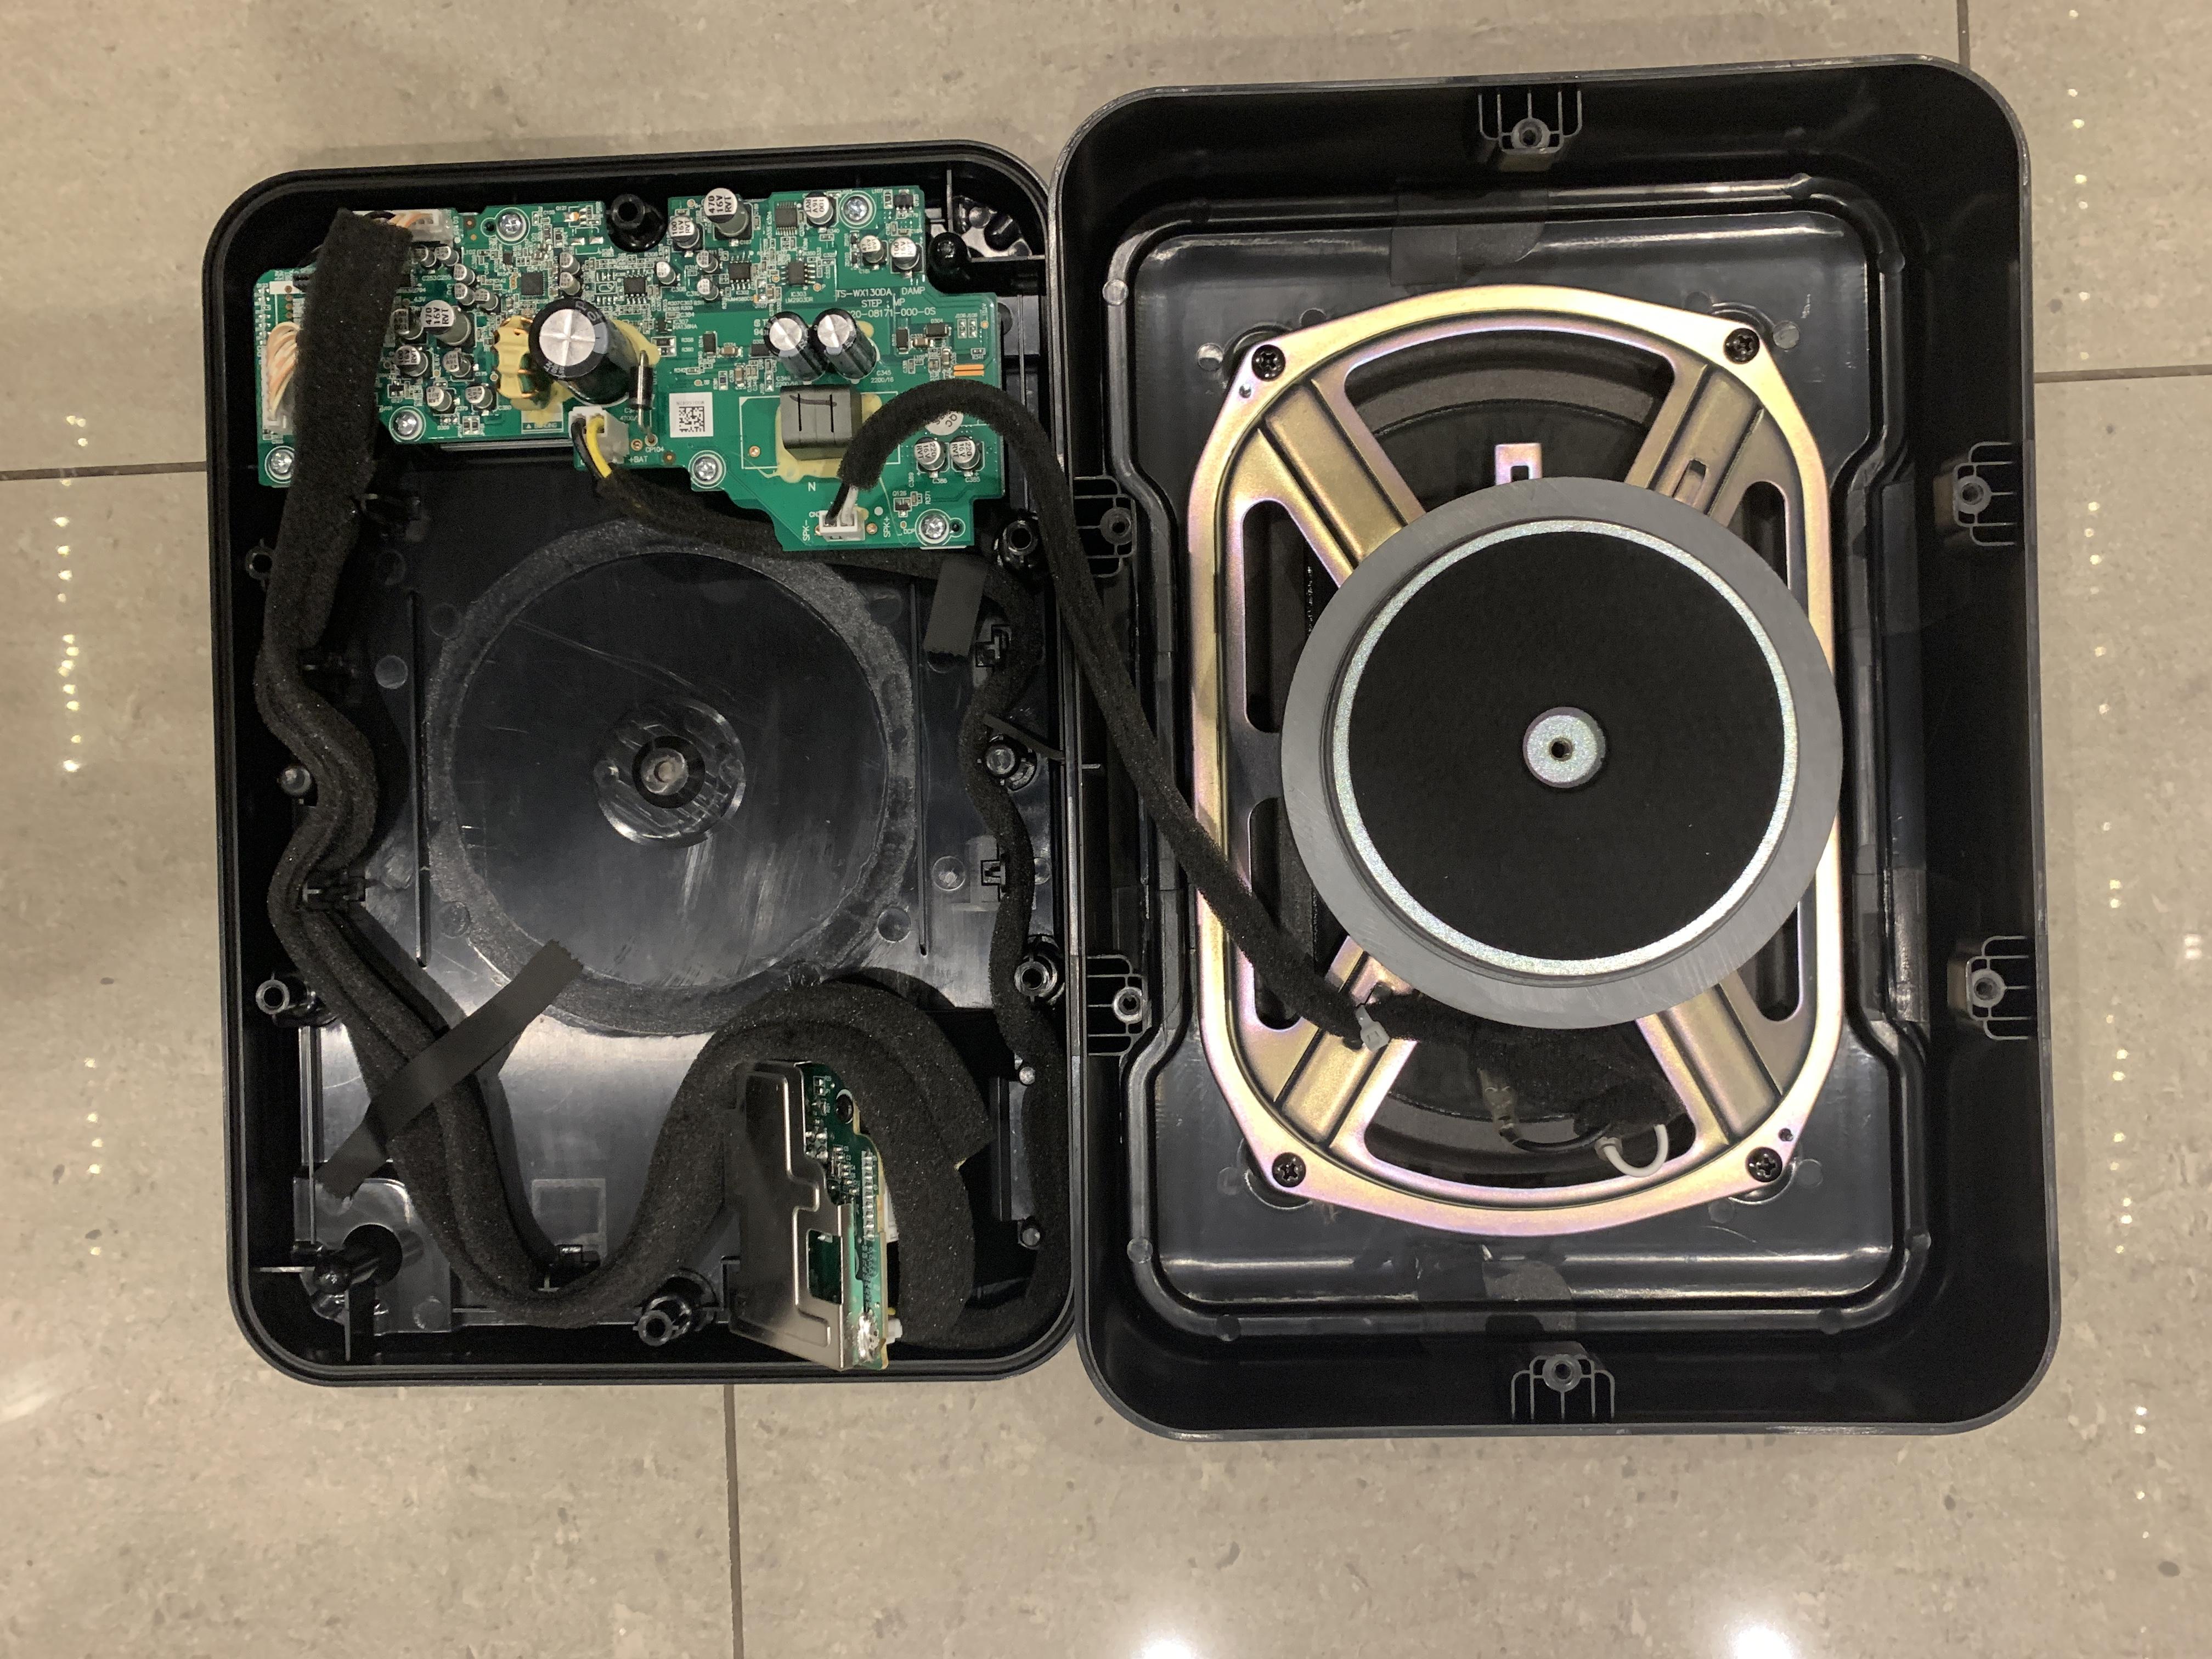
But like this pulled apart
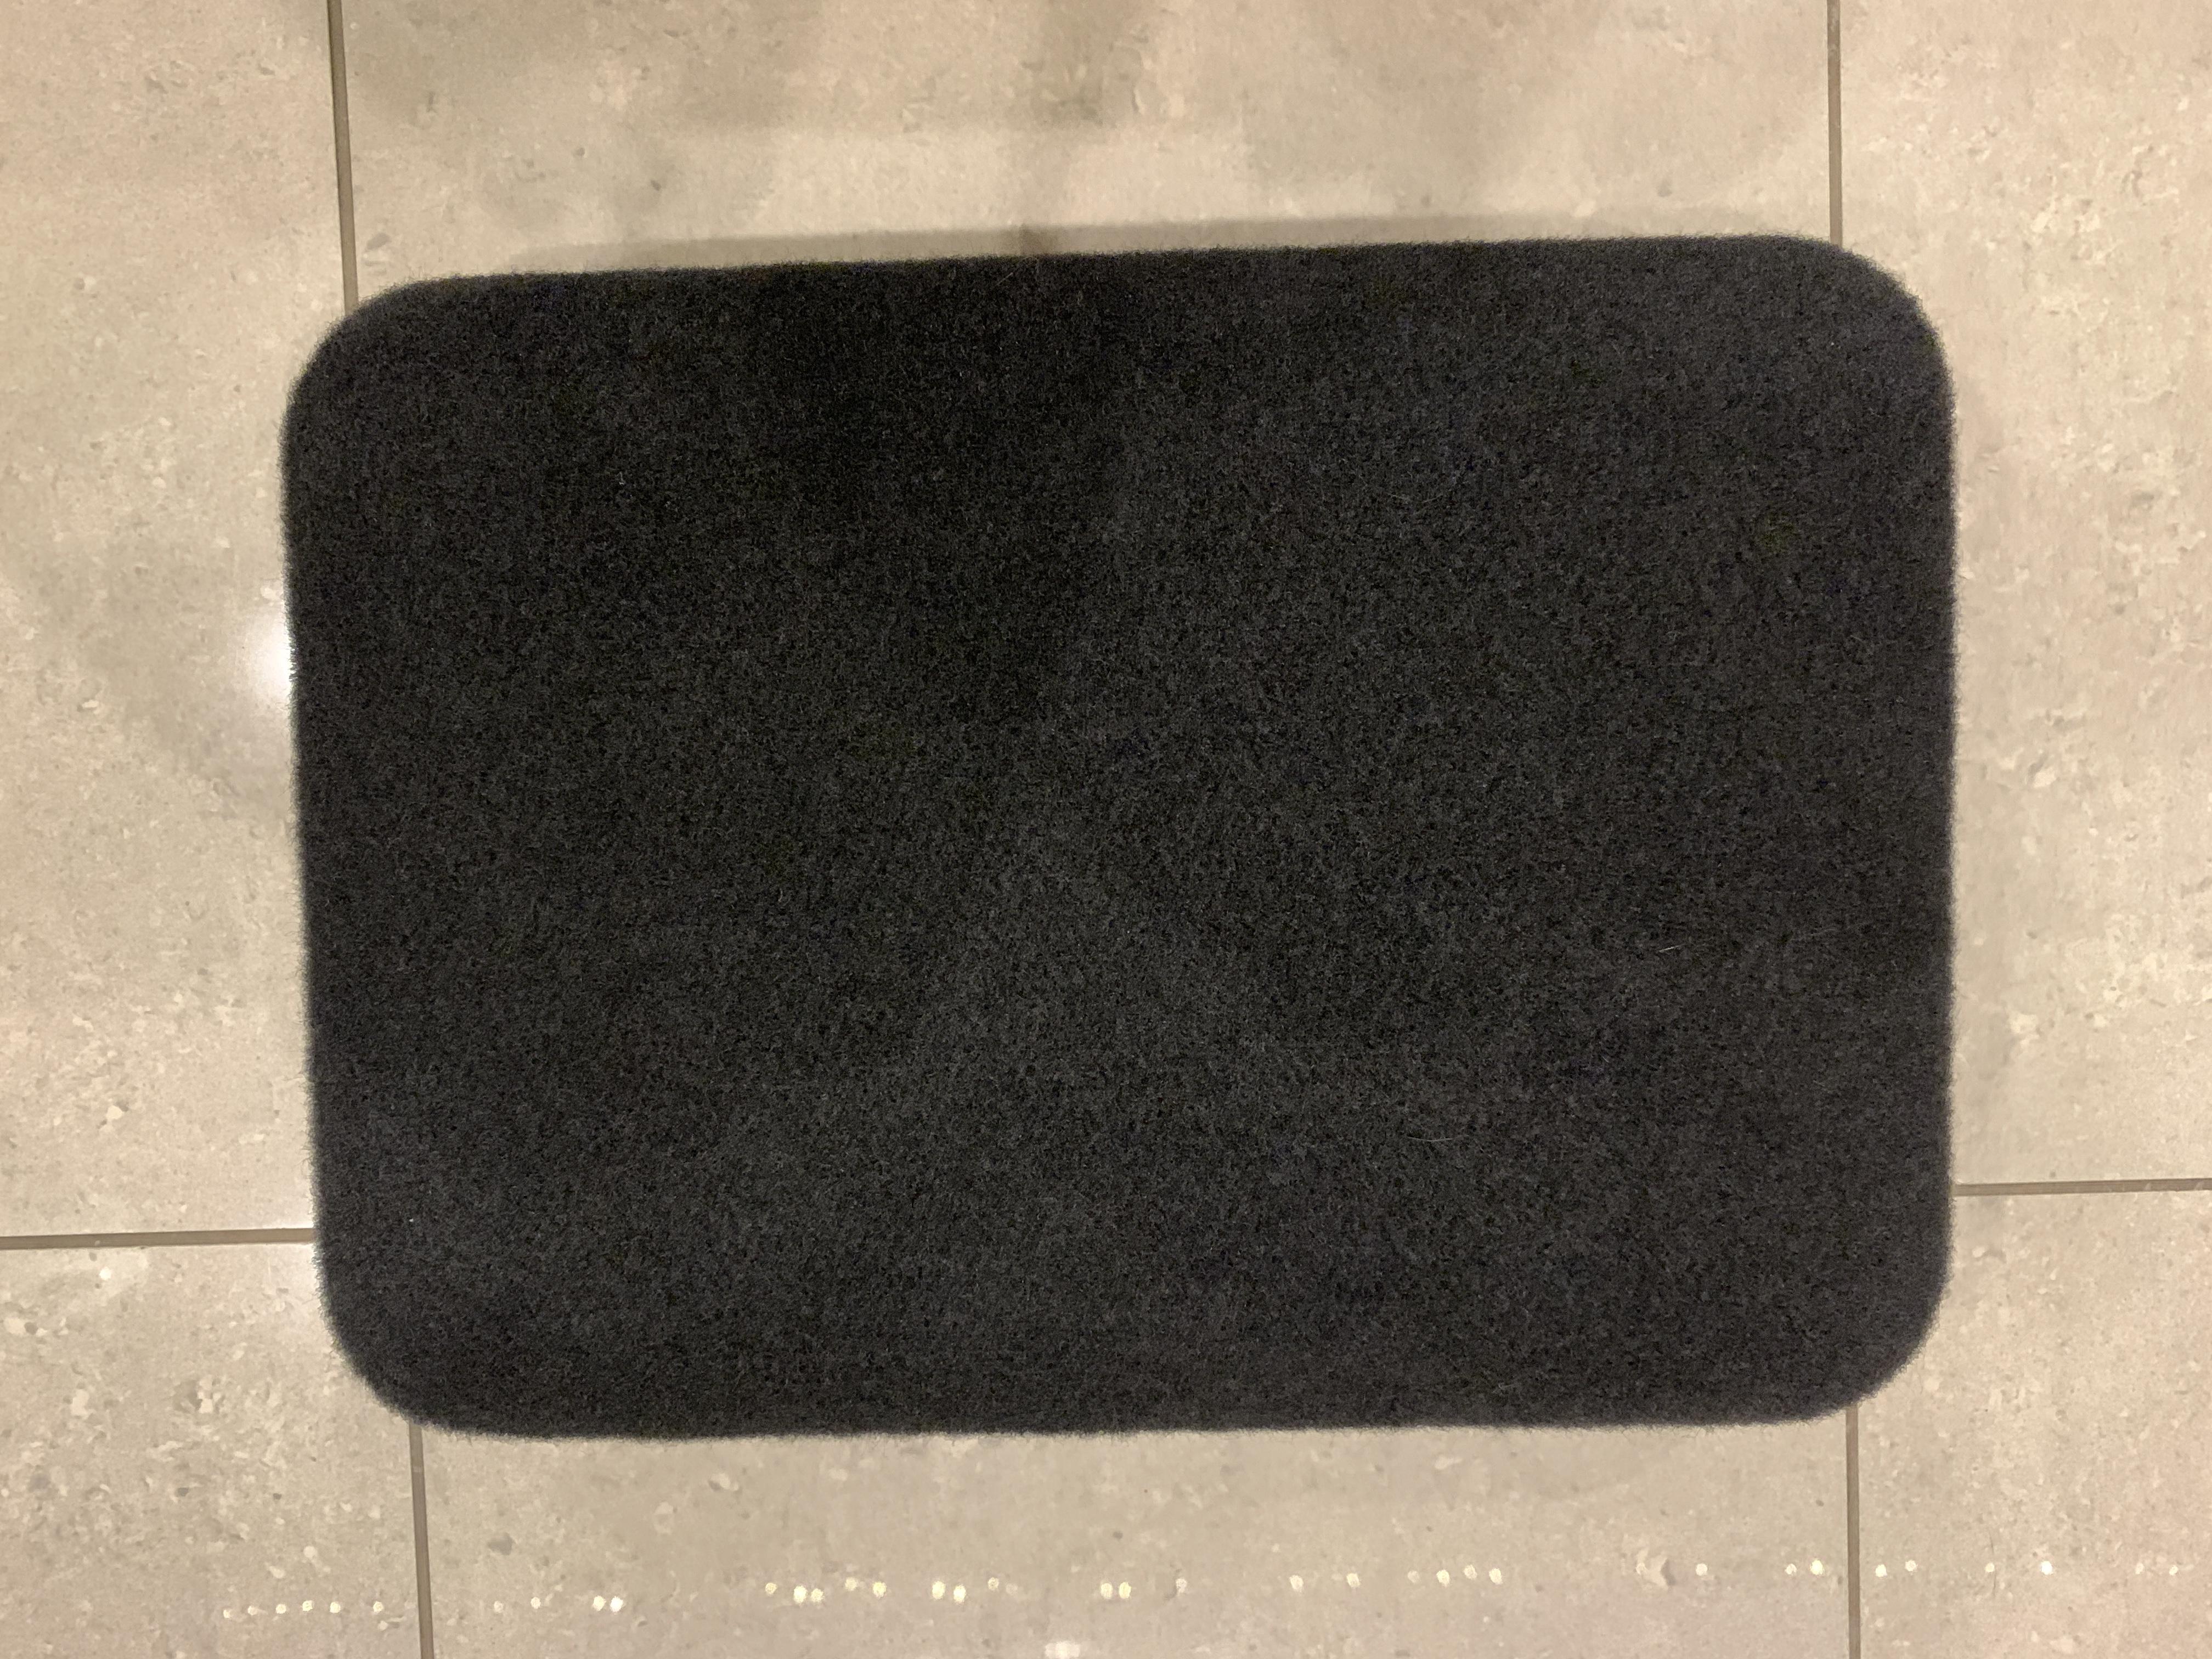
Then carpeted and it will be lost against the carpet already in place
Weight is not much more that the footrest I removed (too short for me, to far away for wife, plus I use the car to escape the world so rarely want a passenger:))
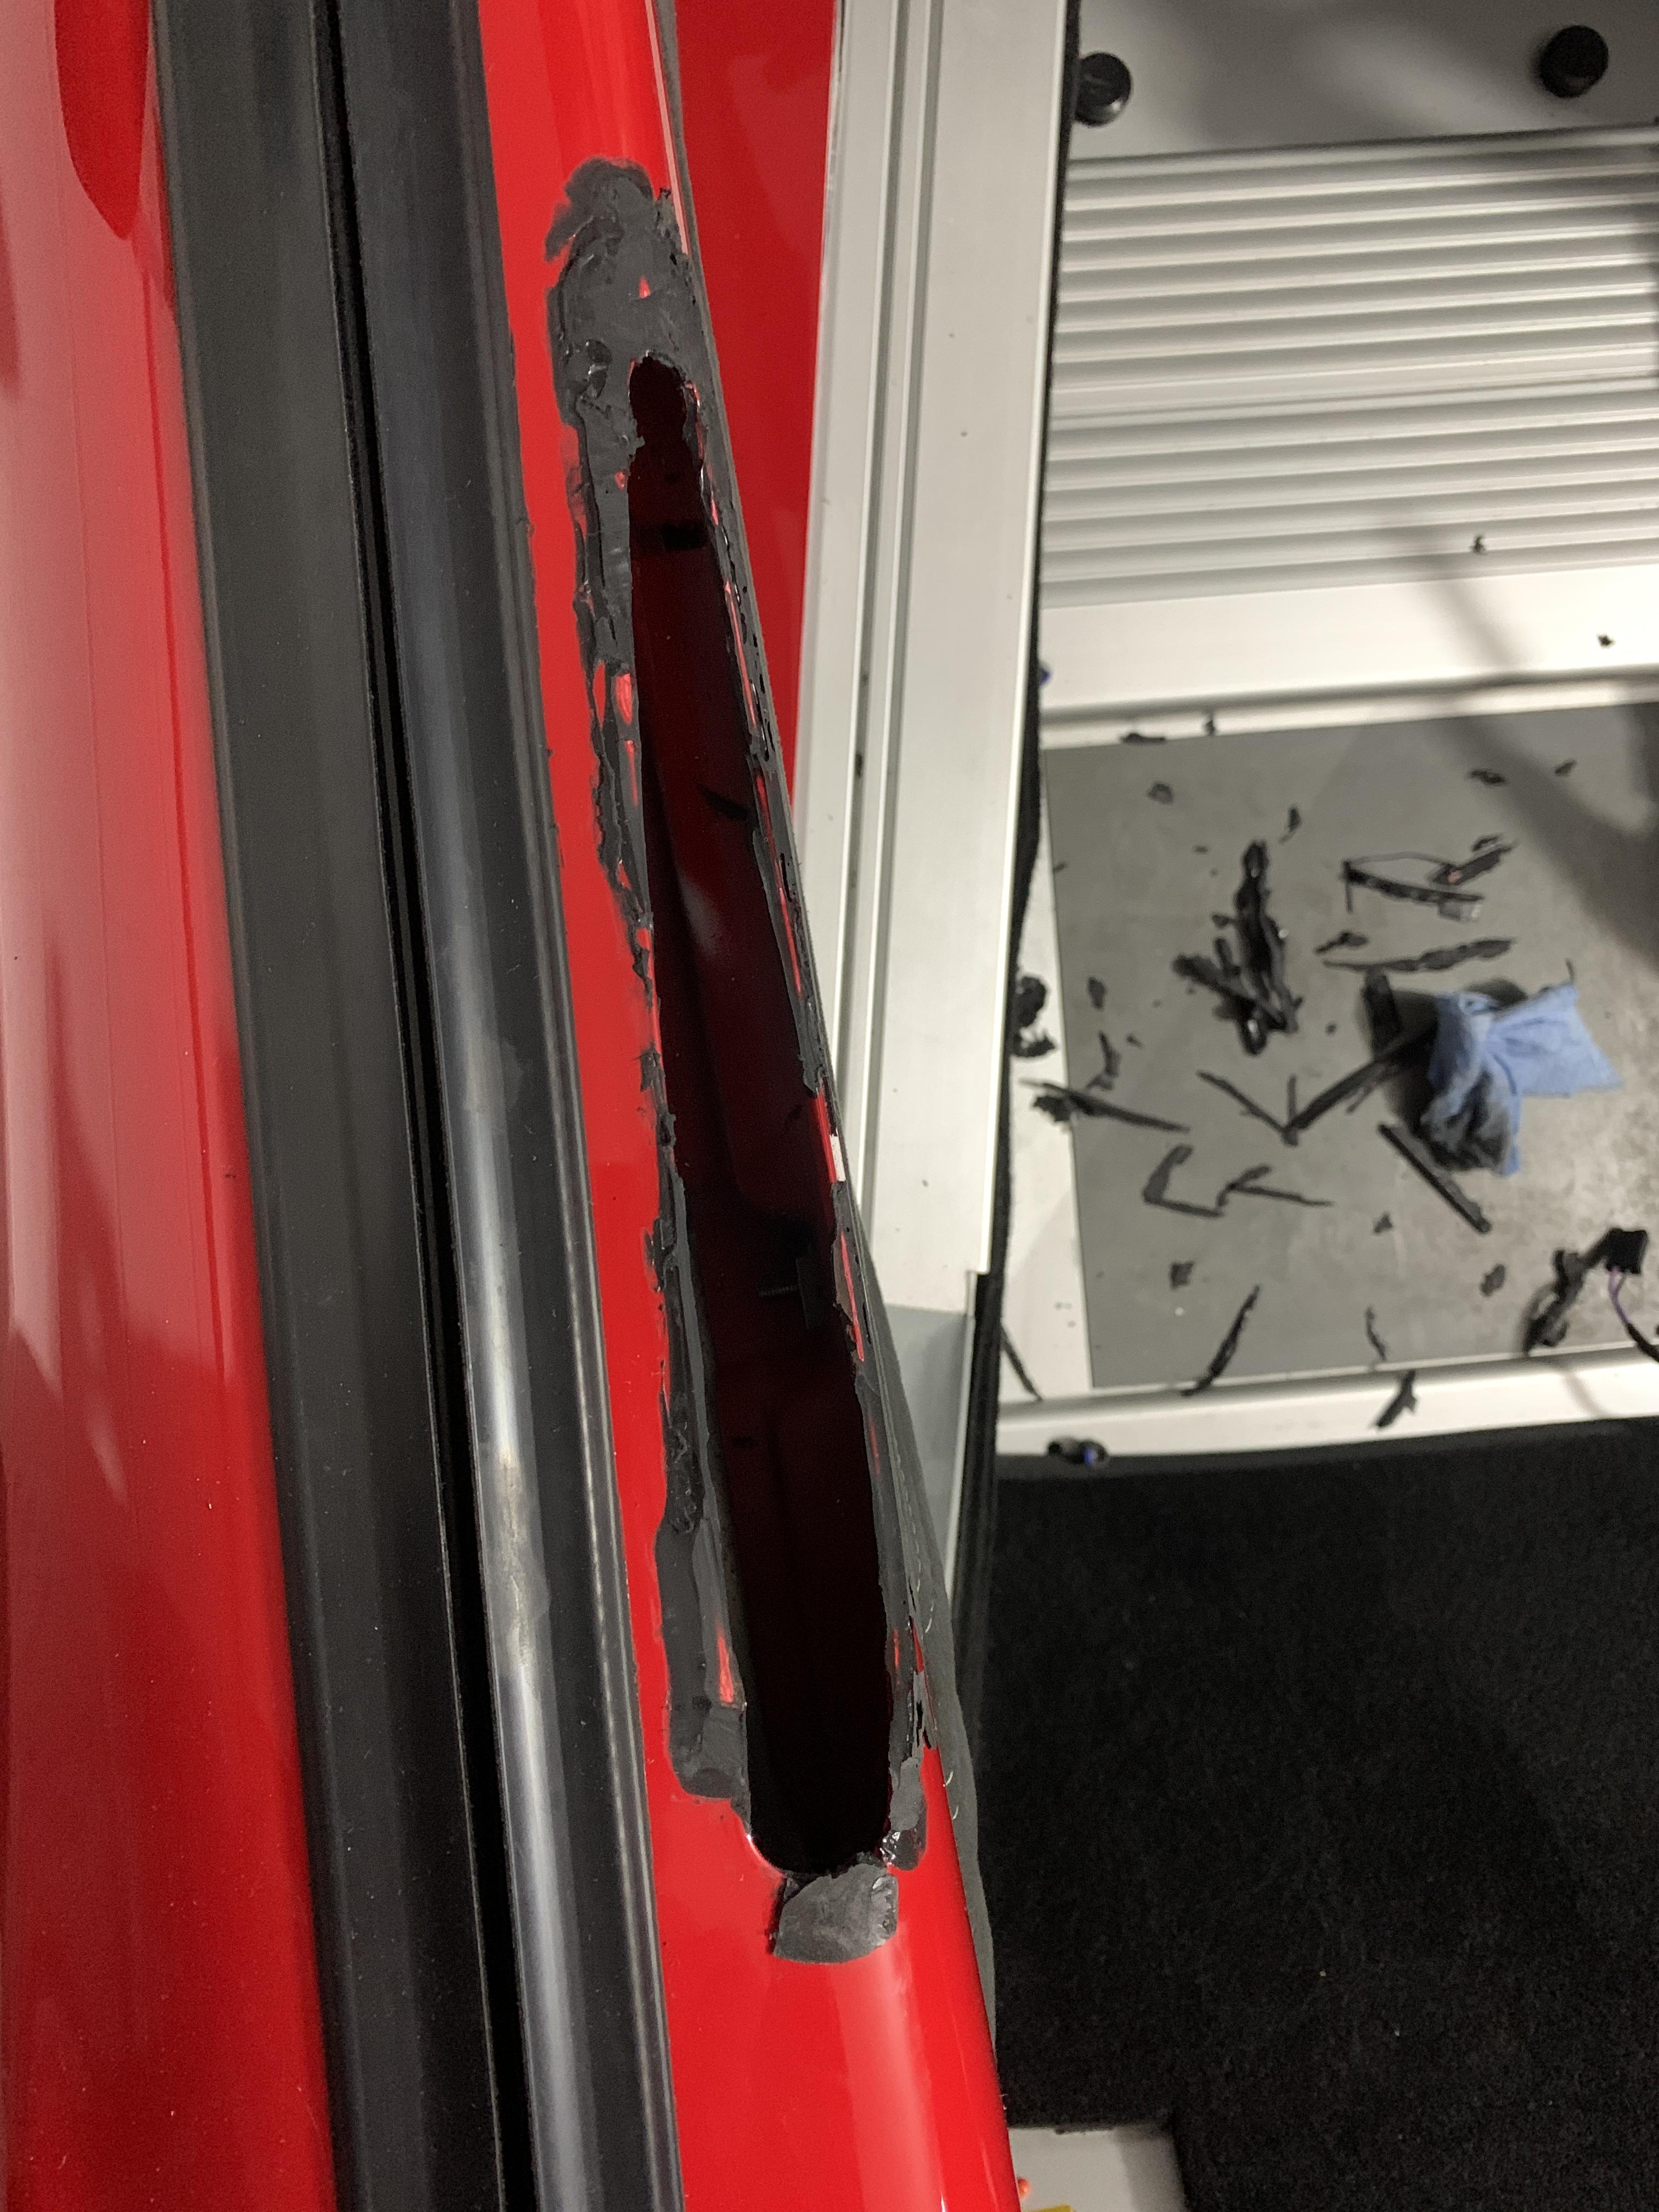
The interior door handle had been mounted cack handed after respray, so was hanging off at the front, looked like this - maybe not too many would notice but I keep finding these bits
Upon removing it was clear it hadn’t stuck first time so they just shoved more on
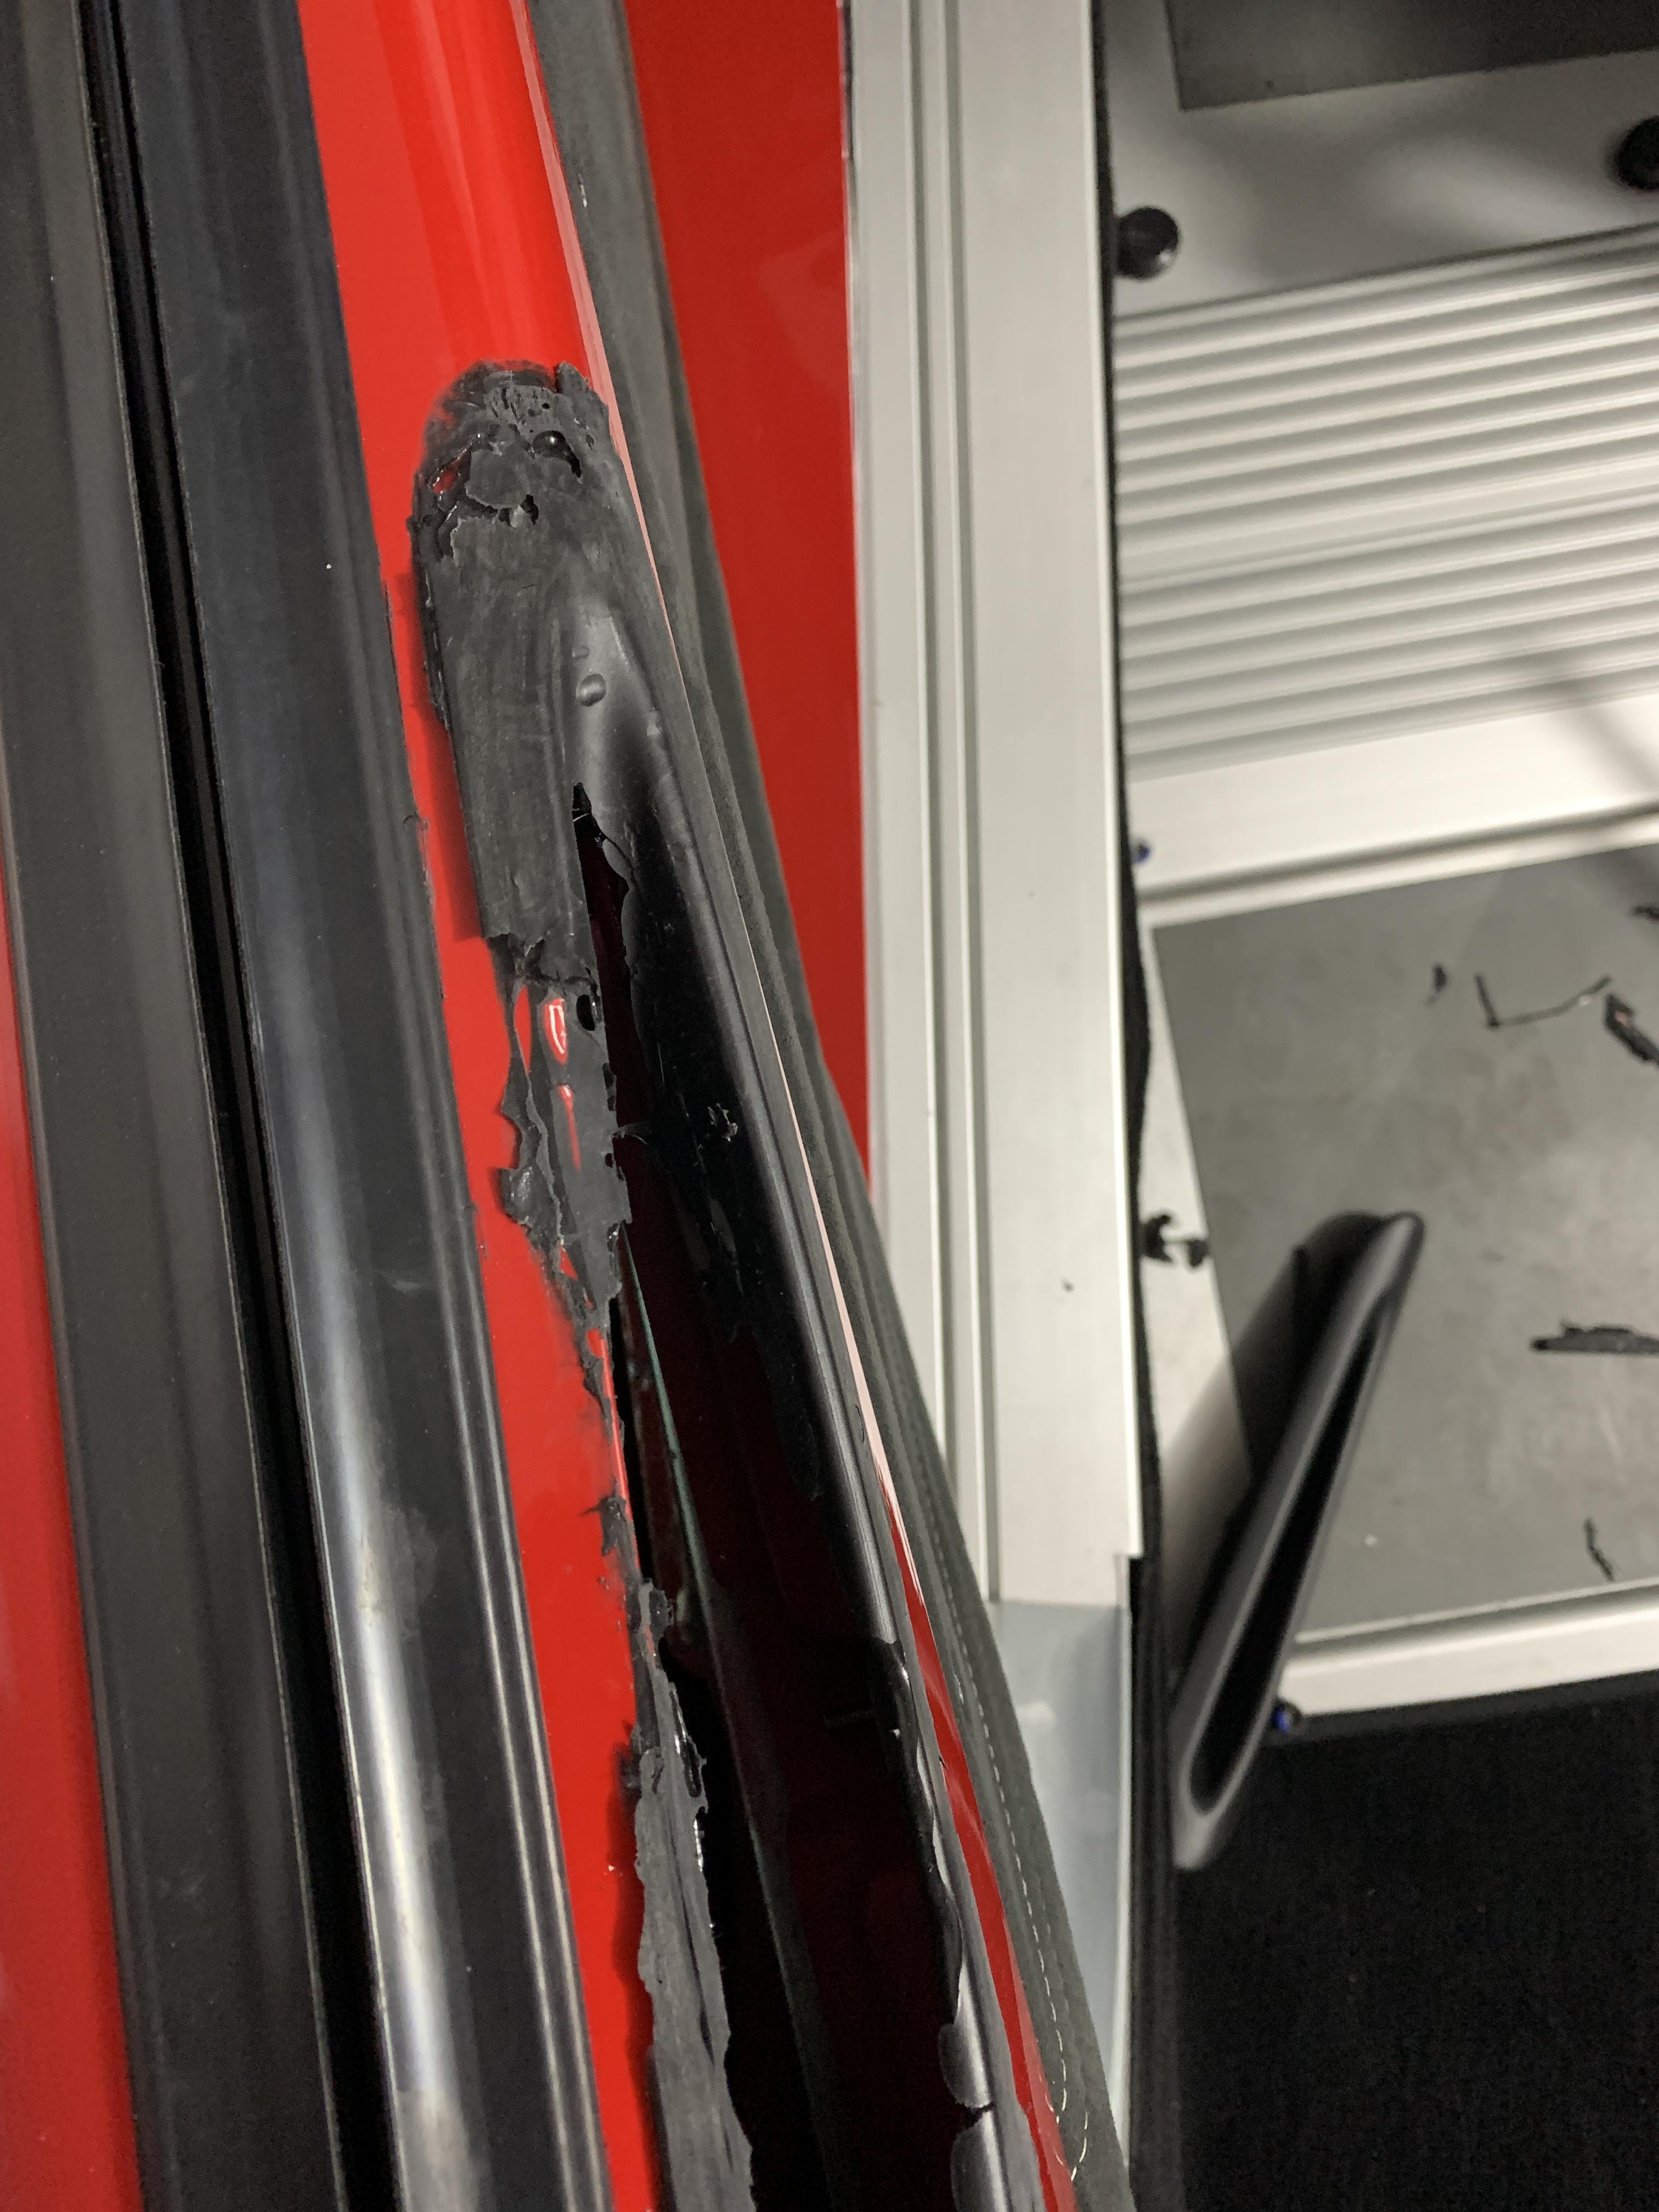
Trimmed it all out and will rebond
I’ve also found various other areas that are less than impressive like poorly fitting seals and paint defects needing wet sanding- frustrating as hell after all that money but at the minute easier for me to fix than face the fight of whats ‘acceptable’ combined with having to take the car back sort lifts etc I just have too much going on at the moment
Defects amount to poor denibbing so I can resolve, but I’d hoped to not have to be wetsanding the car - at present it is looking like a couple of spots of wetsanding, removal of those plus bodyshops sanding then pretty much a two stage polish.
Defects are hard to spot and balancing a camera with inspection lights etc makes it hard to photograph as the only chance I get to look at the car is post midnight due to work - if I can’t remove I’ll document, otherwise I’ll just show the wider detail later
That’s a shame, I think you were clear from day #1 that a perfect job is to be expected with the process you outlined/requested - but I’m also sure they’d put it right if given half the chance. I feel your pain, sometimes it’s easier to just suck it up and resolve yourself.
I’m sure they would, but as you say its easier to fix them as you find them especially as it means taking time out in the day which is near impossible these days, get them to look, agree its a problem then come back another day to be resolved etc
I’m constantly debating if I am being a pedant on these odd things or not - I’m sure its way better than it left the factory, its just those final little touches. Its hard to know if I am just looking for faults that aren’t material, or if I should be reassured that I can detail my way out of this?
Not sure how much weight that comment has when it comes to Lotus ![]()
I’m trying to be all positive about this ![]()