Top work ![]()
The rear bulkhead panel was that covered in on section or did you have to cut and join in ?
Cheers ![]() It is really awkward work.
It is really awkward work.
It was one piece for the main panel, and another for the bottom shelf stitched in. If I was doing it again I’d do it in three: Bottom shelf, main indented bit where there net goes, then the bit round the sides
Nice to know you have a plan for when mine is dropped off ![]()
After looking at pictures of the cabin again, I’m sure its wasted you can only see about 6 inches of it! But those trimmed blanking plates for your rear speakers should be easy to knock up…
Paint wise the car is pretty much done, well it is done and should be all finished now. But I am still waiting on the decal set. I have probably mentioned before, but when getting resprayed I wasn’t sure if I wanted all the cup bits over it (front and rear corner flicks, scallops on the doors) but I figured I would get them and decide later – over 4 months ago I ordered the set from Lotus. Well my wife did, the stickers were a fortune but she thought she would sort them. All good, but I am still waiting. I have had a proper rant at them and in the time its taken to print a set from a file, the car has had pretty much everything except the engine take out and refurbed, a complete panel off respray etc etc. And they can’t press ctrl P…
Broken record I know, but Lotus are still a joke with their parts supply and they really need to sort this as it will not be tolerated at their suspected intended position in the market. Pretty much every part I have needed has been on backorder, or just doesn’t exist and I’ve had to waste weeks ringing around anyone who could possible help, and these are really simple parts, I’m not asking for someone to retool a foundry!
Anyway…
With the car itself being away I’ve been focusing on the bits that I took out of the car before handing over so cleaning up the carbon.
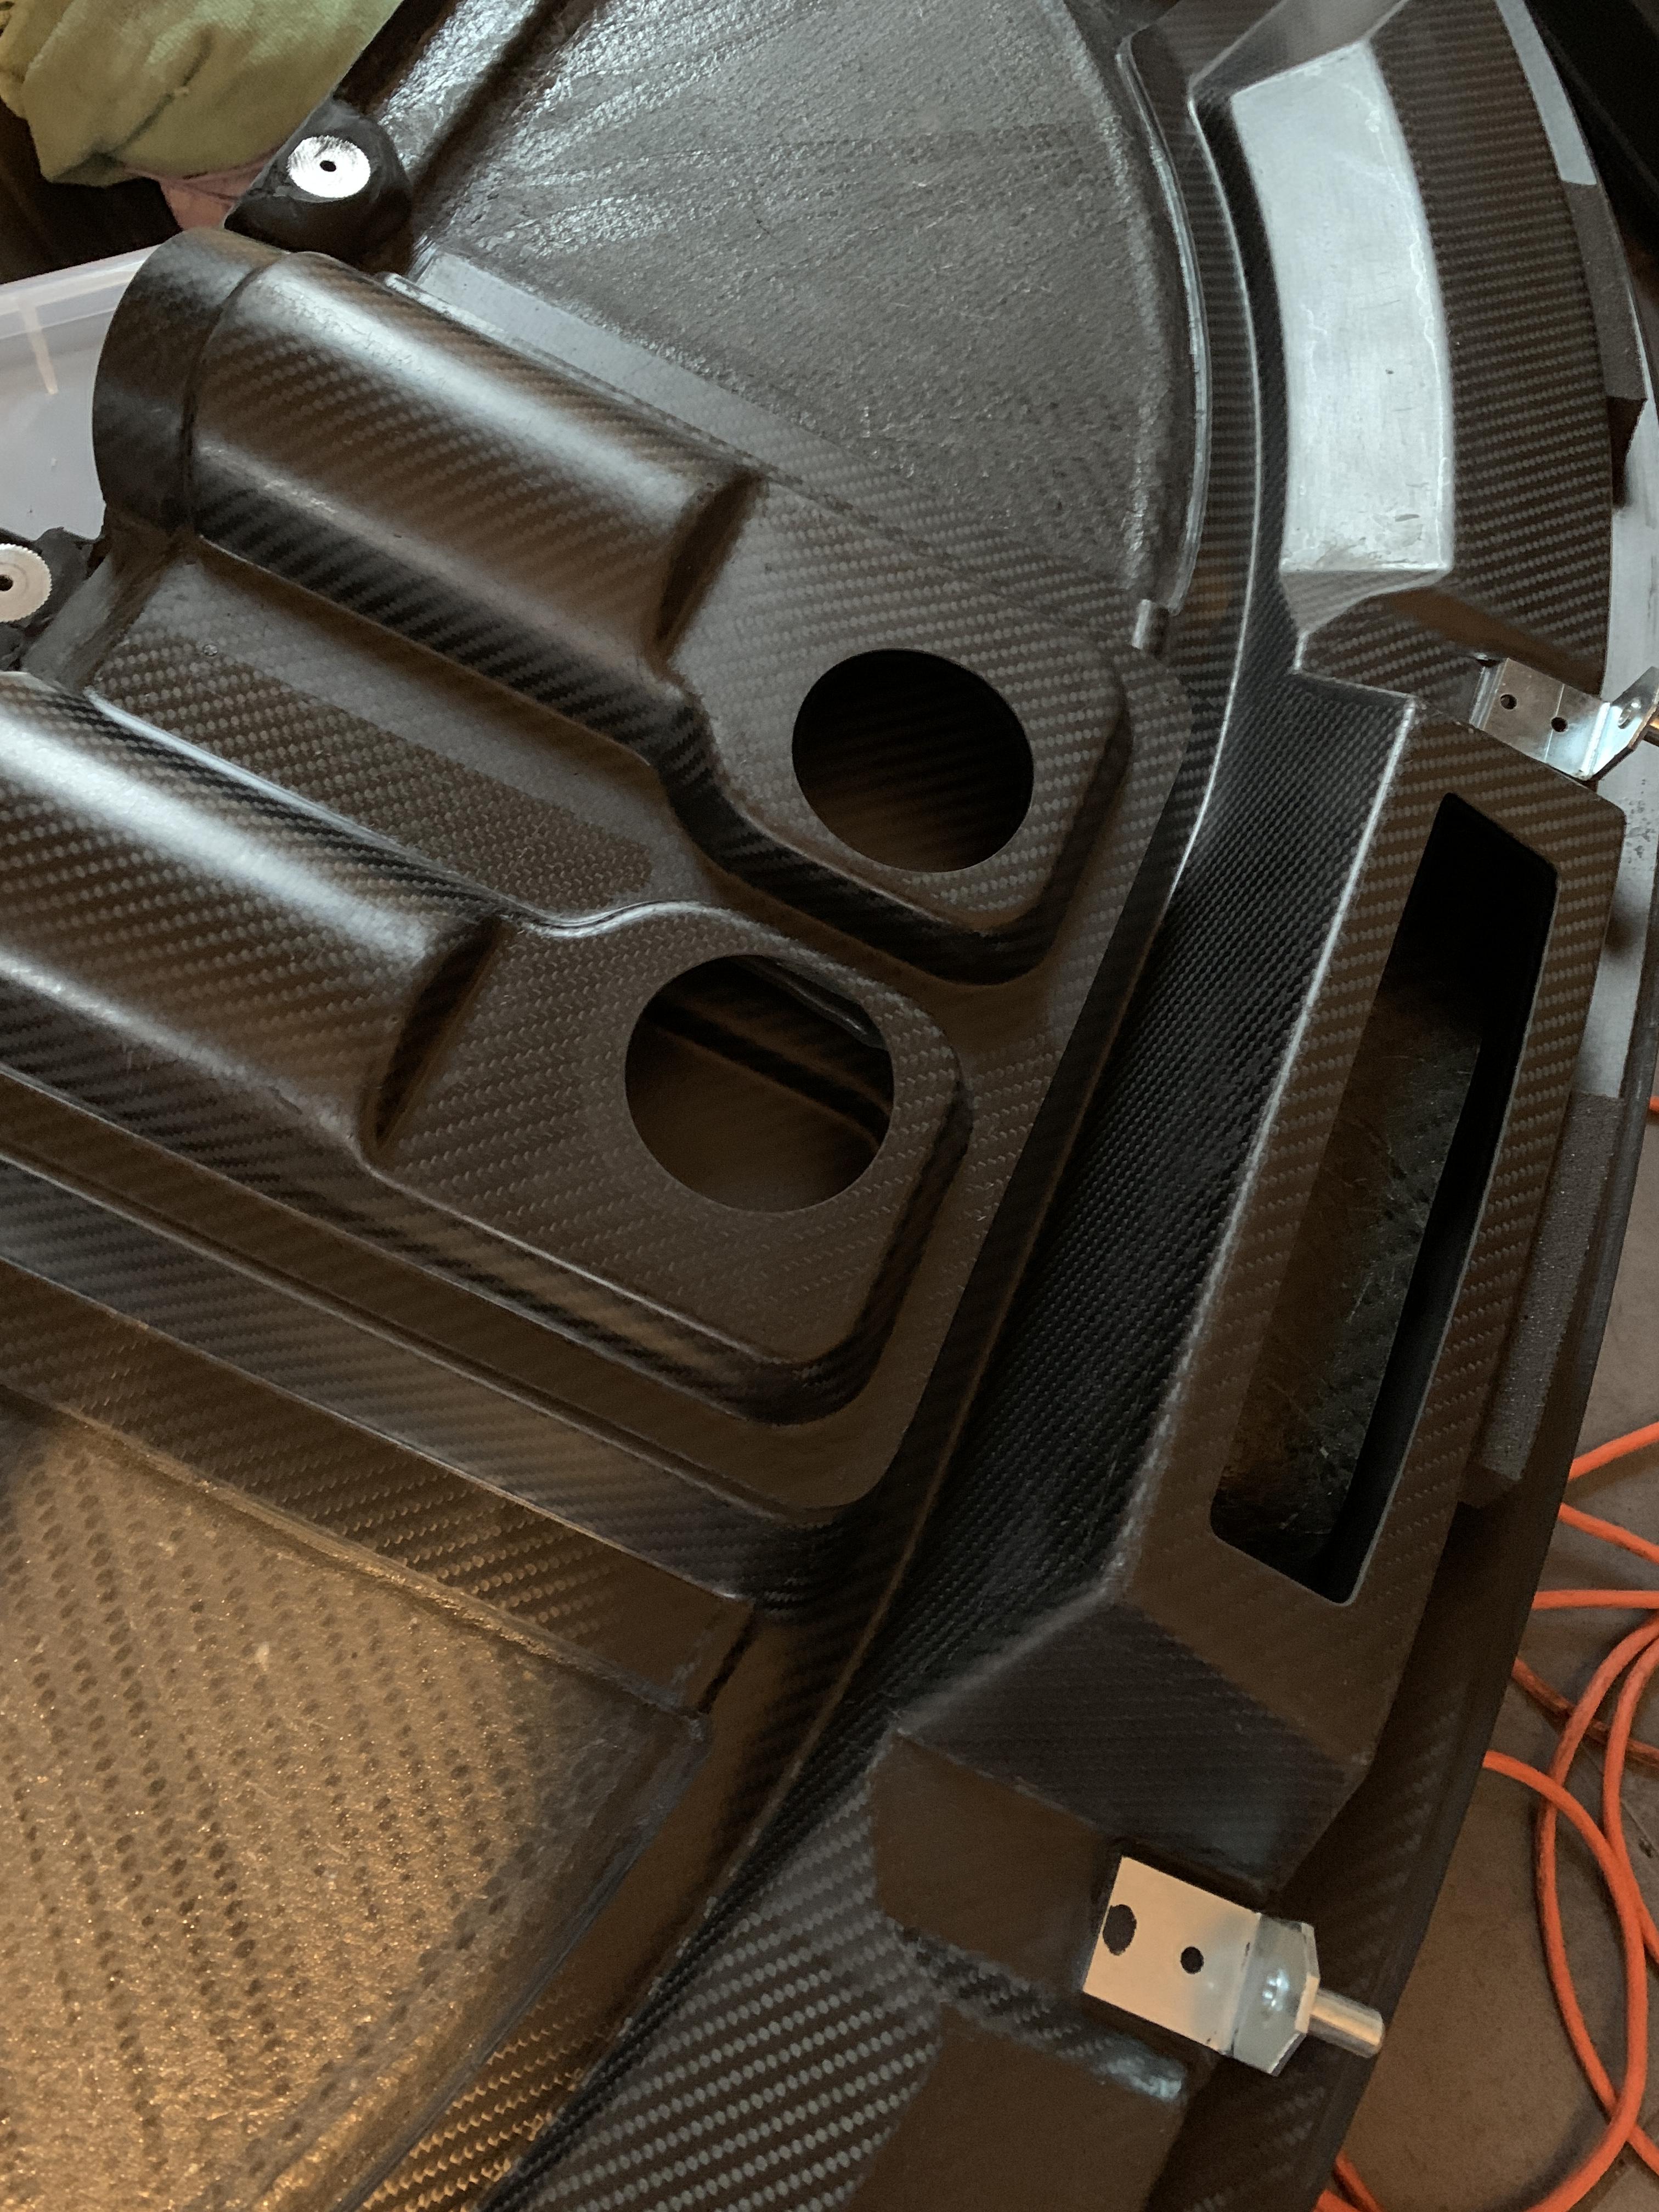
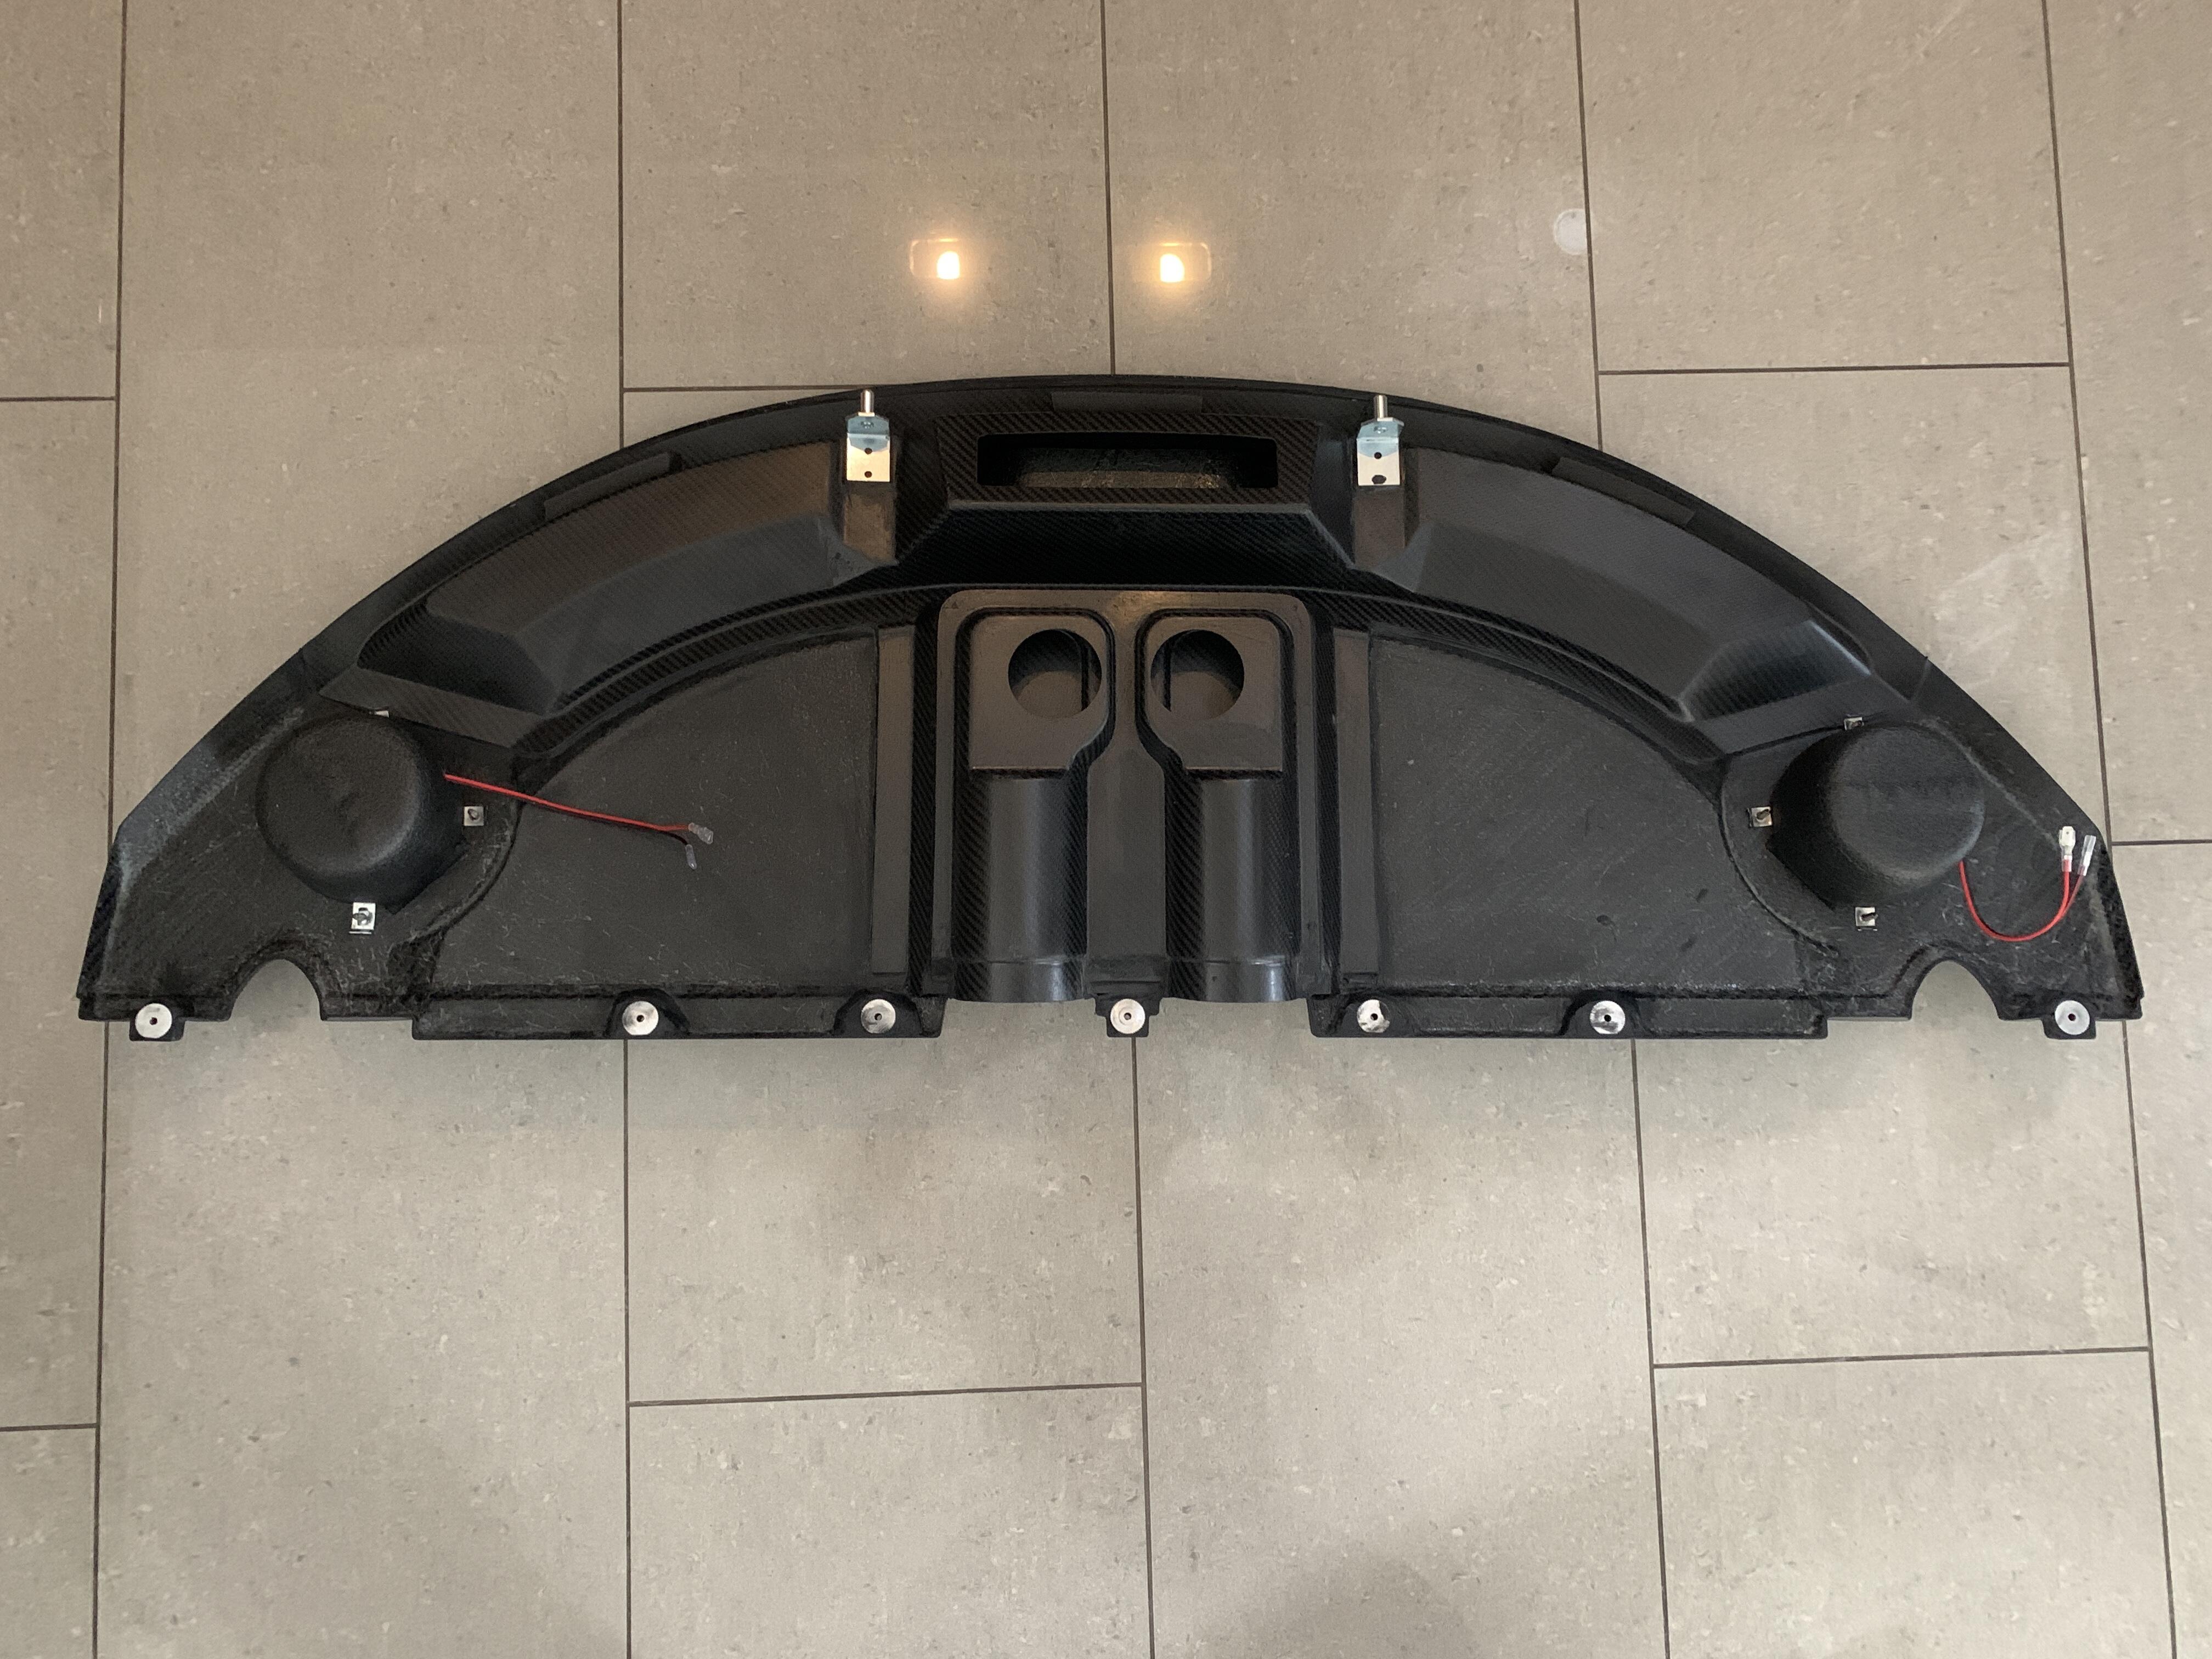
The Cup260 has plenty of carbon on the inside, seats, vent panels, side sills, and dash itself
Most think it’s just cosmetic, but to their credit Lotus did a full carbon dash. Not sure if its much lighter as when I pulled the dash out of my 350 it struck me as light. But anyway its carbon throughout for those that like this stuff.
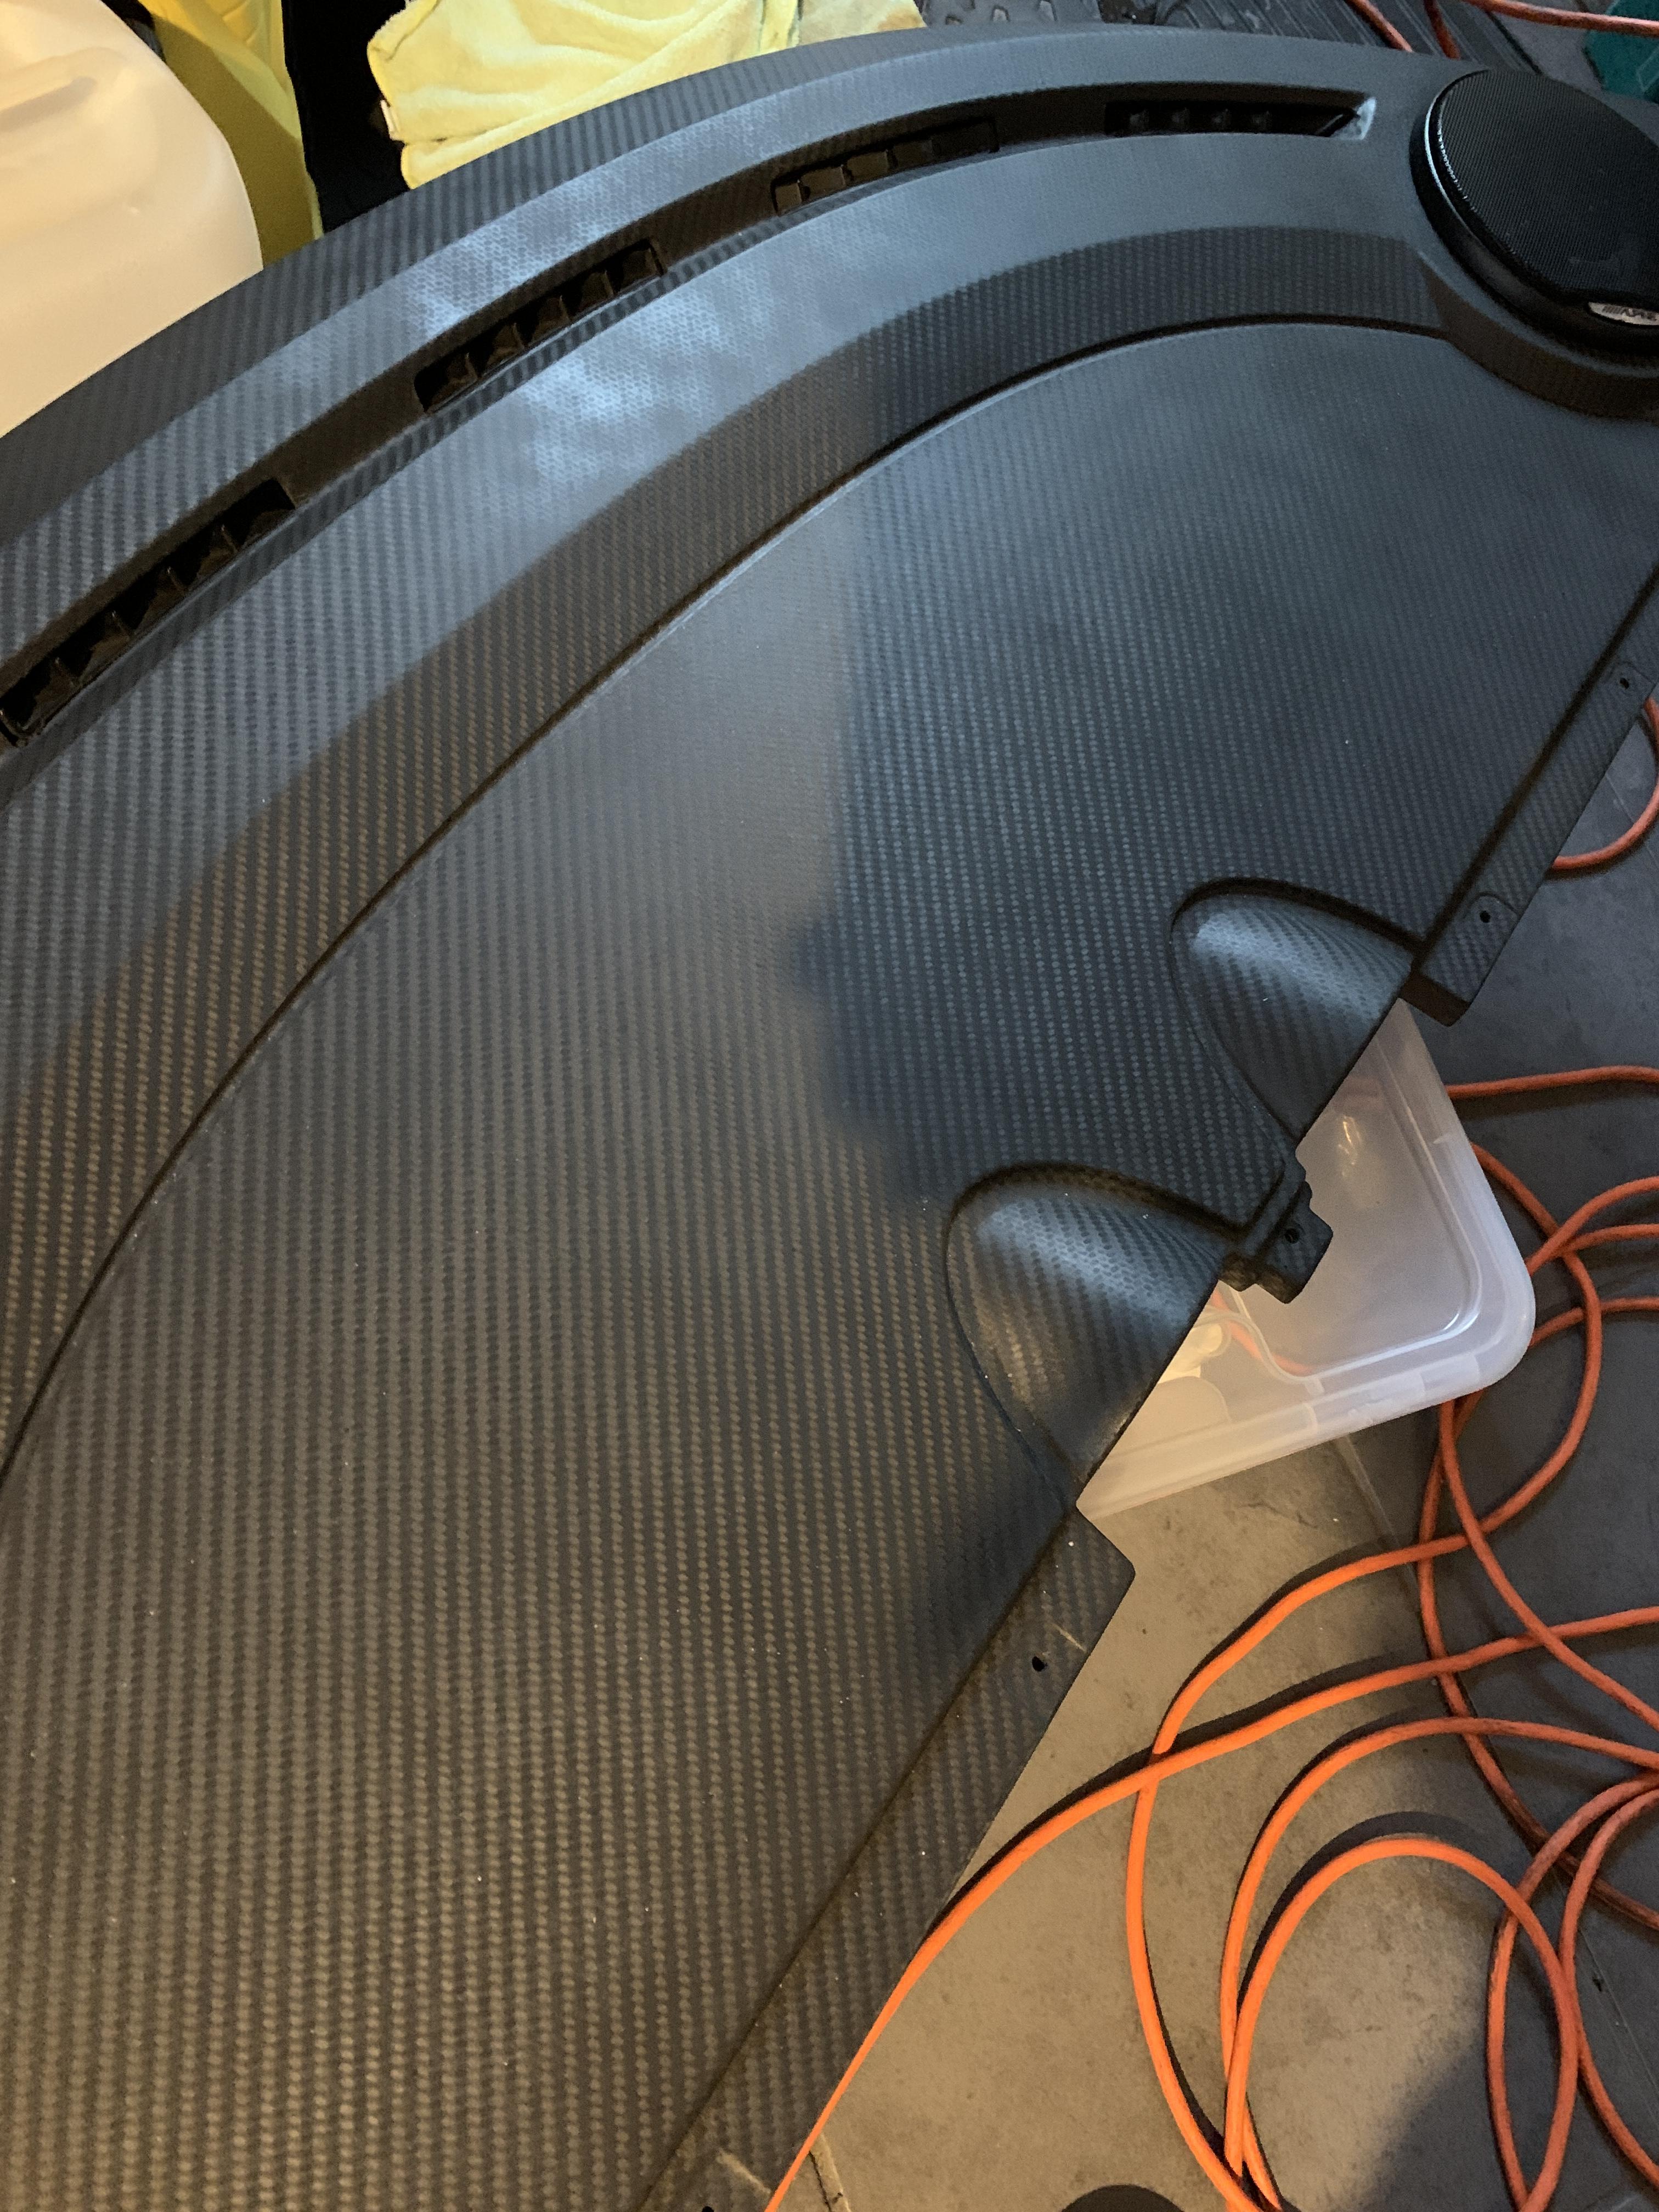
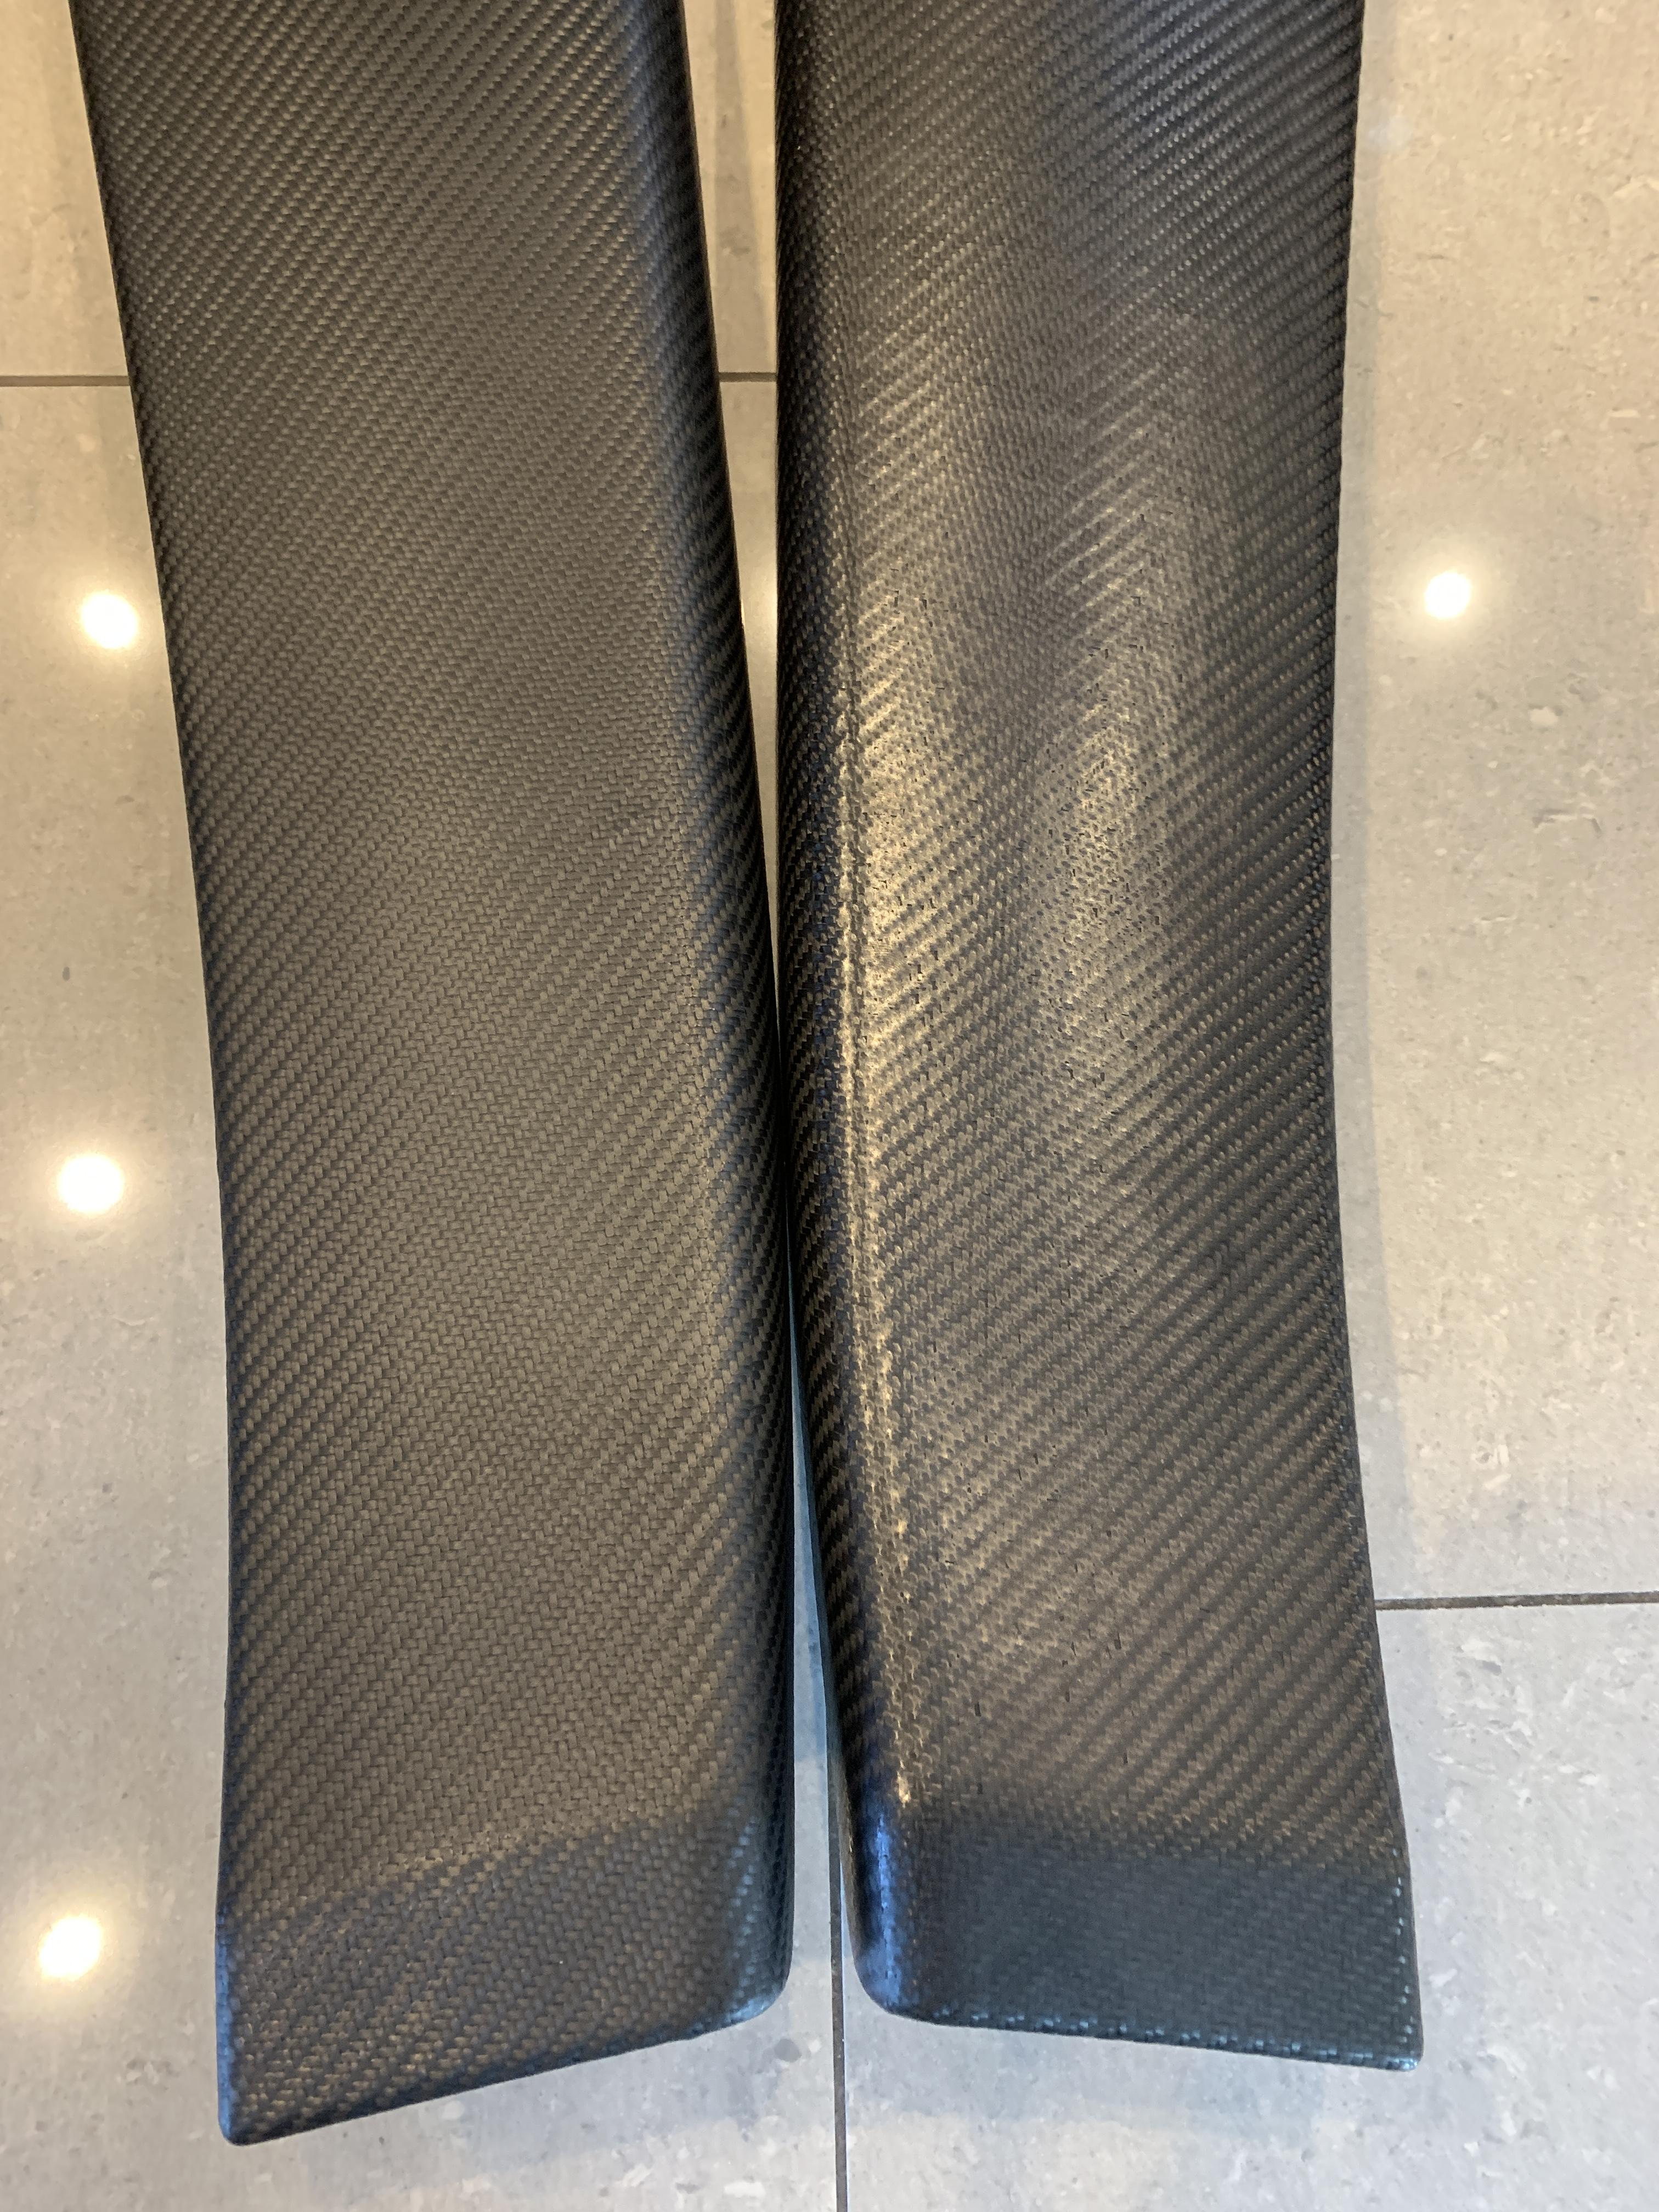
Probably fair to say its not been cleaned much – 10 years of Halfords interior ‘cleaner’ I would imagine, coating layers of silicon and farts on top of each other. End result is it all looks kind of shiny, and it should be a nice matte finish. I can’t stand shiny carbon on the inside of the car so needed to restore it.
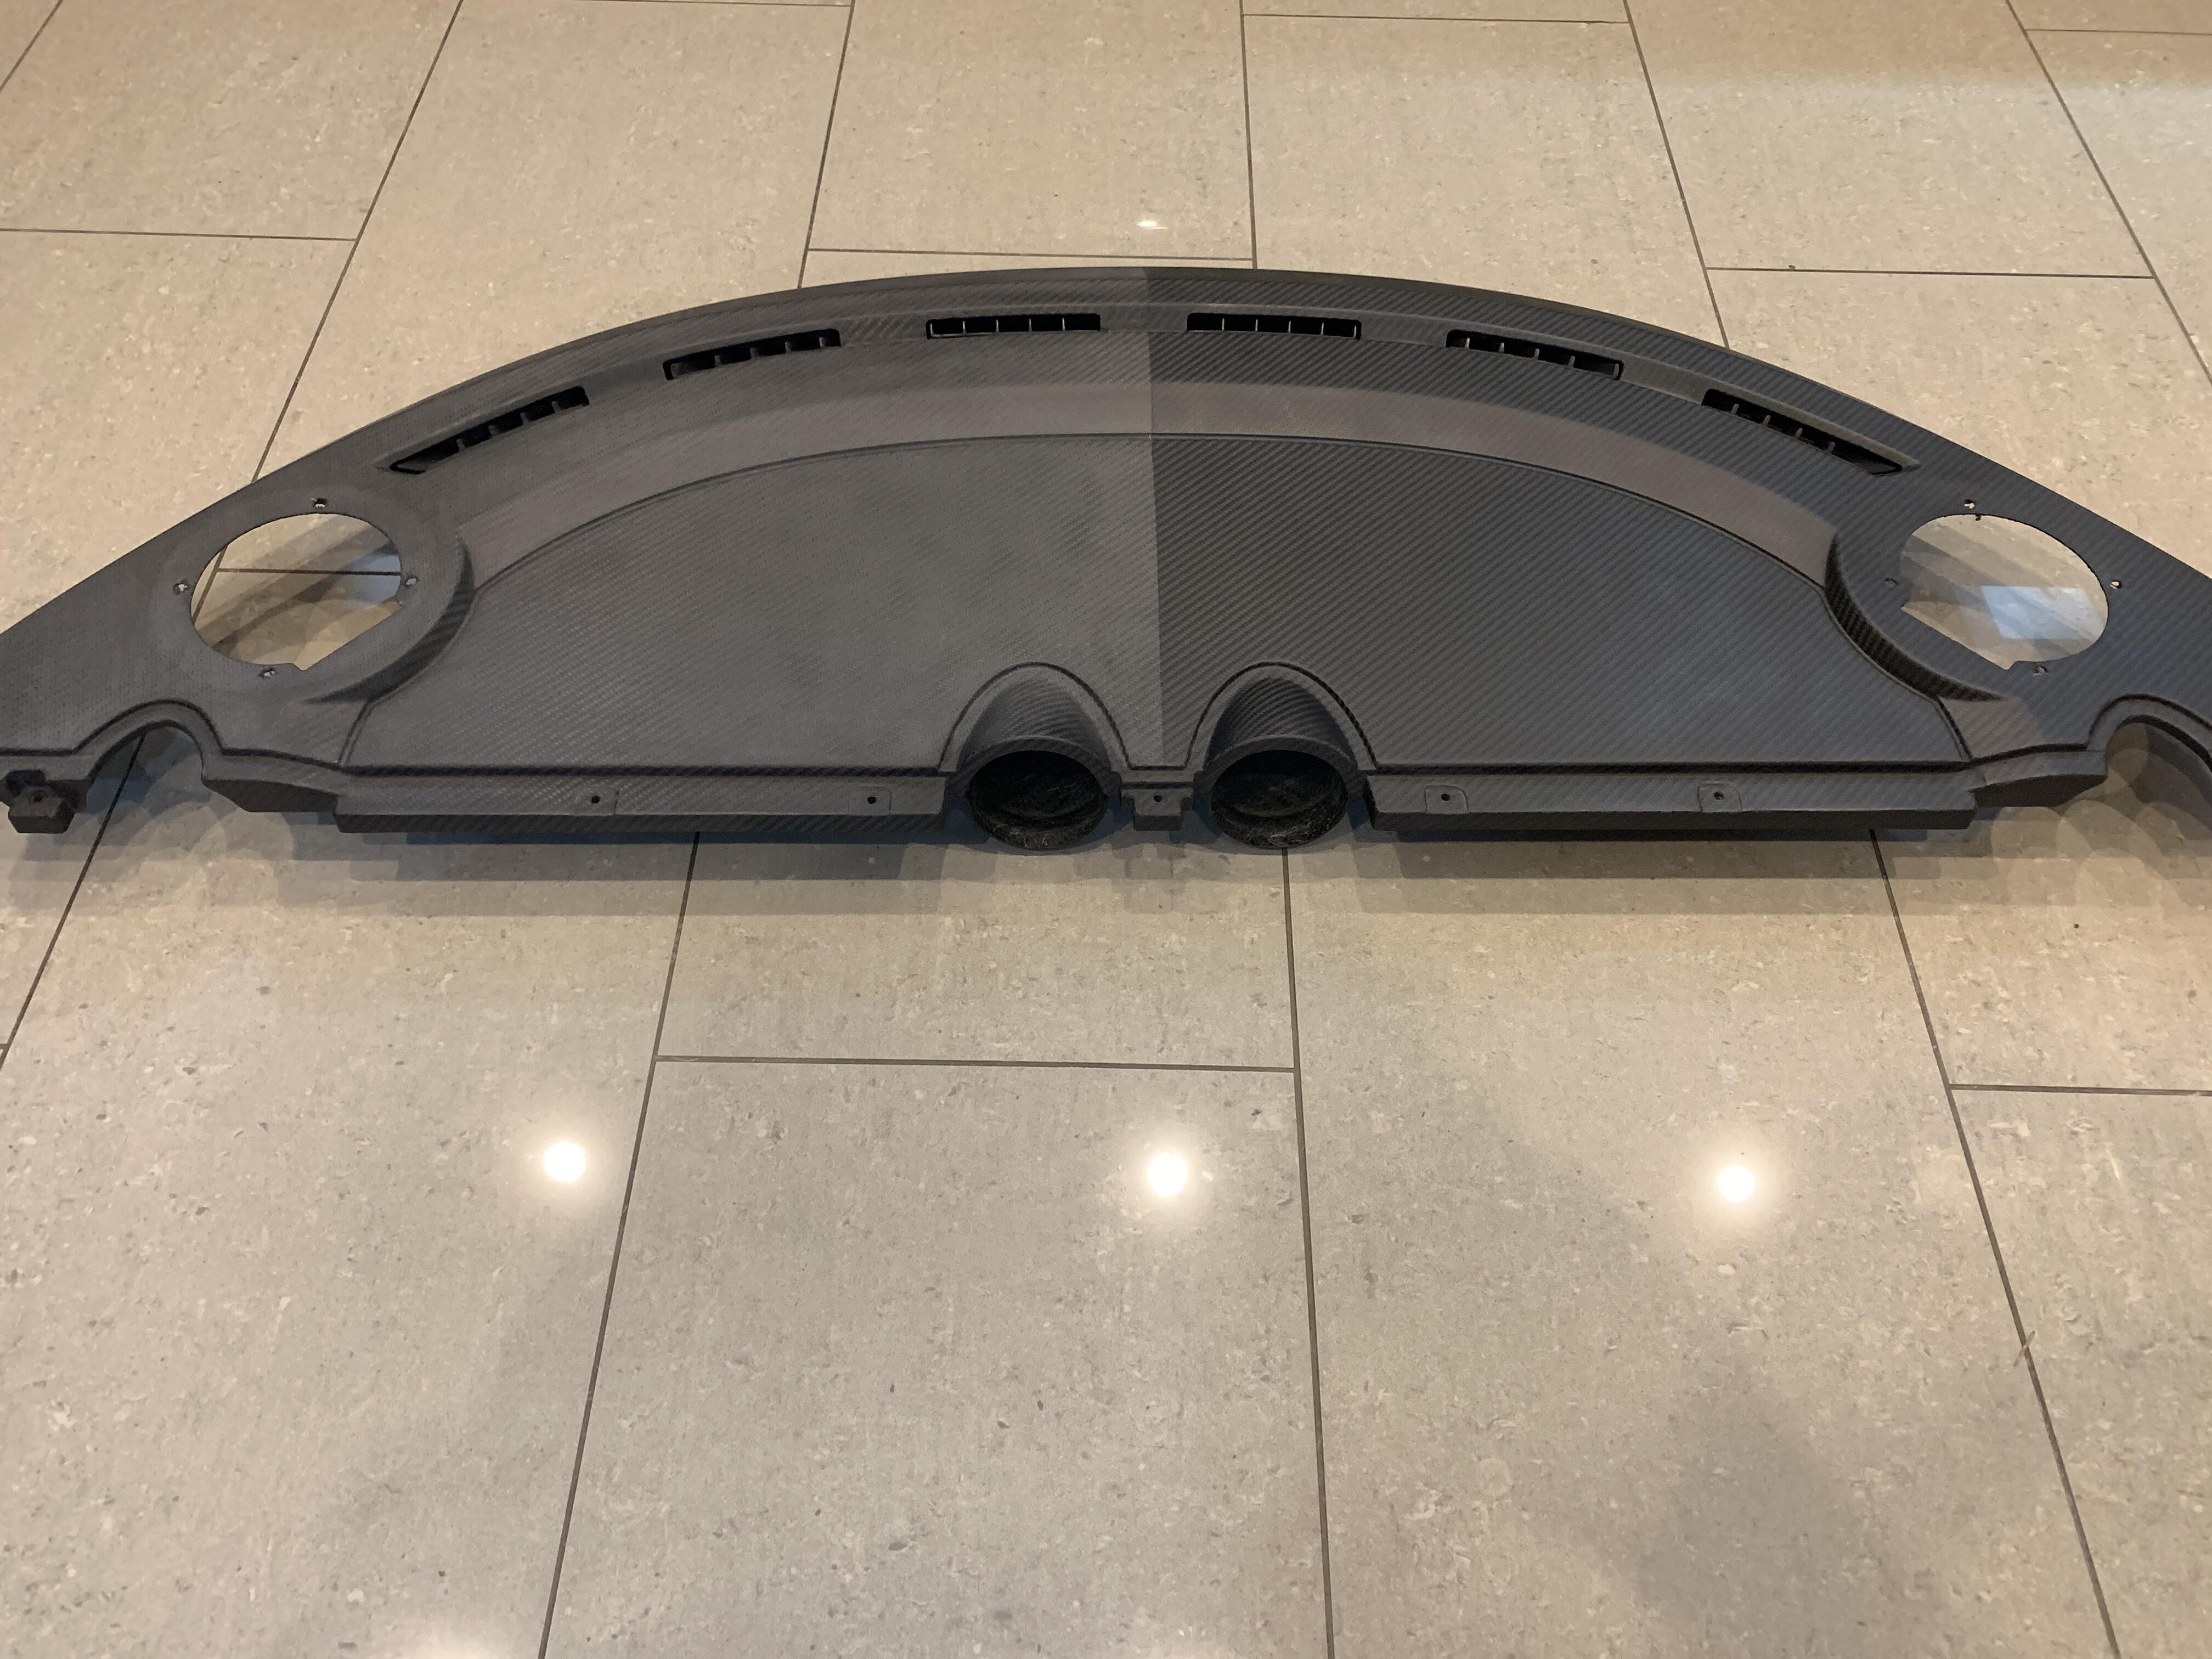
Dash was about the worst. The top layer was hit with UV damage, dirt and junk. After a clean it was no longer shiny but dull as you like:
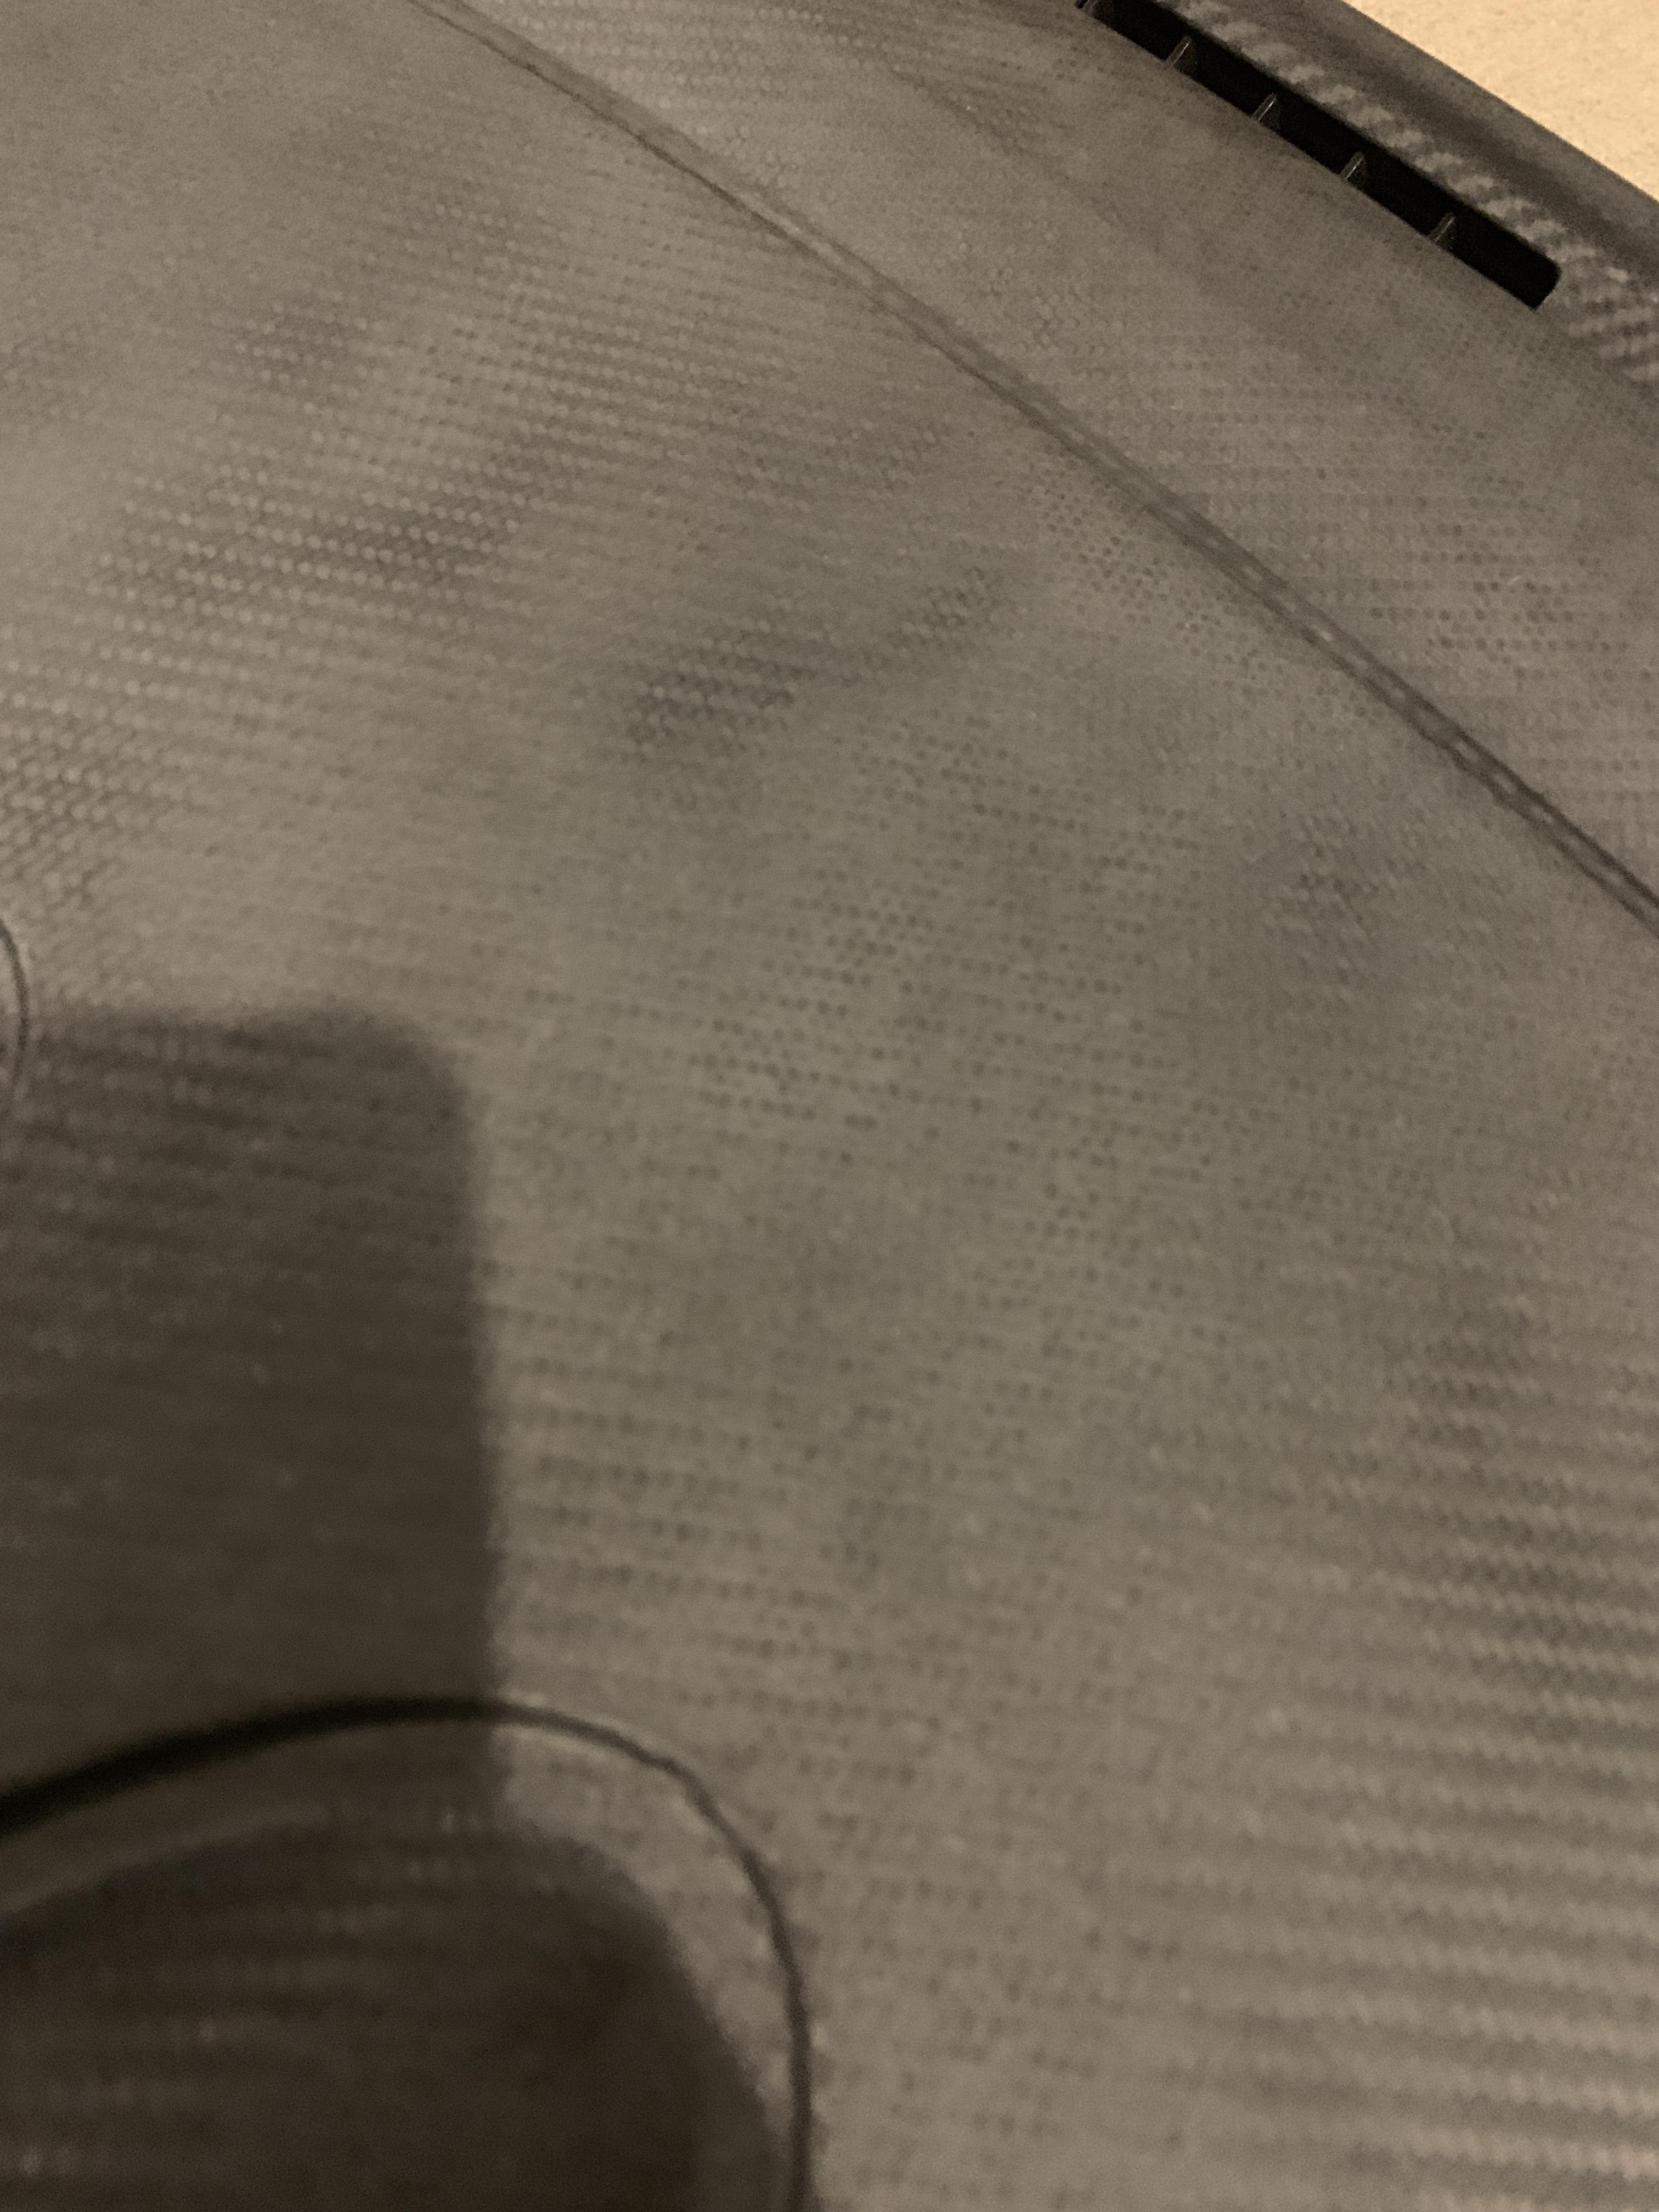
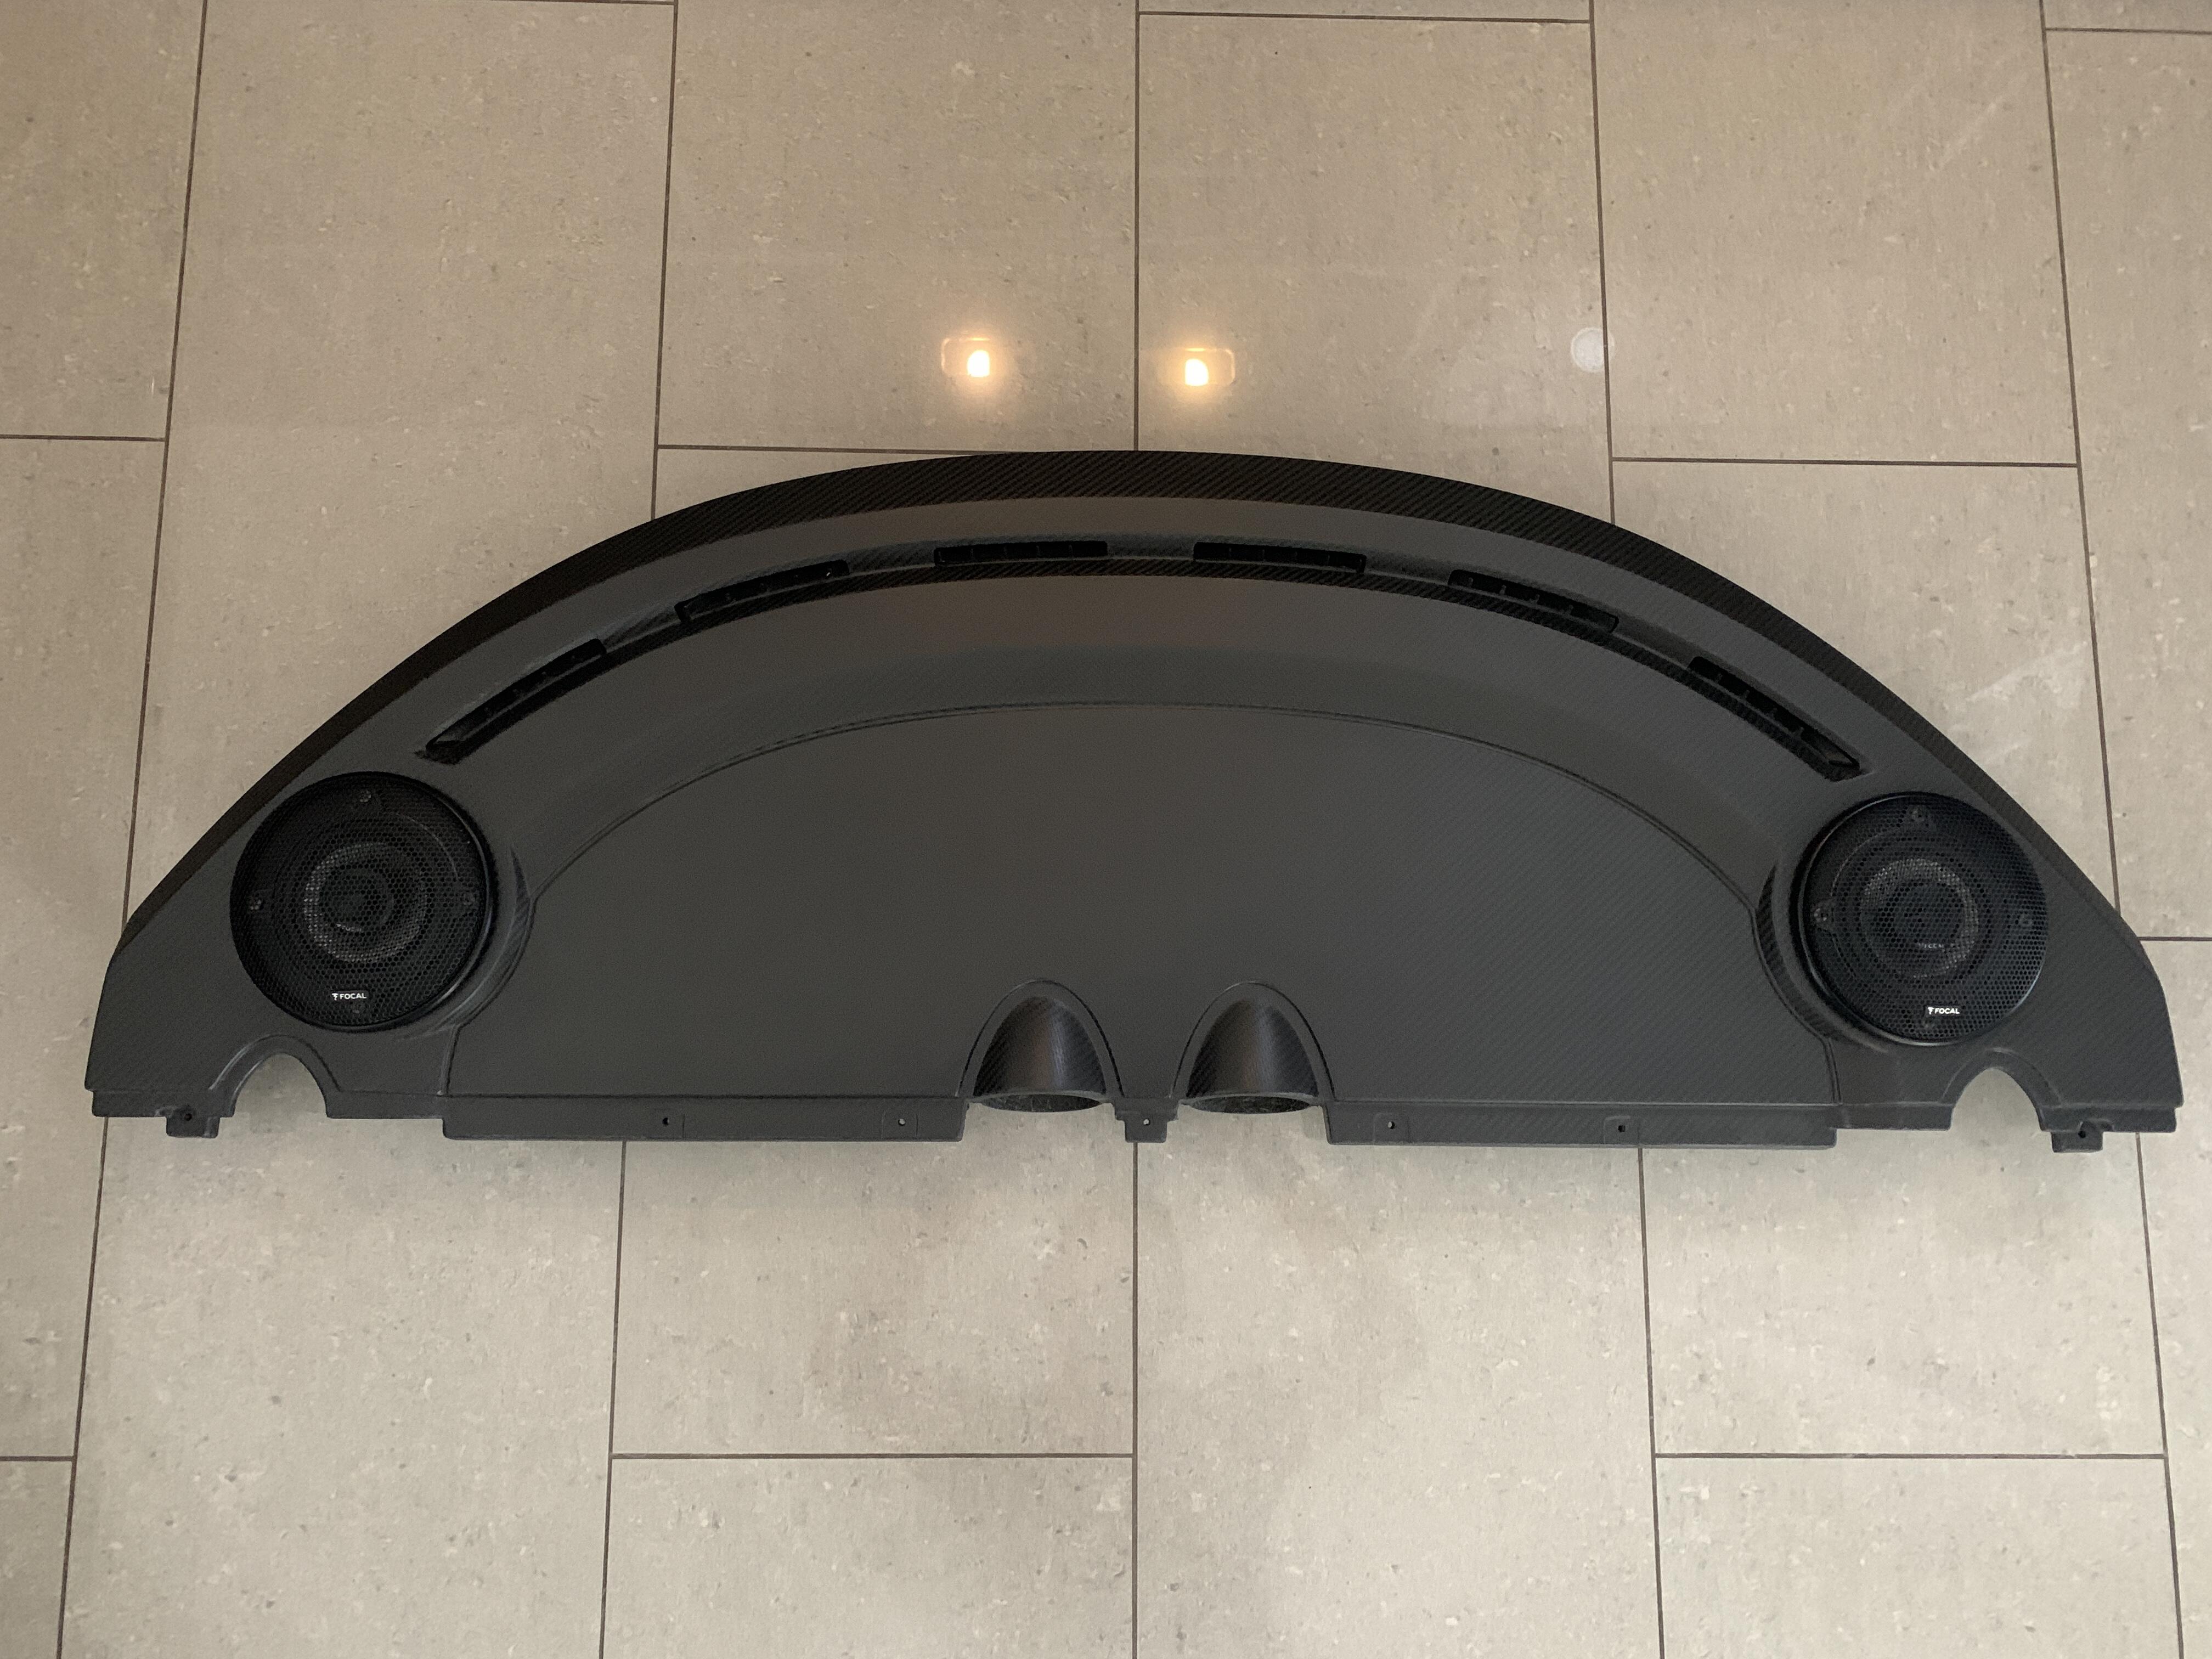
So I went down the route of wet sand (2k and 3k), then hand polish and then topped with AngelWax Luminosity to seal it in, heres the 50/50:
Attacked sills in the same way , cleaned and sealed sill on the left, rubbish dirty shiny one on the right:
1 Like
That 50:50 shot, beauty!
Top work
Looks mile better. Night and day so to speak
Ditto ![]()
Cheers chaps, shame lotus didn’t use a lacquer on it and didn’t add some protection, but thats the way it was then I guess - would have just meant a wipe down and we were done!
Probably due to glare from the sun if a glossy effect?
I’m not sure what was available 10 years back, but I’ve done plenty in matte clear coat recently for other cars which added zero glare, the Cup430 binnacle has this finish thinking about it.
I’ve also been talking to a few sprayers about a ceramic matte clear coat for interior parts (mainly seats) which doesn’t scratch. You don’t need to worry on the dash, but you will put in little scratches on the seats if you are going naked shell and if matte you can’t polish out. This finish apparently is solid and well above 9H hardness rating so you can’t scratch, but its something like £400 a seat!
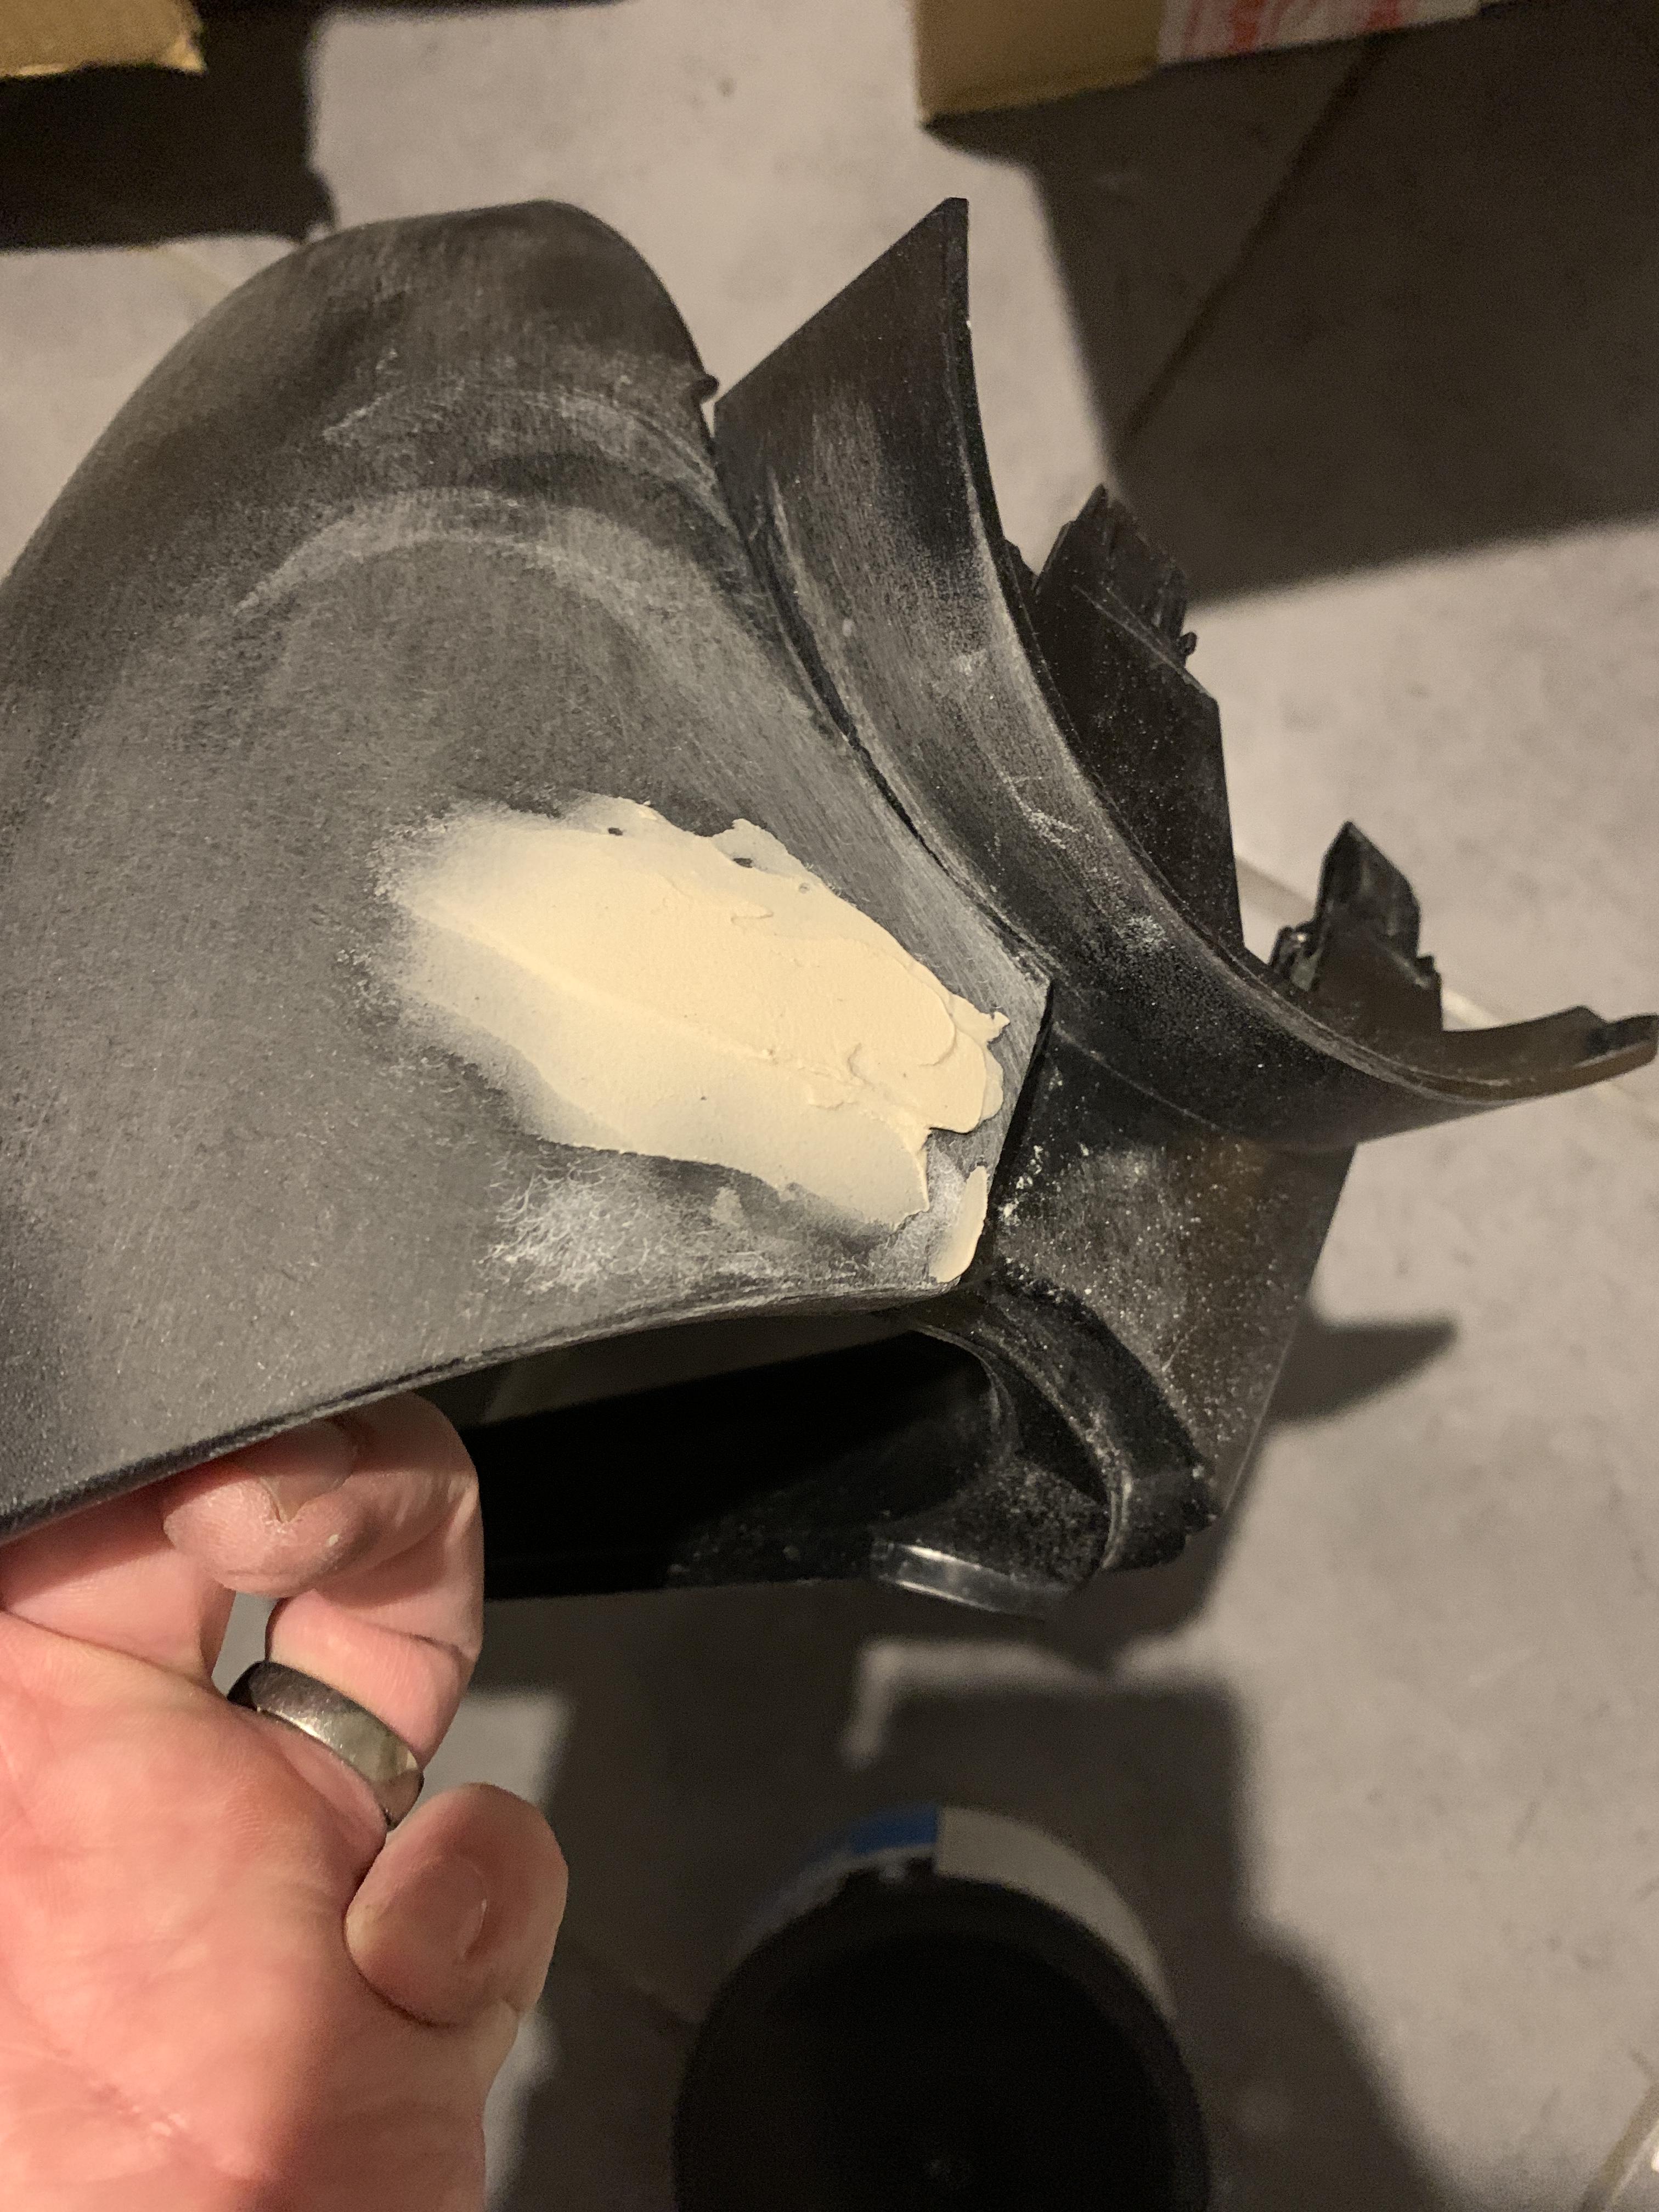
As mentioned I’ll be moving to the Aim dash. One of the downsides is its an ugly binnacle, I have the earlier version of the binnacle so its doubly ugly. As all the interior was being retrimmed it would be covered so not an issue, but I had these buttons to deal with:
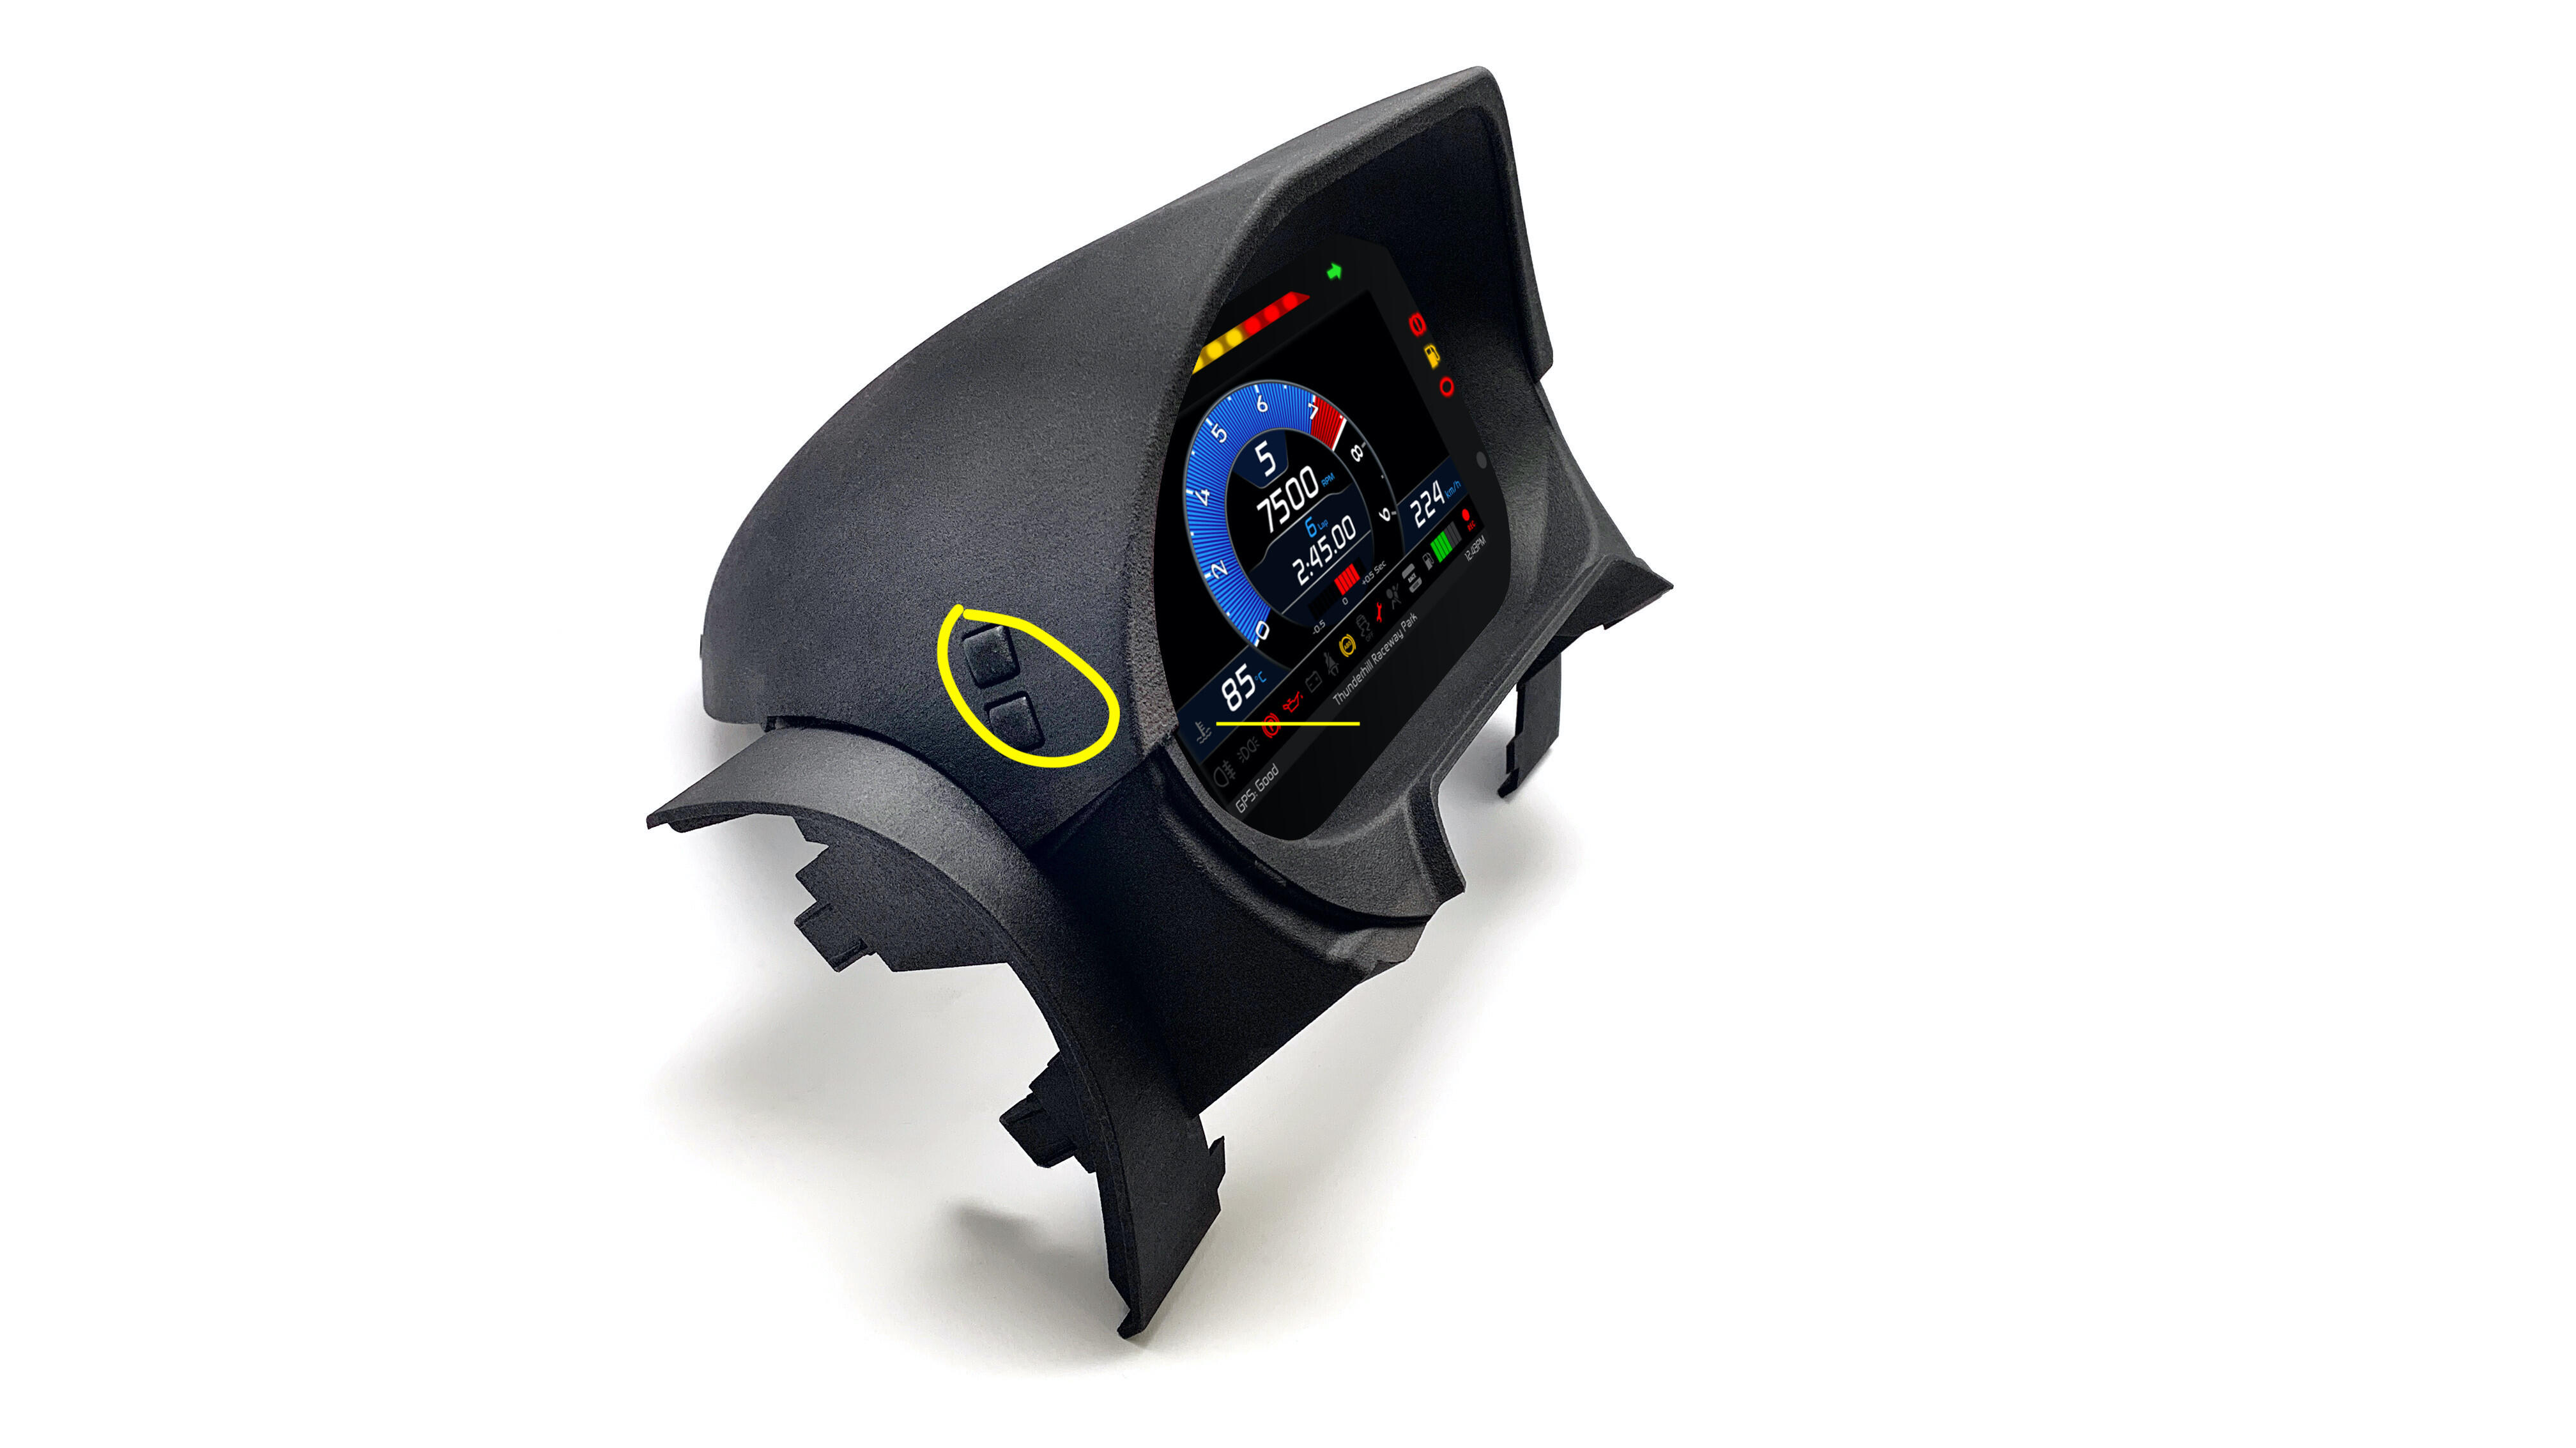
With the trimming I had three options:
- Cover them and they exist under the material - ugly, and just a rubbish solution
- Trim around them - would need to expand holes
- Move them
Option 1 was out, I thought option 2 most likely but option 3 as a backup as it was more work
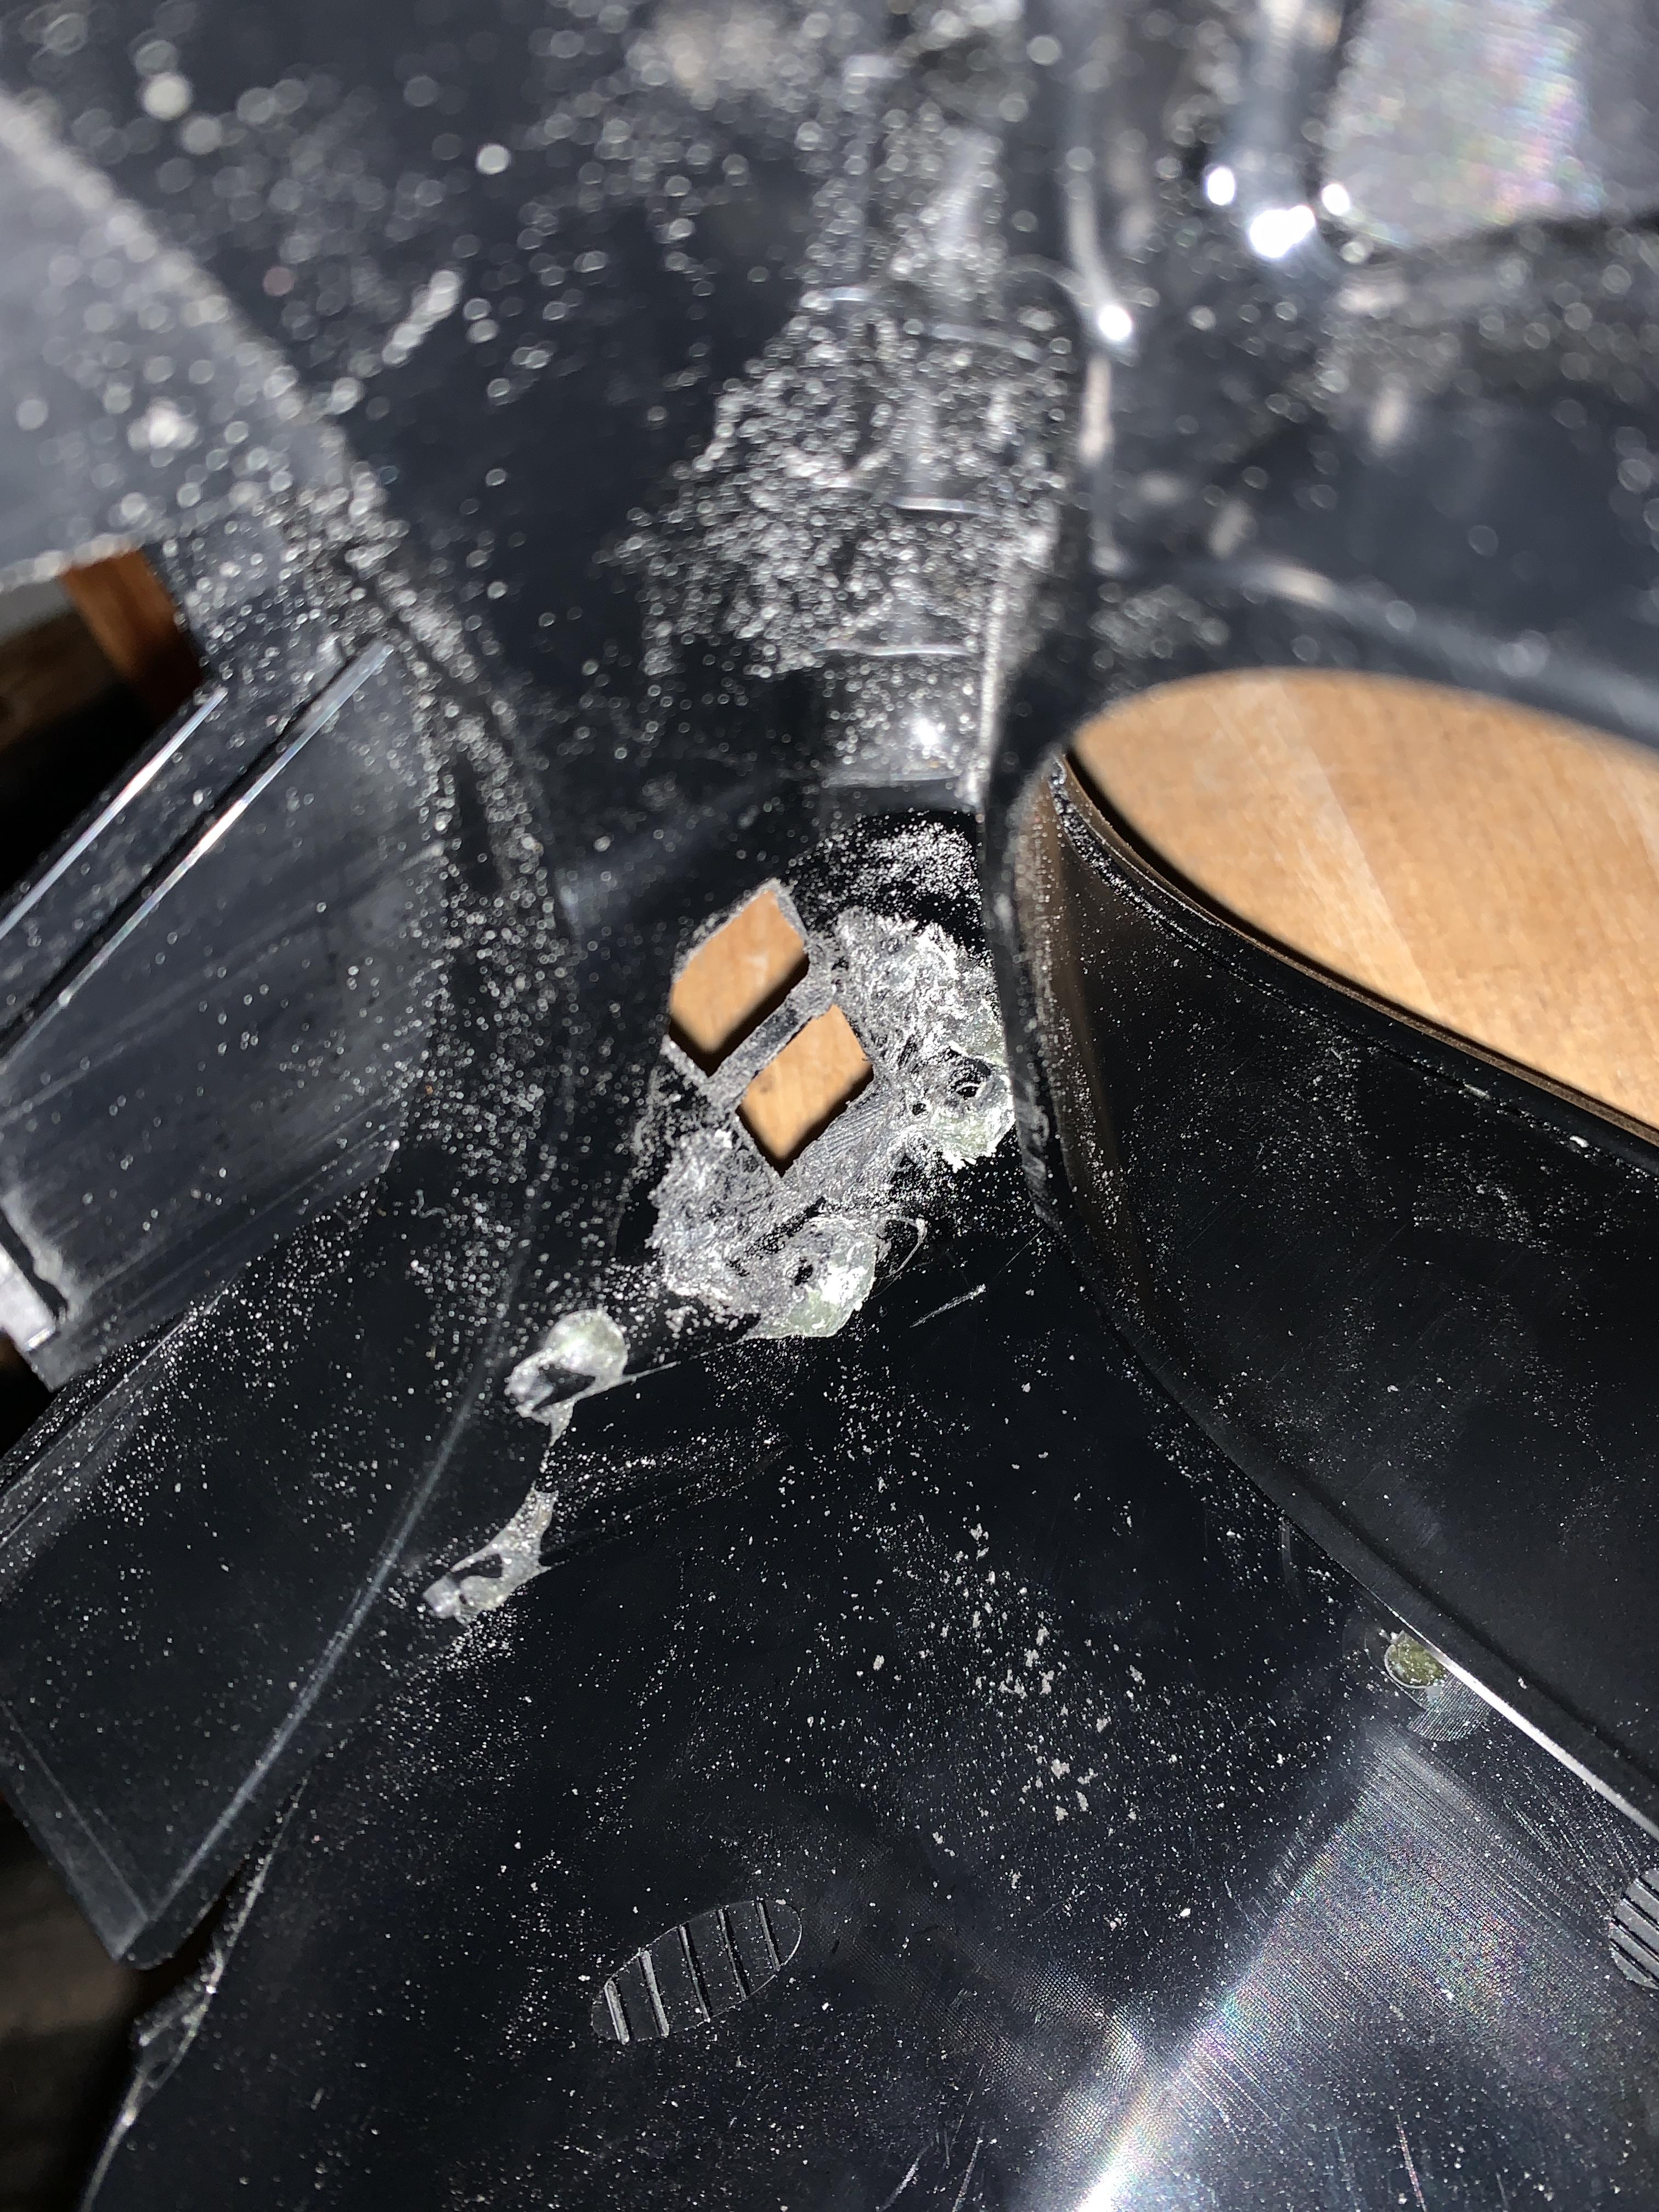
First up remove the buttons, the are screwed in, then bonded on top - so I had to cut through the glue to get to the screws. Might of just been my one and the others just pop out, but I had to get cutting and dremeling out the epoxy
End result from the inside (who bonds switches in I ask you?):
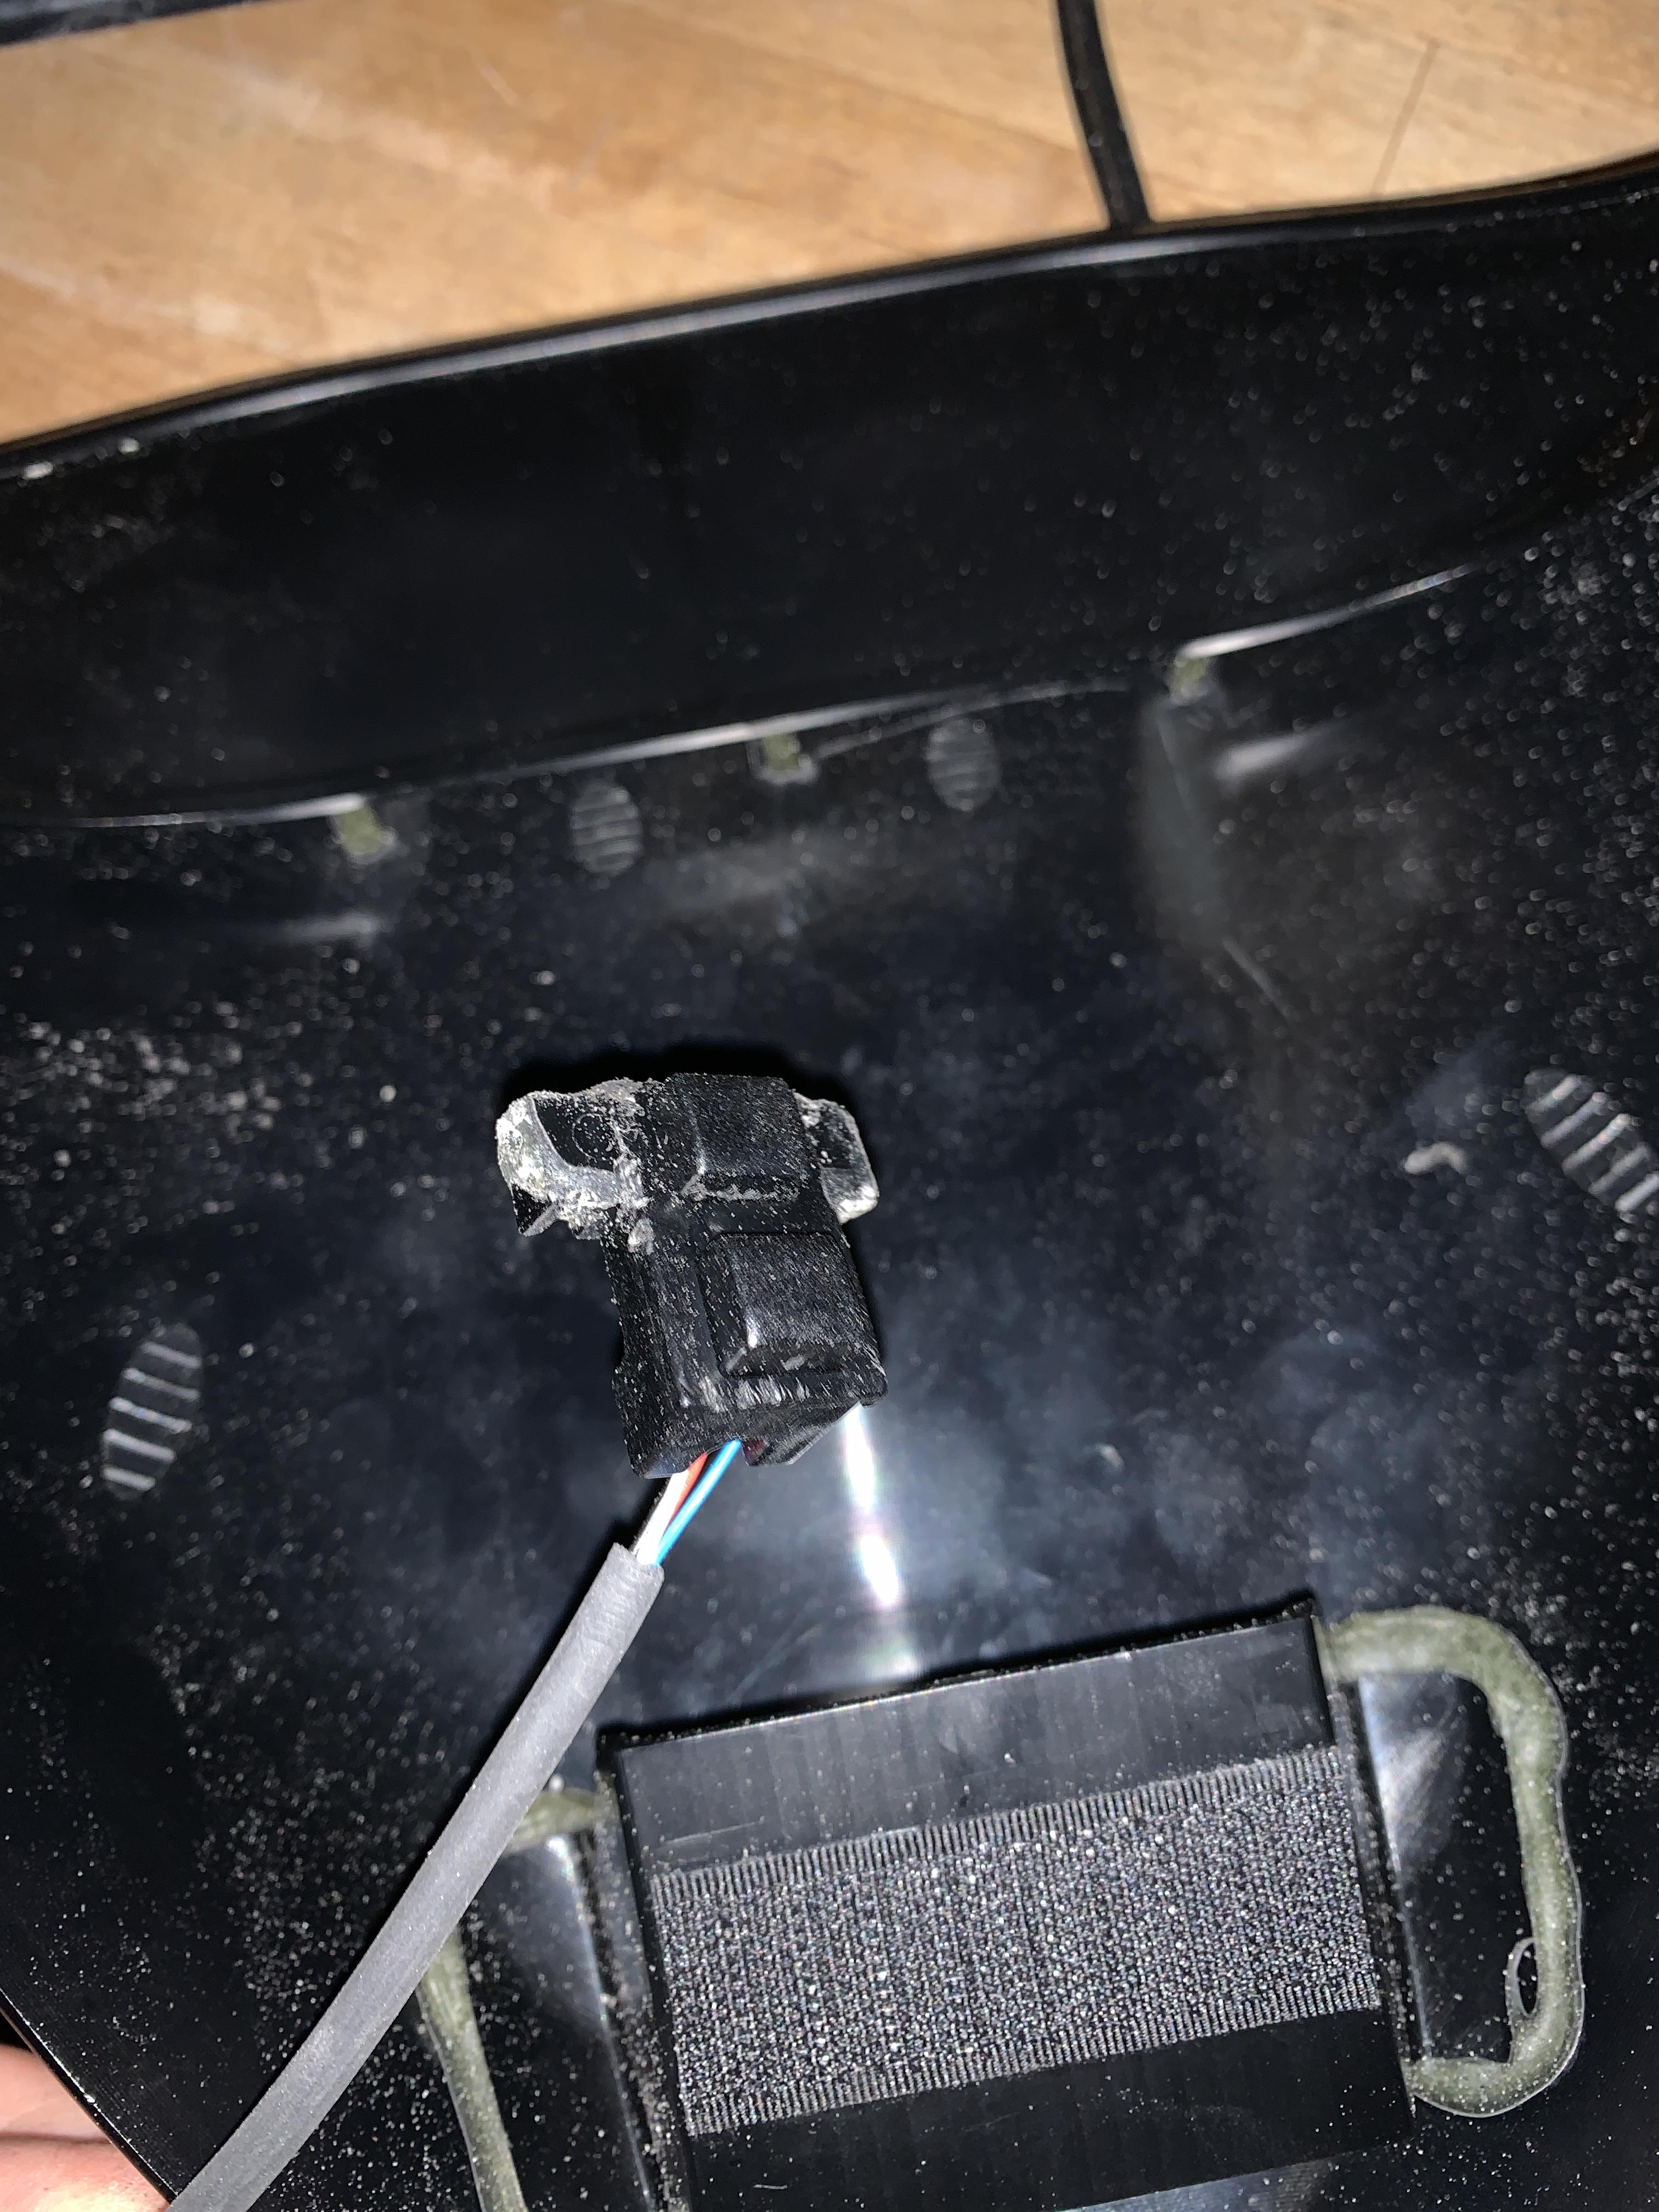
And the switches themselves for those that want to see
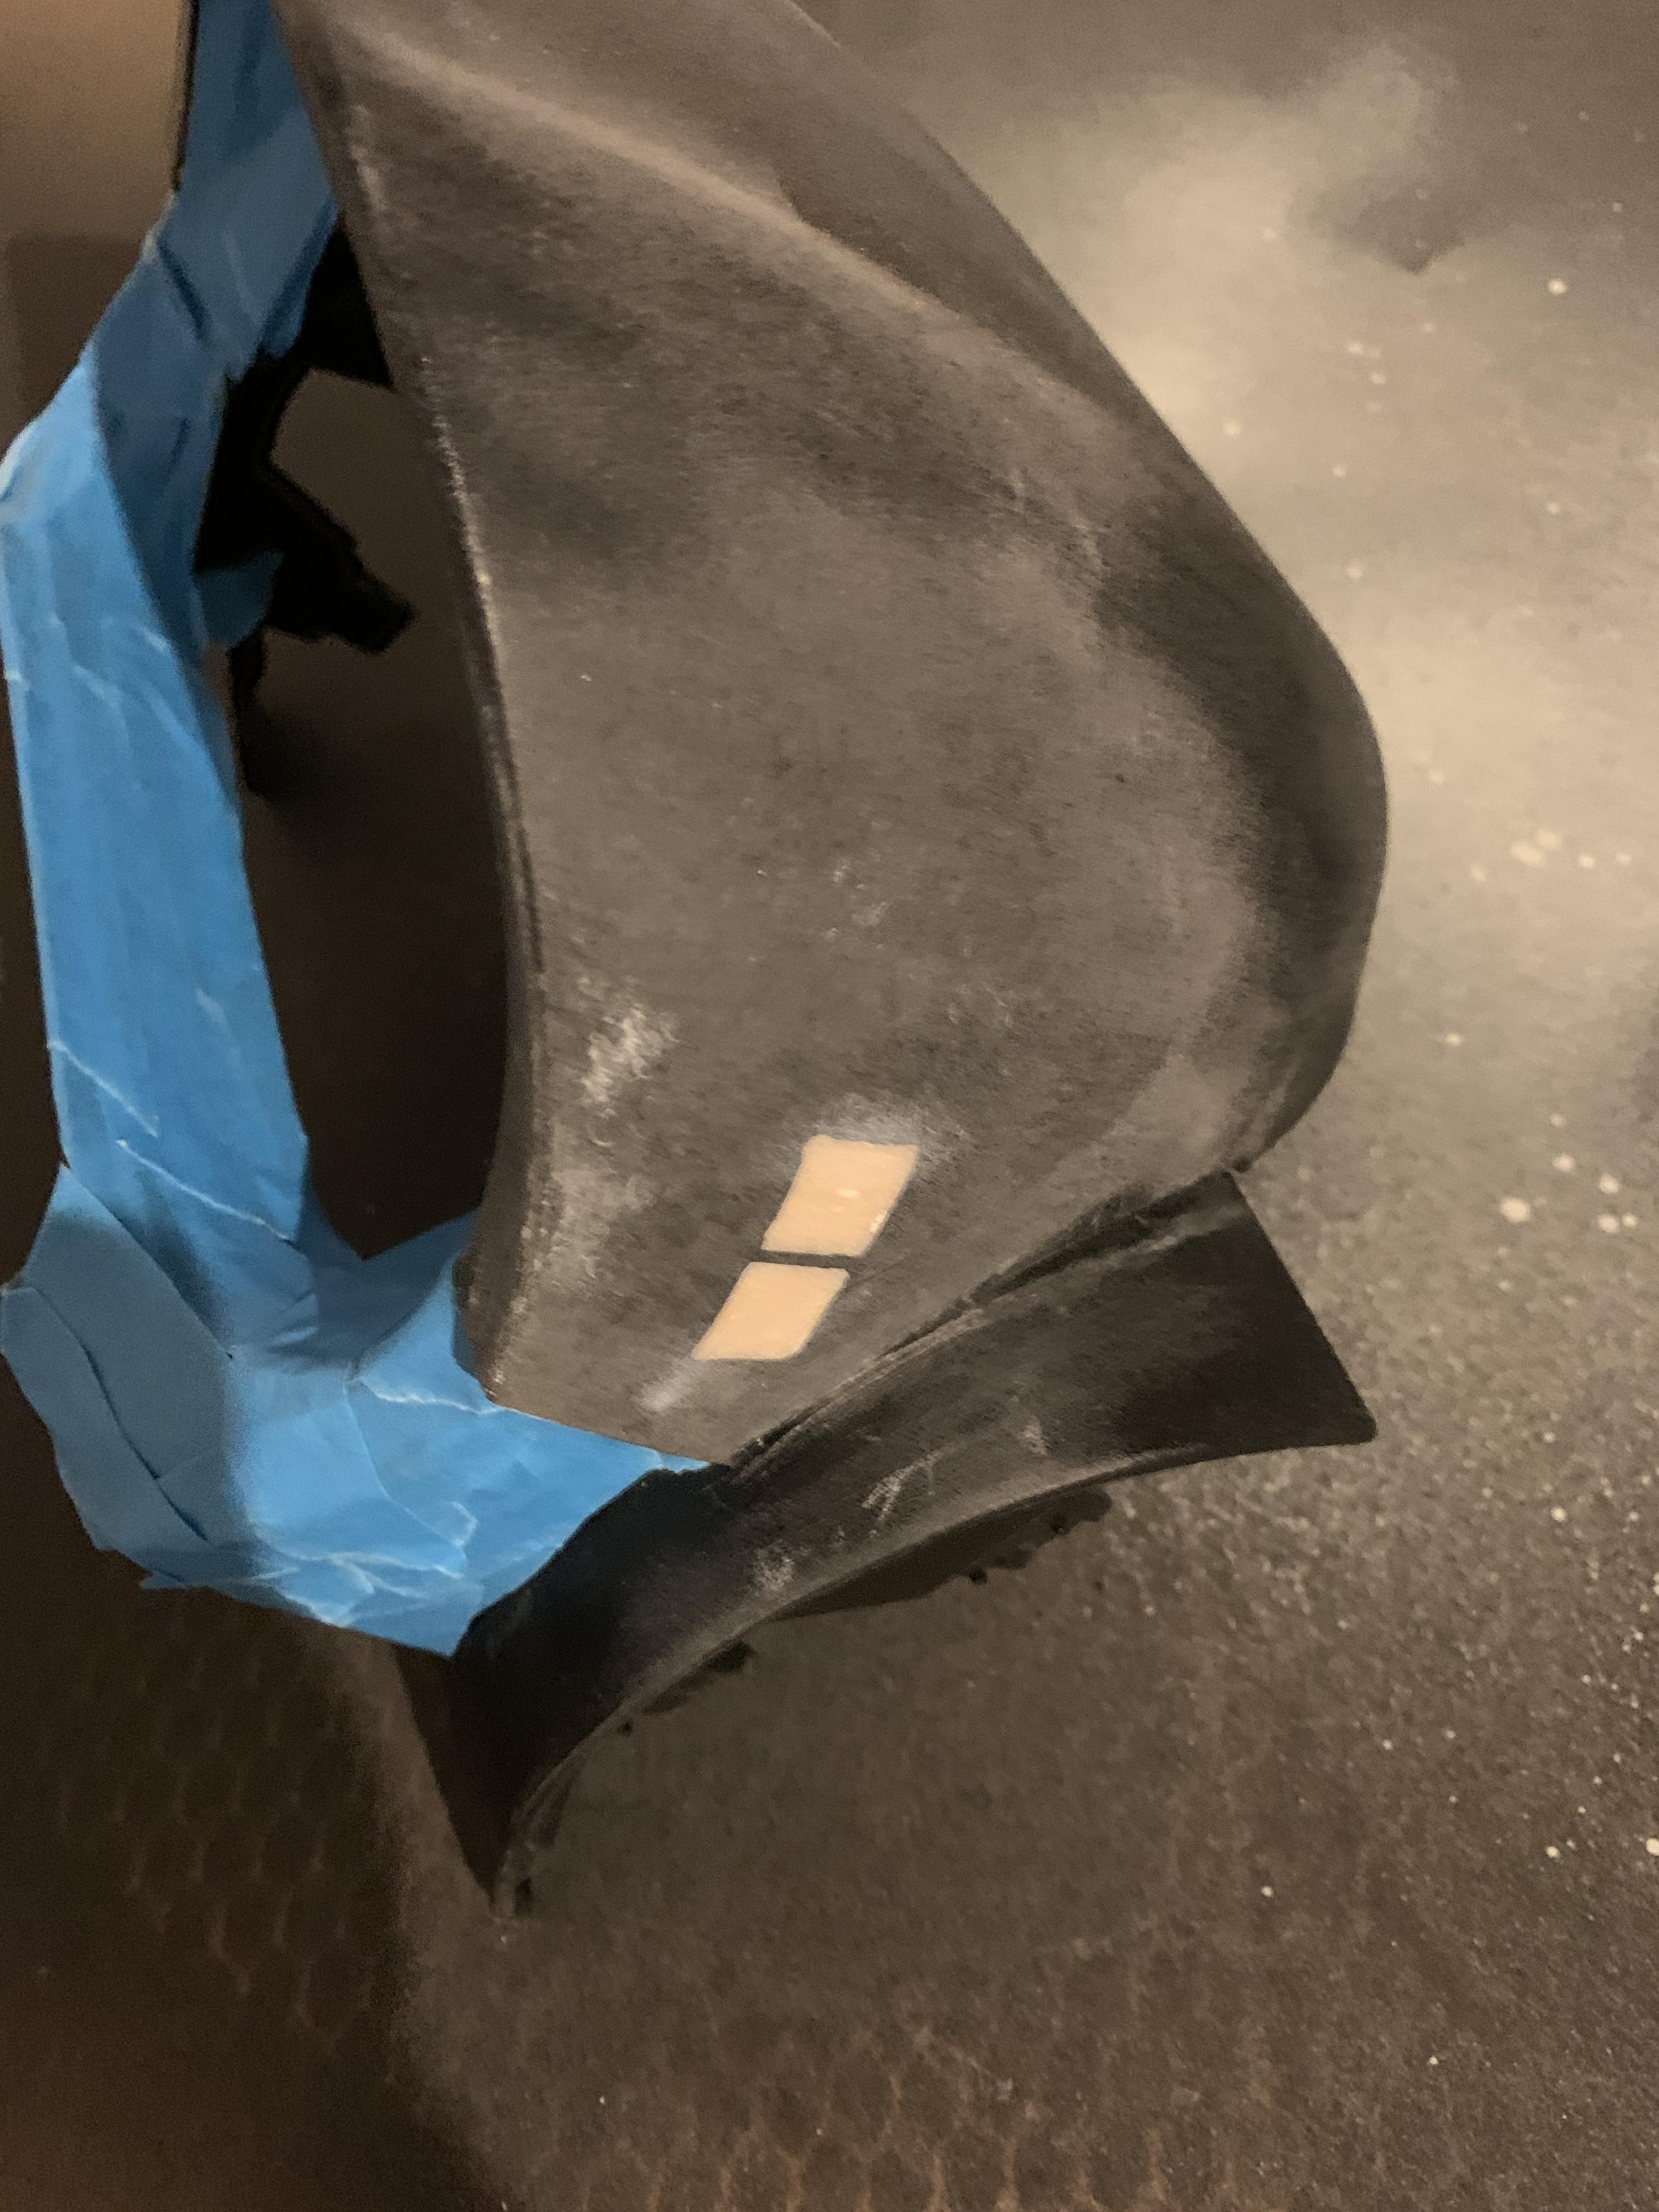
The holes would need enlarged so were marked out for a rough cut, and then I’d trim with an alcantara and see how it looked
After a quick trim, I figured I hated it, so set about relocating the buttons to the steering shroud hidden away. The switches are just simple non latching switches connected through a 4 pin 712 connector, so generic switches will be a better bet.
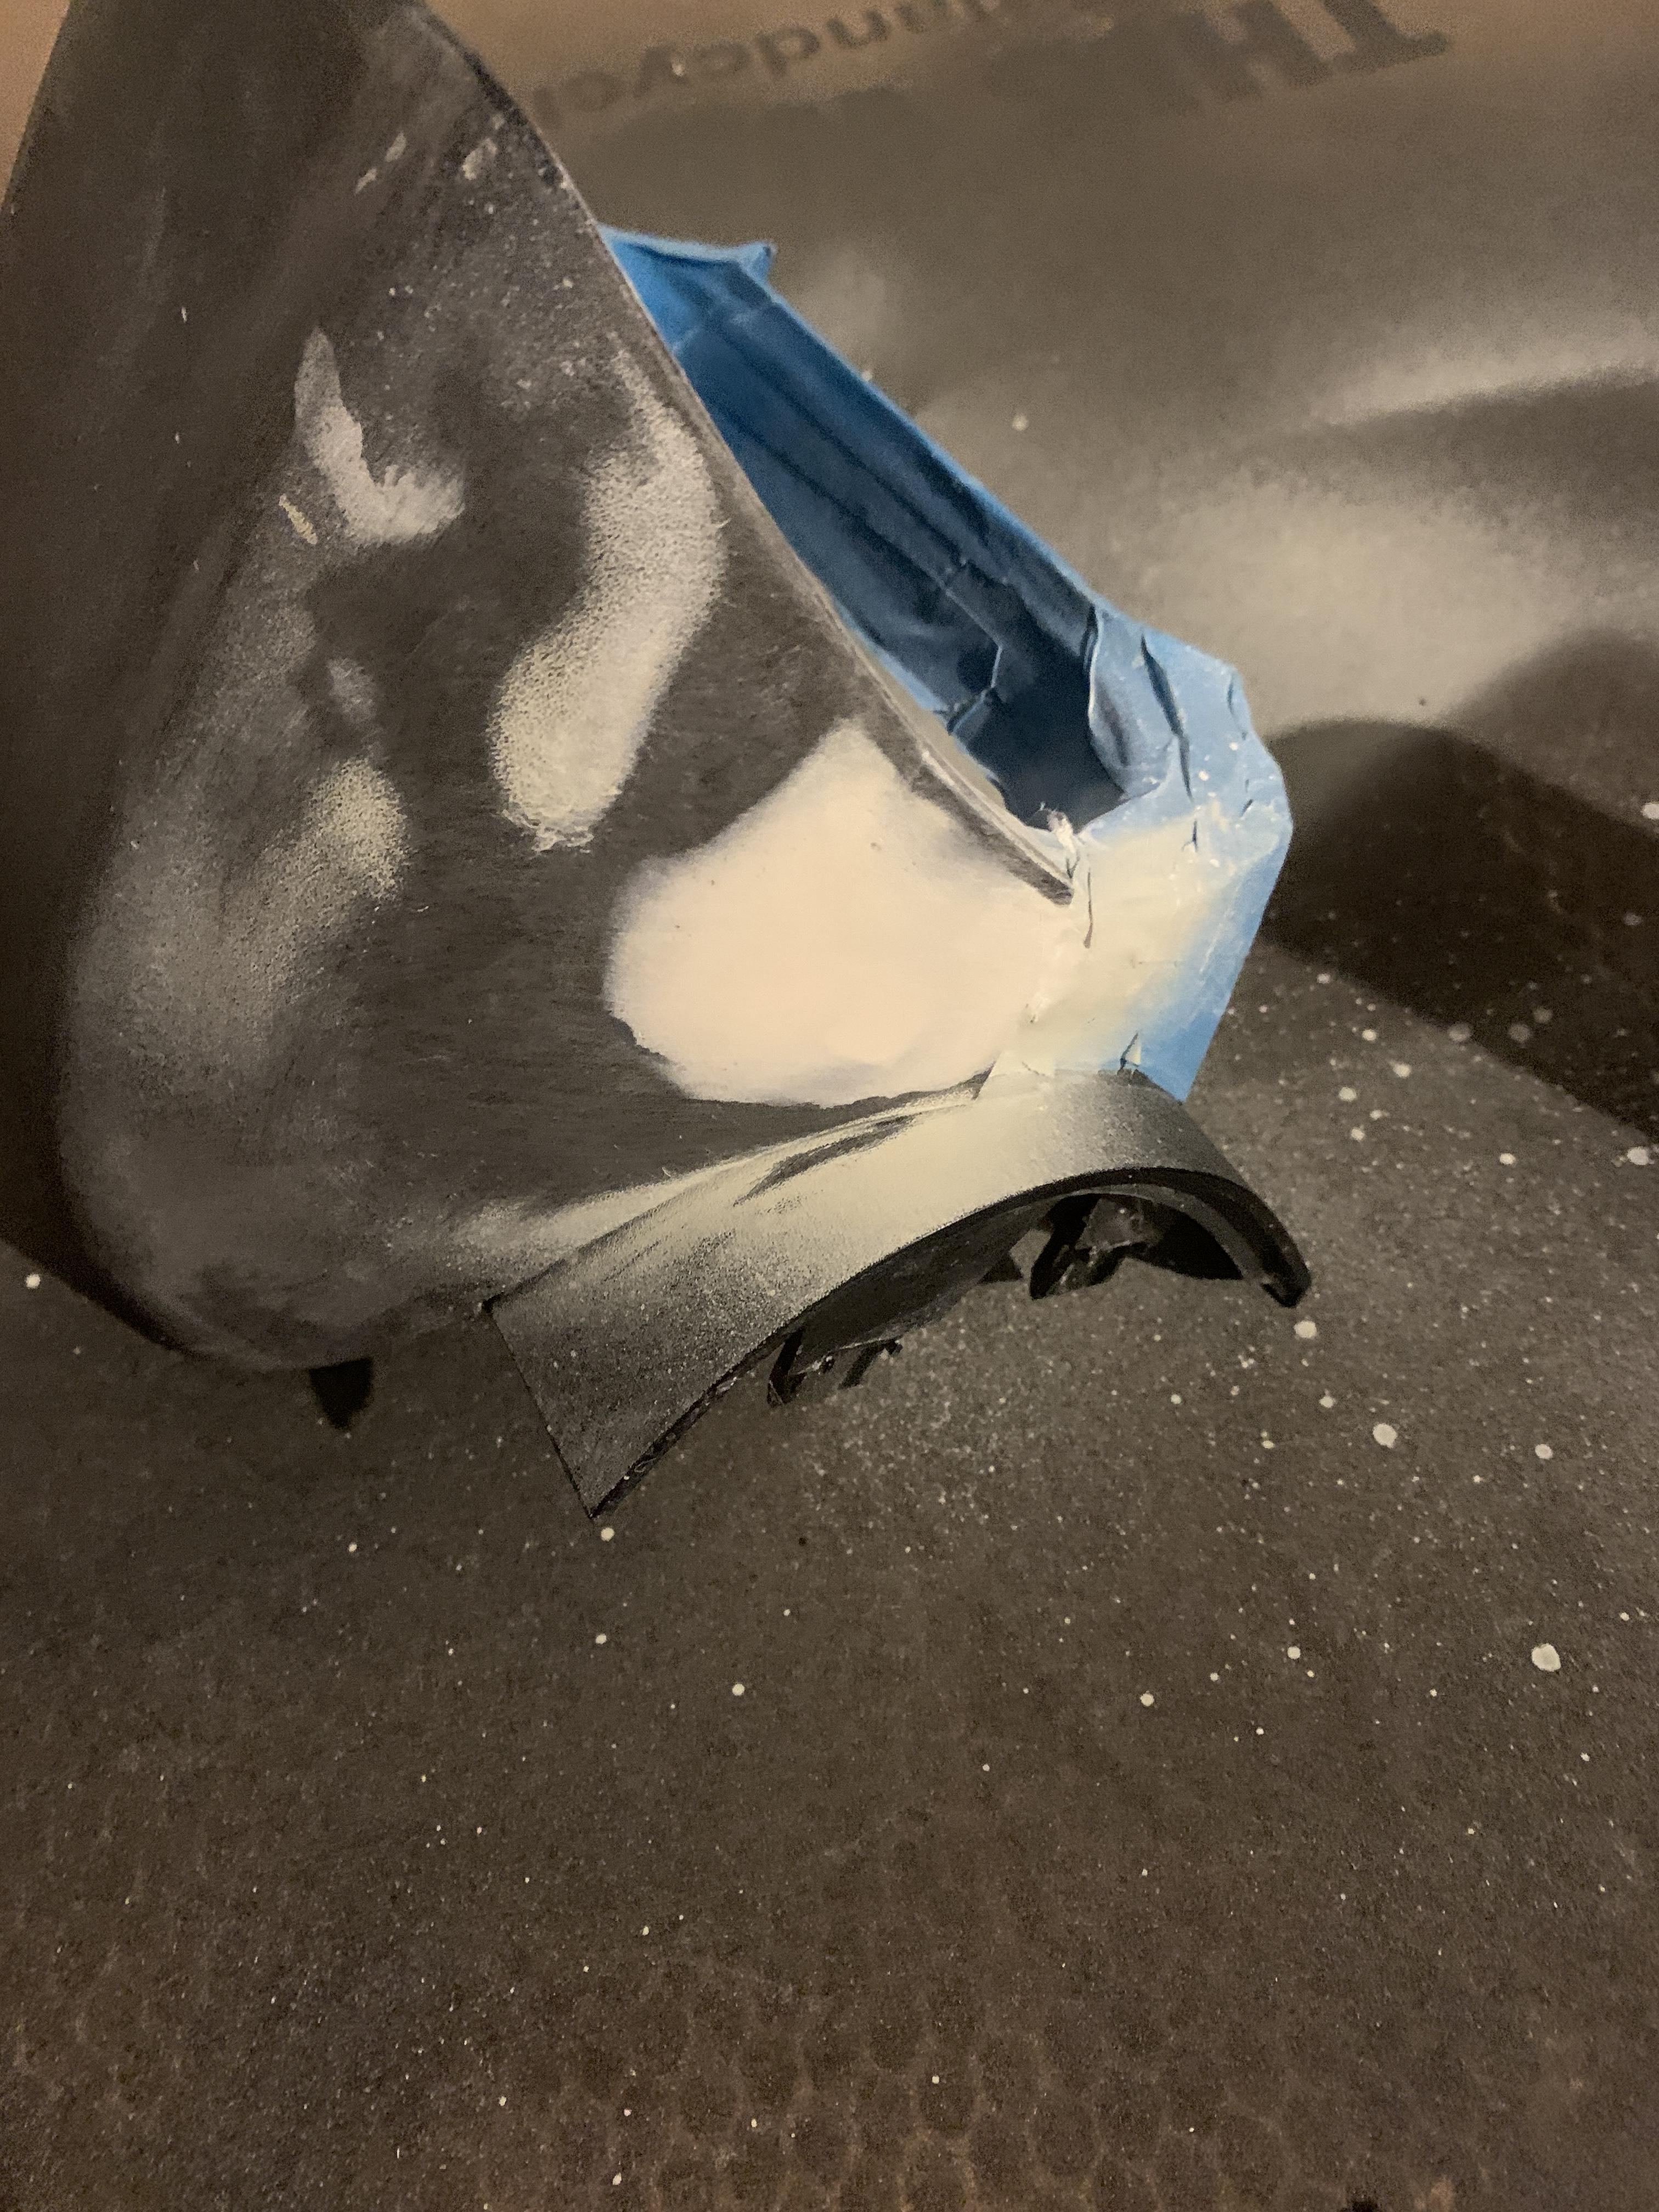
So I bonded in aluminium mesh and started filling the holes
Sanded back and masked for putty spray
Putty spray and rubbed back
Painted ready to go
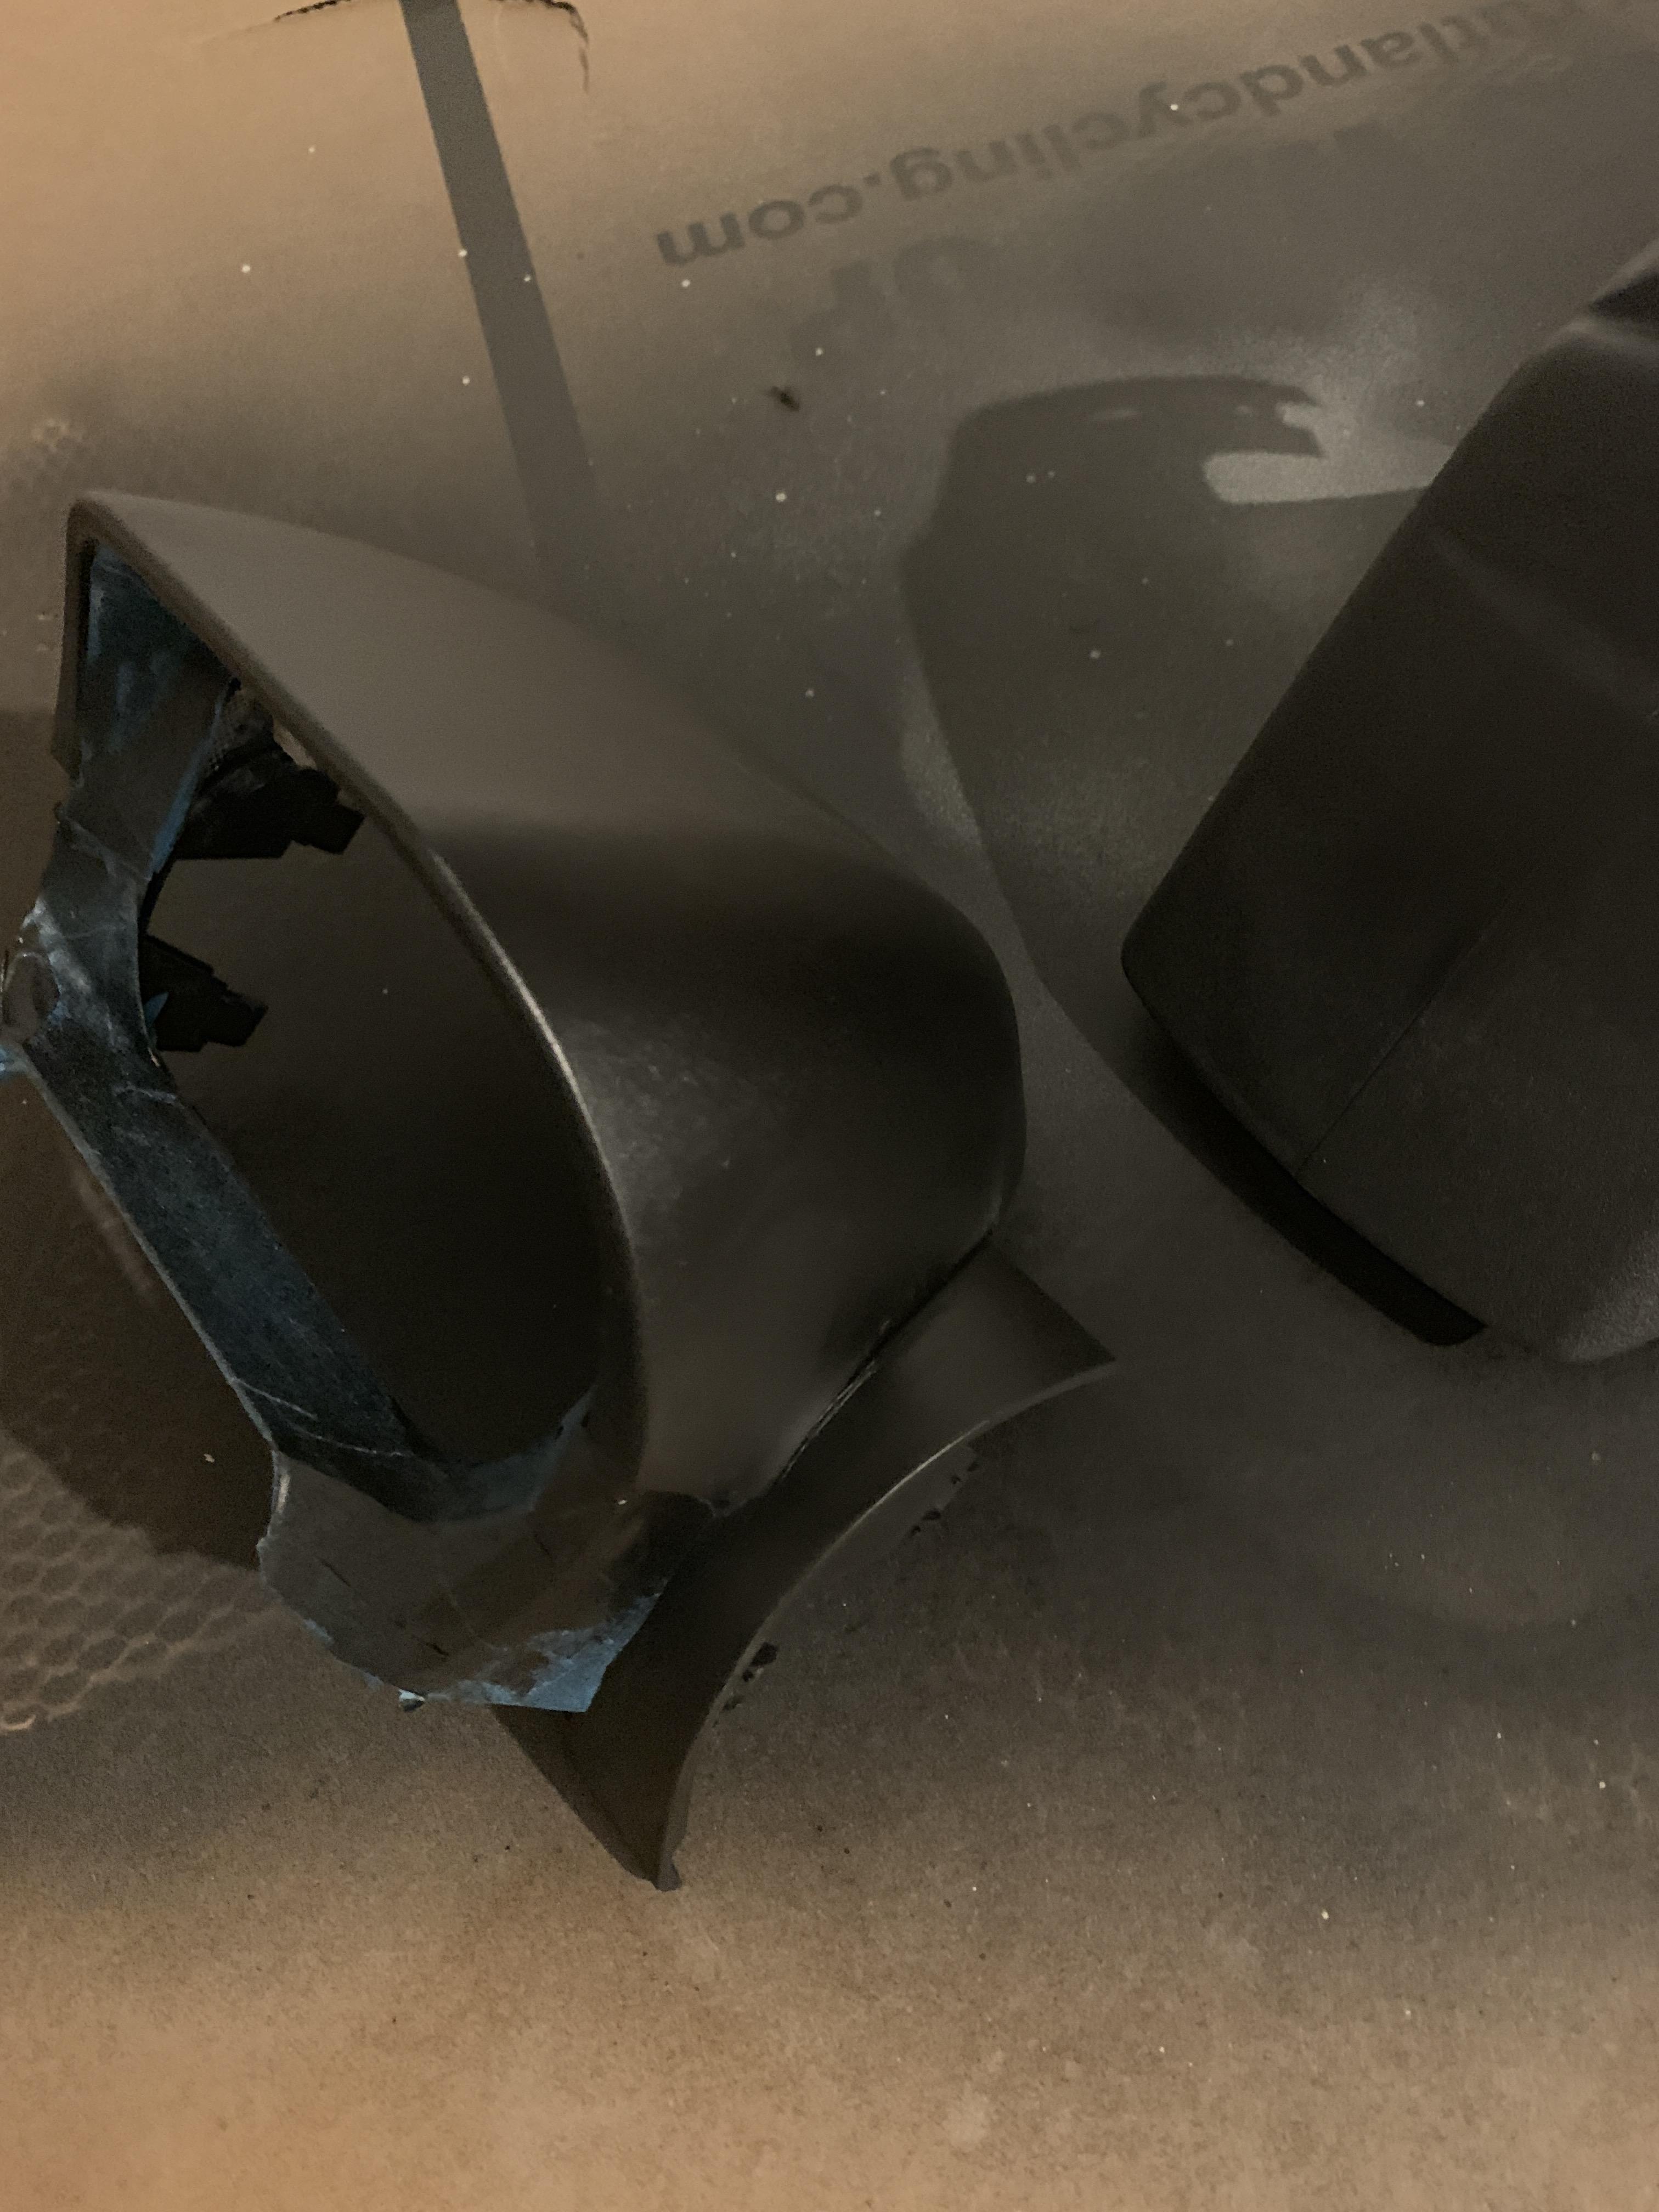
Will trim properly later, as well as make up new buttons for the steering shroud
Not the most interest update I know, but lots of folk do this an hide it as some kind of black art
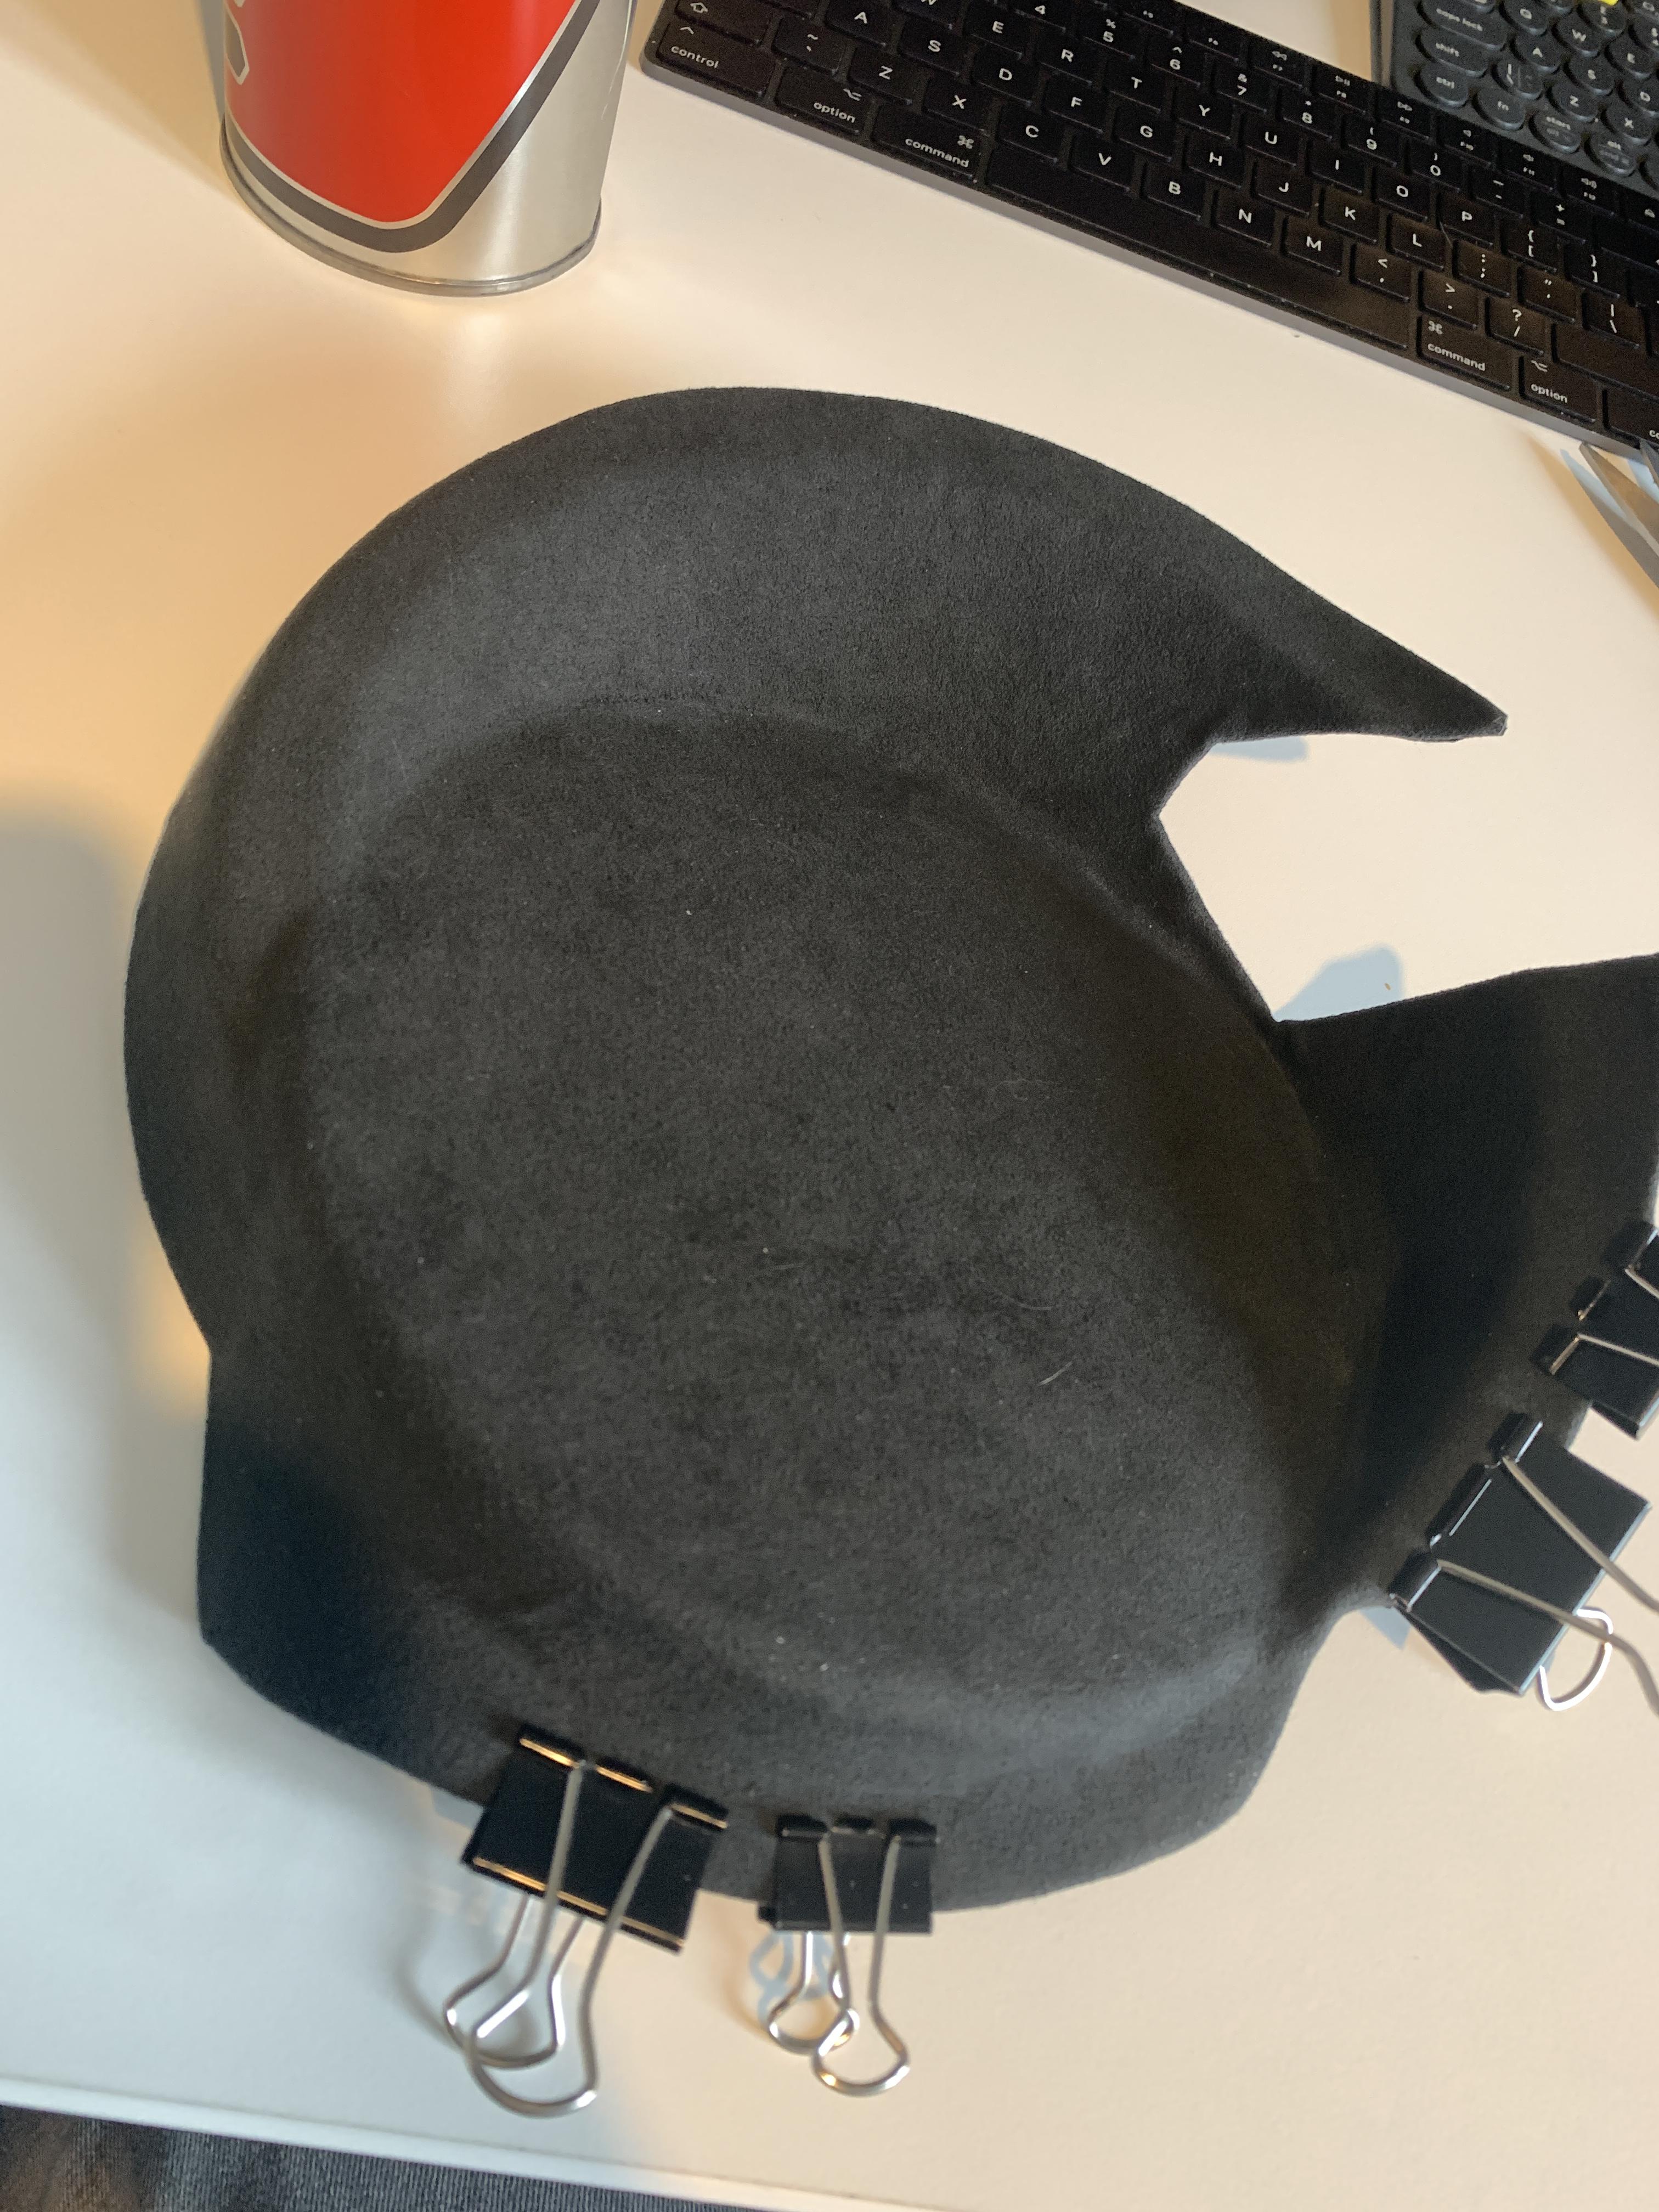
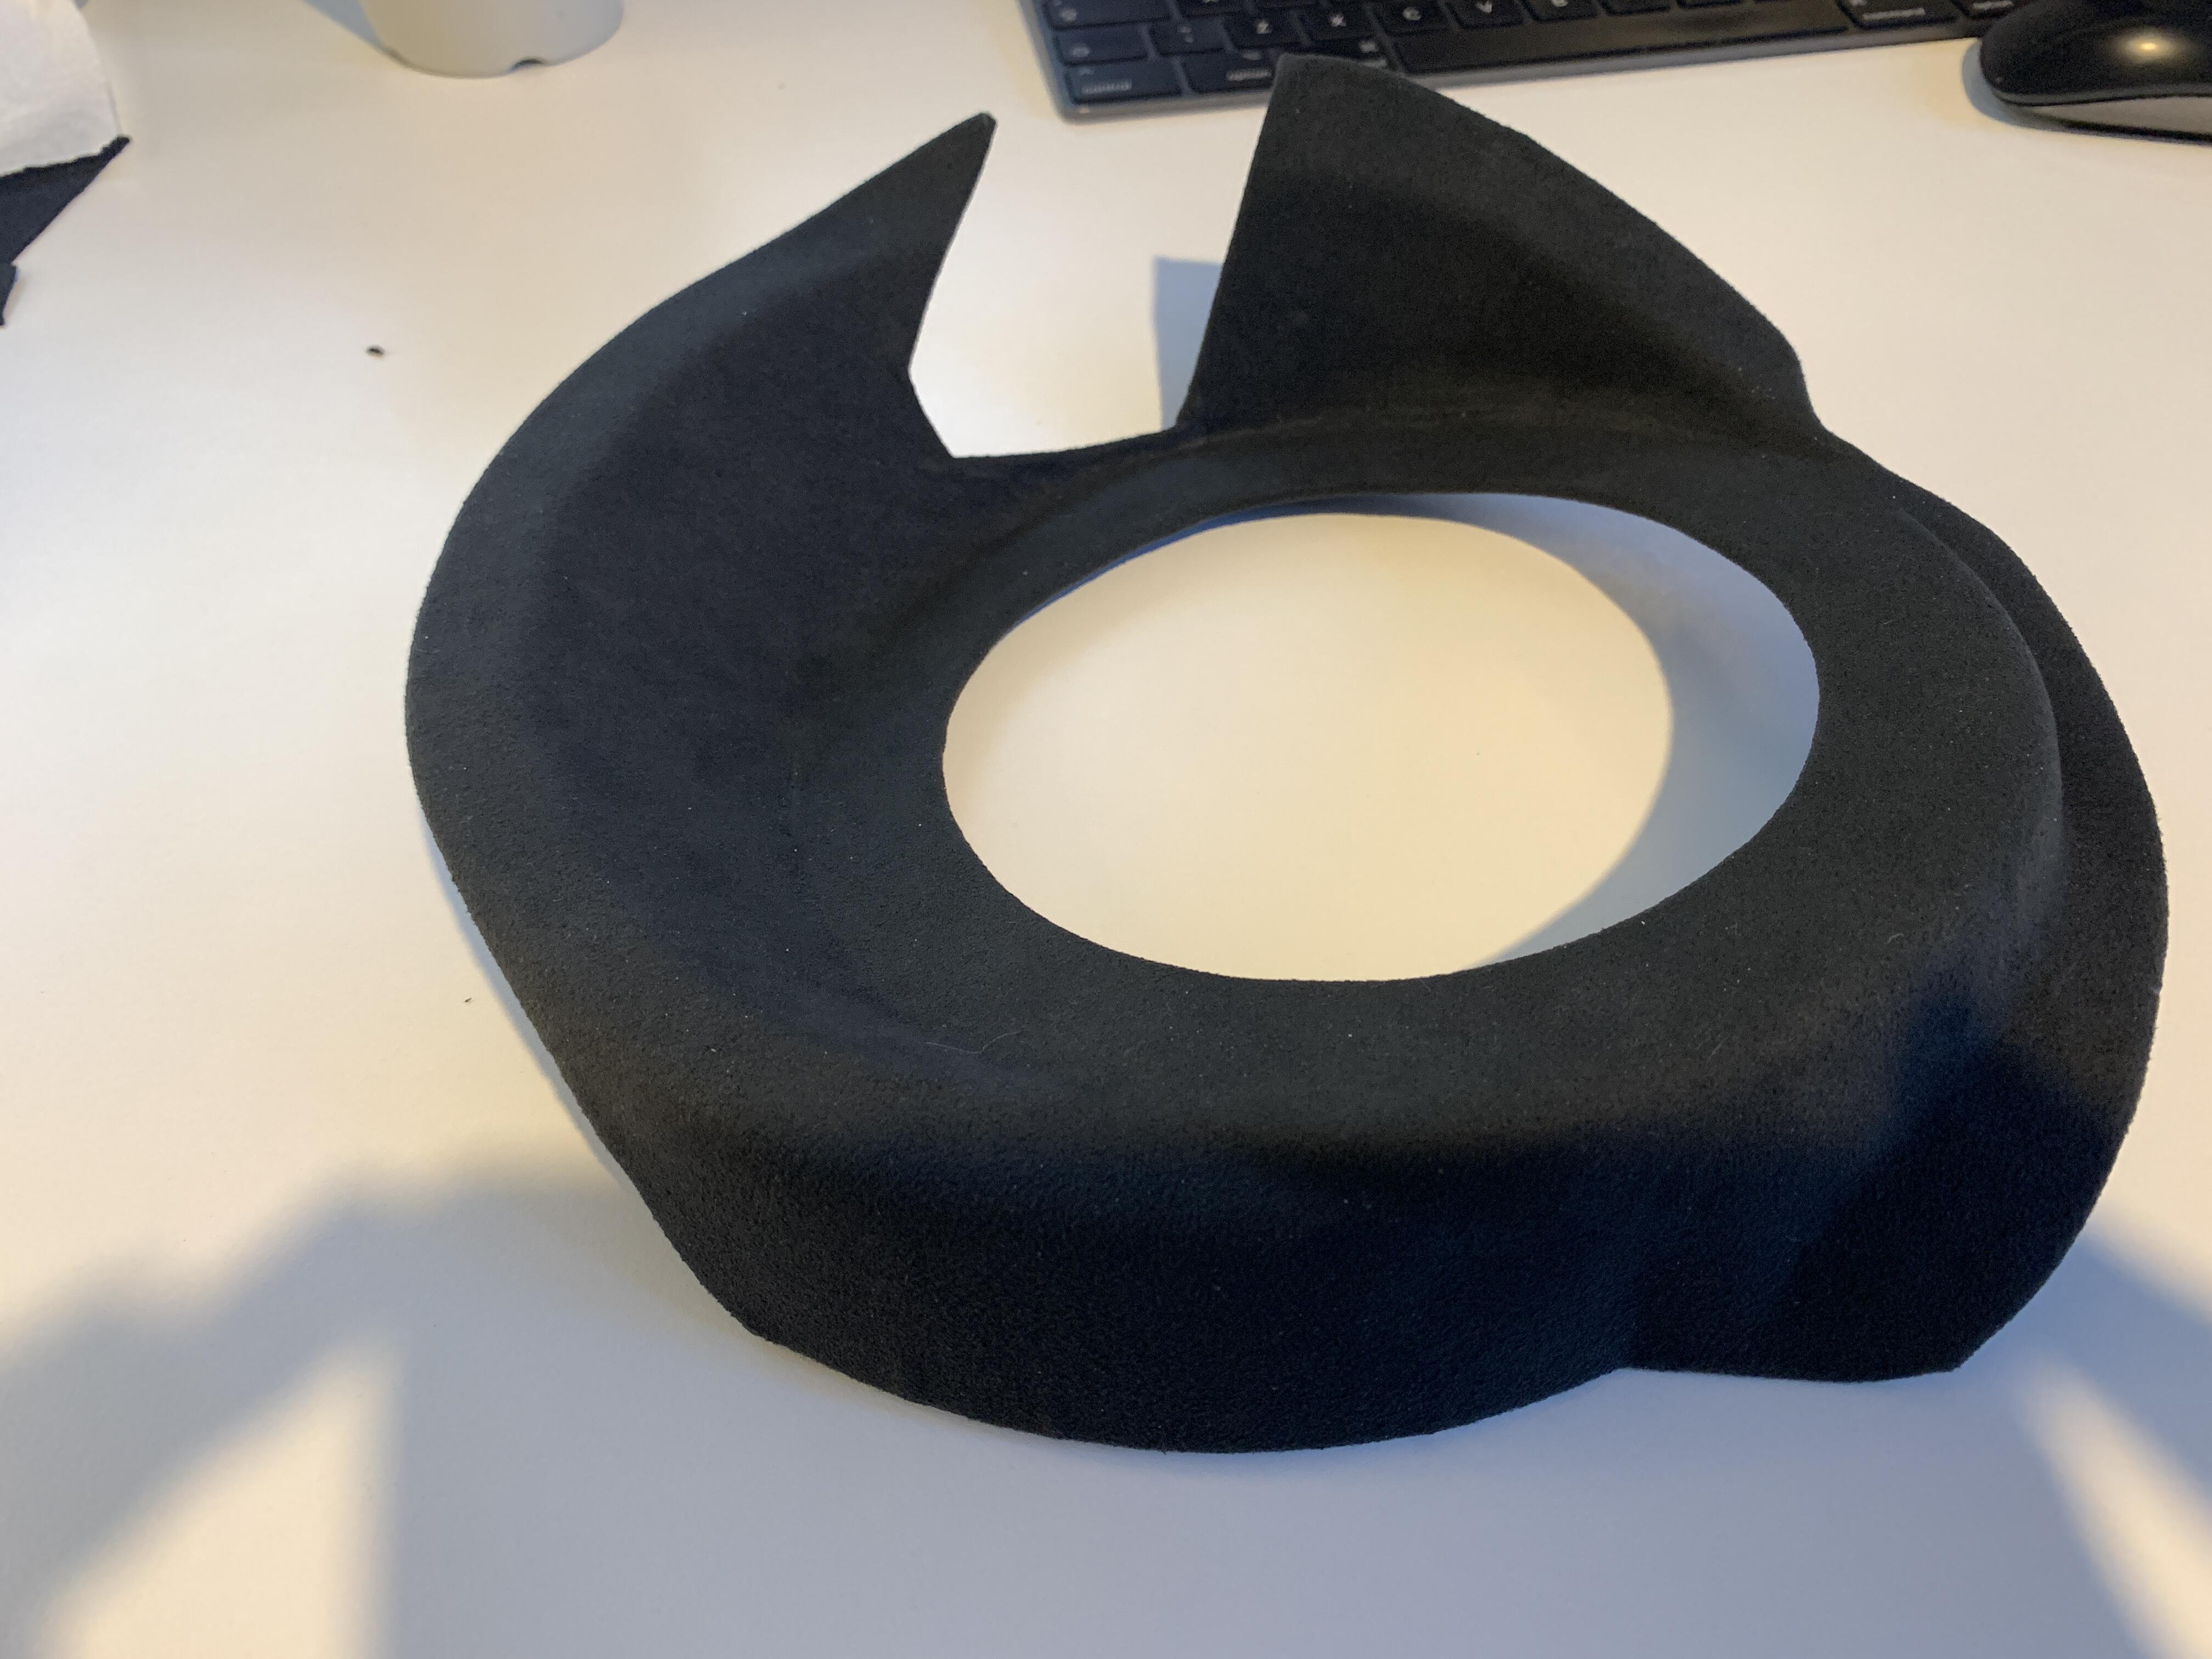
Still waiting on Decals so I can get the car back (hopefully resolved in the next 24 hours) so more trimming fun! This time the rear speakers, these (as most probably know) are to drop the speaker back out the way of the harness bar.
Getting used to it now, material stretched glued and held in place
All done
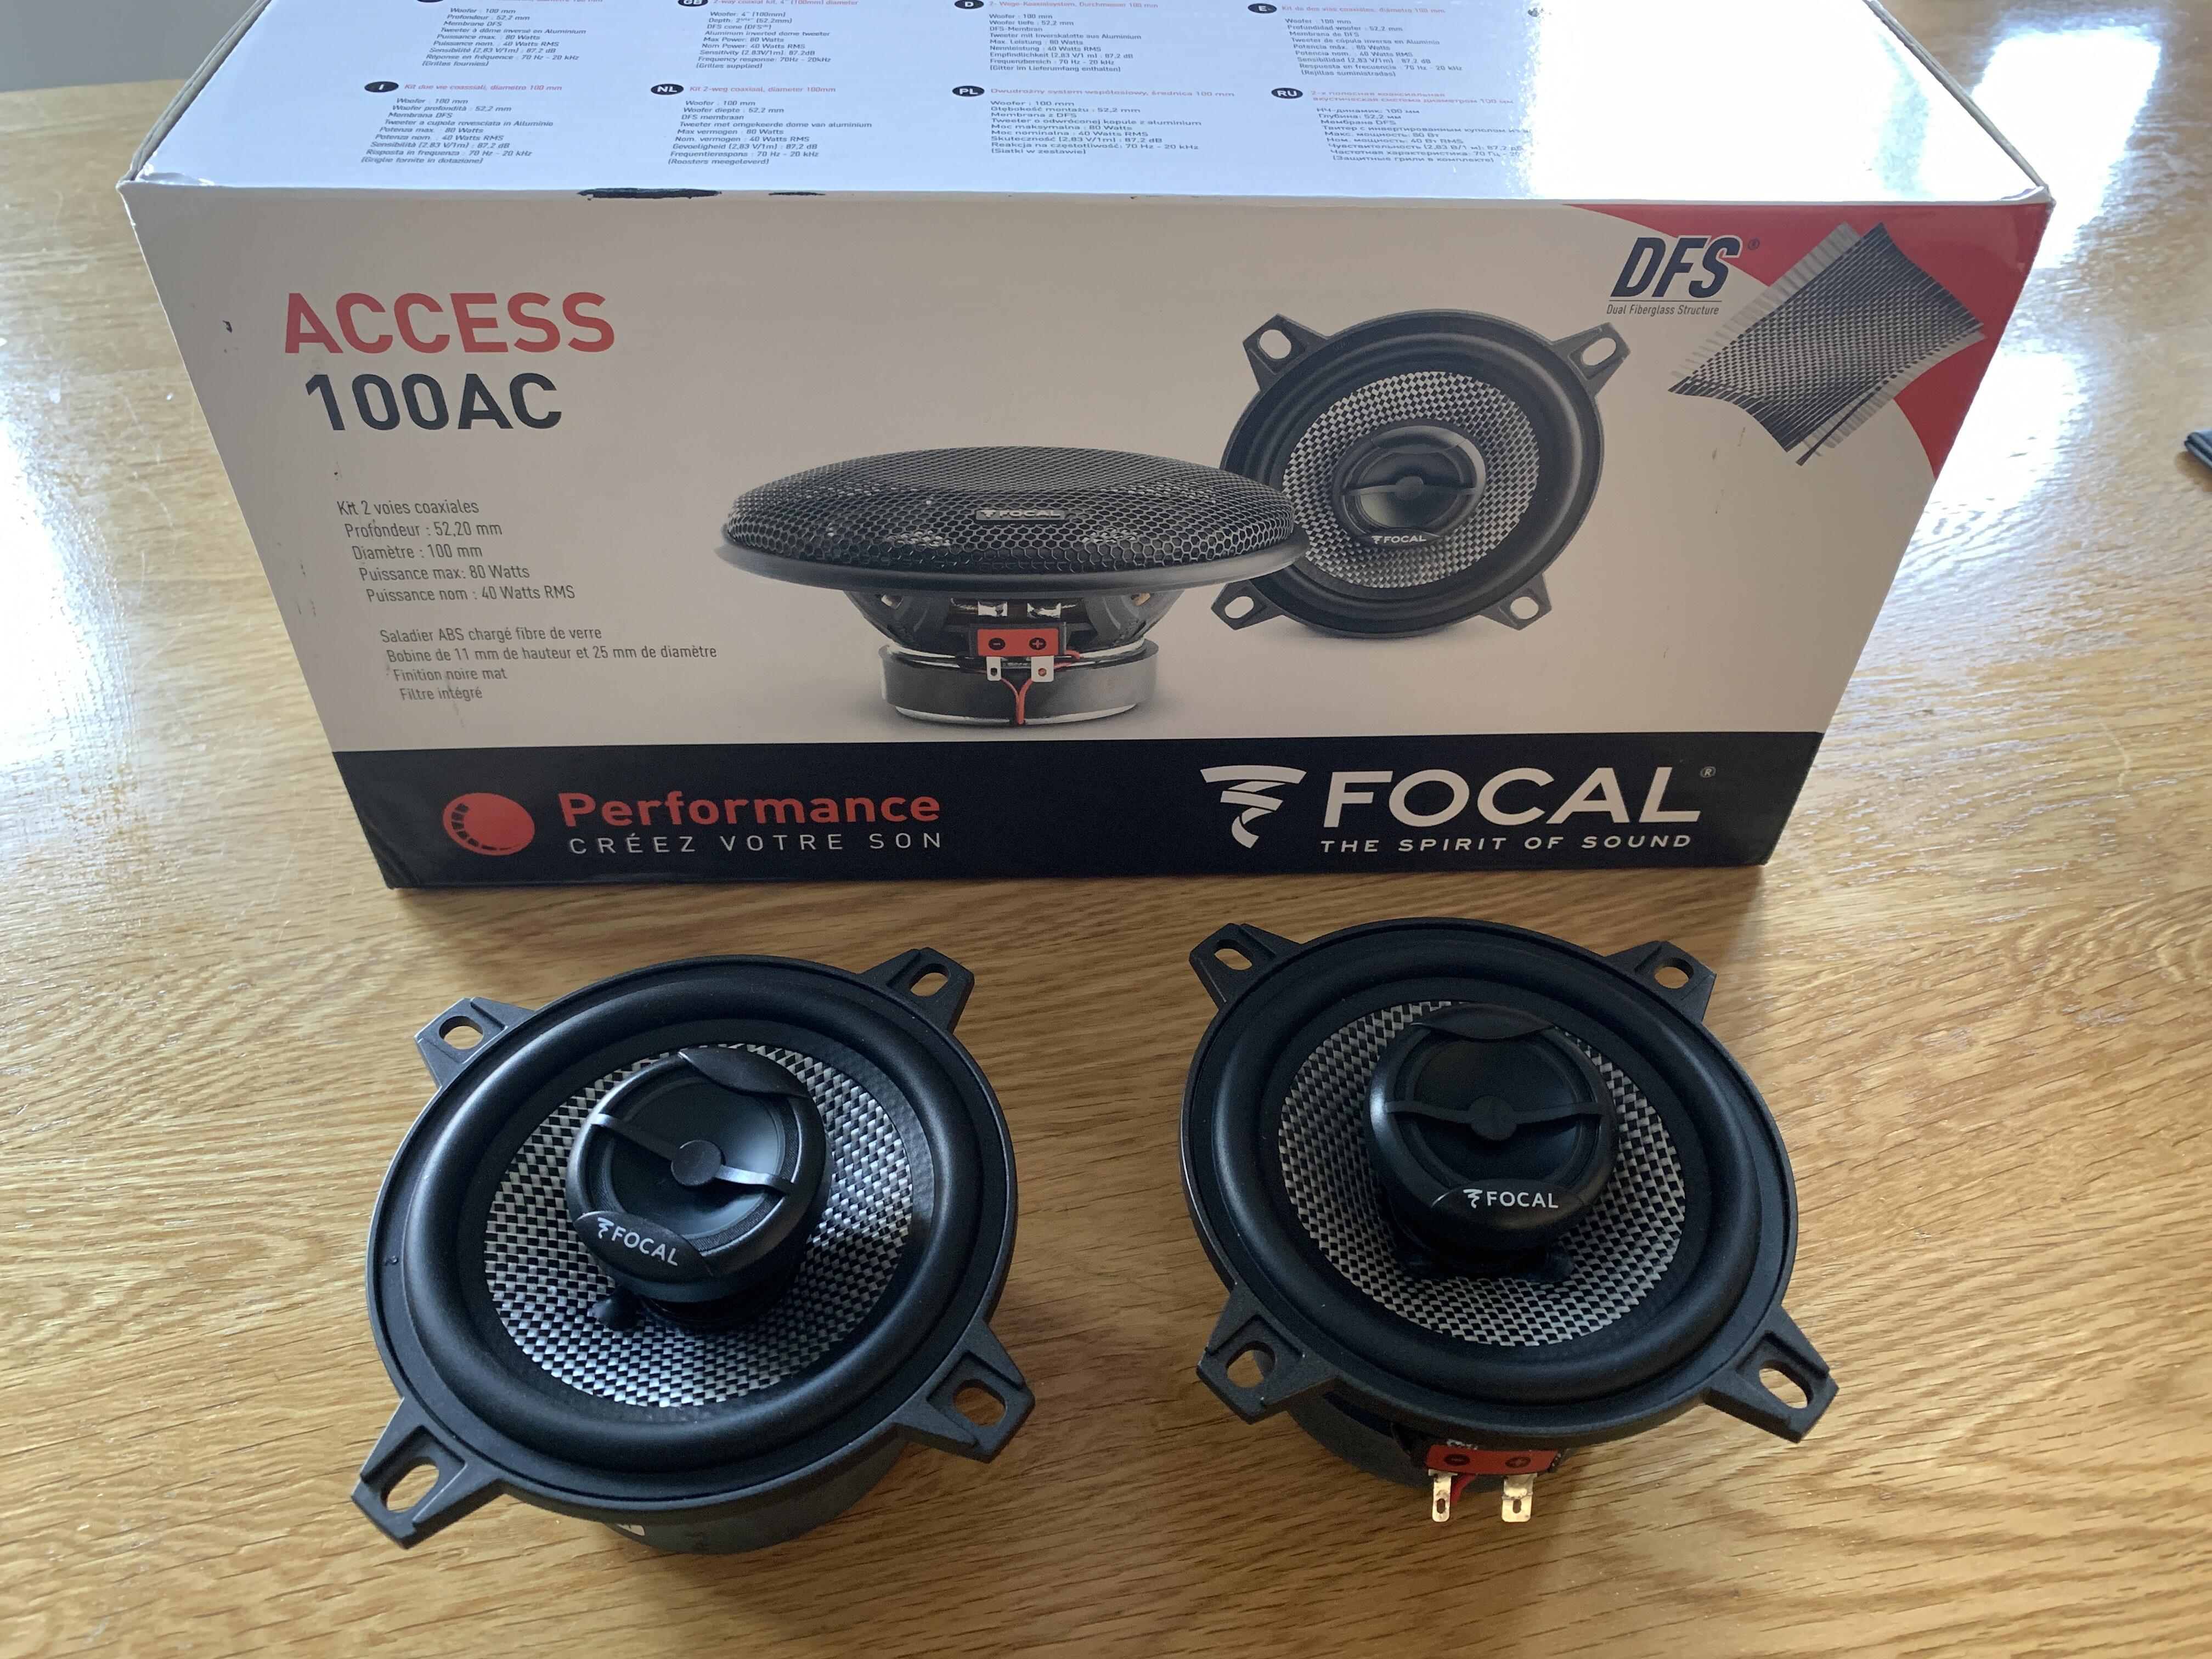
Thought I’d prep the dash with the new speakers. I am throwing in Focal 100AC’s, last time I used PC100’s but they were too brittle sounding, being reflected off the screen into your face. I know some would say I should delete the speakers but 1: I don’t want to, and 2: the dash has already been cut by Lotus for the speakers from the factory and as its a different design to the normal dash the normal blanking panels won’t fit
I’ll be mounting them in foam baffles as the speakers are not infinite baffle, will give a mountain more mid bass than infinite baffle
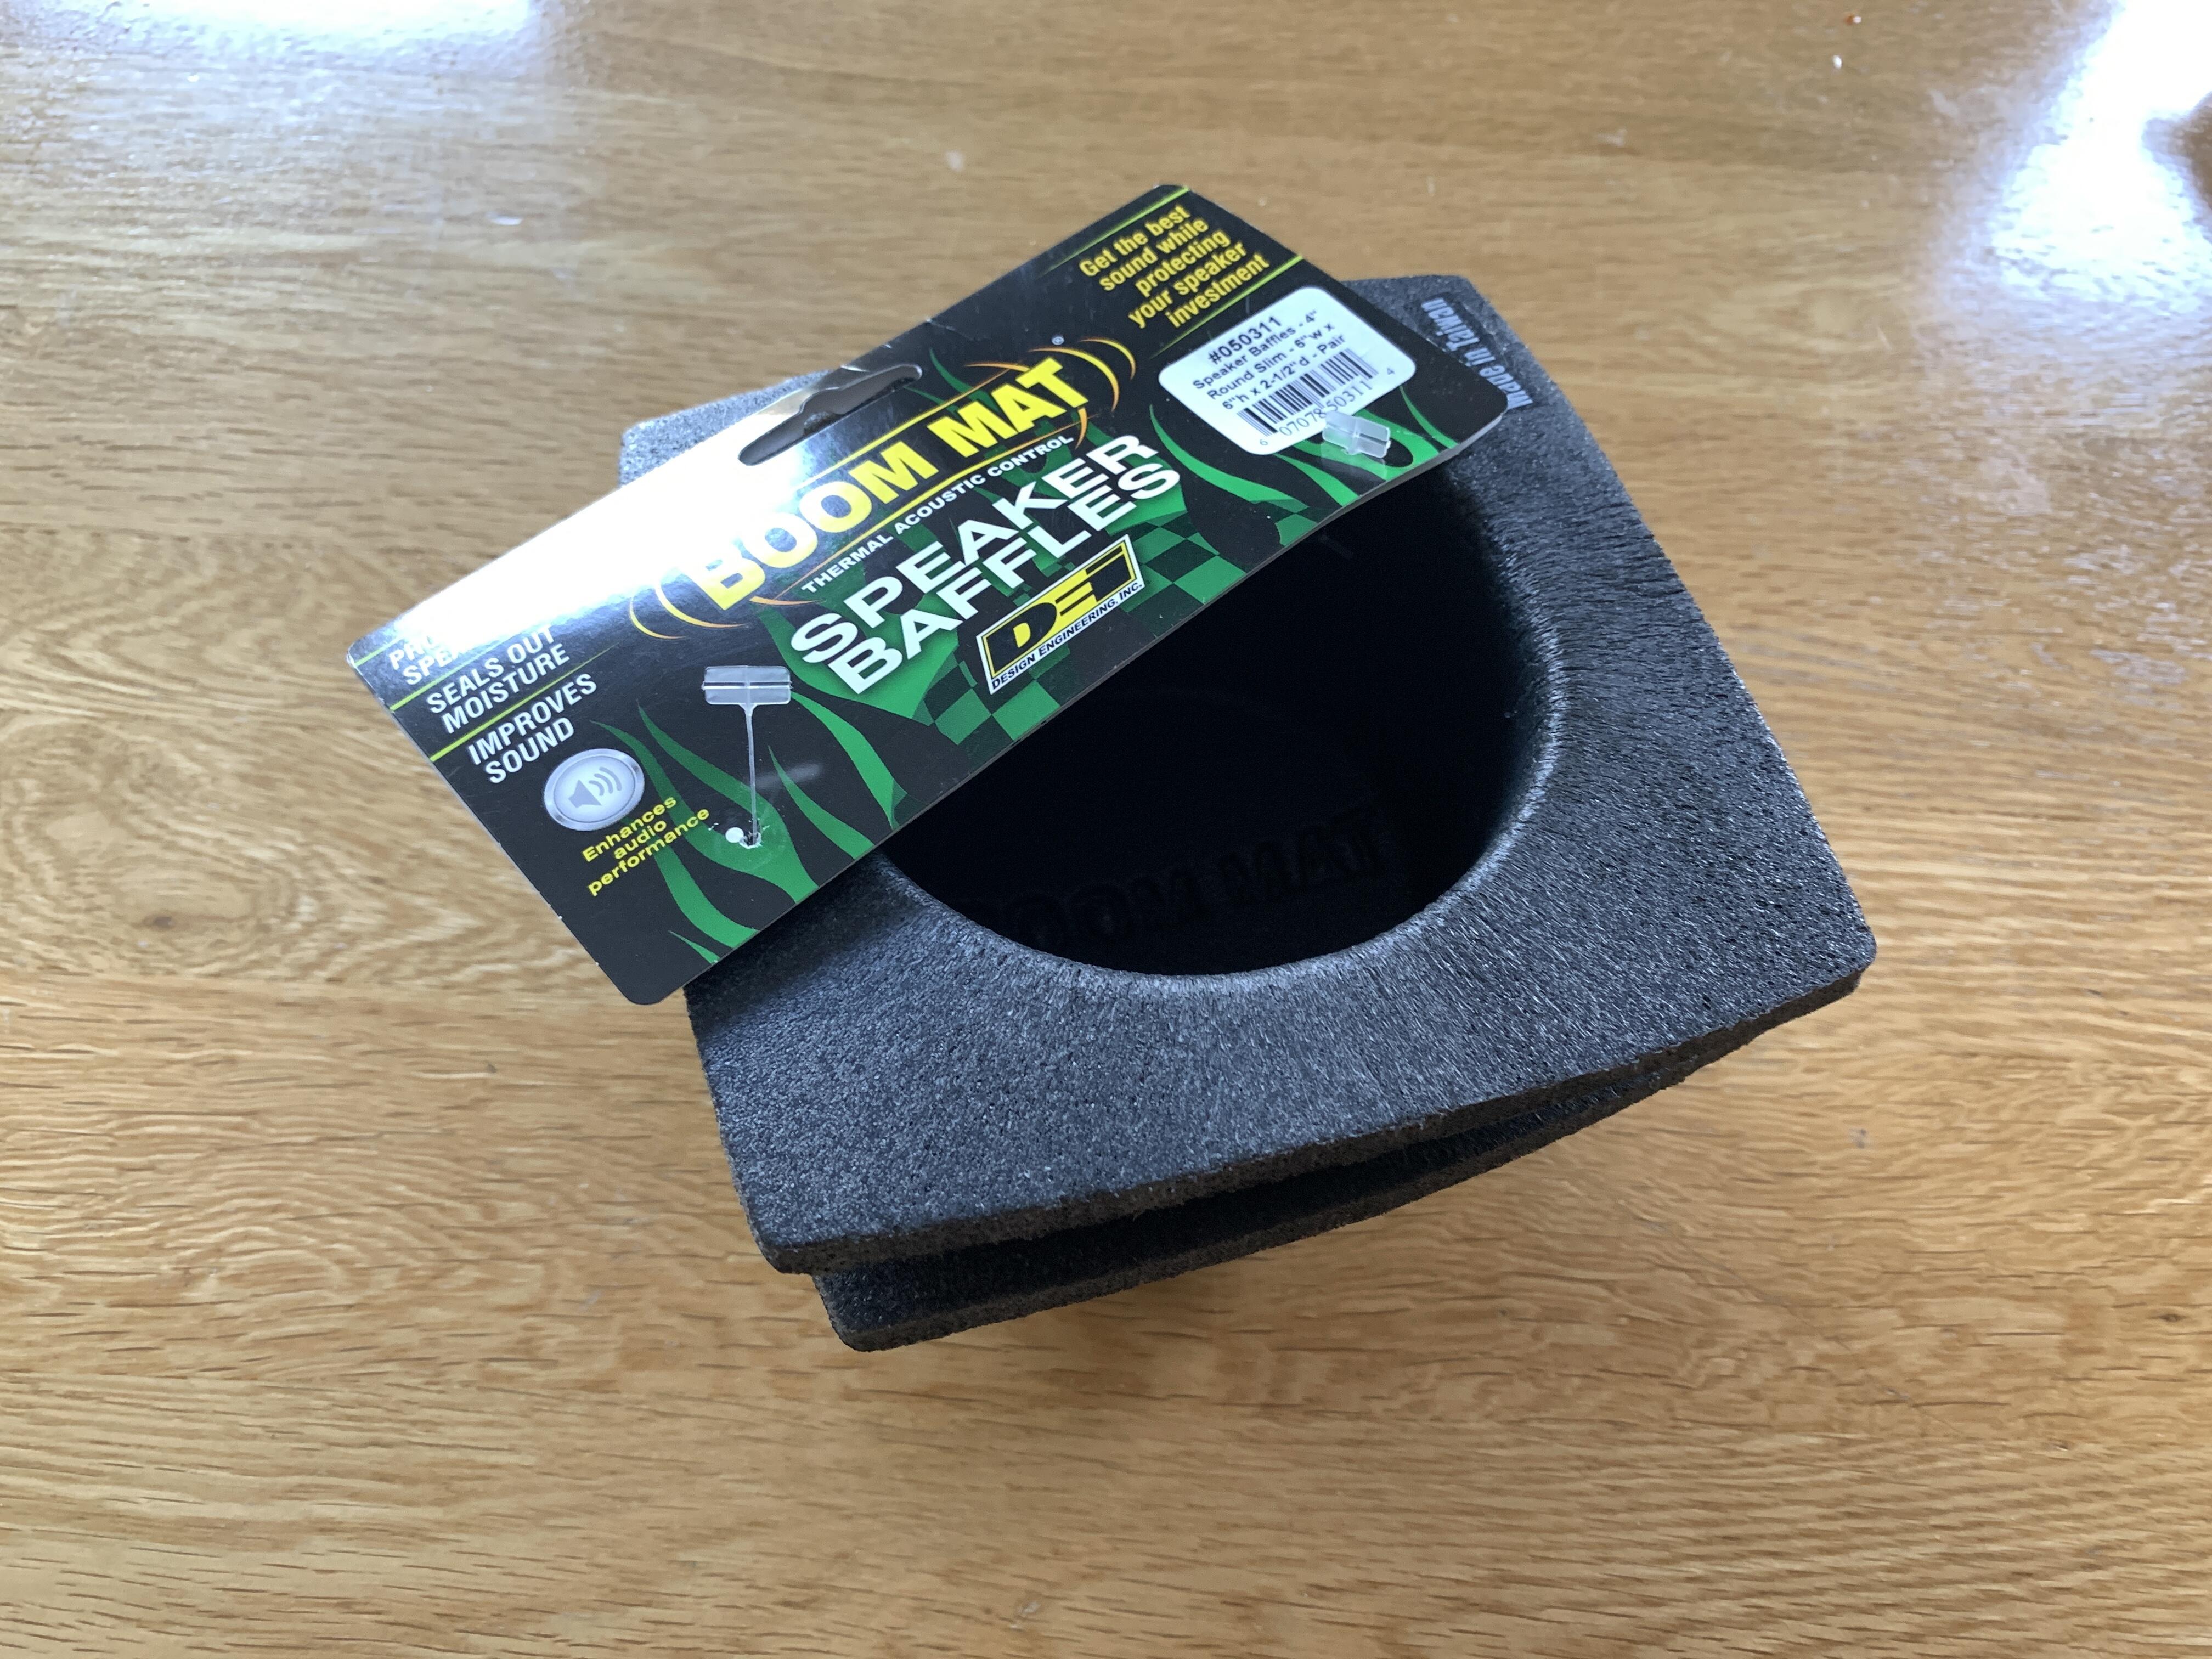
To make fitting easier I made speaker extenders going through the foam. All mounted ready to go, with gaskets on the basket so seals up nicely
Foam baffles provide better base and some insulation against vibrations.
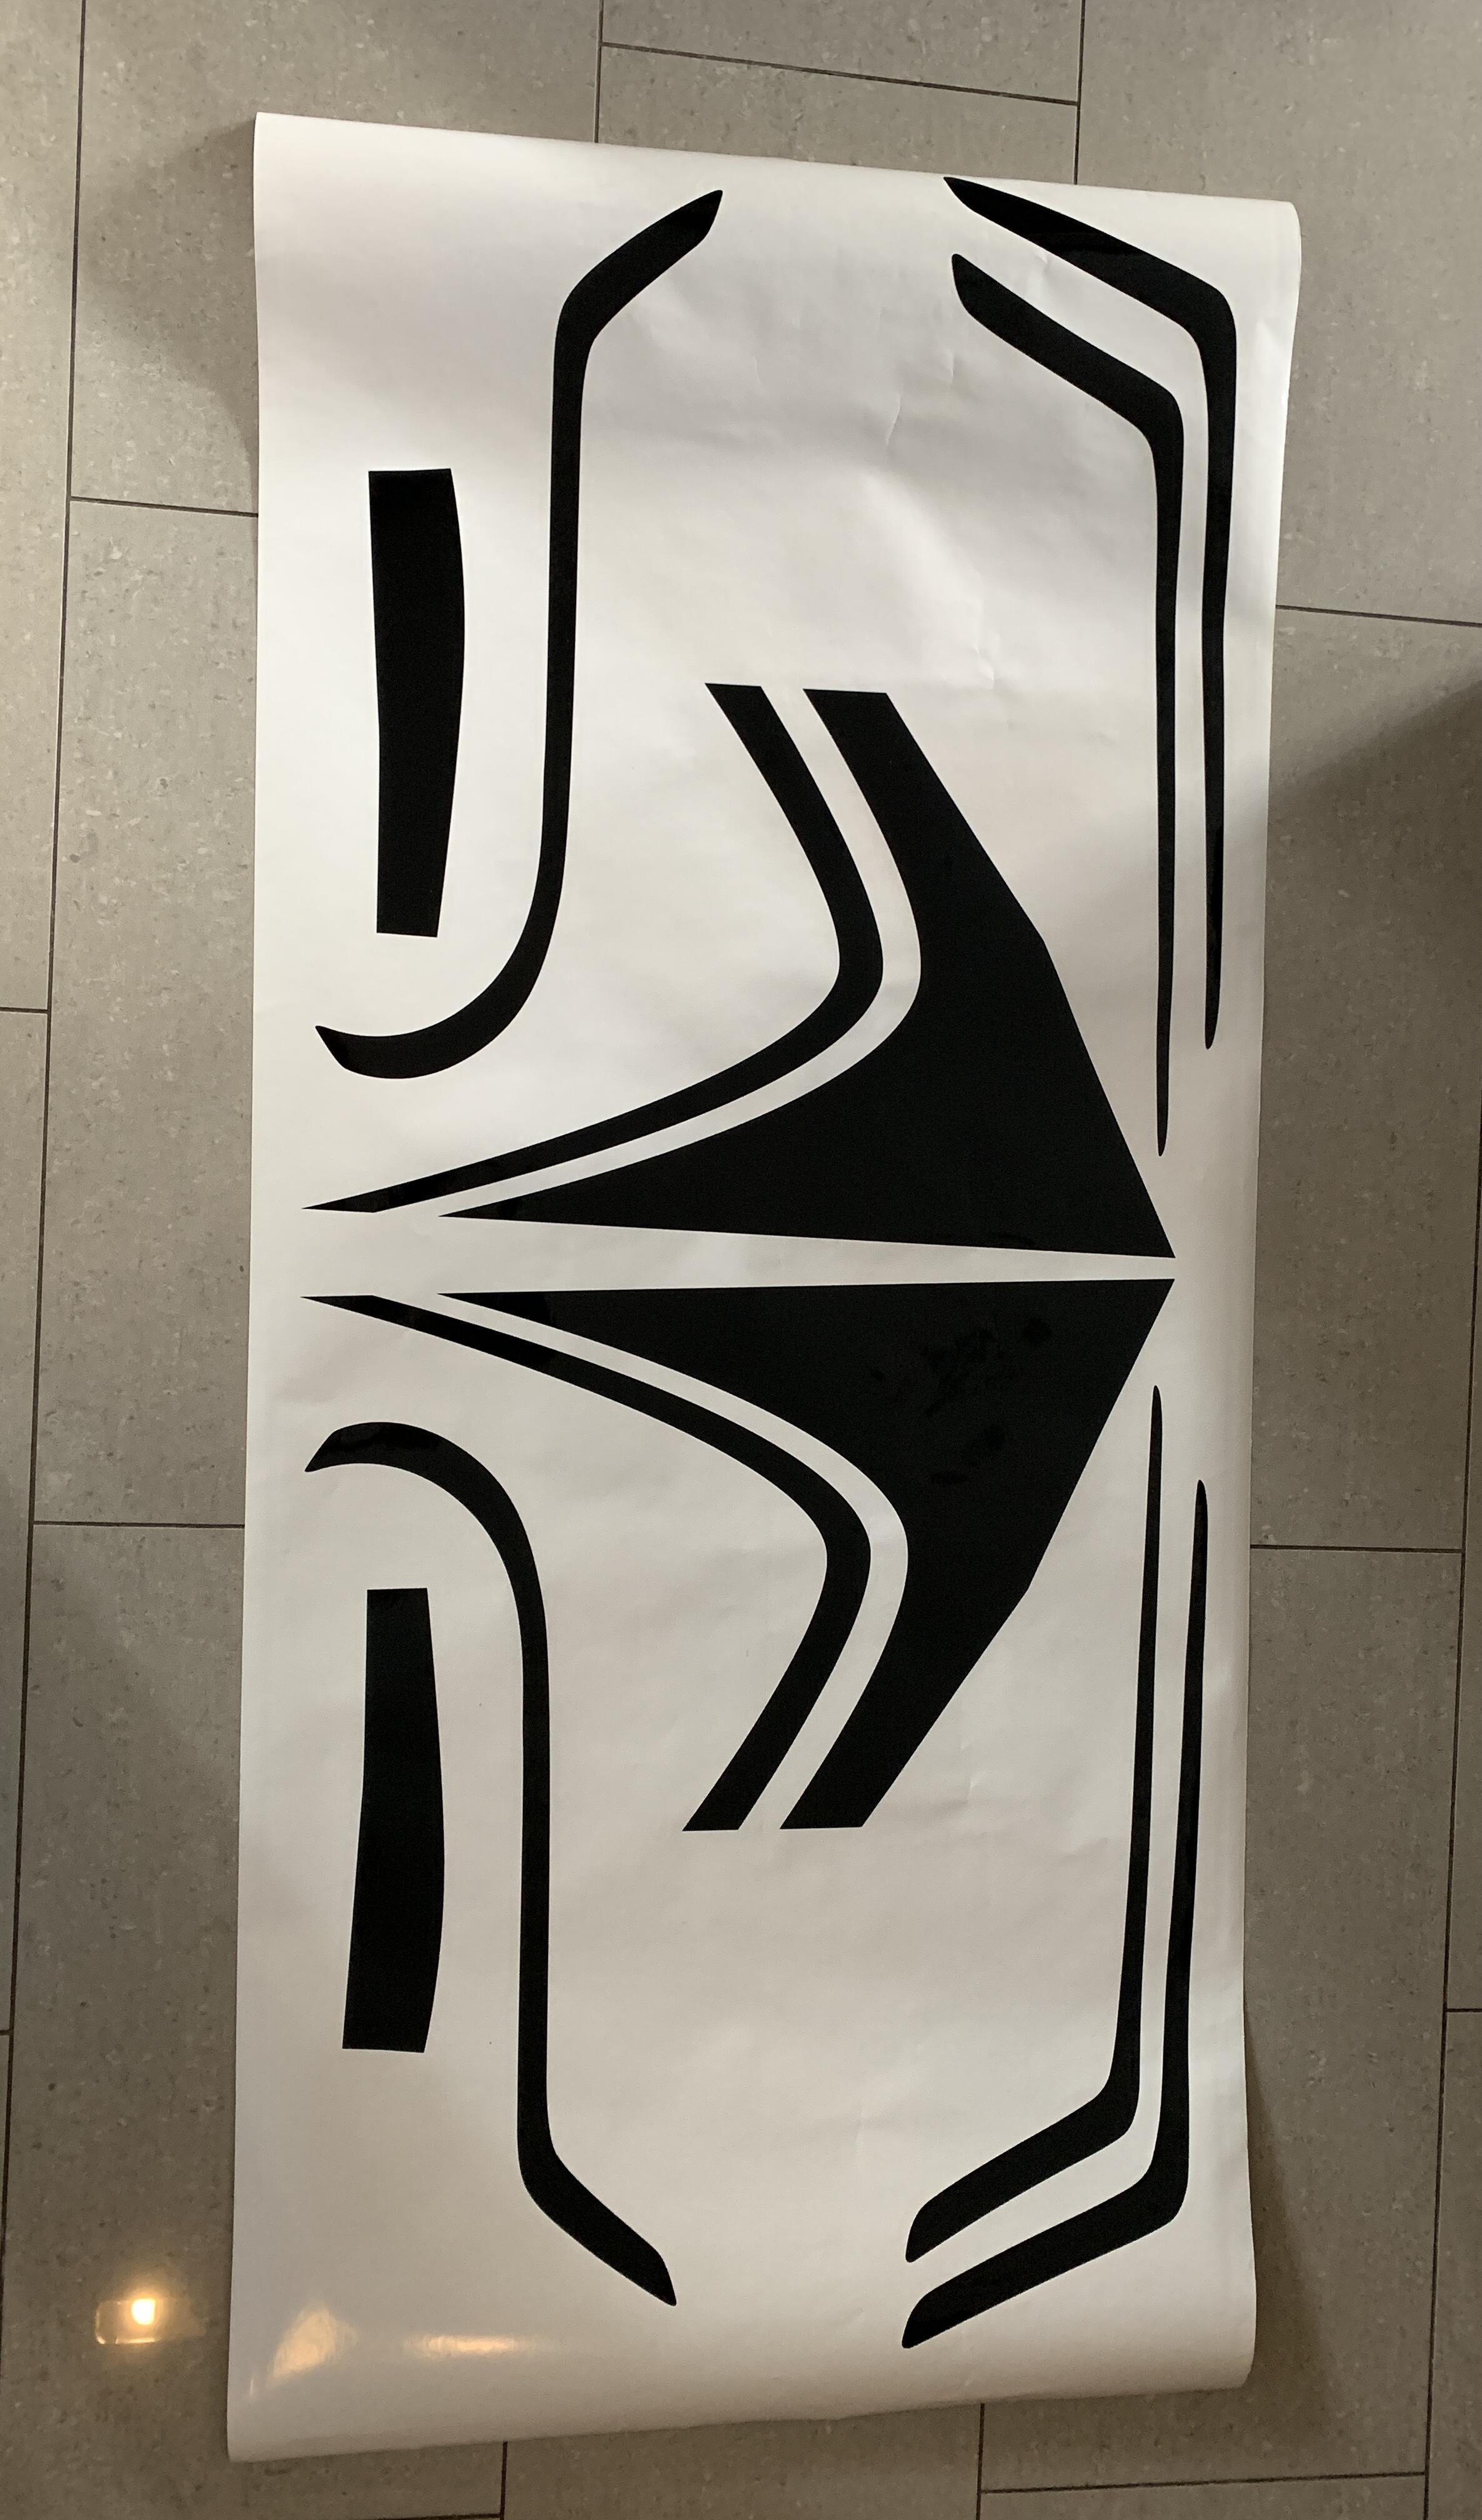
Small Update, but the decals arrived
Nearly 5 months for these! Stupid price to begin with and in typical Lotus fashion its cheap vinyl normally sold as have a 4-5 year life. So I’ll get them remade with considerably better material, but either way they are here and have just been run up to Oakmere for fitting
Here’s a Cup260 decal set if it interests you - a total bargain at £300…
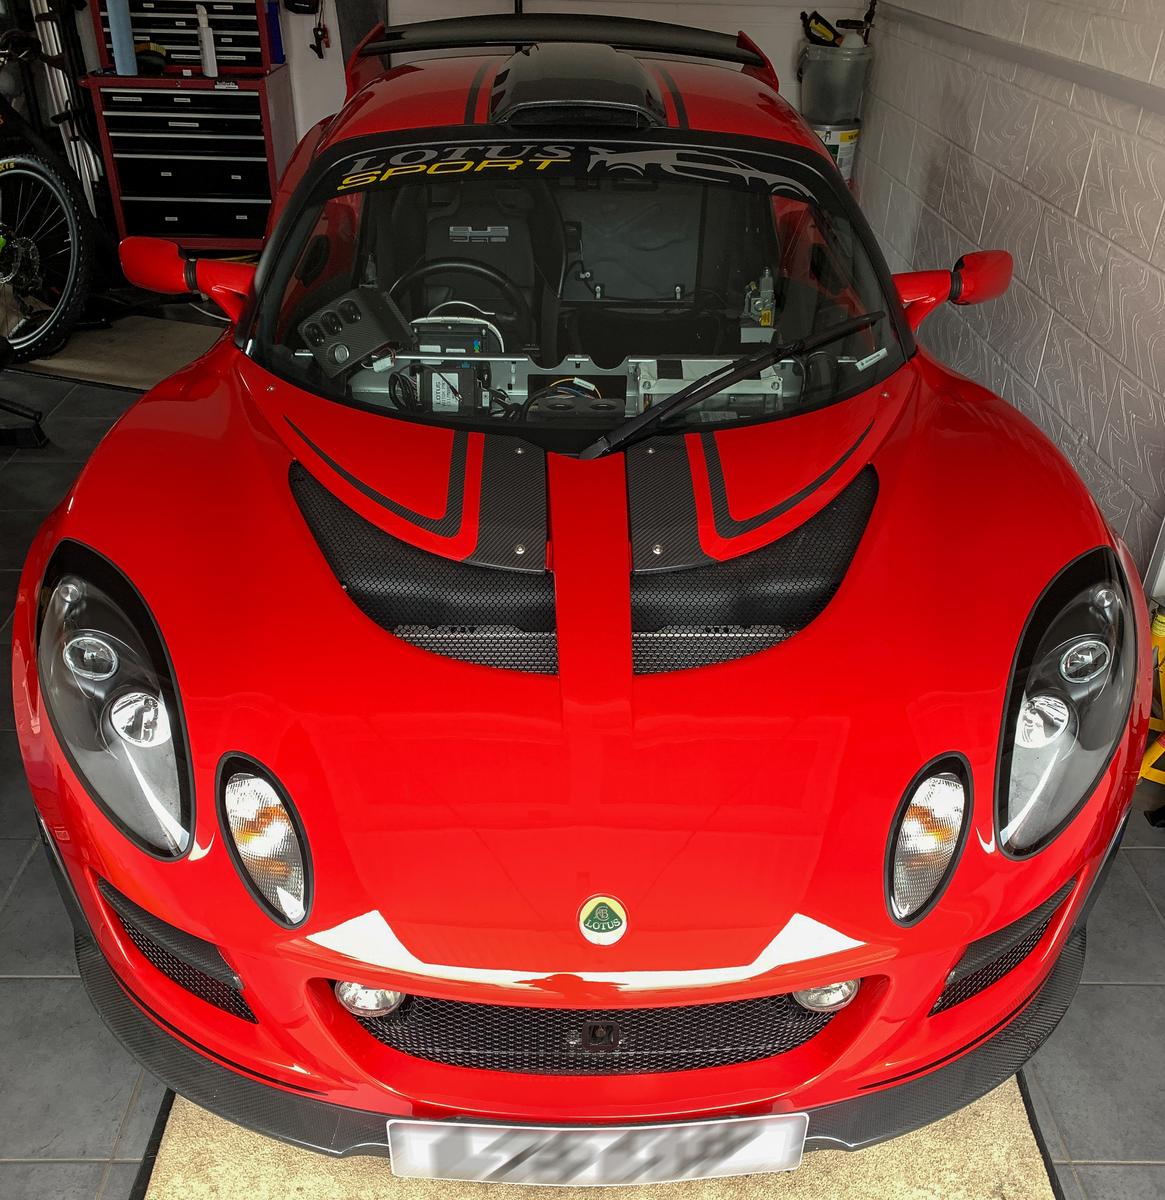
A short one but a major step - paint is done!
All looking good, it was a process that I’m sure many would say was overkill but as mentioned it was very stone chip heavy, sills had no clear left, someone had burnt through the drivers door clear coat etc
So I went for the full works everything removed all grills out, most seals replaced etc etc - end result whilst far from cheap is spot on. It will look fantastic once I detail properly and give it the at final touches. All credit to them, Oakmere did a great job
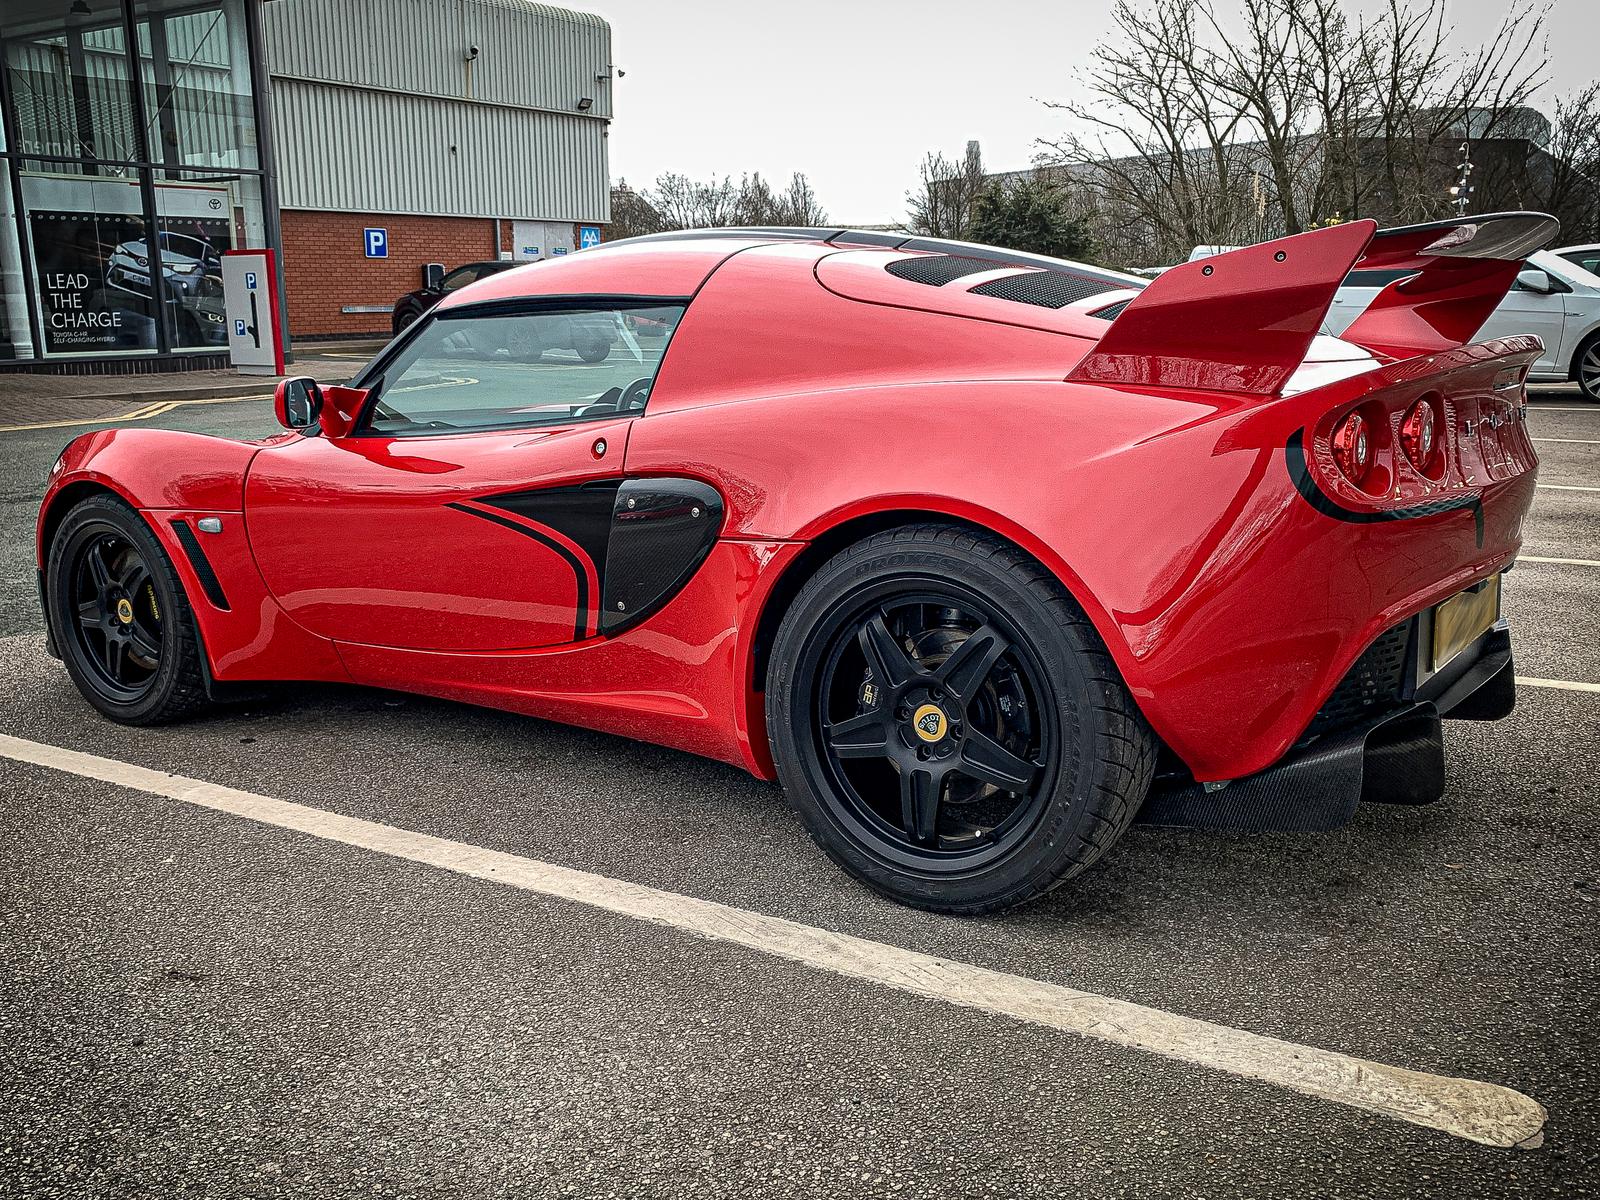
And tucked up in the warm again looking a lot brighter as the sun peaked out (Ignore messy garage)
Now I’ve got it home I can start to put the mountain of parts back in the car and making some progress rather than just doing stuff without the car
Still waiting on some parts, but next steps are:
• Electrics/cameras/sensors
• Finish retrim and refit interior
• Tidy up diffuser install (never been happy with it)
• Brake upgrade and calliper repaint
• Refinish spare wheels (waiting on tyres, may as well swap up the same time)
• Changes to engine breathing (again waiting on parts)
• A few external tweaks
• Detail
•PPF
Then final touch up and ceramic coating
Then I should be done for the year, might even drive it but don’t want to get ahead of myself
Holy moly…
Stunning
She looks lovely! ![]() . You must be extremely pleased with the way everything’s coming together, I’m looking forward to seeing the completed car
. You must be extremely pleased with the way everything’s coming together, I’m looking forward to seeing the completed car ![]()
Just mind the fresh paint work ![]()
Yep all coming together well. Drive home without PPF was a cautious one!
Great to see it looking like a proper car again not a collection of bits, and now its back home I can get on with finishing out the rest so it feels like a massive step forward ![]()
Cracking job!
WOW that looks amazing ![]()