Big Shed Build

I always enjoy reading other people’s DIY build threads so I thought I’d document my own garage build here. Although, calling it a garage might be a stretch as it’s more like a really big shed. This is copy paste from another forum so I’ll try and update it so the timeline makes more sense as I go.

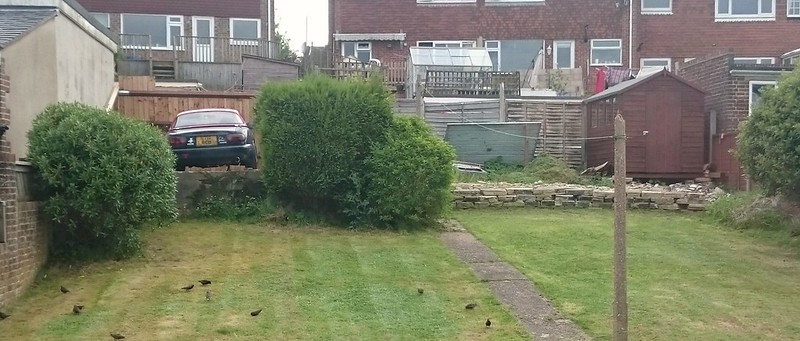
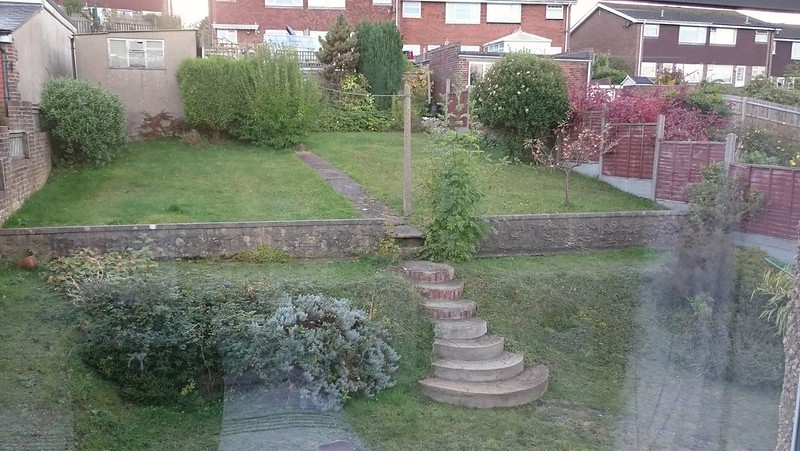
I bought my first house in 2015, one of the requirements was off road parking, preferably with a garage. When I bought the house, it had a single garage at the top of the garden, with access via a lane which runs behind the row of houses. My garden is on an uphill slope and you can see the garage in the top left of this photo.

DSC_0307_1 by zimbarbaluba, on Flickr


d878c95d3120396b63763fbc887624f467b57bbe_645_430-1 by zimbarbaluba, on Flickr

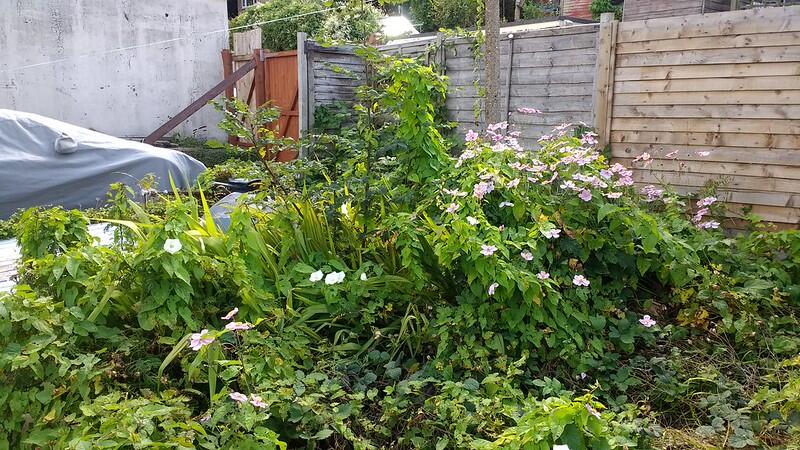
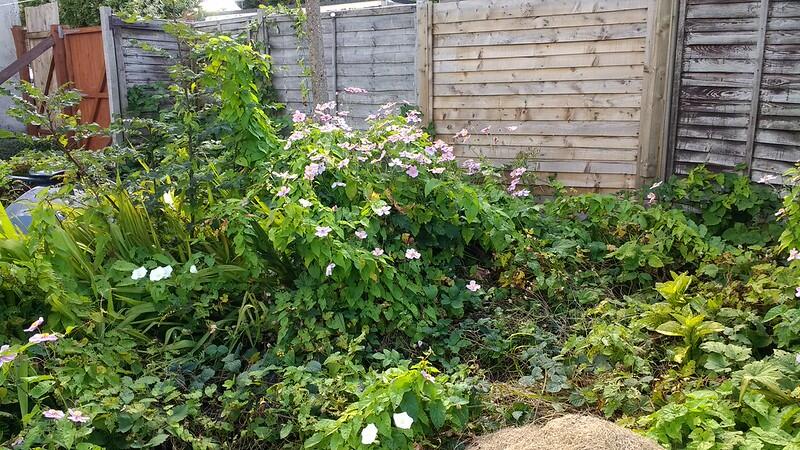
When I moved, the garage was still full of rubbish which I had to clear out

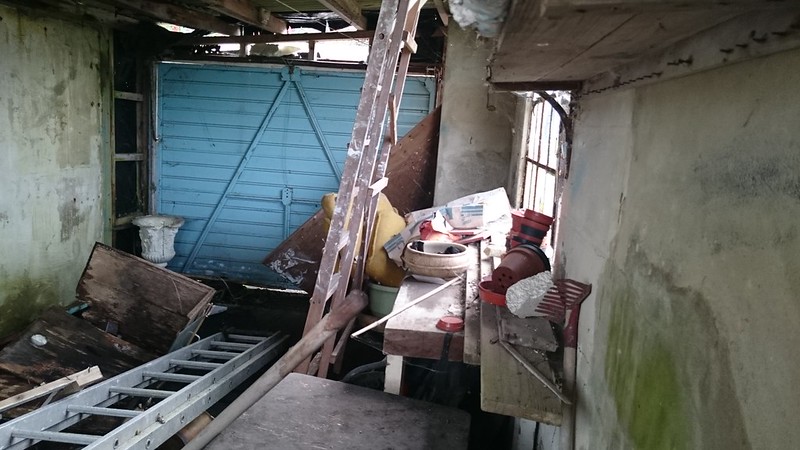
DSC_0517 by zimbarbaluba, on Flickr

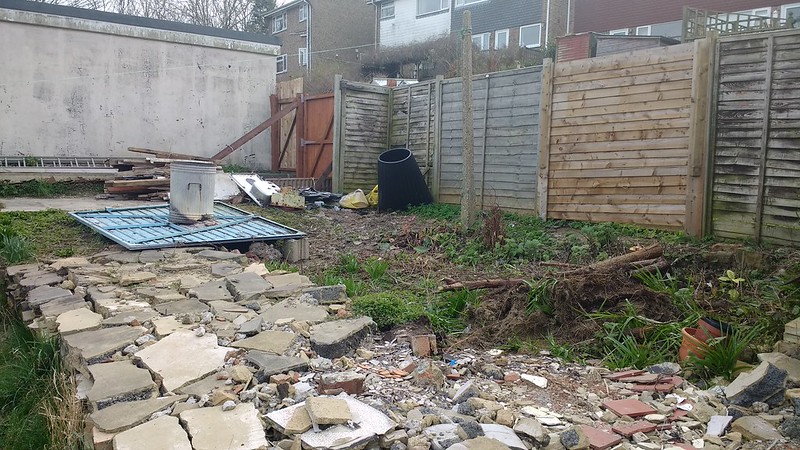
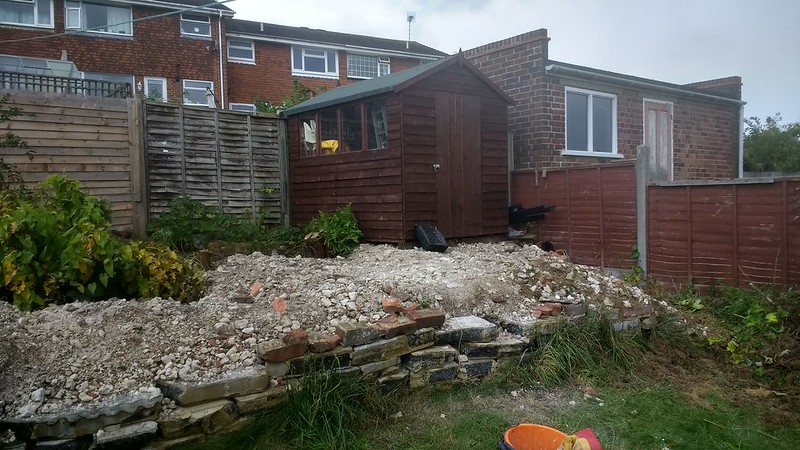
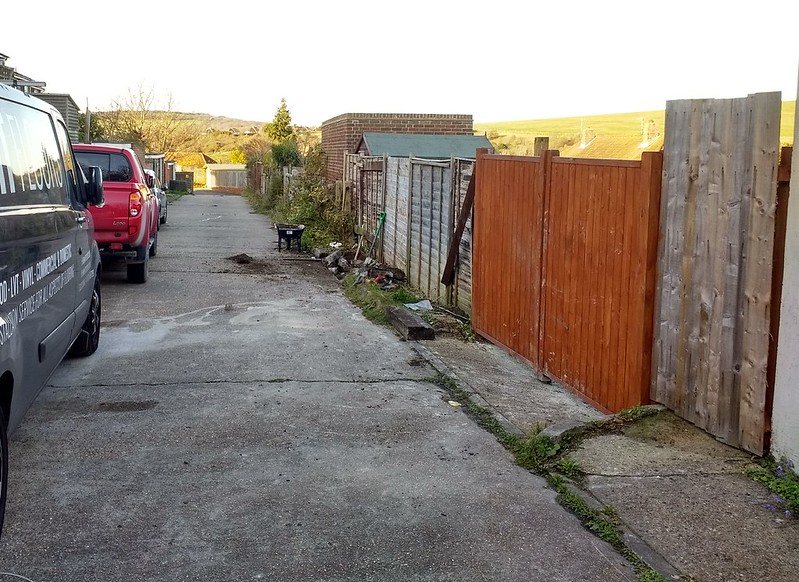
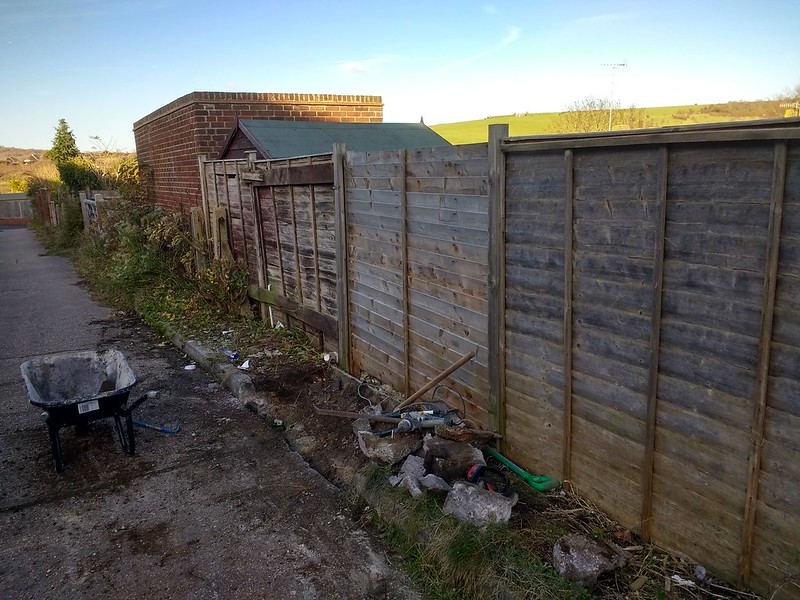
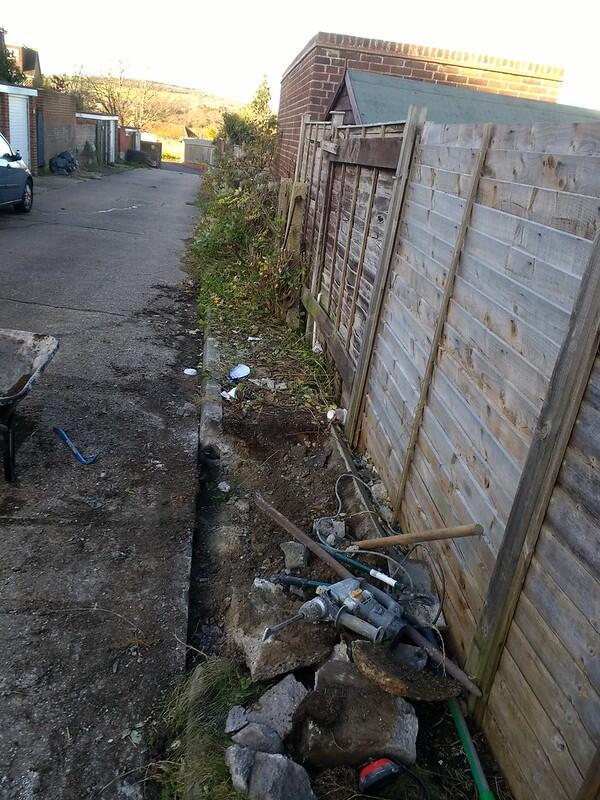
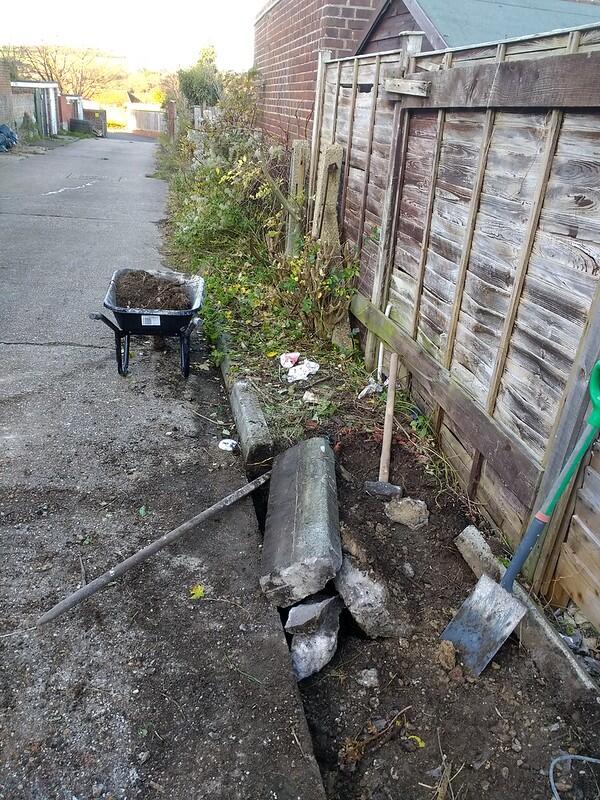
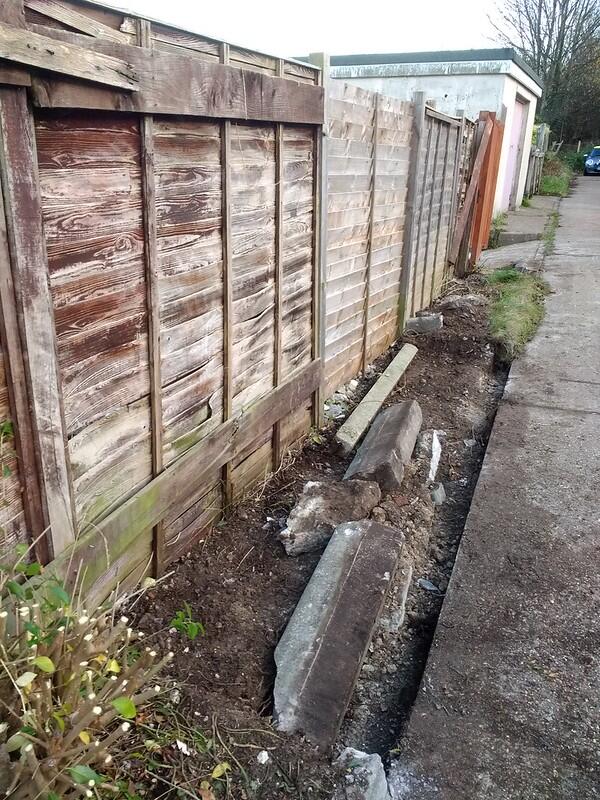
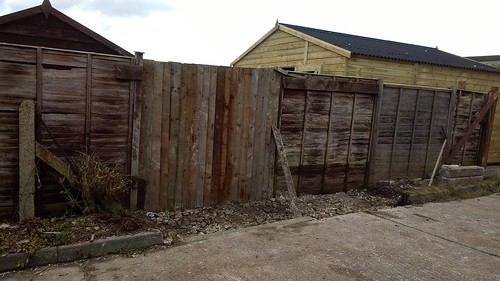
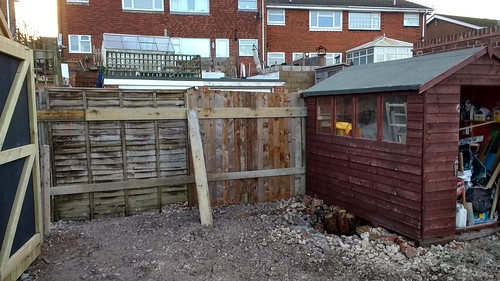
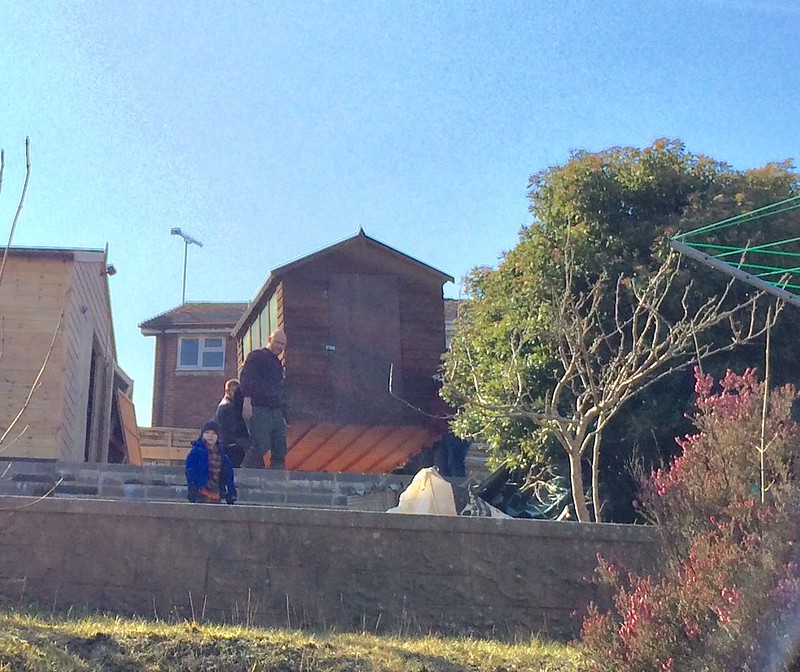
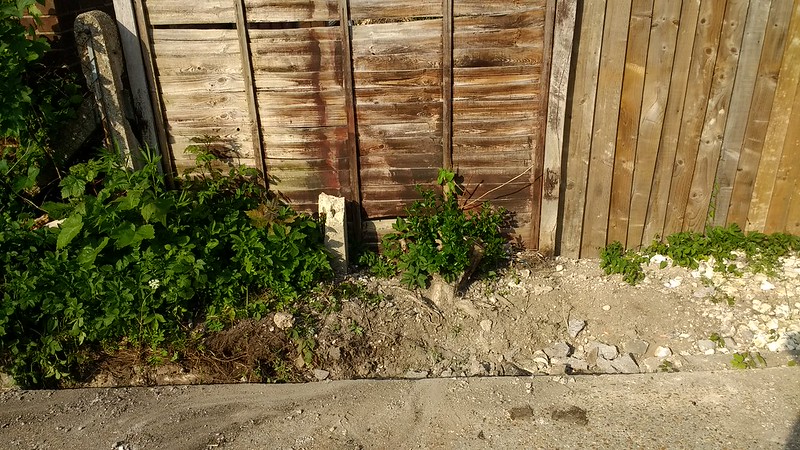
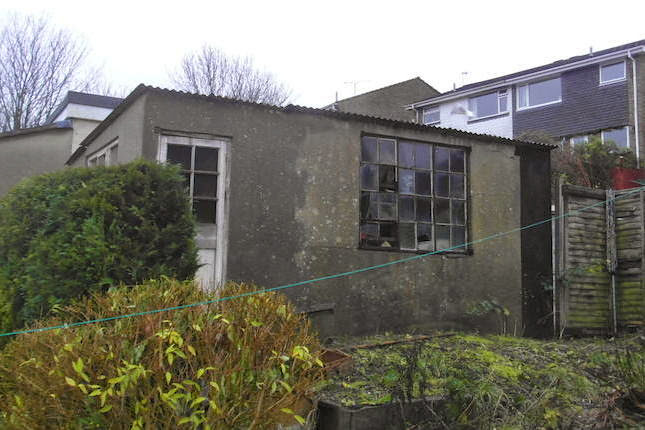
Unfortunately, this garage was well past its best and looked like a strong gust of wind could finish it off. At the time I had an MX-5 track car which had failed its MOT and I needed to get off the road and strip to sell the parts and fund my next car purchase. At the end of October 2015 I knocked it down so I could park the car there instead. Here you can see the view from the rear access lane, not a very friendly slope into a small, single garage.

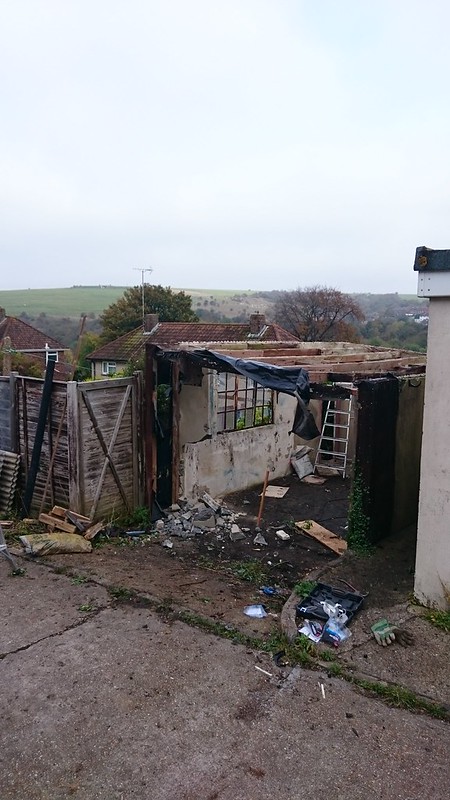
DSC_0015_2 by zimbarbaluba, on Flickr

DSC_0013_1 by zimbarbaluba, on Flickr

DSC_0019_2 by zimbarbaluba, on Flickr

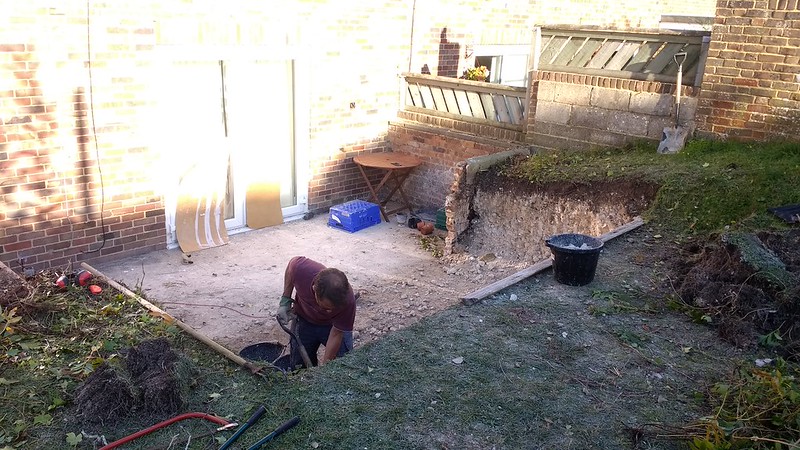
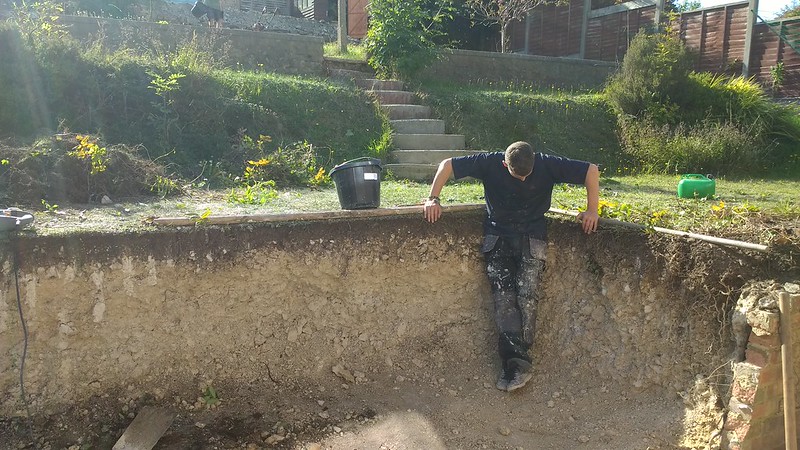
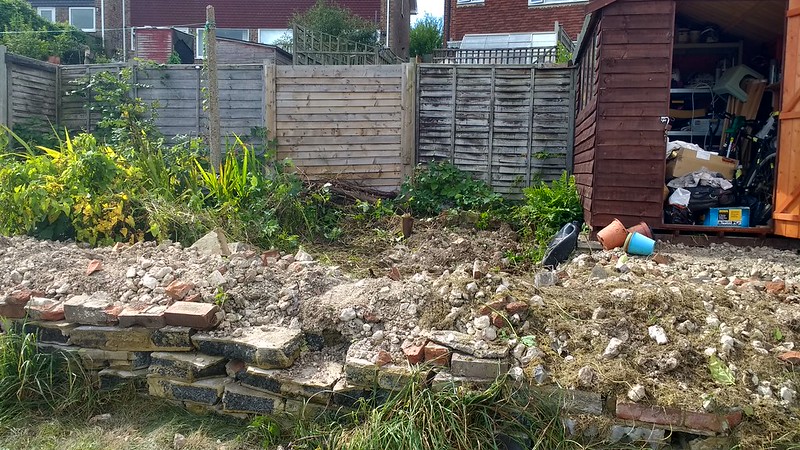
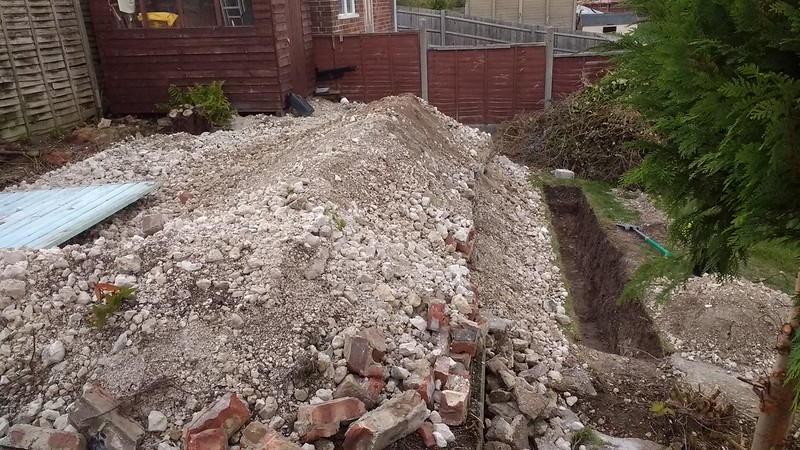
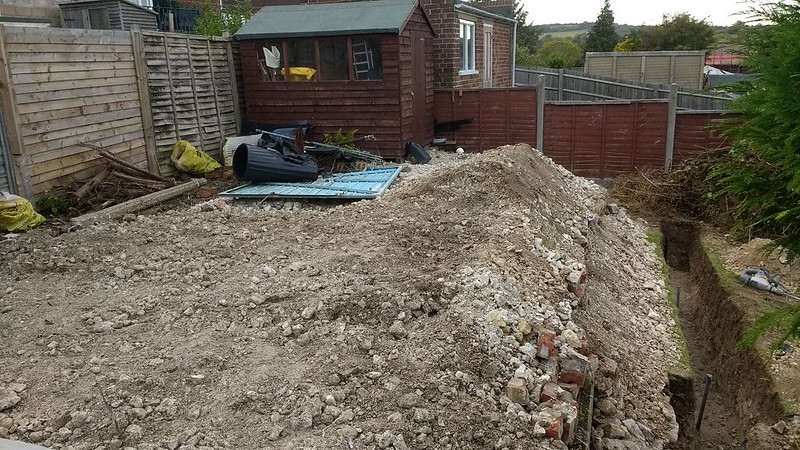
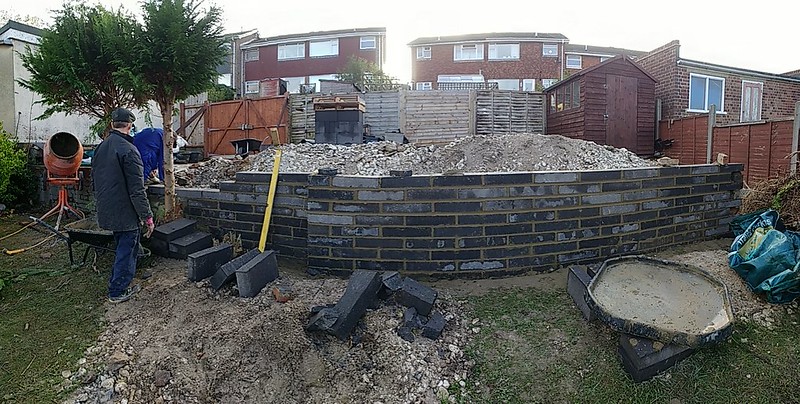
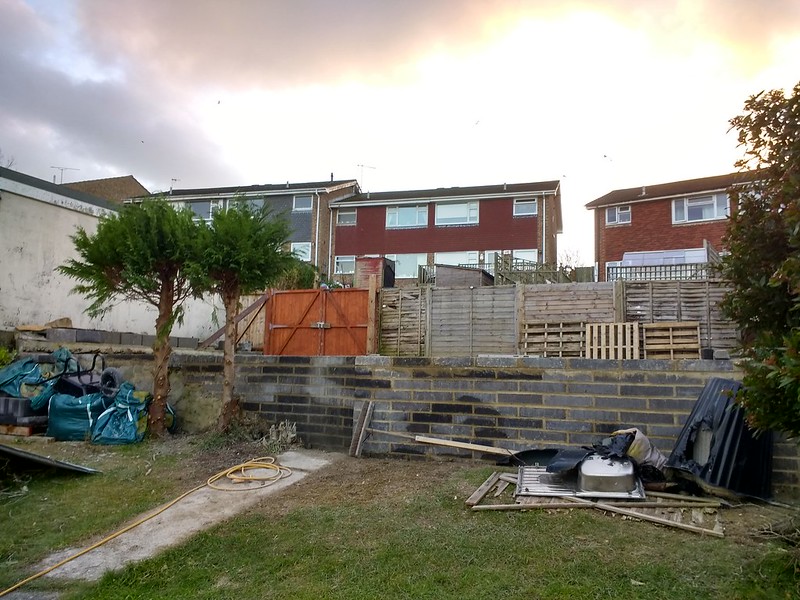
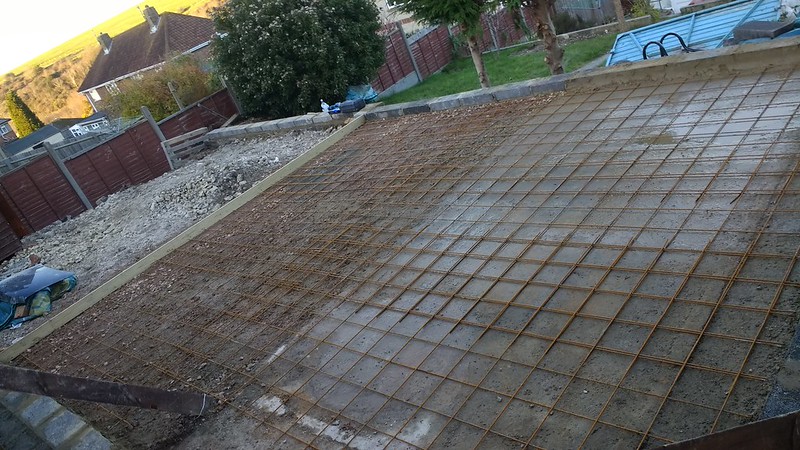
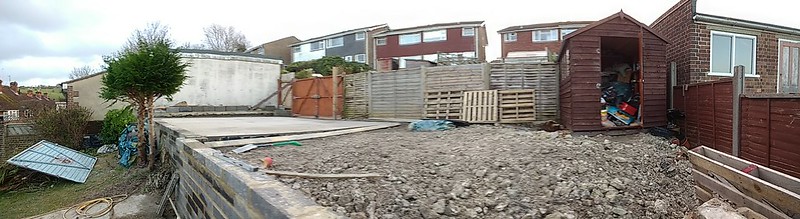
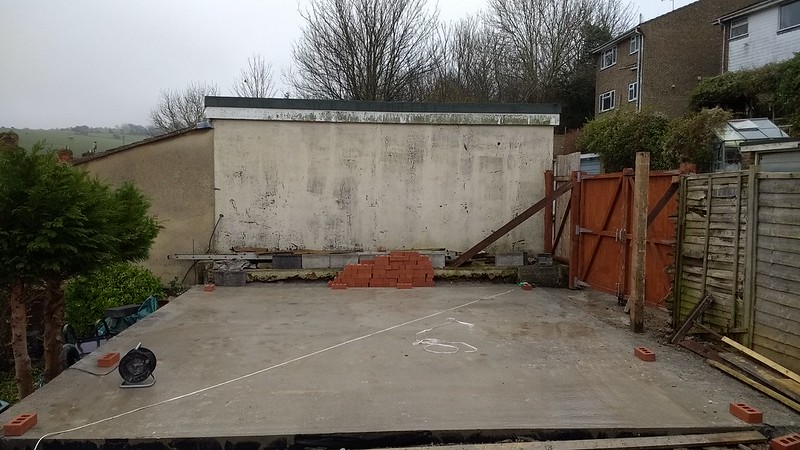
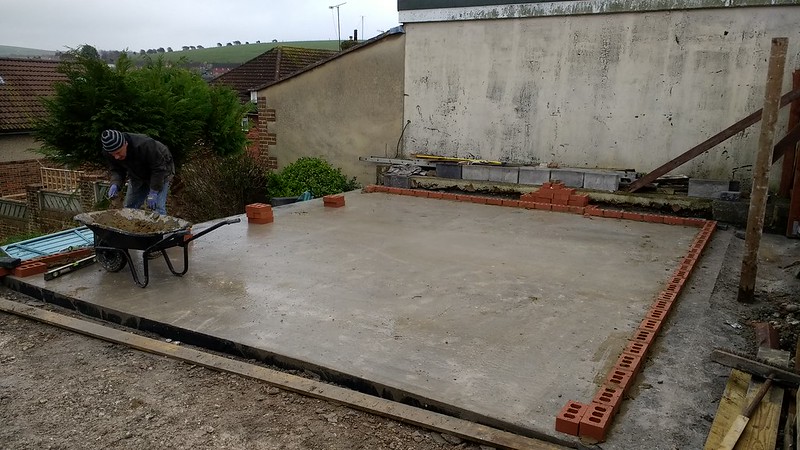
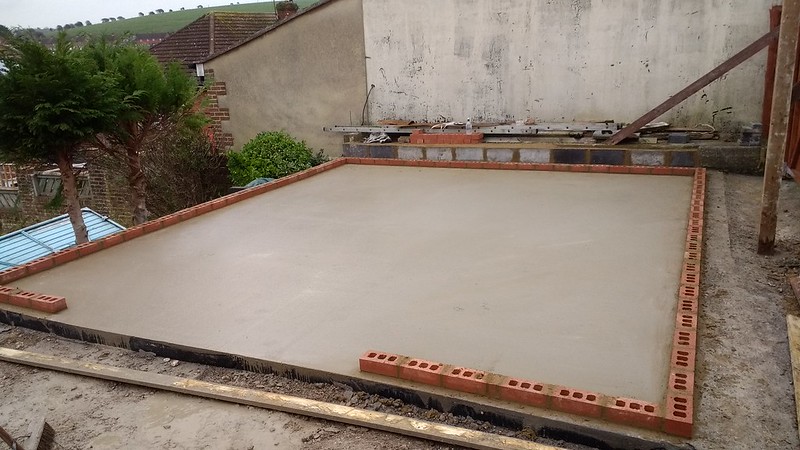
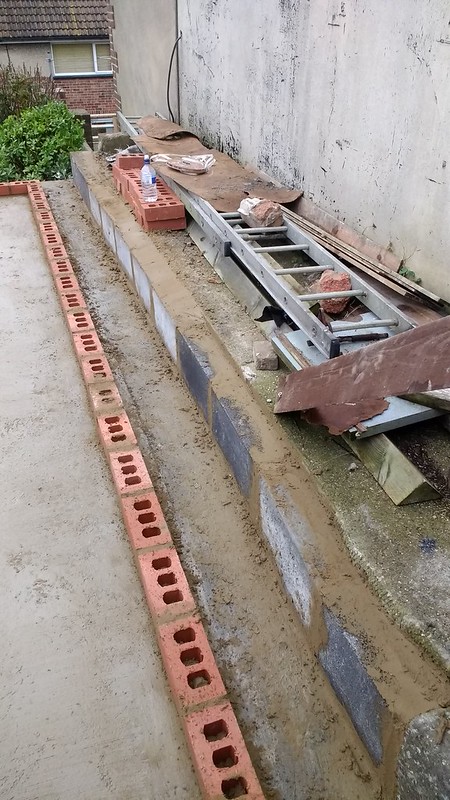
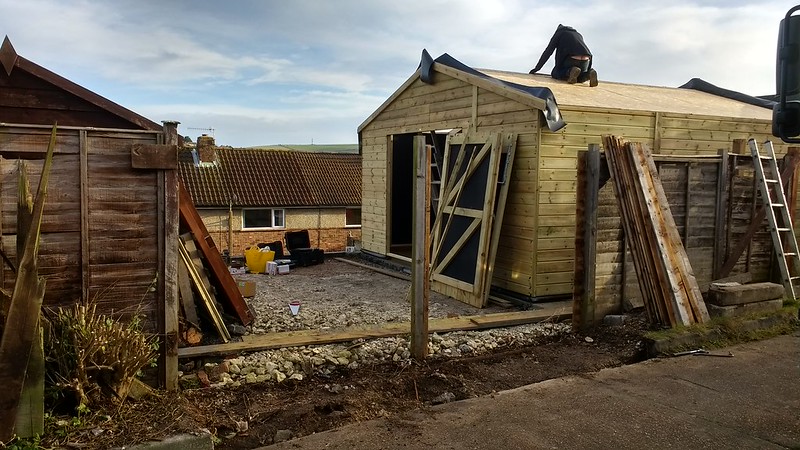
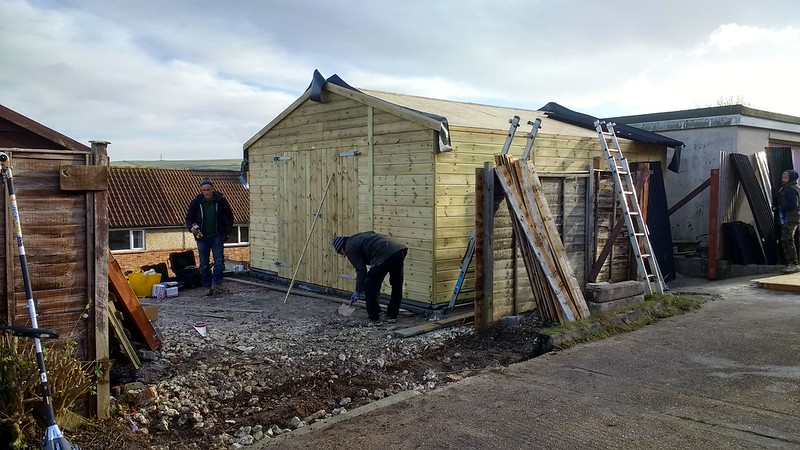
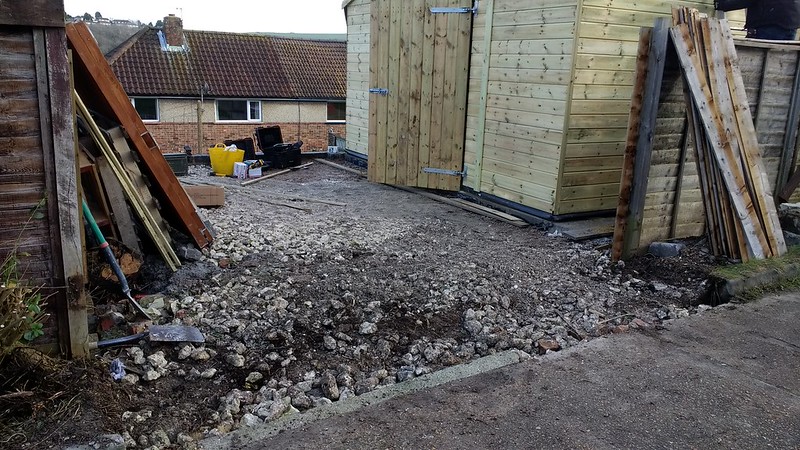
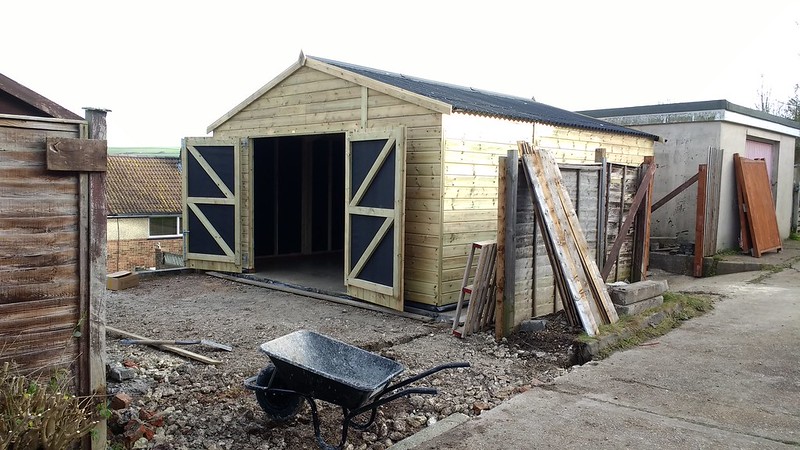
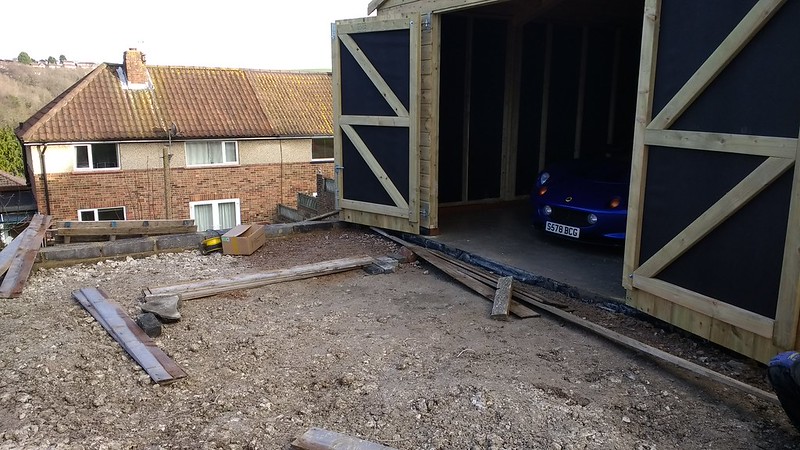
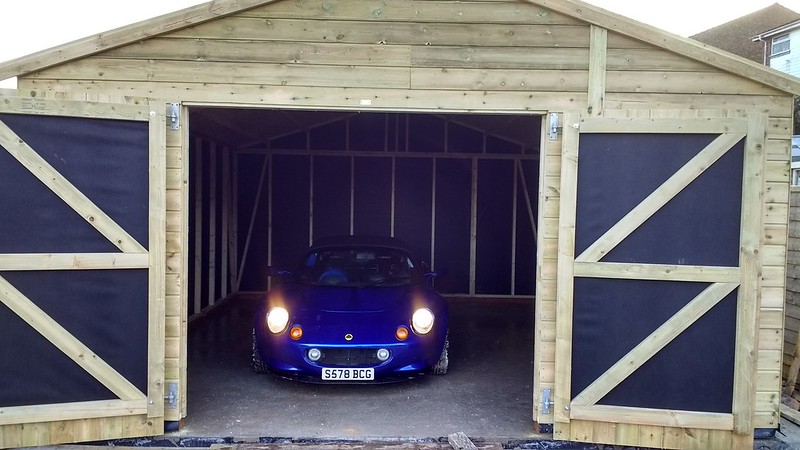
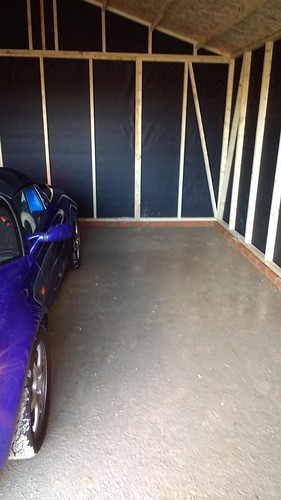
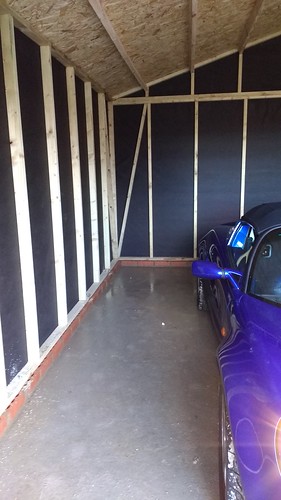
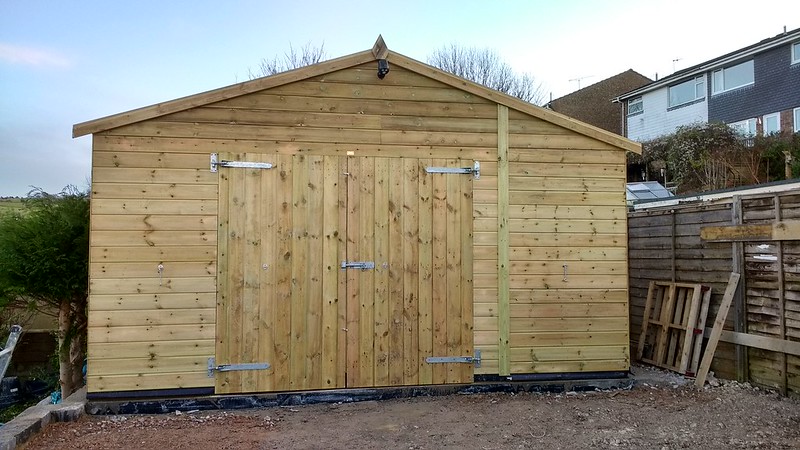
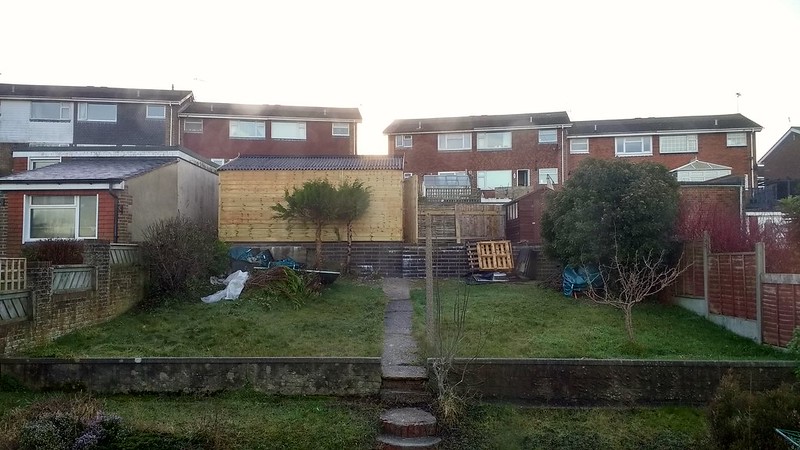
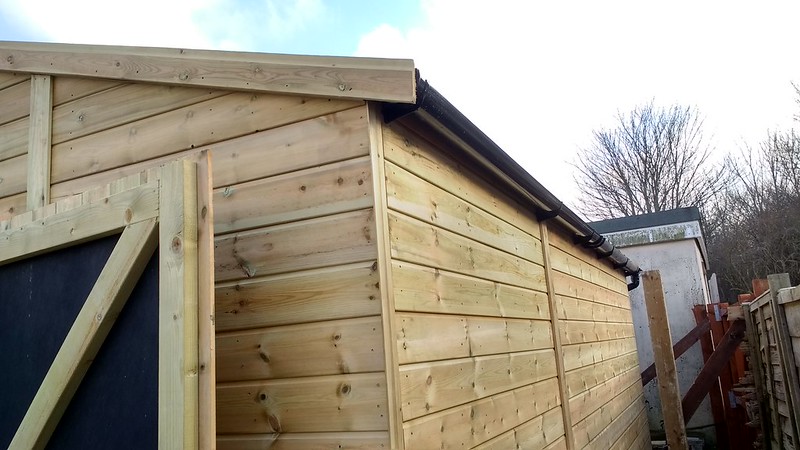
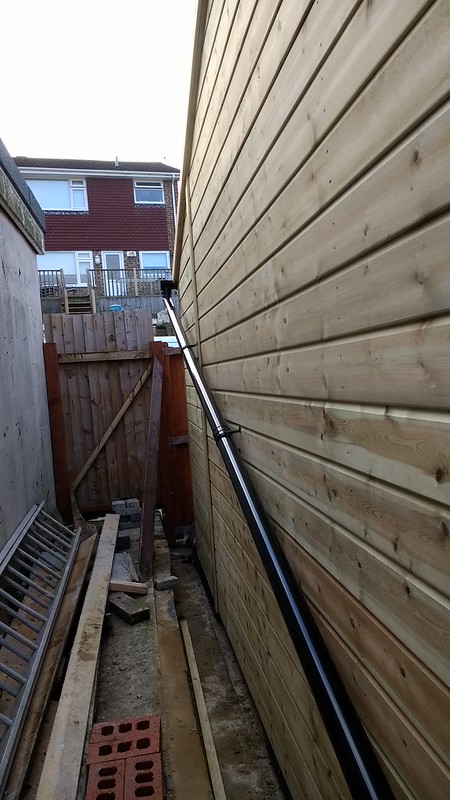
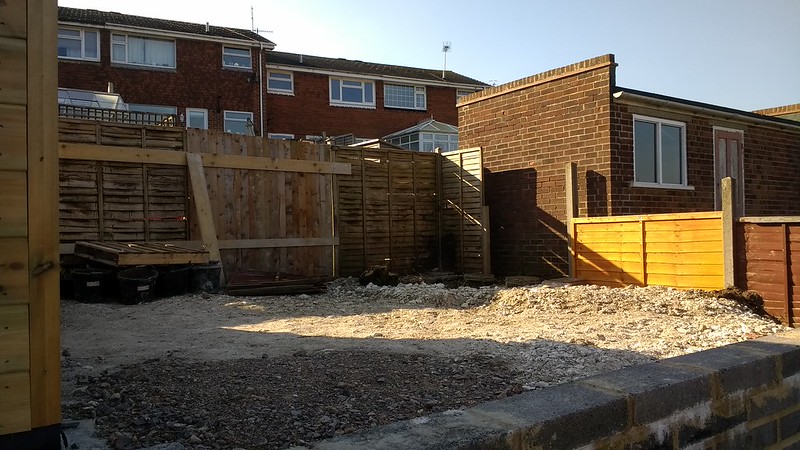
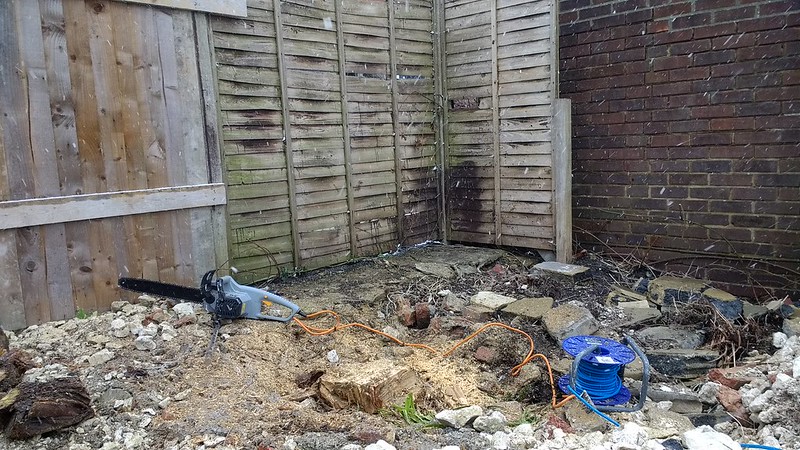
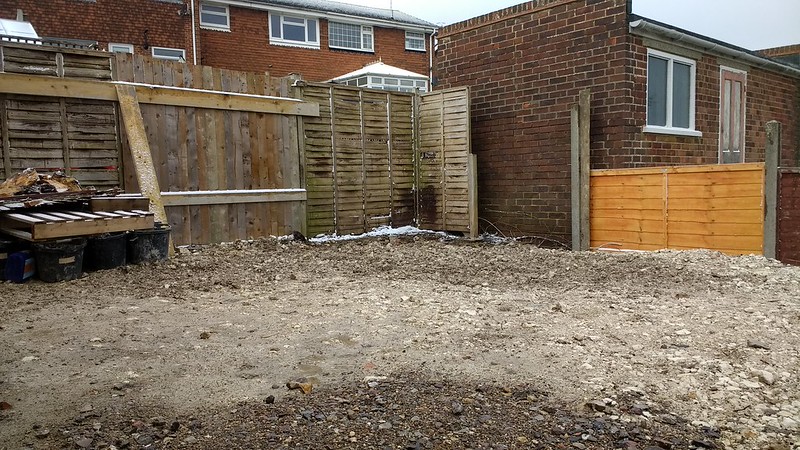
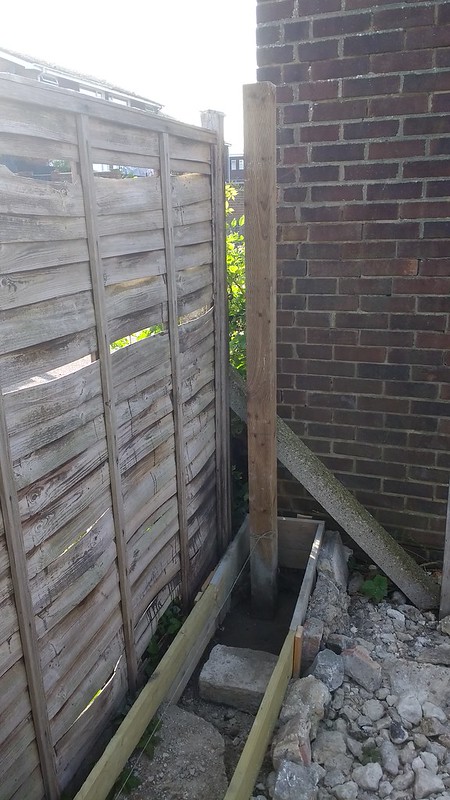
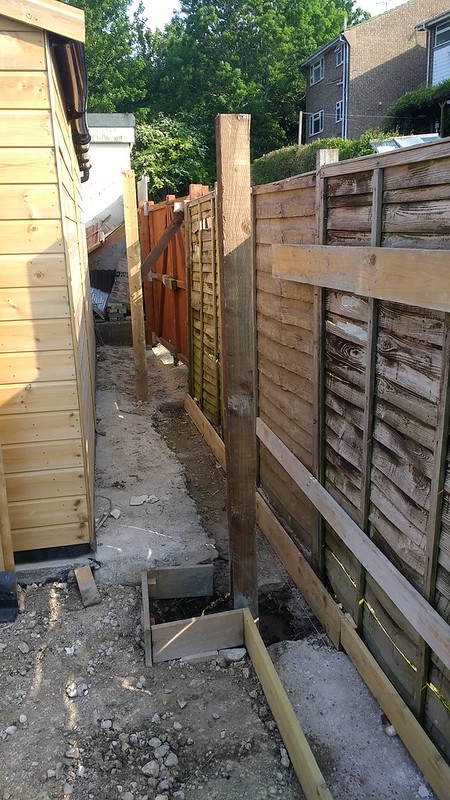
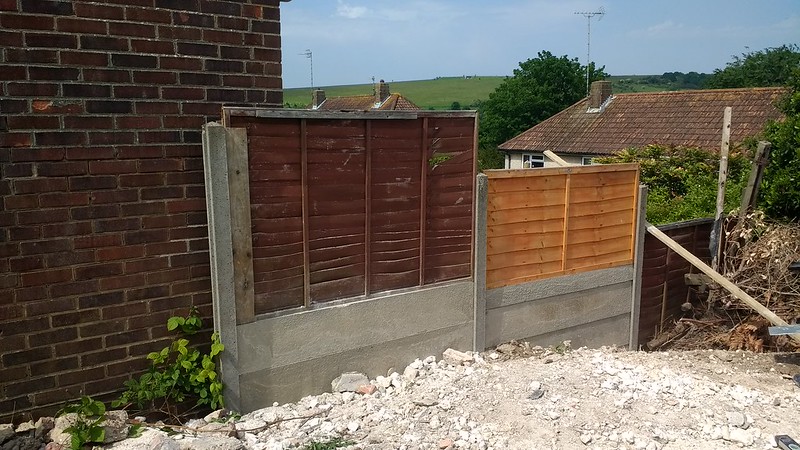
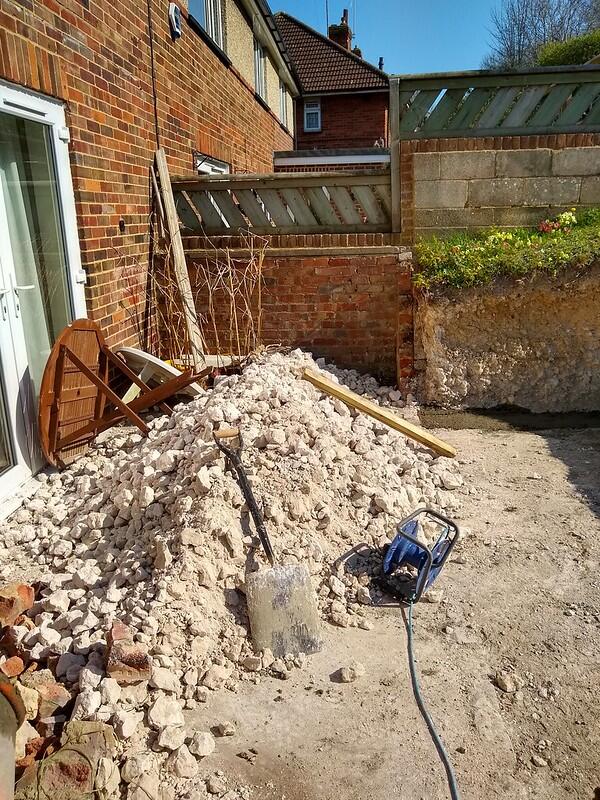
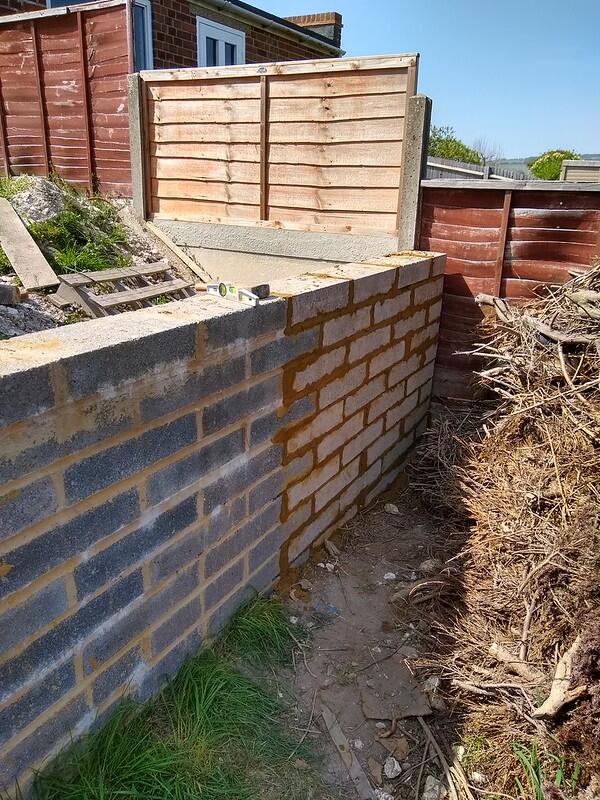
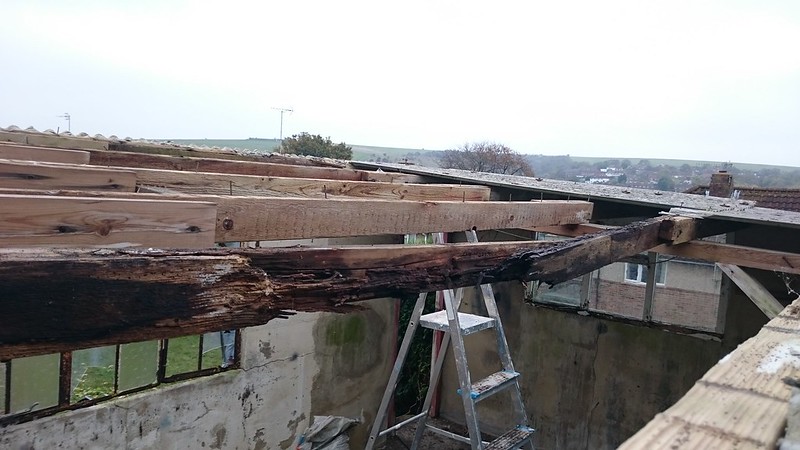
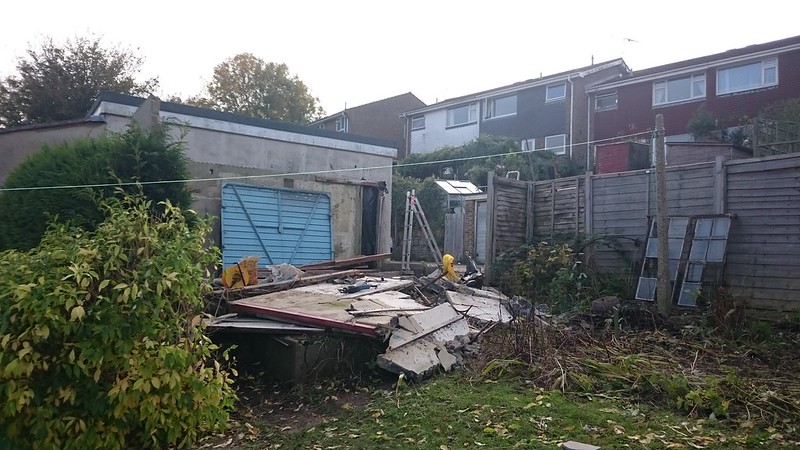
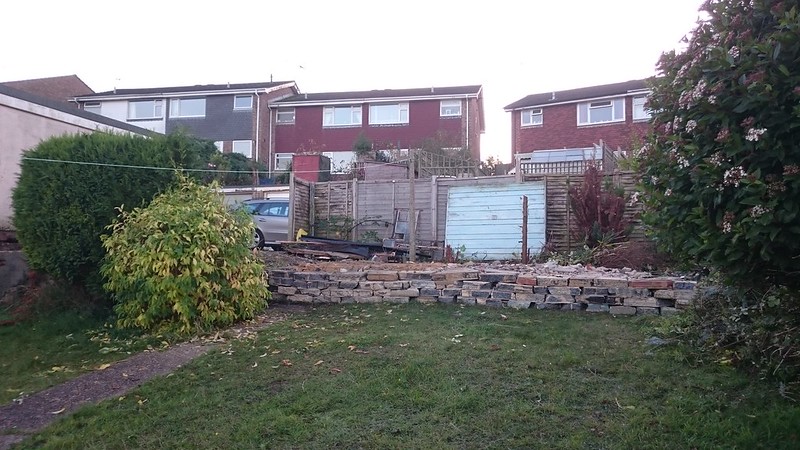
At this point I had a rough idea of the future goal. I wanted to level off the top of the garden across the whole width and build a double garage, orientated width ways across the garden (so 90 degrees from the original) and the doors would be on the right hand side. At 5.5m long, it would take about half the width of the garden, leaving another 5m in front of the garage doors for a hard stand area to pull out of the garage onto for working on/washing the car etc or providing parking for another car. With this in mind, the old garage wall was roughly re-laid across the garden to start building up the level. You can quite clearly see the slope I’m working with here and I would have to build up to about 1m height to create a level with the end/top of the garden.

DSC_0025_2 by zimbarbaluba, on Flickr
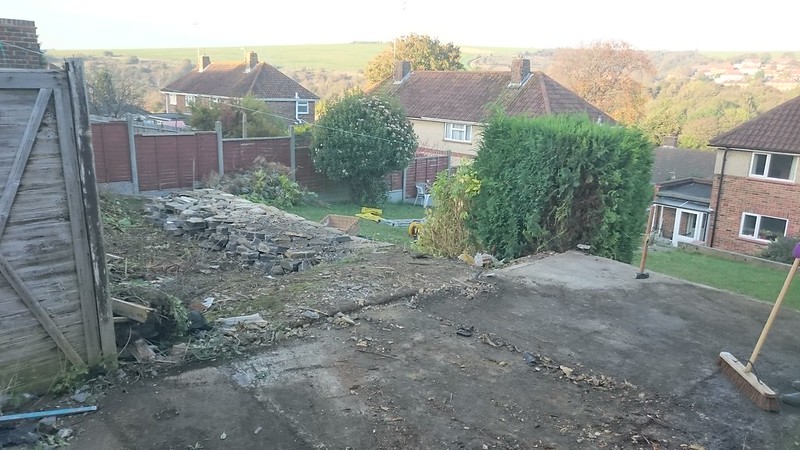
DSC_0023_2 by zimbarbaluba, on Flickr

DSC_0031_2 by zimbarbaluba, on Flickr

I built a shed so we could move the garage junk and tools out of the utility room, moved the mx-5 into place and fenced off the gap where the garage had been, this was later replaced with an opening gate when I replaced the MX-5. We then focused on redecorating the whole house.


DSC_0113_5 by zimbarbaluba, on Flickr

There was money left in the budget after decorating and the plan was to use that for the garage build. However, the kitchen, which we thought we could live with as was, turned out to be a disgusting mess and 6 months later I decided to redirect that money and completely gutted and replaced the whole kitchen (that whole build is documented in a time lapse on YouTube somewhere if you want help going to sleep at night). I saved whatever I could over the next few months, and when there was enough money in the bank again I had a tough decision to make:
Build a garage or buy a new track toy?

It seemed daft to have a garage without a fun car to put in it so I went out and bought this little Lotus.


2017-05-31_02-55-12~2 by zimbarbaluba, on Flickr

The poor thing suffered being kept outside all through winter 2016/17 so again, I put my mind to saving up some money to give it a home. That brings us up to September of 2017. Budget severely restricted I now had to find the most economical way of getting a garage built before Christmas. I settled on a wooden garage from Chart Garages, 16’ wide and 18’ long. This meant I could use the concrete base from the old garage (which was 17’ long) and just level off the rest of the garden up to that height.

The top of the garden had become very overgrown so a few months earlier I had cleared away most of the weeds, only for them to have completely grown back again over summer


IMG_20170902_135615960_HDR by zimbarbaluba, on Flickr


IMG_20170902_135618746_HDR by zimbarbaluba, on Flickr

I cleared them again and needed to find a way of getting a lot of hardcore to start leveling off the slope.


IMG_20170317_144621964 by zimbarbaluba, on Flickr

It was going to be quite expensive to buy something in, so I spent a month digging out a new patio area at the bottom of the garden outside our living room and carrying the waste up the garden, 2 buckets at a time.


IMG_20170923_170118910 by zimbarbaluba, on Flickr

IMG_20170923_152232628 by zimbarbaluba, on Flickr

It’s all chalk so with a big hammer drill and some sweat we started to level off the garage area.


IMG_20170909_120736313_HDR by zimbarbaluba, on Flickr


IMG_20170917_163220510~01 by zimbarbaluba, on Flickr


IMG_20170909_163354388_HDR~01 by zimbarbaluba, on Flickr


IMG_20171008_173133133 by zimbarbaluba, on Flickr

At the same time I started digging a trench for foundations for a retaining wall.


IMG_20171005_183154560 by zimbarbaluba, on Flickr


IMG_20171008_173219244 by zimbarbaluba, on Flickr

With the trench dug, we spent a day mixing concrete and filling in the hole again.


IMG_20171014_124253379 by zimbarbaluba, on Flickr


IMG_20171014_170028287 by zimbarbaluba, on Flickr

The retaining wall would line up with the existing concrete slab and build out from there. I put a kink in it where the garage stops and the hard stand starts, to give a little extra turning room. And not at all because I dug the first part of the trench in the wrong place…


IMG_20171014_170044641 by zimbarbaluba, on Flickr

The concrete blocks for the wall arrived


IMG_20171018_130435540 by zimbarbaluba, on Flickr


IMG_20171018_141247953_HDR by zimbarbaluba, on Flickr


And the first block was laid, quickly followed by the rest of the wall. This was all during Storm Brian in October 2017. Myself, my dad and his experienced bricklayer friend had it up in a day while dodging rain showers,


IMG_20171021_104806946 by zimbarbaluba, on Flickr


IMG_20171021_163407492 by zimbarbaluba, on Flickr


IMG_20171021_163505148 by zimbarbaluba, on Flickr


IMG_20171123_153617899_HDR by zimbarbaluba, on Flickr

After the mortar had strengthened, I finished backfilling and making level. By this point, the garage had been ordered and a build date supplied. I had 6 weeks to finish getting the site ready. However, the budget was getting stretched thin too so I decided to focus for now only on the half of the site where the garage would go. The second half for the hardstand/driveway area could be finished afterwards. The MOT Type 1 went in and was whacked down.


IMG_20171105_124121915 by zimbarbaluba, on Flickr


IMG_20171105_164500163 by zimbarbaluba, on Flickr

A frame to hold (and level) the concrete slab was put in. For this I laid concrete blocks on 3 sides, with wooden shuttering on the front edge. I trial fitted the steel mesh and cut it down to size. Here you can see I have a problem with an existing gate/fence post diagonal support, which is concreted in right where the slab is going to be.


IMG_20171112_153309415_HDR by zimbarbaluba, on Flickr


IMG_20171112_153341795 by zimbarbaluba, on Flickr

I shored up behind the blocks with concrete, filled in a gap behind the rear edge and the neighbour’s boundary and sunk and concreted in a new fence post to re-fix the diagonal support.


IMG_20171112_140235054 by zimbarbaluba, on Flickr


IMG_20171112_140247539 by zimbarbaluba, on Flickr


IMG_20171119_132817547 by zimbarbaluba, on Flickr

I then laid the DPM sheet, put the steel mesh on spacers and tied it together.


IMG_20171119_132833407_HDR by zimbarbaluba, on Flickr

The concrete arrived (3.5m3) and was poured straight into the hole.

IMG-20171122-WA0007 by zimbarbaluba, on Flickr

We leveled and smoothed it off best we could but it didn’t really dry fast enough to get the best surface before daylight ran out (and then it rained).


IMG_20171122_155042718 by zimbarbaluba, on Flickr

The following day I found it looking like an acne riddled teenager with a pockmarked surface. Less than ideal but as the plan was to cover the floor inside the garage anyway so tried not to get too upset! This is how the site looked at this point (end of November 2017). After the garage is built, the shed will be moved and three fence panels taken down, this will be the new access point to the garage with a long sliding gate.


IMG_20171123_153754152 by zimbarbaluba, on Flickr


IMG_20171123_153815034 by zimbarbaluba, on Flickr

At this point, you can start to appreciate this was a fair amount of groundworks and prep required. It might help to show the lane access at the back of my property which explains the difficulty I had accessing my garage/driveway previously.

Here you can see the problem with the situation. My inconsiderate neighbours insist on parking their vans/trucks directly opposite the gate which used to provide access to my off road parking. To even get the elise in here required a multiple point turn if the neighbours’ vehicles were there. I avoided going out if it involved returning in the dark as it was just too stressful. One cold morning I left with the windows still steamed up and caught the rear wing on a fence post when I misjudged the turn. Luckily no significant damage was done but I just got fed up with the situation. The final straw was when they threatened to punch my girlfriend one night when she politely asked them to move their van. They are not nice people.

The new gate will be at the other side of my garden, combined with the turn off the lane being more of a parallel park turn instead of a 90degree swing off the road I will have a lot more room to maneuver. This means taking out the 3 fence panels on the left.

I first had to cut down some bushes, then remove the kerb stones and dig out the soil (and more chalk) to just below road level so I can resurface it.

The kerb stones are extremely heavy, I had to smash the first one out but after that I was able to lever the rest out with a long metal bar. I couldn’t move them far on my own. All of this took me about 4 to 5 hours, I’m not getting much more working time in the daylight on a weekend at the moment.

I went to Wickes and loaded the car up with 100 engineering bricks.

The garage will be built on a frame of these, so we set about measuring up, checking and double checking for ‘squareness’.

The bricks then went down, this took us about 20-30 minutes for each side of the square.

This was as per the design spec sent by the garage company. The doors in the front are offset to the left.
We also tidied up along the back edge where the boundary with my next door neighbour is to prevent it crumbing away. Originally this was right up against the garage (which I knocked down). Later I realised there was a big design flaw here which is still plaguing me to this day. Because I didn’t install any drain along this edge, whenever it rains heavily the water pools up in the channel formed between the end wall of my garage and the boundary wall. Eventually this finds its way into my garage, puddling up in the rear corners.

Now I was ready for the garage delivery which was about 1.5 weeks away. I still had to finish leveling of the area which will be in front of the garage and sorting out the new access point in the fence.

The tricky part of the situation here was that row of houses behind mine was built about 15 years after mine. Before then the lane was only used for access to the rear of our properties. However, when they built those houses, their deeds were drawn up to include the section of lane immediately behind their plot of land, which previously wasn’t on anyone’s deeds, meaning they now effectively own that part of the lane and I have no authority to say they can’t park there. We have right of access, and their argument is I can access my property (even though it’s very difficult). Any decent human being would be more considerate, perhaps park on the other side of the lane which would allow me to swing around their vehicle onto my property, but that would mean they have to walk a few steps further each day which is apparently too much to ask. Man maths obviously means the best solution to this problem is give myself a nice big garage and hardstanding.


Just before Christmas 2017 there was a big step. In fact it was mid week, a couple of days before I went away for 3 weeks over christmas.

The guys from Chart garages turned up when they promised - 5 minutes past 7 in the morning. We had to wait for the neighbours to move vehicles - I got 2 different rather grumpy people out of their beds, removed my gates for better access and by 8am the build had started.

25 minutes later it looked like this

The first part of the roof went on and while I was doing the day job, my father starting removing some fence panels temporarily so I could get the lotus inside before I went on my holiday.

We leveled out the gap/hole from the lane roughly so I could drive the car across, and the doors went on.

The Onduline roof sheets went on next.

And it was finished. The guys packed up and were on their way to the next job by 12, it was all very fast.

Bearing in mind I basically had to find the cheapest way possible to get the biggest size garage I could, I’m very happy with the result and construction. I didn’t add any windows so will obviously need to run power up there, once it’s dried out I will think about flooring options. Also needs guttering (which they would do for me but I think I can do it cheaper) and some drainage issues tidying up. I’m thinking insulate, board it out and paint the internal walls white.

Moving the lotus in was a challenge. A very tight turn, restricted by the shed (next task is to remove it) and uneven ground with a low car. A lot of shuffling back and forth, planks of wood and bricks under the wheels and I made it.

With the car parked in this position, you can see there is plenty of room all around

The fence was rapidly rebuilt, stronger than before so it will last until I move the shed and build the new gate.

and a battery powered security light fitted. I’ve had one of these on the side access of the house for 2 years now, still on the original batteries. Later when I ran power up there I replaced this with a mains powered LED security lamp.

And the view from upstairs window in the house

Now, clearly having the lotus fenced in isn’t ideal so I had to try and sort the next phase out as quickly as possible, especially seeing as the MOT ran out shortly after. Empty the shed contents into the garage, remove the shed, finish leveling out the rest of the base and build a new sliding gate for access.

Another great project thread.

What product are you going to coat the exterior wooden sides in ?

Well to be honest that’s still tbc because it’s 3.5 years later and I’ve still not done it. It has been scheduled as one of the projects for this summer though.

A great read. Not afraid of hard work, then?

I prefer to get stuck in myself if I can. This particular project has dragged on way too long though. More updates to come.

Thanks for sharing Andy, you’ve created a nice space there! :thumbup:

Great work that, I’d never in a million years be able to look at that property/garden/old garage and be able to picture a double garage going there - I just don’t have the vision for it!

Neighbours sound like they need to shit a hedgehog though.

One weekend in January 2018 I went and bought lots of bits of plastic and cobbled (bodged) together some gutters. The garage people would have done this (better) for me but it was a minimum cost of £150. I think I spent about £70 on parts and did it myself.

I then fitted an alarm to the garage and moved some stuff from the shed into the garage. I decided on a space in the garden which meant I could keep the shed for garden’y stuff and not have the garage full of lawnmower etc.

Several weeks of slow progress saw me to the end of Feb 2018 (flu, bad weather, other commitments).

I cleared an area next to the garage to move the shed to. Threw together something quick and dirty which resembled a level base and asked everyone I knew to come over and help move the shed. It turns out 8 pairs of hands was more than enough to lift the empty structure.

We lifted it down over the wall

Swung it around and left it in the new location.

This left me with the area clear to finish leveling for the hard stand and build a new gate etc.

I tried to continue digging out the chalk to level off the area but the ground was just way too cold and hard to make any progress. There is an annoying tree stump in the way too, in the process of removing this I somehow managed to land a sledgehammer blow on two of my fingers which swelled and bruised up nicely. Snow was then forecast for the following week.

I also spent some more time clearing the area behind the fence, where there is another big plant stump and a concrete post sunk into the ground. I had a track day booked for April and the car had to be out and MOT’d before then.

Progress was very slow over the next few months, first a lot of snowy weather, then a holiday to Italy over Easter, shortly followed by the arrival of a new puppy to distract us constantly.

First task was to remove a tree stump which was in the far corner. Screwfix purchase of a £50 electric chainsaw did the job nicely.

It even snowed a bit while I was doing this. I finished leveling off the rest of the area so I would be able to get the car out without scraping splitters, sills etc

This was what I’m still dealing with behind the fence. Two kerbstones still to remove, the remains of a concrete post and a few big plant roots.

The main task was to prepare the concrete footings for the sliding gate to run on and the gate posts.
I dug the hole for the main support / guide post and dug out the footings for the track run off area

Then I ran out of time. I had to get the car out of the garage and MOT’d, then go up to Snetterton for a trackday.

To get the car in and out we had to take down two of the fence panels again, putting them back up afterwards. This means that although the car was now back in the garage after the trackday, it won’t be coming out again until I actually had a gate. The odds of being able to use the car in the summer weren’t looking good.

On the early May bank holiday I managed to get a bit more done. I dug out the hole for the receiving post - the one which the gate will close onto and lock shut against. I also measured up so I could buy materials to put in the shuttering for a concrete pour. This will form the base of the track which the gate will run along. The gate track will be almost 12m long - the gate itself will be 6m in length.

Got some more done over the end of May bank holiday weekend. As mentioned before, the next big step was to build a sliding gate. The framework was finished for a concrete pour. This channel will be where the gate runs along on a rail. It’s about 12m long, the entire width of my garden, as the gate will be 6m wide.

In these photos you can also see I’ve set the two support posts - one at the end which the gate will close and secure to and one at the other side of the opening, from which the gate will be supported and guided from while opening and closing. If I was to do this again I’d use steel posts - I can’t remember why I chose wooden ones at the time.


I had to raise the ground height of the fence line. The easiest way to do this was by installing some additional gravel boards between the fence posts. Although not ideal it will be a strong enough solution so I can run the hard standing right up to the fence line. The gravel boards are freaking heavy to lift over head height.

I then went back into the lane behind the houses and finished removing the final kerb stones so I can build the new ramp access onto my land.

I still had to deal with these big root stumps and concrete post.


So on Monday morning I had a spare hour and started digging out around the root, once I’ve cleared enough of the dirt and chalk I’ll be able to get a chainsaw in there to remove the rest.

Another 4 hours of digging on a Sunday morning and I’d finally cleared all the roots, stumps and concrete posts out of the way.

This is a pile of stuff that came out

And this is what it looks like now. I still had to dig out the chalk across the other half of the opening again, it was temporarily put there so I could drive the car into the garage but now needs to come out so I’ll have a good base to pour concrete for a ramp up from the lane.

The project still essentially seems to be about digging a hole in order to fill it with something else, rinse and repeat.

The steel for the gate frame has been ordered. And then 3 days later I called to change the order because I got a measurement wrong (height, didn’t take into account the extra the wheels would add to the overall height).

Roller guides, wheels, rails etc have all arrived. I’ve contacted a local ‘mobile welder’ who can come and weld the box section for the frame together for me too. It was looking like I could use the Elise again some time in July if all went well.

Concrete pour on a Wednesday (middle of June 2018), having finished the shuttering for the gate/rail footings and the ramp from the lane up to the area in front of the garage. The concrete truck arrived, it took about an hour to pour and level off 1.8m3 of C30 mix concrete.

And down the side of the garage, behind the fence, where the gate run off will be (so when the gate is open)

And how it looked from the back lane, the first time I’ve seen the full 6m opening width because I’d not taken all the fence panels down before. This shows a bit better the gradient of the ramp, should be easy enough to get the lotus up that.

At the start of July a big milestone was reached - full access to my garage for the first time since it was built 7 months previously!

I designed a gate frame and bought in some hollow section steel and hired a mobile welding man to come and stick it together. I’m really pleased with his work - he arrived on a Saturday morning, measured and set everything up and had welded it together before lunchtime for £100 and change.

This is a 100x50mm bottom rail, with all other pieces being 50x50mm and 3mm wall thickness. It’s 6m long, 170cm tall and weighs about 100kg.

We bolted the wheels on and bolted the rail down into the concrete. Set the gate in place and then gave it a couple of coats of paint.

Here you can see the roller guide bracket. This is basically enough to support the gate through it’s full width of operation. However, I was concerned that on windy days with the gate partially open that it is a lot of leverage on a single support so I’ve also put in a second guide half way down the run off area for extra support.

I then attached some wood batons to the gate, the bolts go through the wood, sandwiching the gate frame between. This means no wood is actually attached to the metal so differing expansion rates won’t cause a problem.

And then I started to clad the front of the gate with feather edge boards. Until I ran out because I had changed the design and now didn’t have enough.

A week later, work continued:

Followed by a lick of paint. Now I really need to replace the old fence panels at some point! (errr… 2 years later and I’ve still not done this but it’s another job for this summer!)

Two years on and the gate is still holding up well.

Things took a bit of a diversion at this point. I left the garage and gate project how it was for the summer of 2018, it was good enough to get the Elise in and out. Remember how I’d dug that big hole for a patio outside the back doors?

Over the next 18 months the chalk wall remaining had gradually collapsed. I needed to build a retaining wall so first I had to clear out all the fallen debris and dig the trench/footings for the wall. A fair amount of chalk had to come out. The bricklayer friend was going to be called upon to finish the end of the wall up at the garage hard stand (it was not run all the way to the fence line originally) so it made sense he could do the patio wall at the same time.


IMG_20190420_160138438_HDR by zimbarbaluba, on Flickr

The next day, we mixed up and poured the concrete for the wall foundation, I think this was about 8 or 9 loads in the mixer. The worst part really was that all the ballast etc had been delivered to the top of the garden so it had to be carried in buckets all the way down the garden first.


IMG_20190420_160126295 by zimbarbaluba, on Flickr

When the retaining wall was built at the top of the garden for the garage and driveway, at the time I was thinking I might put steps up at the side/end so we never finished the wall. I’ve since changed my mind and wanted to take the wall all the way to my boundary. Last year I had dug out the footings for this so now we just had to pour the concrete and then finish building the wall


IMG_20190422_135447277_HDR by zimbarbaluba, on Flickr

Now that this has finally been completed I can finish leveling off the drive area and get that concreted and finished.