Point taken. I like things I can easily understand ![]()
Not much progress; I really do need to buy a cage and get the bulkhead in really, as that will let me get on with fitting the engine…
In the mean time take one set of wheels from the shop of Mr English

Make them shine in a nice anthracite.


Well the engine was pulled from the civic as I’ve got to the point on the build where I’m waiting on parts. I’m struggling to locate a safety devices cage, none in stock anywhere. I’ve had an order in for two weeks but still no delivery date so I’m just sat waiting. I’m annoyed with myself really on this as I could have ordered one a while back when I was working stupid hours and then fitted it when I had more time on my hands…So in the mean time I’ve been getting on with a number of other jobs.
Pedal box pulled from my other chassis cleaned up, fitted with new pedals. It’s now gone off to be fitted with twin master cylinders and a bias bar, should be back in a couple of weeks.


I’ve picked up a pair of early 4 pot ap calipers which I’ll run up front with the standard ap two pot (front) calipers on radial mounts for the rear. The current chassis only has a couple of brake lines installed so I’ll probably run braided lines throughout.

Standard bulkhead has been cut out of the other car which took quite a while to do without damaging it usual way using a knife and hot air gun.


This was then covered in the standard gold bling DEI bulkhead covering that is obligatory for any build these days! You can spot that I’ve removed the indentations and holes along with glassing over the hinge recess to clean it up.

Dash panels have been cleaned up

I’ve then been on the look out for other various parts the main ones being a front bonnet and a centre rear brake light what are not as easy to come by as they once were. The latter was picked up from a saab breakers and the former I paid too much for really but at least I’ve got one albeit yellow. I’m also going to use a 3" inline blower fan in this as it’s a lot lighter and less complex than the original and I also came across a cheap rear light on the bay.


A few other bits have also been acquired along the way. On the exhaust system I managed to pick up a EA 4-1 manifold many months back as a spare with the usual hairline crack at the edge of the manifold, which is common on their earlier cars (soft engine mounts). My other car had this, so 2 minutes to run another bead of weld over it at it will be perfect again. 2.5" exhaust flexi purchased to replace a damaged one on a honda like pipe I already have left over from the last build. I won’t replace this until the engine is mounted.

I’ve stuck 211 upper wishbones on the front also as I want to run this car a little lower whilst trying to keep the wishbone/ball joint at a reasonable angle. In this photo you can see a standard S1 disk mounted on the hub to check alignment only (its way to small to use on these)

I’ve picked up a set of 2 way Ohlins also. Now I’m a Nitron man so this will be something different for me and I know bugger all about them. These will need a rebuild but they have cleaned up nicely.


High flow/pressure fuel pump and webcon 3.5bar fixed FPR on this install which is slightly higher than a usual NA set up.

First compromise is for now I’m going to retain the standard steel tank. I might change this later on but its basically £600 I’d like to use elsewhere on a diff/lightweight flywheel which is a lot more difficult to install at a later date than that of a tank. The tank had a little surface corrosion but was basically in good condition

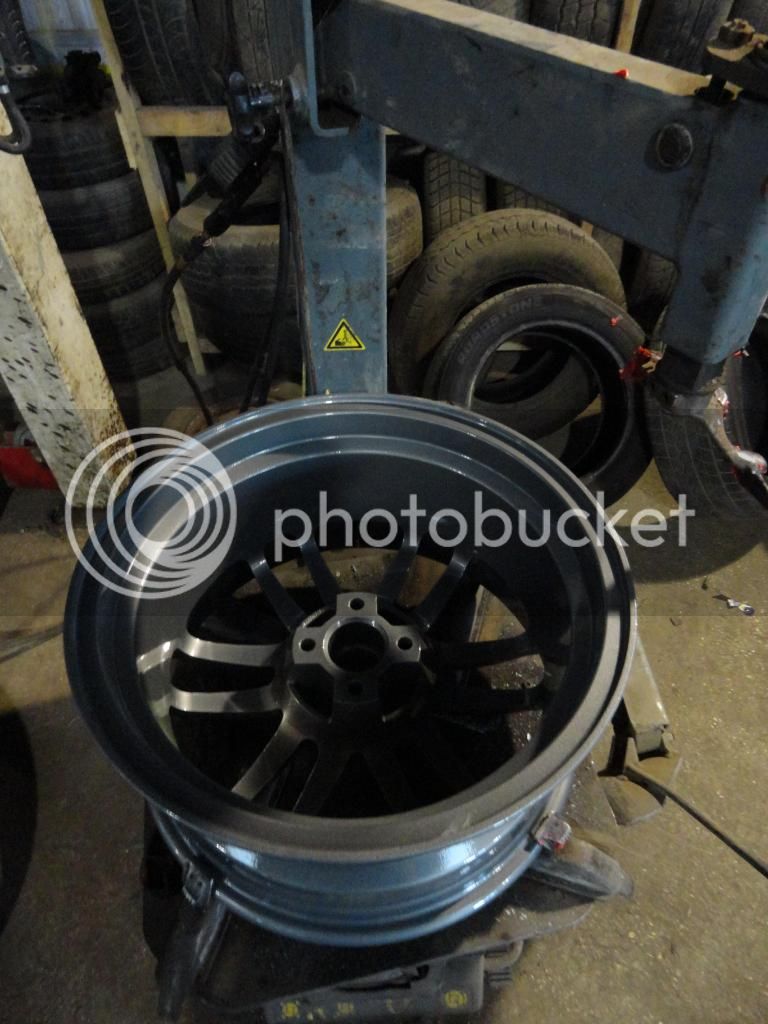
So it’s been cleaned up then painted a dark grey in water based paint. Basically this is the first time I’ve sprayed anything with a gun rather than rattle cans and its turned out very nice using a water based primer, colour and 1k lacquer. Shame no one will ever get to see it!

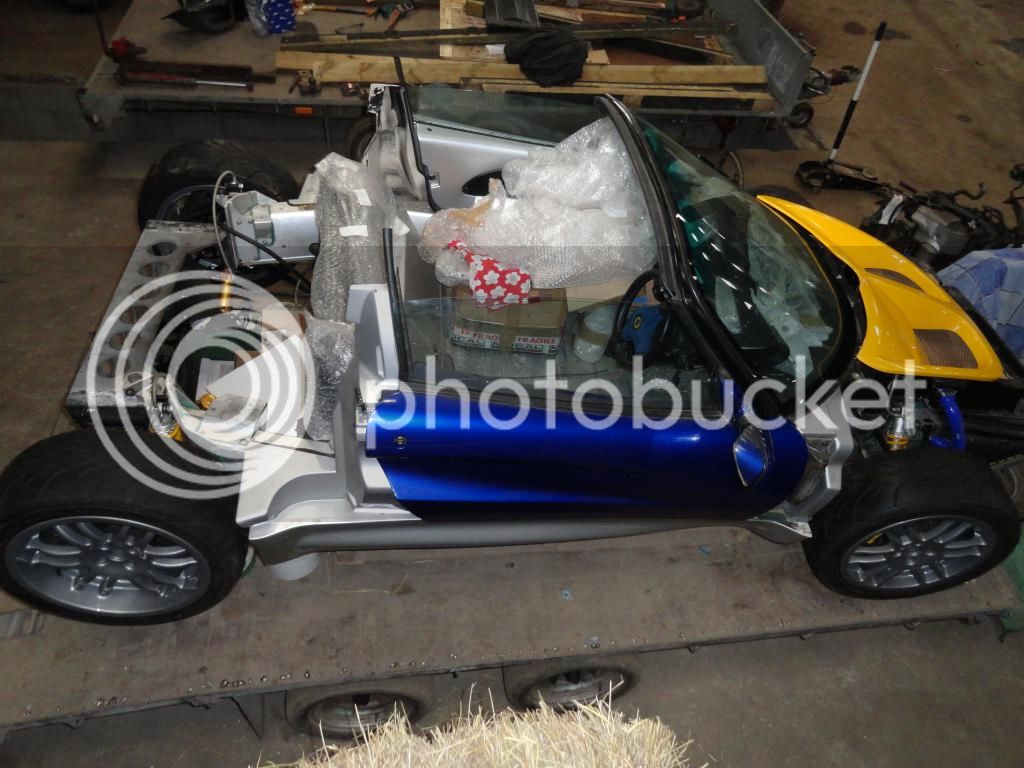
How it currently sits, looking interesting in fetching blue/yellow/silver and is full of bits that have been cleaned up ready to go back in.

You sure you want a 6 point cage Si? I have a lovely T45 4 point cage that would be perfect for you. Available now! ![]()
Dan
Looking good!!!
Tempting as it is Dan (as I’ve still no cage) it would need to be cheap as I’d need to fab’ some t45 front legs as I do want a six point cage really.
Cheers Sean. I’m at that point where its looks like big pile of expensive vaguely organised bits!
Quite a few small things done, excuse some of the poor photos from my phone.
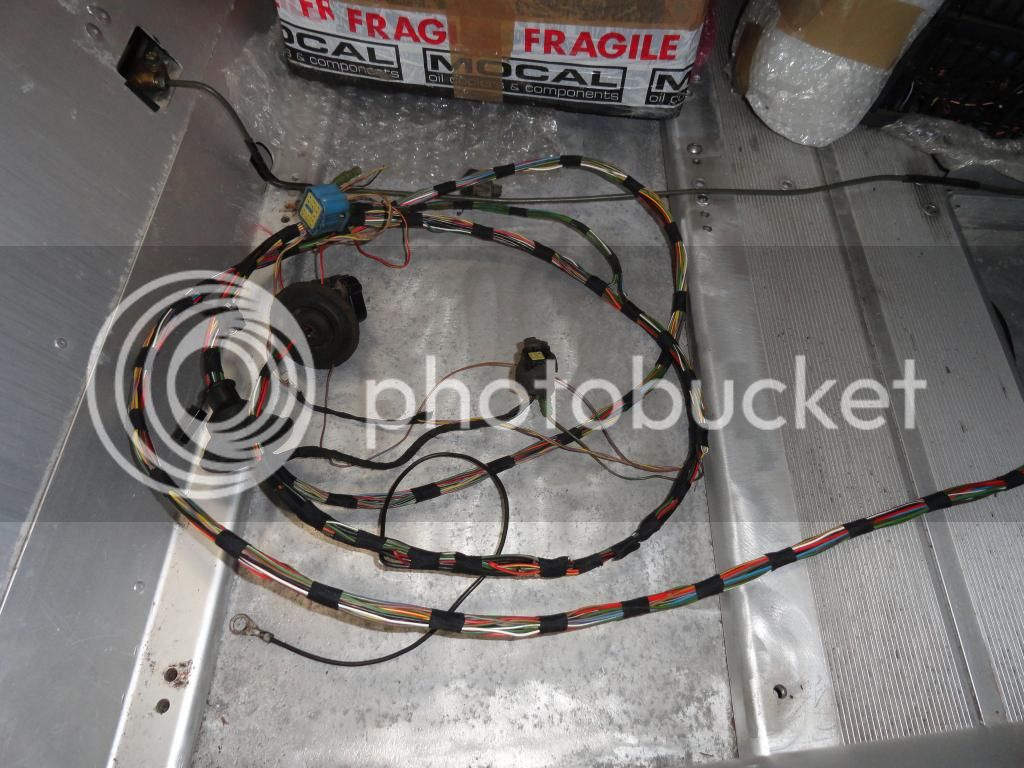
Engine loom has been pulled, gearbox dropped and the engine is now sat on the stand in its filthy state.

This is the pile of parts and hoses removed to date, which includes the heater (I’ll cover this later as its a slightly different install nothing fancy)

I’ve an RSP manifold from an FD2 on stock (bargain purchase of the bay a year or so back) which is now going to get used.

It needed the waterway cutting off, so just used the gasket as a template for the cut.


Fits just fine now


Stage two will be a larger TB and then port match it.
Aircon pump removed and new idler, tensioner and non air con belt mocked up to make sure I’ve got the right belt.

Telfon fuel lines and -6 fitttings have turned up (no photo but all black. I’m sticking with the standard S1 fuel filter they are cheap £7 and work I just swap to M14 1.5 to -6 to fit in this set up.

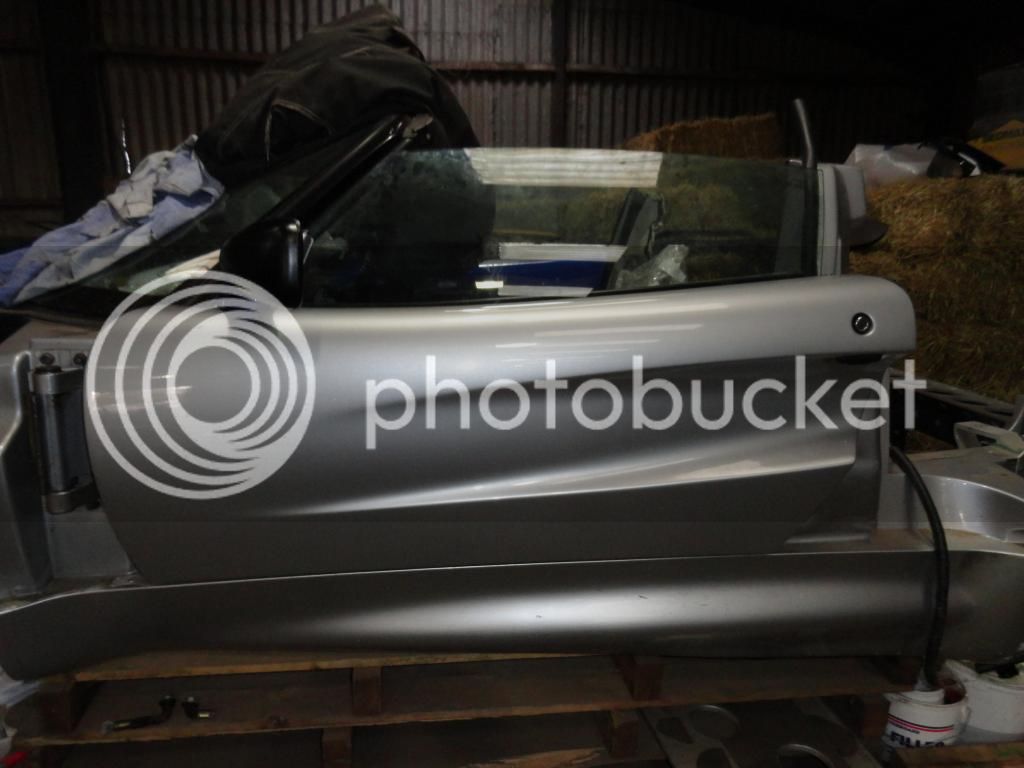
Other door beam has gone on while I get the damage to the nearside door looked at/repaired.

How does £300 sound? I converted my last 4 point to a 6 point so can send you all the photos of that if you want to fab up some front legs.
Gotta be the cheapest way to get a T45 6 point cage I would have thought and the front part is easy to make. ![]()
Dan
A few weeks have passed since I last updated this thread.
I picked up another set of doors with a view to having one normal set and possibly building a light weight set as a project later on.
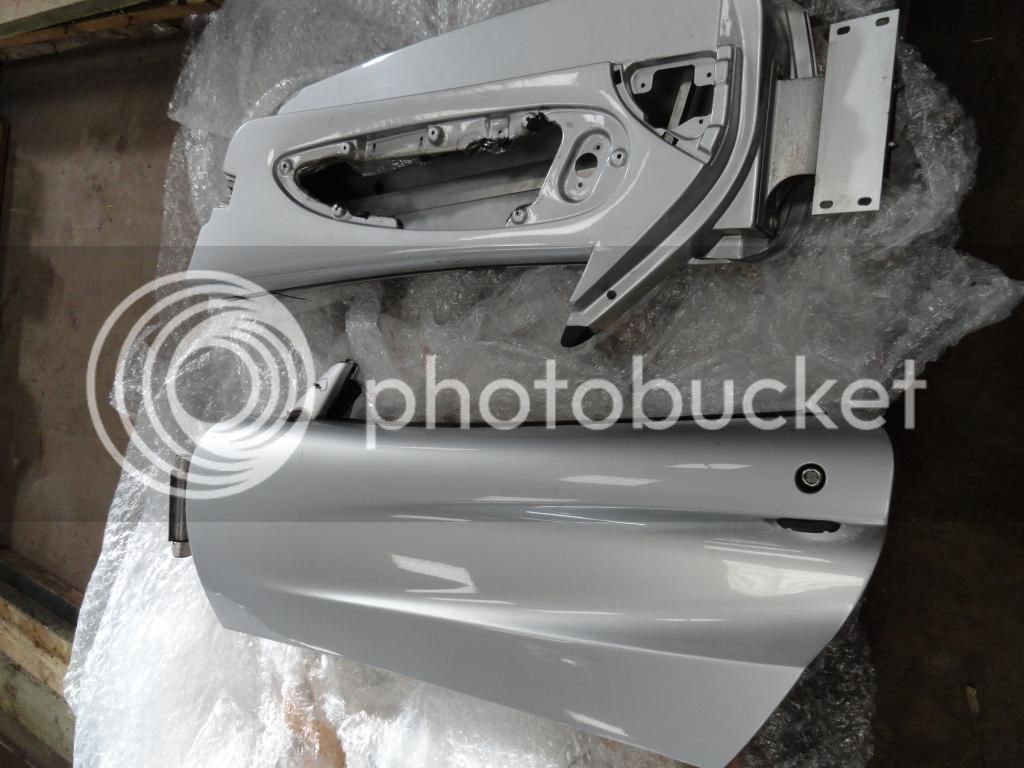
It was only really the passenger door but they aren’t exactly common so I’ll hang on to the spares…After a few hours making a single good door from the parts I have its now hung on the car.
Door lock swapped over so its a matching set, plinth swamped and a new metro mirror attached.
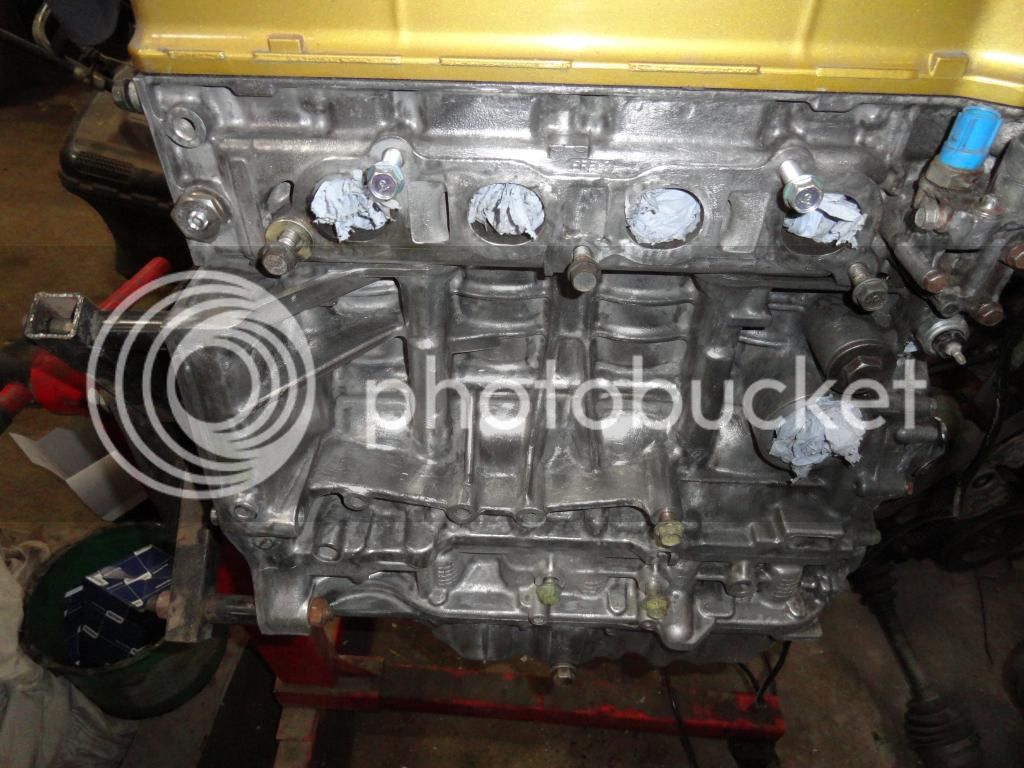
Engine was also cleaned up from this as it came out the civic

To shiny. The observant will also spot a ktuned bung in the block which I’ll either tap for a standard blue coolant sender or use ktuned single wire thermistor.
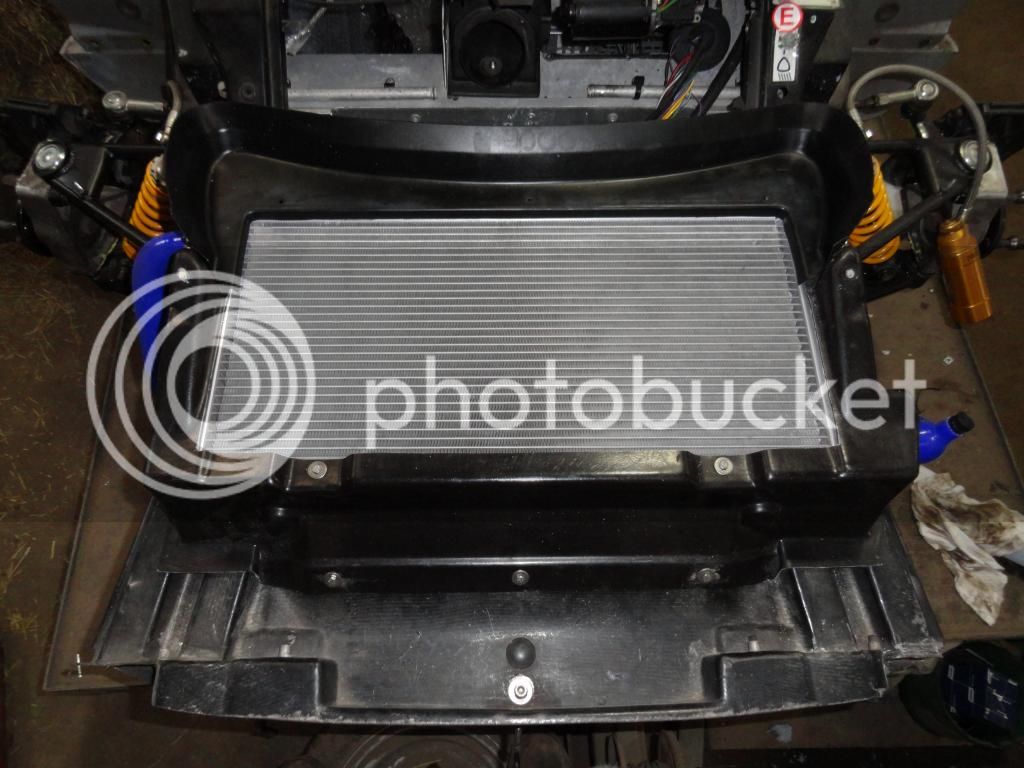
Front end is also back together with a replacement rad surround holding a single pass pro alloy radiator with a new spal fan and eliseparts hoses with the final part being the rad cowl just to be attached (resting in position)
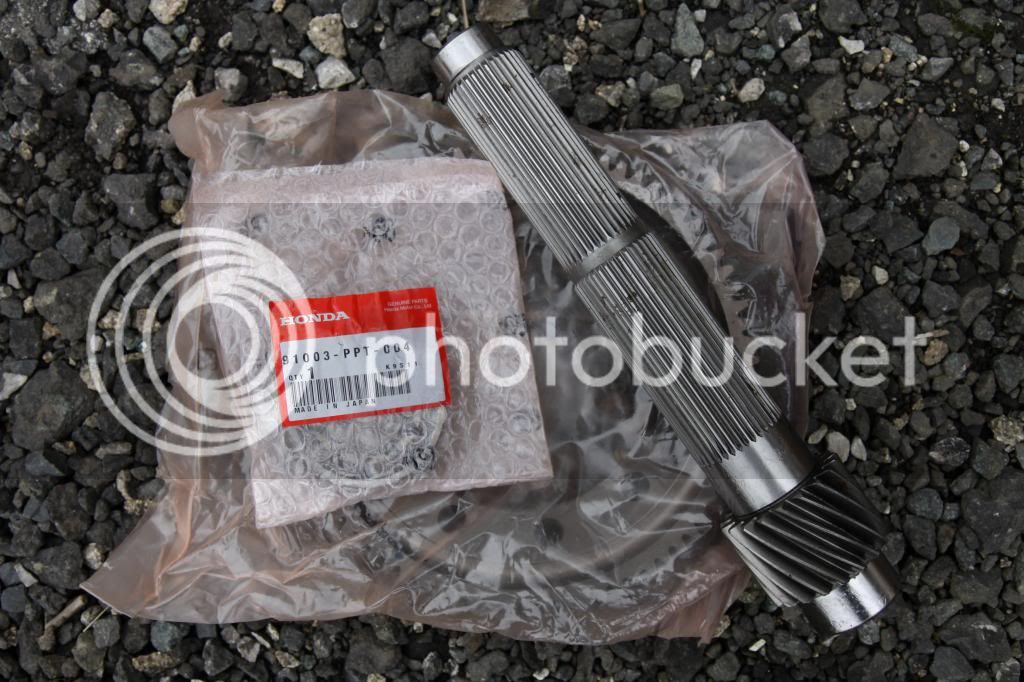
Engine mounts have also arrived along with my gear linkage. My photo of the mounts doesn’t do them justice, they are even nicer in the flesh.
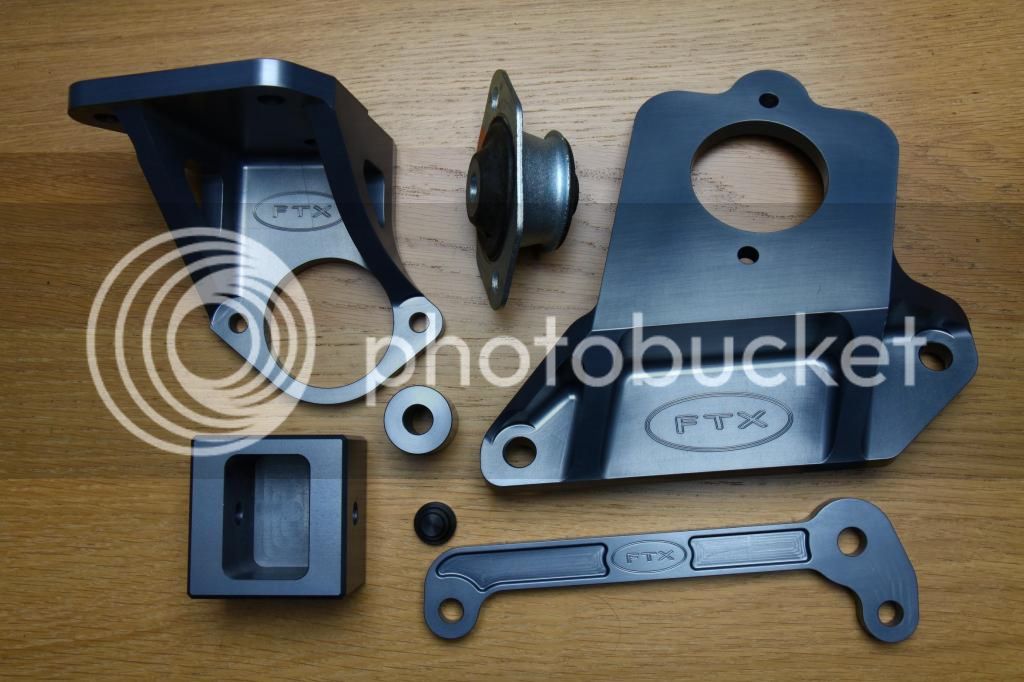
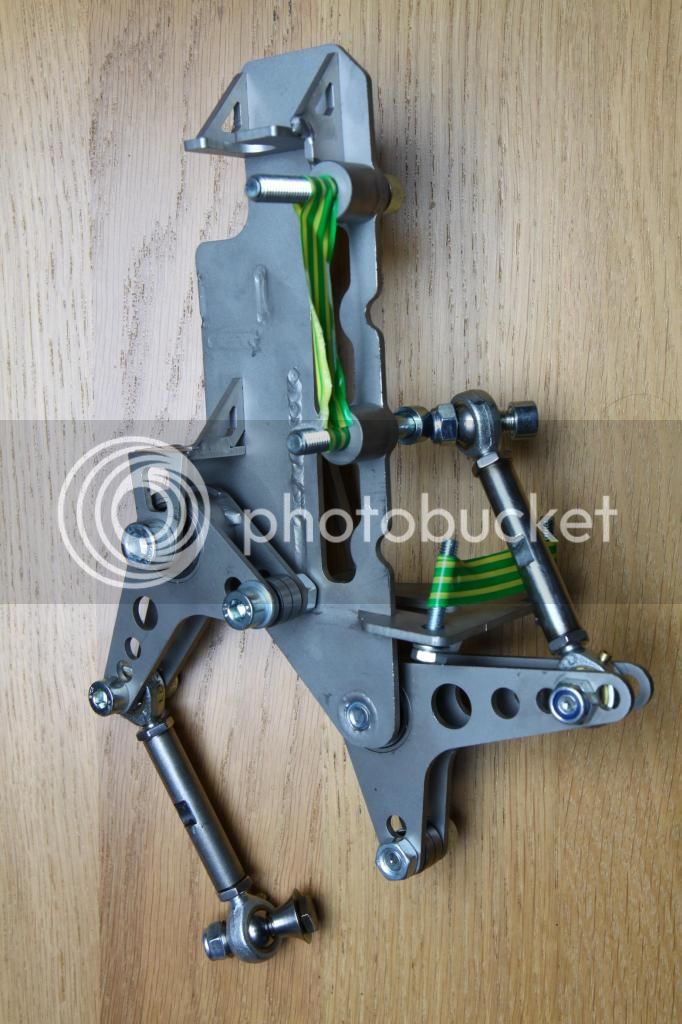
Linkage is also rather nice and is all stainless steel

I’m hoping to take delivery of the cage this week, but we’ll wait and see if that happens! I’ve still many items on the shopping list to complete the build to get it to the specification I want, I do keep coming back to Gavs words take your time and do it right first time.
Looking really good.
Love the gear mech.
looking nice
what engine management?
Yeah nice. How much are a set of those mounts?
Good looking build !
Thanks, It’s a nice piece of kit. I just need to get my box built to go with it, taller final drive is sat here but I need to pick up a diff and flywheel.
cheers. Probably Hondata as I’ve got an ecu ready to be socketed.
€900 so ~£700 not a cheap option, but 7075 t6 billet is nice! You then need to add a couple of gearbox mounts plus I’m also going to use a 4th mount from the EA conversion which bolts to the subframe. The 4th mount is probably over kill but I want the engine mounted as solidly as possible and this mount also helps with torsional subframe stiffness.
Cheers. It does feel like it’s coming back together now.
Its now a year since starting this build. Slow steady progress is probably the best way of describing things.
Lots of little jobs have been completed since the last update.
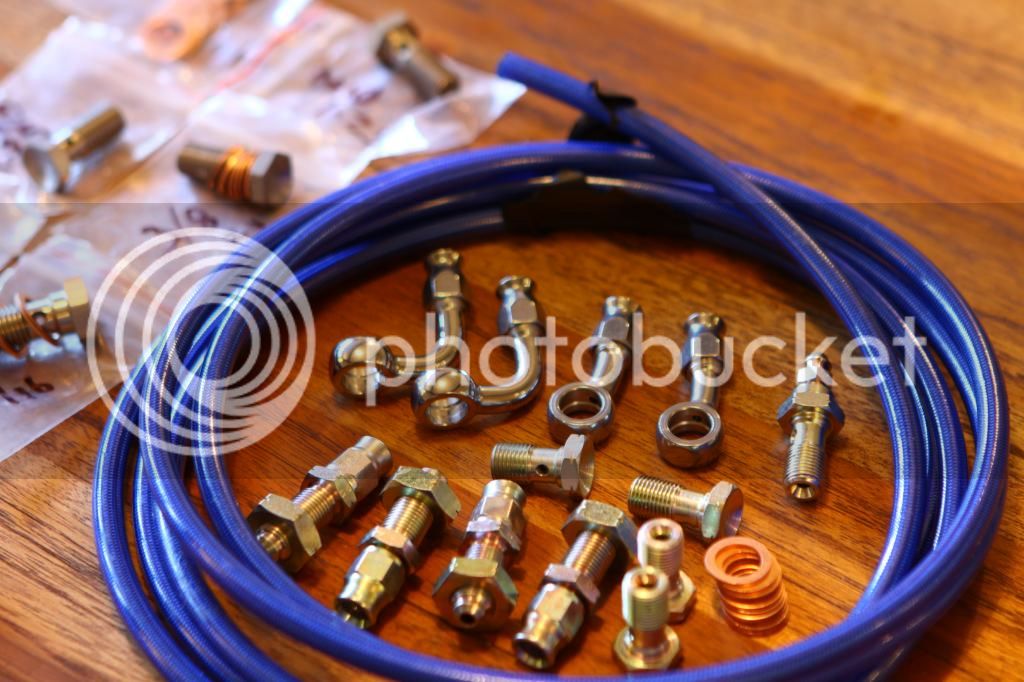
I picked up a set of set of replacement 2 pot callipers and a set of AP290 disks for use on the rear of the car. New callipers were needed as the ones I had on stock had stainless hoses fitted to them without any corrosion block meaning the alloy and stainless reacted. When extracted it just ripped the thread out even when heated with a gas axe… Because I’m running the 2 pots on the back I need to make up different length brake lines and banjos, nothing complicated. Goodridge -3 600 series stuff ordered and made up, I’m also using a banjo with a bleed nipple so it will hopefully make bleeding easier rather than having to remove and rotate callipers. I went for blue covered pvc -3 hose for something a little different.
A pile of shiny brake parts and a few extra banjo bolts I use for working out metric/imperial thread pitch on fittings as they often jump about.
This photo is quite interesting it looks like the callipers use half a VX casting on the inside and lotus on the outer. This kind of fits with the parts bin nature of this build! These callipers were donated to me by a NYLOC’er I’ve helped out in the past a few years back. You can also see even though everything is shiny/new its got a coat of dust from where the car is built and stored. That the nature of a working haulage yard sadly, but the pluses are that I’ve got three cars stored they (blue elise donor, full civic type r donor and this build.
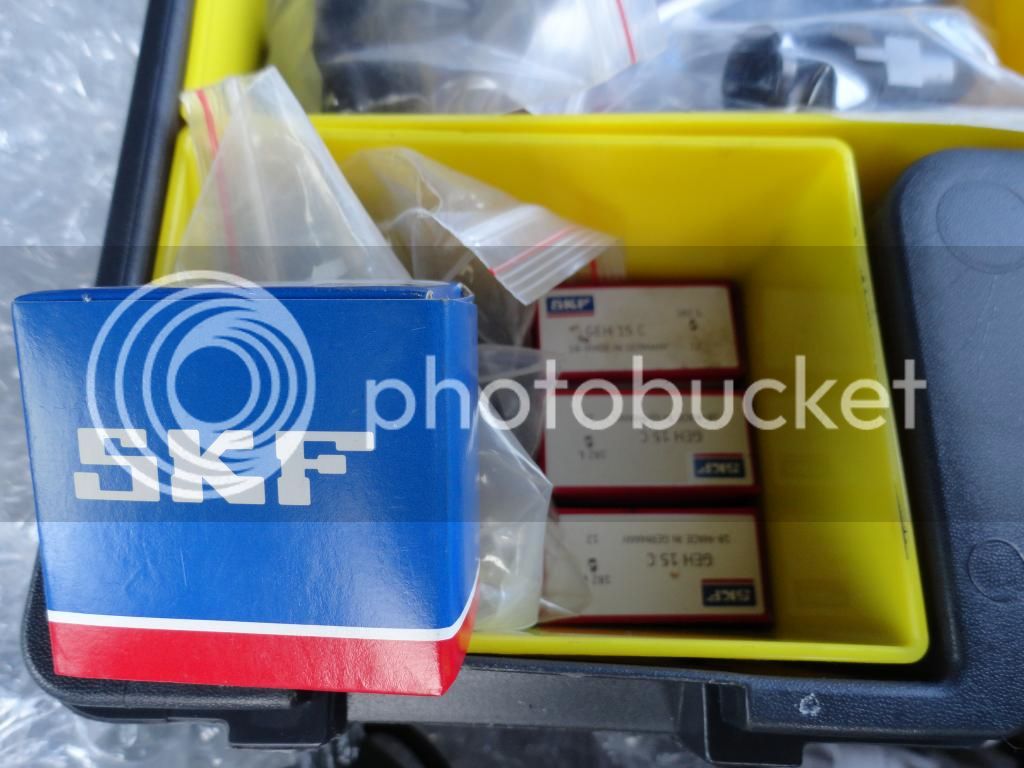
I also picked up a few more spherical bearings for the nitron wishbone kit. These are for the 211 wishbones rather than having to press these out of the standard wishbones if I swap them out. They are a skf bearing, part number may help a few people out?
A set of AO48 tyres were donated to me by another fellow NYLOC’er. They are still just road legal and will be perfect to push the car about on and do initial shake down. It also means I don’t throw >£600 at something which could be better used elsewhere. Tyre fitting also cost me nothing as I do all this myself, it just take me a while to do so I would never make any money at it!

Usual trick of mounting rear tyres backwards
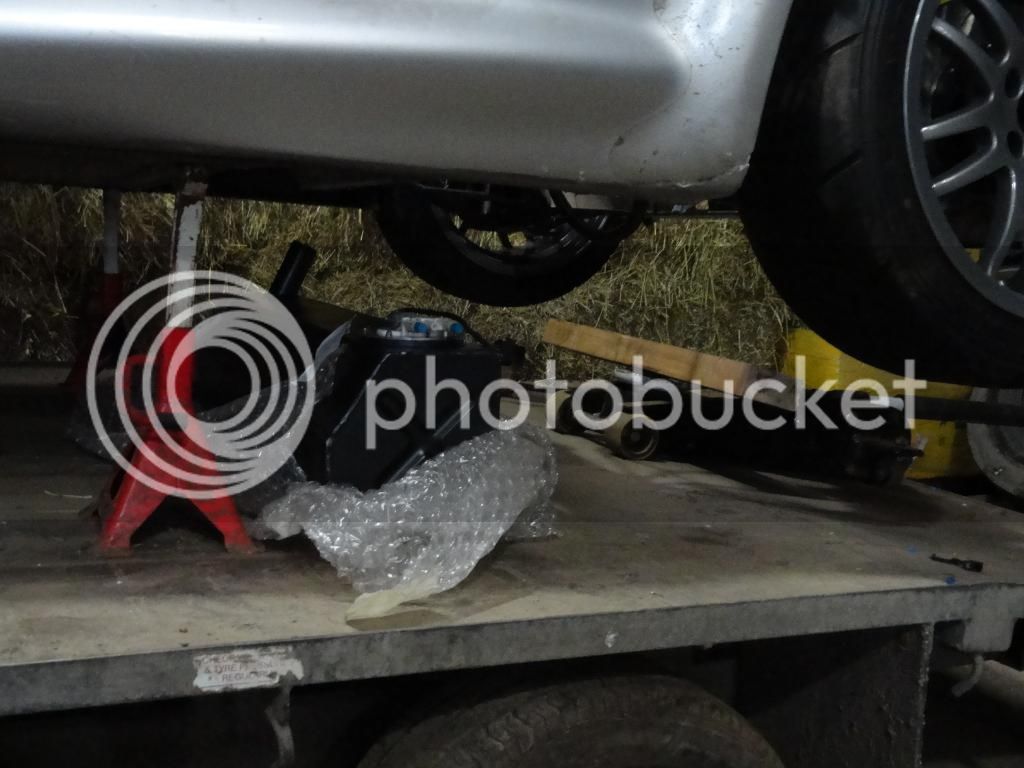
Tank has gone back in the car which means I’ve got more space to store stuff in it!
I’ve done an initial tape of loom. I’ve decided to keep this accessible, so its not going to run over the top of the tank. This means I can fault find (I’m not sounding positive on the loom am I) and replace at a later date more easily if I want to move or change things. I also want to mount the Honda ECU in the cabin so this also means
Front blower motor is now mounted and the duct from the original heater box bonded to the standard crash box collector. You can also see hose linking the heater pipes installed.
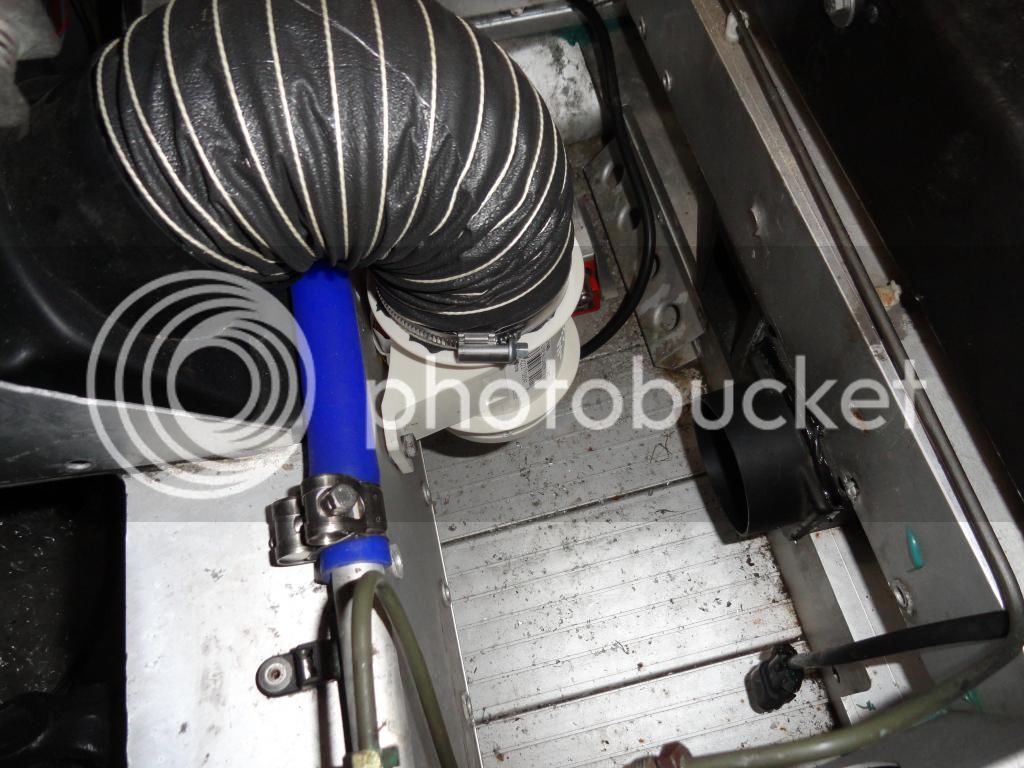
Bottom duct is then attached and hosing fed. By pure luck the ID of the lotus parts is 3" meaning the hose just fits nicely. You can also see in this photo I’ve mocked up where I’ll put the PC680 battery and mount. This is not yet secured. I’ve also mocked up where an Anderson jack plug and mount will go for charging purposes (this battery has more than enough capacity to run the honda lump as I used it for starting and moving the civic about for a while). I will also fabricate some sort of bracket to hold the standard elise relays and fuse box over the battery.
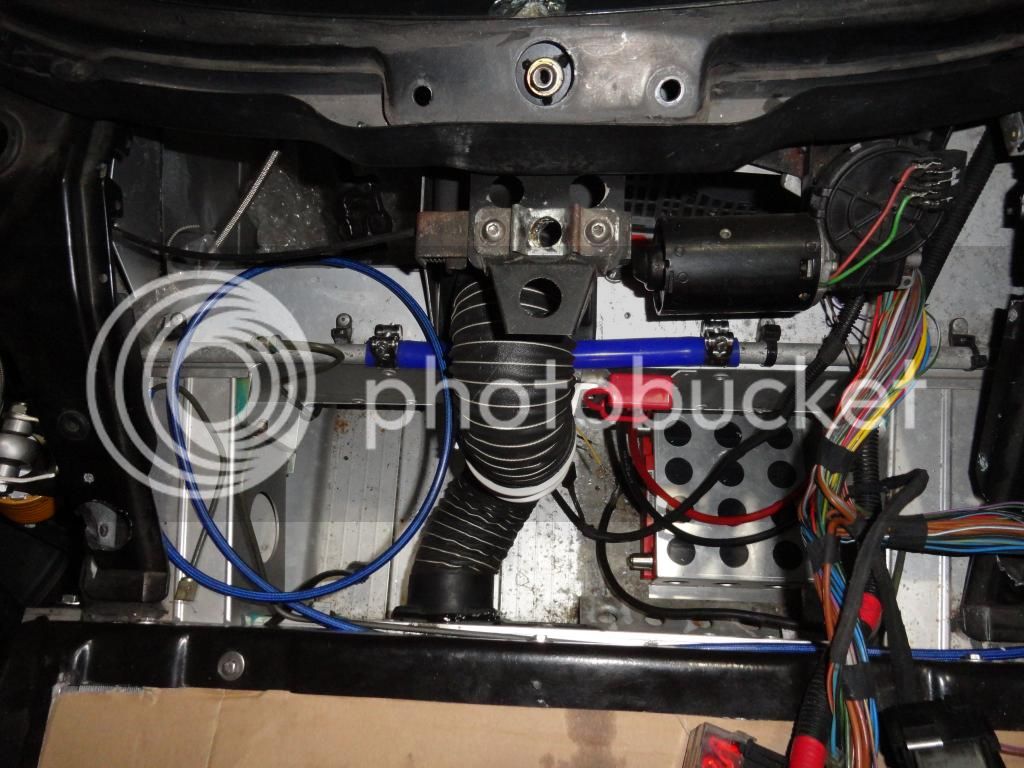
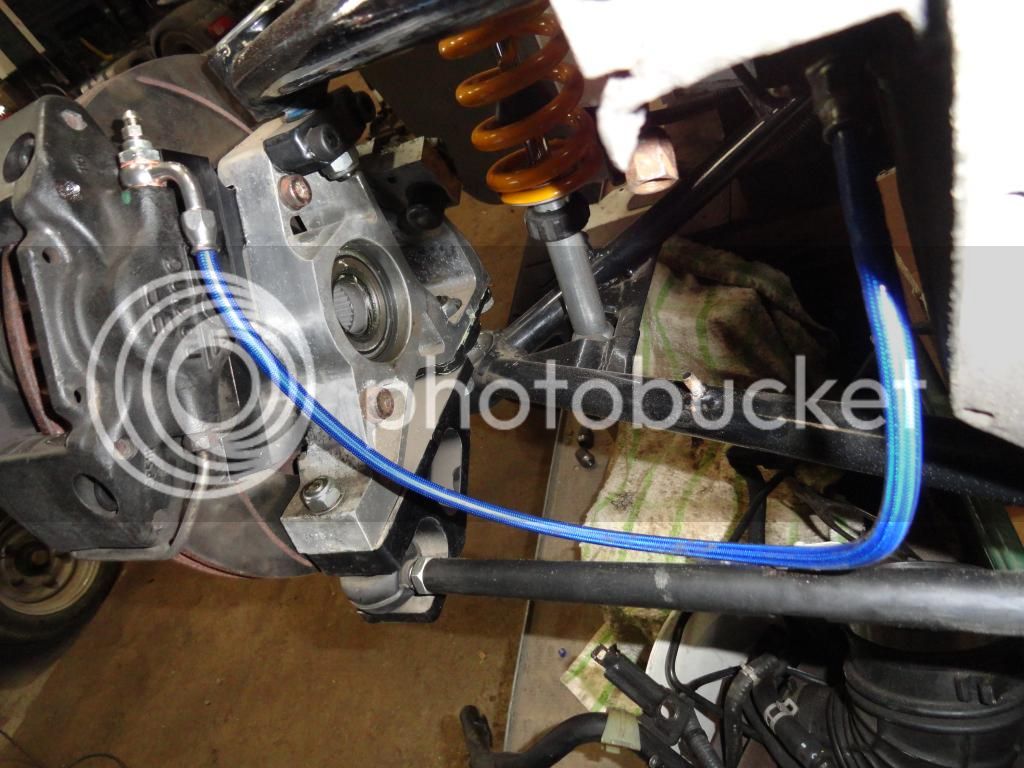
You can also see in this photo that I’ve also installed the original lotus brake line but also have the blue goodridge brake line going to the front 4 pot. I’m most likely to use the goodridge line as the pedal box will have split circuits for front and rear. Speaking of which, I called into see Oli a couple of weeks back, and both AP master cylinders were mounted to the pedal box and bias bar in. I’m hoping to this will be back before xmas so I can work out the final bits of it plumbing (I don’t want to fit it yet, you’ll see why at the end).
I’ve also installed the first of my 4 engine mounts into the car. The is the 4th EA/Sincs honda mount which links the rear subframe. The EA conversion quite heavily modifies the rear subframe, I understand these mounts don’t need this doing so the brace should also stiffen the subframe a little also. This again uses a standard elise gearbox mount and a small bracket to the Honda gearbox (not shown). You can also see against the chassis bulkhead a trial fit of a lamova oil cooler and and also a polished up coolant hose, what you can’t see is there is also the standard external thermostat for switching the fan. I’m not sure which direction I’m going to run the coolant circuit as yet so they could be in the wrong place! I do need to get some -10 fittings for that oil cooler as they are only -8 at the moment.
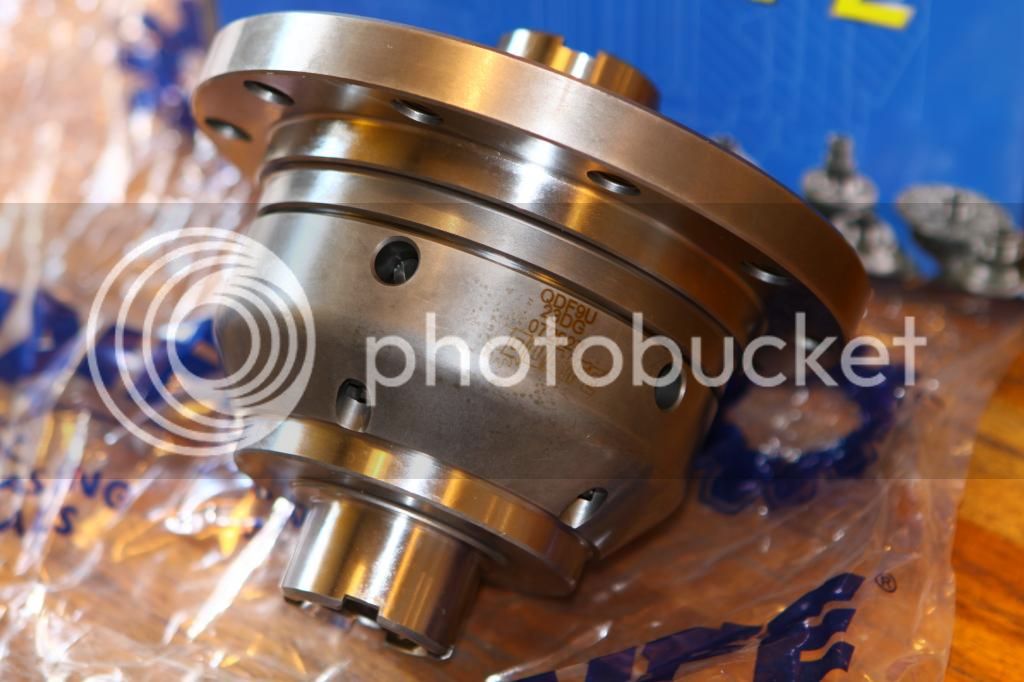
My diff has also turned up. Quaife geared unit which will be built up with a longer FD from a CRV to give me a longer first. Ideally I’d also drop in a shorter 4/5/6 but its to much £££ really (£1.2k just for 5/6) so I’m going to compromise. My thoughts are that at a later date this box could come out entirely and be sold on and I could build something custom using an elite gearkit or the like. I’m not going to build this box’, instead I’m paying a friend of a friend. I just haven’t the time or space to do it.
The car is now back to being a fully rolling chassis which is still sat on a few pallets which are stored on my trailer. The eagle eyed among you will spot the tank is still sand on rather an in the car in this photo.
I’ve had the guy’s that are going to paint it take a look at what they are going to take on and they are quite happy with the job (they paint a lot of VW stuff so this will be easy). If you look back at the photo of the loom sat on the bare alloy floor (previous chap took a wire wheel to it), I’m going to get them to paint both the floors and under the seats just to neaten things up. They are also going to paint both sills door and bonet now. I don’t yet have any clams so they will be done at a later date. They are also going to paint my cage rather than having it powder coated. It just means I can touch the thing up later and it will be neater.
So the cage has been a nightmare, safety devices via elisespares have been a nightmare to deal with (I suppose that’s what you get if you farm out all production to Poland and move factory and treat customers as an annoying inconvenience). I’ve ordered a bare T45 hotlap cage which should be with me in a few weeks (they have been thoroughly pleasant to deal with.
I think progress on the build will now slow up as I don’t want to bolt too much more on the car that will just get in the way of it being painted.
Banjos with bleed nipples…now that’s a great idea.
That’s wierd Si. I ordered a Safety Devices cage last month and it turned up a week later. Not from Elisepares though.
Dan
I think I’m only getting half the story on the cage saga…still not got a refund either yet. I deliberately held of naming companies but you can see how long stuff has gone on (funnily enough I’ve just been offered one today). Order will stay with hotlap.
I know its a bit of a nightmare now since they moved production to Poland.
From what I understand the dealer must order 5 cages at a time. I would imagine most would want 3 or possibly 4 orders before they bought 5 cages and just hold 1 or 2 in stock.
I ordered one from Essex Autosport knowing that they already had at least another 2 orders so I had a good idea they would turn up quickly.
Dan