Well first post on Exiges now that its been open up to the masses…
This is my starting point, almost a bare S1 elise chassis which I intend to build into a motorsport bodied S1 with NA honda power as a bit of a track tool.
A few of you will know me from NYLOC and I’ve also been on your annual trackday outing for the last few years in my Honda NA S1
This isn’t my first build, if you’re bored, hop over to SELOC and spend an hour reading through THIS, I’ll be using many of the part salvaged from the blue car plus a lot of other new ones to build this.
What I’m starting with; S1 chassis, crash structure, sub frame and longerons. The chassis also has a v5 and isn’t on vcar (shunted). It’s a former hill climb car so has random extra holes all over the place for fire extinguisher lines and other mountings, so basically it’s never going to be a beauty queen. My intent is to build it lightish and sort of around the elise trophy open regs where I can (I’m not letting these limit me though), reason for that is so if I do chose to have a little foray into competition I can. It’s never going to be mint but that suits me as I want to use it without fear of damage.
Current plan is to get the thing rolling before Christmas.
Shortly after picking the chassis up I took it for a quick steam clean to get some of the dirt and grease off (excuse the iPhone photo).
Back end showing heat shield replaced with bolted single skin nimbus
Subframe and random repair washer spacers (presumed for a heat shield)?
All suspension pick ups are good. Small repair to edge of the crash structure
Small amount of damage to corner of the crash structure, nothing that a bit of new glass won’t sort.
Suspension pick ups good again, small amount of corrosion evident between shock mounts and chassis
Clam fixing repairs
Couple of riv nut holes in windscreen support
Extinguisher mounts and you can see someone has used a wire wheel on the chassis to clean it which has taken off the anodising (annoying but not the end of the world)
Extra rivets and general crud
More crud and extinguisher line holes
Glue and crud in footwell
So warts an’ all listed, it was then onto the cleaning and trying to plan what to build…
I then jumped in with both feet…At this point I was panicking a bit!
Longerons off too, there was a lot of trapped corrosion under these, but easy to clean up.
Took a while to remove the pieces for reuse and then get the roll bar out in one piece, Sikaflex is nasty stuff. I do have a complete bulkhead and window support from the blue car and only saved a couple of usefull bits as most of it had random holes and brackets attached to it.
Also started to clean up the chassis more, took most of the heavy stuff off using a heat gun. Residual adhesive was then taken off with brake cleaner, this top side took about an hour to do.
Oh and it’s bloody cold working outside, the heat gun comes in useful for keeping the pinkies warm too.
A couple of days hard graft scrubbing with magic sponges and brake cleaner and this is the result.
I also dug out the old blue car to pull a few bits from it and have a general look at condition before dropping a box of stuff at the powder coaters. Excuse these photos as they are from my phone rather than L glass…
I’d forgotten how much I actually have, the car if full and my garage is also full of lotus bits.
I’ve now got back a box full of shiney black powder coated bits along with a box of bits from Dave at seriously lotus.
Oh and for the eagle eyed amongst you, yes there are two many bits there for a single build…and yes I’m also in the middle of sorting the house hence the masking tape
Morning Rob, I’ll be there at Easter in the elise no chance this one will be ready. I’ll get it booked at Christmas!
So do I, I think I’ve read Gav’s four or five times now!
Hopefully it will live up to expectations!
Just do it, I can’t justify throwing £25k in one hit on a complete car so it’s kind of like reverse finance. I also enjoy the building side of it.
The man maths on this went something along the lines of…ooh seats they’re cheap = buy. Ooh chassis for sale also up at “offers”, I’ll have a look when I get the seats, thinking then starts; well it would be rude not too as you do still have 2/3rds of a car…
I was also lucky on this chassis, it was local and a good price… Bonuses were it had a subframe, a v5 and it’s not on v car. Negatives it’s not mint so will never be worth top money. I also got a pair of tillet b5 seats from the same chap ( they are going in the elise for now).
Looking like another good build here from the tub up…
Only one bit of advice i can give you is try not to rush through anything, youll only be going back to do it again after youve thought about it a bit more.
Hit a stumbling block, leave it and come back the next day rather than bodge on. it will make the job all the better at the end.
Thanks Gav, sage advice. I’m lucky that I’ve got space to store it and another to play with while I’m building this one. Its also so easy to get caught up in throwing bits and money at it, but there is a market value for these things and I’m not a man of endless means.
I’ve spent a ridiculous amount of time pondering many things the immediate need was the wishbones, hub and brake set up on this build. I really do want to run an S2 upright/hub set up on it, as it opens up the number of wheel options massively along with giving me the option of better bearing longevity and I can then also play with the later features of the Hondata v3 (although that ecu itsn’t confirmed yet). With the eliseparts sale on I’ve nearly pushed the button to by the S2 GT uprights three or four times. However, I have a full S1 set-up here on the shelf ready to go, so for now V1 of the build will use the standard stuff with radial caliper mounts on the rear and a pilbeam pedal box. Its a compromise but hubs are bolt on and the budget can be better spent else where, as effectively this has cost me 4 s1 bearings if I sell them on.
I’d be interested to know if there are any problems with just running the s2 uprights on S1 wishbones as this maybe a halfway house for now?
I’m defiantly not rushing anything at the moment as this bloody weather means that the chassis is currently stuck in my field on the trailer! Even with the L200 on BFGs with both diffs locked, it just sits and spins all four wheels on the Yorkshire mud which is defeating me pulling the thing up an offroad slope!
No progress on this build lately work has gotten in the way and the chassis has its not made it over to North Yorkshire yet (its still in my back garden), so I’ve amused my self tinkering with the matt black elise and raided some of the bits I’ve accumulated.
I’ve a pair of these but have only put the drivers in for now, as I hate taking the seat out the passenger side as its on a fixed rail making the bolts a pain in the arse to get at.
Its been a while since updating this. Slow and steady progress has now got me to the point of a rolling chassis.
Thanks to SimonE for selling me a set of S1 exige wheels and a few other bits to help with this build (radiator surround and a diffuser). The tyres are on loan to me at the moment but will be going back when he picks them up!
I like this photo…One can never have too many bolts or fittings! That’s only about half the boxes I have :oops
Rear suspension on temporary konis with eliseparts toelink kit installed
Final bit to get it truly rolling was a rack rebuild. I’ve two spare racks, one <2k miles on and one with 50k both had bent steering arms, so its been a case of make one rack out of two. <2k rack was pulled from the blue car along with the UJs ready for transfer. I’d never done a rack refurb before now, but its so simple. Pull the boots off, drill out the pin, loosen the lock nut and spin off the outer and bent arm, swap over arms, torque up, insert new roll pin fit boot bolt up to car!
Steering column, dash and wheel back in
[/quote]
All four wheels on. The chassis has been mounted on a few pallets on my trailer and is a nice height to work on and means its easy to move about at the place its being stored.
Steering wheel again sourced from Mr E
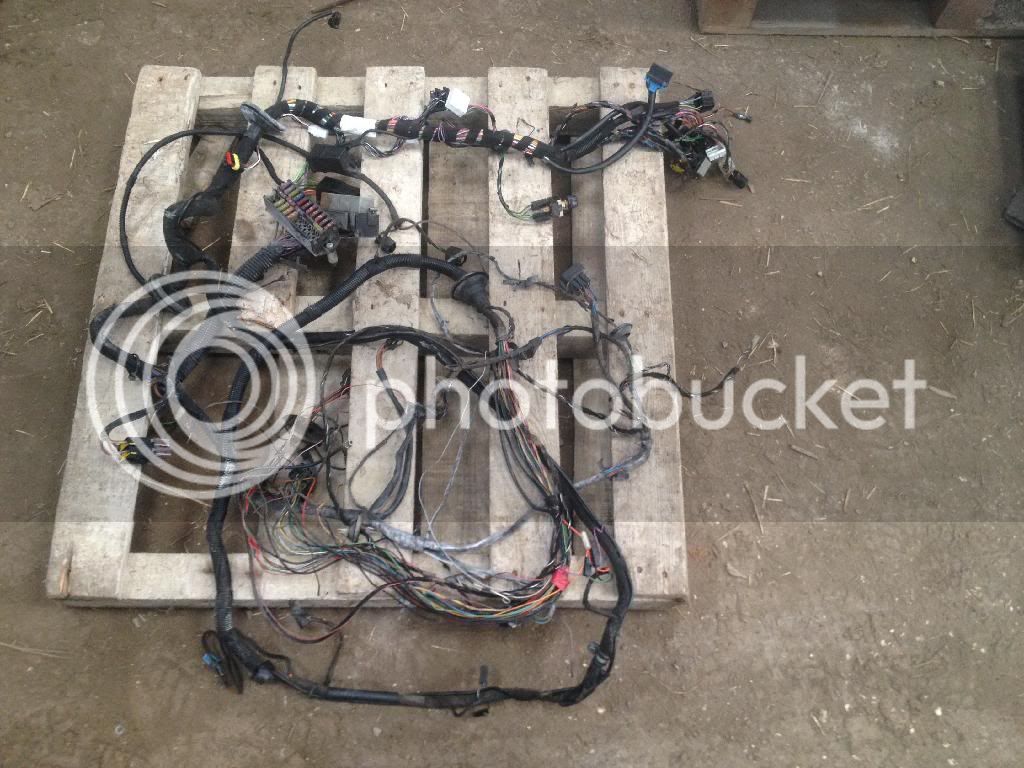
Loom out. Note the rear of the loom is stripped of the honda loom splice hence the untidiness…
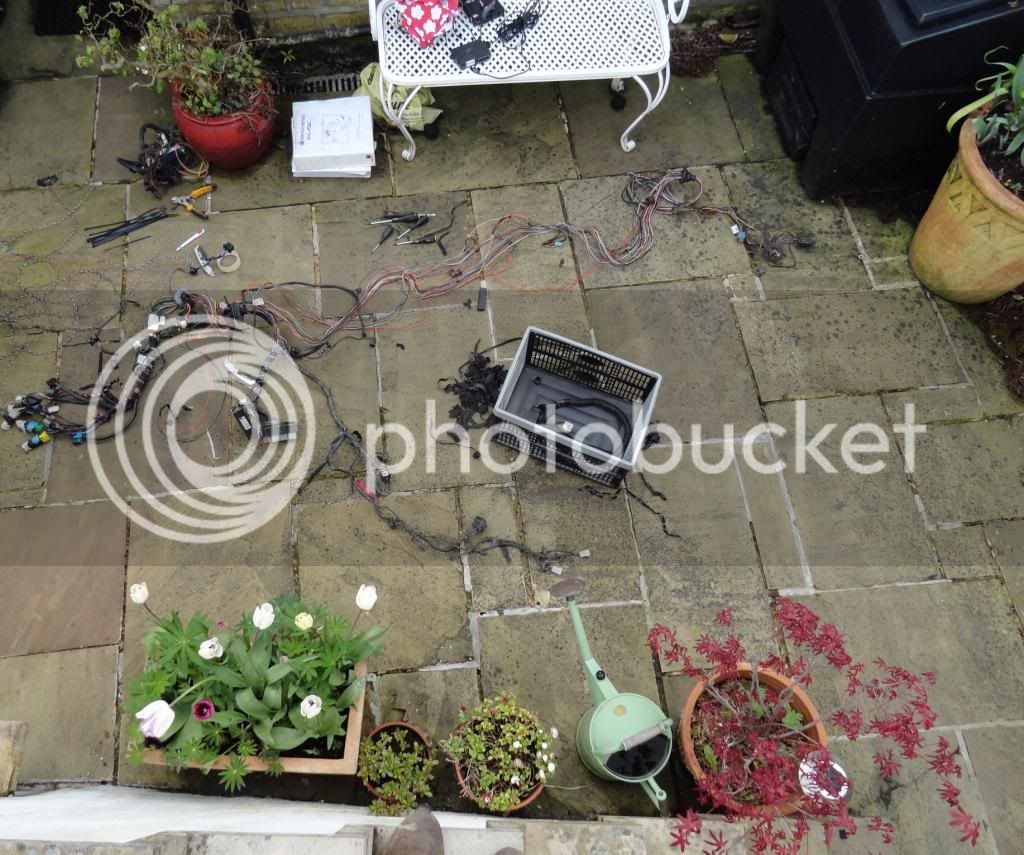
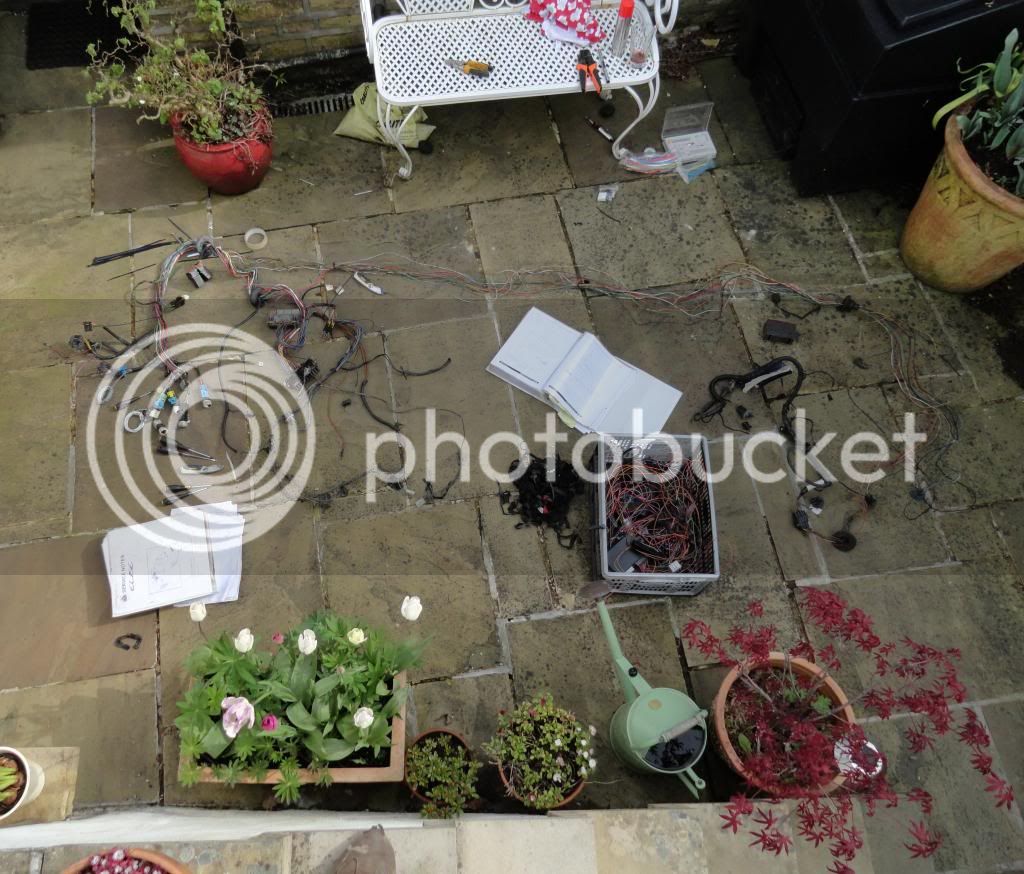
It’s been fun stripping out what’s not needed. Just look in the plastic basket for what’s been stripped out - No alarm, immobiliser, 5as, fag lighter, interior lights, door switches, aerial, speaker, radio or extra unused wires to the stack etc. I’ll make up the connection to the honda once I pick up an engine/loom/ecu.
The black plastic bin bag looking ones aren’t too good I’ve not touched the Nyloc thread for quite a while, I don’t think they quite ‘get’ builds like this.
Thanks. The intent is to do exactly that and get a bit of cash back by breaking the remnants. I’m getting to the stage where I’m going to have to throw some serious cash into the build.
Proof in point as Paul’s build is standard lotus and finished with some nice paint. That’s not intended as any insult to Paul as it’s a stunning build and finish. The point I’m making by that statement Is it’s easy to understand and follow. My first and now this build move progressively further from that point.


