Oh, found a little 2-Eleven easter egg too.

Shoved down into one of the roll cage supports.
Reposted and images fixed. Thanks @andybond
Intended to get some thread updates done this week, but I’ve just been unable to finish off any one job on the car. Royal Mail are mainly to blame for that.
I’ll soon forget what I’ve done, so I’ll do a partial update on the “general tidying up” front.
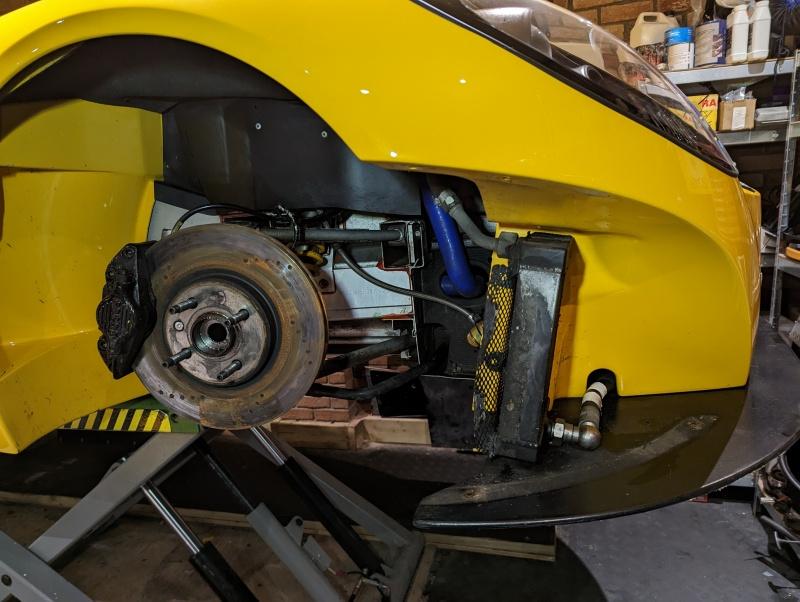
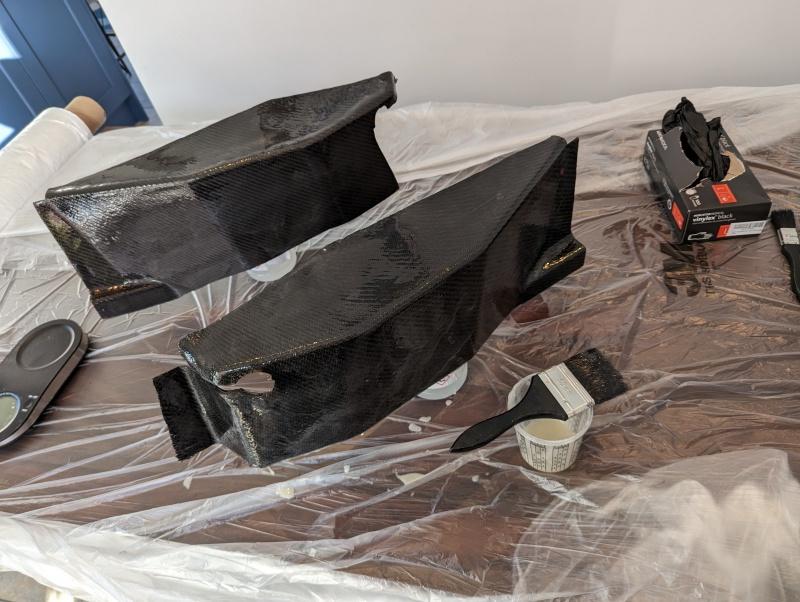
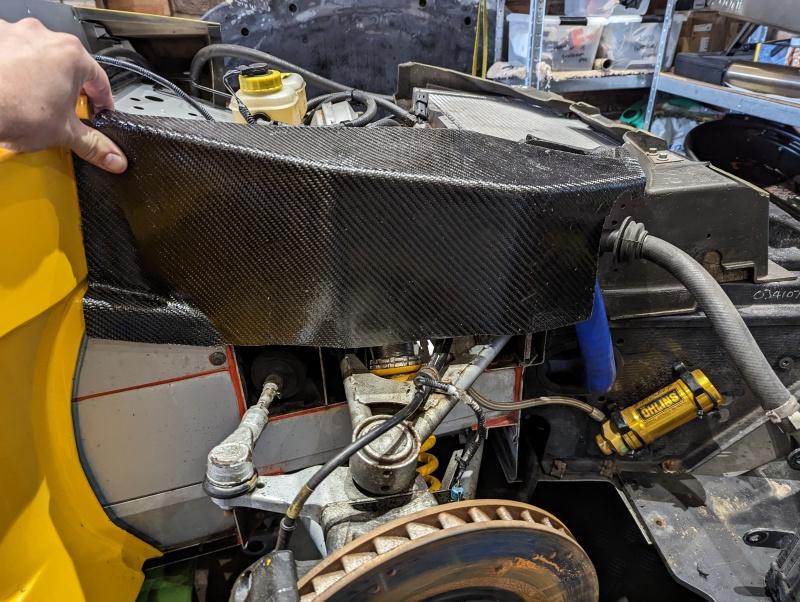
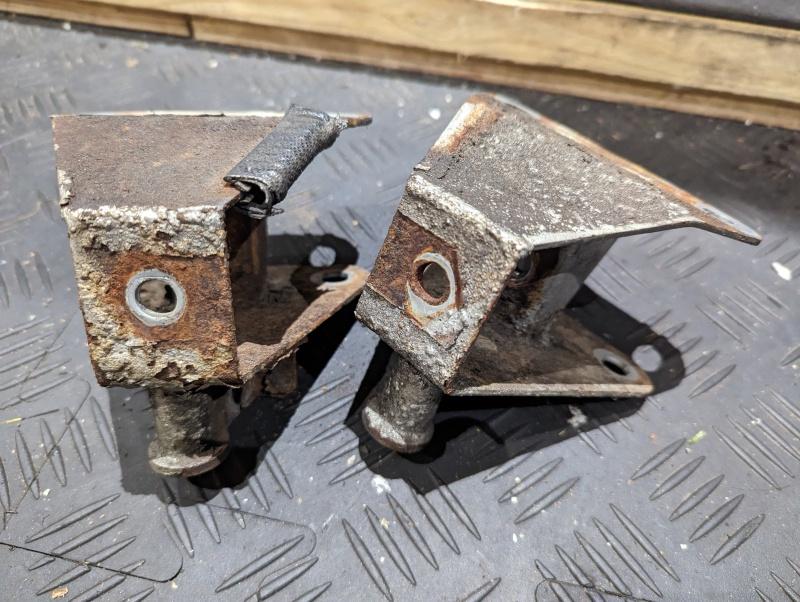
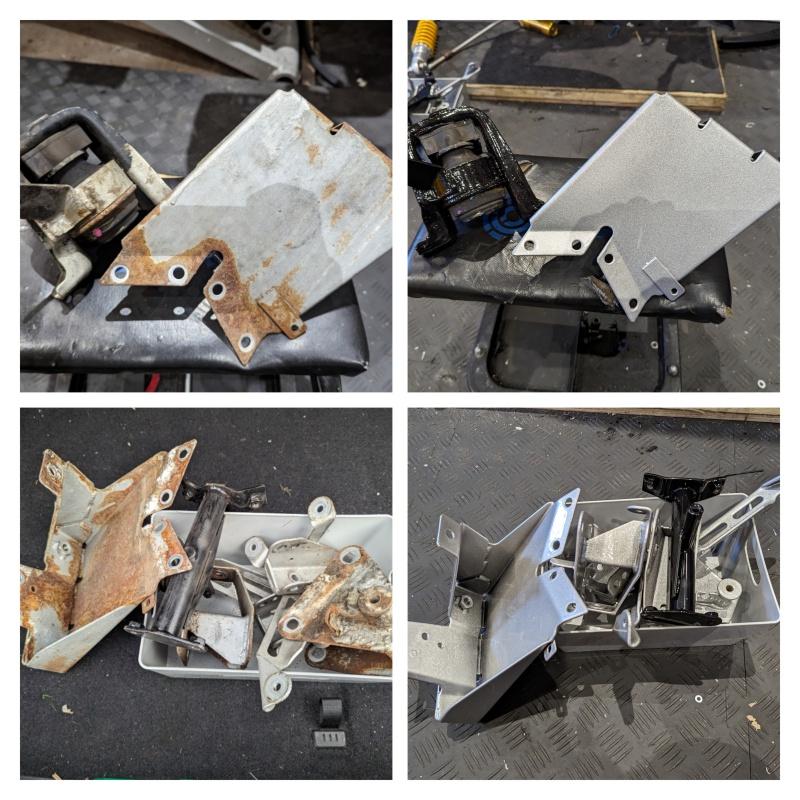
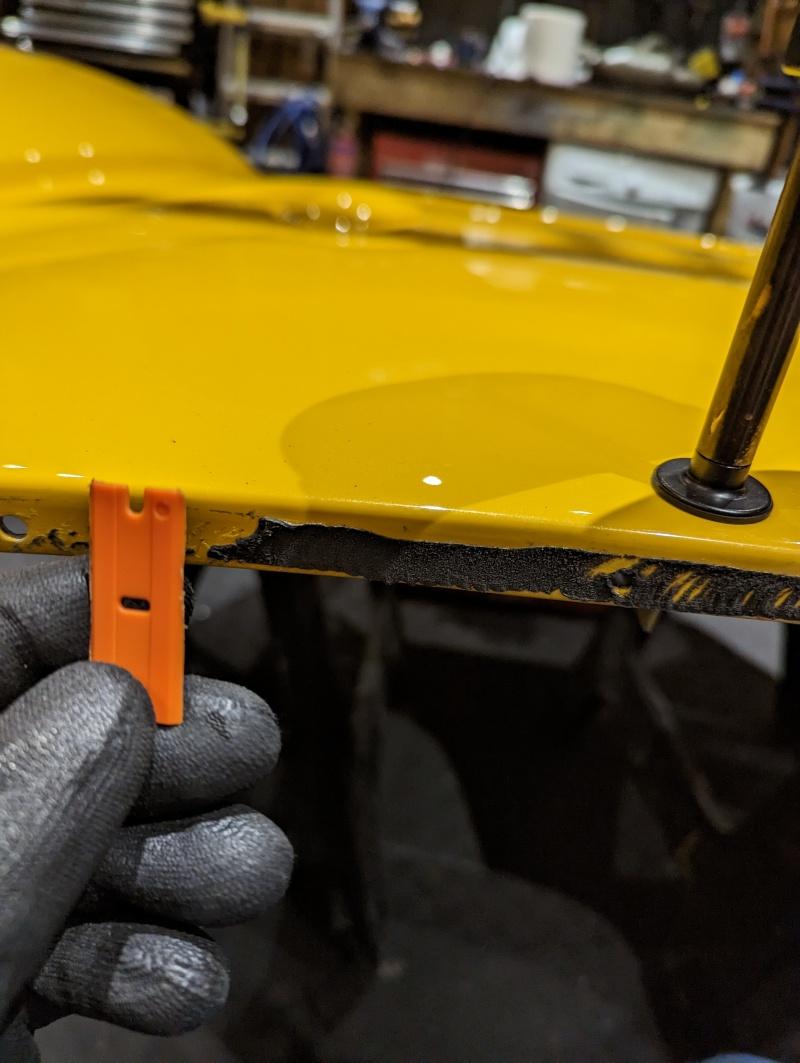
The 2-Eleven doesn’t have arch liners at the front like the other S2 models do, usually just a DIY dynamat type thing stuck to the inside of the clam to stop stone damage but it does have some really thin flimsy ‘buckets’ stopping crud from getting into the front clam area.
You can see them here just above the top wishbone
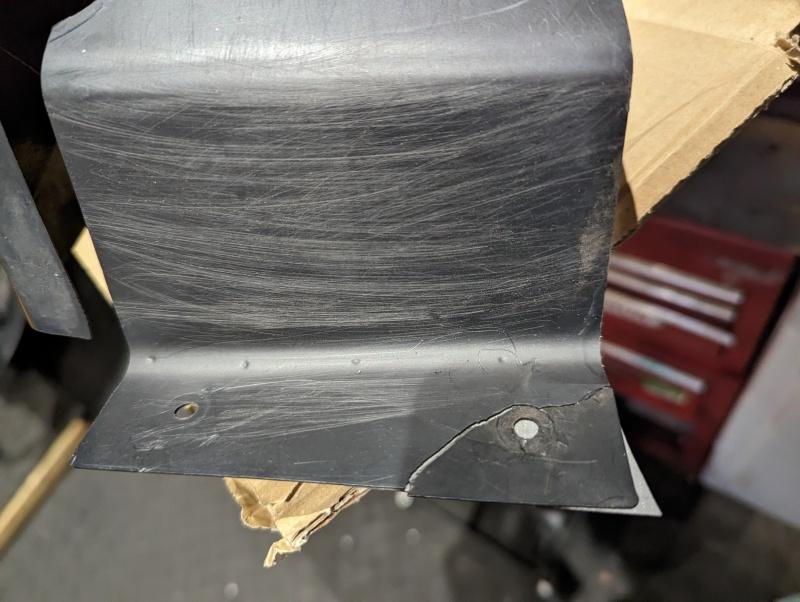
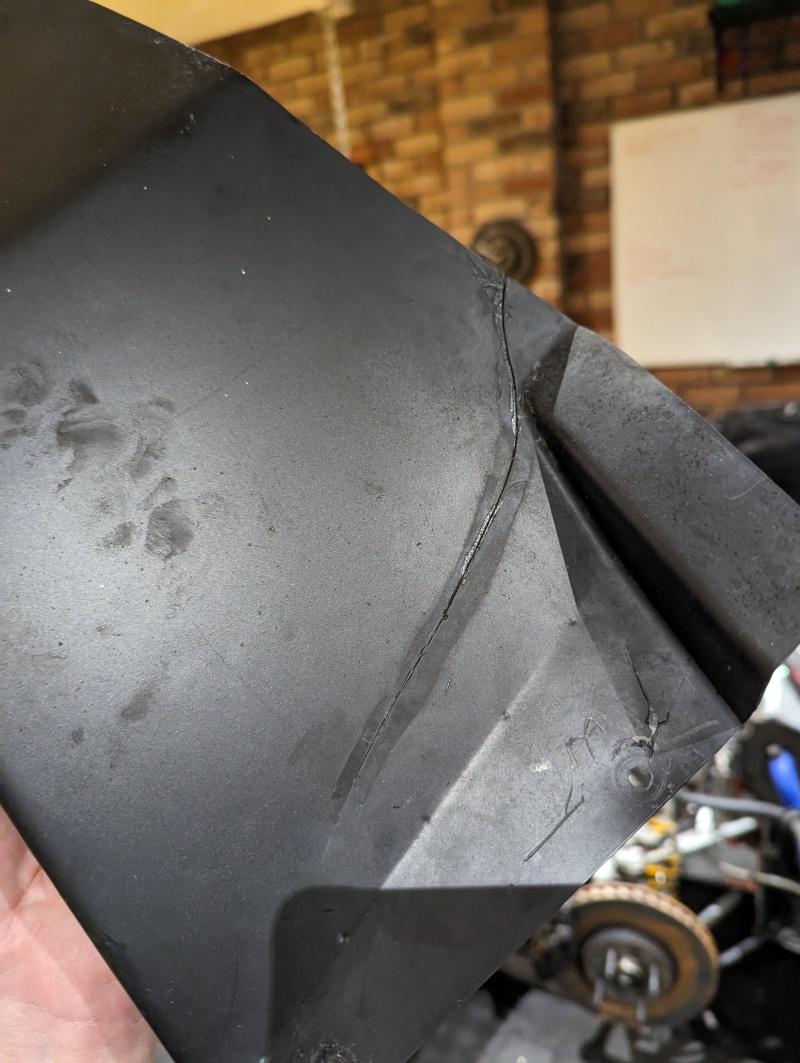
Both sides had cracked in many places, in some cases causing them to be no longer rigidly attached to the car and just resting on the oil cooler lines for support.
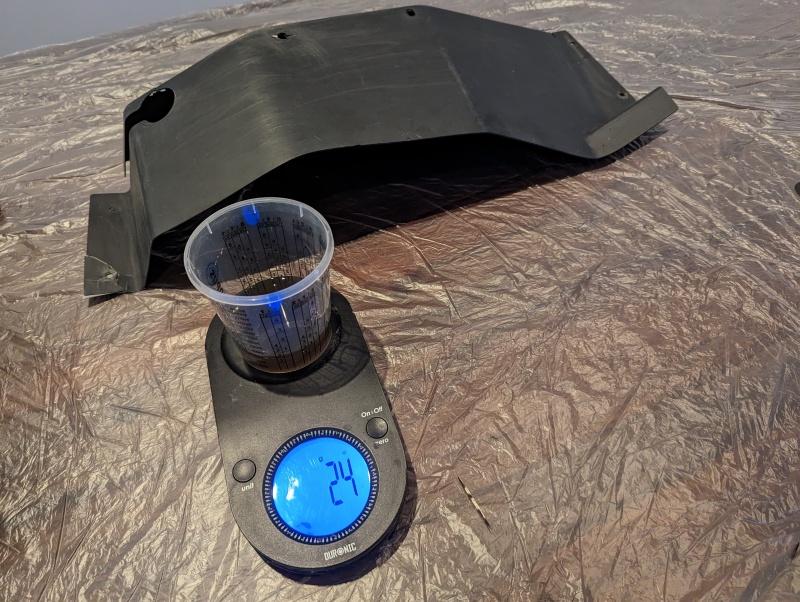
I taped up the cracks the best I could for support from behind, and then dug through some old supplies from an old abandoned mini project.
I’d tried wetlaying some carbon skin onto some old knackered parts years ago and never quite got the aesthetic result I was hoping for. In this case, aesthetics aren’t really important - I just need a structural repair.
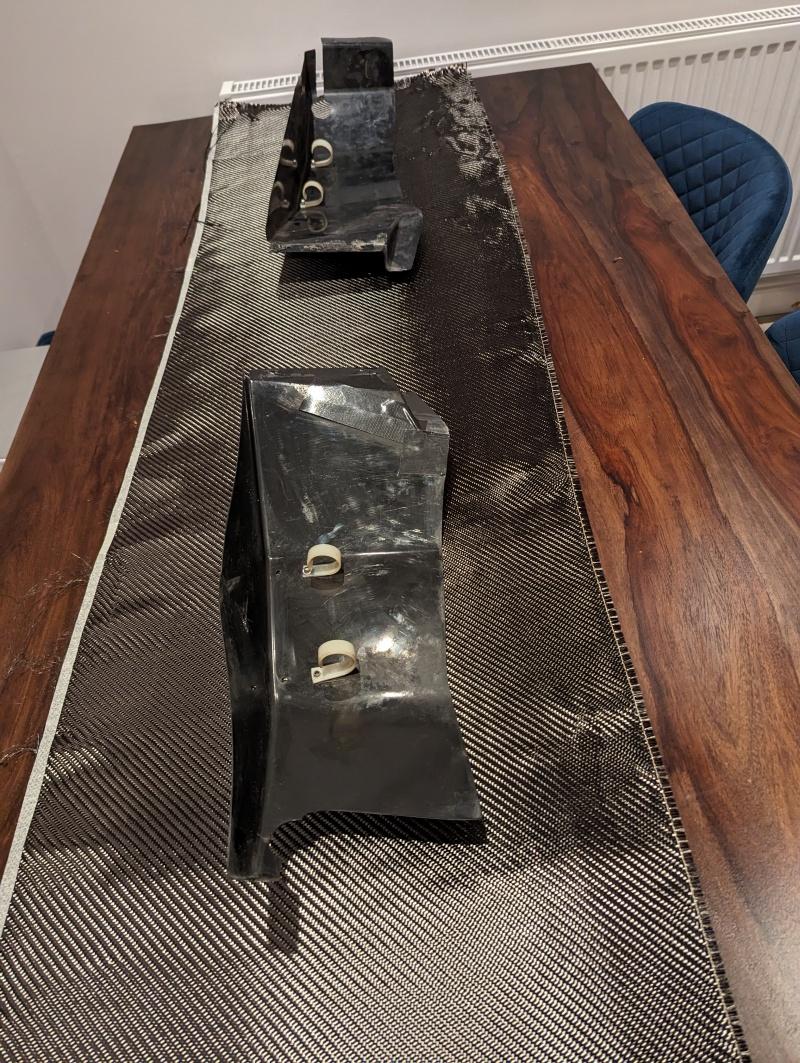
With the oil cooler line pclips drilled out, and the plastic scuffed up I mixed up my resin and got started with the first coat.
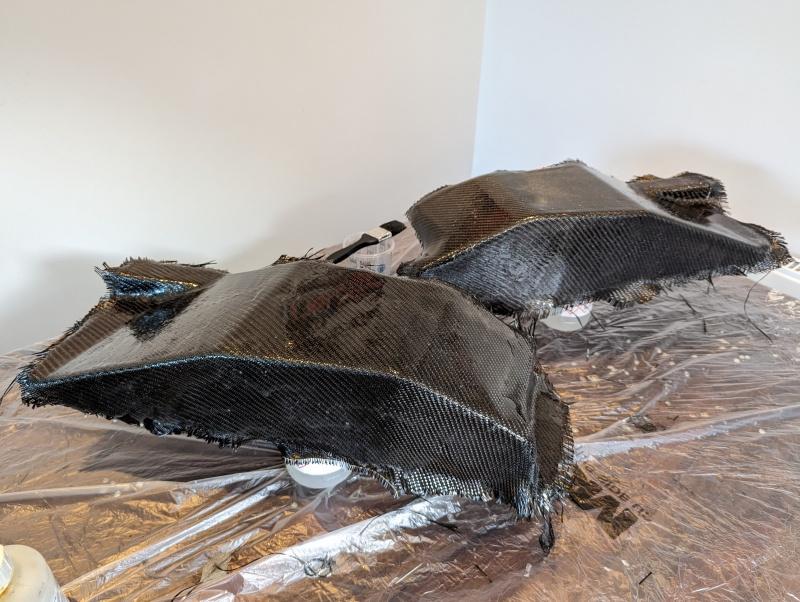
Not many photos during the process, as I’d just end up with a phone glued to my hand… but after the first layer of cloth was down it was looking acceptable.
A few more coats go on at prescribed intervals and then it’s left to cure properly for the first time. This allows me to trim off the excess cloth and get my first look at what the final product might look like.
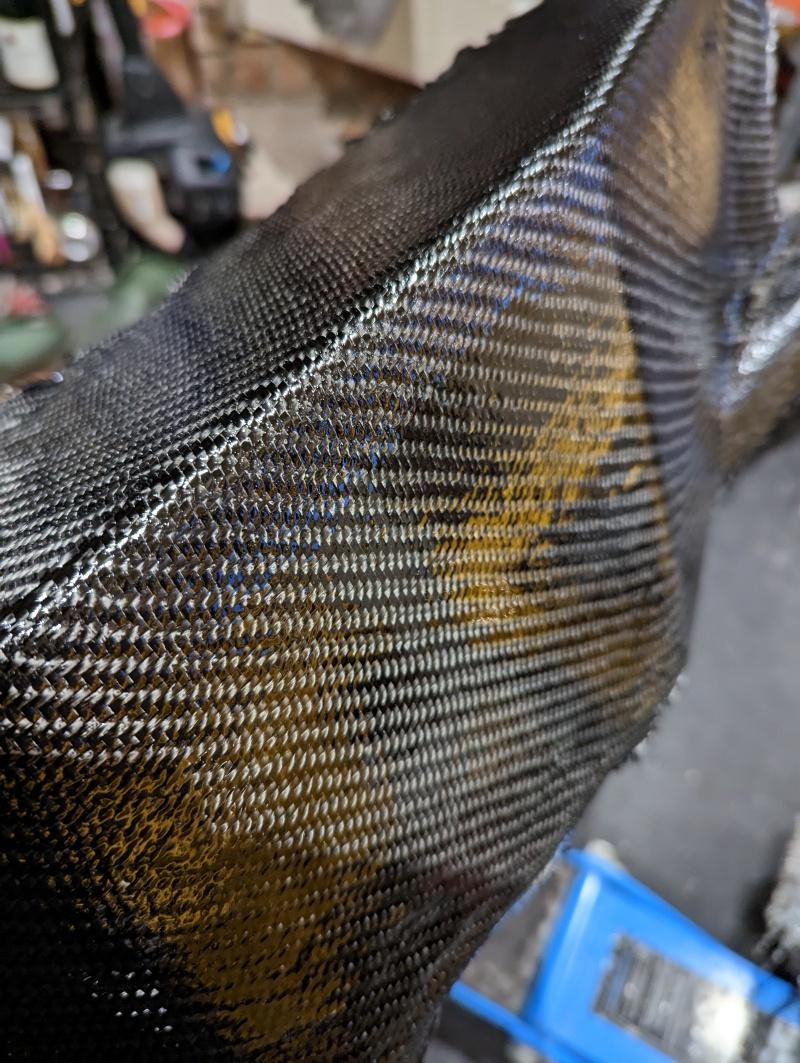
I then had to scuff it all up again and start adding ‘finishing’ coats of resin.
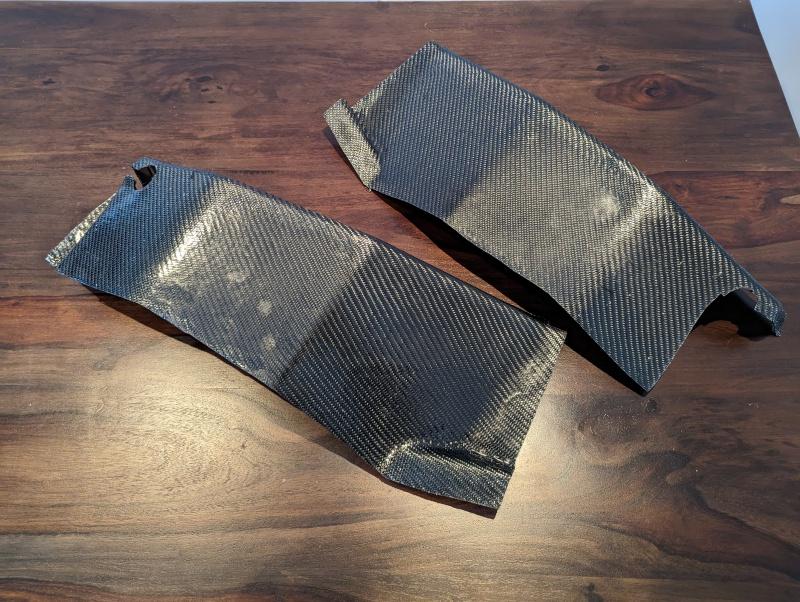
And that’s pretty much where that’s got to. They need a good wet sanding session now to go up through the grades and get something like a shiny smooth finish. Happy with how they’ve come out so far, they could happily go back on the car as they sit - so they’re on the back burner now.
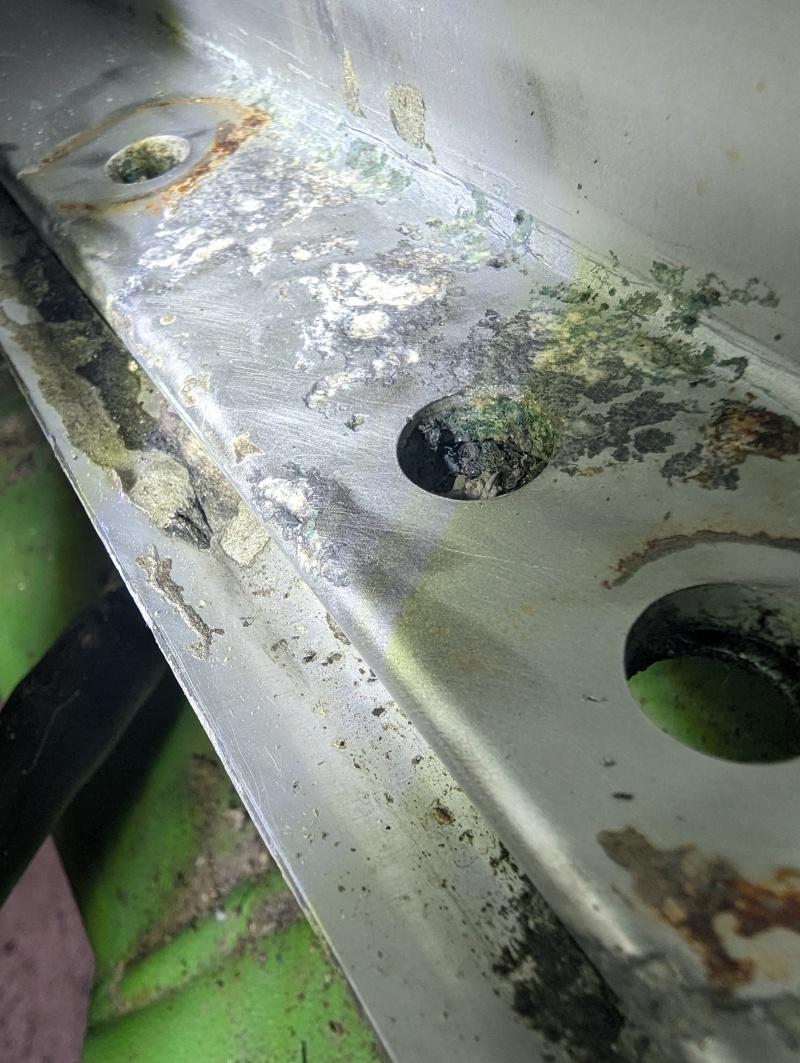
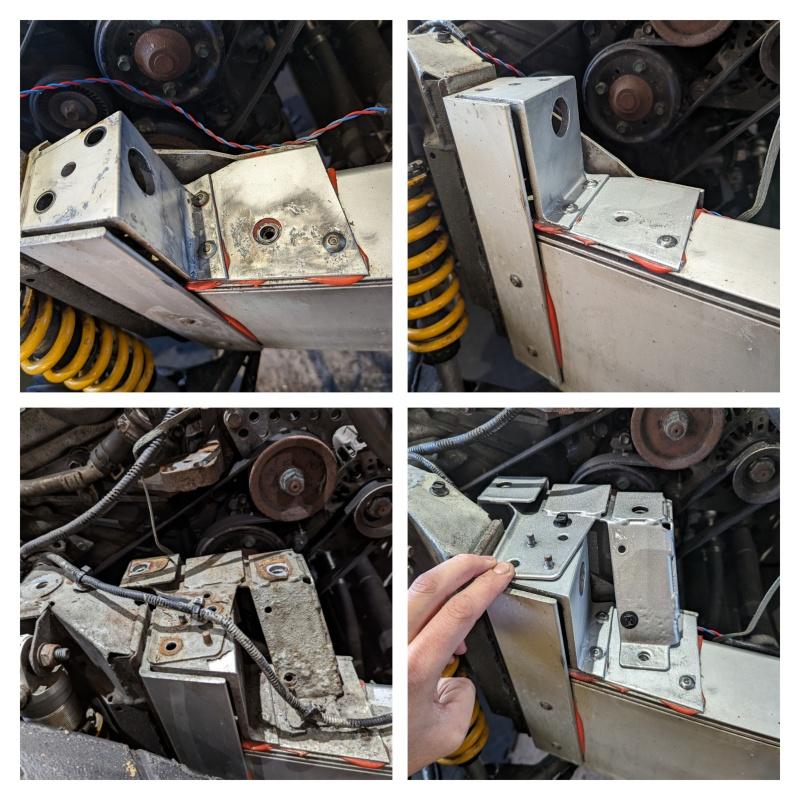
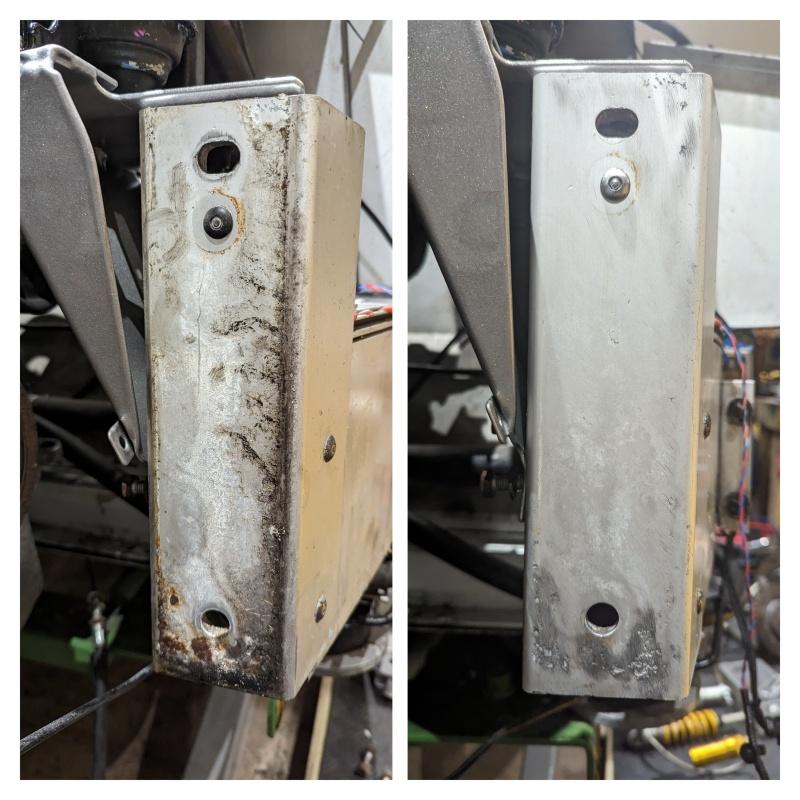
Moving on from that, I’ve moved around the car removing anything I can find involving mixed metals. It’s the only real corrosion concern on these cars, and something (based on what I’ve found) I expect will become a more frequent topic of conversation over the coming years.
The areas of concern are:
Example:
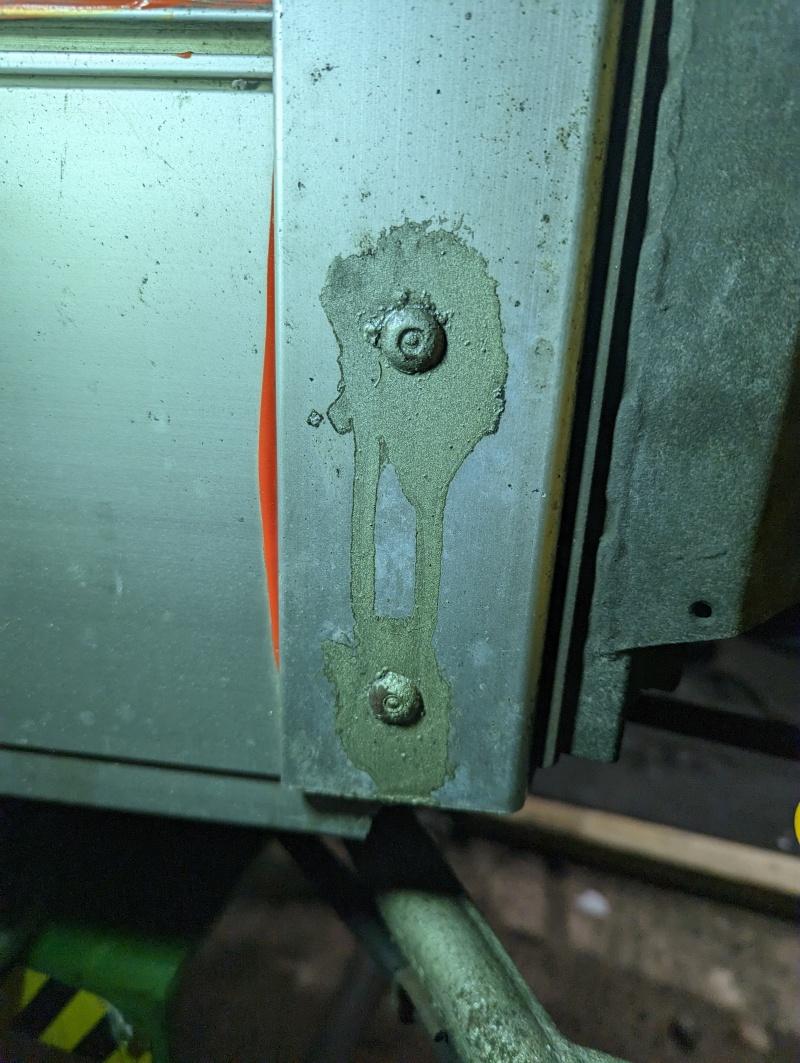
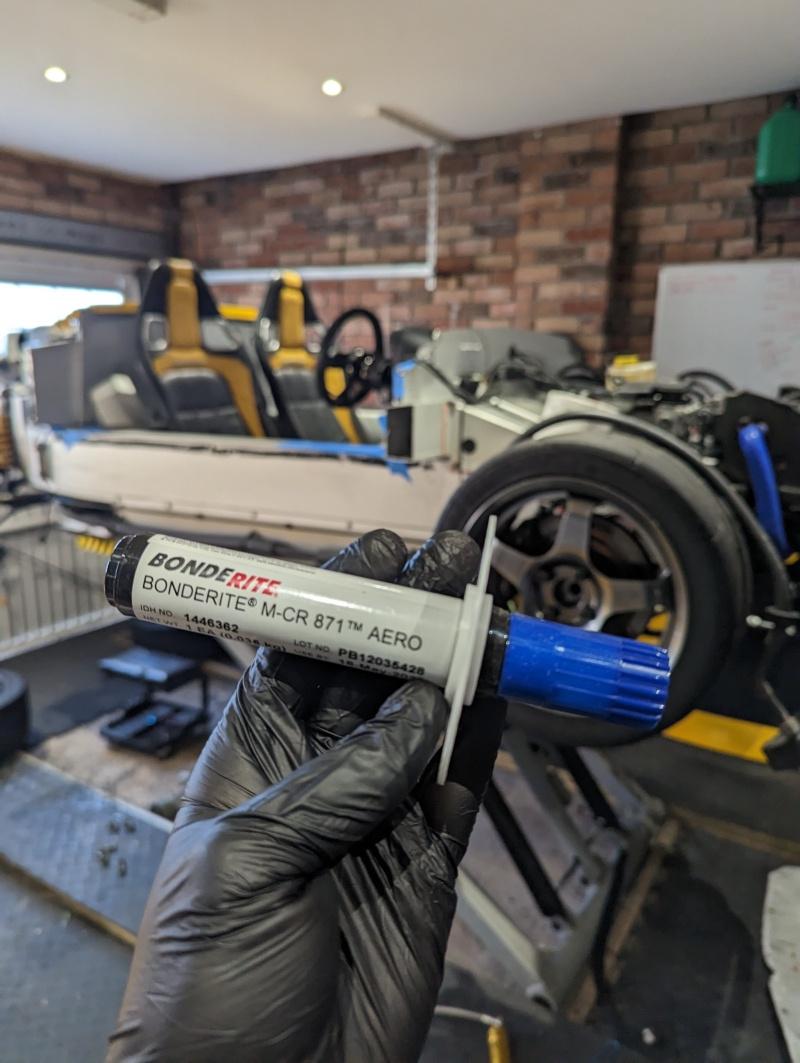
I’ve never really taken much notice of this before on my previous Lotus. the done thing is to take the parts off, slap a load of duralac in (isolating jointing compound) and bolt it back up and call it a day. This car has had some half-hearted attempt at some point in the past, but I think someone has just slapped gunk on the outside of the relevant parts rather than removing them and putting it in the gap… which seems pointless. They used awful, awful stuff too and gobbed it on:
So the plan was to take everything off that would easily come off, get it off to the powdercoaters and then clean up the chassis best I can. I talked to a friend who’s recently restored/rebuilt an S1 which had some similar corrosion dotted around and the plan, though maybe a little overkill became:
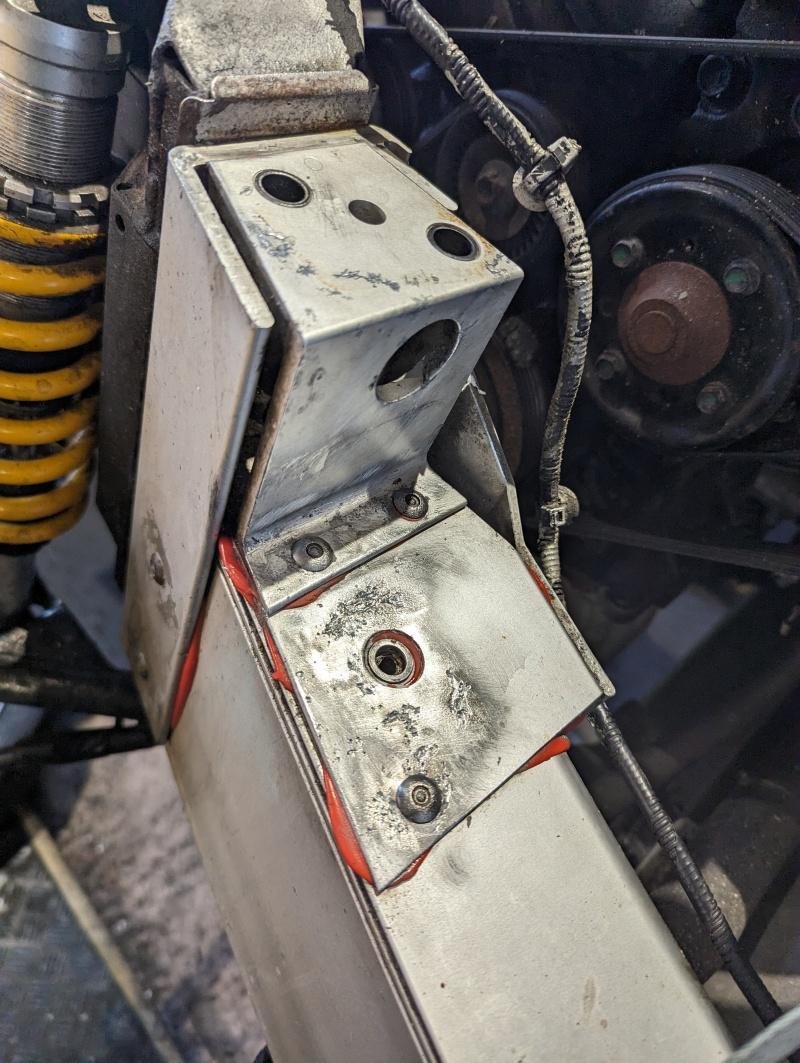
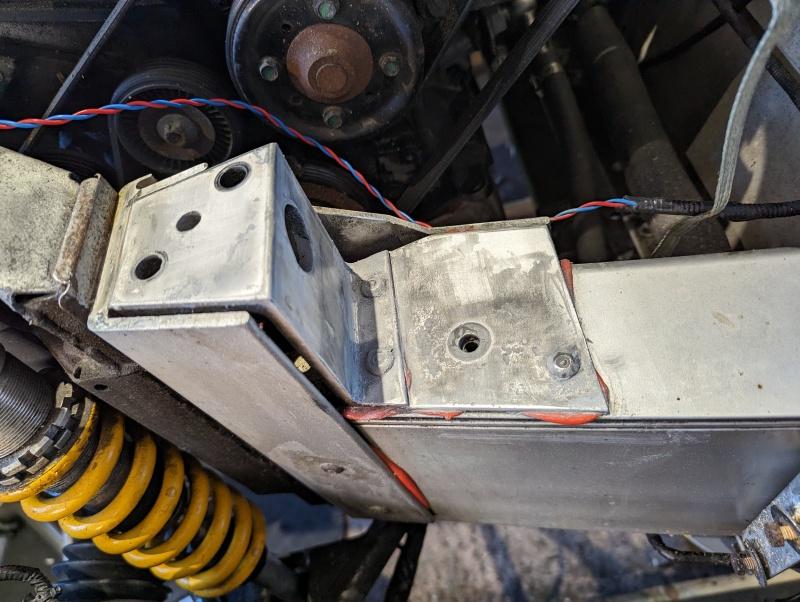
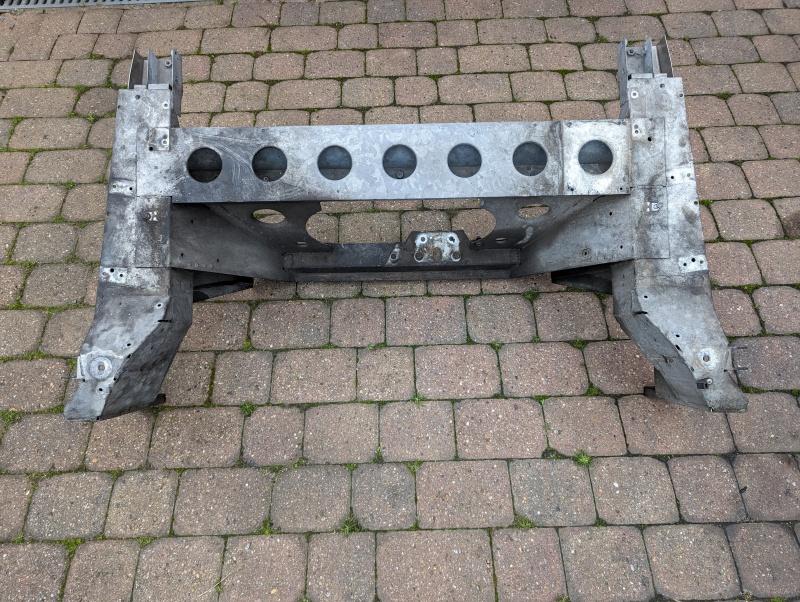
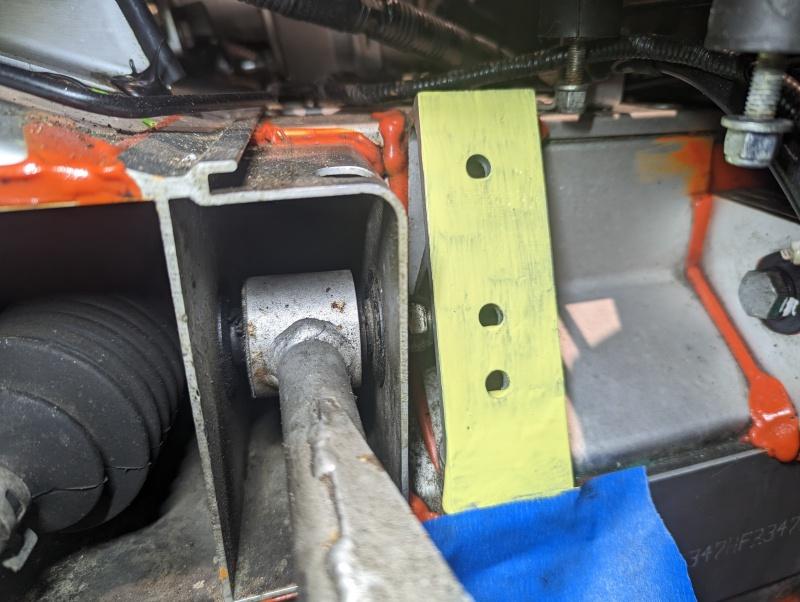
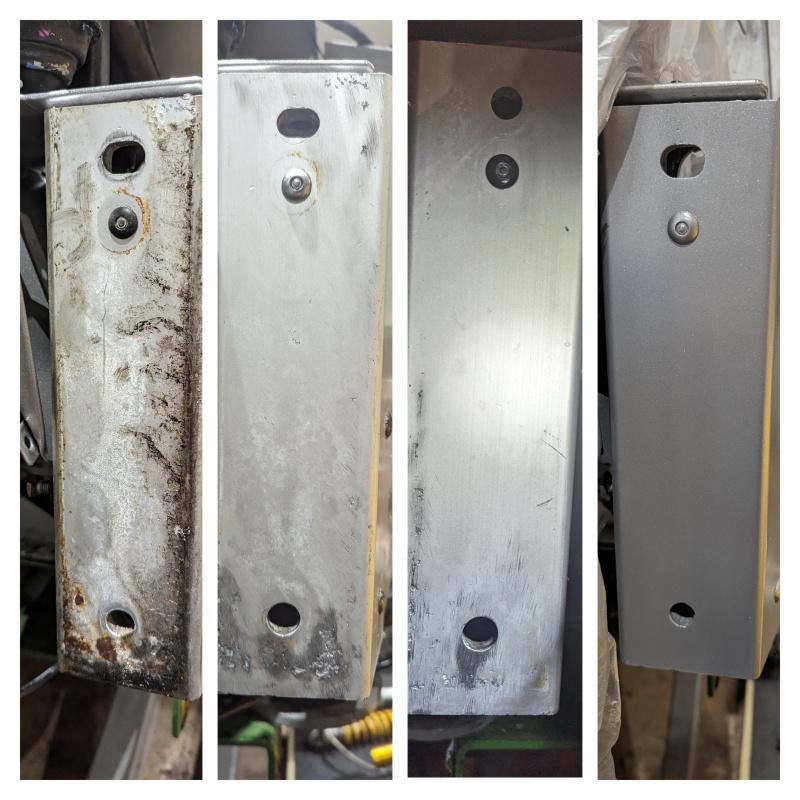
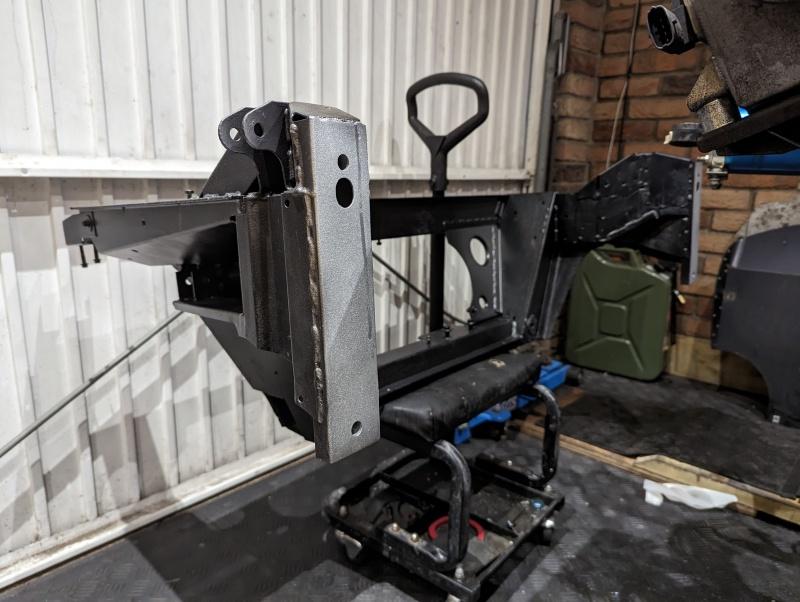
The easiest bit to photograph was the part of the chassis where the OS engine mount bracket bolts to.
After wire brushing. It felt awful to be attacking the anodizing like this.
Treatment with Alodine. Goes on completely clear, according to the label will kill you at will and felt really unsatisfying to use. No real evidence that it had achieved anything at all. Oh well.
Bit of aluminium filler, mainly to stop water being able to collect in the holes. This part won’t be visible, so it’s not an aesthetic job.
And then finally painted over. Well, not finally - I plan to sand this back and give it one more skim of filler but as I say, I wanted to get posting.
I’m really happy/relieved with how it turned out. I wanted to document it in detail here because I think it’s a thorough approach to future proofing the chassis, and didn’t want a potential future owner to one day find a bit of paint and filler on a chassis leg and panic thinking it had been in some sort of horrific shunt.
Just need to rinse/repeat on all the other bits now! I wasn’t planning it originally, but I think I’ll also pop the subframe off and do the flanges there. Then I can say that I’ve at least done everything I can, and this issue should not be a factor for the life of the car.
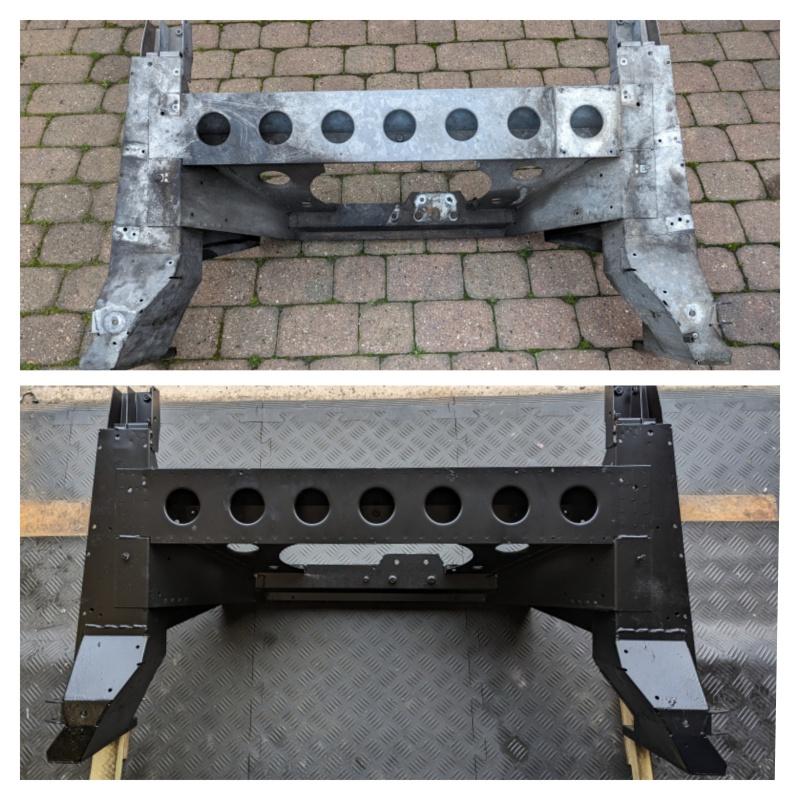
In the meantime, I outsourced some work to the powdercoaters
Going for brushed on POR15 for any parts not suitable for a dip and a bake.
The rear heat shield on the car had been hammered flat after a slight altercation with a garage wall in a previous ownership. I’d been planning fixes for this all year assuming it would be unobtainium as this was the last car to leave Lotus with this style heatshield on it, the post LotusMS cars apparently had a different setup. As it happened, a replacement was actually quite easy to source - and cost effective too!
I need to kit it out with rivnuts, then put it somewhere safe - as it won’t be needed for a while yet.
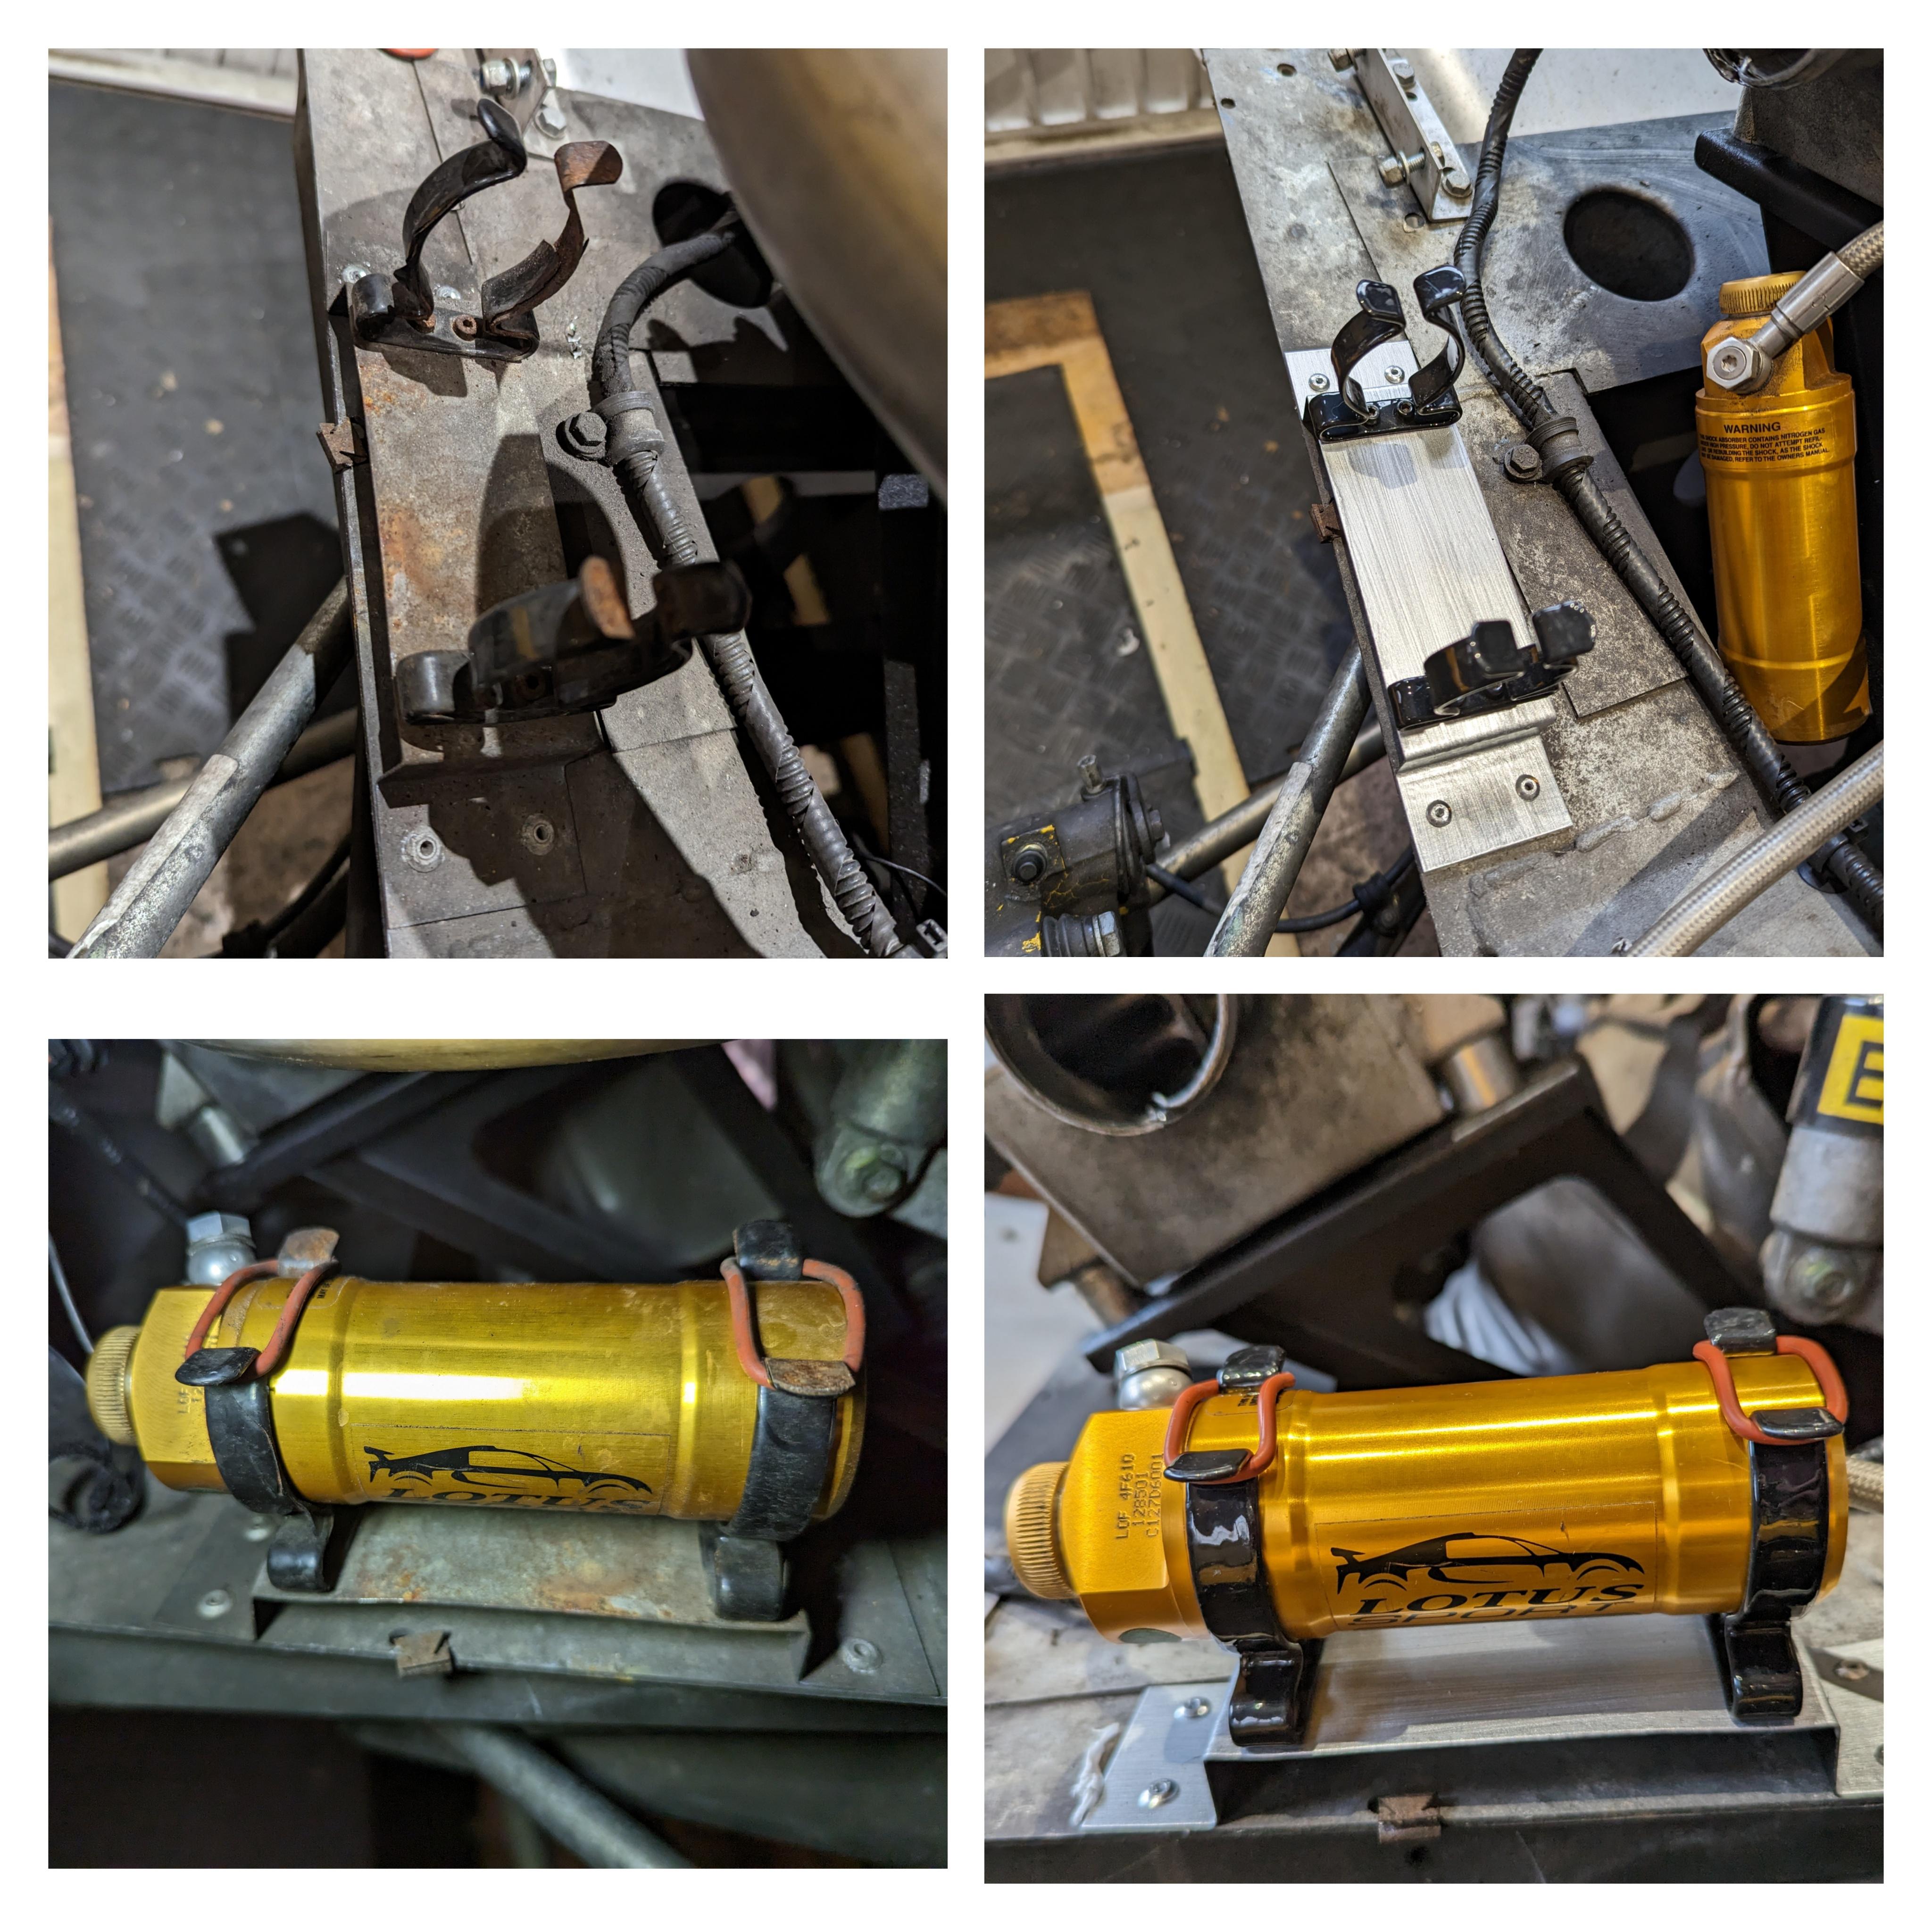
The Ohlins reservoir brackets were tidied up too at some stage. Replaced the clips with new ones, fresh o-rings to hold in place and a lick of paint on the brackets.
Also had the tedious task of scraping the weather stripping from the clam/aeroscreen.
Cage is due for collection from powdercoat tomorrow. It’ll probably live in storage for a while because I’d really like to avoid scratching it clambering in/around the car.
Awaiting a few wiring gubbins to complete some of the other work I’m doing, so will hopefully have an update to that over the weekend.
Classic!!! ![]()
No arch liners you say? Now that’s pretty tempting….
Wow, I love the in depth effort you go to in making it be the best you can.
Amazing work as always ![]()
Seeing the corrosion on the areas of mixed metal was a bit of an eye opener for me. Not that it looked particularly bad on your car, it’s just not something I have been particularly aware of.
I’ll add it to the endless Lotus to do list!
I’m just sticking my head above the parapet to say this is great reading, honestly. Doing the job is one thing but recording all the steps = something else. Splendid, I forsee a rather nice autumnal calendar photo coming up… ![]()
More great work. I’m fascinated by it all. Maybe I’ve said that before?
Too kind, as I keep saying - it’s only nuts and bolts… but the pile of nuts and bolts is getting higher and higher, and the car is looking less and less like a car.
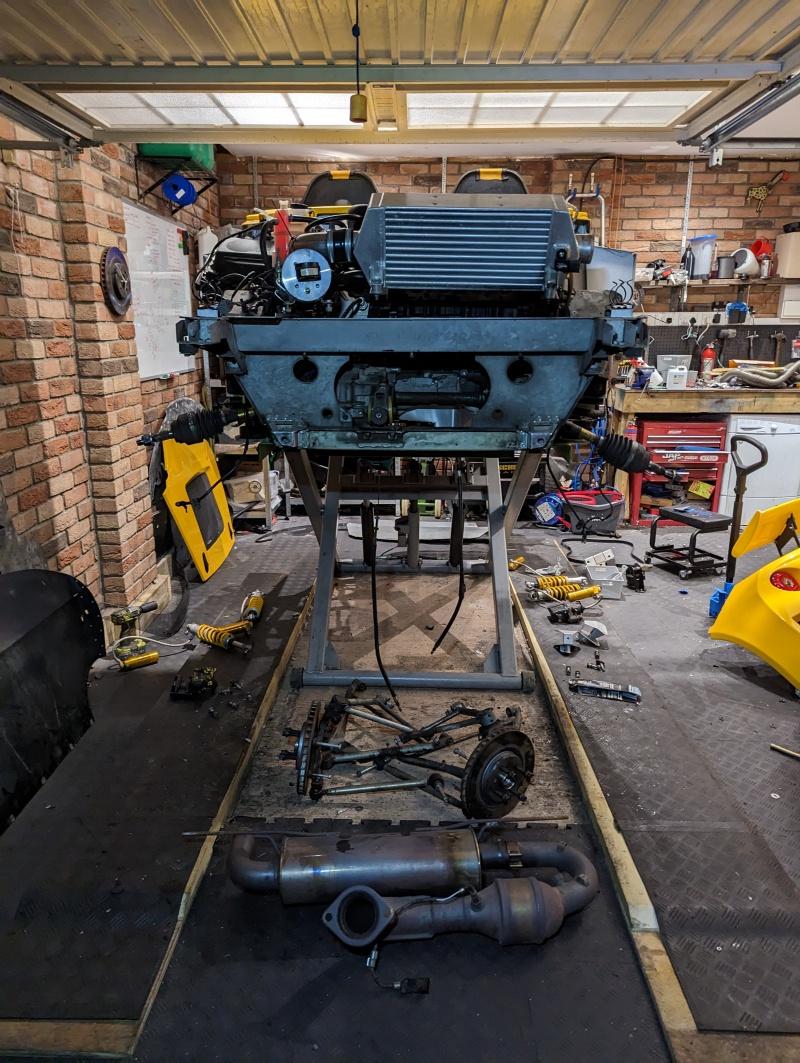
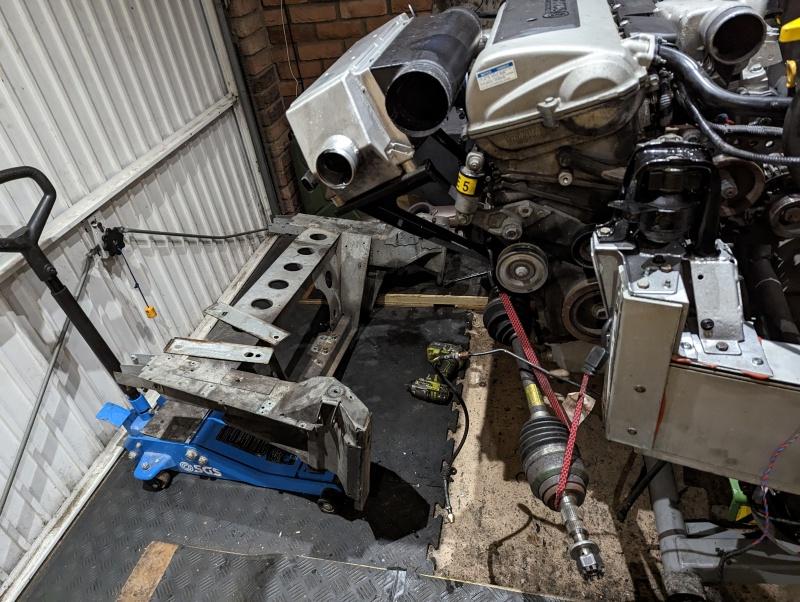
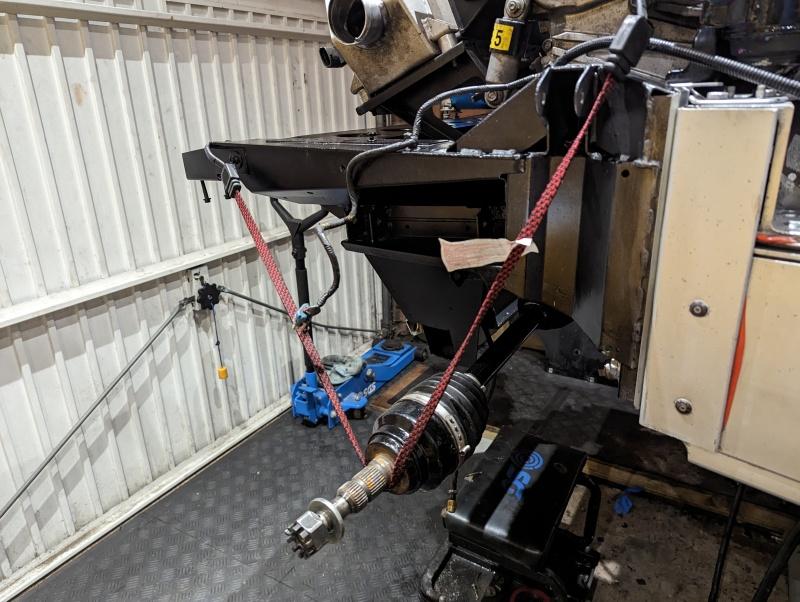
I decided to go ahead and remove the subframe. It’s another job I’ve yet to attempt on a Lotus despite having fairly comprehensive refurb attempts on three different cars now. Always happy to try something new.
First up, the exhaust and suspension came off. Nothing new here, and barely the work of an hour for me nowadays.
Suspension corners came off in one big assembly, which I may need to break down to refit as it’s a heavy old lump to lift and line up to the pickup points. That is, if I can resist the temptation to strip it all down and refurb that too…
I detached the flexi/braided brake hoses from the solid lines, just for long enough to pull them out of the clips on the subframe and then re-attached, with a brass blanking plug over the end which previously screwed into the calipers. Should prevent my ABS circuit from draining which is a real PITA to rebleed.
With that sorted, it was just the rear engine mount connecting to the subframe - a load of wiring clips and the four M12 bolts holding the subframe to the chassis.
Boink
Car now looking really, really intimidating to look at.
I was due a trip over to collect the cage from the powdercoaters, so I’ve done them a swap and let them have a go at the subframe too whilst it’s off.
Really happy with the cage, lovely Satin finish - very OEM looking. Obviously the test of time is the only important one, but I’ll see what I can do to protect the finish a bit before it goes back in the car.
As for the subframe, it’s an ugly lump but no corrosion or issues with it at all. I debated whether to get it powdercoated or not in the event the original galvanised treatment was compromised. I didn’t want to end up with something with worse protection than it currently had, as we all know powdercoat can eventually chip off and I especially know that it’s subject to a few knocks when a gearbox comes out!!
The Powdercoaters (Powder and Paint in East Yorkshire btw, very good service so far and a strong recommendation from @seriouslylotus ) put my mind at ease, they have a special blasting media for galvanised finishes and often powdercoat stuff fresh from the galv process which is much more difficult than an old/worn part like this. We’ll be masking off the mating surface to the chassis, and the rest will be done in satin black to match the cage and hide the ugliness of it a bit…
Speaking of the chassis, the reason for going to the extra length was to inspect the extrusions where the subframe mounts. Corrosion not too bad at all, but still glad I’ve done it.
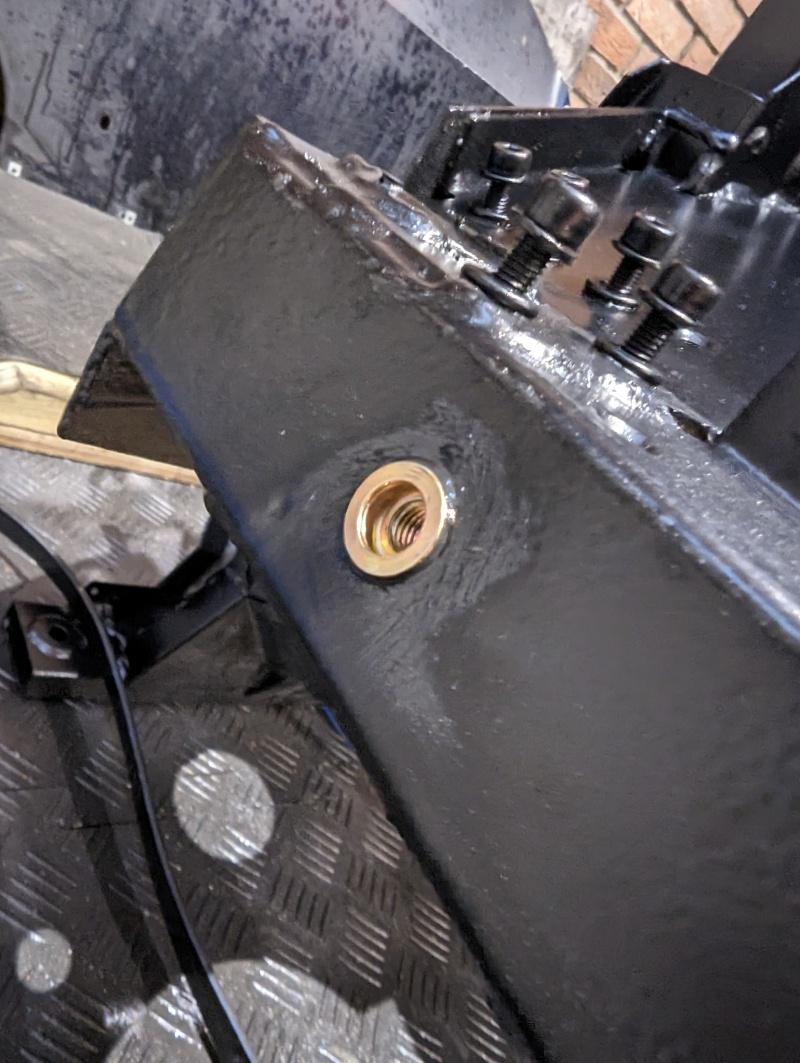
Just a bit near the bottom. I’m going through the alodine, fill, paint steps here too - and with a nice coat of duralac on rebuild it should never be a problem again.
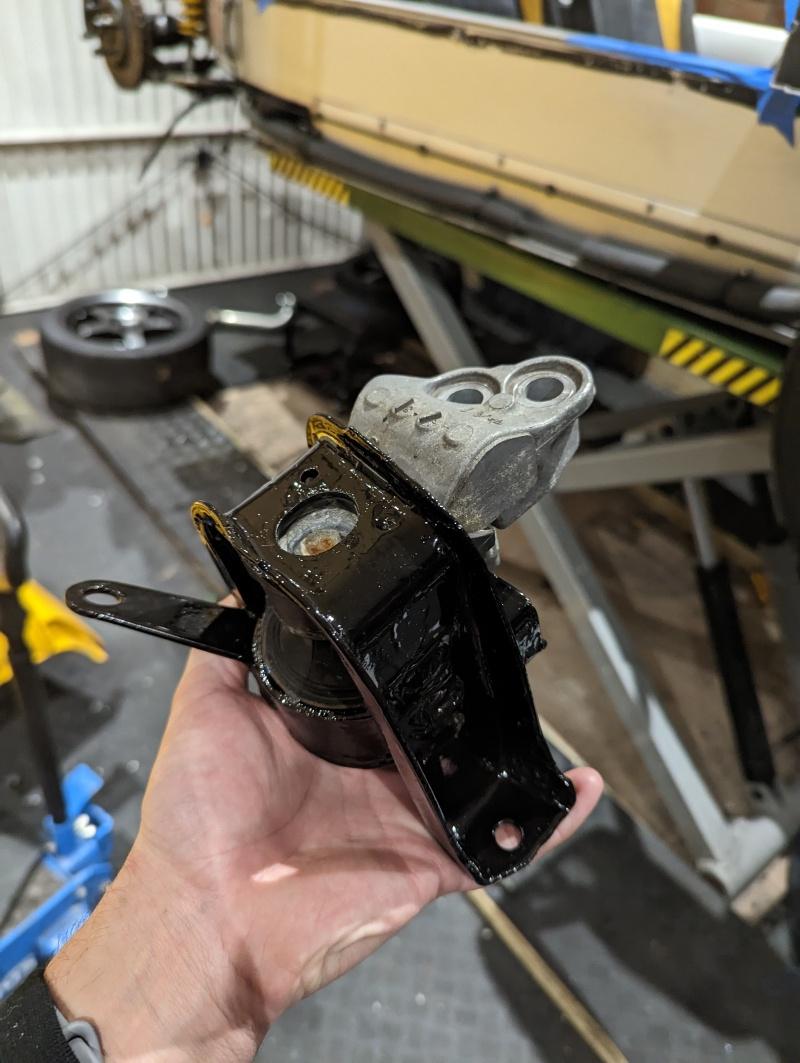
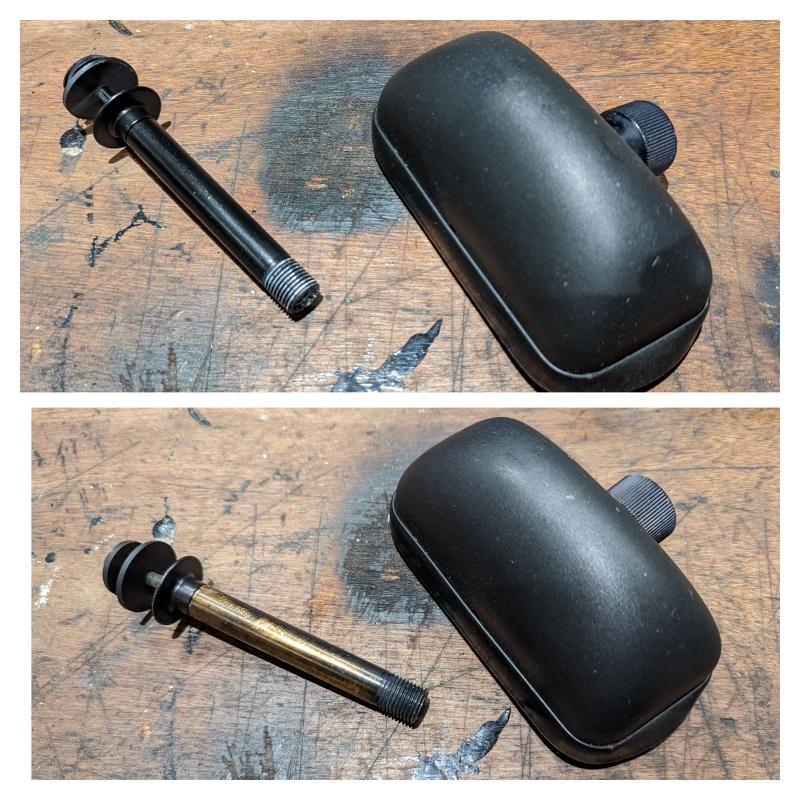
On the note of duralac, the stress of the state of the car was getting to me so I went for a token rebuild victory and fitted the freshly powdercoated damper mounts to the front of the chassis. This is what duralac looks like, its minging.
As I alluded to earlier I now have the festive period to decide whether to do anything to my wishbones/uprights to tart them up. It was always a Winter 23/24 thing in my agenda because they’re not that bad as they stand… but they’re going to look nasty against a spanking clean subframe.
We’ll see where it goes, and whether I find other places to scope creep between now and January.
Powdercoaters made short work of the subframe, to their own admission not quite the aesthetic grade job that the rollcage was but it will do the job.
They’re confident that the galvanising protection is retained, where it was still intact. I’ve spent some time rust proofing the various threads and cavities and also replaced a couple of rivnuts that didn’t survive the journey.
I’ve got new fasteners and pclips for the various sections of loom that attach back to it so it should all look rather fresh.
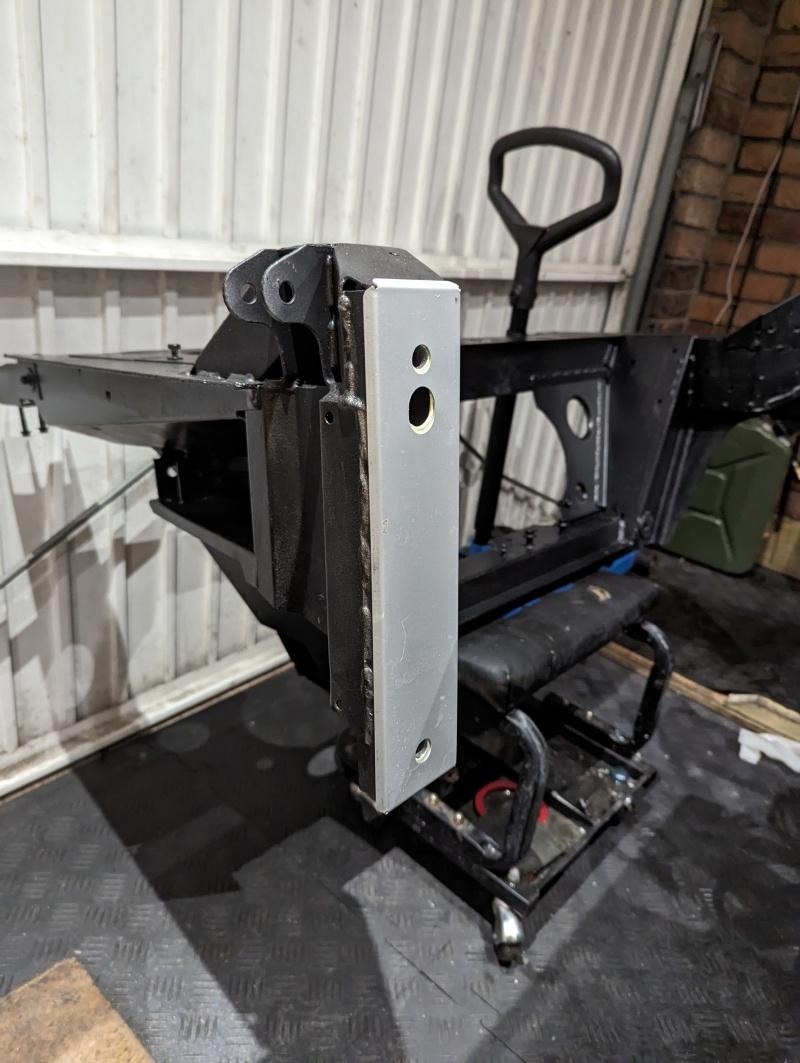
I finished off the ‘repair’ and future proofing of the aluminium chassis side of the union.
The mating surface of the subframe was masked off during the powdercoating, but I gave it a dusting with a zinc primer to give some protection.
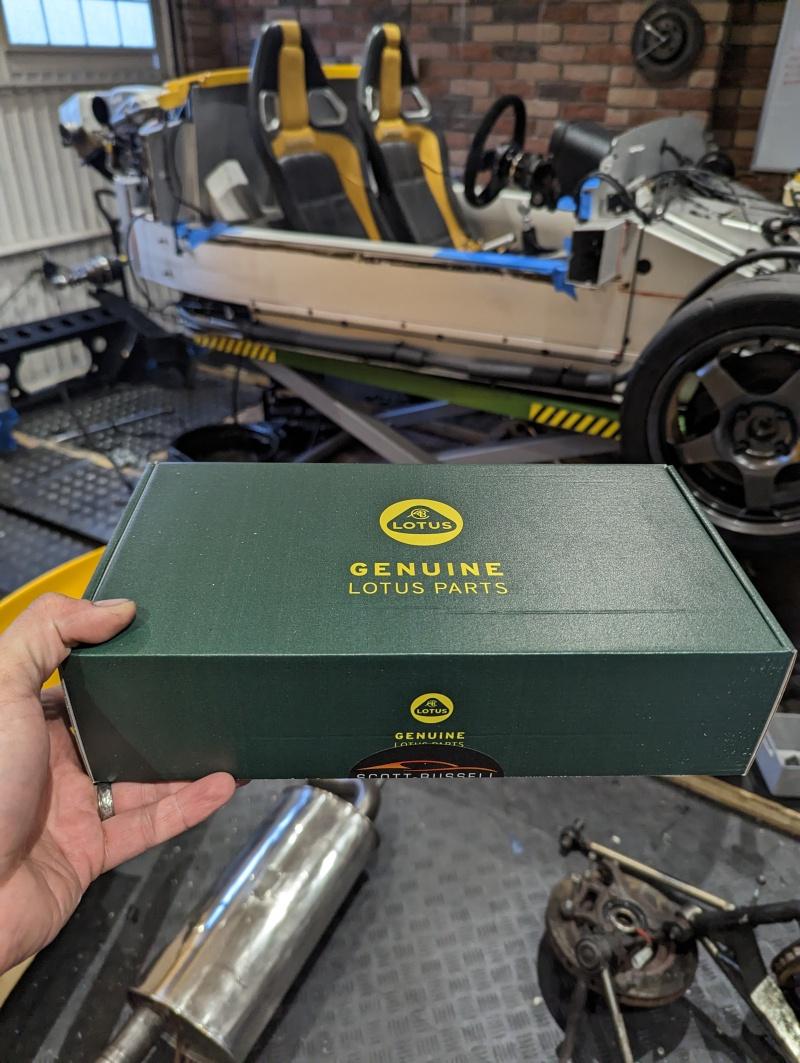
Box of goodies from Lotus included two new shim plates that sit between the subframe and the chassis, seem to also be coated in some sort of chalky primer to help with the corrosion resistance.
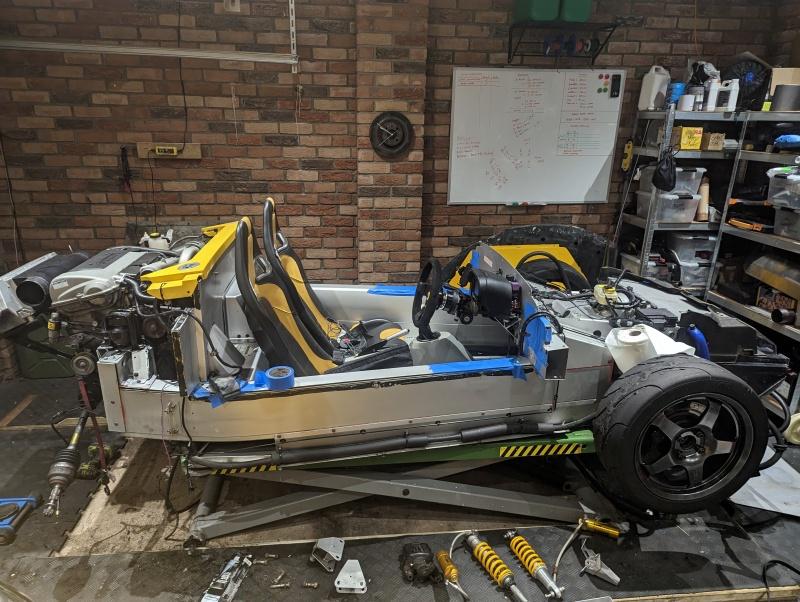
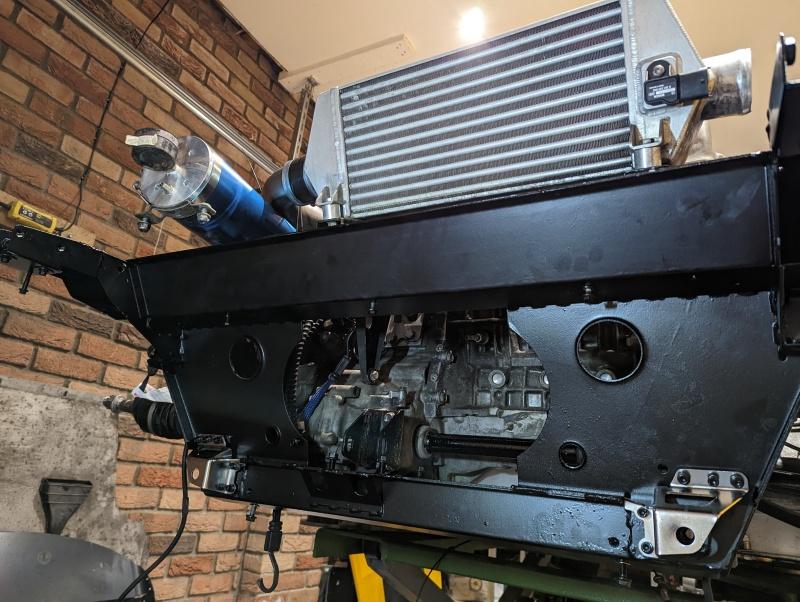
Lowered the car to roughly the right height, then offered the subframe up to the car on my wheely stool and was surprisingly easy to bolt up with some nice fresh hardware.
Love the look of it, nice milestone to get it back on too.
You may also notice the driveshafts got tarted up with some POR15. Probably other stuff too, starting to lose track!
Some other bits I’ve been on with too…
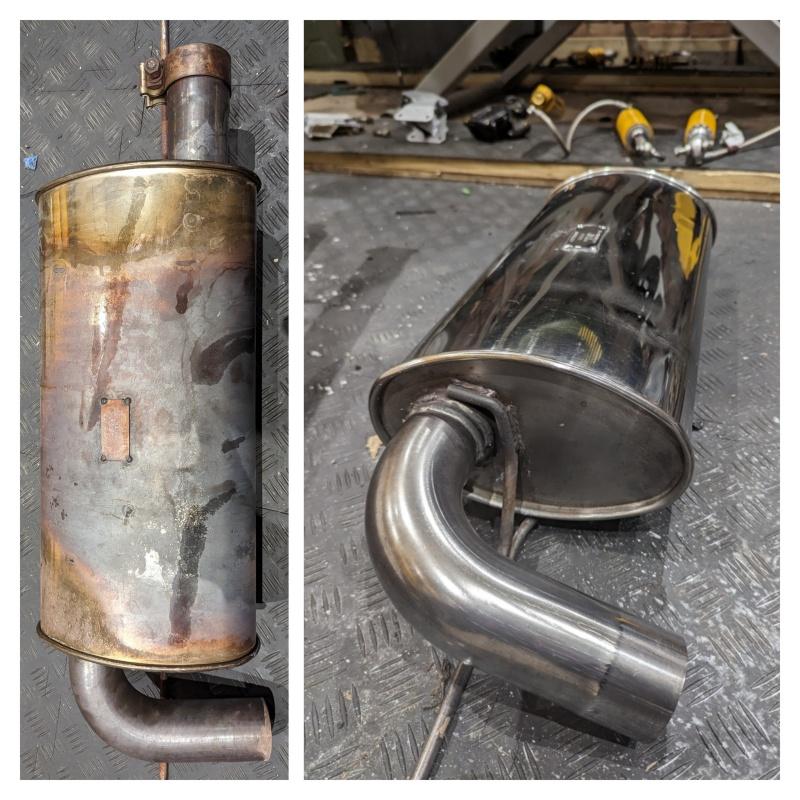
Gave the backbox some love with some wet and dry, then metal polish. It’s not quite perfect yet - but as perfect as I can be bothered with until I run out of other jobs.
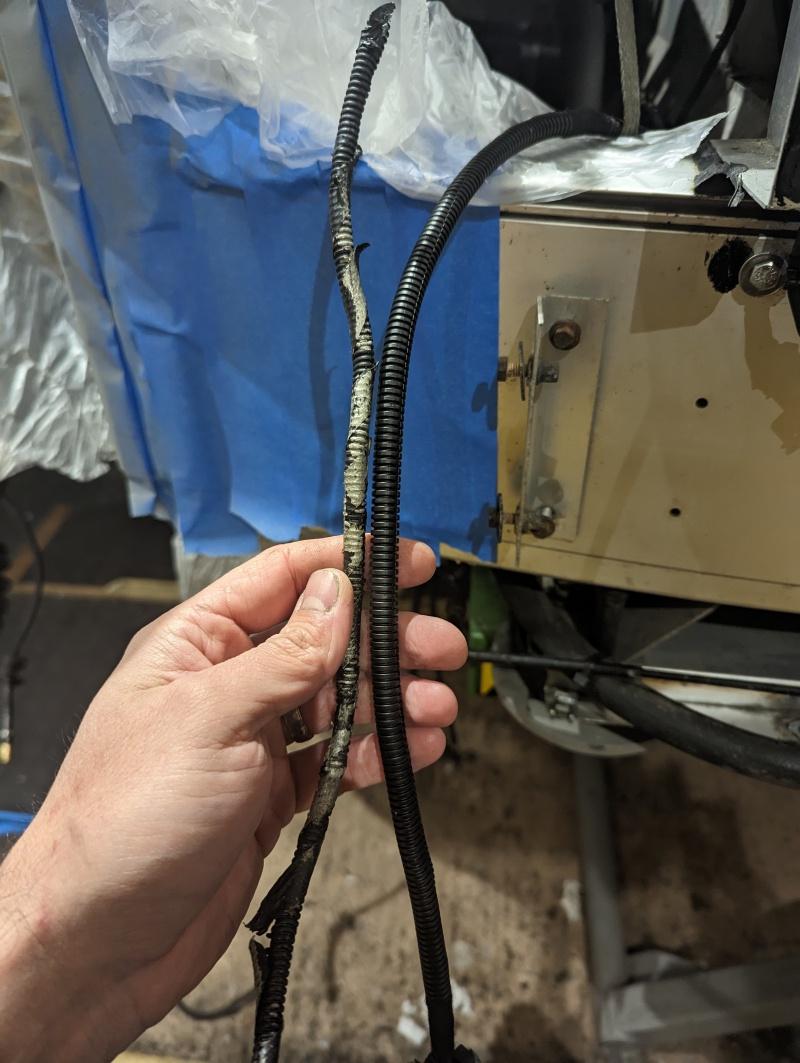
Replaced some cable trunking that was covered in the previous attempts at corrosion protection.
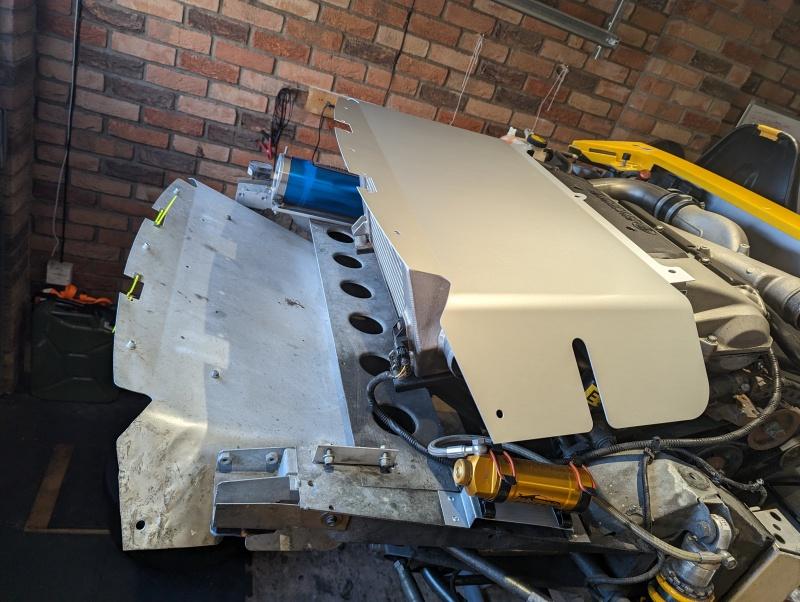
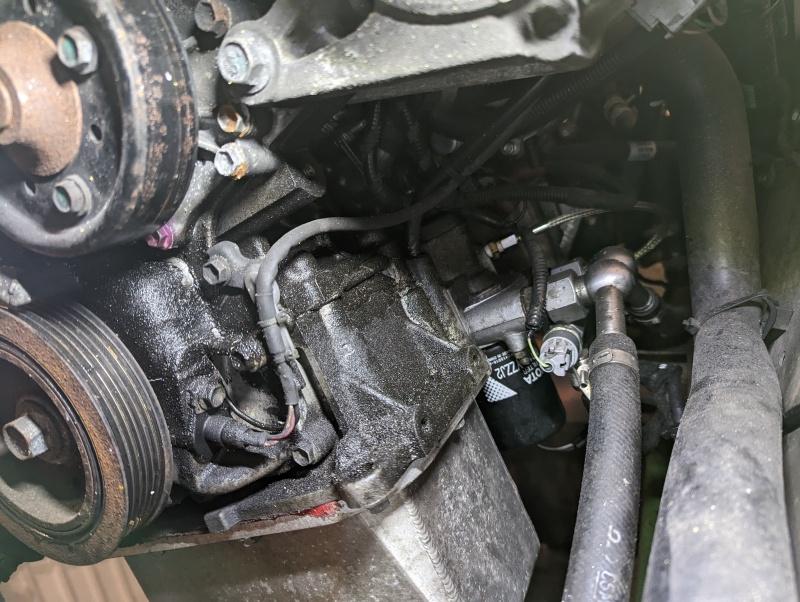
The next thing I’ve got to tackle is this.
It’s a little odd, there’s a fair bit of oil back there - hard to tell if it’s “fresh” or not, but since I’ve fitted the sump back in Summer I’ve had no mess drip onto that, and haven’t had drips on the undertray since owning the car so this could just be a legacy mess. Still, with the subframe and clams off this gave me some pretty good access in back here to address anything that could be causing the leak.
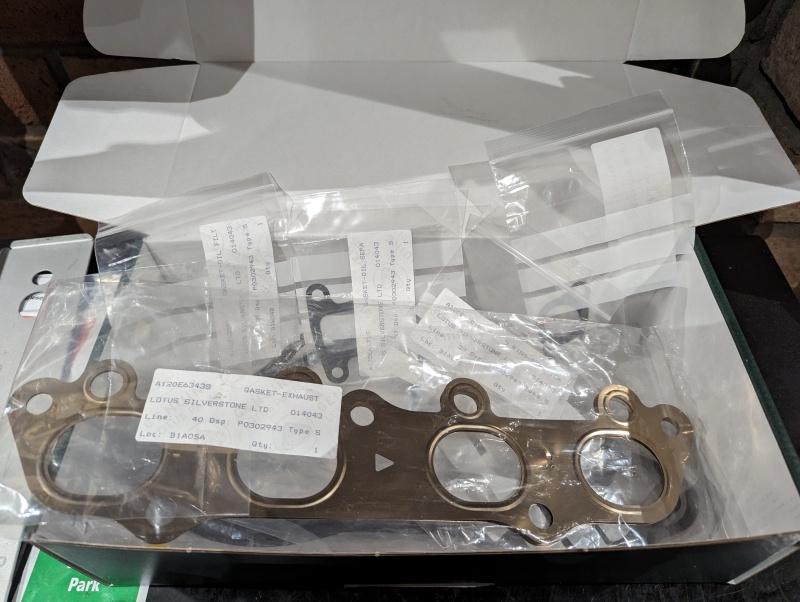
In my box from Lotus I have got, amongst other things:
Supercharger nose is also up there somewhere, that has a small amount of oil in it but I’ve fondled it and there’s no oil spattered anywhere on it, so ruling that out for now.
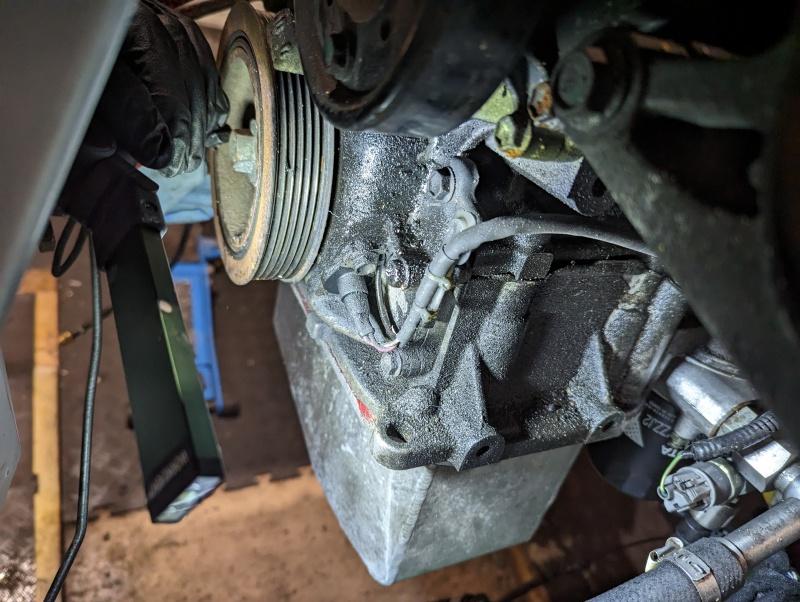
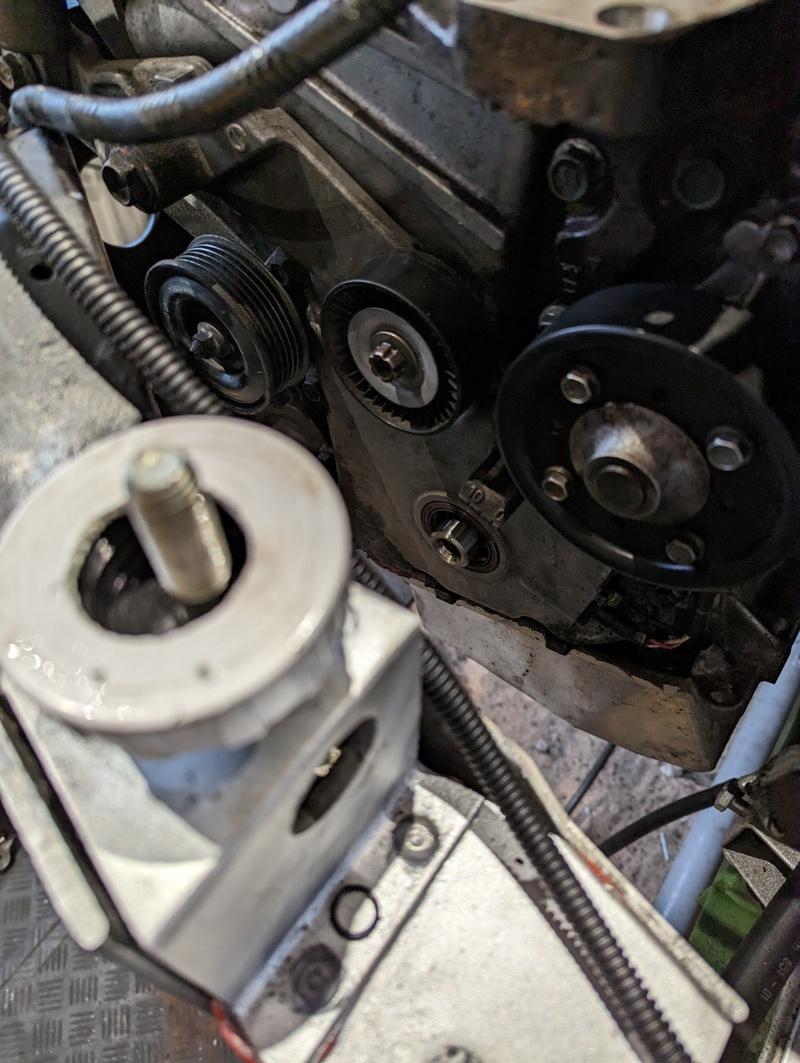
Any other suggestions welcome, but I’ll be working my way through these over the next few days. So far I’ve given the block a bit of a clean, and taken the crank pulley off. I wasn’t convinced this was the cause, but my Exige did have a leak from here so it’s something I wanted to cover off whilst access was easy.
No obvious spatter marks from it, though the gallons of brake cleaner I’ve blasted at the engine probably ruined any evidence. It’s a cheap part, so no reason not to change it while I’m here.
Great progress here @Fonzey. The car is going to be mechanically and cosmetically unrecogniseable other than the yellow paint!
Quick lunchtime update, as RM decided I could have a package early today.
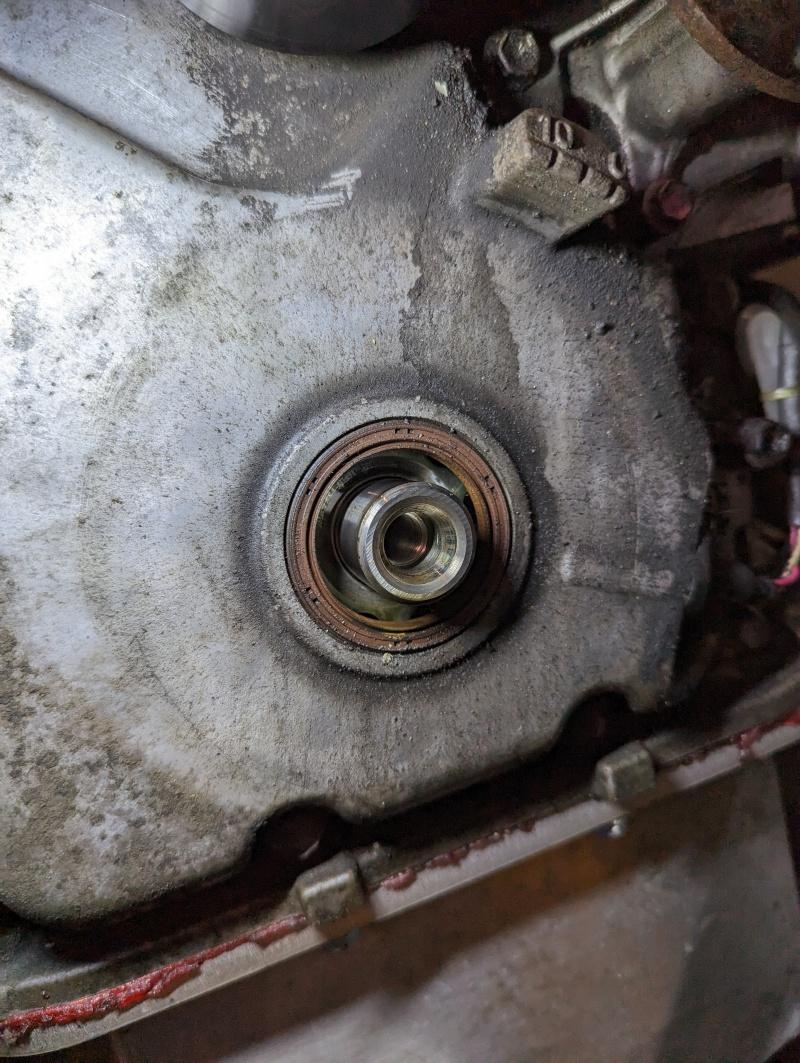
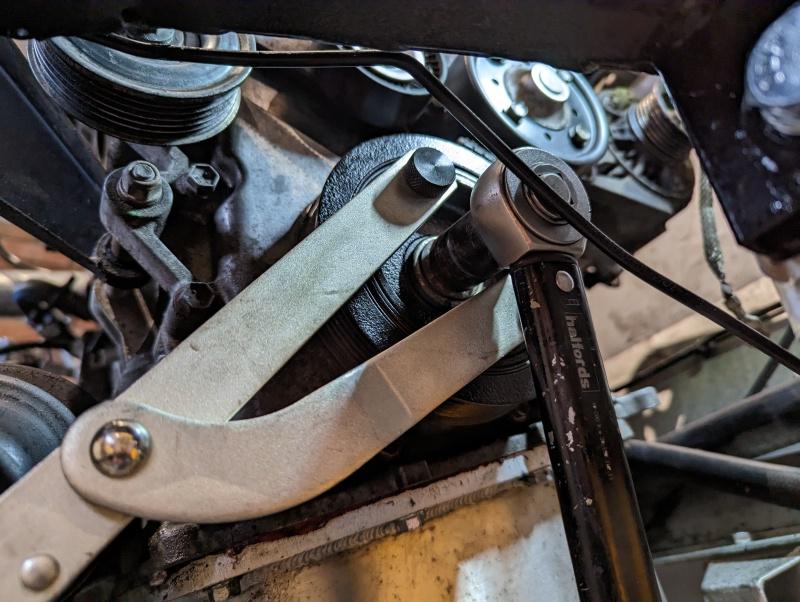
Crank seal in, with my home made insertion tool showing off in the foreground.
Rarely for me, I had an actual proper tool to do a job.
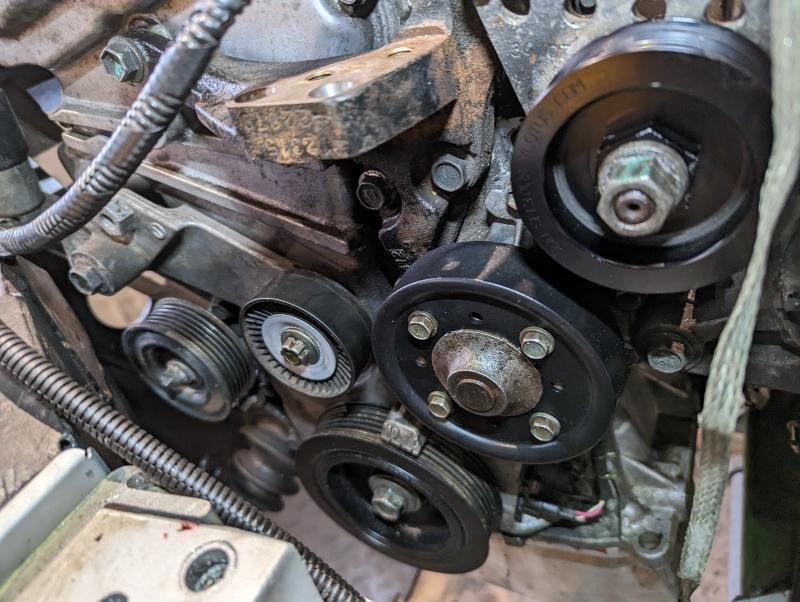
You may have noticed my pulleys have all had a bit of love, sprucing up the metalwork and a lick of paint for the plastic bits. Oh, and the supercharger pulley somehow got new and small.
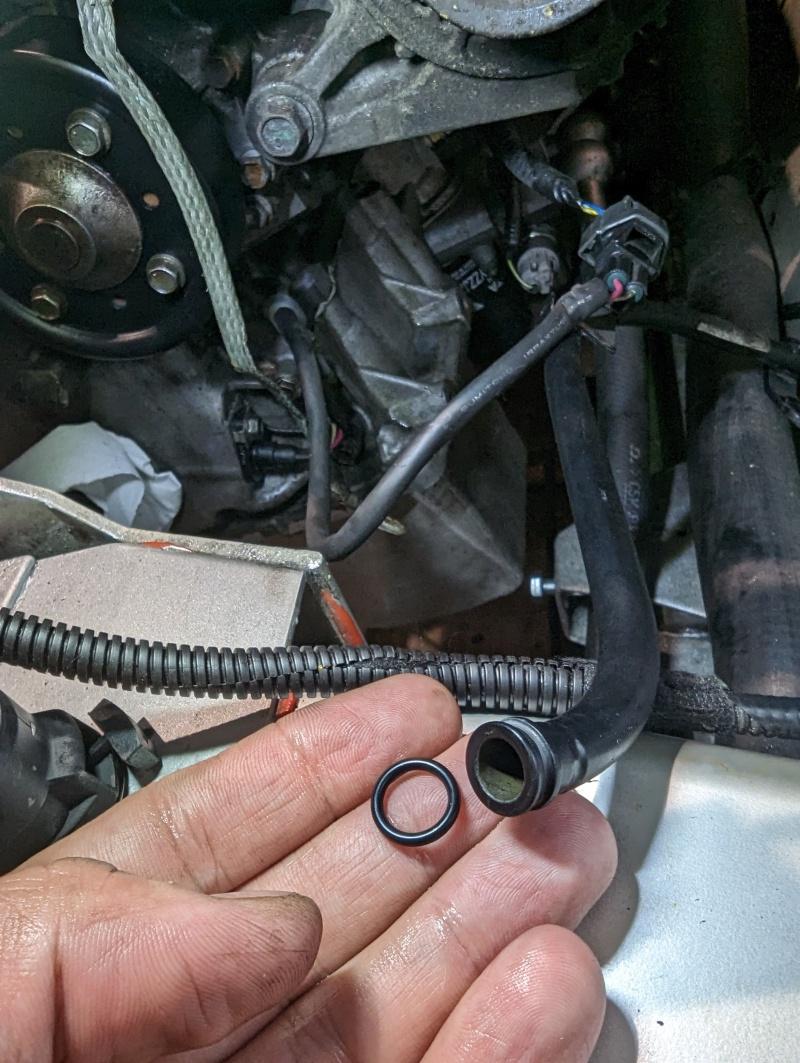
Also did the dipstick o-ring (PITA) and the crank sensor o-ring, so that’s three seals done… few more to go.
I find it perplexing how the supercharger pulleys shrink when you remove them.
Not something I have experience of… but if I had such a pulley, it would have reached ‘very small’ by now, knowing me… ![]()
I know I’m exposing my lack of skill here, but I genuinely find I hustle along quickly enough on the track without a blower, but on the road it would make the car more fun, I think?
It’s a fools errand adding power, it adds no additional thrill on track - might shave some untimed seconds off but who cares, really?
I had as many track thrills from my 111R as I had in my Exige as I have in the 2-Eleven. I find added power much more beneficial for a road car, contrary to what you’d think is obvious. When on the road, you’re not going to be dancing around at the limit of grip, at least… not very often - so you have to seek thrills and adrenaline from more mundane things like accelerating out of a roundabout, up a slip road, etc. Power, and specifically torque become a more substantial part of the driving experience on the road compared to on a race track.
On track, no matter how fast the car is - you normalise within a couple of laps, and it feels no different. There’s perhaps an argument for not getting ‘caught up in traffic’ and having power to blast around slower cars certainly helps - but is not a game changer.
For me it’s all the thrill of the chase. Planning out on-paper-improvements, buying parts, fitting parts, removing parts after I realise they ruined the car, rinse/repeat.
I have some plans this time around to alter my course slightly from that of the Exige. In terms of hardware fitted to the car it will be practically identical, but using some switchable maps I intend to give myself half a chance of running the car with OEM-grade reliability whilst still producing fireworks on demand. We’ll see how that goes.
Top job! Yours will be up and running before mine, I dare say☹️
I agree with the thoughts re power. Was discussing the same with a friend recently and concluded that the best track car I’ve had, when considered purely on levels of fun, was my S1 elise with the 143bhp vvc engine. The SC Exige was very exciting to own and drive, and a thrill on the road but on track I felt it was faster than I needed.
@Fonzey The cockpit cover on this car is a nice touch.
Yeah they’re pretty cool and allegedly a bit of an aero/drag penality upgrade. Does mean deleting the passenger seat though ![]()