Really cool to see how much less ‘stuff’ there is underneath the front clam than the Exige. It looks very clean under there as well which bodes well ![]() .
.
1 Like
Great write ups and pictures. I was late to this thread but enjoyed reading through thank you
1 Like
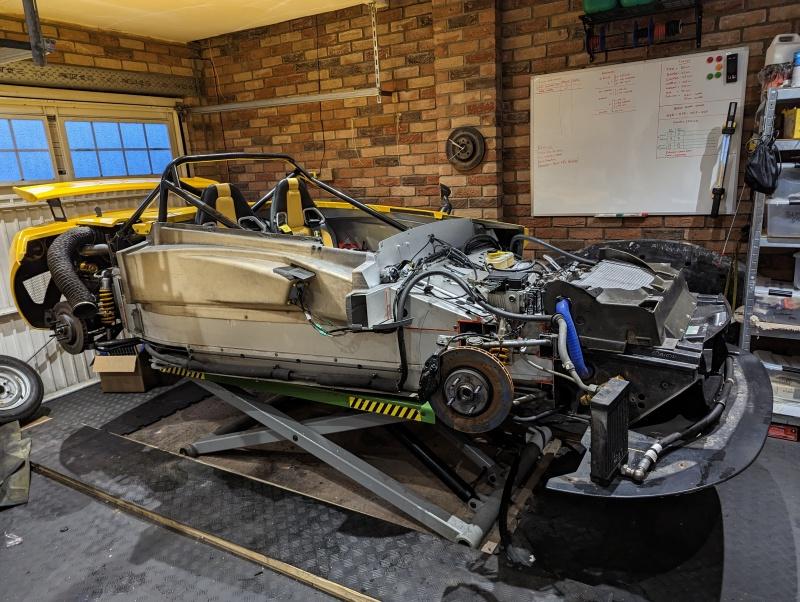
A bit more bodywork has come off this weekend, and really given me a good view at the car to get things planned in my head.
With the front clam off, the side panel was the work of a moment - half a dozen fixings and it popped off as an easy one-man lift.
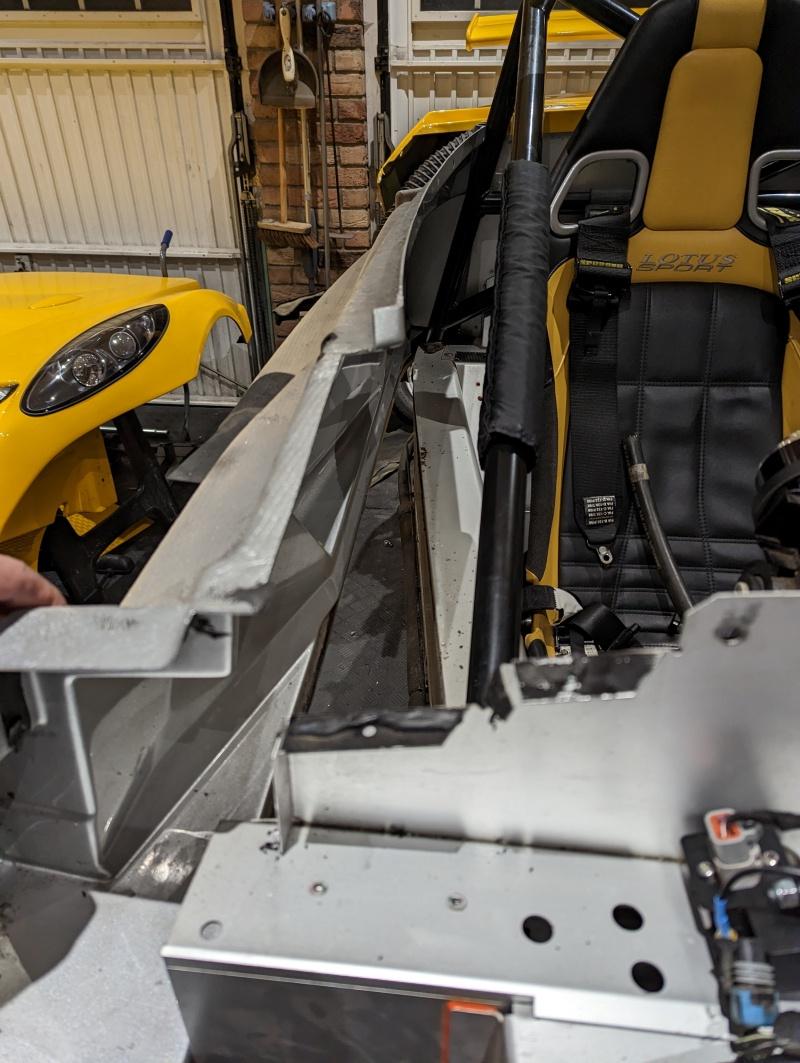
This is a view that most Lotus owners will never see, because the sills are bonded on to the Elise/Exige models. For a chargecooler install, it’s simply dreamy - no blind bungling of some rubber hoses down the sill hoping for the best.
Up till’ now working on the car had been a treat, but up next was going to be the first real awkward bit. The interior ‘doorcard’ skin was bonded to the chassis, all the way along the bottom, leading and trailing edges was stuck down with Betaseal - the sort of stuff that windscreens are glued in with and the same stuff that Lotus used on the front crash structure. Really tough stuff to deal with.
I wanted this doorcard off to give me access to take the cage out, so that can be spruced up. I really, really didn’t want to risk breaking the doorcard so it was a few bravepills popped before I got started.
I eventually found success with some locking wire fished through, with handles fashioned on each end and then sawed away at it. Supported by assistance from a palette knife and eventually I had two of the sides completely freed off.
The trailing end was to be the most difficult, because it tucked under the painted scuttle panel with the fuel filler cap - which was also bonded on. Grrrr.
Eventually though, over a couple of days I got it off - no damage, but some very cut up hands and a sense of dread about how I’m going to get all the remaining betaseal off the chassis…
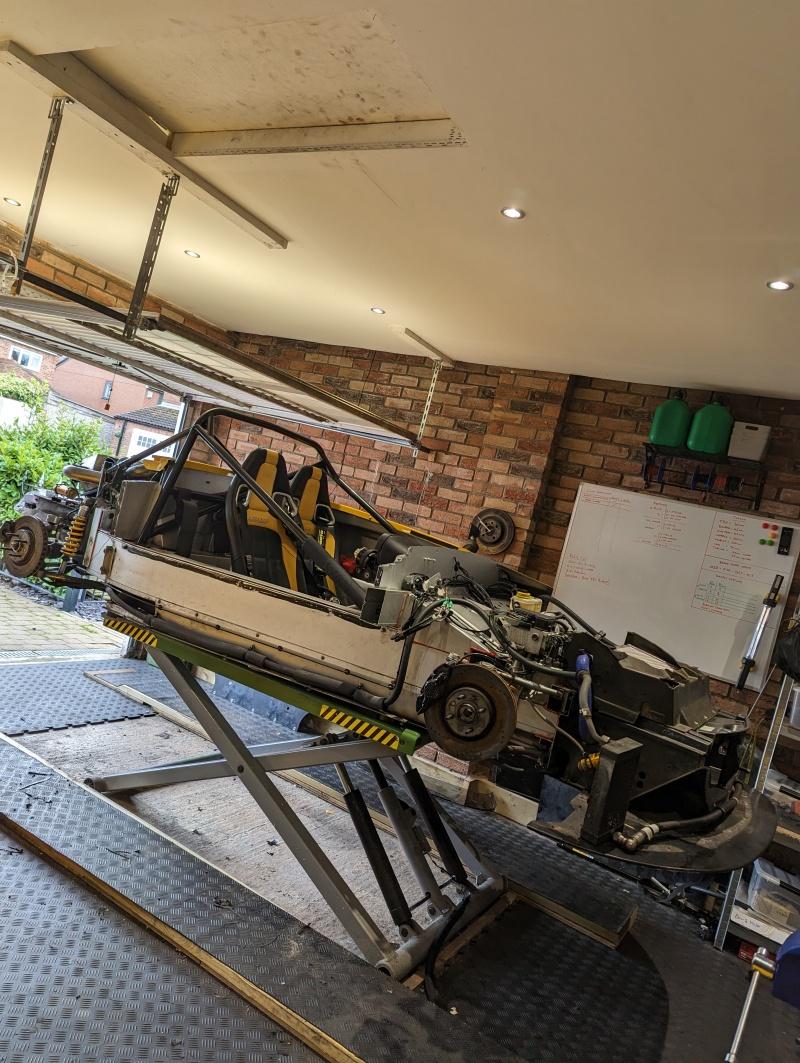
As you can see from the picture above, the rear clam came next and this was again the work of a couple of minutes and a one-man lift to get it gently down from the car.

This now gives me access to everything I need to complete my winter work. The Cage should come out in an “up and sideways” direction towards the driver side… but for the effort it’ll take I’ll likely take off the passenger side panel anyway just to avoid risk of it taking a knock. I’d really, really like to avoid ‘unbonding’ the doorcard on that side, but I should get away with it.
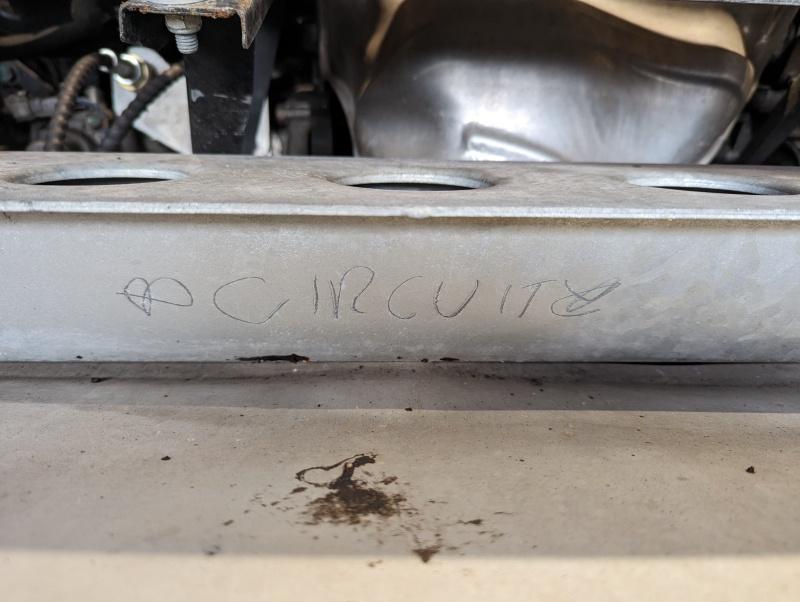
For the Lotus geeks, the 2-Eleven was known internally and to the press as just “Circuit Car” before it had a proper name. I guess this is how Lotus MS dept’ dealt with asset transfers from the production line.
2 Likes
Wow, that extent of strip down is really impressive, you have balls of steel!
Great work and thanks for sharing the progress ![]()
It’s just nuts and bolts ![]()
…and glue
… and cable ties
Now… where did I put all those nuts and bolts? ![]()
Loving it Kyle keep the posts coming, cant help thinking a great chance for a full repaint on std or a one off colour ![]()
1 Like
Cheers Lee. No bodywork this year, but I reckon now that I know what I’m doing the full body will be off the car in little over an hour, so easy to fully strip it if paint is required in future ![]()
FWIW, I think your yellow suits the car brilliantly - it looks great!
Yes I think it’s likely to only ever be yellow! As tempting as it is to have artistic license, it’s already had one respray so no points left for originality.
1 Like
Never, never change the colour. Apart from the fact I have a yellow car, I think yellow transforms the 211. I hate the original colours. Even red doesn’t work as well as yellow.
Now why would you go and spoil his day? ![]()
1 Like
Yellow ruins the 2-11 like every other car ever ![]()
![]()
It looks so, so good in Laser.
But I’m also fine with yella… honest.
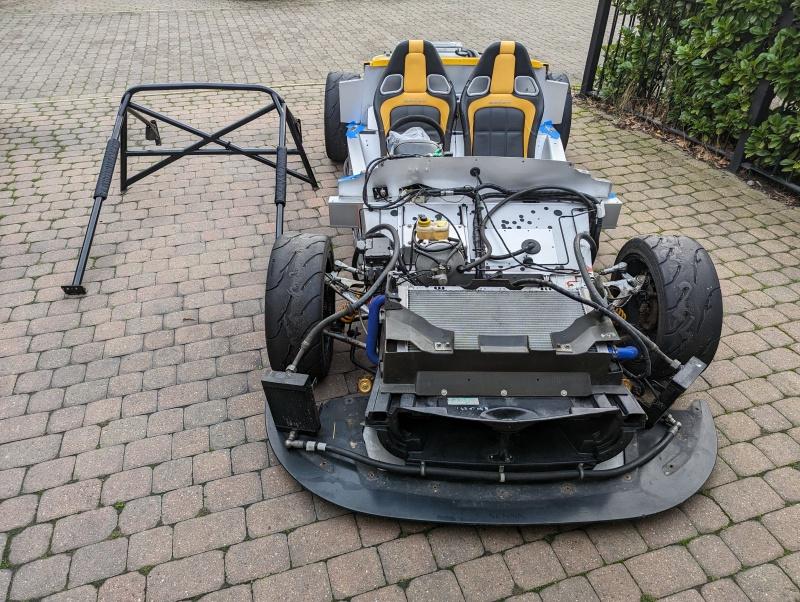
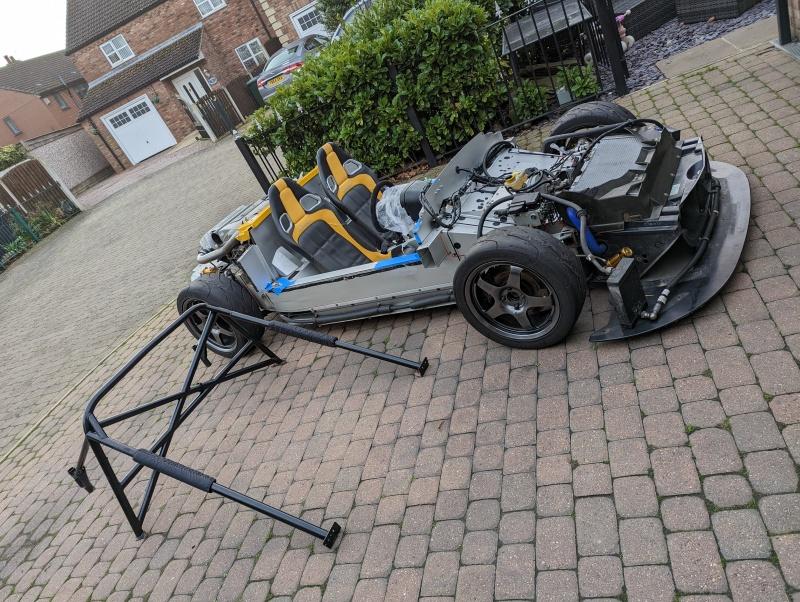
Last of the bodywork updates I think.
I decided to get the passenger side panel off, and attack the interior ‘door’ panel whilst at it. It would give maximum clearance for the cage, and I’d learned a few tricks for dealing with the betaseal now (warm it up!).
The body panel was off in under five minutes, and the betasealed’ interior panel within an hour. Not too bad.
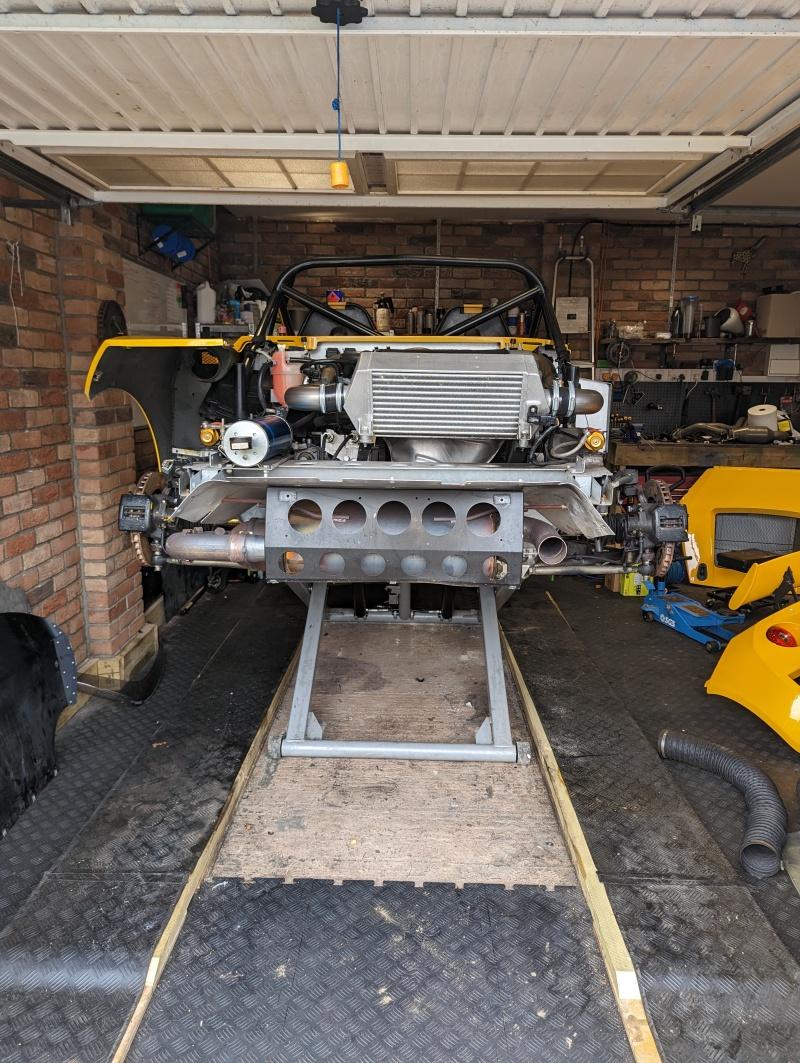
I spent some time masking off the bodywork around the cage legs, just to minimise the chance of any chassis scratching. I freed a few bits of engine bay stuff from the rollbar stays and soon ran out of excused not to attempt a cage removal.
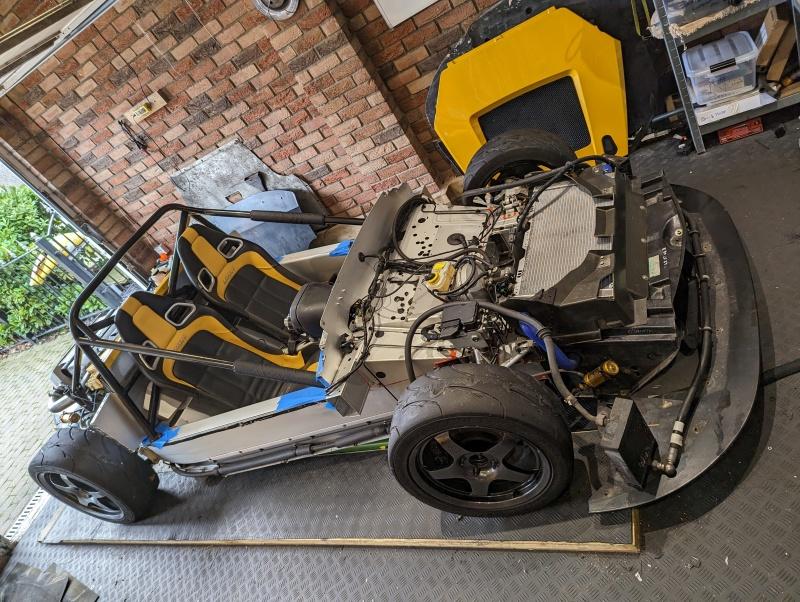
I popped the wheels back on the car, figuring it would give me more room if I did this on the drive… which allowed for some photos of the car, outside, looking pretty damn mean.
The cage was just a few bolts, then off she came.
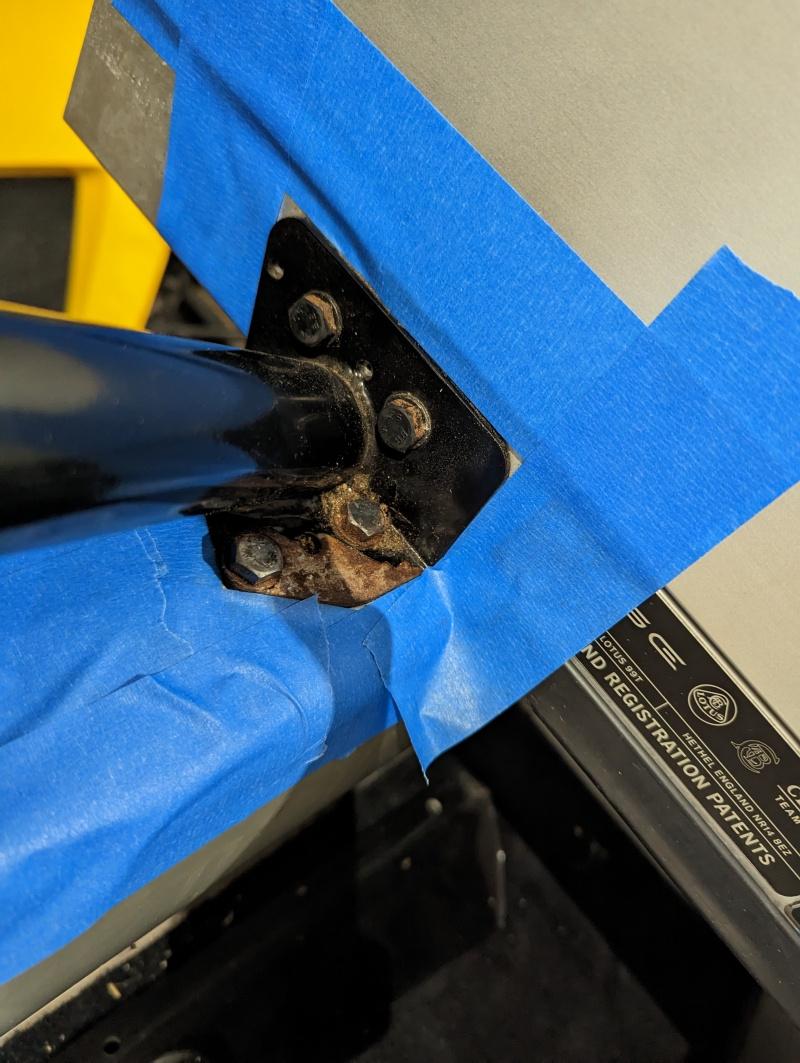
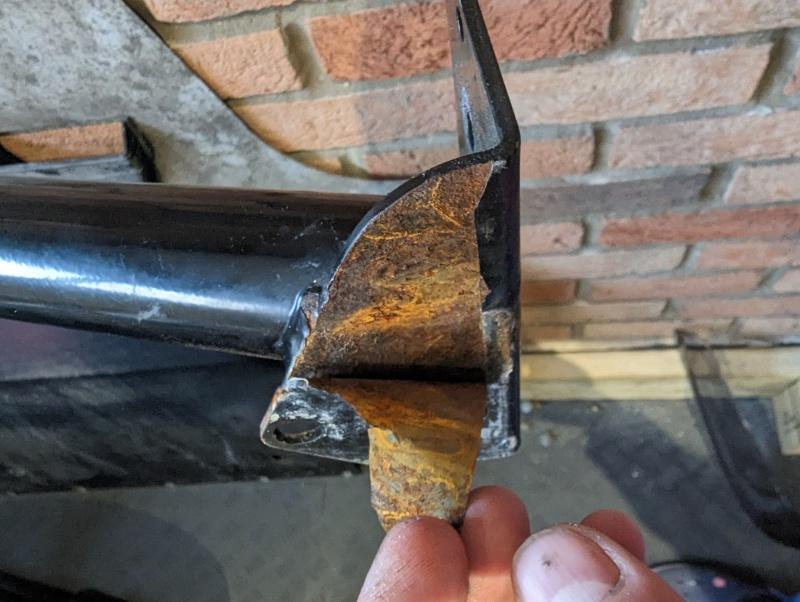
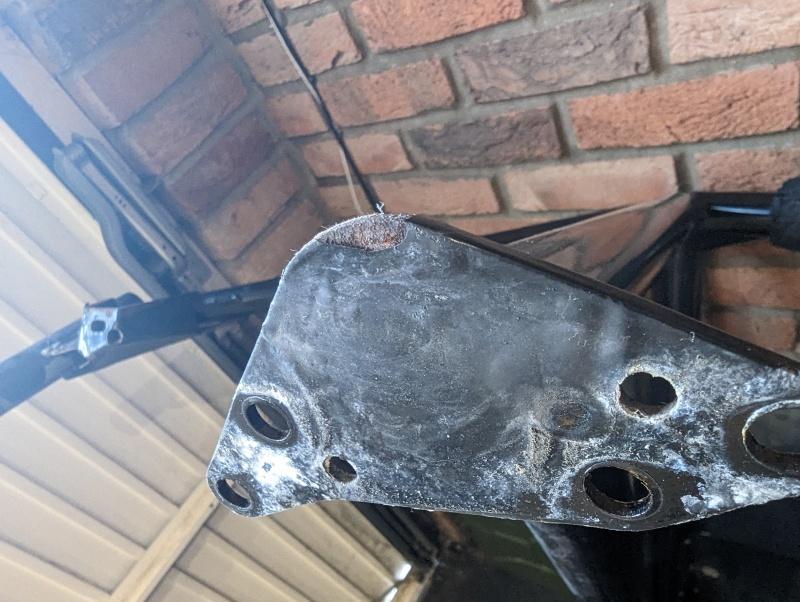
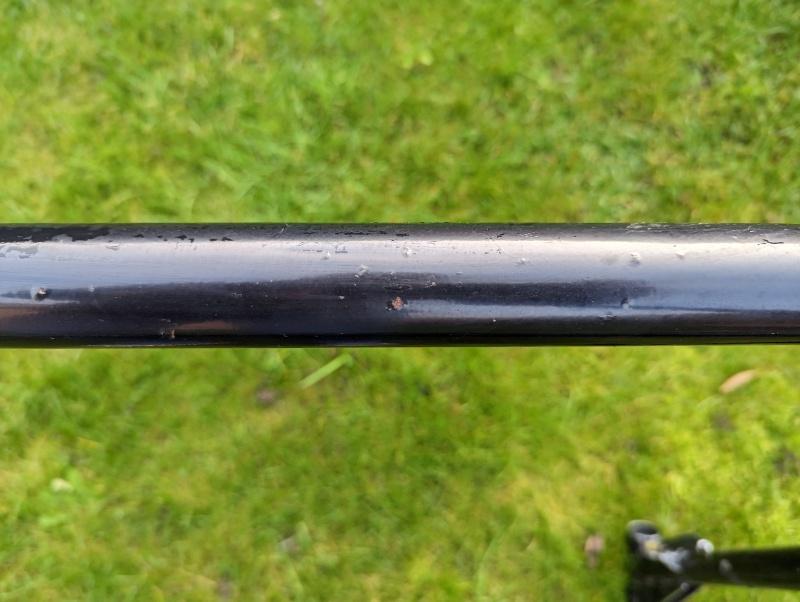
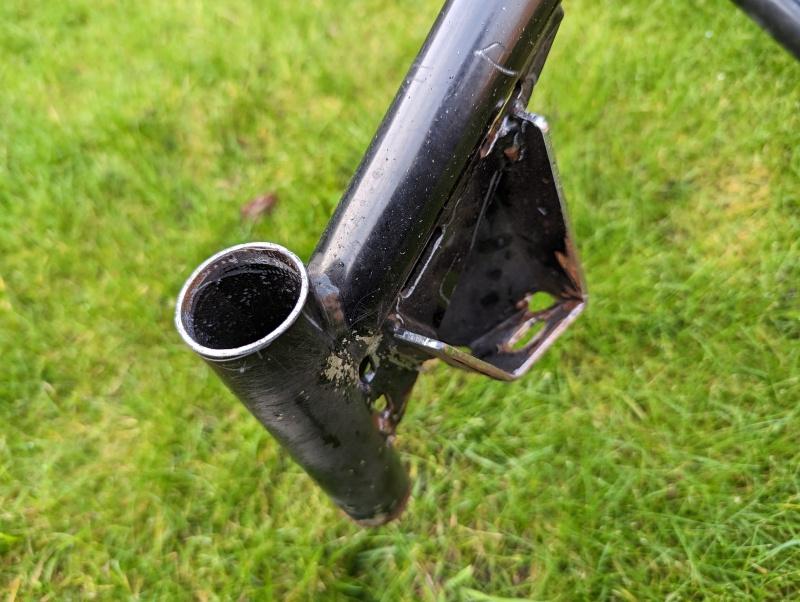
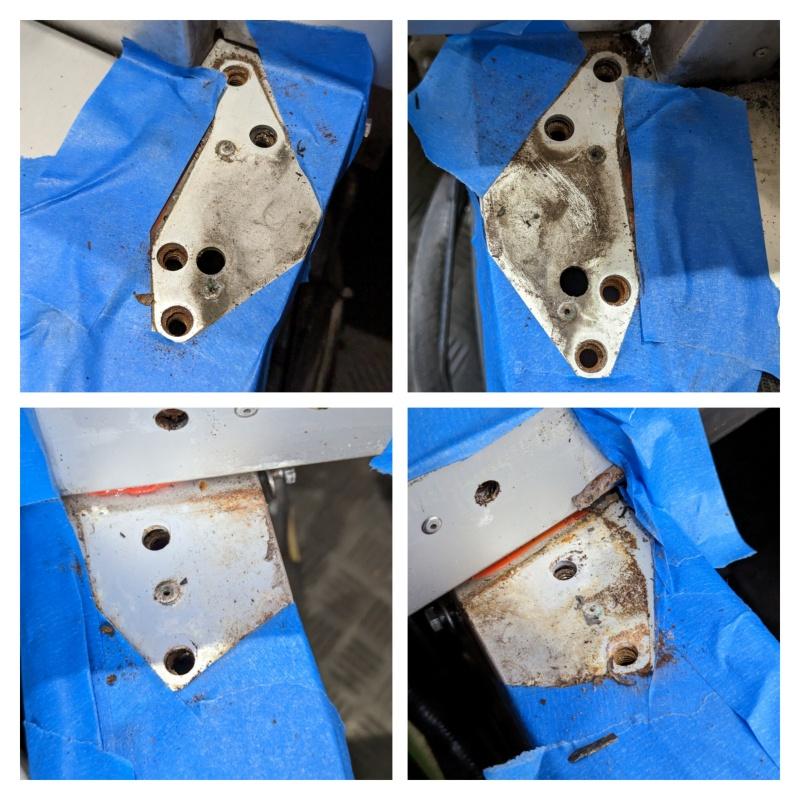
I rattled the car back into the garage, then got to work inspecting/prepping the cage. The main issues with it are stonechips across the main horizontal bar at the top, and failure of the powdercoat down by the foot plates.
After some advice from a fellow owner, and some googling I learned of an issue with laser cut plates and powdercoating. Combination of some sort of oxide layer left behind by the laser, and the sharp edges left behind mean that the powder struggles to cling on.
I’ve hopefully addressed this with a light burring from my dremel.
I’ll speak to the powdercoaters about it to see if they have any other suggestions, as I’d like to avoid this cage ever coming out again.
Mercifully the aluminium chassis hadn’t suffered from the rusting steel bolted to it. I’ll give this a good clean, and a layer of duralac will go down before the cage is refitted.
Whilst manoeuvring bodywork around the garage, I have started work on other areas… slowly. So I’ll get some new updates coming through over the next few days.
Oh, found a little 2-Eleven easter egg too.
Shoved down into one of the roll cage supports.
Your last 2 posts have broken images for me? All other images are still working fine?
1 Like
Yeah same here. My pistonheads version of this thread seems to be working though ![]()
1 Like
Kyle why not do the cage, same colour as your wheels ? Anthracite ![]()
![]()
Last of the bodywork updates I think.
I decided to get the passenger side panel off, and attack the interior ‘door’ panel whilst at it. It would give maximum clearance for the cage, and I’d learned a few tricks for dealing with the betaseal now (warm it up!).
The body panel was off in under five minutes, and the betasealed’ interior panel within an hour. Not too bad.
I spent some time masking off the bodywork around the cage legs, just to minimise the chance of any chassis scratching. I freed a few bits of engine bay stuff from the rollbar stays and soon ran out of excused not to attempt a cage removal.
I popped the wheels back on the car, figuring it would give me more room if I did this on the drive… which allowed for some photos of the car, outside, looking pretty damn mean.


The cage was just a few bolts, then off she came.
I rattled the car back into the garage, then got to work inspecting/prepping the cage. The main issues with it are stonechips across the main horizontal bar at the top, and failure of the powdercoat down by the foot plates.
After some advice from a fellow owner, and some googling I learned of an issue with laser cut plates and powdercoating. Combination of some sort of oxide layer left behind by the laser, and the sharp edges left behind mean that the powder struggles to cling on.
I’ve hopefully addressed this with a light burring from my dremel.
I’ll speak to the powdercoaters about it to see if they have any other suggestions, as I’d like to avoid this cage ever coming out again.
Mercifully the aluminium chassis hadn’t suffered from the rusting steel bolted to it. I’ll give this a good clean, and a layer of duralac will go down before the cage is refitted.
Whilst manoeuvring bodywork around the garage, I have started work on other areas… slowly. So I’ll get some new updates coming through over the next few days.