I’m tempted to try your tuner to see if he can sort some of my EMUBlack issues (cold start being the worst of my issues, to be honest)
I watched some GoPro back of Silverstone a few weeks ago and I heard the TC kicking in which was completely new to me, I had no awareness from the cockpit that it was happening.
I wonder in hindsight whether the (relative to the Exige)Trick TC is covering up the open differential. As it’s not a simple “on or off”, and can allow a certain degree of slip it’s perhaps nipping any inside wheelspin off at the bud, combined with a slightly racier chassis setup and perhaps a bit more mechanical grip this might be why I’ve had no appreciable downgrade from going back to an open diff.

This was obviously on an open differential too, though I’m far from a driftking I had no issues steering the car a bit on the throttle once I got the hang of it, and neither of my passengers would believe that the car was on an open diff (I think I posted at the time, but it also made me suspect an LSD). The key is, the TC was actually enabled during those laps - just on a very relaxed setting allowing lots of slip.
On the Exige, the open diff combined with the binary TC just killed it. As soon as the inside wheel started spinning at all there was just a sudden and annoying cut of power. As a result, it was switched off whenever on track.
Sounds like a good result on the dyno and great that it’s all coming together as we’re getting closer to spring.
Hearing about your brake bleeding issues, I’ve also had my calipers off and have been trying to bleed the air out to get a decent, firm pedal again.
I’m not sure how much this will help if you do have air in the abs system, but I was amazed at how much air I was able to get out just by wedging the brake pedal down over night and checking again the next day.
I suspect that you’ve probably already done this and I’m stating the obvious, but having not tried it before myself, it really surprised me how much it helped.
I have to say that’s not something I’ve tried, and I’m willing to try anything so I’ll get wedging!
You’re welcome to borrow these if you like?
We remove the pads, front and rear, wind all the pistons as far as they will go back, then lock them in place with wind back tools, then bleed as normal. Has only failed us a couple of times with ABS cars, but still good enough to drive on before pulsing the ABS or plugging in Tech 2 to bleed them.
It appears that as soon as the piston isn’t fully home, they get air trapped behind them.
Cheers John, can’t see a photo but assuming you mean some sort of piston clamp setup?
Last time I bled, I used 2x rewind tools to keep the rears clam and some g-clamps to spread the fronts, then a perfectly sized socket to wedge them in place. It certainly yielded more air… but not enough, yet!
I’m fairly confident the next bleed will do it, and it’s just about ‘roadable’ now, so I’ll get bodywork back on it and then go for a tootle up and down the road followed by one more bleed. If there’s still not enough pedal after that, you can sort it when I come for geo ![]()
Good luck with the pesky bleeding. I have just this evening got my pedal feeling great again after a few attempts since hooking the refurbed front callipers back up.
Standard Sealey vacuum bleeding didn’t do the job but this worked a treat :
-
I left the pedal wedged down overnight (around 10-12 hours)
-
Released wedged brake pedal and noticed a much firmer pedal already
-
Removed pads and pushed back pistons
-
Placed wooden chocks I had knocked up to fit into the calipers and pumped the brake pedal to make sure they were held tightly by the pistons
-
Hooked up Sealey bleeder filled with fresh fluid
-
Removed callipers and bled both upside down and upright, bleeding inside nipple first and then the outside. Tapped the callipers and brake lines with a rubber mallet occasionally whilst bleeding to dislodge any bubbles.
It’s a right ballache, especially in a tight single garage, but will hopefully be far simpler next time with a basic fluid swap.
If you need a pedal pumper for the brake while bleeding I should be able to drive again in a few weeks.
Cracking update! Looking forward to next instalment
1 Like
Still haven’t touched the brakes, but since getting the car back from the dyno it lived in the trailer for a few days which gave me time to turn my garage into a woodshop for a bit.
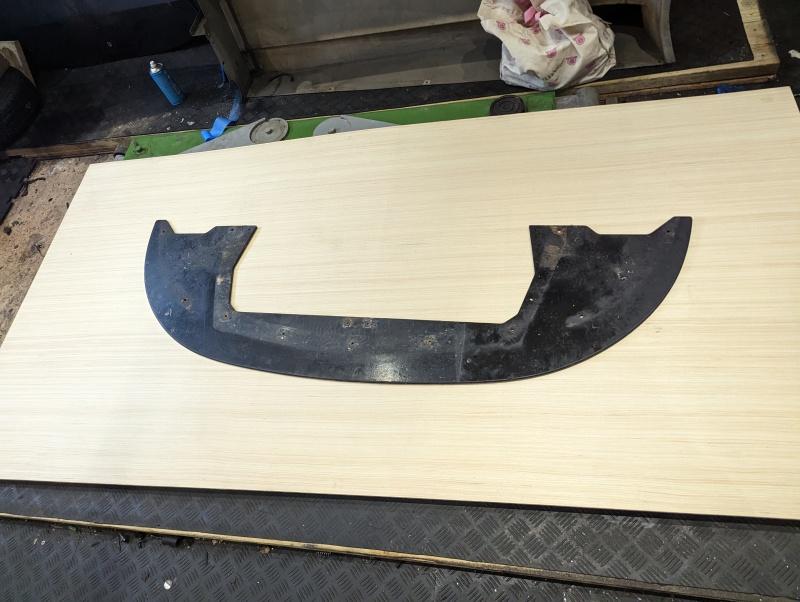
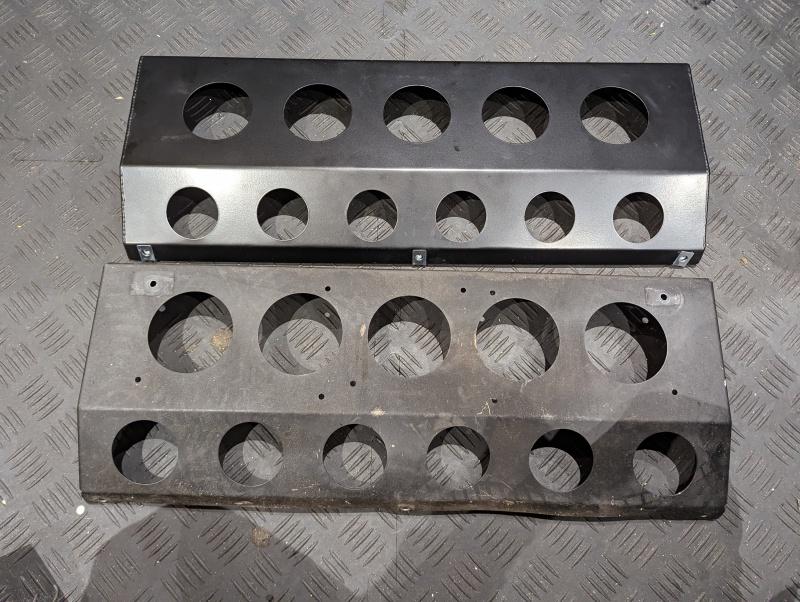
Original splitter (I think it’s original, anyway) is looking a bit worse for wear. It still has it’s original shape and structure, so I wanted to get it replicated before it lost either of those attributes. It was 9mm ply, I’m guessing marine grade… so I got some ordered.
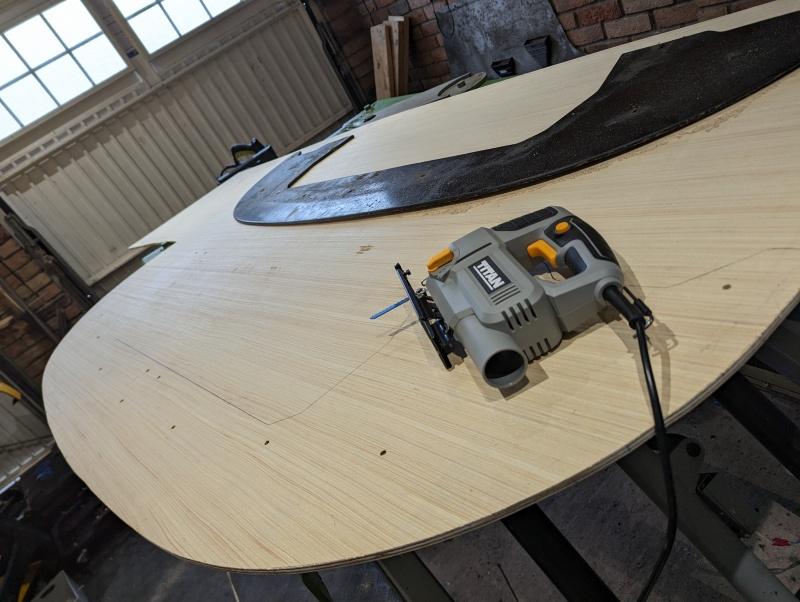
Bit of drawing, bit of drilling, and bit of playing around with my brand-new-second-cheapest jigsaw that Screwfix sold and we had something starting to take shape.
The holes on the underside are countersunk to allow the dimpled holes of the undertray to sit flush, so replicated those.
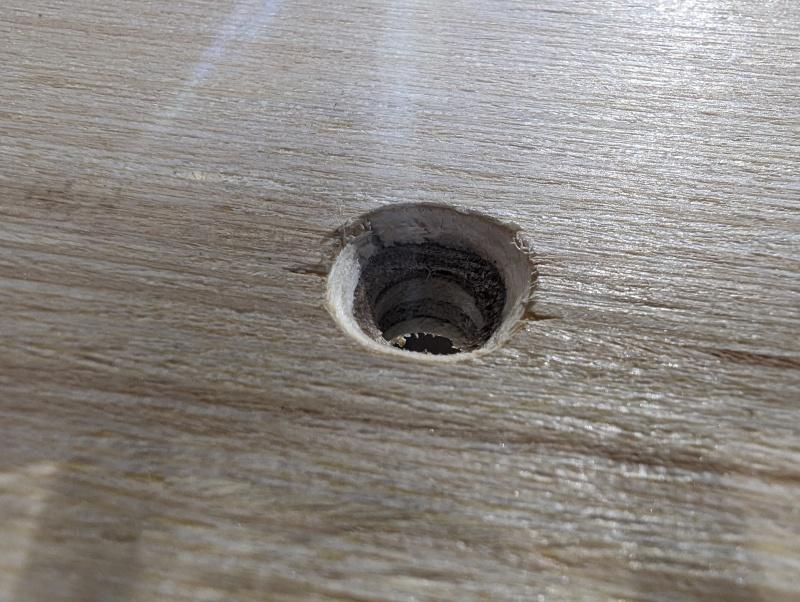
And some other holes are countersunk with a ‘flat bottom’ to allow for a 15mm washer to slide in flush, so I bought a forstner(???) bit for that. Will play with that later.
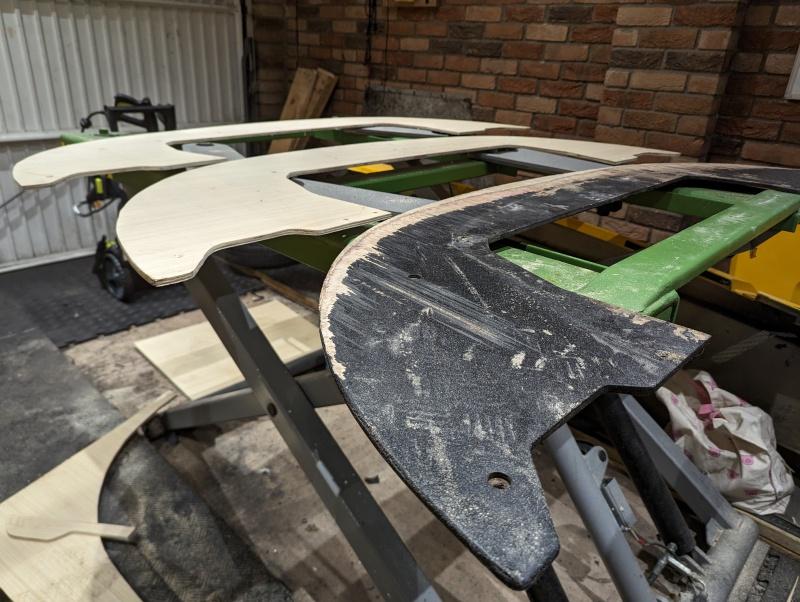
As I’ve left them, they’re roughly the right shape, need a final forming with a sander and need the leading edge tapering a bit… then of course paint. I’ve bought some proper weather proofing stuff so hopefully that’ll do the job. For now they’re piled up in the corner waiting for later.
With the sawdust tidied up (that which I didn’t breath in, anyway) it was time to go repatriate the car and get some finishing touches done.
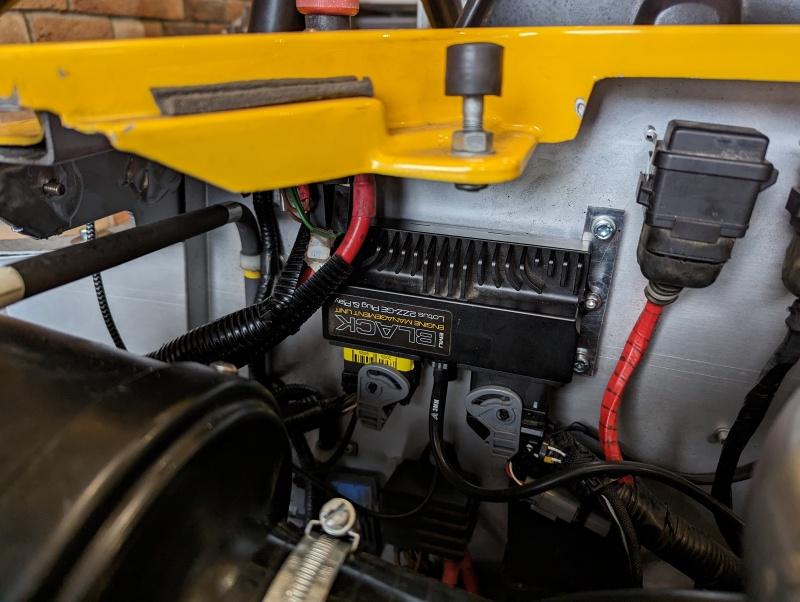
First up, I had the ECU nicely mounted originally but when I came to mount the scuttle panel thing, the wiring for the cut-off switch fouled it… so the car was mapped with a wonky ECU.
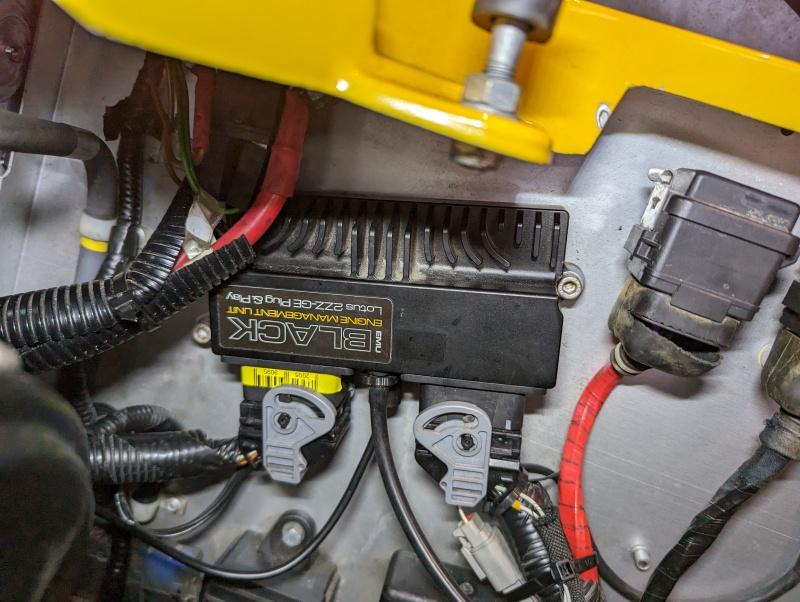
I knocked up some little brackets that allowed me to use the factory fixing points, but just sat a little lower. Tidy.
Next up, wing mirrors. They’d taken a few stonechips over the years so wanted to tidy them up. I’m told they’re from a Yamaha Fazer 1000 (some sort of jetski for the road I think) so I did find and order a very cheap set of replacements, but they weren’t quite the same size and shape so didn’t work for me - so back they went. If anyone knows of a good, reliable source of Yamaha originals I’d probably pick up a pair for spares.
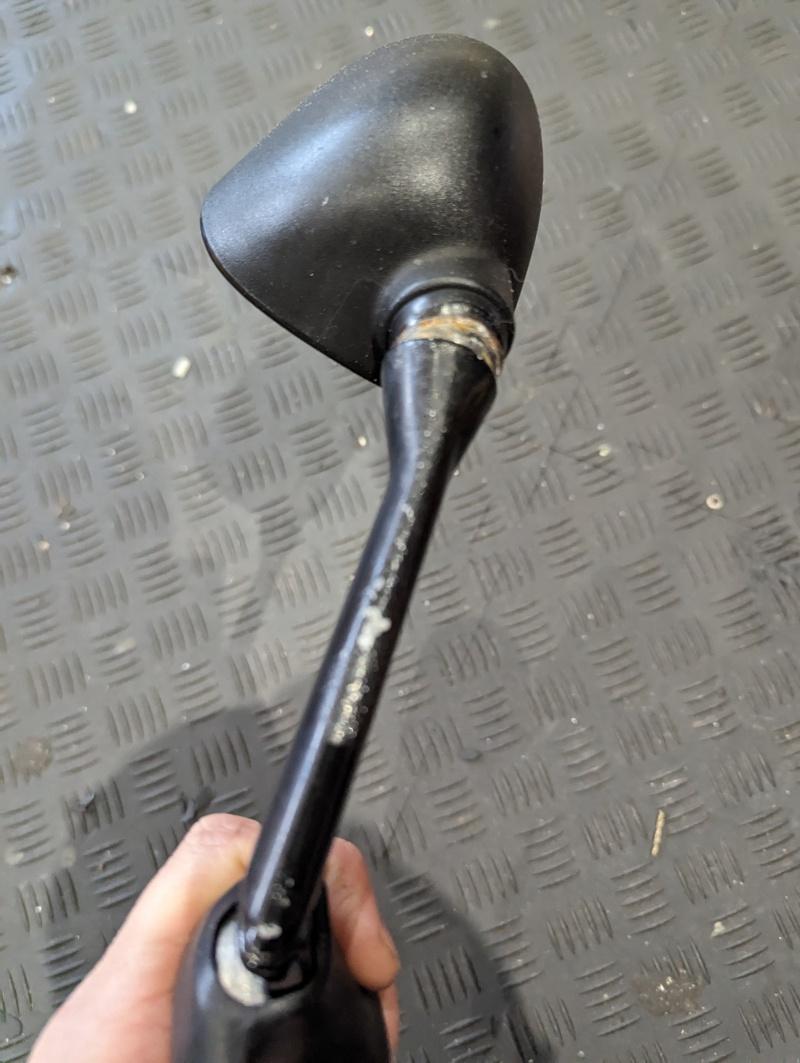
Still, I’m not short of satin black paint so I scrubbed them up myself for now.

Did some idle tuning next. As we inherited the config from my Exige, and Chris tweaked it enough to get it idling and fuelling nicely on the dyno… it really didn’t take much to just finish the job.
I did a lot of work for this on my Exige, even the OE Lotus mapping wasn’t great for returning to idle characteristics, often stalling out when cruising up to stop lights etc. Lotus improved it throughout the S2 range, and even my 2-Eleven worked much better than the Exige in this area.
When switching to standalone, the issue is carried over but at least you have the tools to sort it. The root of the issue, I believe is the length of the intake tract from the throttlebody to the cylinders. Any attempt to modulate idle control using the DBW throttle is just too slow and laggy because of the sheer quantity of air between it and the combustion chamber. What worked for me, after lots of trial and error and advice from people like Chris, was to limit how influential the DBW throttle could be under idle conditions and use ignition control for it instead.
In effect, the DBW becomes more of a ‘long term trim’ tool for idle control, rather than something responsible for quick adjustments. Combined with some EMU features to temporarily raise idle targets when returning to idle, and slowly ramp the target down to the resting level allow you to catch the revs smoothly and feels as good as any OEM application.
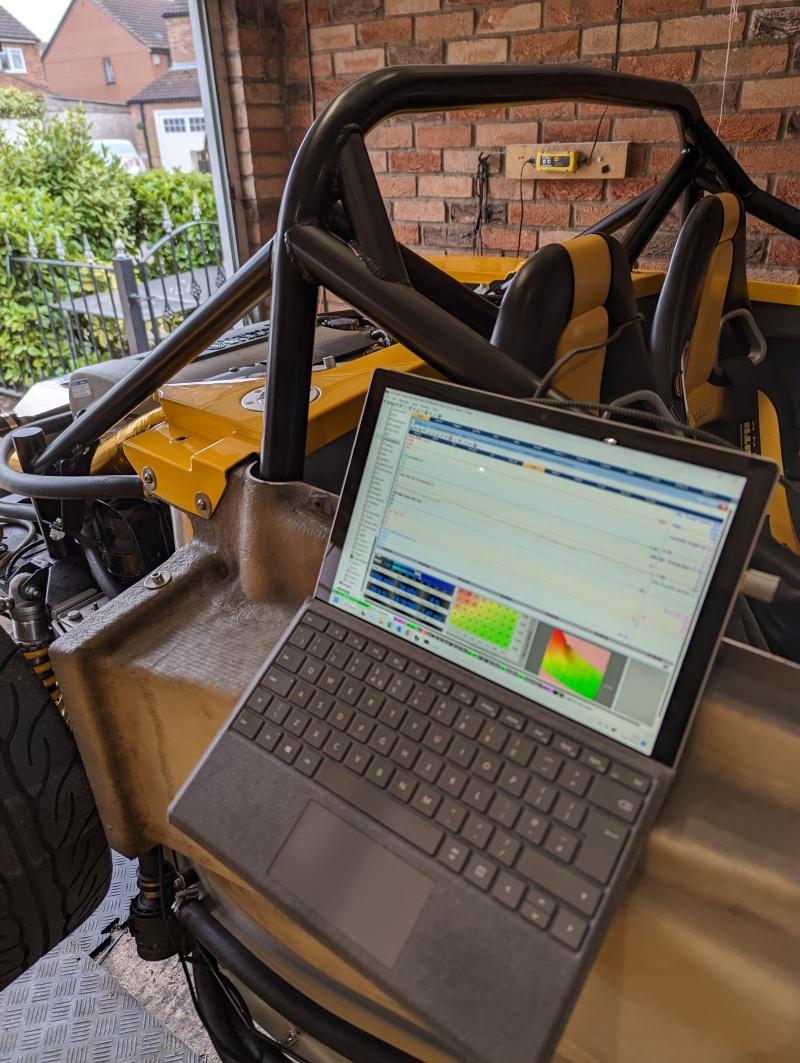
I did a little demonstration of what you want, vs what the car tries to do.

Red line is RPM, blue is target. You can see when I blip the throttle that the idle target gets a short term boost, then tapers down. The aim is to get the rpm to drop and trend along with target smoothly which it does on the first throttle blip.
On the second, the revs dip a bit too low, and the car has to raise it back up again. This isn’t so bad, but it feels “clunky” when it happens on the road. If this scenario gets too dramatic, the revs fall too far and the car stumbles or stalls.
Bored yet? Sorry… will move on.
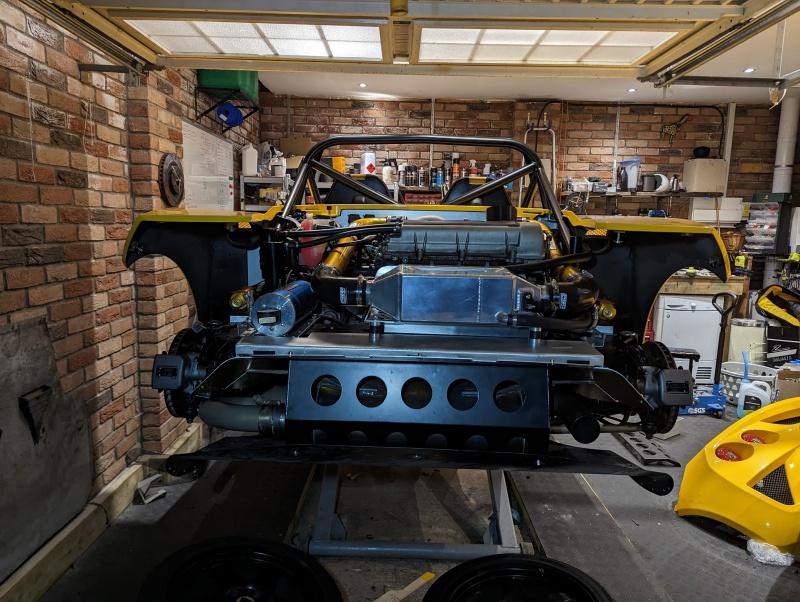
Next up, bit of a gimmick I’m sure but over Christmas I spent a load of money on heat management stuff. The boost pipe route on the 2-Eleven puts it in a position to pick up a lot of radiant heat, so I wanted to attempt to do something about it.
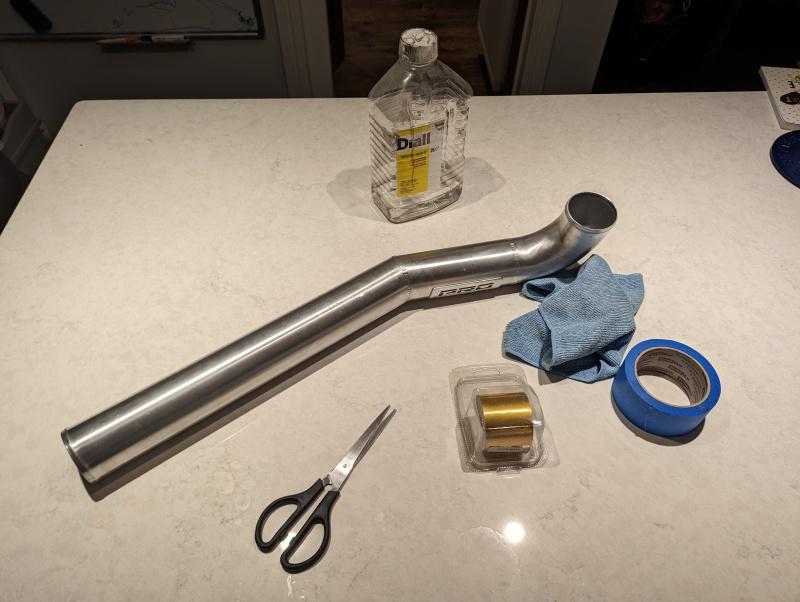
Very tedious hour or two later and I had something that looked acceptable.
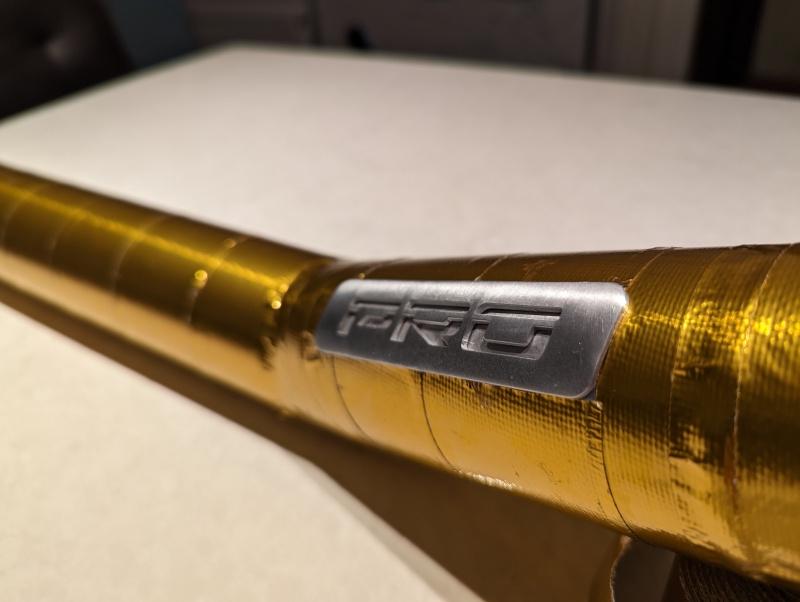
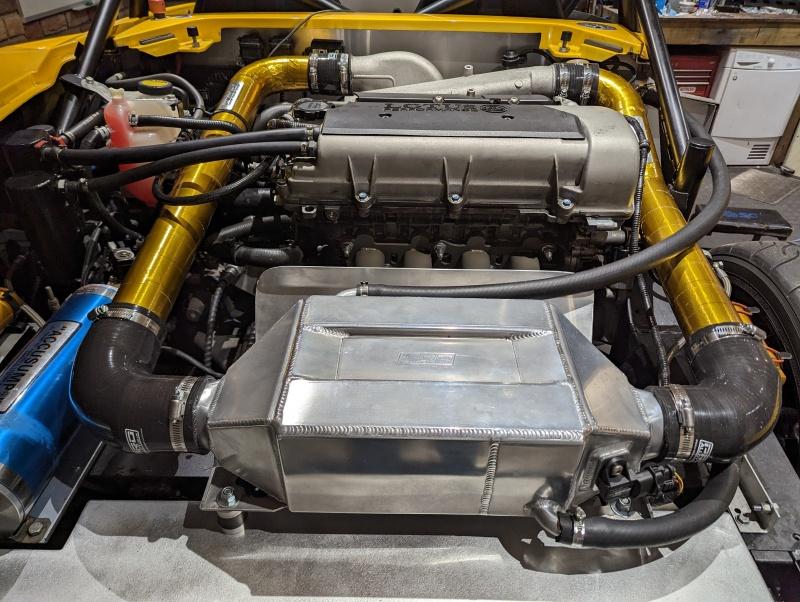
It’s the cold side of the intercooler (right side of picture) that I was most concerned about, it runs within mm of the engine and during some of my intercooled trackdays this side became too hot to touch. Obviously a lot of that was due to the heat saturated intercooler which the chargecooler has hopefully fixed, but still even on the dyno between runs you could see the cold side slowly getting warmer and warmer where it ran close to the engine. This gold tape, in theory should reflect that radiant heat but still allow the pipe to shed a bit of temperature once it has airflow running over it. I’m sure it’ll be worth 0.5degrees C and be a total waste of time and money, but bling.
With that I had pretty much run out of jobs, so time to start thinking about bodywork.
I’d bought a remanufactured number plate plinth some months ago, it’s pretty close to the original but straighter and doesn’t have a dozen numberplate holes drilled in it.
It did come completely undrilled though so needed to get that fettled and lined up.
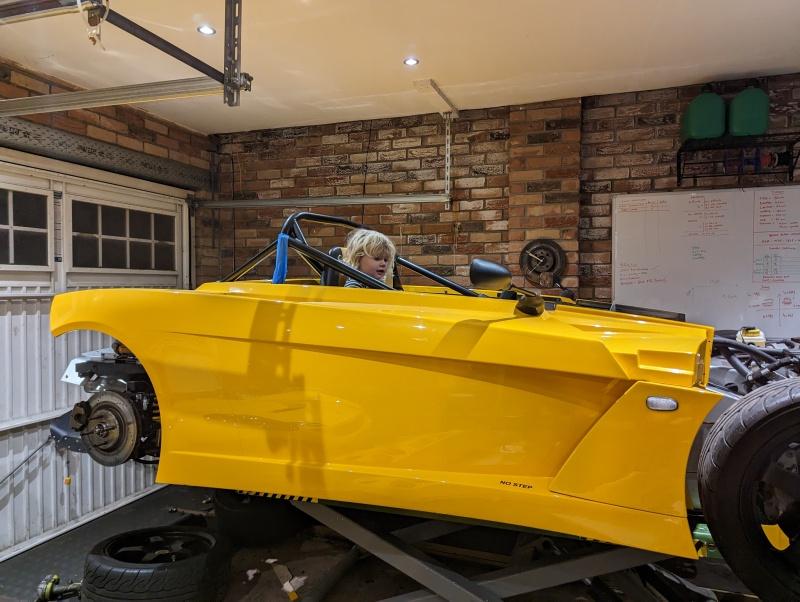
Side panels went on, sort of temporarily but I think they can just stay on now.
Up next will be rear clam, it feels like the most awkward bit to refit because it doesn’t really ‘sit’ on anything, it kinda floats whilst being anchored to various other body panels. It only finally gets anchored to the car when the spoiler uprights go back in.
Front should be easy enough, but it’s the only part that’s a two-man lift. My arms just aren’t long enough to support it properly. I do wonder how all these body panels will line up, as this car uses no shims at all… unlike the Elise/Exige clams which are shimmed to buggery. The clam mountings are hardly precision engineered either, they’re just gobbed on with glue and glass… fingers crossed I get it looking something like.
2 Likes
Nope. Its interesting and quite similar to how the cable throttle one works. You aim for a target which is completely ignored and it prevents the stall
More details please of the tape. I have been considering this for my baby chargecooler pipes and also inlet pipe
It’s this stuff here:
If the blurb is to be believed, it reflects radiant heat but it isn’t an insulator. If you wrapped the pipes in something with insulating properties, then it works the other way too - and it traps heat inside the pipe rather than letting it escape, which would be bad.
It won’t do anything to protect against convected heat from a heatsoaked enginebay, but if there’s a hot object (engine, exhaust, etc) blasting radiated heat directly at something, then this is what it protects. So it does have a narrow use case.
My hope/theory for the 2-Eleven engine bay is that it’s extremely open and gets a lot of airflow through it. Any Convected heat building up from the engine/exhaust will be blasted out of the back pretty sharpish and there’s a constant stream of fresh air coming in. The Engine being a few mm away from the cold side pipe though is always going to heat it up via radiation, hence the gold tape.
I don’t have a strong argument for using it on the cold side pipe other than the fact I had plenty left (10m roll did both pipes with enough spare for odd jobs and patches). and aesthetically I don’t think I could live with one aluminium pipe and one gold one…
In theory, polishing up the pipes to a very high shine would have the same effect, I think?
1 Like
Good point on the insulation. I never considered that.
Duly noted.
I can’t see the pics from today, link icon shows up.
Same here, they appeared upon first post but now have gone.
Links still seem to be active. AAAAaaaaaandy
Fixed!
Great work, Andy. I’d be even more mystified without pics!
1 Like
Loving it.
As cool as your exige is, this looks much cooler!
And the little mini person seems to agree ![]()
I did the firewall and airbox on the 340R. I bought gold from 2 different suppliers. DEI and cant remember the other. The one I used on the firewall has in places started to fade the gold to silverish. The one on the airbox is as shiny as day one.
Planning on buying some of those thermometer like stickers which show the heat degees to find out what is happening around the engine bay and on the damper bodies. Given you are more data smart than me it might be interesting for you on the 211.
This place never ceases to amaze me.
Stickers with real life , live data.
SO MUCH WANT!
The temperature stickers are good, but are a one way sort of thing. Once they blow the window to show temp, they don’t go back.
Like the brake temperature paint - that will really blow your mind!!!
Very useful in their place though.
2 Likes