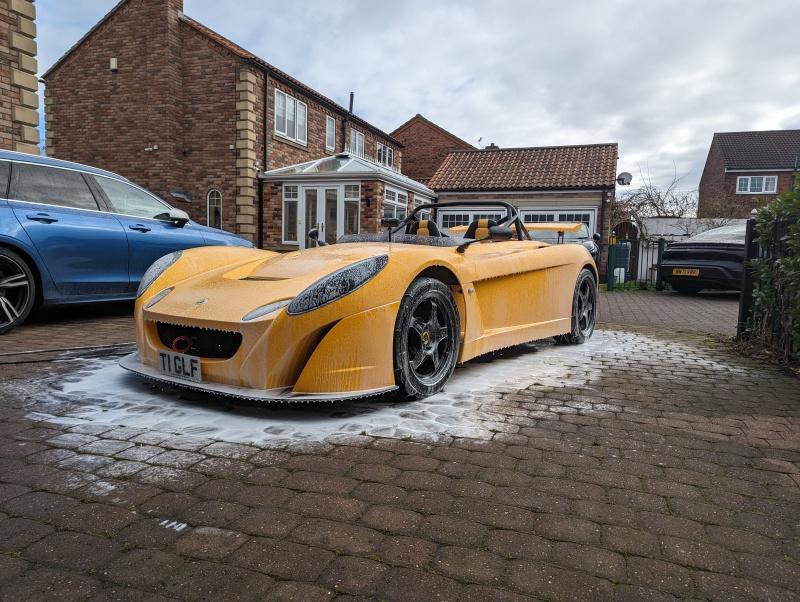
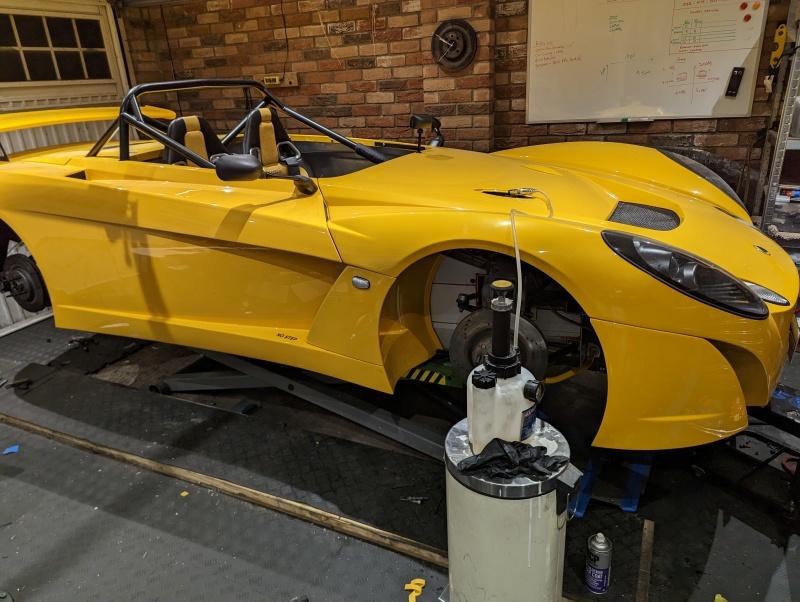
2007 Lotus 2-Eleven

Bodywork weekend.

Rear clam was fairly straight forward, I loosely mounted the spoiler uprights to the clam and used those to support it in place on the subframe while I ‘folded’ the corners in under the side panels and loosely bolted those up.

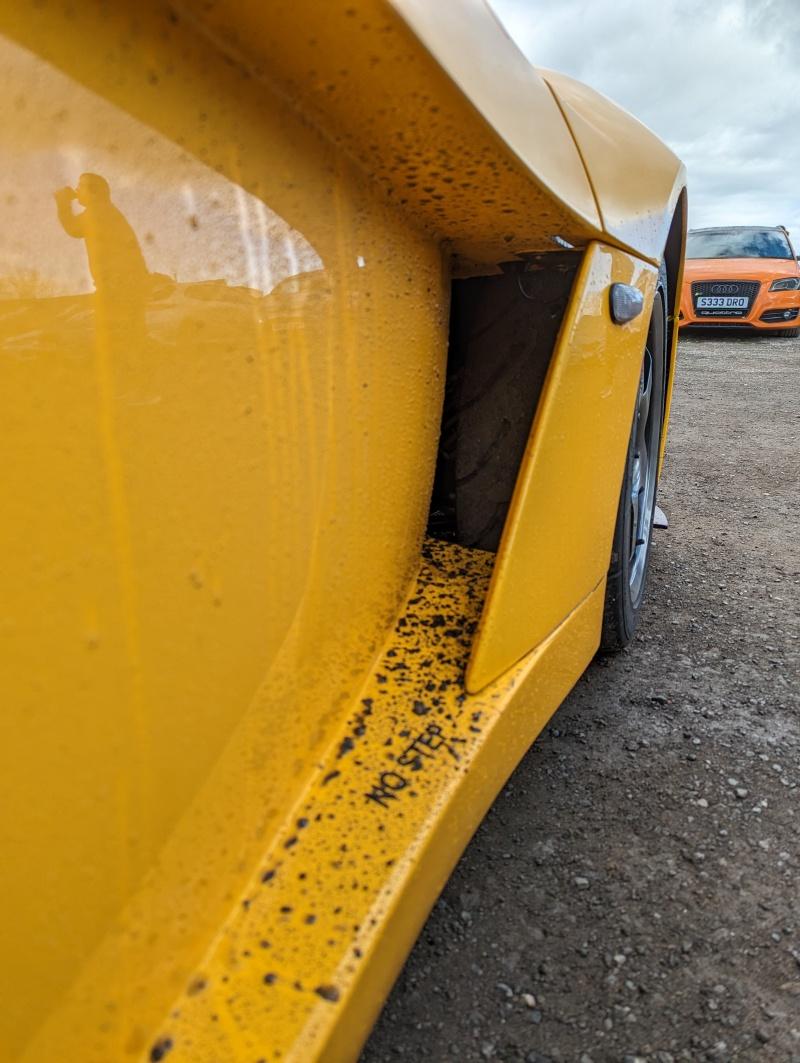
I think I mentioned before, but there’s not really any shimming to do with the 2-Eleven for panel gaps, it all seems to be just loosely bolting up, then manhandling bits into position whilst nipping up the fasteners. There’s enough flex in the bodywork to allow you to line it up with reasonable success, and there are startlingly few fixing points to the chassis itself.

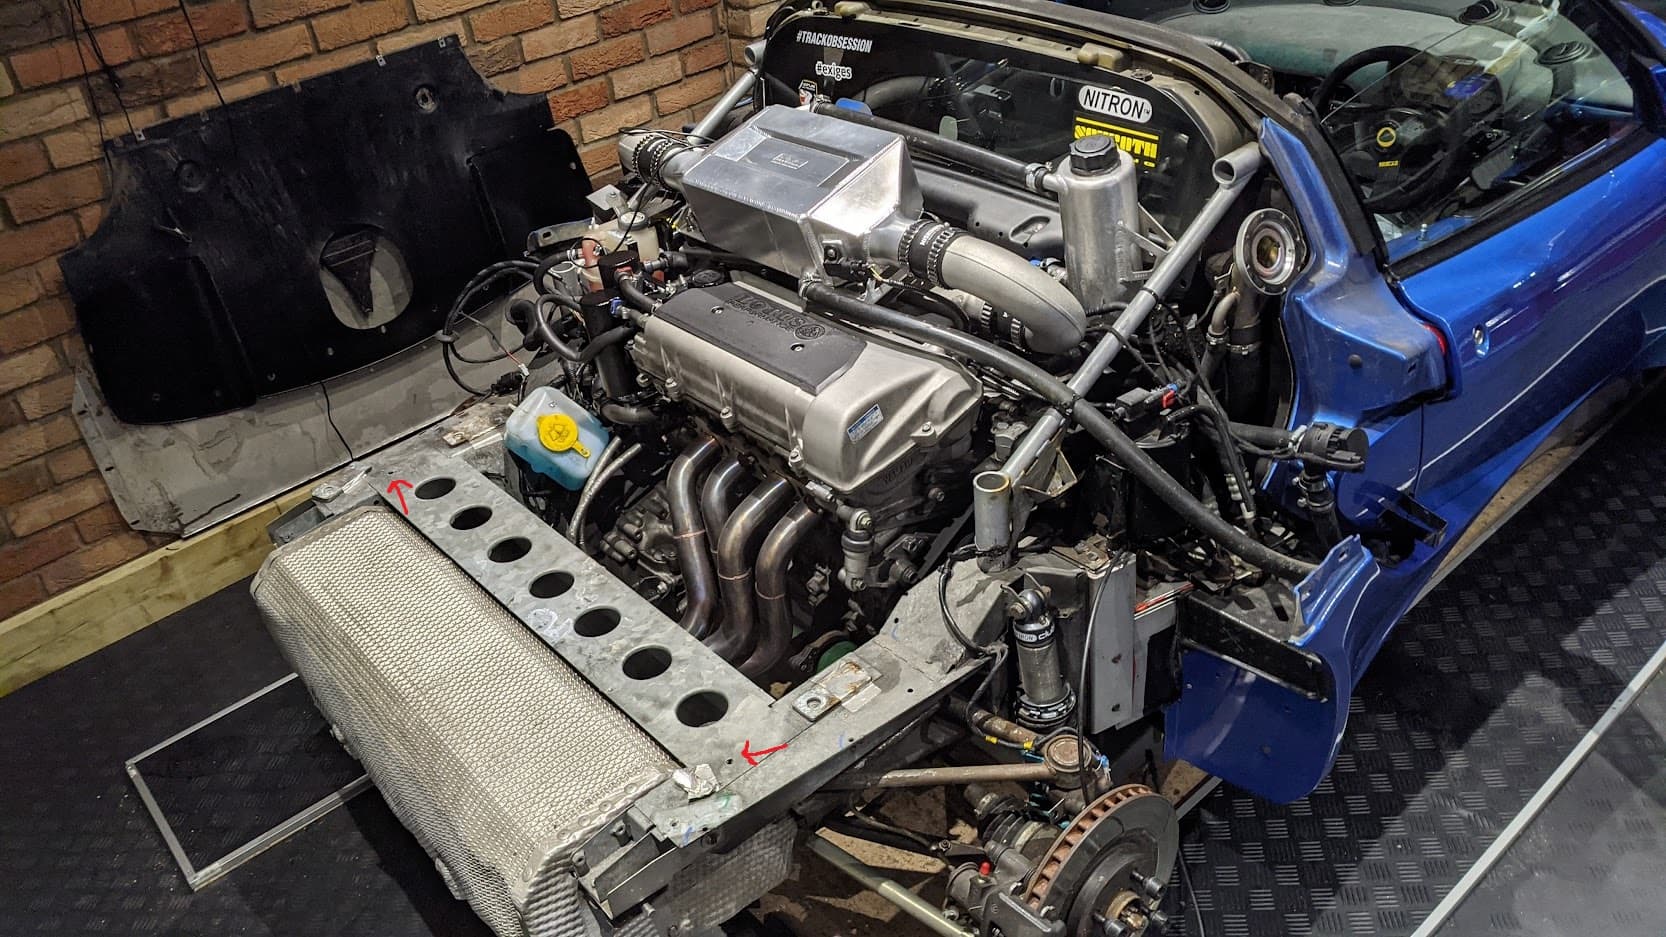
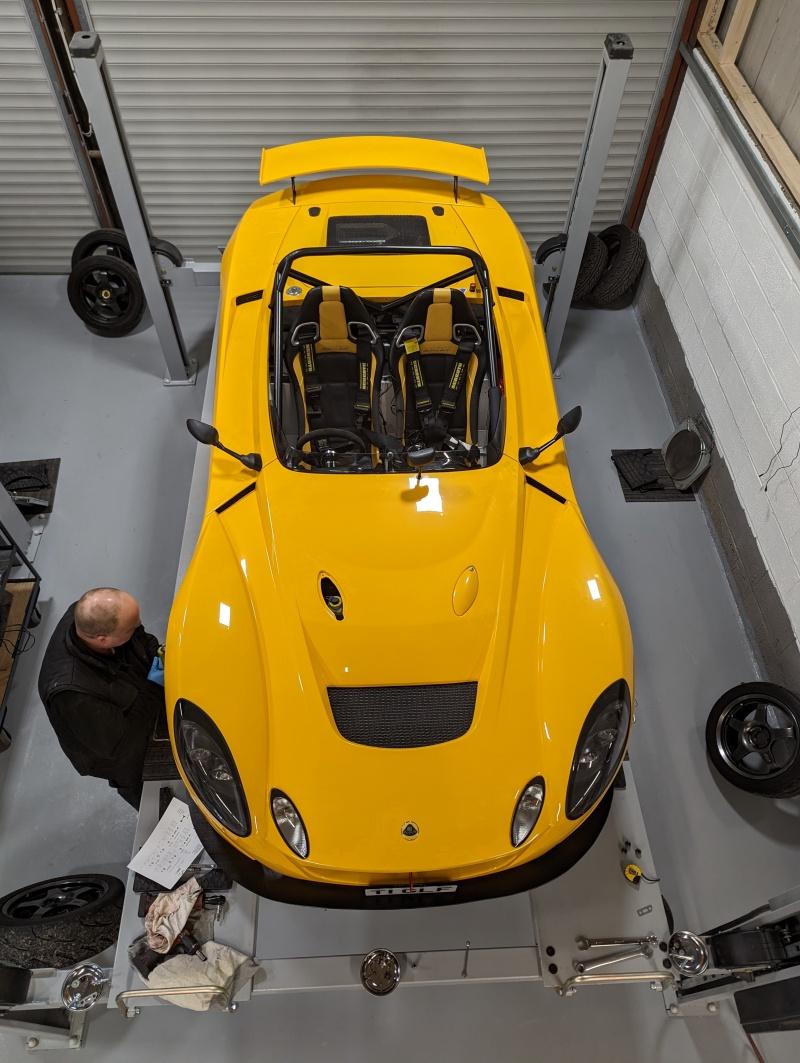
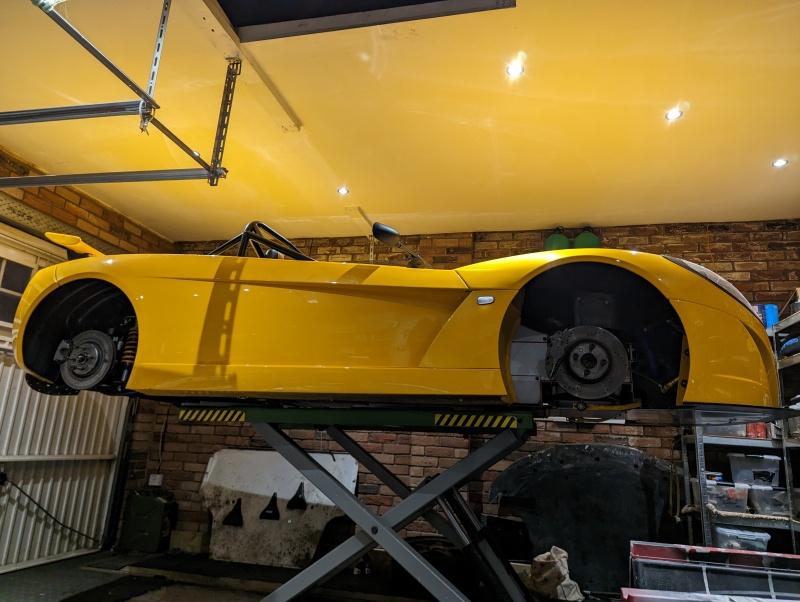
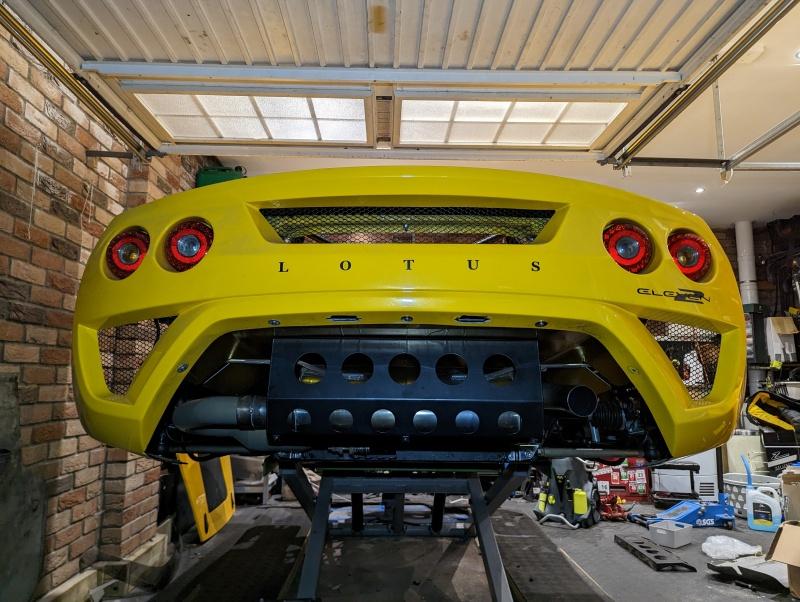
Engine cover on to check for panel gaps, pretty good - at least as good as it was before, maybe a bit better.

Onto the front, I needed a second pair of hands here because you can’t carry and support it alone. It’s light enough, just a bit too floppy and ungainly… I could imagine it just snapping down the middle if you tried to lift it solo.

Slots on a fair bit easier than the Elise/Exige versions as it just kinda sits on top, rather than needing to be fed from the front in a hooking motion.

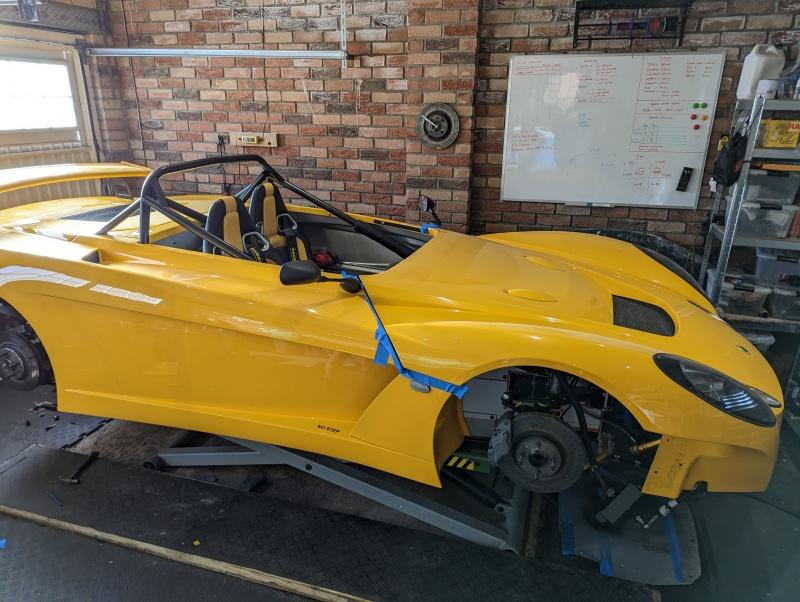
Again alignment was just a case of jiggling it around before bolting it down. It only rigidly mounts to the chassis via the dashboard/bulkhead thing - all other fixings are just into other pieces of bodywork. The final bit of support will come from the front undertray and wooden splitter.

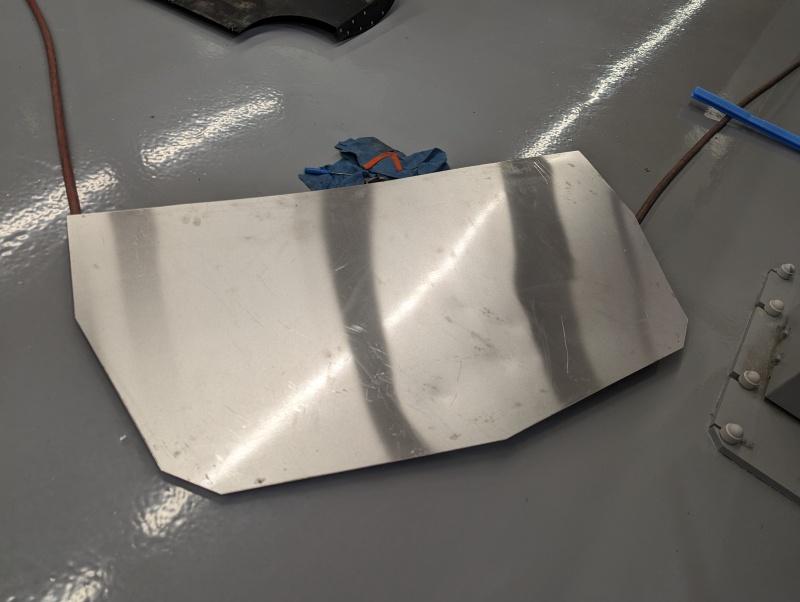
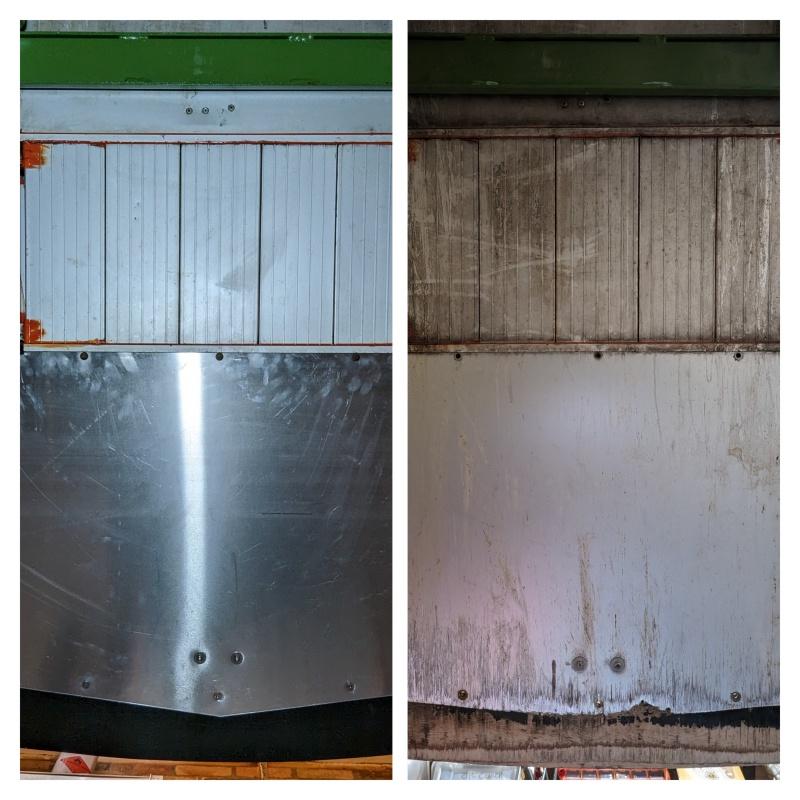
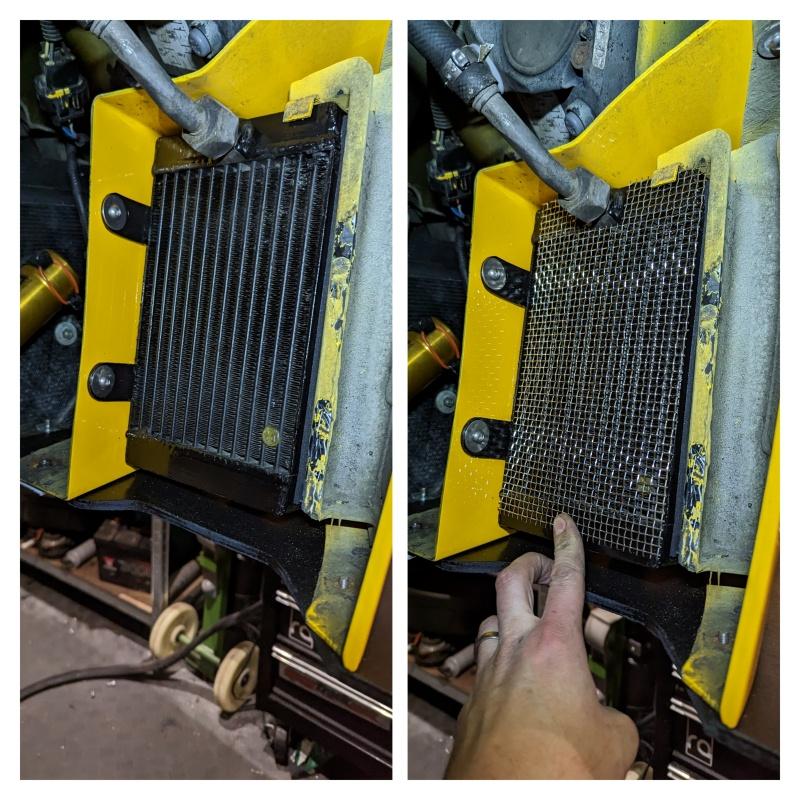
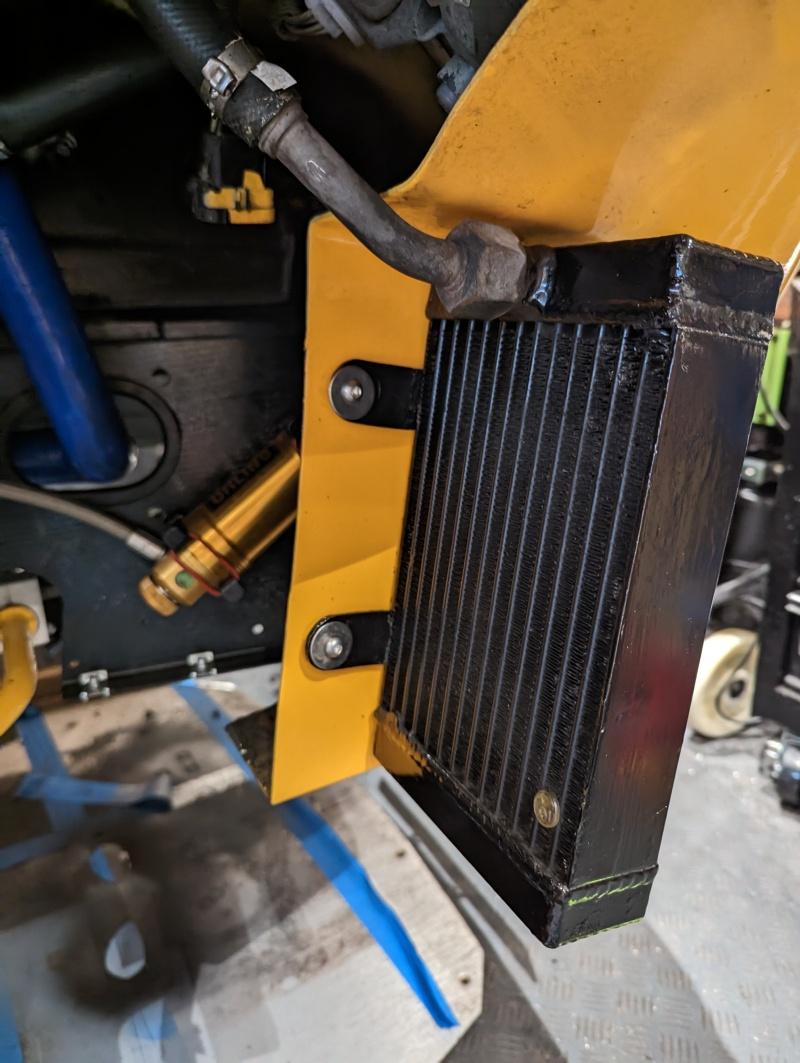
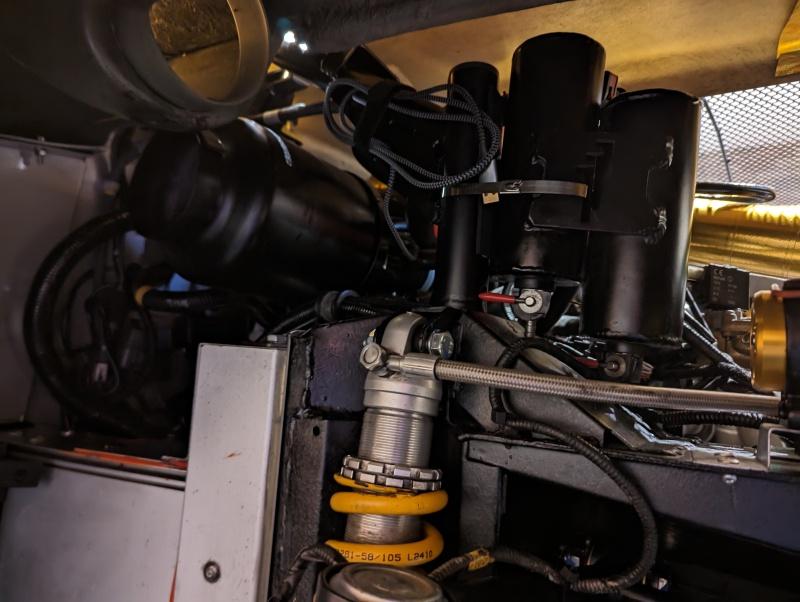
Mounted the oil coolers which have been cleaned up

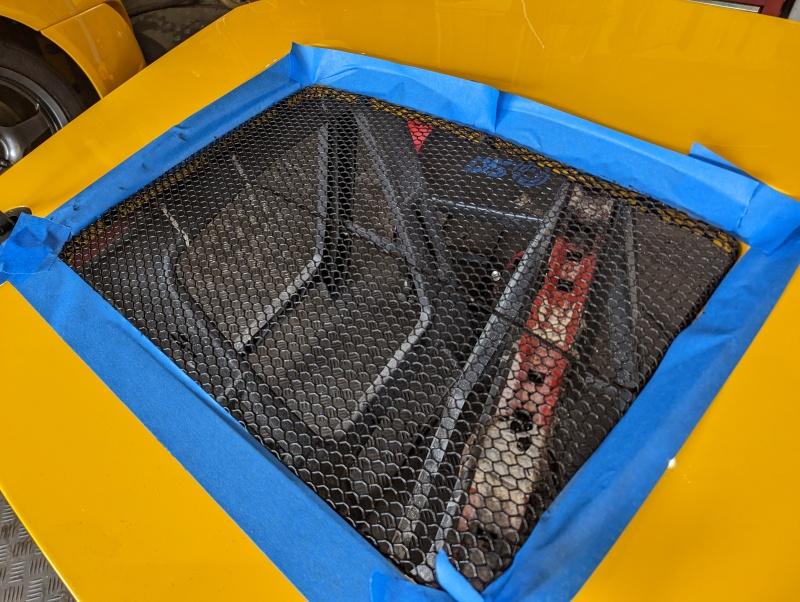
And fitted the aero spat things to the front corners and the ‘a’ pillar area.

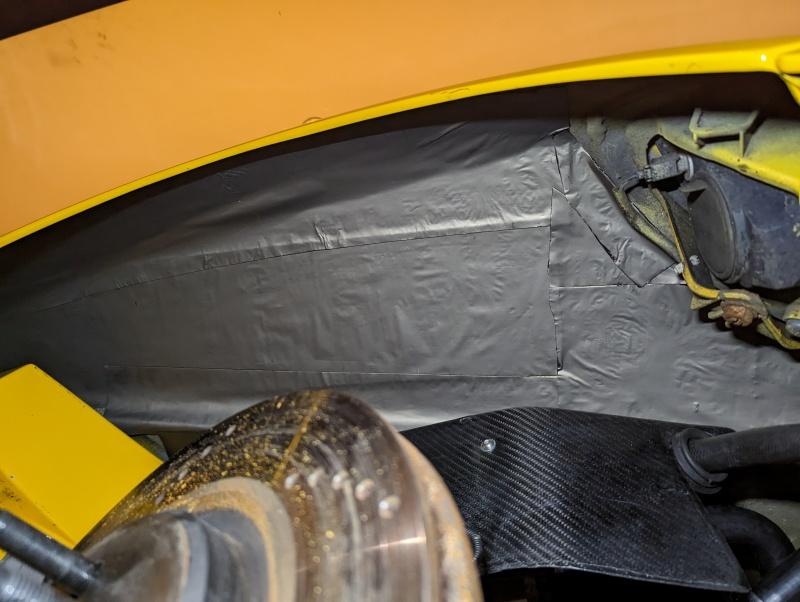
It’s a relief to have the garage floor cleared, not only for the space but also it marks (another) 3 month period without tripping and walking backwards into a load of fibreglass. Also a relief that all of my chargecooler plumbing fits comfortably into the wheel well.

I still have the carbon skinned covers to go here to cover up all of the electronics/plumbing - they just need a final wet sanding and maybe some lacquer before going in.

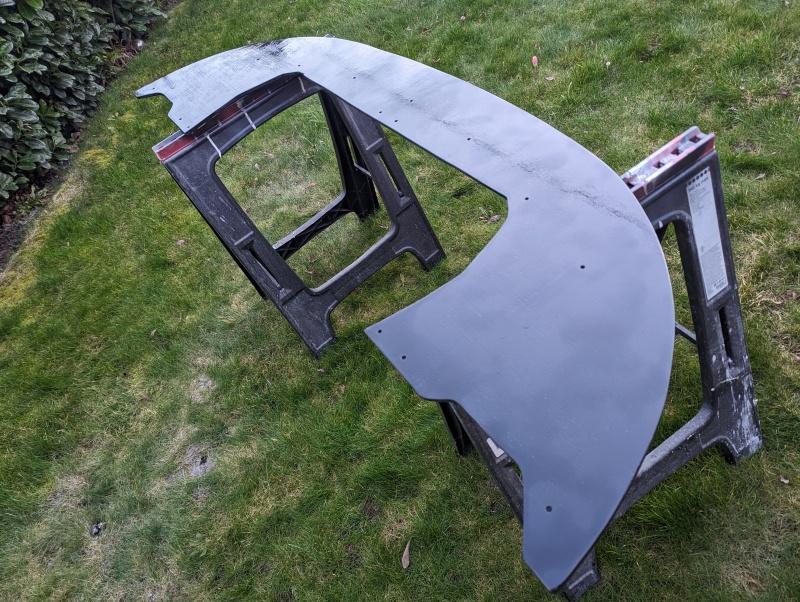
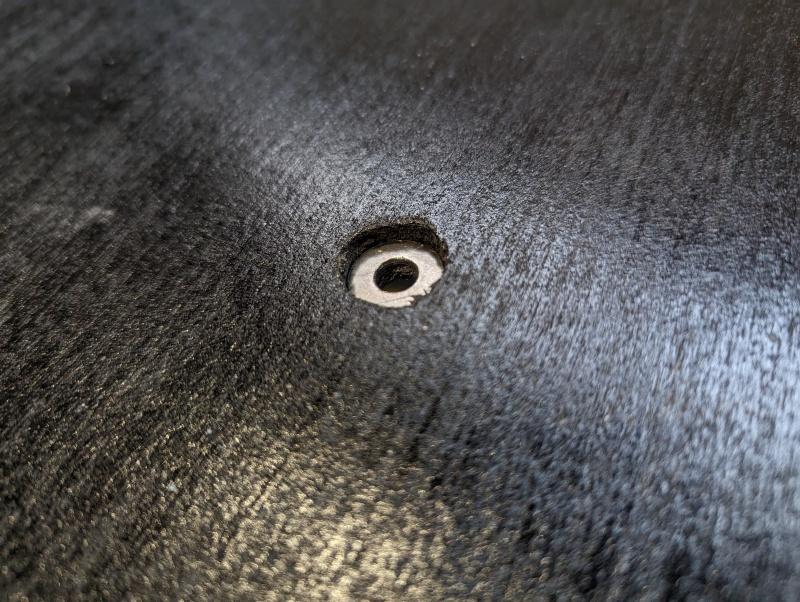
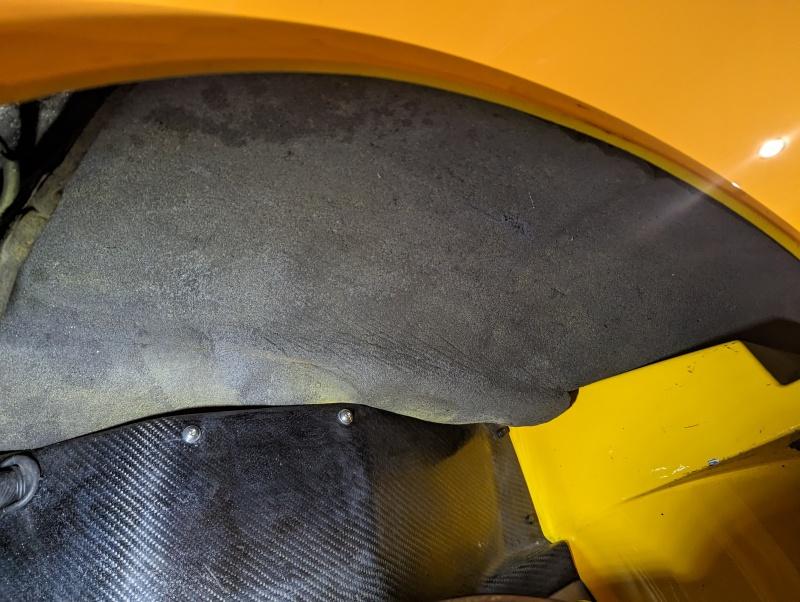
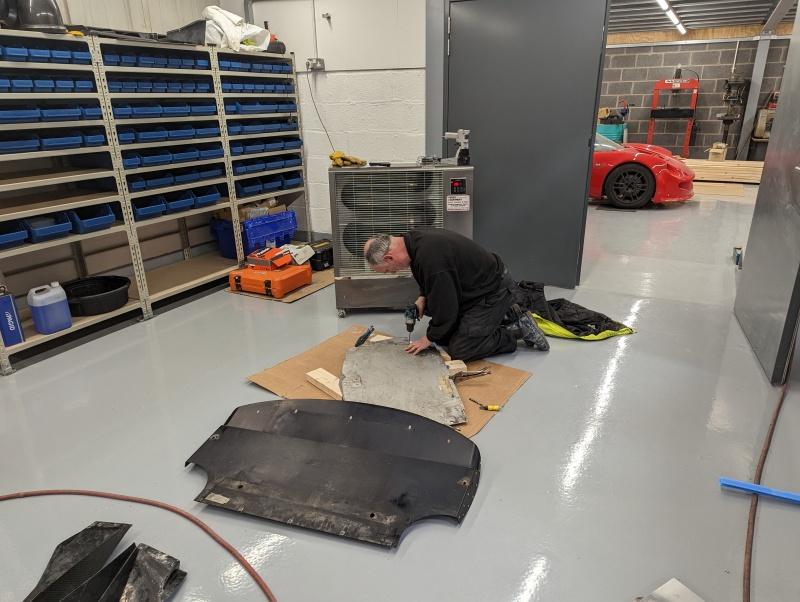
Arch liners are about ready to go in at the back, but I did spot a couple of things that I think I failed to document in the thread ages ago.

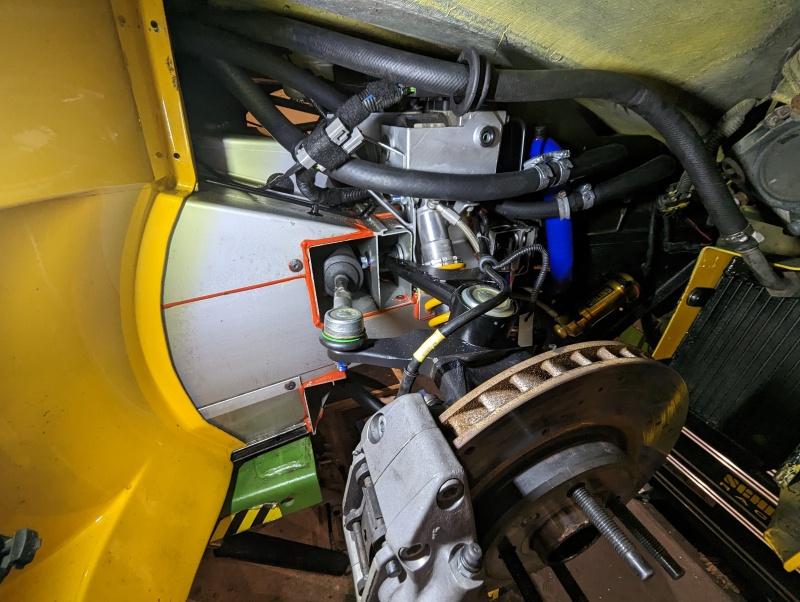
My Sector111 catch cans have been repurposed from the Exige. They can’t mount to the head as they did on the Exige because the CC piping is in the way here, so they’ve been relocated to the roll bar support. Nicely accessible to drain them off from the wheel arch without removing from the car.

Also lurking in the background is the ITG Stab99 airbox. The EMU black runs MAF-less so really frees up your options for induction. This has a nice bit of a induction noise, not that I’ll hear it on the move…

There’s a temptation to run some fresh air to it, you can see at top of shot that there’s the big round opening from the previous clam mounted ducts for the A/A intercooler. They’re now redundant, so could maybe pipe something around in a convoluted U-Bend. I don’t think I’d direct attach it to the airbox because it might throttle the air supply, but having a bit more fresh air blown into the direction of the airbox can’t hurt.

I thought I’d give the brakes another bleed. I’d had a broom handle jamming the brake pedal down for a few days to see if @Elise_Mark 's technique worked for me.

Initial impressions were underwhelming, pushed pistons back and clamped them. Ran 20PSI through from the Sealey and didn’t really get any satisfying globs of air… but the pedal was no question a lot firmer. I relieved the pressure, popped the pads back in and remounted the calipers and gave it one more round of bleeding. Pedal I think is almost there, I think any real road/track mileage will still produce a bit of sponge but hopefully I can get some shakedown mileage on it, lock up the brakes a few times and then give it one last go.

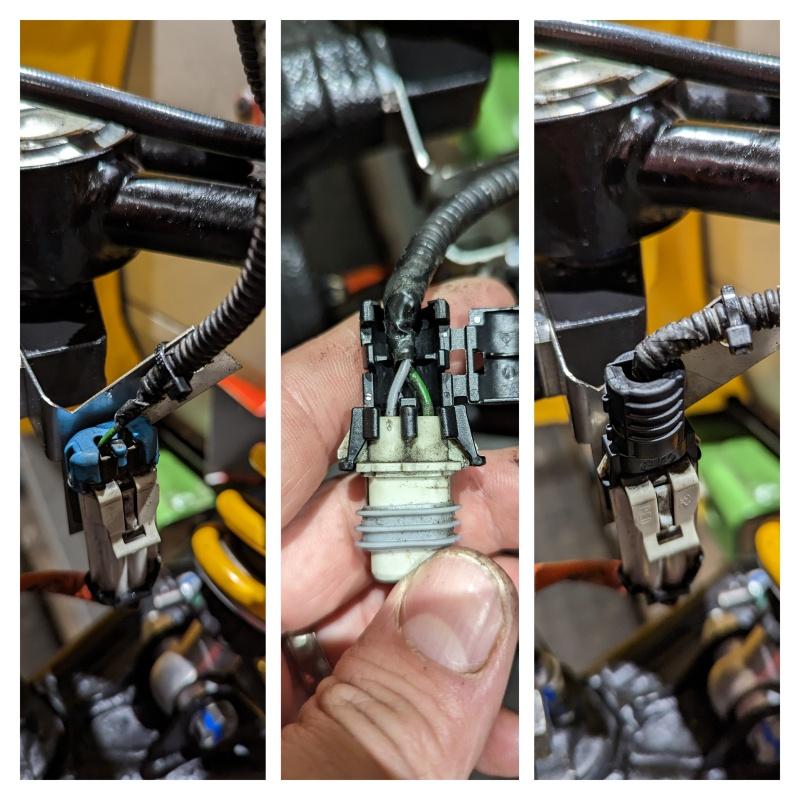
@junks Had been advertising some little gismos, presumable from another OEM that used the same 2-pin connectors for the ABS. These wires are prone to breaking if mishandling them, I know because I’ve done it before. I now treat the ABS wires like I’m diffusing a bomb but these replacement plug-clips should help offer a bit of support for future hamfisting.

I got to spend some time sat in the cockpit to finish off the clam fixings (wee M6 bolts you can just see under the clam line) so I replaced the weather stripping too which the aeroscreen would mount against.

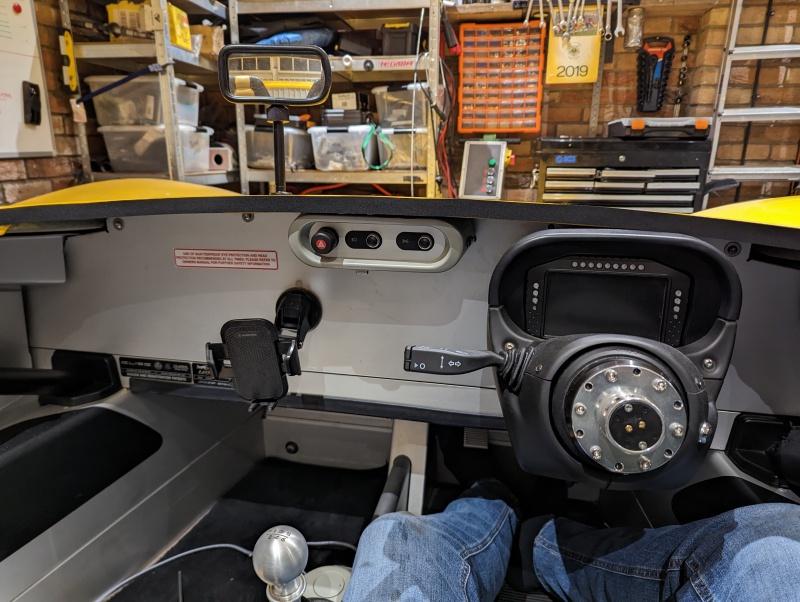
Speaking of which, I decided to break out the spare aeroscreen that the previous owner had supplied with the car. It doesn’t have the hazy/crazed effect of the old one. It does make me very nervous thinking that I’ve now “used up” my spare aeroscreen, so I might be on the lookout for another spare. I imagine once they run out, these will be incredibly expensive to get made up.

A few fixings delicately done up later, and we had giazing back.

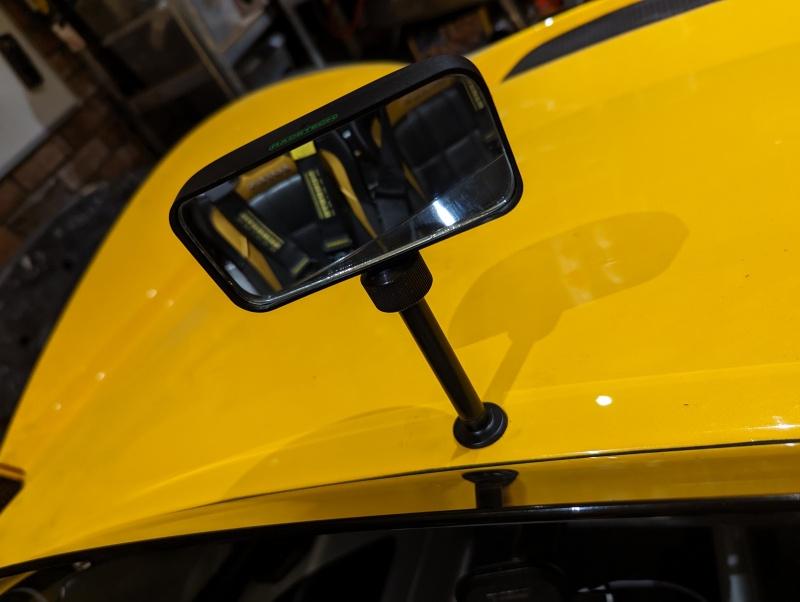
You can just see a bit of clumsy rubber trim going around the rear view mirror. It might be some sort of IVA compliance trim but it’s constantly trying to fall off, so I gave it a helping hand. Mirror looks much sleeker now, but still as useless as ever.

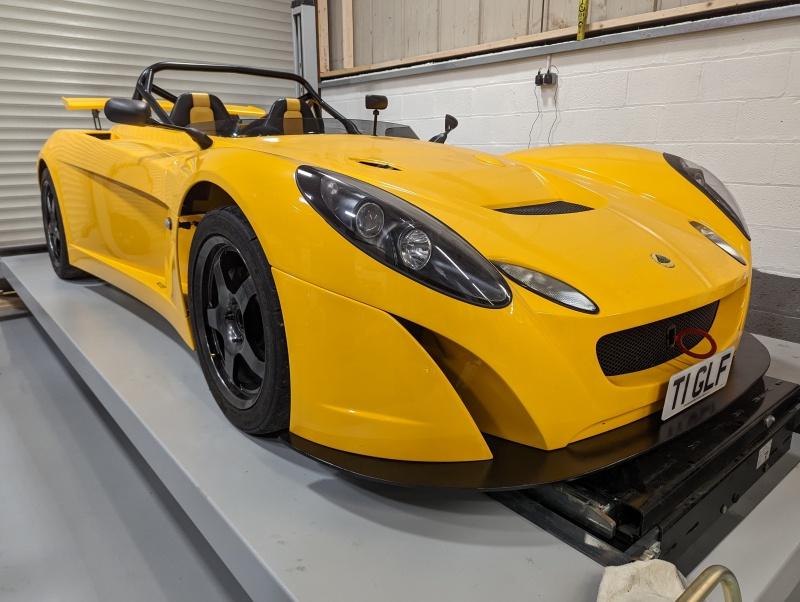
With that done I’m now just arch liners, wheels and a splitter away from being able to drive the car. I have Geo booked with @seriouslylotus Wednesday this week so if push comes to shove I can bolt the old splitter on to get it onto the trailer (clam flaps around far too much without a splitter fitted, wouldn’t want to drive it even a few feet like that).

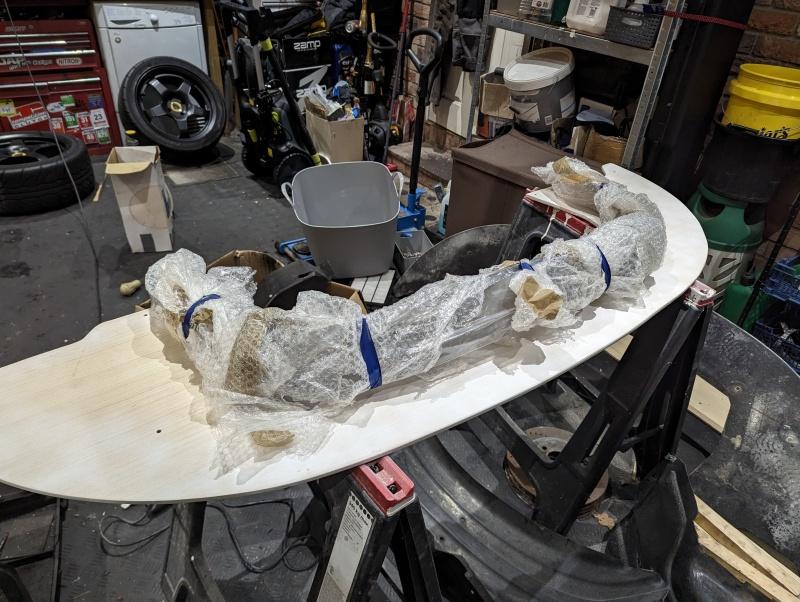
If the weather allows though, I’ll get this finished off. So far it’s primed.

Will give it a fine sanding and then a couple of coats of black then we should be good to go. This is the worst of my attempts, but still pretty damn good. I’ll spend more time (maybe borrow a router) on the better one to give it some nicely finished edges.

1 Like

On the 2-11 there are wing mounts that go onto the chassis. Are these chassis mounts unique to the 2-11? I assume I dont have them on my poverty spec non racing exige?

1 Like

Yes they go straight through the clam and bolt to the subframe. No factory S2 Elise/Exige had them as far as I know, you’d see them going through the boot if you did.

1 Like

Agree on the boot bit. I was just curious if the holes / mounts were there on the subframe but never realised on a production car.

A quick look at the Exige subframe photos I have suggests that the threaded holes used by the spoiler brackets are indeed there… but not sure if they’re used for anything else. It might be the same bolt holes that the boot floor is bolted to in an Elige.

You can see the fore hole just in front of the sticky tape that holds the shims in place.

Got a few more finishing touches done.

The worst of my splitter remake attempts got some paint. I’d spent ages sanding it to flatten the grain. but as soon as I painted it, the grain rose up again. Bit annoying, but need a better plan for next time.

The underside was barely sanded at all, as it’ll get scuffed up within about a mile from my house. All my countersunk holes lined up nicely though.

I’m a bit harsh on this splitter, it’s the worst of my efforts but still really happy with it. It’ll probably stay on the car for the forseeable but I can spend a bit of time on my next version to see if I can perfect some techniques.

Next up, and last job really was to sort out arch protection at the front. Lotus didn’t fit arch liners cos’ race car but most owners have figured something out to stop the front clam from being smashed to pieces from the inside.

Mine had previously been fitted with some dynamat foam, but despite still being in one piece it hadn’t done the job. Couple of star cracks on the OS wing. I have made an effort to improve it by fitting some Bostik roof flashing tape. I had a roll left over from arch liner repairs on my Exige.

It’s dead easy to work with, cut to shape and it’s barely sticky at all in the cold garage temps so you can keep peeling it off and repositioning etc. Once happy with it, quick blast with a heatgun and it sticks like tar (which I think it might be!) and once cooled off goes rock hard.

I then sprayed with contact adhesive and replaced the dynamat stuff over the top, so I’m doubled up.

You can just see my carbon skinned/repaired arch “bucket” too in that shot peeking out. They never did get the final wet sand/polish that they deserved but they’re fine for their purpose.

Had a quick test of my intercom system, works a treat.

Bolted the diffuser on, mounted front undertray (still needs replacing, it’s a mess) and rolled it out of the garage fully clothed for the first time since November.

…then straight in the trailer and off to @seriouslylotus for spanner check and geo.

3 Likes

Love the update @Fonzey

Splitter looks great.

1 Like

Actually jealous of how much work you manage to get done.

Looks great. My suggestion for getting a shiny finish on the splitter(if that’s your aim) would be to blacken, then lacquer/resin pour, then polish, or get it made from carbon fibre…

I really need to start work on mine.

BW

Cheers Gents, yes I’ve had similar advice from elsewhere. There are some ‘filler varnish’ type things that can be sanded down, and painted over. Seems like a winner, so will try that on Splitter #2. If it’s really good, I might re-do Splitter #1… but it really looks fine, I’ll get some proper photos once I get the car back and cleaned.

Lots of late nights!

I finish work at 2300. I don’t think the neighbours or wife would be to thrilled with me banging in the garage…

You should be chuffed with the work so far. What’s the point of the flashing tape? Minimise flexing of the fiberglass?

BW

Yeah 23:00 is not a great time to start. I try to get my noisy jobs done during the day, but often I’m in the garage trying to muffle my noise until 2-3am. I quite enjoy it, neighbours know me well by now, and I like to think they know I won’t take the mick with grinding/hammering etc!

Swearing and desk slamming do get an exemption.

The flashing tape is stone chip protection from the inside.

ETA: I find that for DIY tinkering that many, shorter sessions work better. Almost every session I can’t proceed because I need X tool, Y fitting, Z consumable etc. If I put aside an 8 hour Sesh on a Saturday, my family would hate me (even more than they already do) and chances are I’d end up unable to finish loads of things because I need to stick an order in for bolts or parts or whatever.

I never go into the garage expecting to be there for XX hours. I work for as long as I’m enjoying it, then stop when I run out of useful progress or when I start getting bored/frustrated. Sometimes it’s 5 mins, sometimes it’s hours!

I have lighting, maybe I should look at getting a propane heater then I can do some work later at night.

I tent to find starting the hardest, however once I’m in, I can easily spend too many hours.

Maybe ill do some tonight. Need to make a heat shield for under the intercooler…

That’s a nice idea for the flashing tape. Ill have to look on the E if it requires it.

Depending on where / what you are working in you tend to get a lot of condensation from propane heaters.

Garage, timber roof.

However that’s not good. I just want a warm garage…

Great to see it come all together after an epic winters work that I’ve immensely enjoyed following.

Let me know how you get on with getting the air out of the brakes. I thought I’d sorted mine but spoke to soon. Having now driven the car a couple of times they feel crap :rage:

You have arch liners, the 2-Eleven does not

Dave and John spent a fair few hours over a couple of days checking out the car and making sure I hadn’t made many stupid mistakes.

Was great to see the newly refurbished workshop in use, lots of hard work gone into it - few finishing touches still to come, but it’s a proper job. Actually took my shoes off to come inside, will fetch my indoor Crocs next time.

John has a good eye for detail and noted a couple of snags, mainly incorrect fixing types in a couple of places. Easily sorted, and John also bled my brakes for me for hopefully the last time.

Generally though the car was all the right shape, so it was time to move onto rideheight and geo.

A big regret is not measuring the setup of the car before taking it apart. It drove really well, but it would have been nice to have had a reference point. The only thing we did still have a comparable datapoint for was rideheight, so that was adjusted first.

The spec for this car is 100mm front ground clearance (measured from front jacking points to floor) with a 10mm rake. This car was a fair bit lower than that, in the mid-high 80mm range. This was music to my ears, as it meant I’d been needlessly bouncing off the local roads. The single biggest killer for this car being a ‘fun’ road car was ground clearance.

Aesthetically though, the car suits the much lower ground clearance. The front arch gaps are massive to allow for clearance so it does look a bit goofy now that it’s running the proper rideheight. Still, function over form n’ that.

The car was setup with my body weight in the driver seat and we landed on:

100/110mm ride height
-1.7 front camber
-2.8 rear camber
Touch of toe-out at the front
Touch of toe-in at the rear
Shed loads of castor

Unlike the Exige, there’s still loads of adjustability either way around these figures. Could add a fair whack more camber if I think it needs it.

Whilst John was setting up the car, Dave was swearing in the corner turning a sheet of aluminium into a couple of front undertrays for me.


He was critical of his work initially, but I think we all agreed he did a fab job. I now have unblemished splitter and undertray and it looks loads better for it.

John gave me a short list of hints and tips for fettling a few bits (strategic cable ties for arch liner support, etc) and I was on my way.

Weather even put on a show

Back home the went immediately onto the lift so I could finish a couple of bits off:

Oil coolers got some stonechip protection:

Mesh stonechips were touched in on the various grilles and vents:

…and the front undertray fixings were all swapped for the correct ones, as we had to cobble it on with whatever we could find lying around before. Uses countersunk cap head type bolts which seem to like chewing themselves apart.

Finally after months, I could wash the car! Woohoo.

We’ve been practising the two-bucket method on Mummy’s car, so happy to let her loose on the proper stuff now.

The car looked sort of clean from a few feet away, but as soon as it got wet - there was jet black water running off it from all of the dust that had settled on the bodywork. The Yellow really is a good colour for hiding dirt.

I now had shakedown to think about. Blyton is booked for next Saturday, and I really wanted to get some miles on it (and get it out of first gear!) before loading it onto the trailer for that. With just two days left in February, it killed me to stick some tax on the car and take it out on Sunday.

However, it was lots of fun!

Conveniently it was the NYLOC monthly meet so that was my destination sorted, weather was forecast to be grey… but 0% of rain. That was a lie.

Good Yellow turnout though :slight_smile:

And four Emira in attendance. Was good to get my first proper look of them, lovely things - Lotus are growing up!

I did about 50 miles in total, was damp and cold in the morning and couldn’t get any power down on the AR1s so I just logged as many areas of the map I could under cruise and low speed conditions.

Coast down and return to idle stuff (historically a problem area on the Exige) was bang on. No stalls, threats to stall, nada.

If I had one minor complaint is that the car seems to generate enough torque at idle to keep it moving (fairly quickly!) in first gear, so driving slowly in a carpark is a little bit clumsy. I can fix that through mapping, but I think that’s mainly a product of it being such a light car.

Had a bit of a near miss on the A1 for the short stint I needed to do. NS mirror flopped down a bit and I was completely blind and stuck in the middle lane. That was fun…

Got it dirty…

For the ride home, it had dried up and I was able to get the hammer down a bit to log some WOT pulls and make sure the map all checked out. In the ‘road mode’ map the car felt as expected, very similar to OE power levels. I was a bit concerned that capping my throttle at 60 odd percent would translate to a poor resolution of throttle actuation and lead to some drivability issues, but it didn’t - it drove just like factory.

A winter away from the car plus cold roads on AR1’s made the car feel all the more lairy, but it didn’t half feel fast.

One roundabout away from home and it was time to put the bigboy pants on and try the uncapped throttle ‘race mode’. Easing onto the throttle gently to avoid too much gearbox pain and the acceleration piled and piled. It felt very fast, and didn’t blow up.

Pulled into the garage grinning ear to ear, nothing fell off, everything points in the right direction (after adjusting the mirror), brakes feel good (would probably benefit from a proper hammering just to clean the discs up a bit) and the mapping felt really good. I know it should do, it’s been done by a professional on a dyno etc - but you never really know until you get it on the road, and with more time (not to mention bodywork!) any decent mapper would want to correlate dyno findings onto a road test for final tweaks.

It needs fuel, another clean - then into the trailer for Blyton. Exciting, more updates in a week or so.

2 Likes

I will be interested to know if the track handling is now compromised to an extent over the 20mm raising of the height.

Was more like 15mm I think, and it was out of spec before - and in spec now. So in theory, it should be an improvement… but as I say - I had no complaints previously!