2007 Lotus 2-Eleven

Cheers John, some good/scary things to watch out for there…

It’s only the Haltech guy talking me out of the internal ones which made me go for the externals, I don’t know if they’ve evolved or improved over time but they seem to be a pretty nicely machined bit of aluminium (no plastic other than the battery cap/cover). I have two sets of wheels, one of which had tyres fitted by a local guy who builds rally cars in a shed and he always fits really short stumpy valves (apparently safer for wheel to wheel racing and bouncing across rally stages) which seem help significantly towards hiding the valve cap ‘into’ the wheel structure. I noted straight away that when the valve caps are on regular length valve stems that they seem far too exposed/vulnerable.

I may consider trying the integral valves regardless of Haltech advise, for aesthetics as much as anything! Each set of valves is paired to the control box so providing I leave it somewhere within arms reach from the arch liner (easy enough on a 2-Eleven) it should be hot swappable.

Or just go full gucci and get some IR cameras hidden in the wheel arches :nerd_face:

No real update yet, just checking clearance for various things so bolted wing back on.

How cool does that look?! :sunglasses:

1 Like

Cool indeed. And lotsof shiny bits too.

1 Like

Just about done with the suspension so will get another writeup out of the way.

Took wishbones off some weeks ago. They were pretty good for an 07 car, bushes in fine fettle and not ‘walking out’ like my Exige ones were… but there was no way I could bolt it all back onto the clean subframe now after the work put into that.

It looks like the fronts had been repainted once before, and the rears were covered in the same awful blobbed on paint/anti-corrosion coat that covered half of my chassis a few months ago.

Still, nowt’ bent and the only thing to report is a little bit of 2-Eleven trivia in that the front upper wishbone is different to the rest of the Elise/Exige range, and has the BJ cup on an angle to allow for the lower ride heights that the car runs.

This is the third Elise platform car I’ve done wishbone refurbs on, trying different coatings each time. IME, the only thing that’s properly robust and maintainable is painted on POR15. It had excellent stonechip resistance, and can be touched up if it does fail. It looks decent too if done properly, easily as good as some powdercoat finishes.

I didn’t have the time or energy for POR15 this time though, so it was back to some sort of outsourced finish. I’ve done powdercoat before which has weathered pretty well (6 years old now and still in fine condition according to new owner) and zinc plating which failed within months. I considered Xylan, I’ve seen it produce fantastic results but also heard accounts of it failing prematurely.

Back to powdercoat then. I outsourced to Jonny @Performance_autocare who has a ‘guy’ with a process that involves ceramic coating the interference fit bits and powdercoating everything else. So bearing tubes and BJ cups are ceramic on the inside, same as the uprights and steering arms etc but the main body of the wishbone is powdercoated for a bit more ‘mechanical’ protection from the elements.

It looks fantastic, only the test of time to go then I guess.

Dave/John @seriouslylotus sell a convenient refurb kit with all the nuts, bolts, shims, balljoints, trackrod ends, droplinks and your choice of replacement pivot bushes or bearings.

As with my Exige, I went for the Nitron solid bearings. Lovely.

I said it in the Exige thread, and will say again here - these have no appreciable downside at all. They don’t add a load of clonks and rattles to the car as you’d expect. If anything, they take noises away because the rubber coming out is likely passed its best!

Aside from the price, there’s no reason not to fit these IMO. Some say they won’t last forever, but with the average mileage of most Lotus cars I’d wager that your wishbones need to come back out for rust treatment before these die anyway…

Pressed in the bearings and BJs over a couple of evenings.

Bearings fresh out of the freezer to make it a bit easier.

Pretty satisfying/therapeutic job to do. Especially in the warmth/comfort of the kitchen. Makes a nice change to rolling around the floor in the cold.

Eventually though, the icy interior of the garage beckoned and it was time to start bolting stuff back to the car.

The clean suspension could not go back on with crusty old brakes, so had to address those too.

Front calipers I’d ruined a bit towards the end of last year. One had a seized bolt and the drilling operation got a bit scruffy towards the end I’m afraid to say… so I was on the lookout for a replacement set which I could refurb and fit. Dave blinded me with some box fresh ones though, so they just had to be bought…

The rears I was less inclined to replace, because I’m reluctant to sink any money into them at all if I can avoid it on the basis that I may consider a 4 pot front and 2 pot rear conversion in the future. This would resign the rears to the bin/spares pile.

So I got to work tarting them up instead. Not keen on doing a proper piston-out refurb as by all accounts it’s a massive pain in the arse.

My starting point:

“Some hours” later, after soaking them in brake fluid and wire brushing and I only got this far.

Some areas of the factory yellow flaked off pretty easy, but other parts was just not budging. Wire brush was just creating fine yellow dust EVERYWHERE.

Next I removed the external seals and sliders, and took them to John @seriouslylotus to borrow his blasting cabinet. Not even that could make a real impact, but it did clean them up enough to consider just painting over the top.

Eventually I tried chemical warfare.

With a bit more wire brushing, this finally did the job.

Finished with some VHT caliper paint

And some new seals for the old sliders.

Not a terrible colour match to the fronts…

That allowed me to ‘sort of’ finish the corners.

Good to finally clear some floor space up! Very happy with the finish and the overall look. I’ve got a few more bits to do before the discs are refitted and brakes bled.

2 Likes

I havent felt the need to increase the amount of pots stopping my exige. What is your rationale for the wish list of 4 pots on the front?

1 Like

It’s just a job I’ve not done yet on an S2 platform, a list which is getting quite small!

I’m with you though, particularly in the 2-Eleven the two pots are more than adequate but I despite the effectiveness, maintenance, weight and aesthetic of the rears. It’s those I really want rid of the most.

The powder coat finish looks outstanding :star_struck:

Excellent that they have been carefully prepped to be bolted up again without having to sand back the mating surfaces.

As for the 4 vs 2 pot debate, I agree that the bigger brakes are not really necessary, but I was amazed at how much more powerful they are than the 2 pots. You really do need to recalibrate how much pressure is applied to the pedal. They might not be to the everyone’s taste, so given that you track your car regularly, if you do go for them I’d be really interested to hear what you think.

Enjoying watching very much.

Feel guilty I have not done the same on here of the 340R rebuilt, which has been similar.

I have wishbone bearing jealousy!!

How different is the 211 fuel tank, it must have bigger baffles / one way valves so there is no starvation with slicks and lefthanders? I have just ordered a proalloy tank to solve this, as I had problems all the time on tracks.

Thank you, glad you’re enjoying!

I believe the 2-Eleven fuel tank is same as any other S2 car. In all the time I had my Exige I never suffered fuel starvation, but did a couple of times in my Elise that preceded it.

I suspected that the Spitfire fuel pump I had in the Exige maybe sat a tiny bit lower, or maybe even just had a slightly higher internal capacity to ‘survive’ any blips in fuel feed… or maybe I just ran my fuel tank fuller than needed. I expect to need to address it at some point, in which case I’ll look at one of the Pro Alloy baffled tanks I think.

Into the frantic stages now, Dyno is booked for Mon 6th to get my old Exige map tweaked in for the subtle differences I’ve made on the 2-Eleven.

Cage came out of storage and went back on.

To conclude the chargecooler install I needed a new bracket to support the rear of the CC core. As a reminder, the Pro Alloy dev car for the 2-Eleven kit was a later car which came with a different heatshield arrangement that could be used to mount the core. The first 50 cars had the same heatshield as me, and I’m #50

I feel like I need to apologise for this, as somebody with a bit of engineering ability would have been able to come up with something so much better, but all I wanted to focus on was getting the dimensions right, and getting something stiff enough to provide the support. I’m certain that a much lighter and more elegant solution can be found, which is something I’ll sort out later when time pressure is off a bit.

My goal was to fill the gap between the subframe legs, so did some measuring up and cardboard mocking and came up with this.

I left it to Pro Alloy to decide materials, and add any folds needed for strength. This is what they (very quickly) turned around for me.


Luckily, it turns out I can use a ruler… and it fit.


It bolts in using some existing threaded holes in the subframe, and is more than stiff enough. I think a short term solution for making it look just a little bit “thought out” would be some punched holes and dimple die bending to make it look a bit more race car. Really though I think the best fix would have been to chop a massive section out of the trailing end, leaving 30mm or so at the sides and front, then rewelding on a ‘fold’ to put some strength back in it. Maybe a project for another day.

All that was left was to pop some bobbins in and we had a mounted chargecooler. Excellent.

Plumbing was next, I had all the old hoses from the Exige but they just weren’t going to work as the pipe run was a bit different and the lengths just weren’t right. Also, the supplied hose with the CC kit is very stiff and heavy, this helps for blindly jabbing the pipes through the sill but it adds up to a lot of weight.

This little bundle is a fair bit lighter per metre, more flexible but probably a little weaker on the abrasion resistance. I can live with that.

Bought 2x 90 degrees elbows to do the initial run from the pre-rad, then mocked up my routing:


For pump mounting, there were two M6 holes already in the chassis that I had been eyeing up. They were very conveniently positioned for a couple of M6 isolation bobbins I just happened to have lying around

They would let me do something like this…

Pump would be hidden from the wheel well by a piece of thin aluminium that’s bonded into the side panel, but just about accessible for service/replacement by some blind fondling either from below or above… not that it’s particularly hard to remove a side panel if needed.

After a few tweaks, rerouting to allow me to use existing fixtures for P-Clips I was ready for coolant. Filling this was significantly easier than on the Exige, because the header tank is a clear high point on this system. For the Exige, you can’t really get it any higher than the CC core so it makes airlocks and ‘burping’ quite tedious. Quick test of the pump, all good - and very quiet too. Isolation bobbins ftw.

Speaking of coolant, I’m out of sequence now - but I also had a few jobs to do before getting the car fired up on the new(old) ECU and idling nicely.

Engine was dry of coolant since having the radiator shroud removed, so took the opportunity to refit yet another Exige refugee (and add yet more weight, woo!) in the guise of my gearbox cooler setup. Pics from the original Exige install:

Worlds cutest laminova with a small fluid pump, and some home made AN hosing. Would fit to the gearbox drain plug and fill plug via a couple of these:

…and would trigger via some logic on my dashboard which acts like a thermostat to fire the relay when the box temp is hot enough.

Pump sits on the chassis crossmember between engine mount and wishbone mount:

Cooler sits just above the crossmember and is covered in coolant splatters from the chargecooler refill.

Suppose I should ‘service’ it too.


(had a peak inside gearbox after oil drained, defo has an open differential in there)

What berk put this on?!

I did, never ever struggled to undo one before so not sure what happened here.

I was getting ready for first fire time. Nothing really scary, engine has only been opened up for a quick peak inside the cam cover and I had a map on the ECU which ran fine on the Exige… so as expected it fired up on the button. Fuelling needed a bit of a tweak, as I’m no longer factoring in fuel pressure to my fuelling model as I did on the Exige but within about 30 seconds it was idling smoothly, returning to idle after a little throttle blip and fuelling bang on target.

Brought car up to temp, burped coolant, discovered fans were wired in wrong so had to reverse the polarity of those but other than that - all good, no leaks, no funny noises or smells. Excellent.

2 Likes

Remind me : Its literally just a pulled from the exige and transplanted into the 2-11 setup in terms of ECU/Injectors/Pump?

Curious why you needed an idle change fuel? Not saying you are doing it wrong BTW :slight_smile:

Yep, but there’s one exception. I did write about it, but the post was already getting too long so it didn’t make post production.

Short story is, Exige fuelling model took fuel pressure into account. This meant that the fuelling table stayed pretty flat through the range, but the ECU modified the pulse width to compensate for pressure at the rail (as Toyota/Lotus use a dead head rail with rising and falling fuel pressure). It worked fine on my Exige, but for the 2-Eleven the I/O situation was a bit different and I ended up wiring the fuel pressure sensor into the dash, to send over to the ECU via CANBUS. I could still use it as part of the fuel strategy, but I’m apprehensive about having a mission critical sensor reliant on another piece of equipment (the dash). If the dash died at 8000rpm, could be bad news for the engine.

So the fuelling model for the 2-Eleven is going to be more “OE style” in that the fuel table ramps up with manifold pressure and the fuel pressure sensor will be used for just monitoring and as a failsafe (can still trigger an engine cut if pressure drops out, for instance).

Good question, proves you’re paying attention.

ETA: one other hardware change is the fuel pump. My Exige had the Spitfire one, the 2-Eleven has the Denso HP pump that Lotus used on 260 cars. Interestingly the 2-Eleven does make less pressure at idle than the Exige did, suggesting either the FPRs in the pump assembly are different (either in terms of spec, or health) or that somehow the higher flow rate from the Spitfire pump was able to ‘overwhelm’ the FPR… not sure if that’s even possible.

Not 100% sure about that but surely that would be the point of a regulator? To regulate the flow? Any that’s not needed is returned?

Another good read!

1 Like

With the car running and idling I could get on to some finishing touches.

I’d already decided that I wasn’t going to put bodywork on for the dyno, it would mean I don’t have to rush (not that it’s a big job, I just want more time to tidy things up, give the chassis a good wipe down, etc) but also I’d have no anxiety about whether the front clam could even fit up the ramp for the dyno!

I would have to put the side doorcard things back on to allow me to get the scuttle panel back on which contains the fuel filler cap. Safety first n’ all that. So before doing that and making the interior of the car a little less accessible, I’d crack on and get a few interior jobs done.

First up, some carbon tat!

Went to the Autosport show in January, was pretty crap compared to previous years but I achieved my two goals. One was getting a technical answer from Haltech about the TPMS stuff, and the other was trying on and buying a helmet a little more suited to an open car.

I was all set to look for a Bell GP3, but Bell closed faced helmets were nowhere to be seen. I spotted a Zamp stand, had never heard of them before but their range was uncannily identical to the Bells in terms of features and certifications.

The key things I wanted were a chin spoiler to try and stop my helmet lifting, capacity for an intercom and readily available options for smoked visors etc.

The Zamp came with a clear visor, and I opted for this metallic yellow one too. Also got HANS posts.

The next job was to sort an intercom out. I think this will only very rarely get used so I went for the entry level ZeroNoise offering.

It either runs off a 9v battery (the ones you lick) or can wire it into the 12v supply from the car, which I’ve done.

Zamp included empty earcups within the helmet lining, so threaded the earpieces into the back and stuck the mouthpiece behind the chin bar where the drinks tube would come through.


The downside of the entry level one is that I think it has a 6.5mm jack which isn’t really common across the other intercom vendors… but nothing is standardised anyway so getting a one size fits all for instructor helmets etc is just not viable. Instead I’ve ordered a spare “guest” headset, which is velcrod into my old helmet for passengers etc, but can easily be removed and stuck into another one if they’d rather use their own.

Mounted it on the roll bar behind the passenger seat

Next one is maybe a bit controversial for the anodized lovers, but I bought some vinyl sill covers for an S1 (2-Eleven sills are more S1 style than S2) and they fit beautifully.

It’s a function over form thing, you don’t slide over the sills like an Elise/Exige but they do come up to your elbows and seem to be always getting clonked by harness buckles, luggage, passengers, etc. Once you mess up the anodized finish on the chassis… there’s no real way back.

At one point this Winter I’d had a bodyshop lined up to paint the doorcards, but on later inspection they were in really good condition. The scuffs and scrapes that I’d previously spotted ended up in the most part being just scum that cleaned off! The few scratches I had left came out pretty well with a quick blast from the DA polisher.

Gave them a good coat of sonax npt and they’re looking lovely.

Finished the job off with harnesses and put the doorcards back on. Only just noticed that my driver harness is not an ASM one.

The doorcards were bonded on originally and I was really reluctant to bond them back in, in case I ever want them off again. I felt very fortunate not to damage them beyond repair when hacking through the betaseal, and it was very time consuming.

As a result, I ran a self adhesive gasket of neoprene stuff all the way around to take up the tolerance and provide some weather sealing (lol). The sealant I think is there from the factory purely because the tolerances are so to cock. You get two reference points to meet (8-10mm gap between doorcard top and rollbar upright) and when lining it up, there are huge voids in some areas between the doorcard and the chassis. Previously this was taken up by a 15mm (in some cases) bead of betaseal, but for me it would be filled with neoprene.

I added a couple of nuts/bolts and washers to secure it at the top end (bottom end already bolts to chassis) and I’m happy with it. Should be a 5min job to remove in future, but if I find a reason in hindsight for why they should have been bonded in - I can always come back in an afternoon and redo it.

It felt really good to get all the crap out of the footwells and give it all a good vac out. One of those jobs that makes it feel ‘nearly done’, and not tripping over those doorcards on the garage floor is most welcome.

I even popped a side panel on just to check for clearances and alignment. All good.

I ran a litre of brake fluid through, got loads of air out of the calipers but the pedal still goes to the floor so I fear my attempts to cap the brake lines during all my work has failed, and the ABS system has got some air in it. Been here before and it’s a total mare to sort, you can either tow it to someone with a Lotus scantool to cycle the ABS and purge it of air, or just run gallons of fluid through with quick road tests between to try and lock up the brakes and trigger the ABS. I’ll give it one run up and down the cul-de-sac at the weekend and give it one more pre-Dyno bleed, but might need to wait until it has bodywork on and is road going before sorting it properly.

3 Likes

Loving these updates and really motivating me to get into the garage to do some work!

Great stuff, looks like you’re getting close :+1:

Liking the vinyl sill covers, they’re perfect for the car being light, functional and a bit of a ‘race car’ style solution.

1 Like

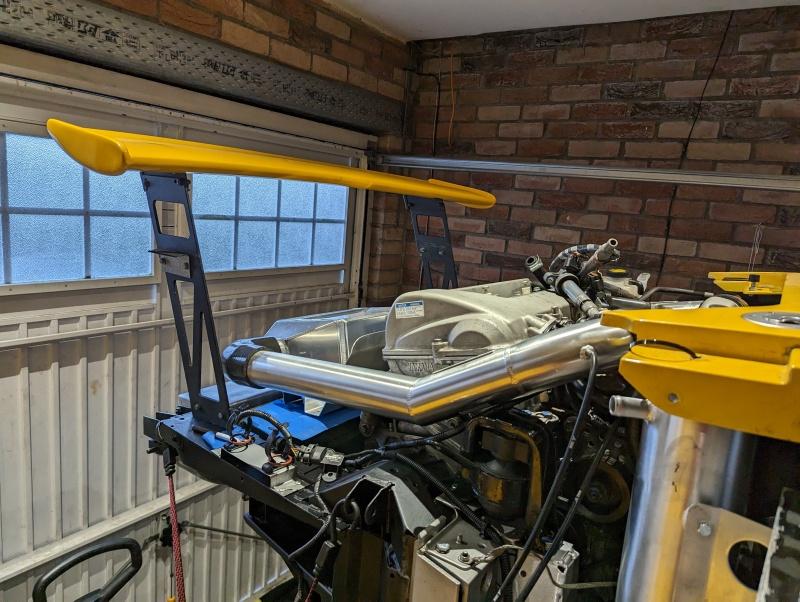
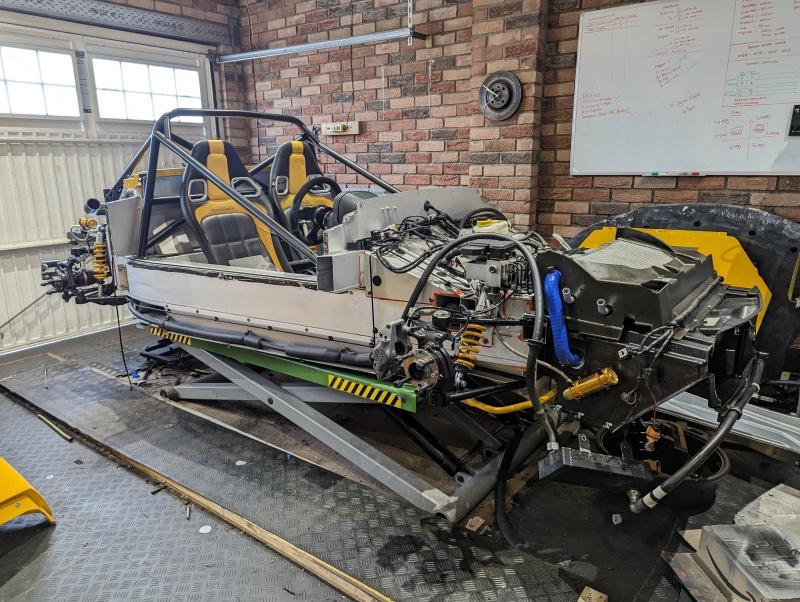
With dyno day fast approaching. I got the car outside and made sure that it did basic things… like forwards, backwards and stopping.

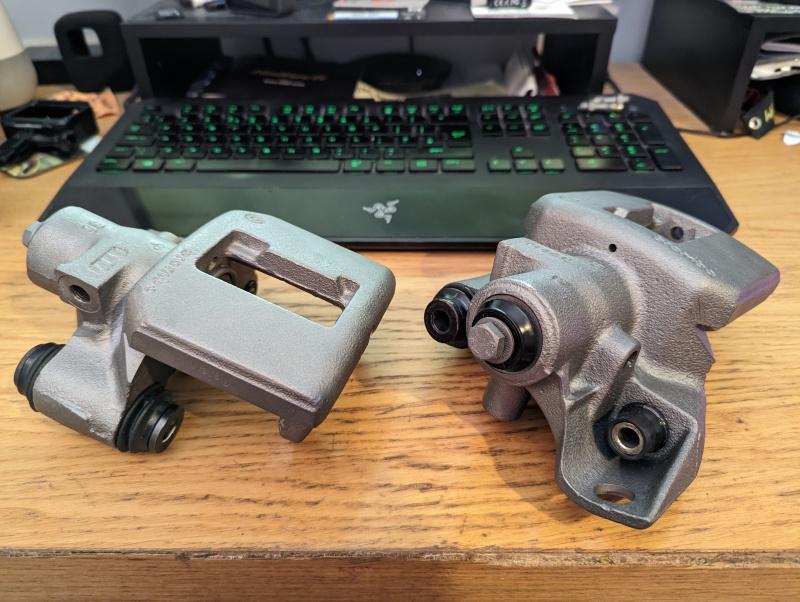
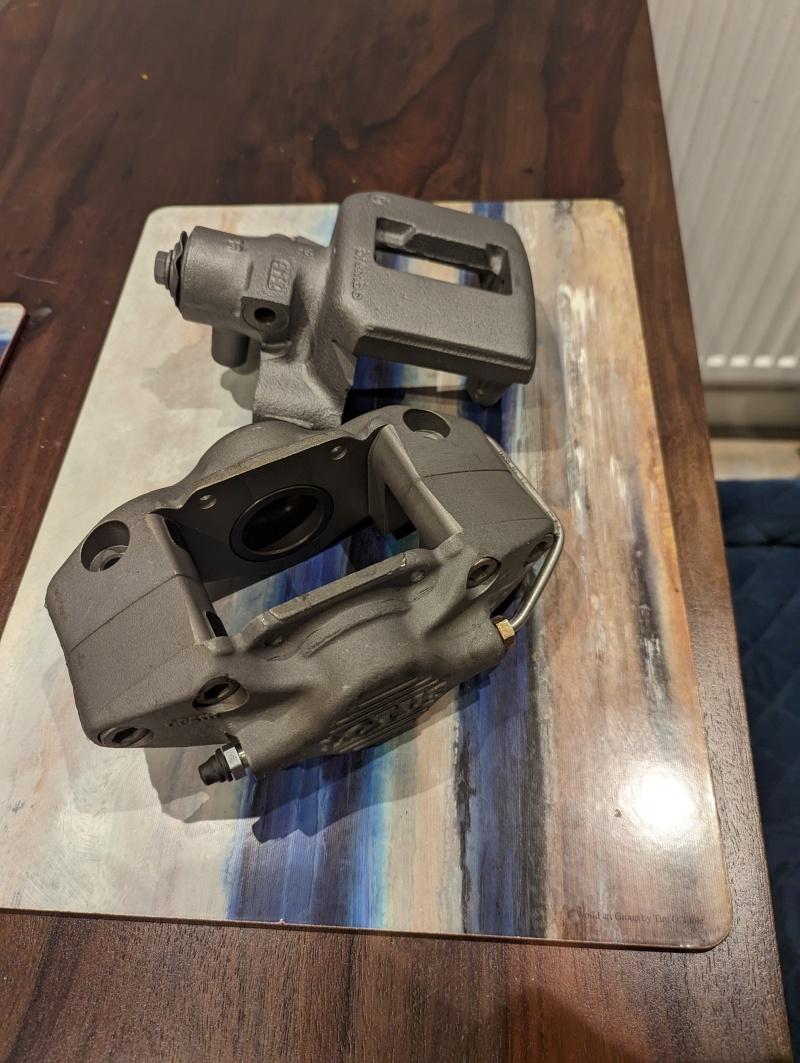
The forwards and backwards were OK, the stopping less so. I slammed on the best I could at <5mph and triggered a couple of tiny lockups. This allowed me to re-bleed the brakes and get a bit more air out, nowhere near ‘done’ yet but probably safe enough to drive onto a trailer, and maybe up and down the road a few times when bodywork is back on.

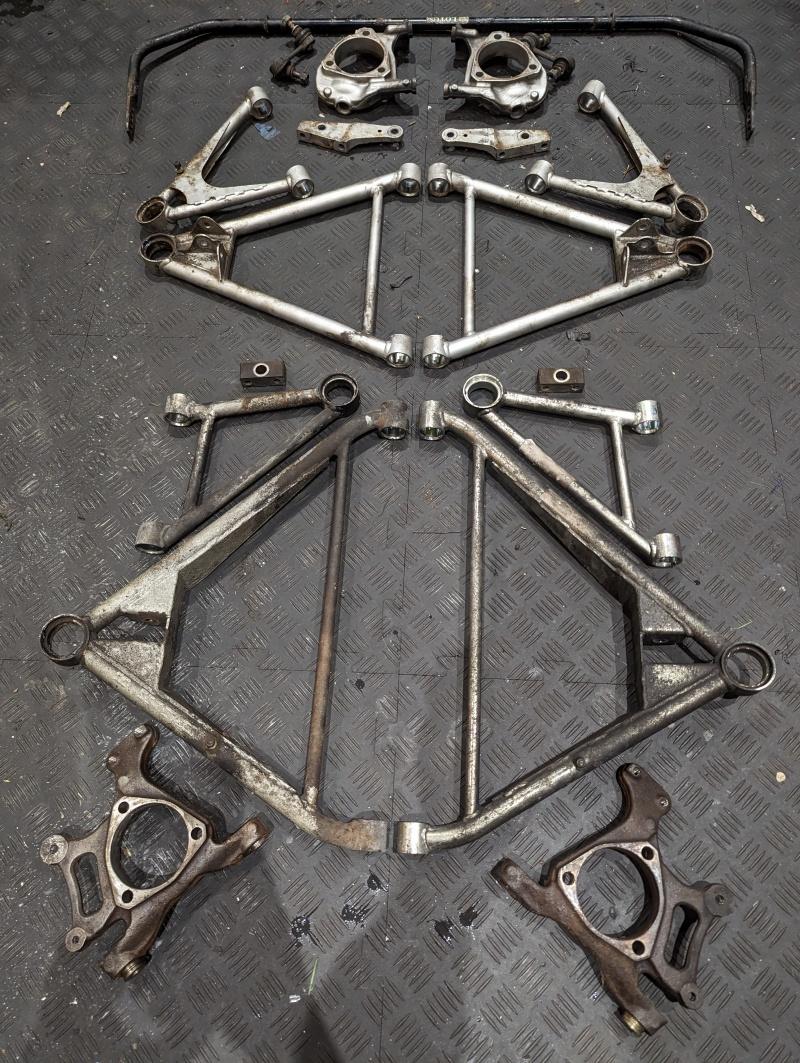
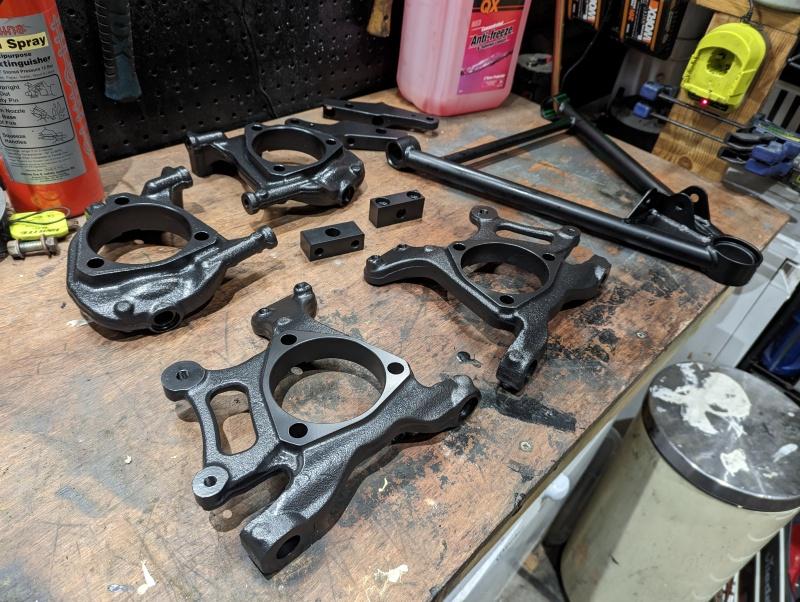
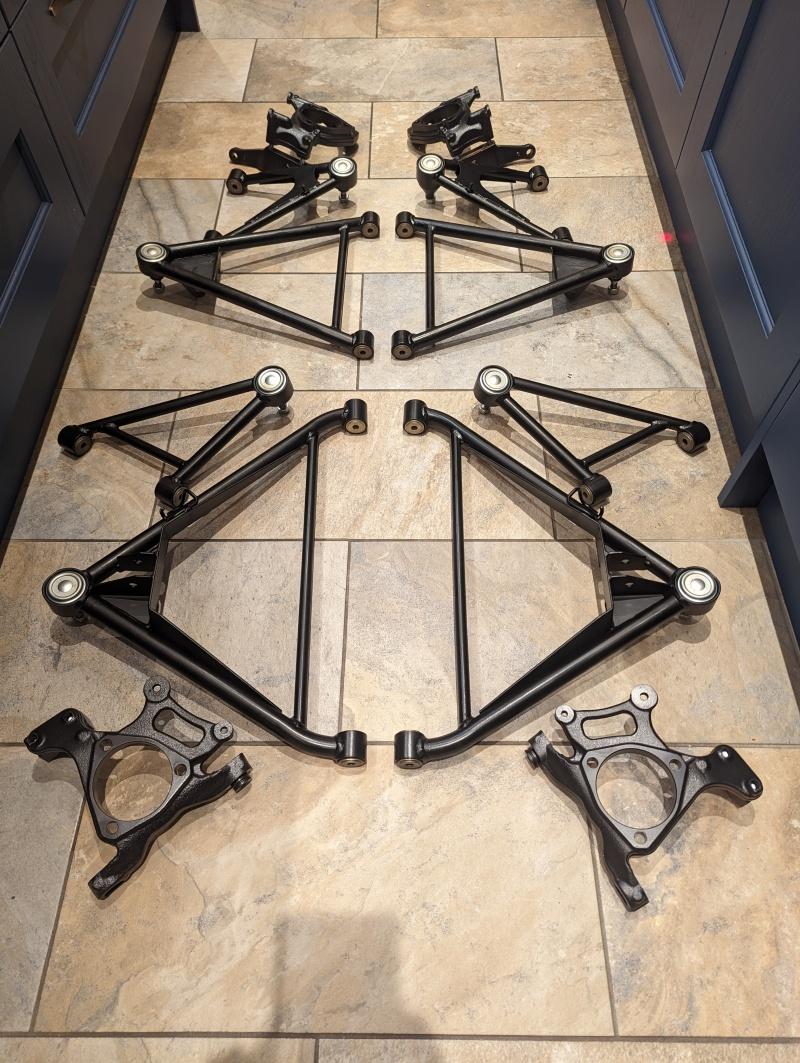
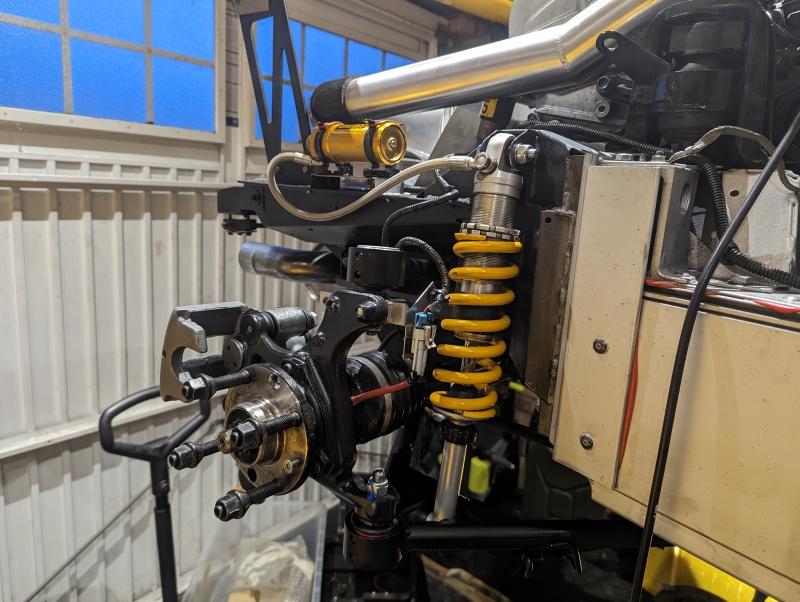
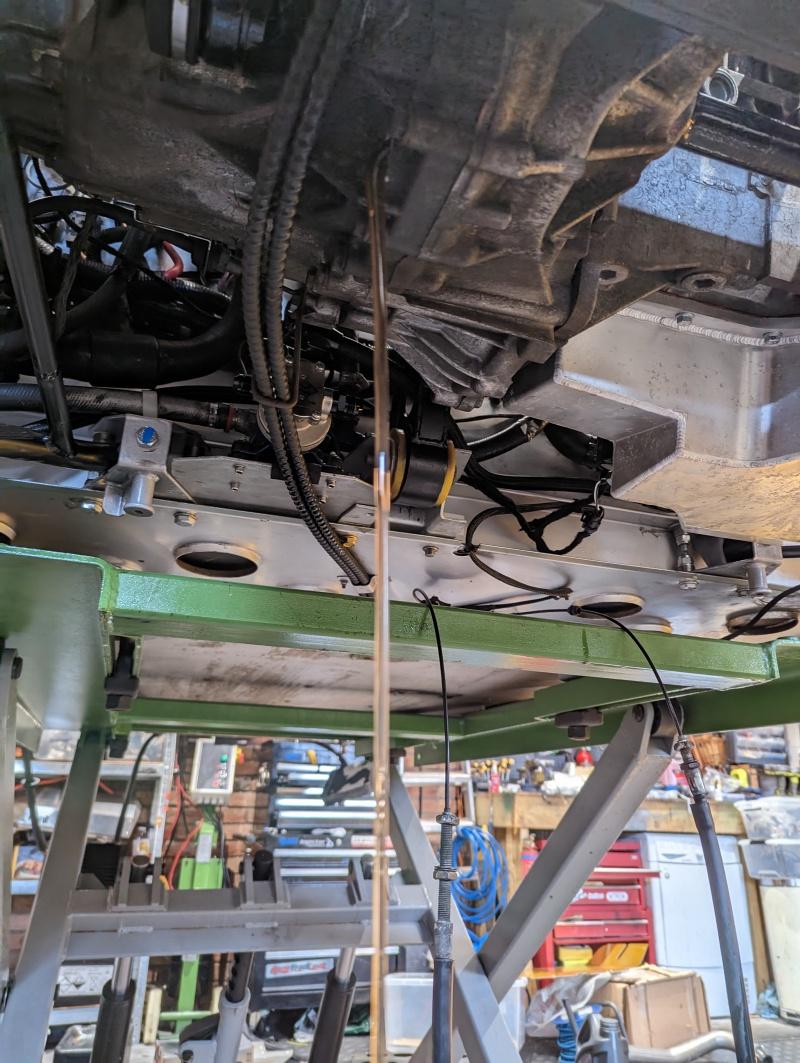
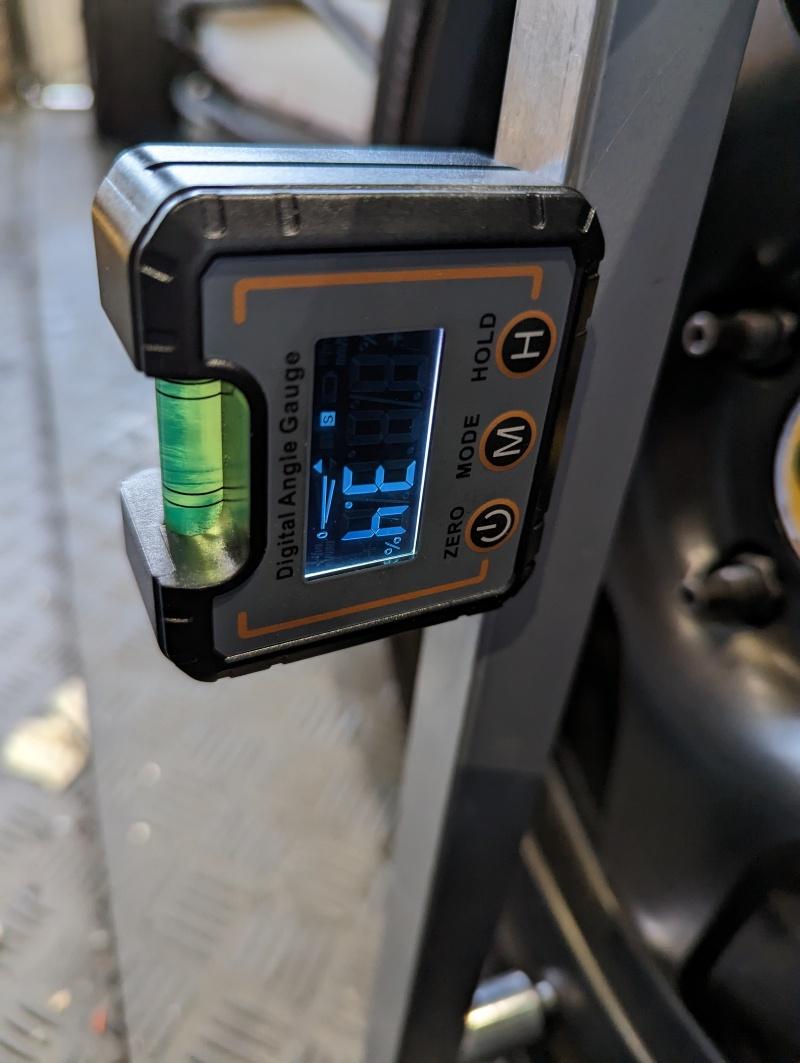
Out of curiosity I put the wishbones back on without any camber shims. On the Elise/Exige cars it’s a struggle to get more than ‘book’ camber of about 0.5 degrees at the front. Aftermarket arms/machined uprights/etc can be had, but even then my Exige maxed out at 1.5deg.

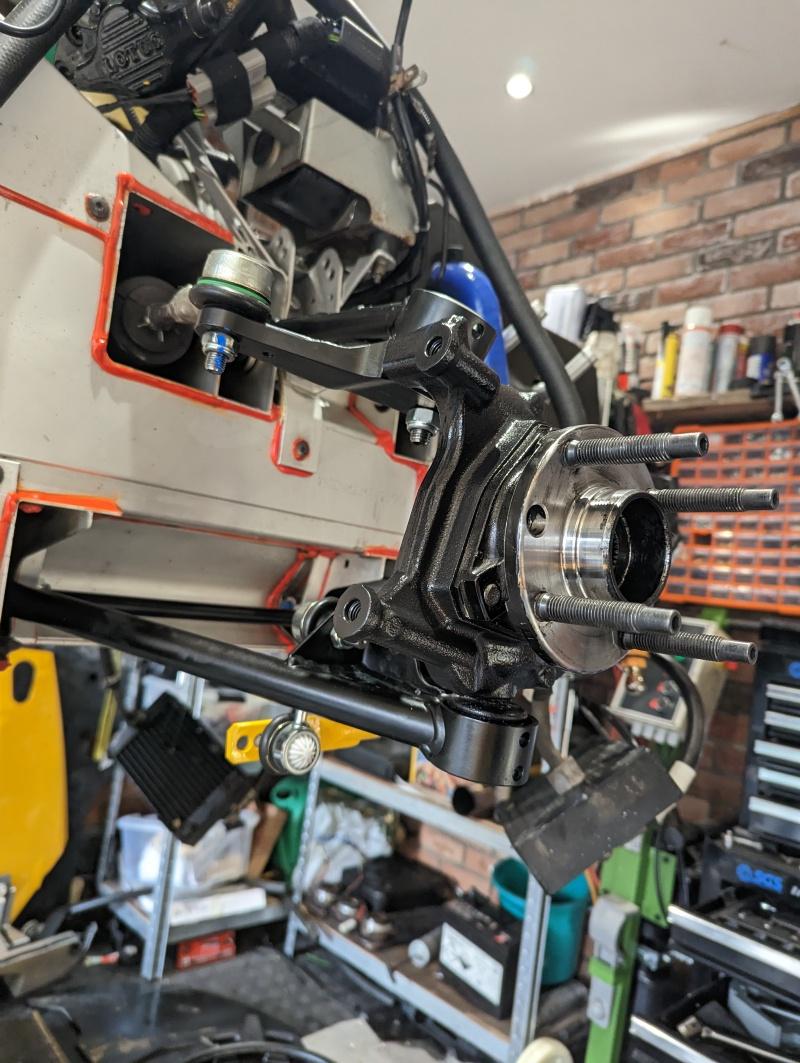
With no shims, the 2-Eleven goes full stance mode!

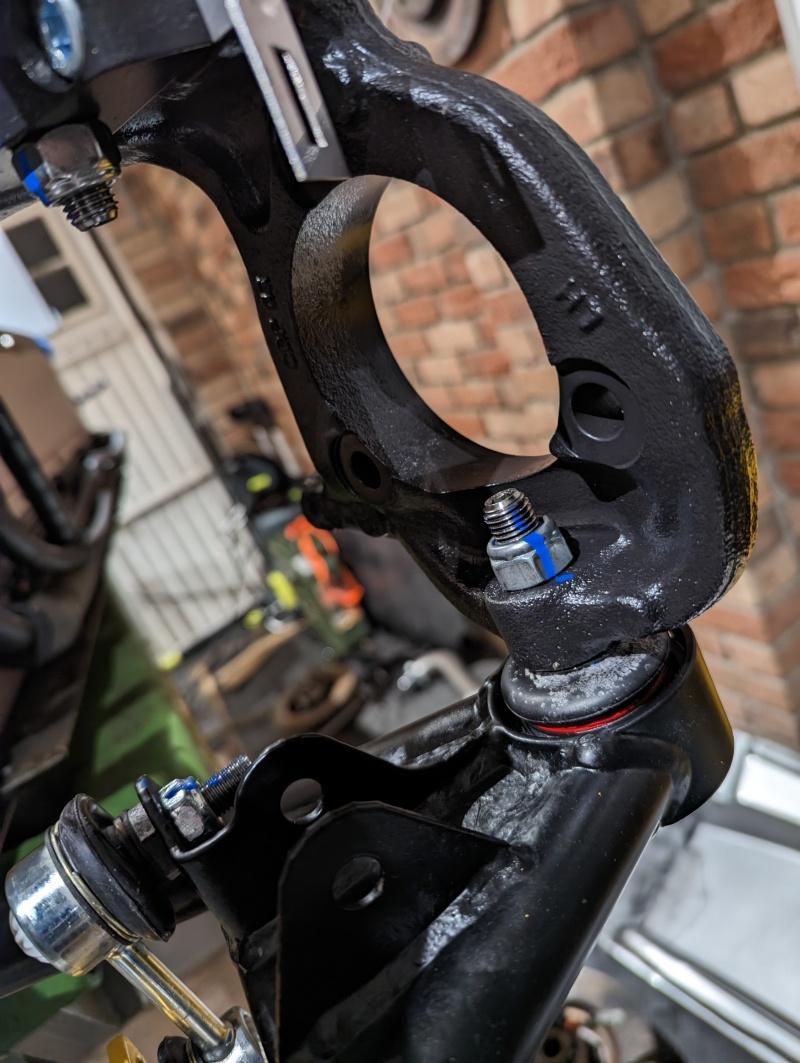
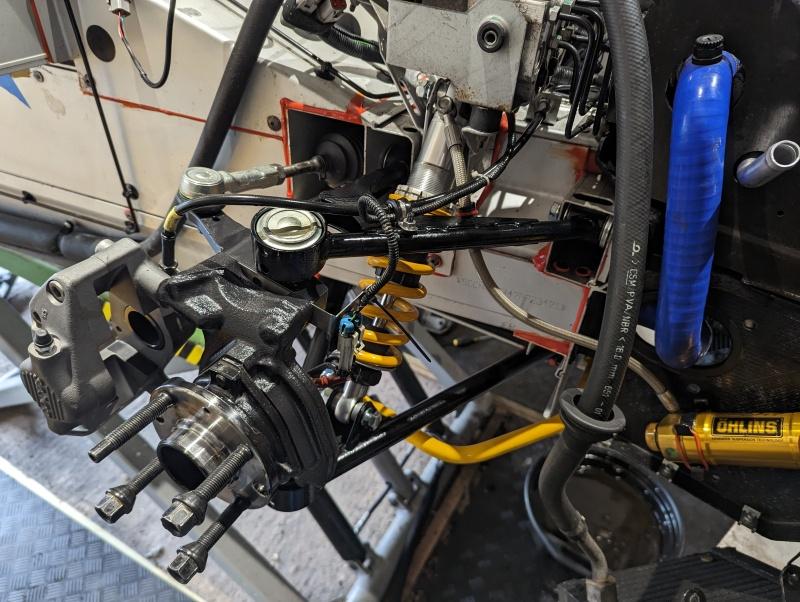
I lobbed some shims in just to give me a closer starting point for when it comes to geo. 2-Eleven will be aiming for similar to what I ran on the Exige, as per the book.

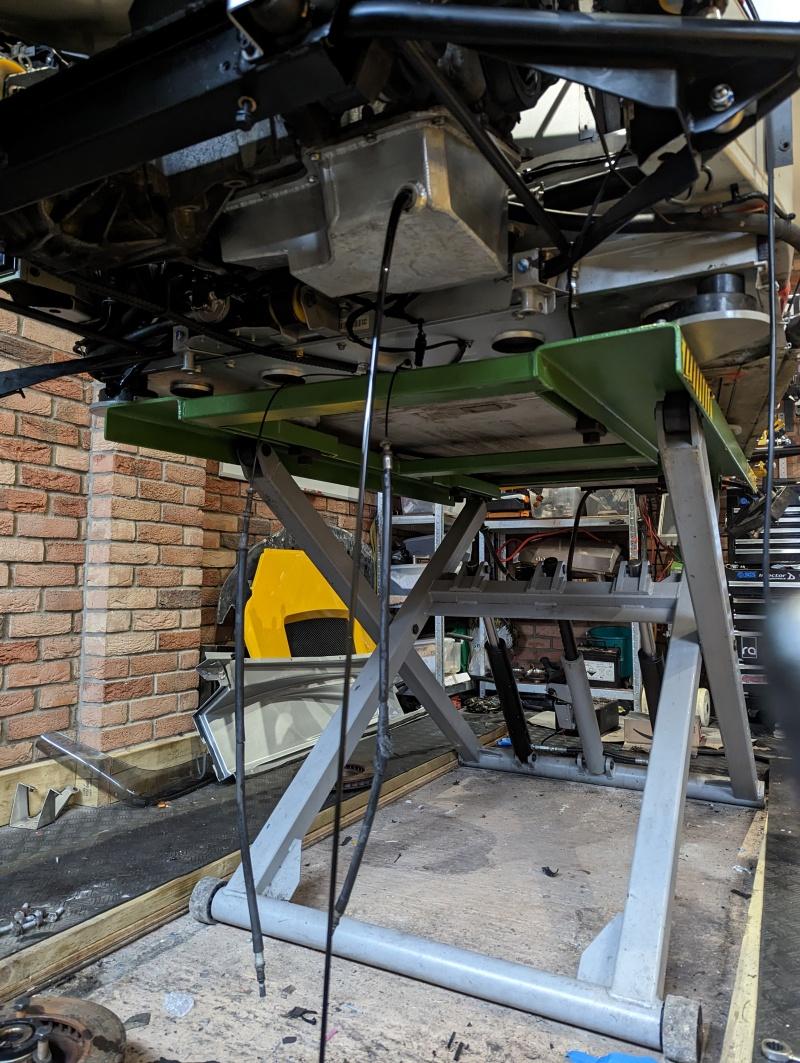
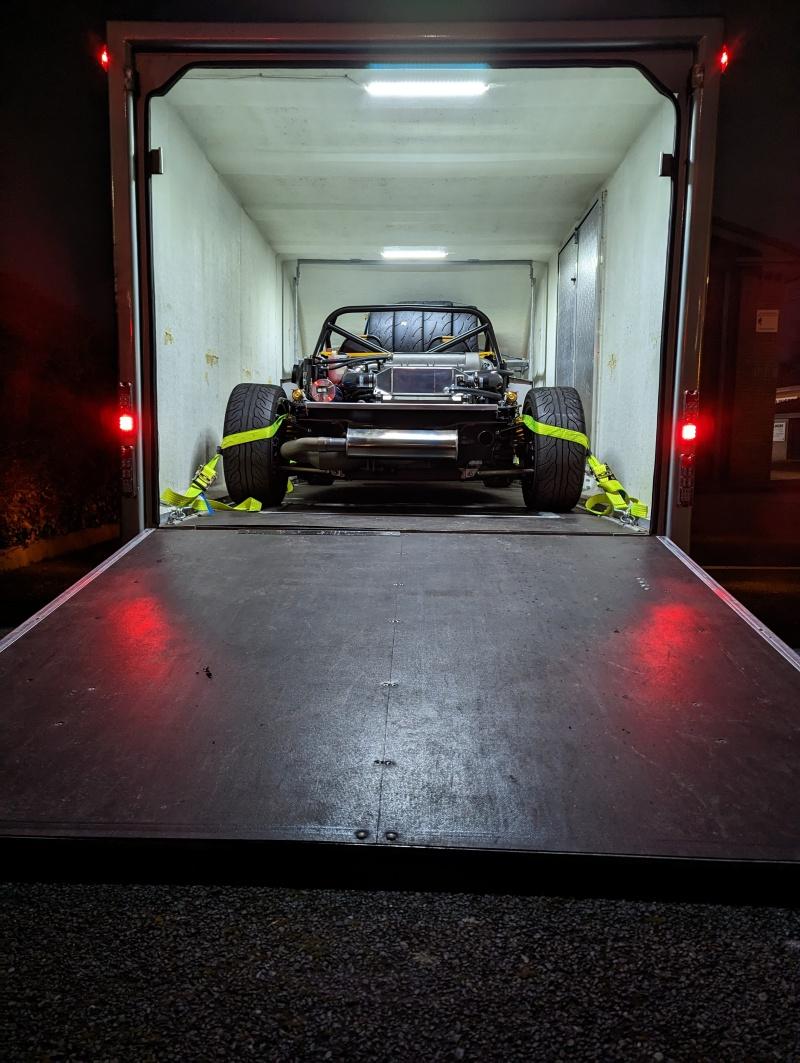
With that sorted, one final check over of the car (found a cam position sensor unplugged!) it was time to load onto the trailer.

Trailer did not like being woken up, with one brake jammed on for its first 4-500 metres. Luckily it sprung loose…

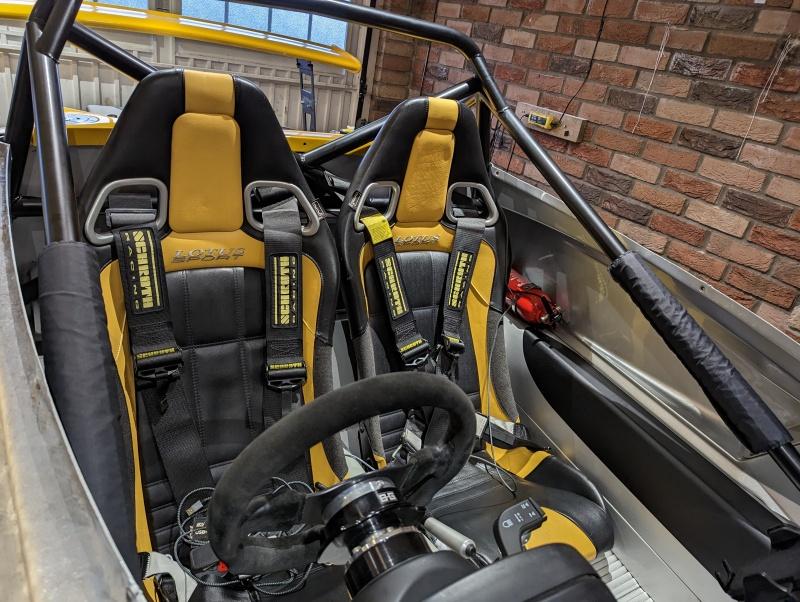
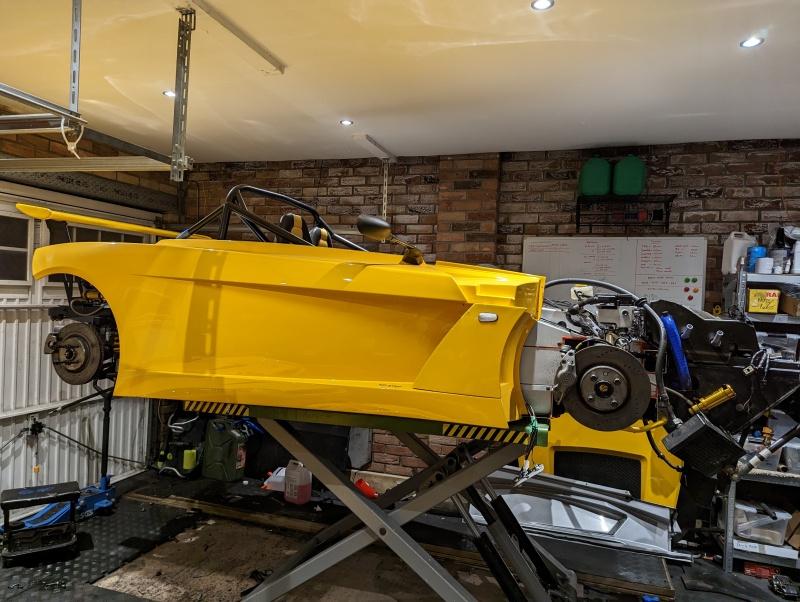
Strapping the car down without bodywork on was an absolute delight. I’m going to resent the bodypanels when they’re back.

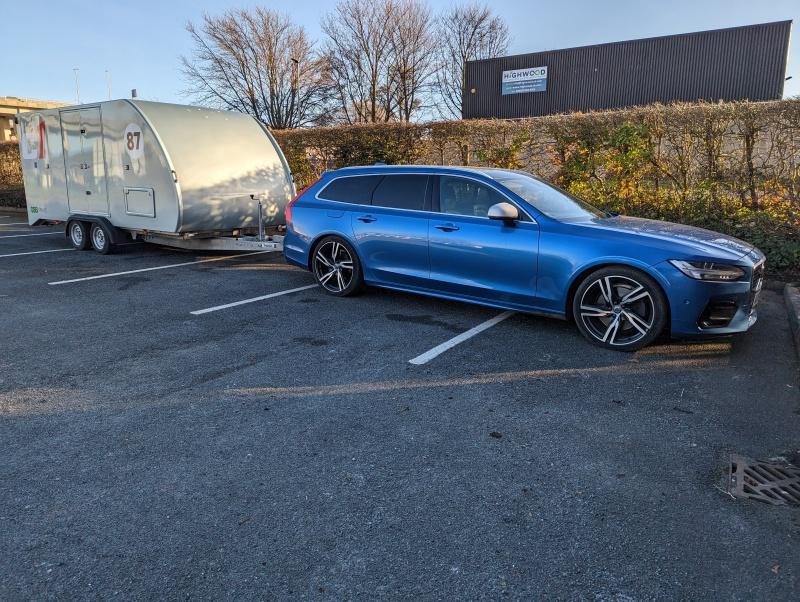
I was booked onto the dyno at 4pm, over in Liverpool so meant for a lunchtime departure. Lovely day for it, pleasant drive over the M62 and no trailer gremlins after the brake freed up.

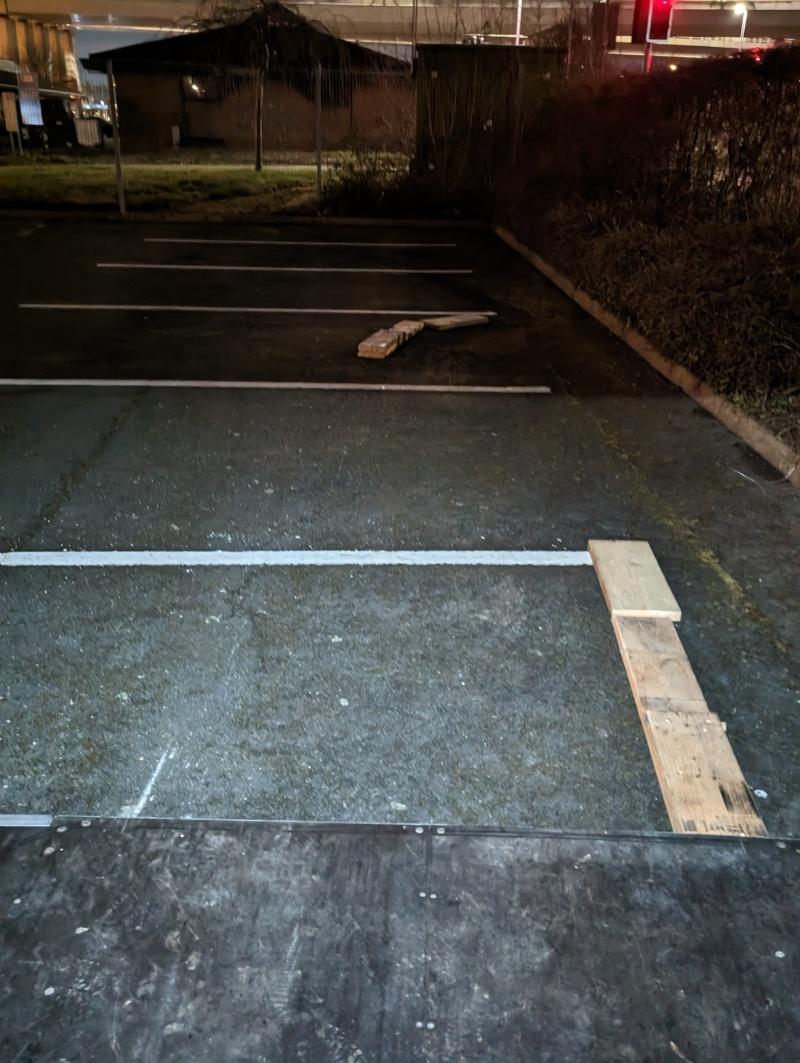
Parking on the industrial park was a concern, but luckily it was chucking out time for more places so the little carpark was deserted and I didn’t feel guilty doing this…

Back to EFI Tuning.

I stumbled across Chris a little bit by accident when I wanted the Exige mapping. I’d wanted a second opinion for a while over how the car/ECU was originally delivered to me and despite Chris not working day to day with the EMU Black nor 2ZZ cars, he fixed some idle/drivability issues that other specialists had really struggled to get the head around. Further to that, he was happy to talk me through everything he did - and even after bringing the Exige home we continued to chat about things for months, I learned a shed load from Chris - so it only seemed right that he get the pleasure of putting up with me again.

Dyno days are supposed to be exciting, but I was apprehensive about this one. I was repeating my Exige path step by step, and that ended in tears. The car had been in bits very recently, with zero road miles to shake it down… was I going to fill his workshop with pressurised coolant, fuel, oil? Was a wishbone going to fall off at 8000rpm? Who knew…

Spoiler alert, none of those things happened.

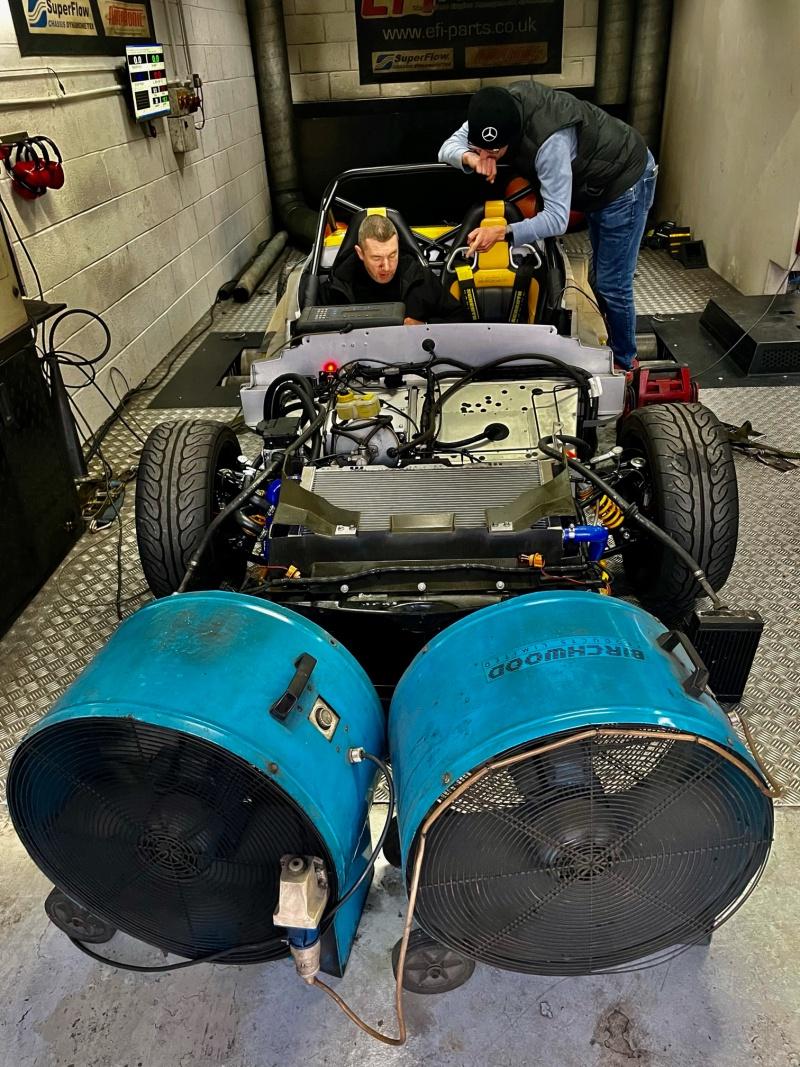
We did have a drama I hadn’t even considered though… how the hell would we get airflow through the car without blowing Chris’ head off. The big dyno fan would have demolished him over a few hours of tuning so we settled for some little ‘sidepod’ fans. It may compromise the overall airflow through the chargecooler and water radiator, but we could monitor that and adapt if needed.

All rigged up and ready to start.

The map on the car was essentially how my Exige finished off. There was a slight change to fuelling strategy this time, on the Exige I used the aftermarket fuel pressure sensor to add a modifier to the fuel table. This meant for a ‘flatter’ fuel table than you’d see on the OE application, or most other tuned 2ZZ as there’s no fuel pressure data on the stock engine.

This time, as the variable TC switch took up an extra input on the ECU I had to wire fuel pressure to my dash, and send back to the ECU via can network. For this reason I didn’t want to use it as a mission critical sensor, and instead just have it for monitoring/diagnostics. The fuel tables now will rise with manifold pressure instead.

Chris was very aware of my gearbox woes and concerns, so we had a plan to see what we could do and give some options to preserve it. Ultimately you’re playing with fire at any power level above OE, there’s no magic cut off point and it’s not unheard of for cars to smash 3rd gear even at OE power… it’s just a sliding scale of likelihood.

After some initial installation runs, tweaking the idle and refamiliarising himself with the engine and map it was time to start hunting for power. Despite having a base map from an identical spec car, Chris went through his program regardless and spent time revving up to 6k RPM without any cam switch to experiment with timing and optimising the “off-cam” power delivery, then he would reverse and tweak the cam switch before finally overlaying all of his results and finding the best crossover points.

Then it was onto the power runs, with the car in my “race mode” designated map the car quickly made the exact same power as my Exige, within 1bhp and 2ftlbs. The headline figures were:

301bhp and 202ft/lbs torque, calculated flywheel figures.

On my request Chris was doing the pulls in 5th. I think technically it’s the best gear to use in this application because it’s the closest ratio to 1:1, but the dyno figures all that stuff out anyway. For me I just didn’t want him smashing 4th gear all over the place! (3rd and 4th are the inherently weak ones, 5th and 6th are not really heard of breaking).

With that done, we turned to options with the ‘road mode’ map. Following the example set by Lotus with the 2ZZ SC cars we figured the path of least resistance would be to peg the DBW back and figure out what impact it would have on boost, and power.

We a did a load of runs at different throttle configurations and came up with the following results

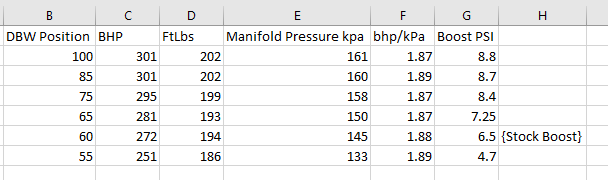
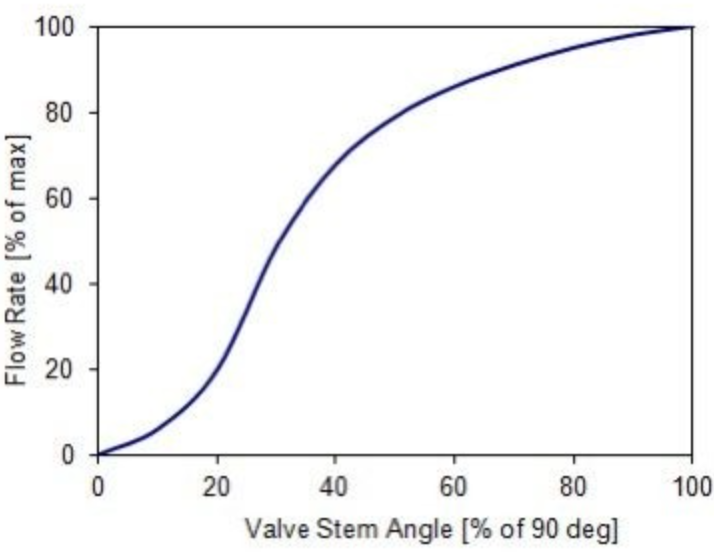
Though probably not surprising to somebody who knows what they’re talking about, I was amazed at how much throttle opening we had to trim to start having an impact. I was introduced to this chart a bit later which describes flow rate vs opening angle of a butterfly valve which correlates and makes sense once you consider that.

To get a 20% reduction in flow, you need to reduce the opening by almost 50%!

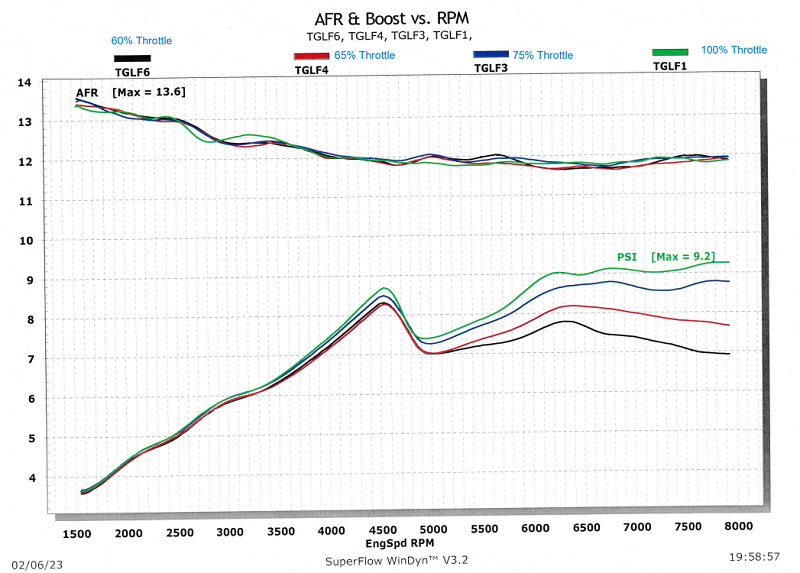
Plotted on dyno graphs:

The boost is a bit interesting (to me, anyway) in that the 272bhp and 251bhp maps can’t actually maintain their levels of boost to the redline, and the boost starts tapering off as the engine flows more and more gas.

With all things considered, we decided to go with the 272bhp map as my ‘road map’. It runs very close to OE boost levels, the SC is of course still running at the same very high RPM thanks to the 2.9" pulley but it’s reassuring to think that the other components are only under the stress of stock boost.

We spent a bit of time after this optimising the maps, to try and keep the same levels of BHP and Torque up to around 4.5k RPM, so low speed drivability and responsiveness will be the same but torque will be capped at the slightly lower level once heading into the higher RPM ranges.

Long term I’m also going to have a play with throttle limits by gear. The EMU gives me the opportunity for example to run 60% throttle in gears 1-4, then 100% throttle in 5 and 6. This could be a best of all worlds map, gives me a bit more punch to try and overcome the 2-Eleven straight line speed handicap without threatening 3rd and 4th.

The last thing we had a play with was transient enrichments. The EMU gives the option to add fuel (fairly common wall wetting technique) during quick jabs of the throttle. It also gives the option to retard timing at the same time, usually used for knock control. We played with using this to pull a few degrees whenever there was a sharp jab of throttle, this retard event would only last a fraction of a second but acts to smooth out the generation of torque. Chris tuned this by feel, it’s not a “tune by numbers” thing which my inexperience struggles to apprehend but it’s something for me to play with. Chris has defined the ‘safe’ limits for this, and the rest will be up to me tweaking it to come up with a power delivery I’m happy with. Whether it will substantially reduce shock loading on the gearbox or not? Probably not, but it can’t hurt to try it.

IATs and CLT didn’t really suffer with the smaller fans, I have logs from my Exige dyno session and they were much the same. IATs for info peaking up to 36 degrees during a pull, then falling down to 20 (seems to be the resting temp for it in these ambients) within 20seconds after a pull. The big test for chargecooling obviously comes on track where there aren’t 20 second breaks between pulls, so we’ll see what the performance is like, but I don’t expect it to be any worse than the Exige was - and that coped with everything I threw at it, pulling 1degrees of timing at the most on a very hot day.

Got the car back onto the trailer, it clearly makes too much power now as my rear right spat one of my ramps back about 20 feet! Luckily I didn’t have bodywork on… that might have been messy if I did.

Drive home was tiring, but very satisfying. Didn’t have a single ‘installation gremlin’ to deal with, no leaks, no hoses popping off, no sensors unplugged. Everything just worked.

1 Like

Almost like you have done it before.

What I am curious about now is with the increased power will you miss the diff?

A lot of the time, I don’t remember I have done anything to the diff on mine - but then, once in a while, I think - that was epic, I’m so glad I have the LSD! It’s pretty rare though - but then again, Naturally Aspirated, so… :man_shrugging: