2006 Exige S

Just remember to blow and not suck! :laughing:

The pump is proper tonking now, starting to get a bit giddy now about getting this car on the road again.

Last two show stopping steps are:

  • Brake Fluid. I could do it any time, but a good friend has a pressure bleeder and we always use my antics as an excuse to catch up and have a cuppa whilst bleeding some brakes. He’s on holiday and back in a week.

  • AC man is preventing the front clam from going back on. Hoping to get an update from him next week.

I might even be tempted to reverse the car out of the garage this weekend and wash the back half of it. It’s looking a bit miserable all covered in dust and (still) bits of veg peeling from Christmas and my garage prep sesh :mrgreen:

Some good progress this weekend.

Got my replacement door switch fitted, 5 second job which once done allowed me to put the interior back in and together. No pics but you’ve seen the interior plenty of times before.

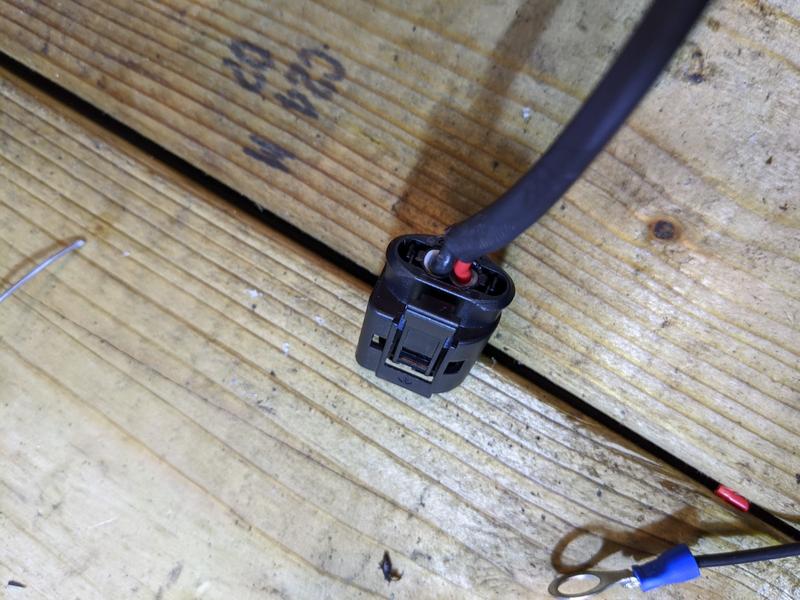
I then got a replacement plug for the charge cooler pump, so got to work rewiring that. I’m no spark, but I’m much happier with it now.

I still had problems getting a good amount of flow through the coolant circuit as referenced a few posts ago, Pro Alloy advised that it was probably an air pocket nullifying the pump but I was fairly sure I’d bled it all through as much as I could. In a final act of desperation I disconnected the feed pipe from the header tank and fed it into a cup, set the pump going and then put my mouth(!) over the top of the header tank and blew into it. My ears popped, then a second later the tone of the pump changed drastically immediately followed by a splutter and then torrent of coolant coming out into my cup. Quickly re-attached the hose to the header tank, job done. Now getting a really healthy flow around the circuit.

With the charge cooler now fundamentally working I could get to work tidying everything up, routing wiring properly, actually bolting the charge cooler to the car, etc. Lots of small jobs signifying that the end is nigh.

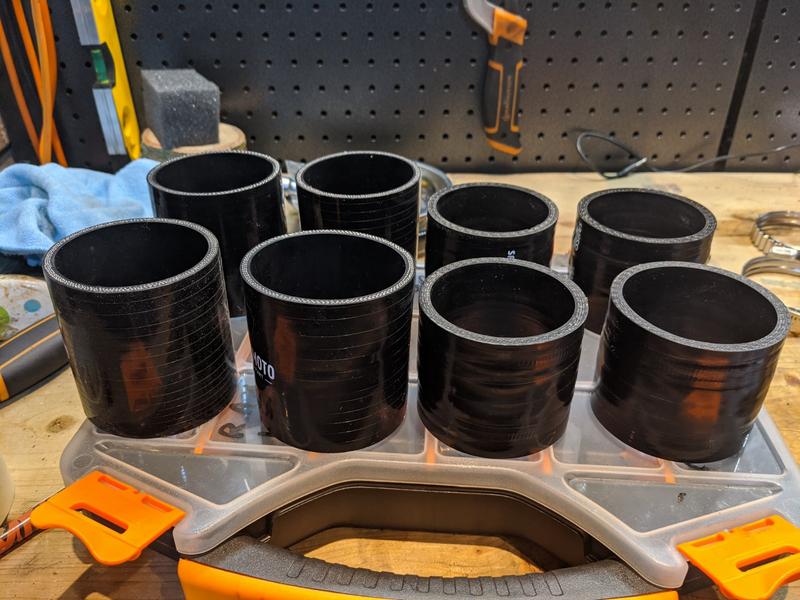
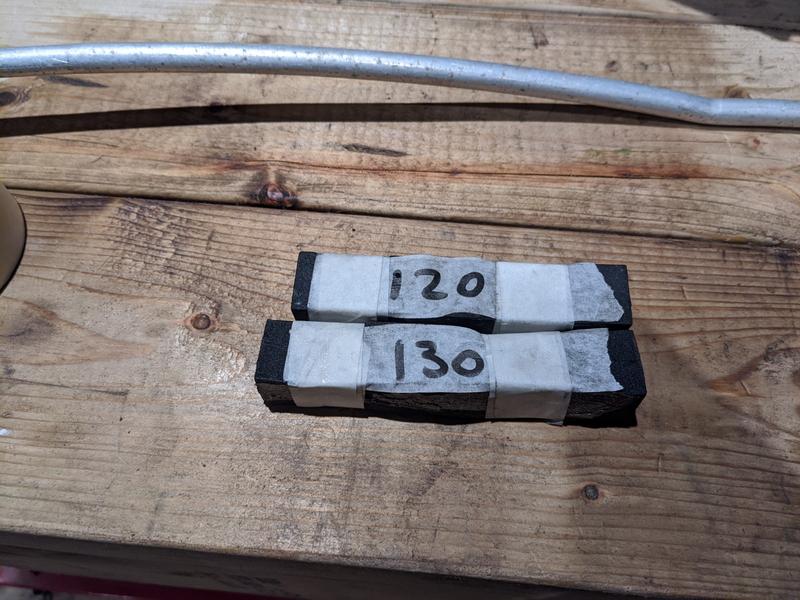
Of course I had to spend a bit more money, I’ve never been happy with the silicone hose joiners on the intercooler as they’re very short and I feel don’t allow any tolerance for vibration/movement. From the OEM rubber joiners I’ve seen on stock cars I think they’re about 1/2in too short so I got some new ones bought.

These have made a huge difference to how secure the boost pipes now feel, not only are the joiners longer but I think the old outgoing ones were also marginally too wide as the new ones are a much tighter fit… honestly think they’d hold boost now without any clamps!

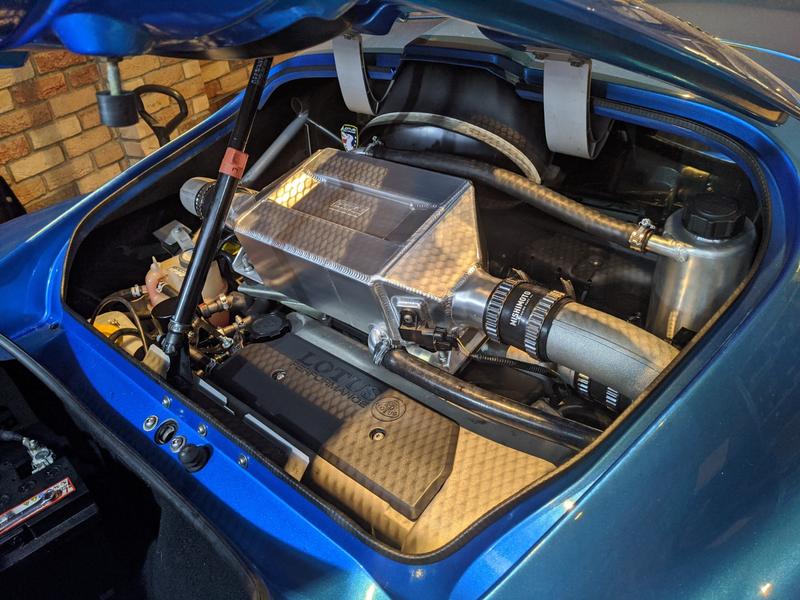
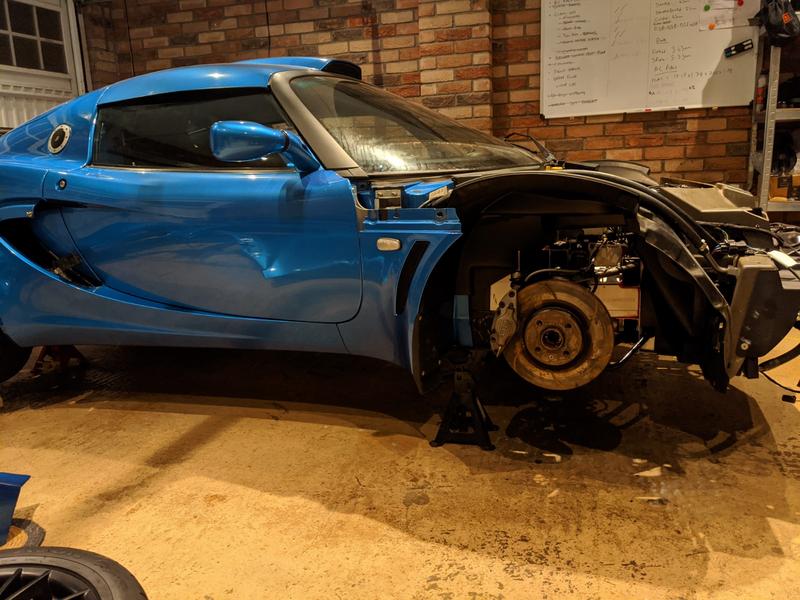
The aesthetics of the install are growing on me, ultimately it’s a great big block of aluminium on the top of my engine so it’s never going to look amazing - but it’s about as tidy as I can get it now.

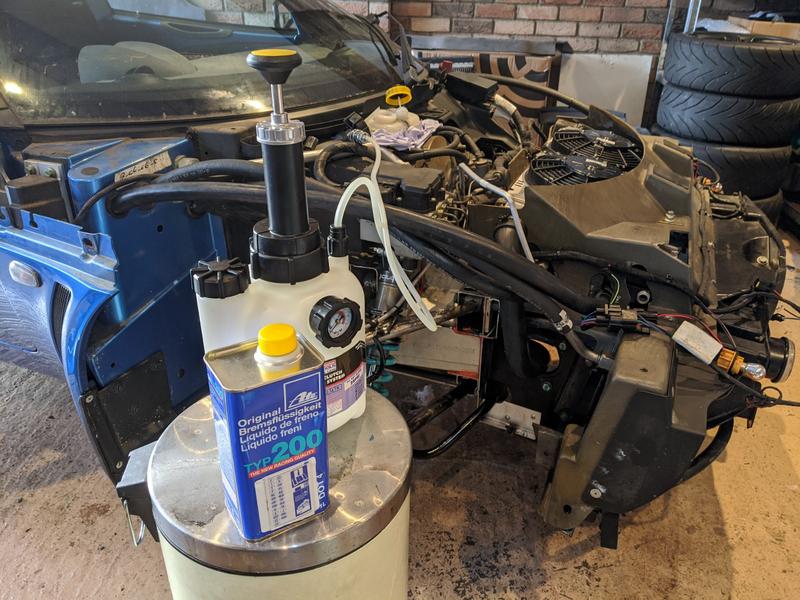
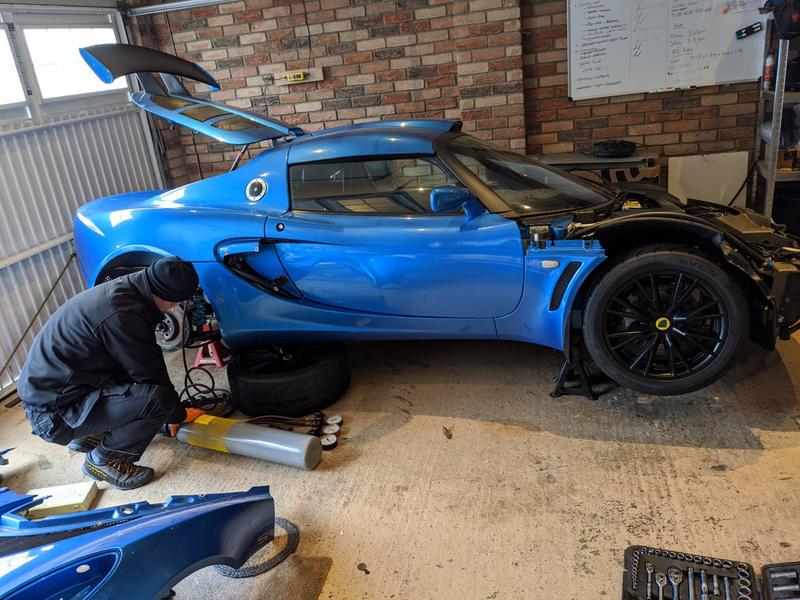
The last remaining major milestone before the car would be road worthy was to refill the brake/clutch fluid system and bleed. This is a pain in the arse at the best of times but with the system effectively empty due to a prolonged period without calipers attached, I was expecting even more of a fight.

Pressure bleeder helps a lot, and after 1l of fluid I’ve managed to get the clutch working again and I’ve got just about enough brake pedal to manoeuvre the car around the street - but no serious driving yet. I’m going to see if I can activate ABS at some point in the near future, then give it one more bleeding session. (probably after the clam goes back on)

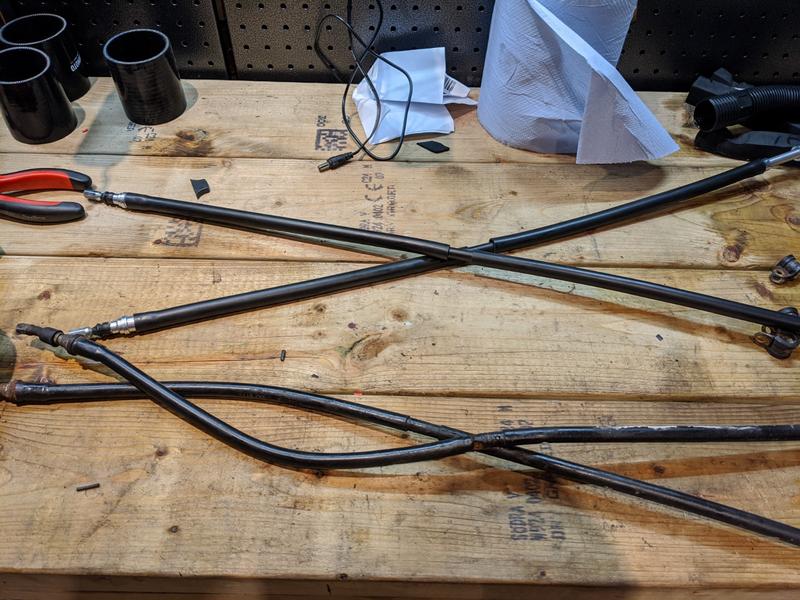
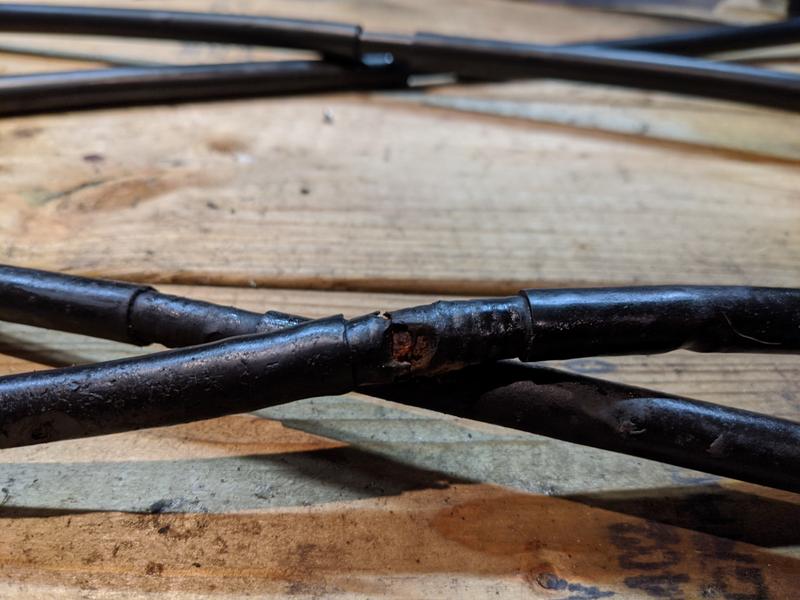
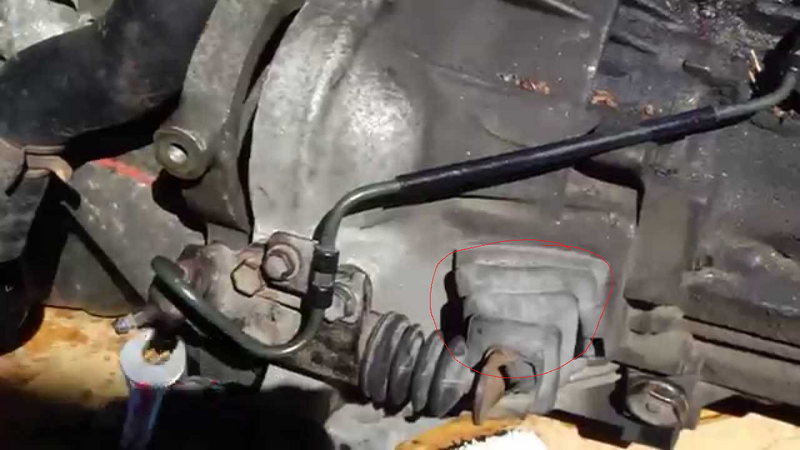
Whilst tinkering on the brakes, I replaced the secondary part of the handbrake cable. I had the same issue on my Elise, the wishbone hangers wear through the rubber and the cable gets rusty, then starts expanding - eventually to the point it catches on the inside of your wheel rim whilst cornering. It didn’t get that far yet in the Exige, but it’s on its way.

Whilst at it I cushioned the offending wishbone hangers with some tape.

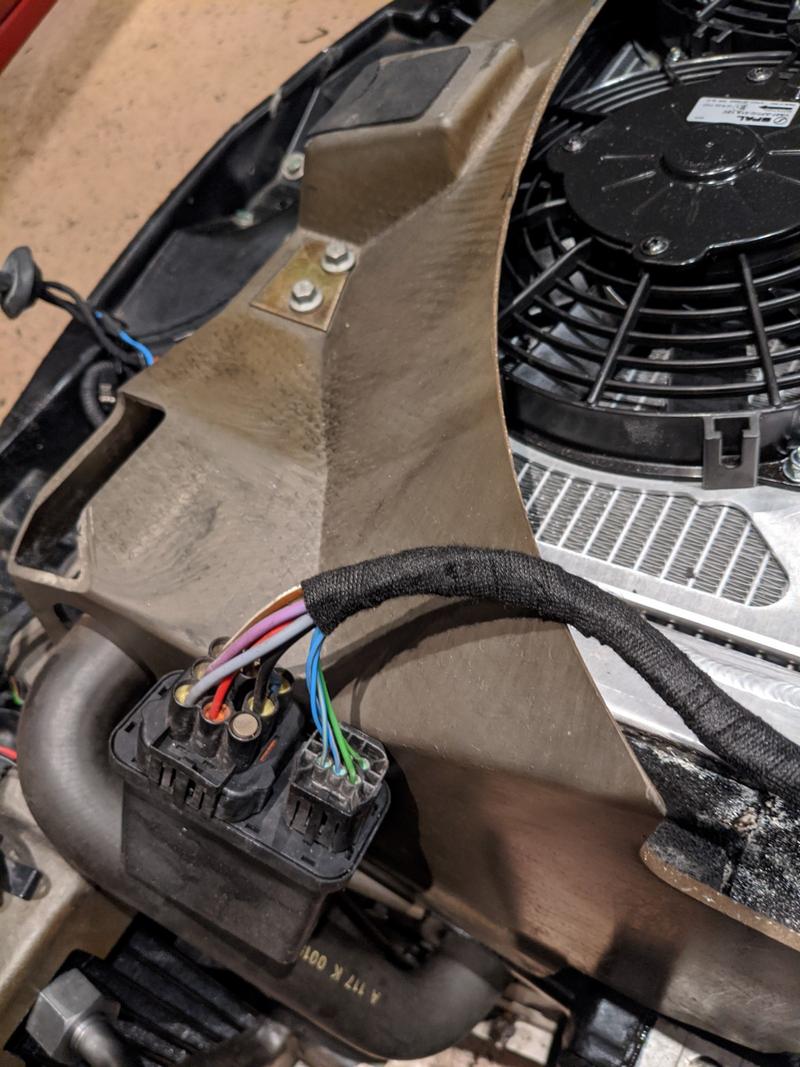
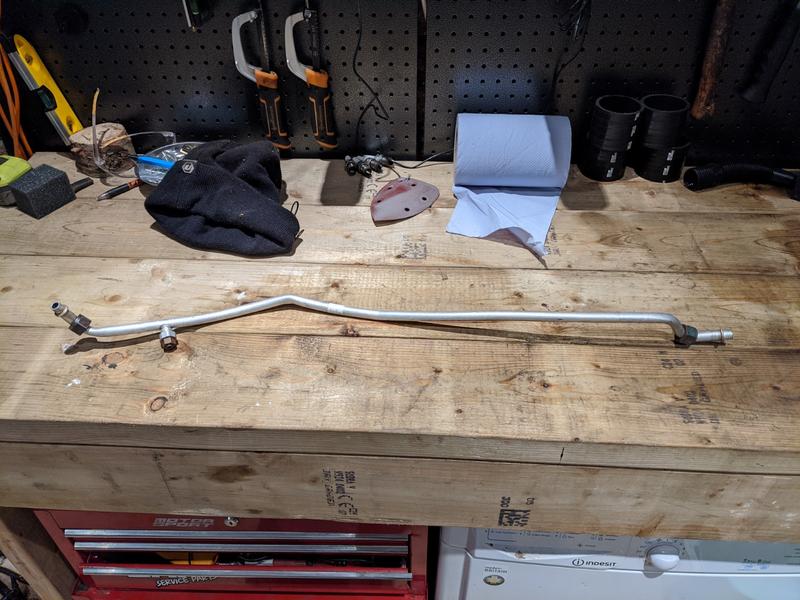
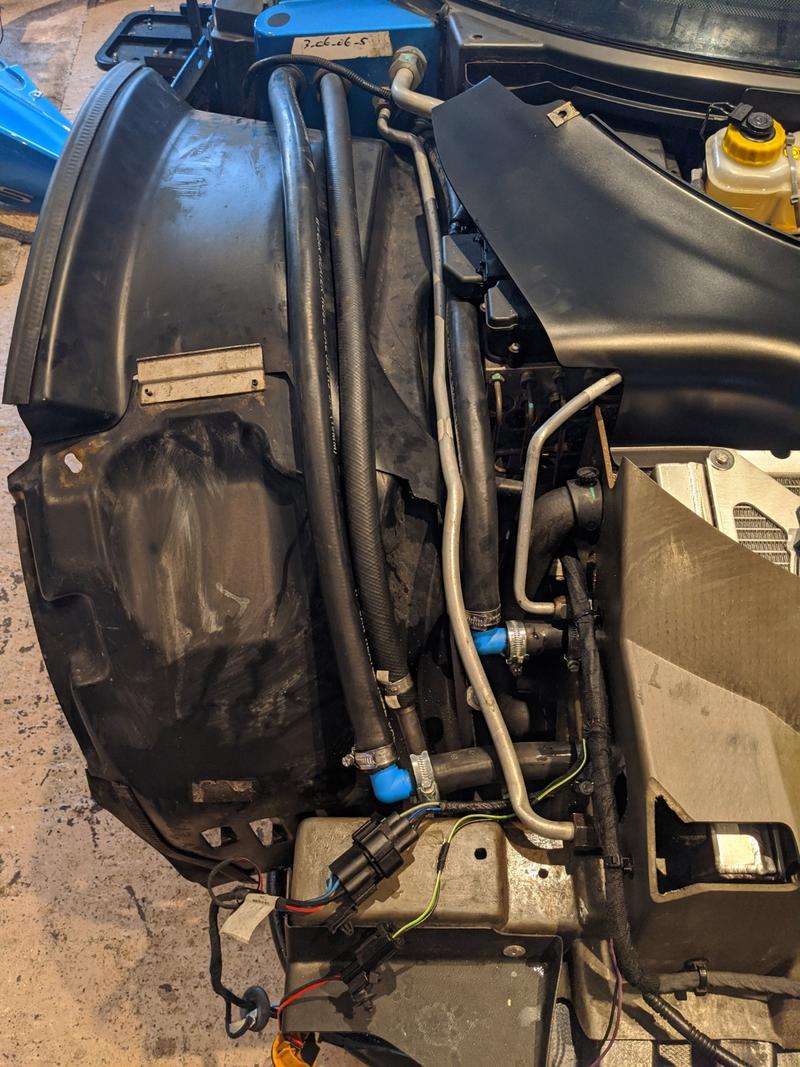
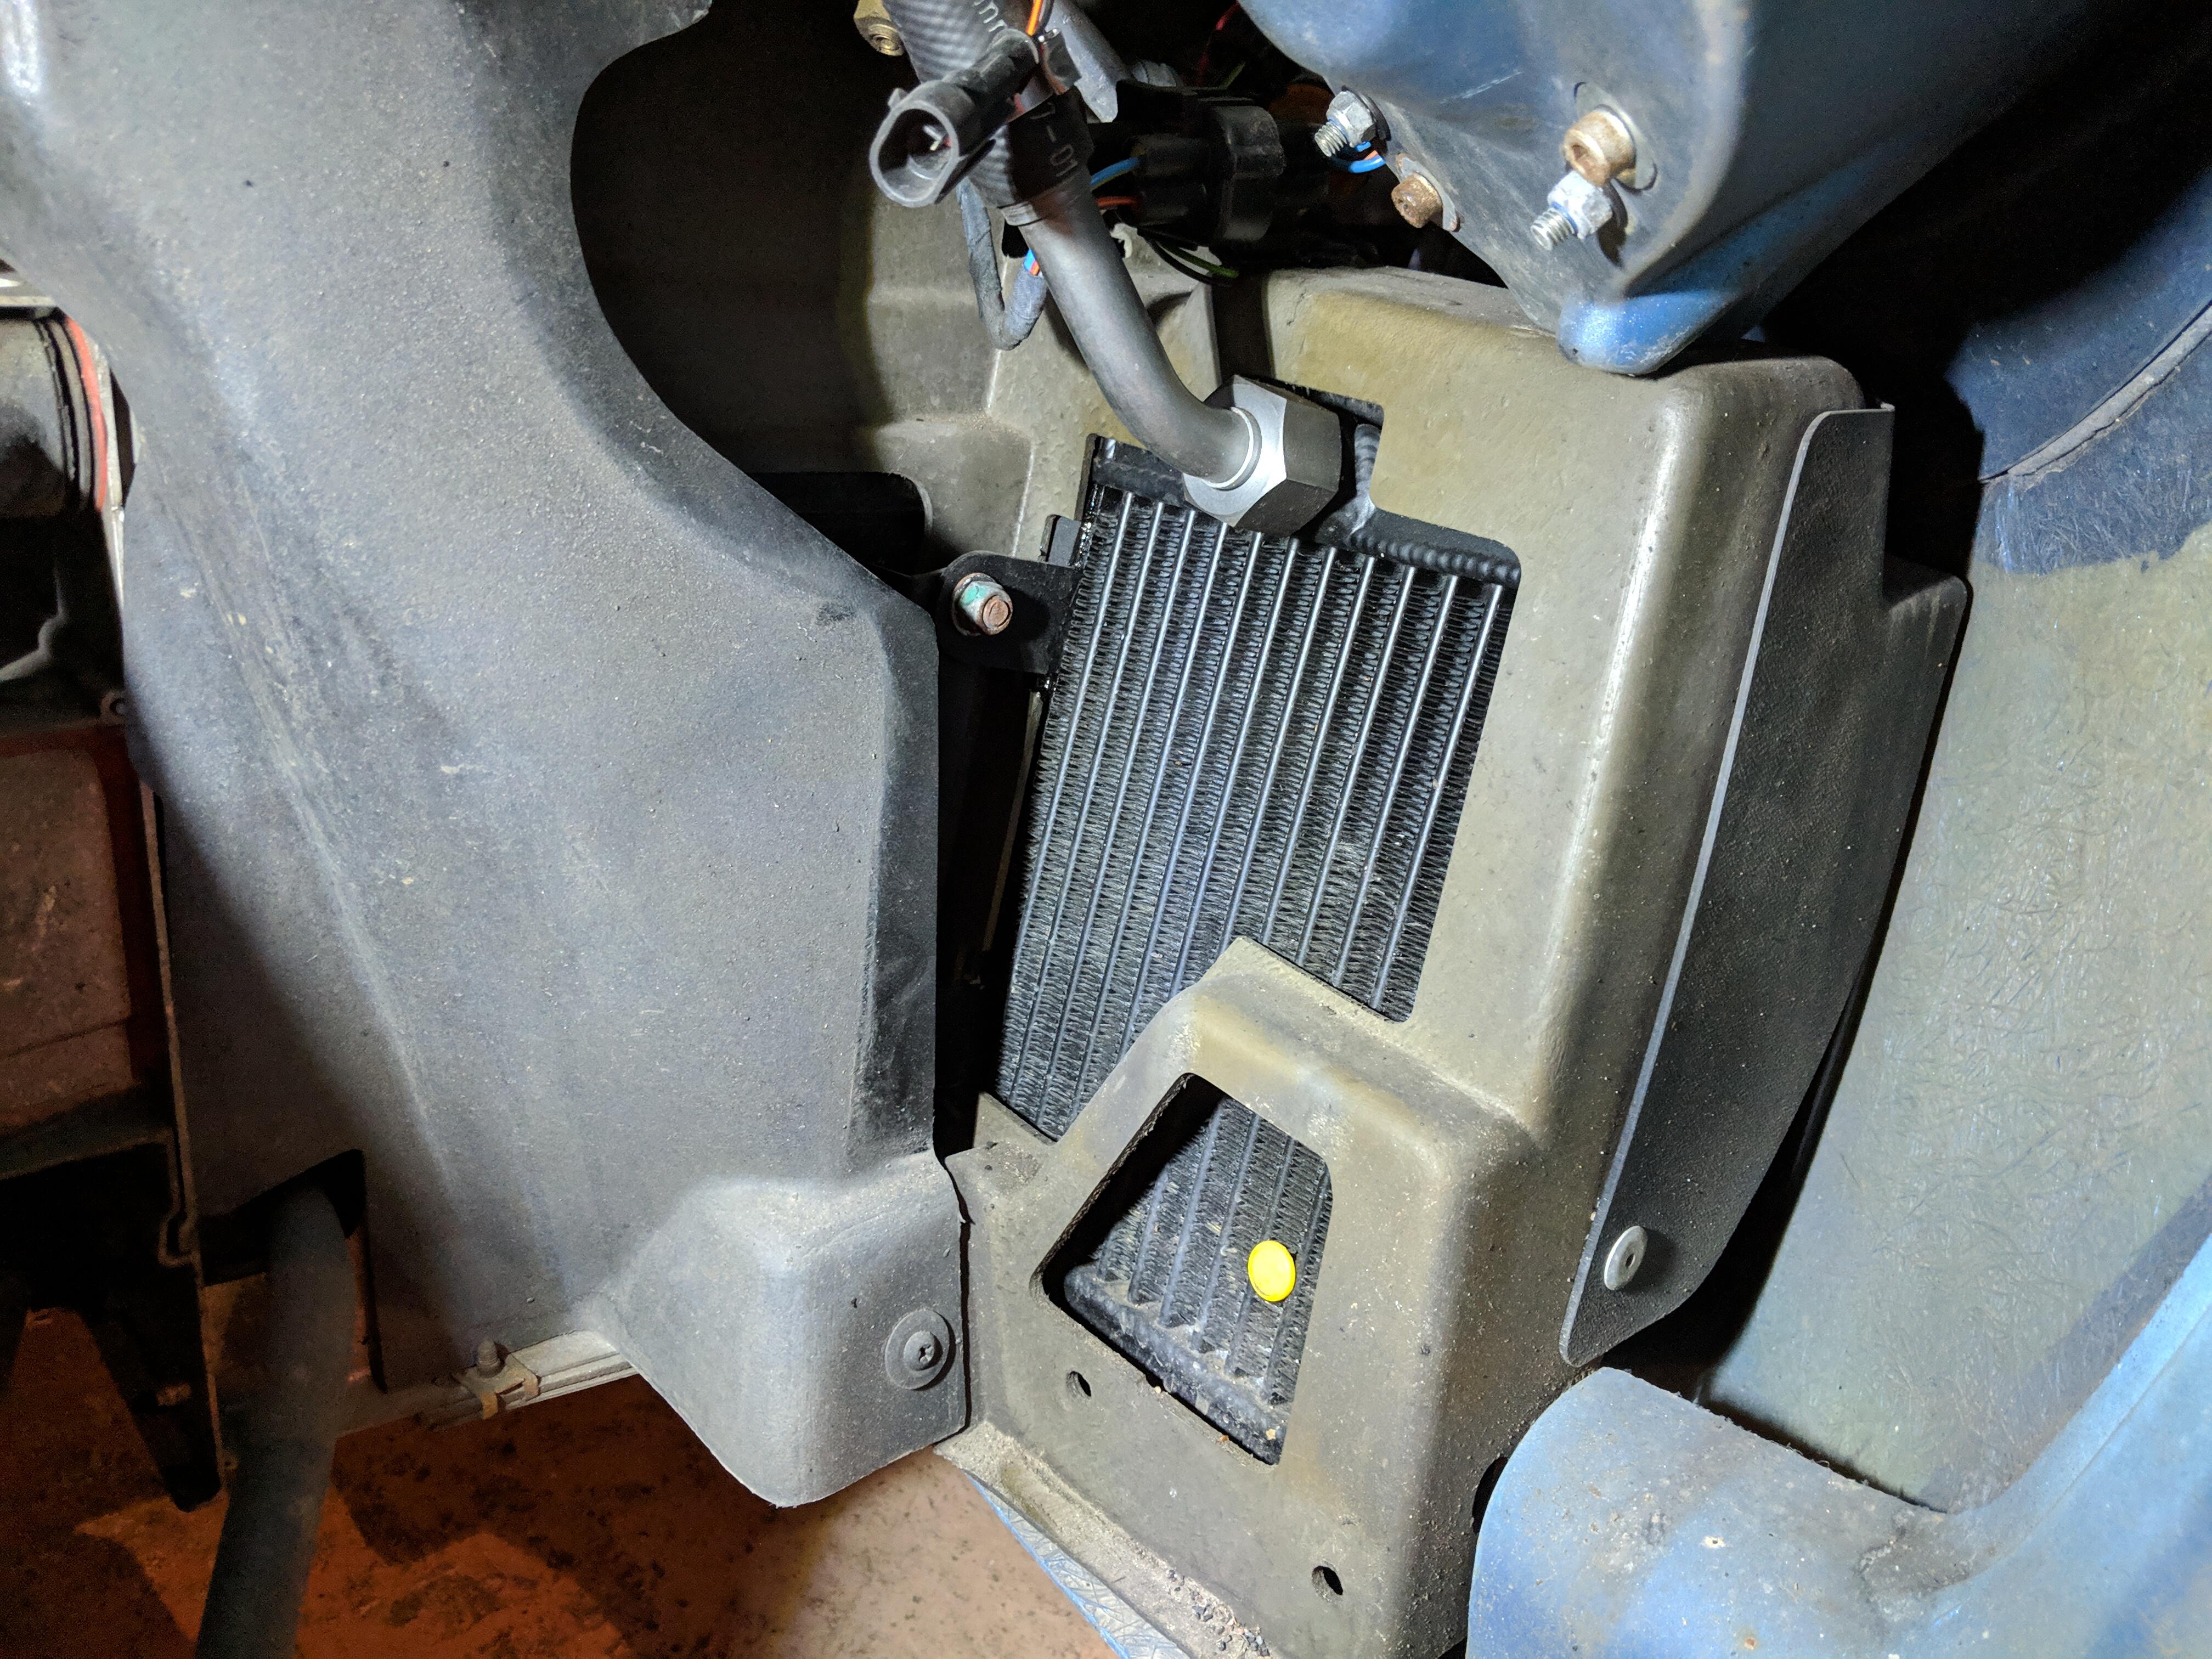
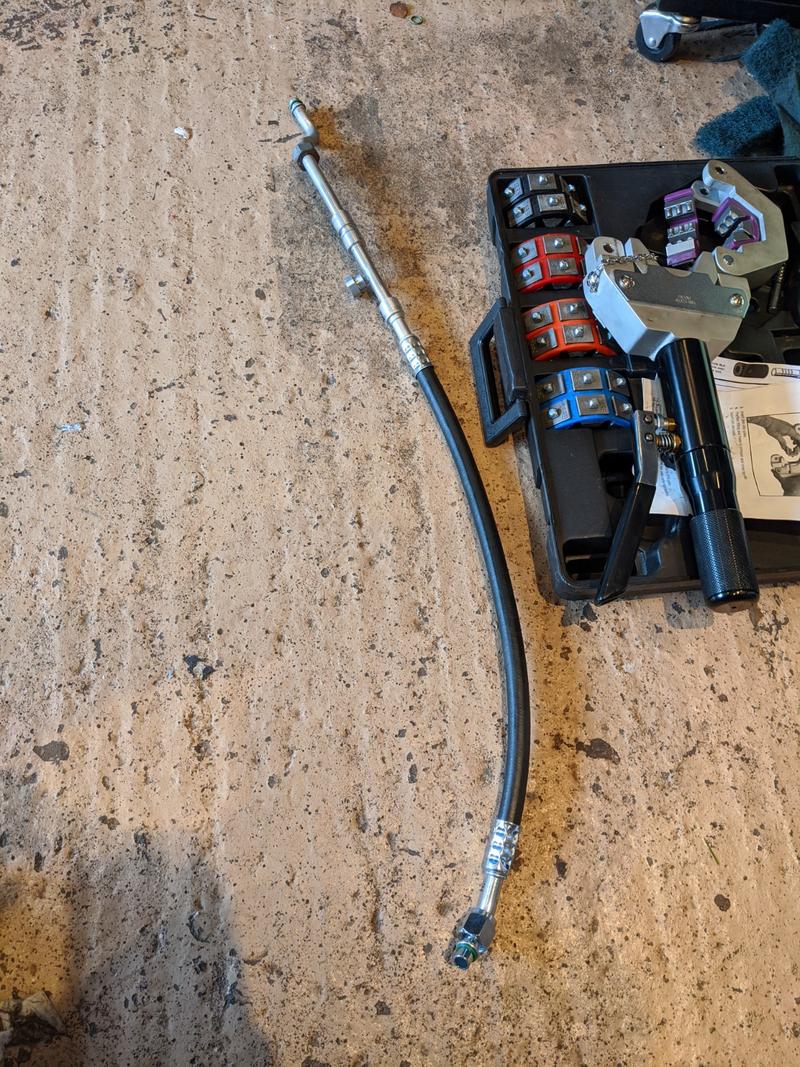
The clam can’t go on until I get this AC pipe sorted, so that’s pretty much now what I’m waiting for - which means the jobs I’m doing in the garage are getting more and more ridiculous. Highlight of the morning was re-taping some wiring loom that was looking a bit tatty:

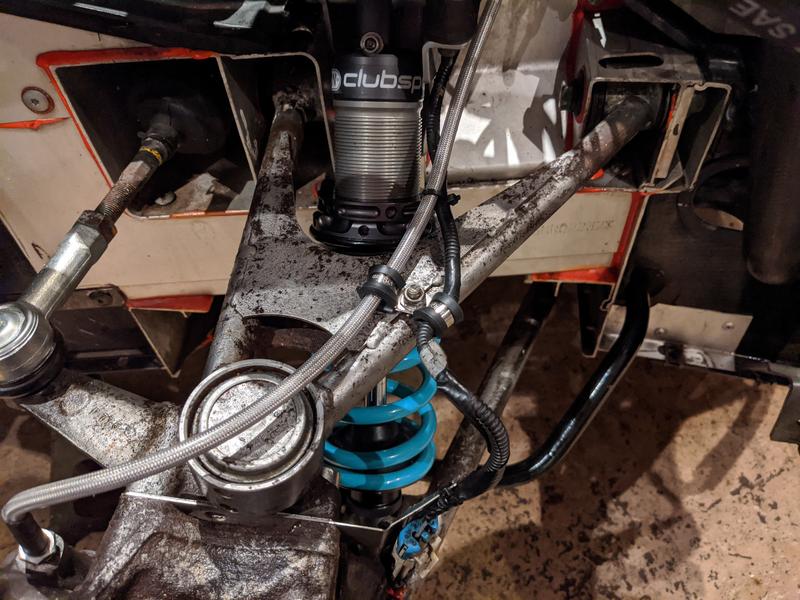
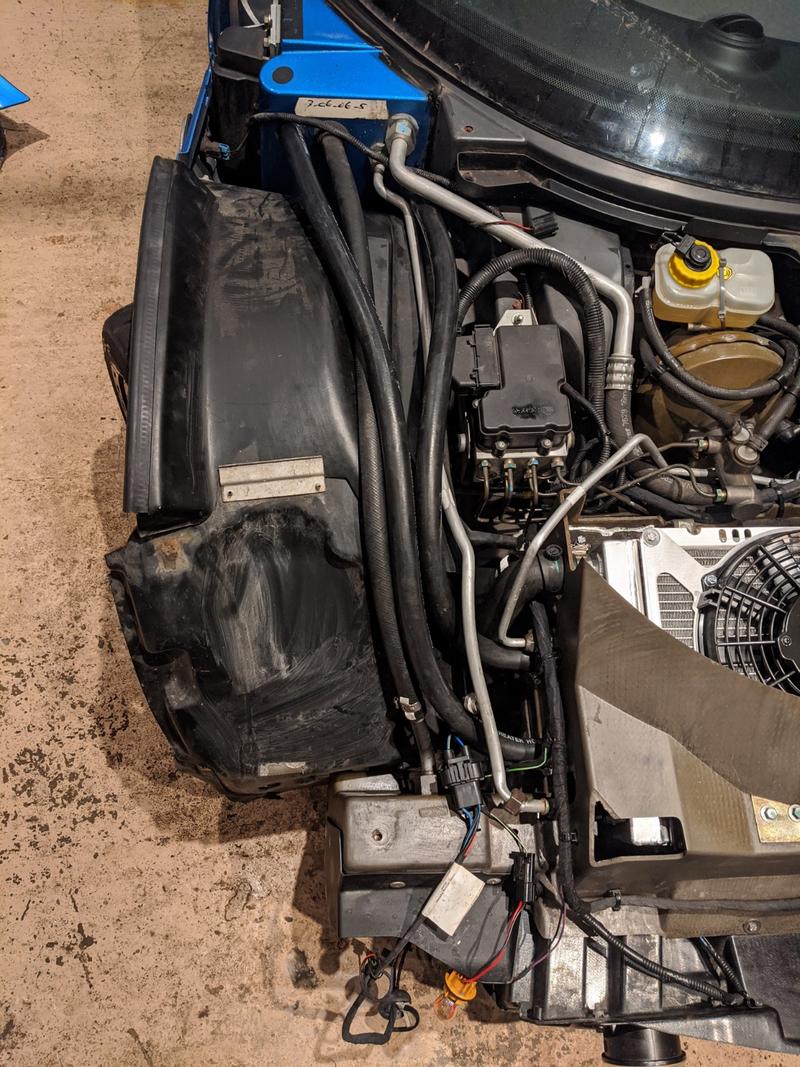
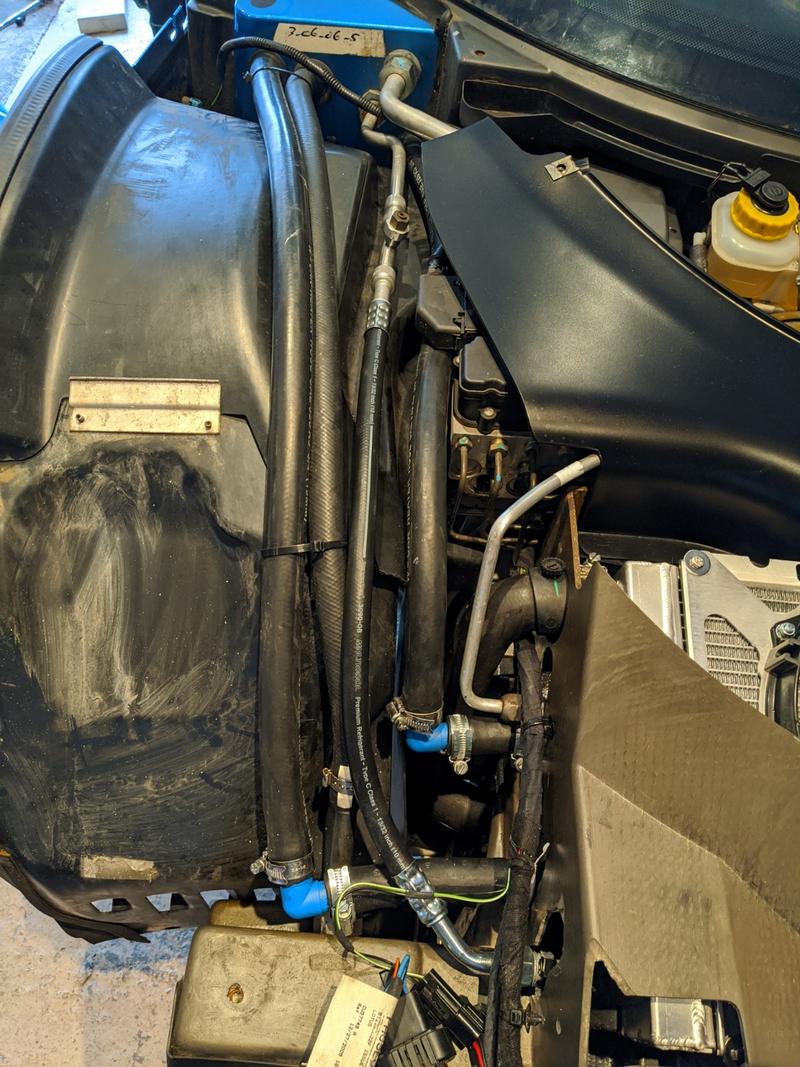
I’ve also been p-clipping the shit out of everything. After fitting stainless hoses the factory clips for the ABS wires will no longer fit, so fitted some p-clips there to secure them:

Par for the course with Amazon Prime, I couldn’t just buy the 2 p-clips I needed so I ended up with an assortment of 100… so I’ve now been going back over any questionable wiring that either I did myself (such as during the gauge install) and securing stuff nicely with p-clips. So many cable ties now in the bin!

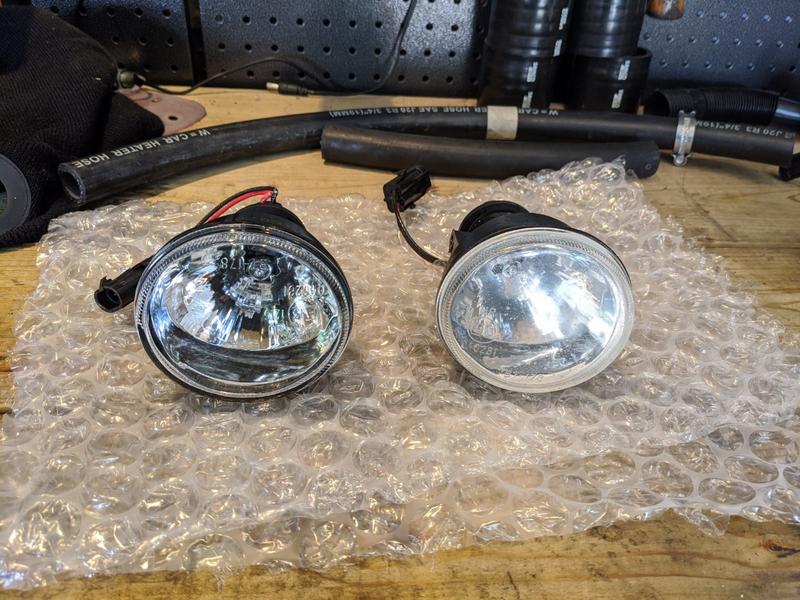
Finally I lobbed some new spark plugs in, old ones looked ok but I think they’re 8 years old now from what I can see in the cars history. That’s only 8000 miles (5k of which I did myself last year :lolno: ) but eh well.

Next update will hopefully be AC related, and then the clam can go back on. Woop!

Tidy progress.

Out of curiosity what clamps do you have?

https://www.murraycorp.com/products/clamps/constant-tension/

Have a bit of boost leak paranoia from my Subaru days. Used to blow hoses off left right and centre on that :lolno:

Mine look shite so want to make sure they are sealing correctly. Thanks for pointer :slight_smile:
WIll be off out tomorrow to measure!

just make sure you leave enough gap between the pipes and the charge cooler, god that vibration took me an age to figure out!

Been there before!

Just rang up my insurance company to get everything declared after my home audio amp went up in a poof of smoke yesterday I figured I should get my affairs in order :laughing:

No charge for the modifications, not even an admin fee :thumbup:

We have a pipe!!!

Elise-Spares came good for me, they had one from a race car they’ve prepped and only wanted a nominal fee for it because the pipe had a bit of a kink in it and wouldn’t be a straight fit.

Due to my CC pipework, this pipe was always going to require some gentle manipulation so the kink didn’t bother me too much - just need to be delicate and not break this one!

Offering it up to the car has identified an issue with my CC pipe routing, as I expected. I’ve got a backup plan (inspired by Ade) to put some 90degree elbows in and run my pipes slightly differently.

From the top down you can see the AC pipe roughly mocked into place. The rubber hose on the far right is putting a bit of strain on it, and the rubber hose coming in from the far left is fouling the pressure relief valve on the pipe. My plan is to run the far left hose more central along the wheelarch liner, with a 90deg elbow and then a straight run into the condenser. The far right hose I can tuck under the ABS unit a bit and run it tight along the side of the radiator shroud, again using a 90deg elbow to get it tidily into the rad.

Once those hoses are rerouted I should have a clear OEM run for the AC pipe. I’ve kept the AC engineer up to speed and he’s got some fittings now, so he’s going to schedule another visit round to either validate my new pipe or butcher it to make up a replacement that we’re both happy with. Either way I expect to have functioning AC… Honestly though I wish I had bought a car without it, just to take the pressure off a bit…

Aside from this I’ve been trying to get my rideheight roughly in the zone. Just aiming for a 120f/130r for now to allow me to safely drive to a geo place once ready. My first random attempt had me at the following:

NSF: 130
OSF: 125
NSR: 135
OSR: 130

So not a million miles off! I was getting a lot of scrubbing on the OSF wheelarch liner though on full lock as the weight of the CC pipes is pushing it lower than it should be. Once it’s bolted up to the front clam that should buy me some more space, and I hope to clip the hoses up flush with the clam too to take that strain off.

These are my rideheight tools, blocks of sponge cut off at the appropriate heights which I can slot under the jacking points. Sponge is good, because if the rideheight is “just” too low, I can still squidge it in and get an idea of how far off I am. Obviously this will all be corner balanced up so I’m not looking for precision, just a rough guide.

The car has also moved under its own steam for the first time since mid December.

Backed it out onto the drive so I could sweep up and clean the floor a bit. Brakes definitely need another bleed through…

Good idea on the sponge…

If I spend enough time in the garage occasionally I stumble across a good idea. Sort of like the broken clock being right twice per day thing.

When I first dismantled the car I put part of the rain shield/gutter thing to one side as it was looking grotty.

This is partially visible when the clam is back on, so worth spending a bit of time to clean it up.

It’s maybe a bit shinier than I expected… probably should have gone for a satin grey instead to keep it looking OEM but it should still look rather sharp when the car is back together.

I’ve got my CC hoses routed a little differently now, as a reminder this is my initial route:

Adding the infamous AC pipe has crowded things a little and it was too difficult to route the pipe without straining something.

Introducing a couple of 90degree elbows has done wonders though:

There’s now plenty of room for the AC pipe, sort of - it makes contact with the CC return pipe in a couple of places but once it’s properly connected in I should be able to resolve that with a bit of gentle manipulation…

The only (quite big) thing I’ve not tested yet is clam fitment with all my new extras. The back of the headlight pod is likely to be my area of concern as it runs very close to the oil cooler feed which I’ve used as a guide to run my CC inlet. From looking at a photo I took upon collecting the car last year, I think I’ve left enough room…

I’m now debating whether to follow through with the AC guy and get it gassed up in my garage, or get the car back road worthy now and just take it to a generic place to get gassed up. The latter is likely to be cheaper, but if I get the system pressurised in the garage at least we’ve got an opportunity to address any leaks whilst the clam is off…

I would use the specialist. He will know his onions and likely get you a fast, reliable solution.

We should have a celebratory drive out!

Yeah I’m a fair kind of person too. He’s been running around trying to source fittings etc, and will be a minimum of two round trips to my house so I’d like to do SOME business with him as a gesture.

Celebratory drive out sounds ace, hopefully won’t be long now!

Nice work Kyle

Be worth noting all the bits that are replaced and offer a Fonzey Fix It Kit?

Really enjoyed following your progress. That reminds me, I must try to finish my bike restoration . . . it was supposed to be finished last spring but somehow never got round to it. :unamused:

As it’s worked out I’ll probably be replacing nothing… it’s really looking like the OEM pipe will be a fine fit now, I just don’t want to button it up until the AC guy gets here (if he ever gets time) in case he finds a leak elsewhere.

I get motivation from reading other threads from people with much bigger jobs/tasks to do than what I’ve got. I’m glad you’ve enjoyed reading, I always enjoy revisiting my threads a year or two down the line which is the main reason I write them… if somebody else enjoys the journey then that’s just a bonus.

I had a little bit of progress this weekend but really running out of jobs to do and it’s upsetting me. Brother in Law came round to have me change the oil in his Civic Type R so I used the opportunity of a spare pair of hands to give the brakes another bleed through and also managed to fix a creaking clutch that I’ve had since buying the car. It was a bit too awkward for photos, but the sound (when sat in the cockpit) sounded like it was coming from the pedal assembly, but once I was laid under the car with my helper pushing the clutch pedal I could clearly hear it coming from the clutch fork.

Nicked a photo off the internet:

Once I pulled back that boot, I could finger in a gob of grease into the pivot point and it cured it immediately. Just hoping now that it’s not possible to contaminate the clutch surface from there… I really don’t know the anatomy of a gearbox at all. :unamused:

Ride height is just about in the ballpark now, but still scrubbing on the OS wheel arch liner on full lock but I think this might be cured once the clam is fitted and the arch liner is ‘bolted up’ a bit. We shall see.

Brakes still have air in them, I knew to expect bleeding to need a few runs through after having the calipers totally emptied as they’re notorious for it. I’ve done the “turn the calipers upside down and bang them” method and the car is just about driveable now so once the clam is on and it’s taxed I’ll see if I can invoke ABS a few times to clear any lingering bubbles out of the ABS system, then give it (hopefully) one more bleed.

Wooo updates!

I had a date booked with my AC guy and we’d both agreed that either AC would be working, or the whole lot was coming out and going in the bin by the end of that day.

As a reminder we had three AC pipes to choose from…

1- The one I butchered from the car, probably the worst condition.
2- A donation from a fellow enthusiast (https://www.instagram.com/biggerome/?hl=en). This was intact, but the tab end of the condenser was still stuck in the threaded portion (the same portion I removed from my own)
3- An offering from Elise Spares, visually in perfect condition and kindly shipped to me for a nominal fee.

The solution should have been simple, attach up pipe #3, check for leaks and regas. Sorted… unfortunately there was a sting in the tail to this job. Little did we know that pipe #3 had a bit of condenser thread stuck in its own threaded attachment. A very small sliver, almost impossible to see from the outside so when we wound the fitting onto my (brand new) condenser it went on fine for a couple of threads and then started binding up…Bit of panic and a quick chase down the condenser thread with a die to tidy it up afterwards…

Due to the captive nature of the compression o-ring fittings there’s no way of replacing or repairing this thread so we faced a choice…

1- Force it on, knowingly (probably) damaging the thread on the new condenser but hopefully getting a good seal and hoping we never need to touch it again.
2- Back to plan A, and fabricate a new pipe.

Obviously we went with #2 and knocked up a new pipe. It was made from donor sections from pipe #1 and pipe #2, and then a flexi portion put on with a new shiny fitting for the condenser end.

Pipe #3 is still untouched, I’m thinking of ideas to try and restore it in case somebody else has a similar drama in future. I think if I bought a 3/4 UNF threaded pipe made out of something hard - I could grind a slot down it essentially turning it into a 3/4 UNF hollow tap/thread chaser and use it to clear out the fitting thread. Side project for another day.

Stuart (My AC man) then pressurised the system with nitrogen up to about 10bar and we patiently waited for leaks. Aside from the new pipe I had refitted a fair big chunk of the AC system over the last month or two so I was expecting something to leak… but nothing apparent.

Once leak checked, Stuart pulled a vacuum in the system for about half an hour, again checking for leaks but mainly just boiling off any moisture before we finally gassed her up. It was around 5.5deg C ambient in the garage and we had the face vents churning out a rather crisp 1.3 degrees C! Success! Rad fans all kicked in as expected for the AC to function, everything checked out.

I had one more distraction now before the clam could go on. I had a chipped driving light which although still fully functional is a bit fiddly to replace with the clam on… I was loathed to buy a new one because the damage was so minor, but eventually gave in.

Unfortunately now due to the road-rash of the other “good” one, I’ve got a bit of a mismatched set! Hopefully a few road miles resolves this… but might try a glass polishing kit on the old one to brighten it up a bit.

With that sorted, it was clam time. Had a good friend come over to lend a hand and we nervously offered it into place. I was nervous about CC hose routing and AC hose routing but I had nothing to be concerned about as the clam dropped into place perfectly.

I put a few of the fasteners in loosely and rolled the car back into the garage to be finished off later (still not done…). The panel gaps weren’t amazing before I took it off so I wanted to address as much as I could. I took the door hinge covers off and reclaimed about 1kg worth of mud, gravel and tyre rubber which gave me some more options for fitting it all back together with some nice gaps. I’m just about there, so just need to tighten everything up and get the light clusters in now.

I made a comment on [mention]andybond[/mention] thread about ride height. I’m set to 130r/120f but it still seems a bit too low to me at the front.

In hindsight this is on an almost completely empty fuel tank and with no driver in, so I’m going to raise to 130/125 and see how that looks. It’ll be getting properly Geo/Corner balanced anyway I’m just trying to get it in the ballpark for a safe/comfortable drive to wherever I go to get it sorted.

Your car does look like its on its knees at the front. I havent been into the garage to get the car out yet, but should be heading out at lunch so will check then …

Update : 105mm at point A , 110mm at point B [mention]Fonzey[/mention]

Cheers Andy, mine’s definitely higher than yours then :crazy:

I know you’ve not been on track yet, but is the car significantly lower than when you last went on track? Even on standard ride height I had issues with the arch liners at the back of the headlamp assemblies (on my Elise too) when really lobbing it into corners like the Mountain @ Cadwell so I’m nervous of going too low, especially with all my new plumbing tucked up in there!

That said, I guess the stiffer damping will mitigate and control the body roll better, so maybe that cancels it out?!

As a small update, we have light!

Slowly cobbling bits back on, wasted way too much time fidgeting with panel gaps but I’m happy with them now. Light pods are all in, tidied up the DAB/FM aerial antennae and replaced a bunch of nuts/bolts with freshies.

I’m going to crank in an extra 5mm of rideheight just to play it safe and then do a final spanner check on the suspension before the cars goes on its wheels. Might wind in a bit of toe on the OS front too as I can see by eye that it’s out by a mile :laughing: