2006 Exige S

Yep two positive really, one my expensive gubbins were not damaged (in fact, the magnet in the gearbox was apparently one of the cleanest he’s seen) and the second is that my decision to remove the box was a good one.

Who knows what damage could have occurred longer term, but fingers crossed it’s all behind me now. :thumbup:

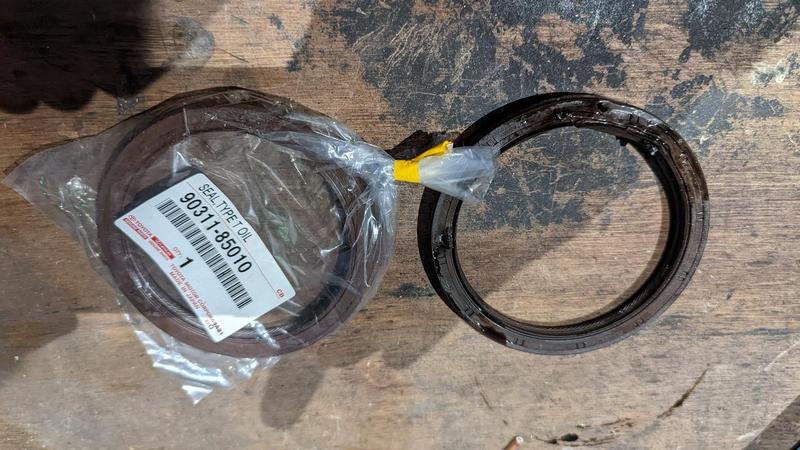
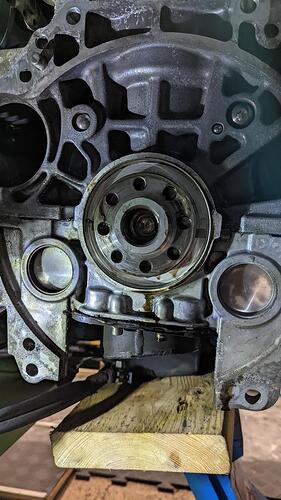
While the clutch/flywheel has been off, I’ve been staring a decision in the face for a few weeks now. The rear crank seal didn’t get touched last time I was in this situation, and it’s something I got pangs of regret about. Although it showed zero sign of leaking, long time thread readers may recall that I did have a leak from my front crank seal when I first bought the car. If one could fail, perhaps the other could too.

My worry about doing this job without it being needed is that there’s plenty of opportunity to cock it up. Removing them can be difficult, even with a proper puller as the risk of marking the sealing faces on the block or worse, the crank could spell disaster. Also placing the new seal in isn’t idiot proof, you can roll an edge or get it installed on the piss - either scenario could lead to it leaking, and I wouldn’t know about it until the car was rebuilt and back on the road!

Eventually I plucked up the courage and got on with the swap. I’d rather regret things I’ve done, than regret things I didn’t yada yada.

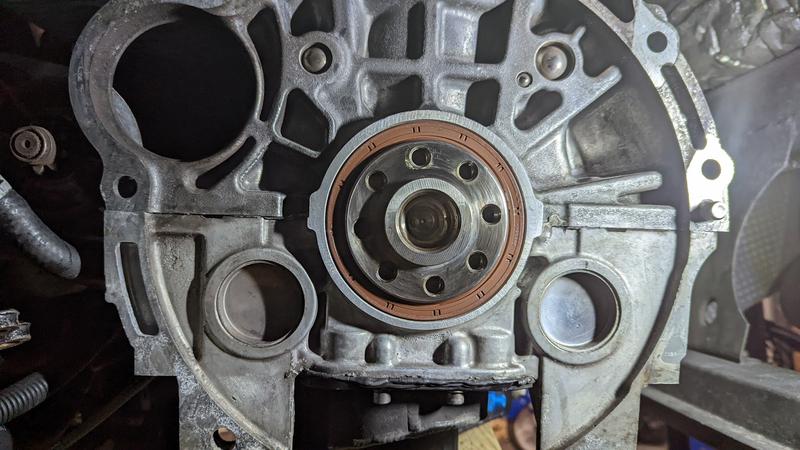
Removal wasn’t as brutal as it looked… honest.

Crank and casing unscathed, phew.

Gave it all a thorough clean out, lubed up the new seal and in it went. Not too difficult in the end, so fingers crossed I made no cockups.

Nice idea!
I’ve been contemplating whether I should use the normal washers that came with the refresh kit I got, or re-use the tab washers due to their ‘added security’. Are standard washers ok (have you or anyone used them) or should I really be getting nordlocks?

Lotus didn’t bother using lock washers until the VX220/S2, and as far as I know there hasn’t been a load of S1’s with wishbones falling off!

That said, the nordlocks aren’t expensive. The tab washers are also difficult to fit “properly”, and they’re only as effective as the quality of their install. I know for a fact my previous fitment of them would not have held a nut for long. Nordlocks are pretty good on the standard vibration tests, so combined with the odd spanner check I feel pretty good with these now.

It’s a good shout, thanks Kyle. I’d not thought of using them but wasn’t convinced standard washers are best after seeing the tab washers, and the tab washers were awful to remove so didn’t fancy refitting them. Thanks!

Great update as always.

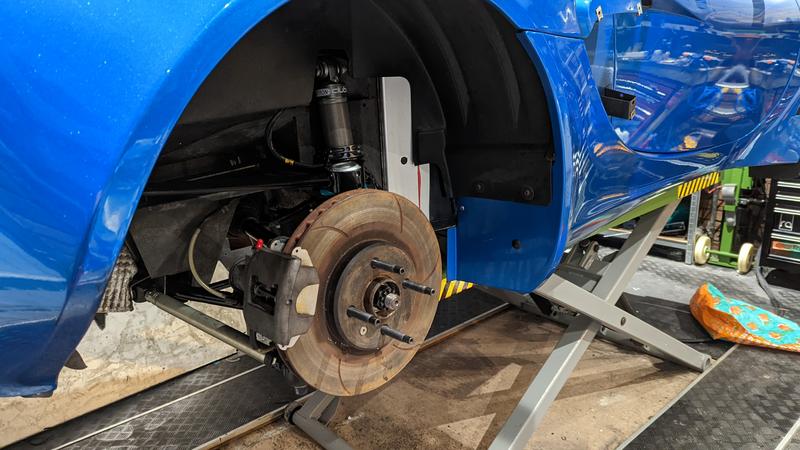
I’ve been scratching around finding some bits to do while waiting for a clutch. I could have had the front suspension off and POR15’d to match the rear, but I’m really not sure I can be bothered. I might do it as a mid-summer job when I get a lull between trackdays, or just put it off till’ next Winter.

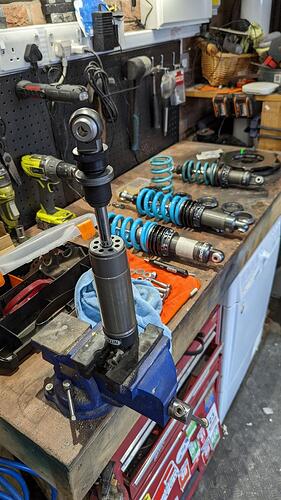
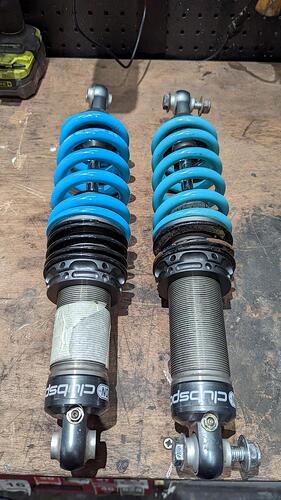
I did however get my dampers off for a clean.

As I was dismantling them, an option came up to pick up some stiffer springs second hand. Long time readers of the thread may recall I was considering this after some feedback from my trackday instructor, suggesting that we were having to max out damper stiffness to try and prop up my springs a bit. If buying new from SL/Nitron I don’t think I would have picked this particular spring rate, as they’re likely to be too far the other way but Nitron have confirmed that my dampers can/will support them without revalving so it is at worst a cheap experiment.

450/600 to 600/850 :astonished:

I’ll get my original springs cleaned up, maybe repainted (again!) and they’ll be on standby for when I realise this was a terrible idea.

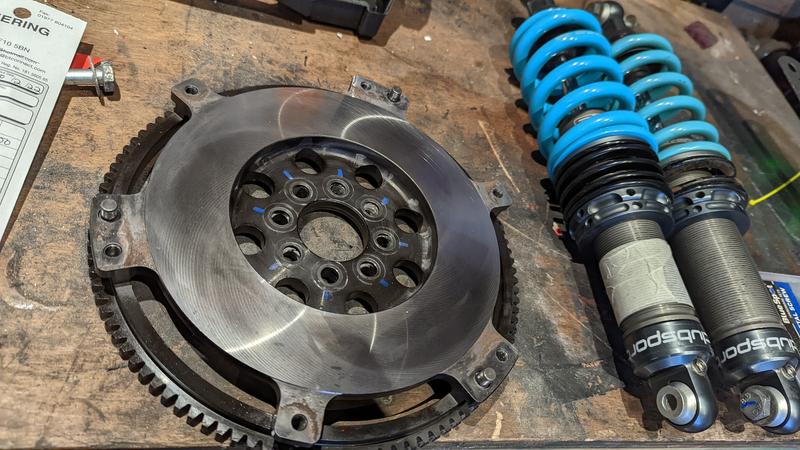
I also got my flywheel skimmed by a local place, it’s only a year old of course but there were a few hotspots on it. Potentially caused by the original faulty pressure place that I used originally but for the sake of beer money, I’m glad I had it skimmed.

Next up is some wiring and a bit of an experiment with my digi dash. I was intending to have a quiet Winter on the car this year, not expecting to be rebuilding gearboxes and refurbing suspension again - but one of my original plans was to fit a gearbox oil cooler (kit from seriouslylotus ) with a slight difference to the usual install. Rather than using a thermostatic or manual switch for the oil pump, I would use my ECU (or more specifically, my ADU digidash) to control the pump instead.

The plan is, when gearbox oil temp exceeds a certain threshold a function will trigger in the ADU which will light up a telltale on the dash, and switch one of the aux outputs to ground. This will activate a relay, powering the pump and oil will be pumped from the drain plug, through an oil/water heat exchanger on the coolant circuit and then back into the fill plug of the gearbox. Couple of challenges yet to work out, such as where does my gearbox oil pressure sensor go after I no longer have a drain plug - but with an array of AN fittings and adapters I’m sure I can figure something out.

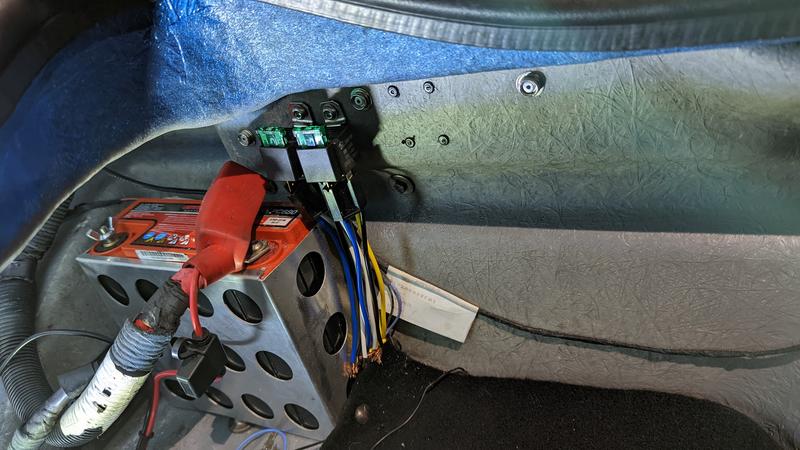
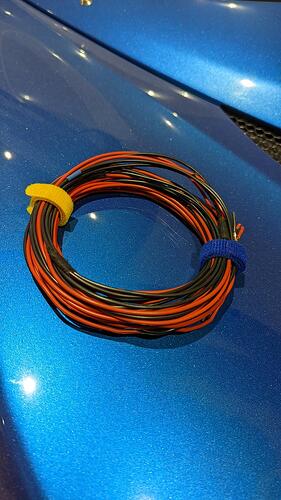
Last time I had my dashboard out, I ran wires from the two aux outputs in my dashboard right through the car and into the boot. I would be fitting a relay for each output, in an accessible spot for now while I stress test it all but eventually I’ll install somewhere tidy/tucked away.

As mentioned I’d use one output for the gearbox oil pump and one was spare. I thought about having it all wired in for redundancy at first but then I decided to use it as an opportunity to correct a niggle that I’ve had since the chargecooler install a couple of years ago. The chargecooler wiring as per the guide is a little bit… agricultural. It works, but I never liked how it was setup.

The chargecooler kit comes with a lead all setup to allow you to drill into a fusebox and piggyback off an existing fuse (fuel pump I think?). It then goes off to an inline fuse holder and straight into the coolant pump. Functional, but not pretty.

I’d use the second relay/ECU output to control the chargecooler. I don’t have any thermostatic requirements for this, so it’s a bit over engineered - so if I can figure out a more useful use for the second aux output then I can always swap it in future, using an ign live feed for the chargecooler relay instead.

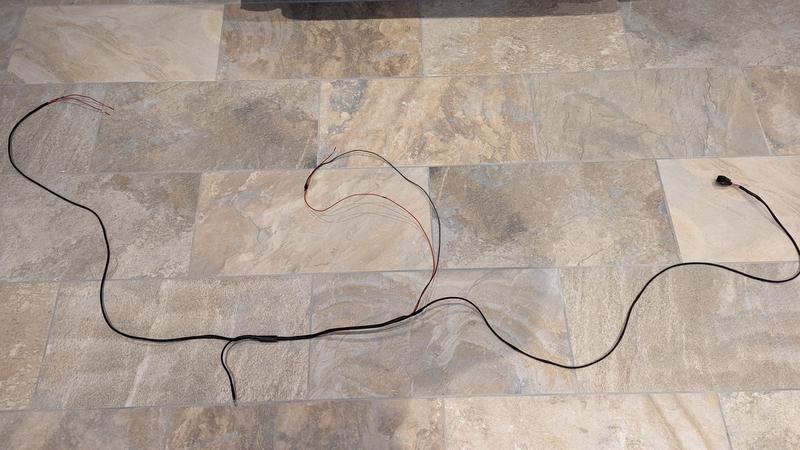
I setup a test rig to prove the concept, which worked a treat - so got on to mocking up my wiring.

Only thing I really need to finish is to connect whatever plug the gearbox oil pump will need and trim that tail of wire down once I know where the final positions will be.

It’s amazing how heavy a small bit of wiring can be… the back of my car is getting full of it too from the various sensors that I’ve added. I might need to cough up for some fancy motorsports wiring at some point to keep weight down :confused:

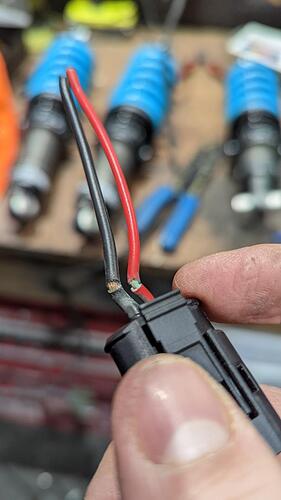
I went to go rob the chargecooler pump plug from the existing setup to find I was sitting on an impending failure.

Poor wire routing from my part had put too much strain on a wire that was too stiff, so will make sure that’s corrected this time around.

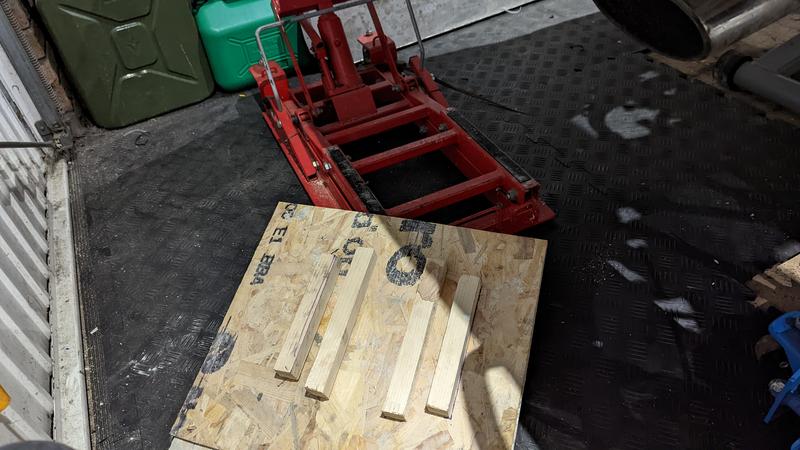
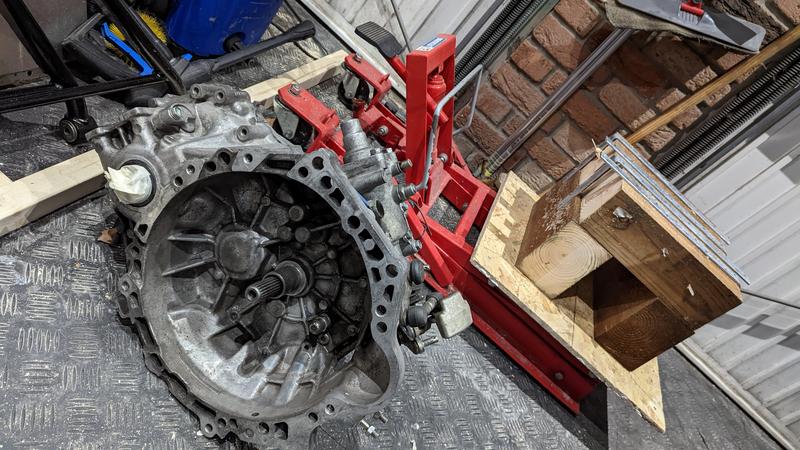
Final bit of progress has been a bit of joinery. In order to lift my gearbox back in without access from the top (clam is still on) I need a platform to sit on top of my borrowed motorbike jack. Squeezing this all under the car with a gearbox on it will be fun, but fingers crossed I can get it somewhere in the ballpark so it can be manhandled onto the splines.

A fantastic update!

I had Hoffman spec springs on my exige pre rebuild and found them really really hard on the road. I’ll see what ib they are. HUGE jump in spring rate.

I ran 600/800 on the yellow Elise, ohlins TTX with electronic adjustment.
Firm but good. not harsh

Cheers Dave, good to know it’s not completely bonkers.

I do so few road miles nowadays that I’m happy to compromise a bit on its road manners in terms of comfort. If it’s so stiff that I can’t enjoy pushing on whilst on the road though, then I’ll revert.

Just noticed your picture of the flywheel after being skimmed. How big a step was - probably an impossible question to answer!! - is there from the friction face to the bolt/dowel face? Remember years ago, someone I know had a flywheel skimmed in a similar way - friction face only, with a reduced step to the mounting face - and had a slipping clutch straight away.

Cooler kit should be here middle/end of next week, as no pumps in stock until then! :thumbup:

Well that’s a bloody good point. The machinists said they “hardly removed owt” because it wasn’t gouged or damaged… but still, I really don’t have a reference point.

I’ve got my OE flywheel lying around somewhere, and an old pressure plate - so I’ll have a think about how I can get a vaguely accurate comparison of distance between a torqued down pressure plate and the flywheel (without a friction disc in it). Thinking of sticking something squidgy in, blutac or something - then measuring it’s thickness after squishing.

Oh, actually… if only I knew of somebody who might have a shelf full of competition clutch flywheels who could measure the step for me :confused:

If I’ve turned this flywheel into scrap, then lesson learned. I’ll be honest I was 50:50 about putting the OE one back on anyway so I’ve got a fallback.

Good news on the cooler. :thumbup:

Just measured the step on a new flywheel and its 0.62mm using a vernier caliper.

Thanks John, that’s great.

I did the same last night and to be honest I struggled to get a repeatable measurement with my Amazon verniers but the smallest step I measured was 0.3mm and largest was 0.65 so we’re in the right ballpark.

I’ve got my old clutch and OE flywheel lying around so my next plan is to bolt them together without friction disc in and measure with a stack of feeler gauges. I can then repeat that test with the new clutch and skimmed flywheel. If they’re within 1mm or so, I’ll not worry as that seems well within the wear tolerance for a clutch based on measuring the thickness of the various clutches I have lying around

I’ve just found a slightly more reliable way to measure the step. I held a steel rule against the surface of the flywheel with it overhanging a mounting lug. This gave me an air gap between the mount and the rule for me to get a feeler gauge into.

Looks like my step is in the region of 0.45mm-0.5mm. I’ll measure my OE flywheel later, as that had 25k miles on it or so, so gives me a reference point for what sort of wear tolerance is to be expected.

Am I being naive? If our measurements are consistent with each other a 0.15-0.20mm gap doesn’t seem to be of concern?

Well worth checking though, lesson learned for next time. :thumbup:

Think I can put this to bed now, not that I’ve been worrying about it… honest.

When fitting the old pressure plate (5kish of wear on it) to the OE flywheel (20kish of wear on it) without a clutch disk in the middle, I can measure an airgap of 4.55mm between them

When emulating this test using the new pressure plate on the skimmed flywheel the gap is as low as 3.4mm, despite the skimming.

Upon inspection it seems like the bulk of that is attributed to the new pressure plate as it’s notably thicker than the outgoing one, perhaps this is how it boasts an additional torque/clamping capacity. In any case, I’ll bolt it all back together and hopefully we’re good. :thumbup:

Progress, wooo!

Things had been on ice for a bit waiting for a clutch to arrive. The Competition Clutch that I had fitted before was really pretty good, but I got arse on with it because the cheap bearing they supplied prematurely wore the pressure plate down (not to mention was noisy from the get-go). I should really have bought another one, used a Toyota OE bearing and got on with my life… but I was a little bitter about it, so spoke to seriouslylotus for alternatives.

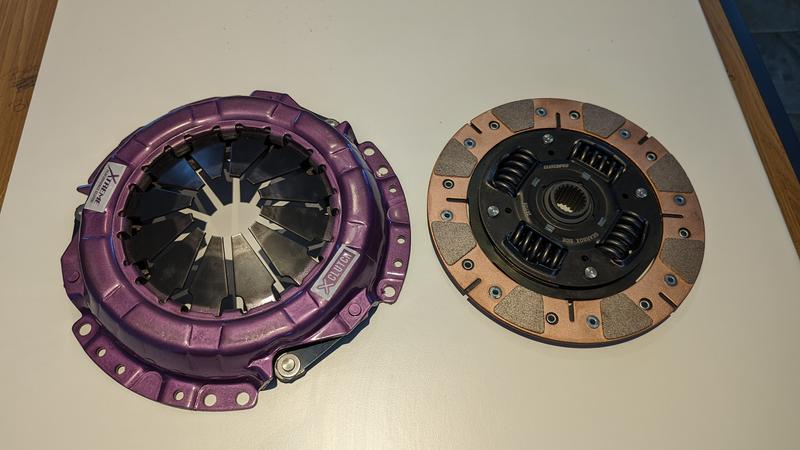
Dave had recently been talking with an Aussie company called Xtreme Clutch, who had some 2ZZ options. One in particular caught my eye because it was somewhat of a hybrid. It seems like at around 200ftlbs on 2ZZ applications, you’re caught between OE style organic clutches and race style ceramic/puck ones. I really didn’t want to go for a harsh undriveable paddle clutch and trying to find organic/sprung options that could comfortably deal with my torque demands (plus what might come in the future :confused: ) was limiting the options a bit.

The Xtreme option is a ceramic 8 paddle clutch, which retains a sprung centre and the cushion between the two plate surfaces. If the sales spiel is accurate, it should give me the best of both worlds. If it’s miserable to drive… well then that sucks.

Dave has sourced this for me without any SL endorsement, he respectfully won’t put his name behind a product until it’s tried and tested - so we’re rolling the dice on this. If it works, and if I’m happy with it - Dave may opt to list these on his site in future if anyone is interested. :thumbup:

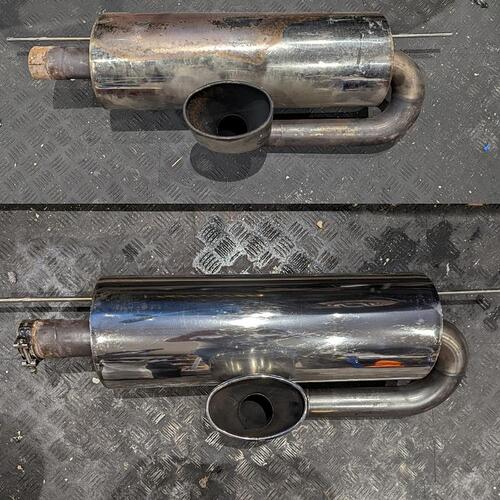
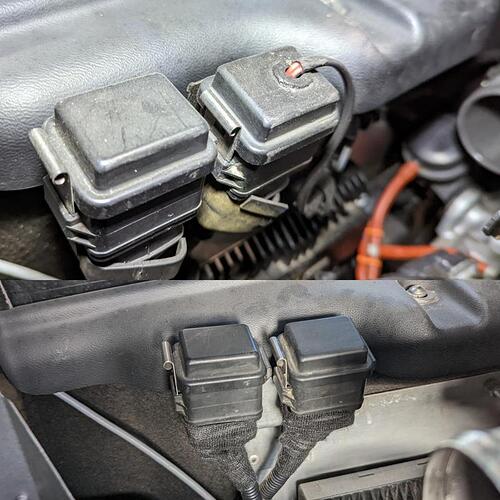
All that said, Australia is a long way away and it took a while for the clutch to arrive. I tried to keep busy on car stuff but I was really running out of jobs to do. Cleaned up the backbox, and removed the old chargecooler wiring thanks to my new boot mounted relay setup, so could tidy up the kitcar looking fuse box setup.

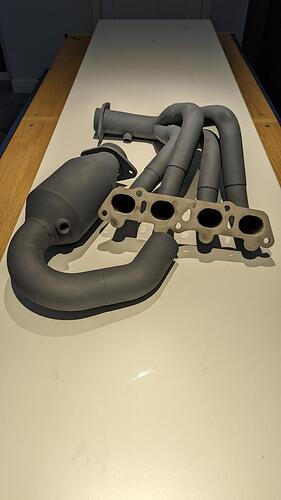
Manifold and Cat was sent off for ceramic thermal barrier coating. I’ve used heatwrap for years and I’ve generally been happy with it, but I was getting a bit bored of the itchy arms and thought I’d try something new. Expensive, so it better work and it better last.

Finally, the day arrived :slight_smile:

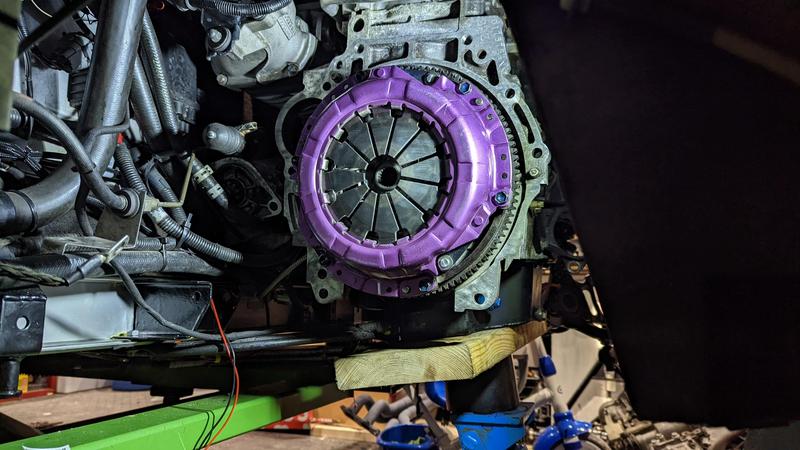
The pressure plate construction looks identical to the CC one, which is good because the pedal feel/weight was OEM-like and I had no complaints. The clutch disk itself though is very different, I hope this does as advertised.

I had a generous list of volunteers ready to help me hoof the box back in the car, then within a few hours of fitting the clutch… Covid struck :imp: Self imposed isolation for a while meant none of my help could attend, plus I felt pretty rough anyway.

Finally with the help from my ever helpful neighbour Geoff (he’s never owned a Lotus and yet he’s now installed three gearboxes into them…) the box was in. This was different to the last two times because the rear clam was on, but it was actually pretty easy once we committed to just laying on our backs shoulder to shoulder and then benchpressed it up.

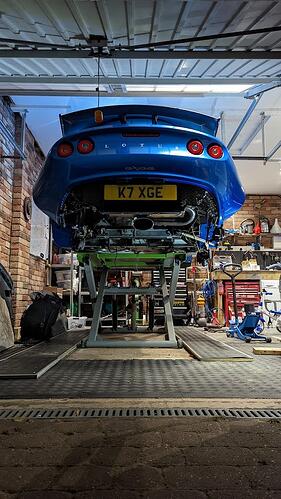
With the box in, and an engine/gearbox mount fitted up I could finally withdraw my trolley jack that has been robustly supporting my engine since first week of January, which means I can lift the car again. Wooo!

I had a productive hour or so tonight, 3/4 engine mounts back on, starter reinstalled and slave cylinder mounted up. Before getting the car MOT’d and Geo’d I need to finish off the gearbox cooler install, so more updates on that to come in the next week or so.

Time is ticking for Blyton on 2nd of April, so hoping for a flurry of progress now.

Great news buddy, happy for you and great to see the box back in.

Fingers crossed all good and it will be ready for blyton…I need someone to show me the lines :joy::joy:

Still fascinated by all your efforts. Keep on keeping on!

Pretty frantic weekend done on the car, didn’t take a huge number of photos because I’ve posted all this sort of stuff before and I just wanted to get it done!

With the box back in, I could start rebuilding the suspension and exhaust. The OS suspension I wanted to leave alone for a few more days, because I had some gearbox oil cooler parts coming from seriouslylotus and having the OS lower wishbone off the car would help with access.

There are a couple of approaches to gearbox cooling, a normal air radiator likely mounted either in a sidepod or maybe even horizontal to the floor by the sump would be slightly cheaper, but IMO would have had more mounting challenges. It’s also a ‘less regulated’ way of cooling, even though you can of course thermostatically manage the pump to mitigate that.

The other option, the way I wanted to go and the way seriouslylotus go with their kit is an air/water exchanger. The ‘cruising temp’ of the C64 gearbox is around the mid 80s which is also where the engine coolant spends much of its time on my car. On track my g’box temps got as high as 115 and increases got sharper and sharper the longer I was out on track so if I can take the edge off of it and allow for a more comfortable 25-30min session then that’s mission accomplished.
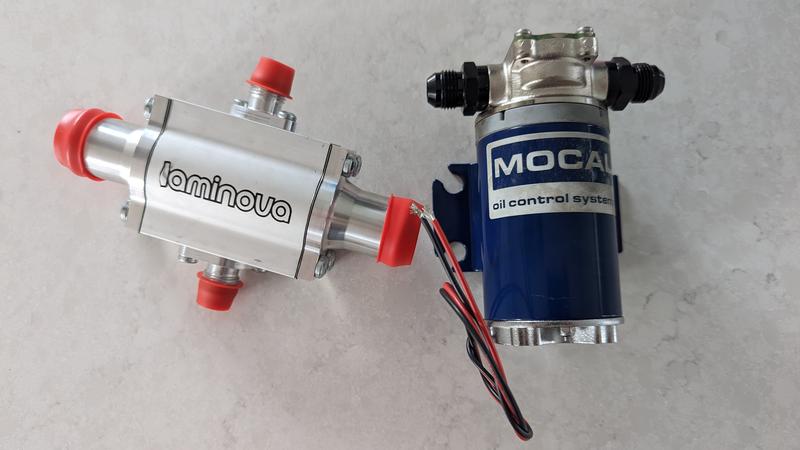
The Laminova is quite cute, I think it might be the smallest one that they do. The pump is a robust thing, it does apparently have a tendency to blow fuses if you try churning cold/stodgy oil through it so it’s not something you’d want to have running full time.

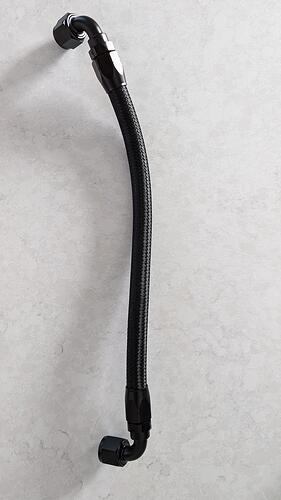
I’m not sure if I’ve plumbed this in the exact same way that SL would with their kits, but I opted to make my own oil lines so I could make it up as I went along. This was going to be my target water hose to splice into.
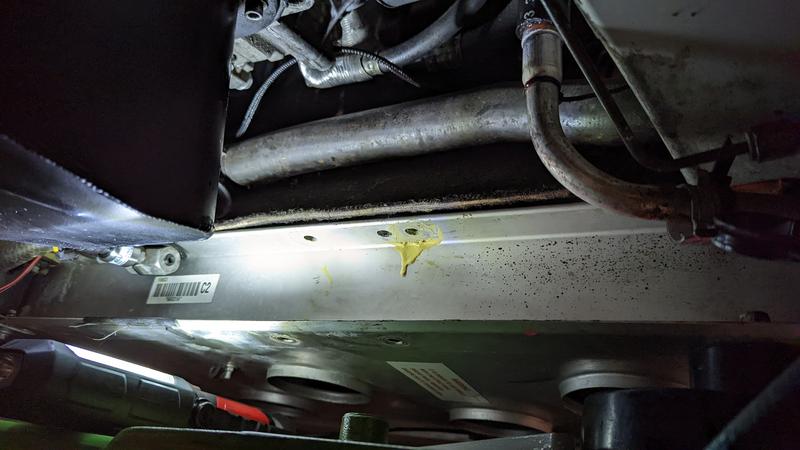
You can see the wishbone mount just below with the duralac leaking through, installing with the wishbone in place would be a bit more awkward than it was.

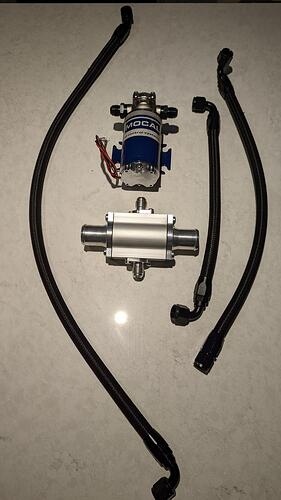
The oil lines would all be AN-8, so I put an order in for various fittings and a coil of braided hose and got cracking. It’s not the first time I’ve worked with AN- hoses, but it’s been a few years and it’s more difficult than I remember (or what Youtube will have you believe!). I woke up the morning after feeling like I’d done a stint in the gym (I guess?), very physical work to get them all pushed together!

It was ‘only’ 3 hoses, so the hard labour was relatively short lived. When I stopped fannying around desperately trying to not scratch the fittings I progressed much quicker, and actually ended up scratching them less. Figure that one out.
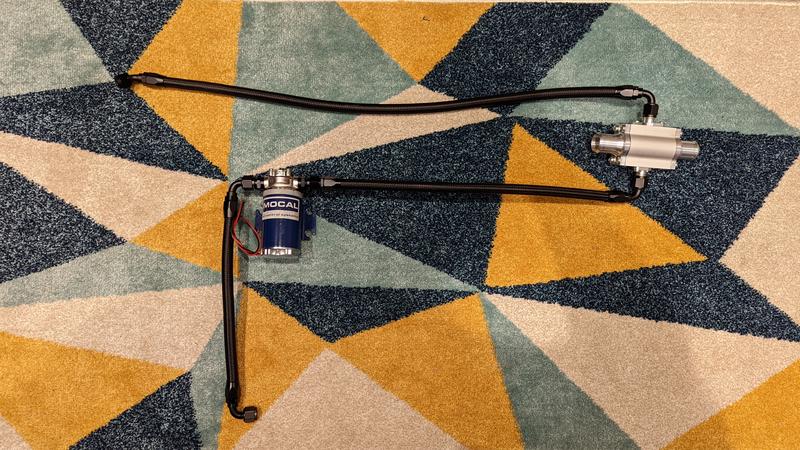
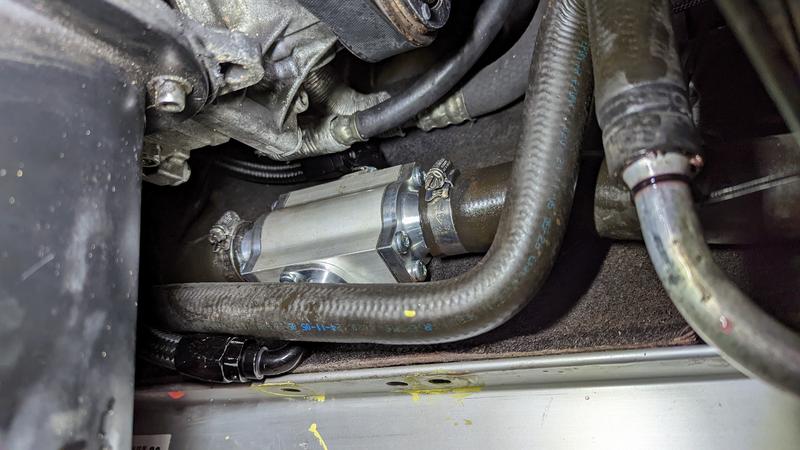
I nipped up the oil feed/return to the laminova before installation because it was going to be a bit tight in there, then threaded it all in. It’ll be fairly well obscured by an (engine) oil cooler line and heater hose once it’s in, but the jubilees are just about accessible and it’ll be easy to inspect for leaks etc.
The pump itself is mounted on a plate which shares some bolts with the central engine mount and the NS wishbone mount.
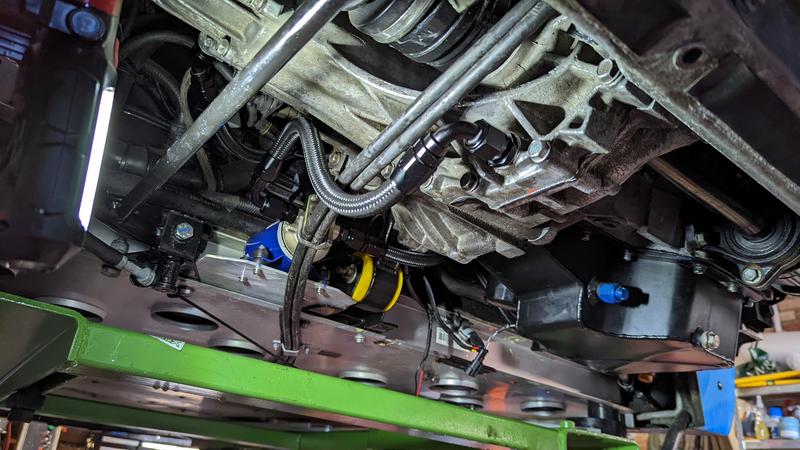
Gearbox drain and fill plugs are M18x1.5 so an easy size to buy AN-8 adapters for.

I’m pretty happy with my hose runs, enough “intentional” kinks in the hose to allow for engine movement, but they don’t really obscure any other service areas of the car so I don’t expect this install to annoy me later.

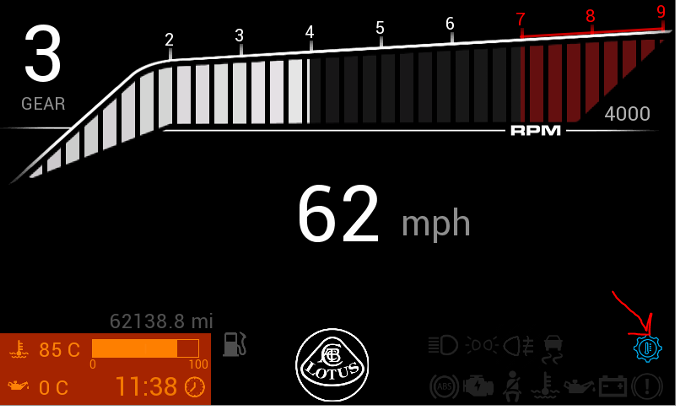
Finally the wiring, I ran this ages ago. As a reminder I’ve got 2x aux short to ground outputs on my ECUMaster ADU Dashboard. They run to a pair of fused relays in the boot, one of which then feeds my chargecooler pump and the other to this new gearbox oil pump. I can then use logic in the ADU software to trigger the pumps depending on whatever parameters I choose. The chargecooler will simply run whenever the ignition is on, but the gearbox pump will only run when gearbox oil exceeds a certain threshold. Currently 70 degrees, but I’ll play with it once I have some data to test with.
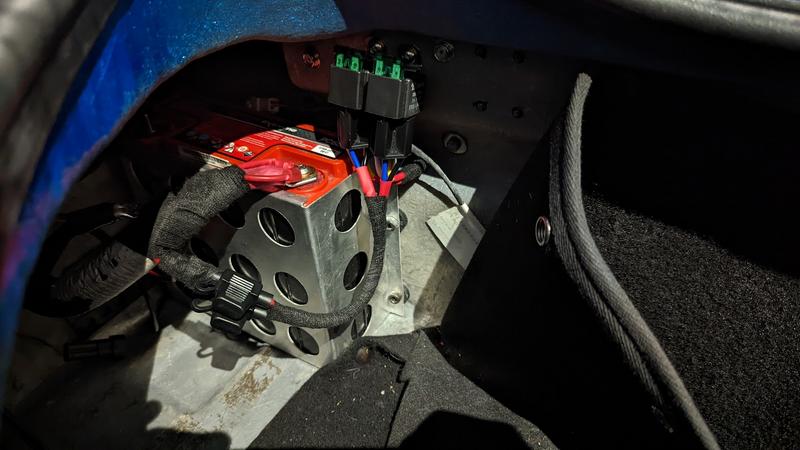
With a little telltale on the dash so I know when it’s active.
With all this in place, I filled the gearbox with oil (MT-90 again) and to help deal with my extra capacity I ran the pump for a couple of seconds to burp any air out, then topped back up again. I didn’t get that much oil in after the burping, so I may repeat this process after my first proper drive where the pump runs for a bit.

With that done, the rebuild could be finished off.

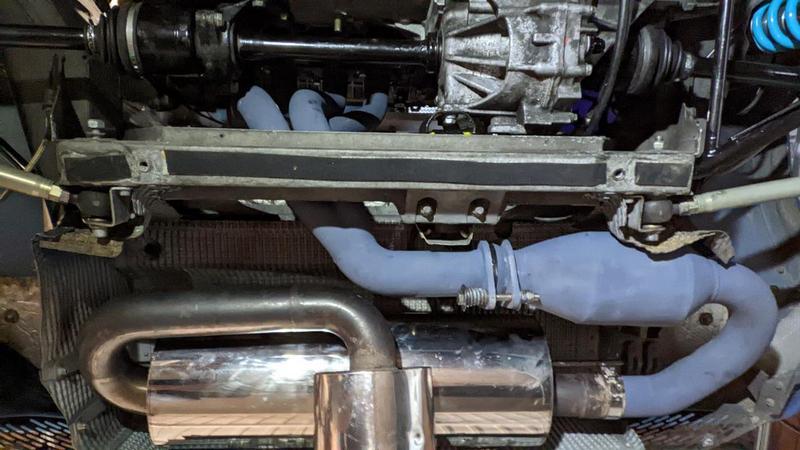
Exhaust on and sensors in.
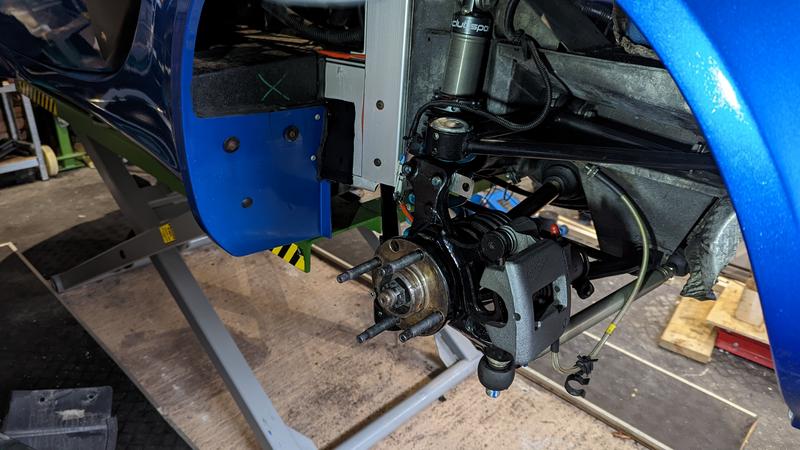
Suspension on with new brake pads in (Carbotech XP8 again, really happy with them last year).
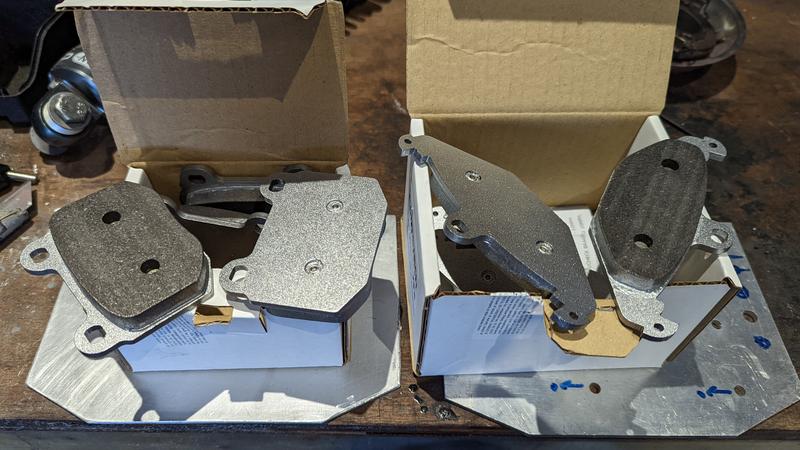
Wheels and undertrays even got a quick wash

Then finally it was time to lower the car on its wheels for the first time since end of December. My front rideheight was a little low, so a quick tweak on that got it roughly into a driveable stance. I’ll get this setup properly later in the week.

Topped and bled coolant after taking a shower in it whilst doing the gearbox cooler. No sign of any leaks, good news!

Then the moment of truth, long time readers may remember my last attempt to change a clutch fell a bit flat at this point as it wouldn’t disengage! Even though it was later identified as a rare/unlucky clutch issue, it haunts me. Getting the box back out at this stage is NOT fun. I was also a bit nervous about how ‘racey’ this new clutch was going to be, was I going to kangeroo out of the garage in a stink of clutch burn?!
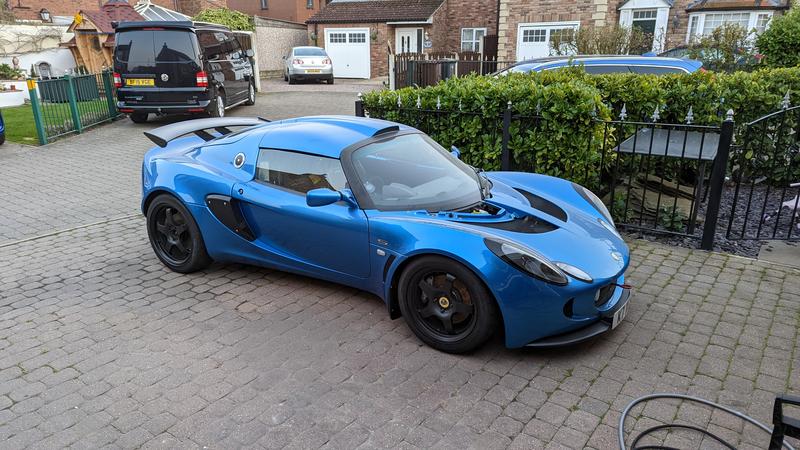
Answer? No - it pulled out of the garage like an OEM clutch would. No crunches, rattles, whistles or chatters - just a nice smooth engagement, and gentle manners at ‘carpark speeds’. I’ve not driven a car with a clutch since December, so it was particularly impressive. I took the car up and down the street, can select all gears with nothing feeling/sounding amiss yet, so fingers crossed.

All that remained was to wash off a Winters’ worth of garage and plaster dust.
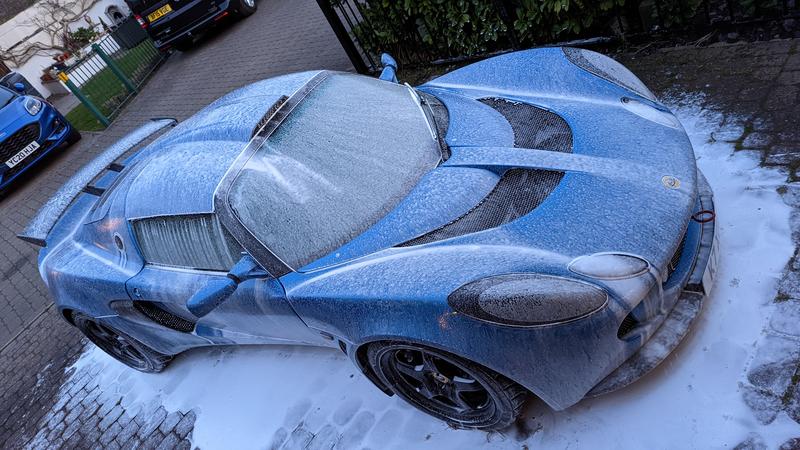
MOT later today, so fingers crossed for that.

Brilliant work as usual mate - looks awesome! :clap: