2006 Exige S

I would expect it to be in the last place it was as the power was cut as nothing to move it. I am sure I read the default is to be shut.

That’s what I’m struggling to get my head around. I’ve also read/come to understand that the flap defaults to “heat”, but that must mean that it has some mechanism to revert itself back to that position when the car is powered off - otherwise the concept of having a ‘default’ setting just does not apply. Perhaps I’m misunderstanding.

Anyway, I did a bit more fiddling last night - I’m somewhat sure that there’s a loose connection in there somewhere, it seems like when I disturbed the wiring that it caused the issue, then when I wiggled all the connectors again it seemed to fix the issue again. Not much I can do to investigate properly as access is too tight, but at time of typing the AC system works fine - so hopefully it stays that way.

I’m fairly happy that the AC circuit itself is working as intended, which is good as that’s the expensive bit. Fixing the heater box properly next time the clam comes off should be both cheap and easy, and there’s a good mod (popular in the warmer US states it seems) to add an aftermarket bypass to the heater matrix to make it work more like a modern system - so may consider adding that if/when the front clam next comes off.

Oh?! Tell more?!

Ill be popping out this evening to take a look at my heater as its constantly blowing hot at well.

Wish I knew about this when the clam was off, it’s my sort of mod is this.

Basically adds a little bypass switch to the dash somewhere which diverts coolant away from the heater matrix temporarily - it’s how most modern heating circuits work and I imagine makes a huge difference especially to a non-AC car.

A rather useful chap on FB has notified me that I do indeed have the old temperature probe on the AC evaporator too - so that brings back the possibility that my AC system is freezing over whilst in use (mentioned it a couple of pages ago).

Wish I knew about all this when the clam was off, most of these modernisations are cheap and easy to do with the heater box out of the car.

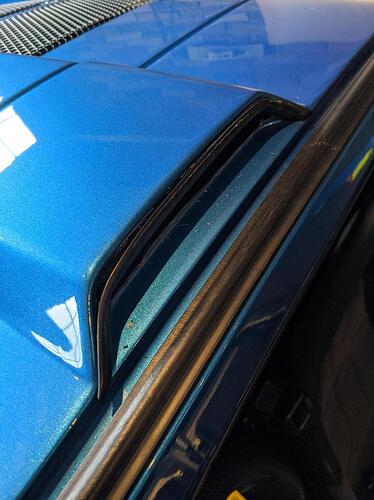
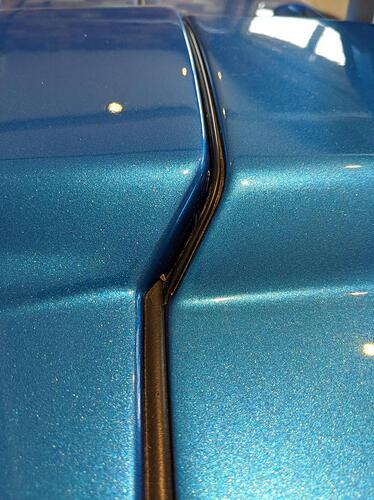
I’ve always had a slight problem with how the rear seal sits on the hard top. It really does seem like every S2 I look at has a slightly different way for the seal to be applied - I guess it’s just one of those ‘quirks’, but armed with a fresh length of OEM seal I got brave and started over.

Mine had two pieces of seal, one applied the full width of the roof and one stuck to the rear clam on the vent aperture:

This created a bit of an air gap which both looked naff, but probably wasn’t doing any favours to the efficiency of the roof scoop pre-charge cooler.

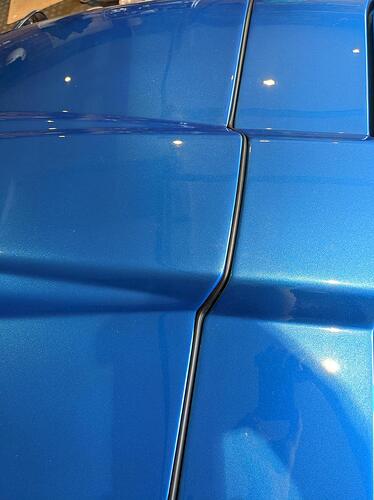
I tore it all off, cleaned up the surfaces and applied one uninterrupted length of seal across the whole roof, including the scoop.

It now looks about 1000 better to my eyes, probably something that nobody else will notice… but hey ho, that’s life!

Top work Kyle. I’m sure if it makes a difference to you then that’s at least one more good nights sleep you’ll have until you find the next thing :slight_smile:

I tackled the steering rack riser plates today, I was putting it off a bit because I hear mixed things about how beneficial they actually are but also involves some time spent in the footwell which is never pleasant…

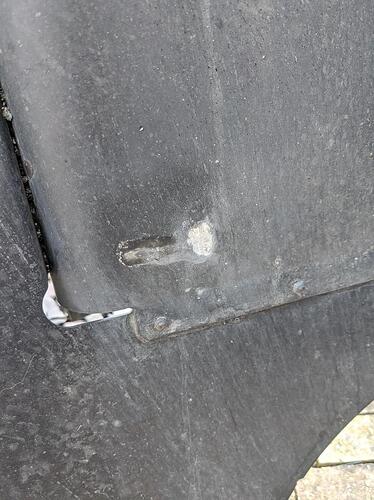
The steering rack attaches to the car through slotted holes in the front of the chassis, these slotted holes allow it to be fitted with approximately 8mm of vertical adjustment. The bolts are then supported by a plate which is riveted in place and has non-slotted holes.

My car with an OEM 130/130mm ride height came with plates fitted that placed the rack in its lowest position. For any factory car that launched with 120mm or lower ride heights, riser plates were fitted to move the rack up 8mm to shuffle the car back into the optimal area of the bump steer curve. Clever little design feature, makes for a very cheap adjustment when the plates are ~ £10 from [mention]seriouslylotus[/mention] .

I took my roof off and driver seat out to make room. Taking the wheel off would have been easier still, but I didn’t bother.

Process should be:

  • Drill out existing rivets
  • Loosen both bolts in each footwell (4 total)
  • Loosen the lower rack UJ pinch bolt just to allow movement.
  • Remove the bolts from one side, the rack will drop down a bit.
  • Remove the OEM plate
  • Refit new plate with new rivet (3mm x 8mm seemed a good fit)
  • Using a screwdriver in the smaller bolt hole you can gently raise the rack up a bit until the big bolt hole lines up. Refit the bolts
  • Repeat on the other side of the car
  • Torque up, don’t forget the UJ pinch bolt.

I read some other guides that suggested the car should be jacked up, wheels removed, helper raising the rack manually through the chassis box section etc etc - but I didn’t need any of that.

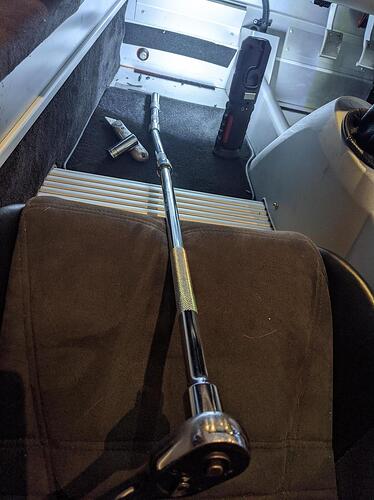
The job is less awful if you take all of your tools with you into the footwell first time around, and a few extensions makes the job significantly easier!

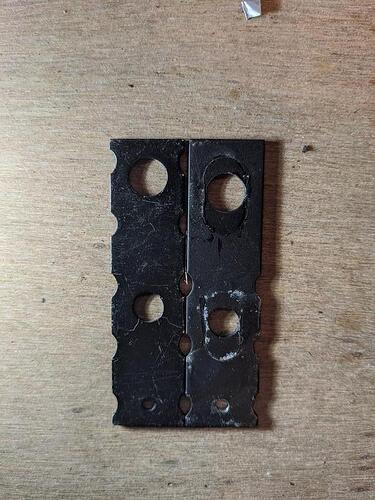
Old vs New:

Whether or not I’ll notice a difference who knows, but they’re in now - and I can’t imagine there are any downsides to them.

:thumbup: Nice one [mention]Fonzey[/mention] hopefully it’ll make some difference.

I had a bit of a test drive at the weekend, only a few miles but despite fighting really hard to not fall for confirmation bias I came home feeling pretty chuffed about the change.

When going through quicker bends I’m no longer feeling the wheel fidget in my hands quite so much. I struggle to describe it properly but before it almost felt that the steering was TOO communicative, each bump/undulation just tweaking at the wheel a bit when I wanted the steering to feel heavy and ‘robust’ in my hands. The steering now feels a lot smoother when it ‘loads up’ which gives the feeling of more grip (even though grip levels haven’t changed) which encourages me to lean on the tyre a bit more - all good stuff, well worth the effort and £10.

Got Geo booked for Wednesday, I don’t expect big changes - just level out the corner weights again and make sure I’ve not punted the front toe out too far.

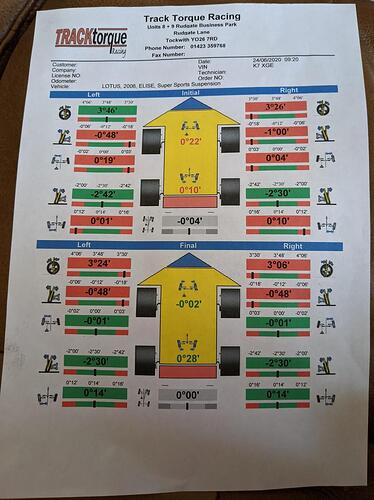
Went for Geo again today, mainly to correct the toe and ride heights after my messing around.

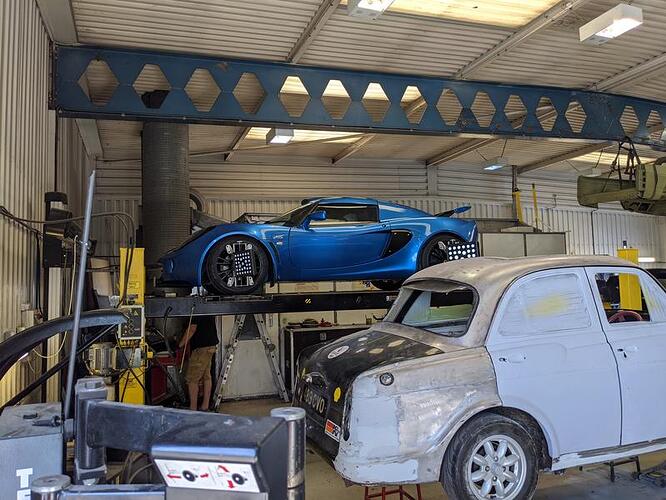
Back to my local haunt for this one.

Other than getting a socially distanced tan in the carpark there wasn’t much to report, cup of tea and a few laps of the estate later and I had a car and print out.

Couple of surprises here, first the OSF camber reading. I specifically recall Dan@HPE saying that my camber was ‘one shim out’ on that corner so he took an extra shim out. It seems the TrackTorque equipment disagrees with that and the shim has been refitted again :laughing: It would seem either TT or HPE have got a calibration issue somewhere, but I guess I need to hand in my race driver card as I can’t tell the difference anyway :blush:

Front toe was always going to be a bit out, but wasn’t expecting a discrepancy from side to side. I know Dan prefers a more neutral toe at the rear as he likes his cars to be a bit tail happy, seems TT have dialled some toe back in to stabilise it at that end.

Ultimately I know what to expect from this geo, TT have done my Elise and the original geo on my Exige with settings very similar to the above so not expecting fireworks, but good to know everything is back in line after my tinkering.

I paid my respects to Grandma while I was there

Car felt well on the way home, still feeling that the addition of the rack riser plates was well worth it. Car just feels like it’s goading me on a bit through quicker corners now, a confidence I didn’t have before.

Back to my AC/Blower issue for a moment, my AC worked flawlessly all the way there, approx 45mins of driving. On the way back the ‘hot/cold’ cycle seemed to return. As it happened I arrived home with the blowers on ‘hot’ so decided to have a quick peek inside again to see if I could catch the blend door in the act and sure enough it was sat on full hot despite the knob being on full cold. Once again I wiggled some wires about and the issue seemed to resolve itself… for a bit.

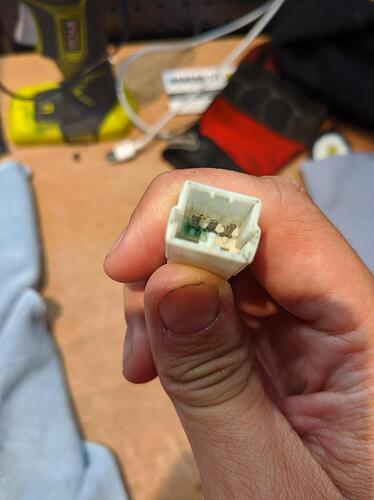
I disconnected the wiring harness for the actuator flap, quite difficult from above but got there in the end. The wires all look tidy enough and there’s no sign of a pinched wire or loose connection but one of the connectors did have a bit of corrosion in it.

I gave it a good clean out and sprayed the connection on the loom with contact cleaner and hooked everything back up… no dice, in face the flap seems to stick more now than it ‘unsticks’ :laughing: I’m fairly sure that the actuator or flap is not mechanically stuck, but the wiring inside could be questionable if it’s taken on water in the past. Heck the issue could even be further up the loom somewhere, but trying to see that with the clam on just isn’t going to happen.

Now that I know I can disconnect the wiring ok from the actuator from above, I may just buy a new actuator and hook it up (without attaching it to the heater box, because that’s impossible with clam on) but I can at least see if a new actuator… actuates reliably and then just stick it on a shelf till the clam next comes off.

In the meantime, I may disconnect the wiring from the actuator completely and just fix it in the 50:50 position. In this position with the AC on, the air is nice and cool but not the coldest, but once the AC is switched off, a bit of warm air drifts through - so it should see me through the majority of conditions. Might also try it full cold, actually struggling to remember the last time I used the heater, and it’s a 15min job to push the flap the other way if it gets to October and the car is still taxed etc.

Another positive update [mention]Fonzey[/mention]

I cannot get a bracket undone that obscures my flap ( oh er ) on the nearside inspection panel.

Glad you are working well

There should be two screws, undo those then slide the whole thing back towards the front nose of the car, it’s got some slotted gaps that slide onto the front clam fixings so you need to push it directly forward to clear those, then you can wiggle it out, requiring some inventive bending!

Yep, found the screws. One comes out no problem. The other is a mess of oxidisation. Ill have to drill it and retap …

Baws… It is just one of those C clips behind it so easy enough to replace once you can bully the screw out!

I bet it’s the hidden away one and not the one in plain sight?

Have you been sneaky peaking at my car? Its exactly that one! I have spare c clips …

Put a bit of time today for some Croft prep… which pretty much just consisted of washing the car :laughing:

Obviously as per my other thread in the tech section I’m spending a bit of time fiddling with the heater matrix bypass/upgrades but I’ll document all of that later when I’ve got some actual updates on it. Whilst messing around testing various things though I noticed a bit of undertray rattle whislt the car is idling/low RPM. Not overly concerned, I know with these diffusers/undertrays that just bolting them up in the wrong sequence can lead to reverberation I just planned to take it off, then refit it again.

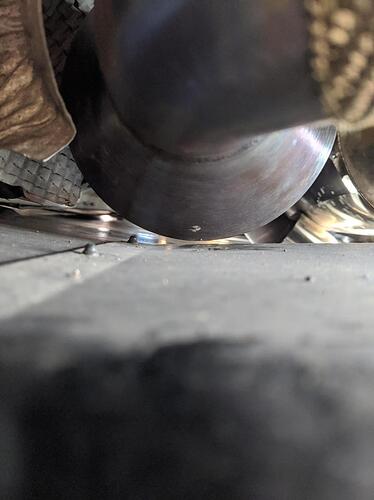
I did however find an actual cause of a rattle, it seems the new 2bular cat has been touching the diffuser :crazy:

I could see looking through the NSR wheel arch that the cat body was sat flush with the diffuser. It is a bigger unit than the OEM cat that came off, but with it being an off the shelf part you’d expect no fitment issues like this so I initially just suspected an install issue from my end. I spoke to Jim @ 2bular who suggested the engine mounts may have some sag in them, which they could but I’ve got the Powerflex bush inserts in and they were practically mint when I inspected them last year so it feels unlikely.

I loosened off the donut join (the only place which can influence the position of the cat) and lightly jacked up my backbox, I maybe gained 1mm there when tightening back up again. I then refitted the diffuser with a couple of washers on the big M8 fixings which has bought me this much clearance:

There’s not much in it, I could probably space it a bit more with some washers on the trailing edge M5 fixings but I’d rather not - it’ll make diffuser removal/install a right ballache. Hopefully this is enough clearance, but I’d be eager to see some photos from other users of the system to compare?

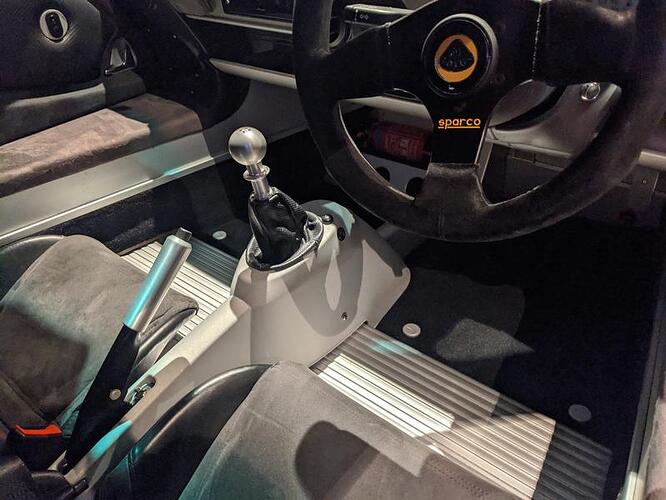
Other than that I did a mod, since getting my fitted mats in the cockpit I just had them velcrod to the floor which was working OK until Blyton last time out, passenger mat made a bid for freedom and ended up dangerously close to my pedalbox on the driver side. As luck would have it a FB’er was flogging some of the aluminium carpet buttons for… well, buttons - so on they went today.

I’ve “hard wired” the heater blend flap into the cool position for my trackday (unplugged the actuator with it in the cold position) so not expecting any unexpected blasts of warm air… but we’ll see what HVAC Jesus has planned for me.

Good idea on the remove wire …

I think Ill drill me knackered screw out this week and do the same …

Out of curiosity what wheel have you ? It looks great

Sparco 300 and yes I love it, OEM horn push goes into it too with a bit of encouragement. Only thing I’m not so keen on is suede for the road, it’s ace on track with gloves on and makes it worth having but it feels a bit minging on the road especially when I get sweaty hands courtesy of HVAC Jesus. Might even consider a leather one and quick release one of these days so I can have my cake and eat it :sunglasses:

Money bags Kyle over here…

You saved me a question about worth it for the road mind …