Suspension Refresh

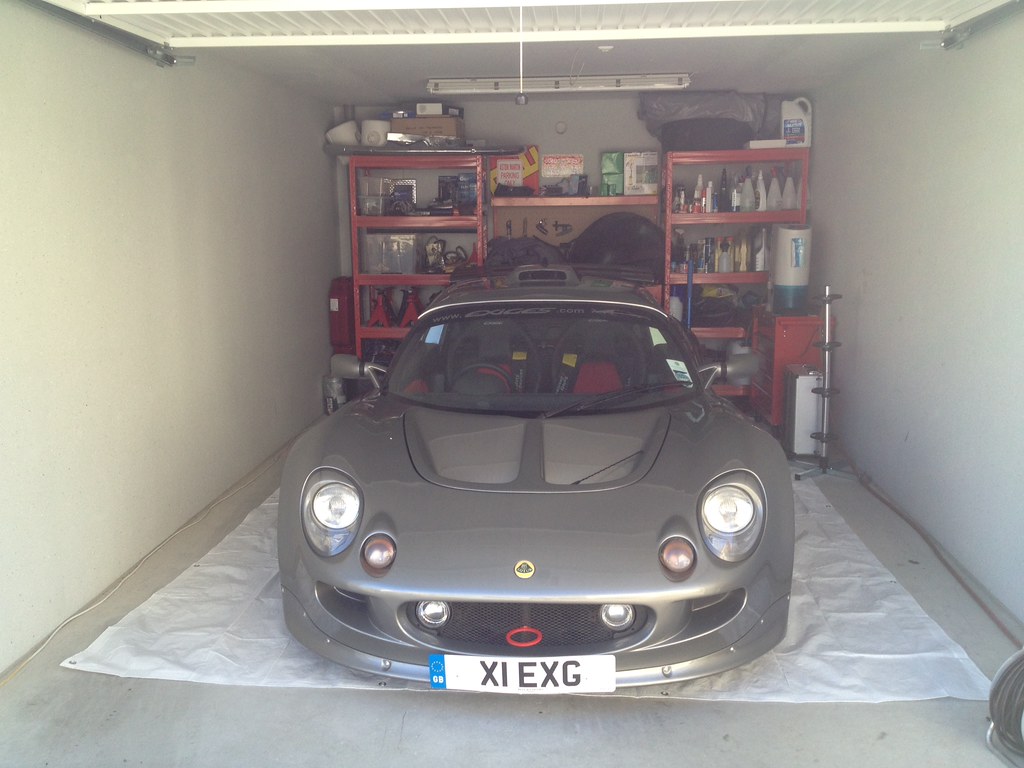
With winter upon us now is a good time as ever to do a suspension refresh.

Hopefully you can give me some advice as I go along.
Please forgive if im posting in the wrong area and mods move it appropriately.

I want to keep the car drivable on the road but also competent on track.
After talking with Nitron my plan is to replace the shocks and springs with Nitron 46 race pro shocks (1 way adjustable) and 450lb front 525lb rear springs with helpers all round.

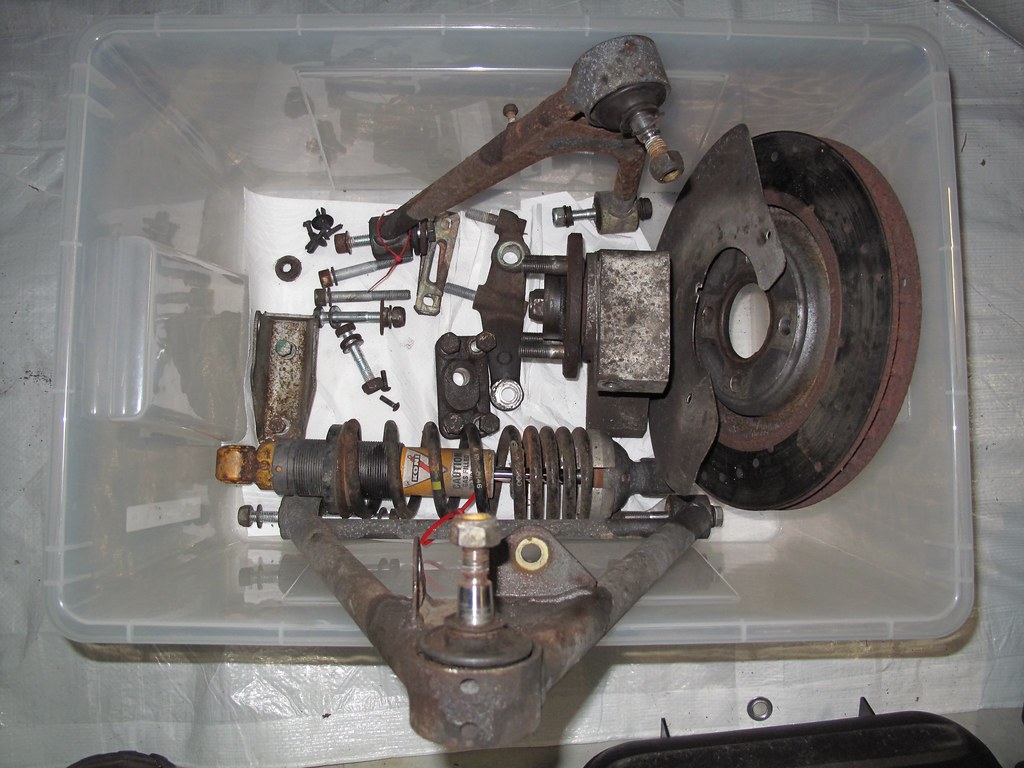
Also I will replace all the original wishbone bushes with bearings and replace the ball joints, drop links, anti roll bar bushes, suspension bolts, uprated toe link kit, new discs and pads.
I am going to refurbish the wishbones by having them sandblasted , zinc passivated then coat with clear por-15.

Apart from the sandblasting of the wishbones I plan to do everything myself, I’m no trained mechanic but I believe there’s more satisfaction to doing it yourself.

I’ll be taking my time (as only a few hours per evening…2-3 times a week) but my aim is to finish beginning of March ready for Angelsey :slight_smile:

Edit: Part way through Day 4 I found an excellent guide tadts.com/instructions/suspension - Replace wishbone bushes and wishbone ball joints (wishbones removed from car)

Day 1

Removed all the non-essential items from the sides of the garage.

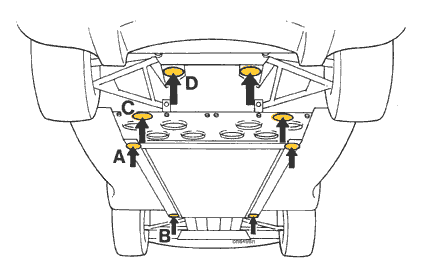
Loosened off the wheel nuts, jacking up at point A to put the car on ramps on one side.

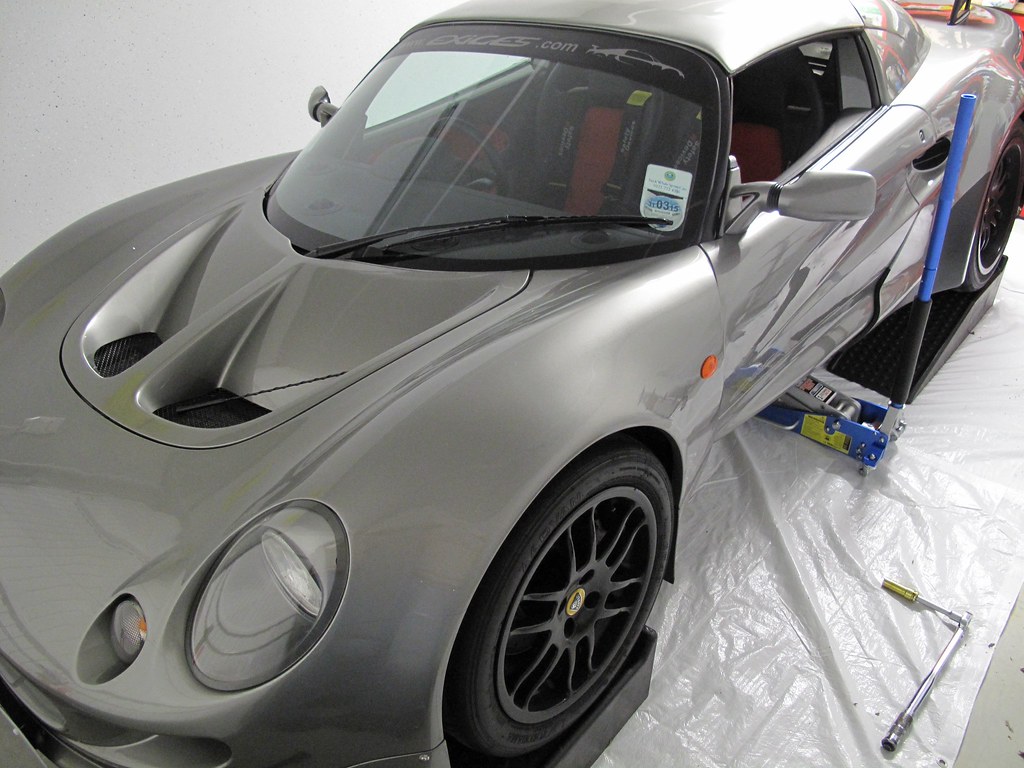
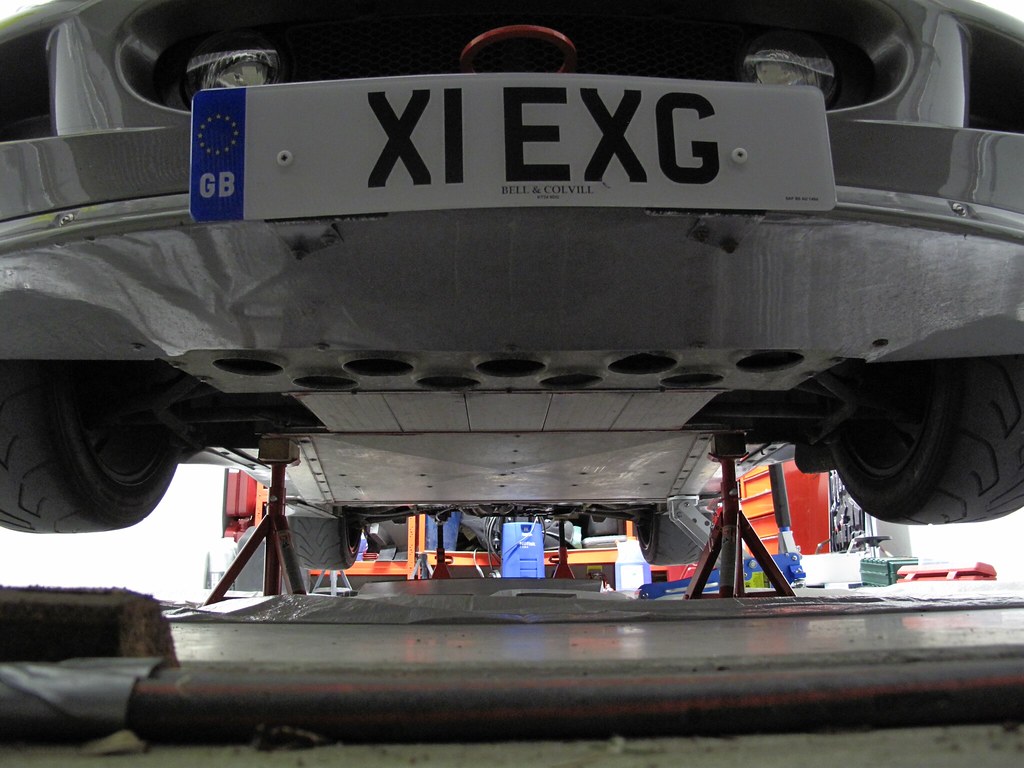
Removed the 2 rear under-trays and jacked up the car on the other side at Jack point A. This then allowed me to position axle stands at points B and D.

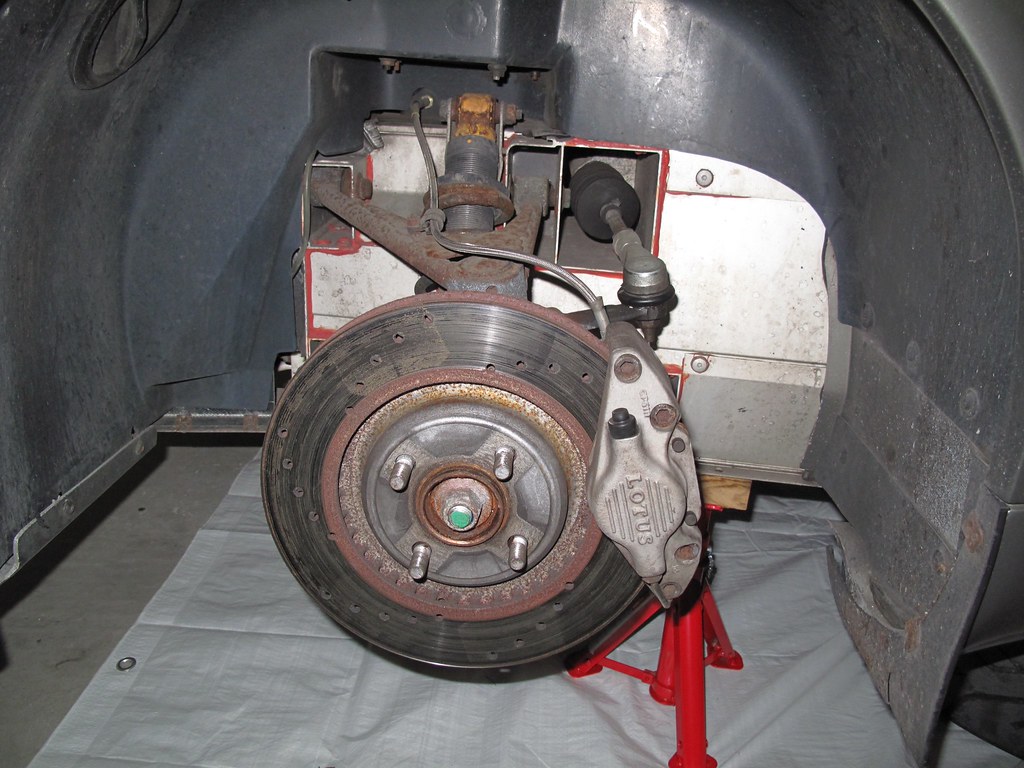
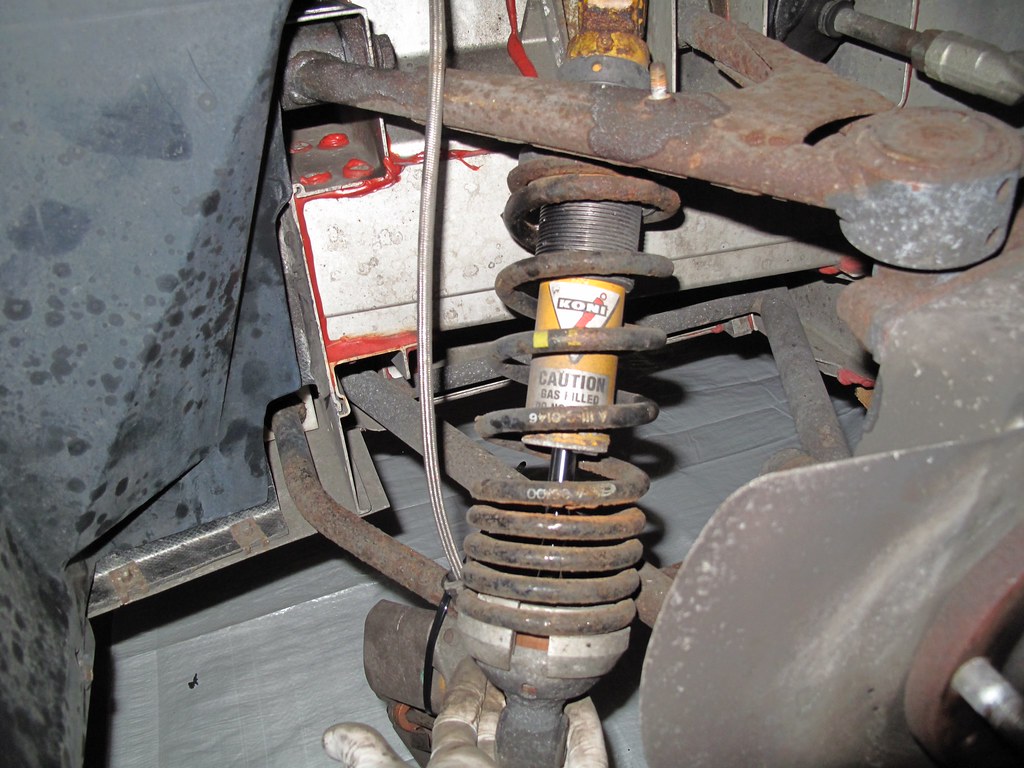
After removing the wheels and placing them underneath the car this is the rear nearside.


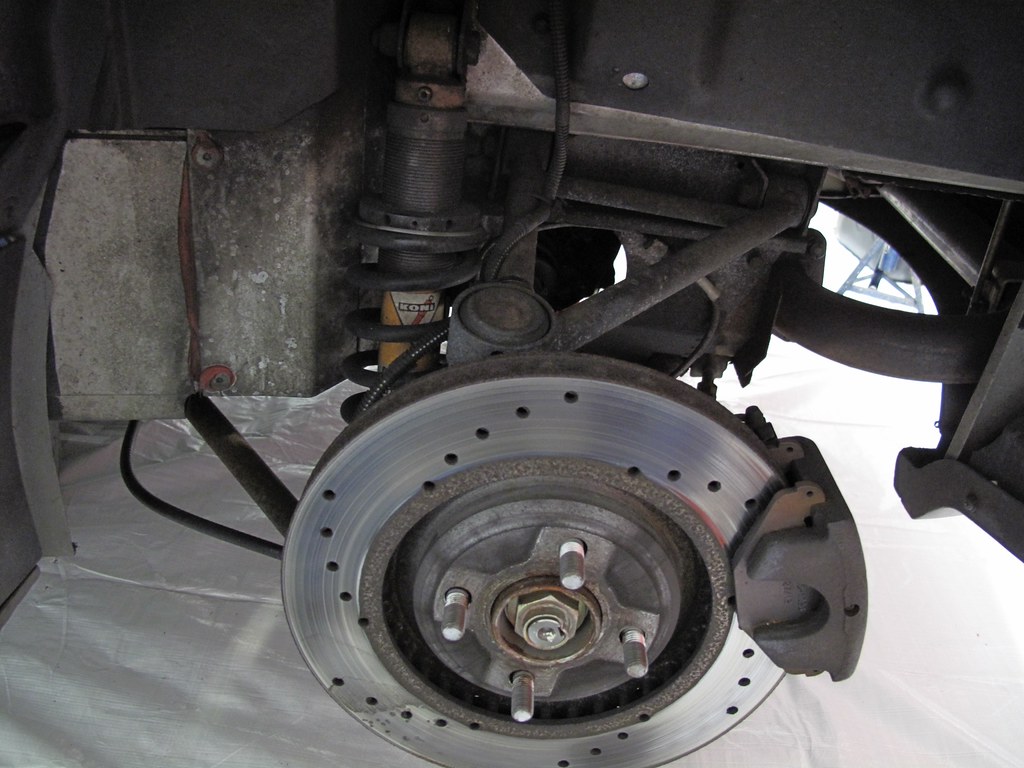
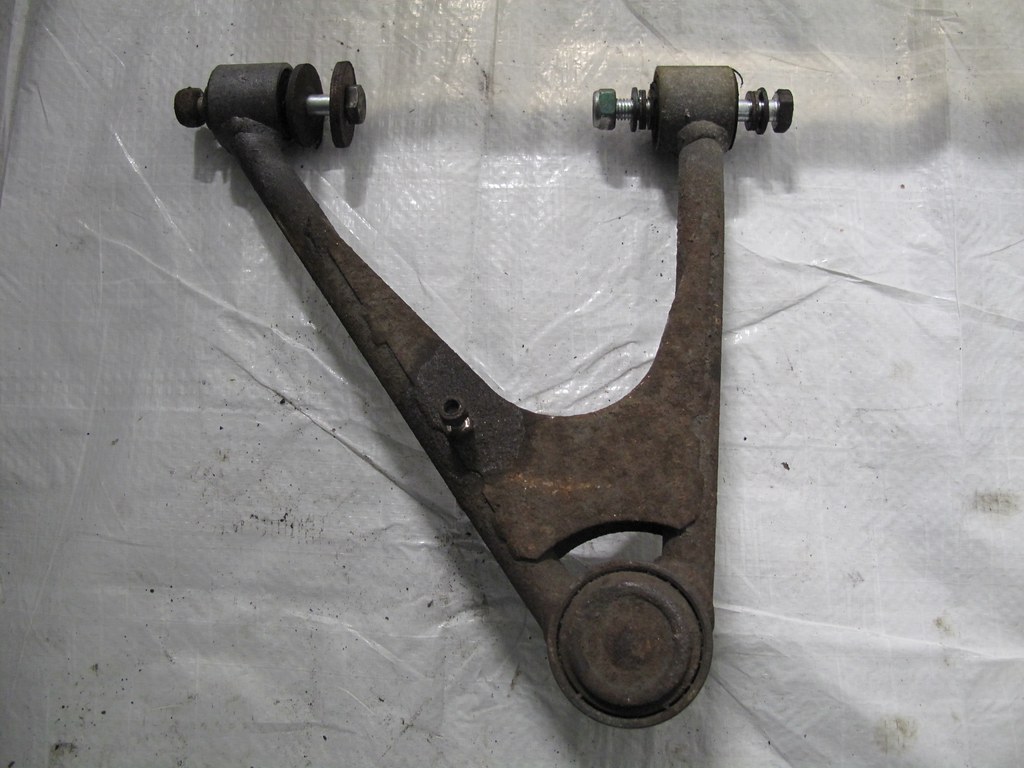
…and the front nearside (quite rusty…although the camera flash highlights more than the rear)

Should there be castor washers (shims) packing in the front upper wishbone joints (aft joint of the shock)? Or is that the design?

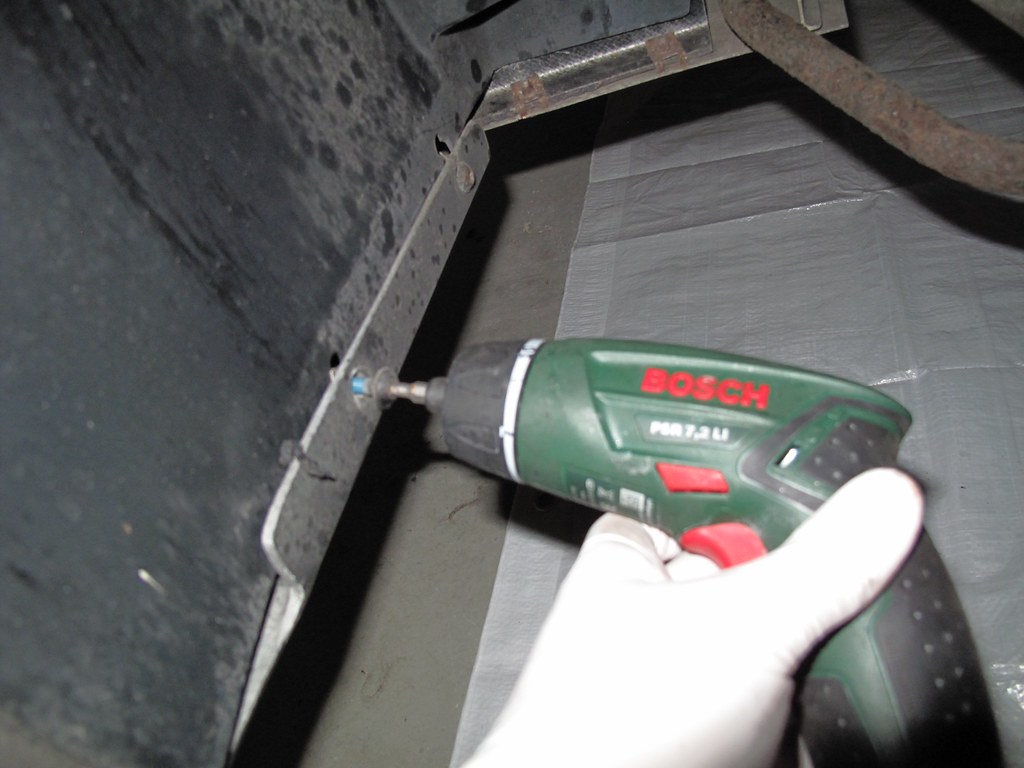
Do i need to remove the wheel arch liner to gain access to the front wishbone bolt

I sprayed all suspension nuts/bolts and retired for the night.

Day 2

I decided to start on the front nearside.

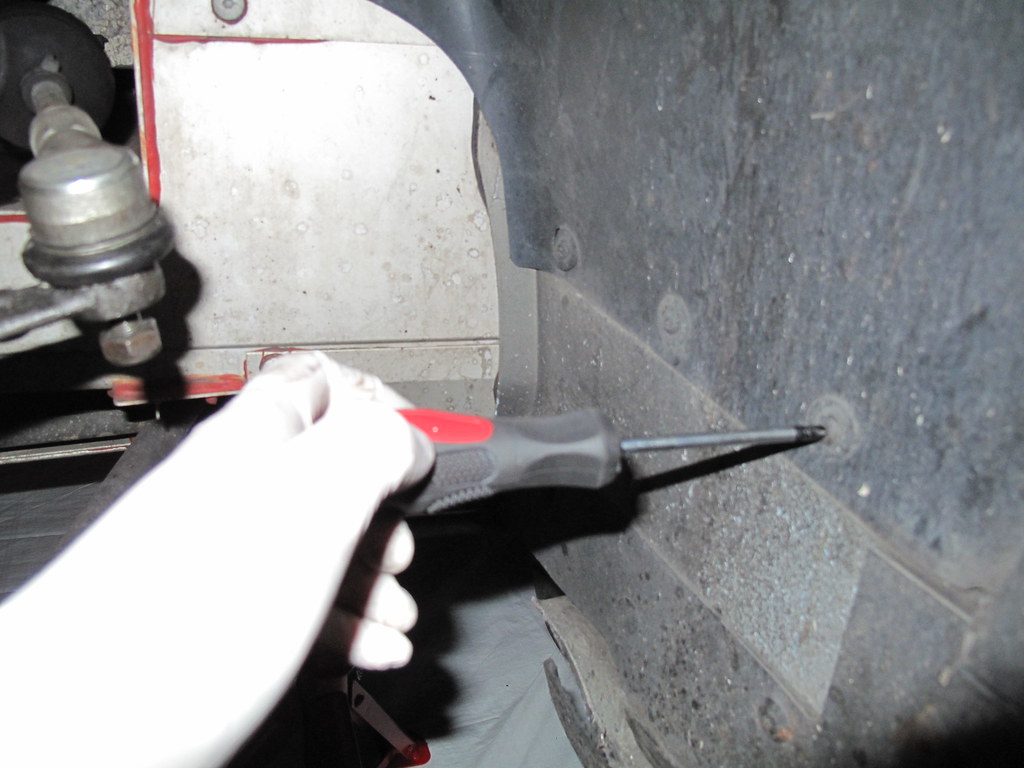
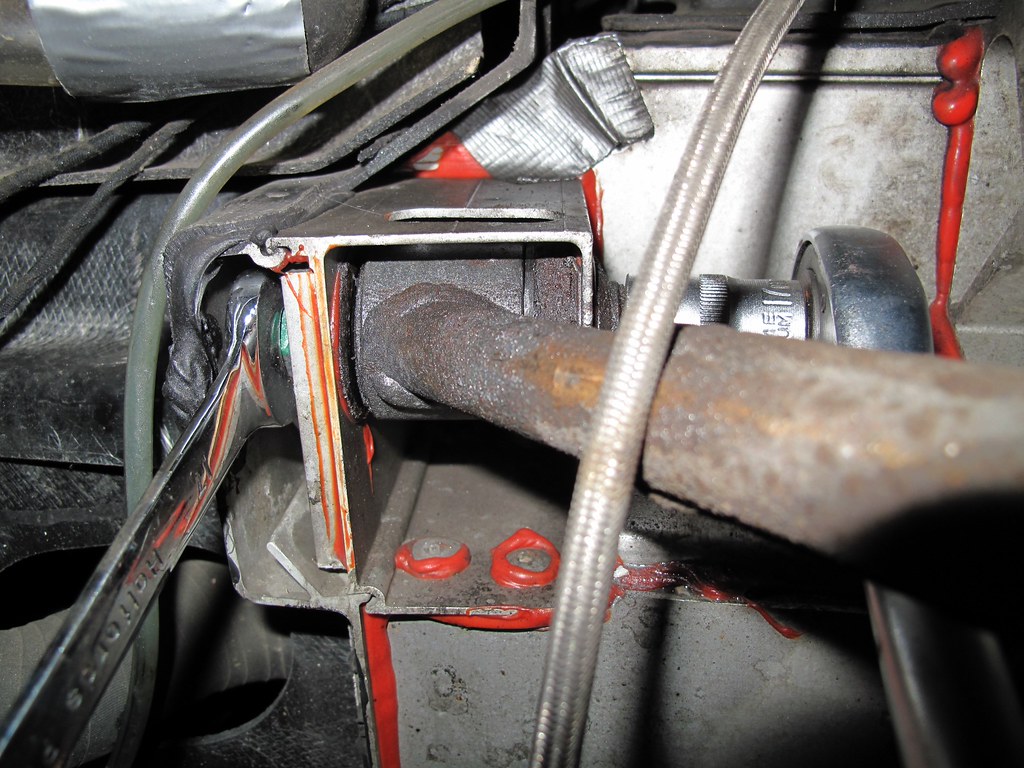
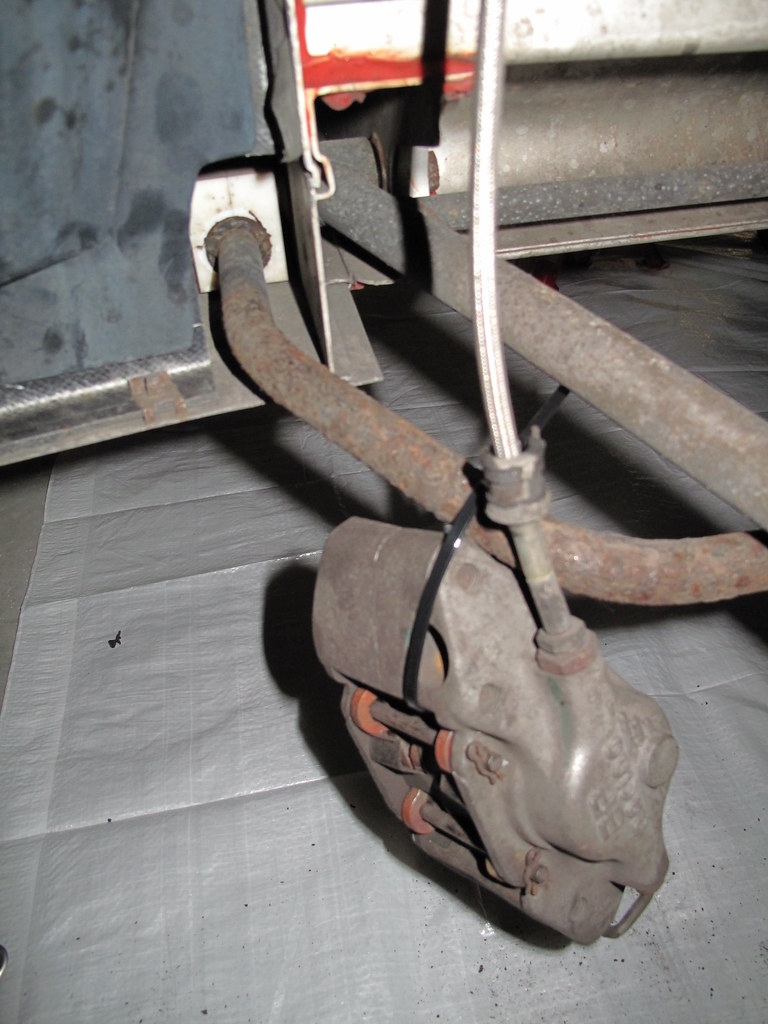
First off I removed the nut retaining the brake pipe clip.

Then removed the brake caliper with an 8mm allen socket.

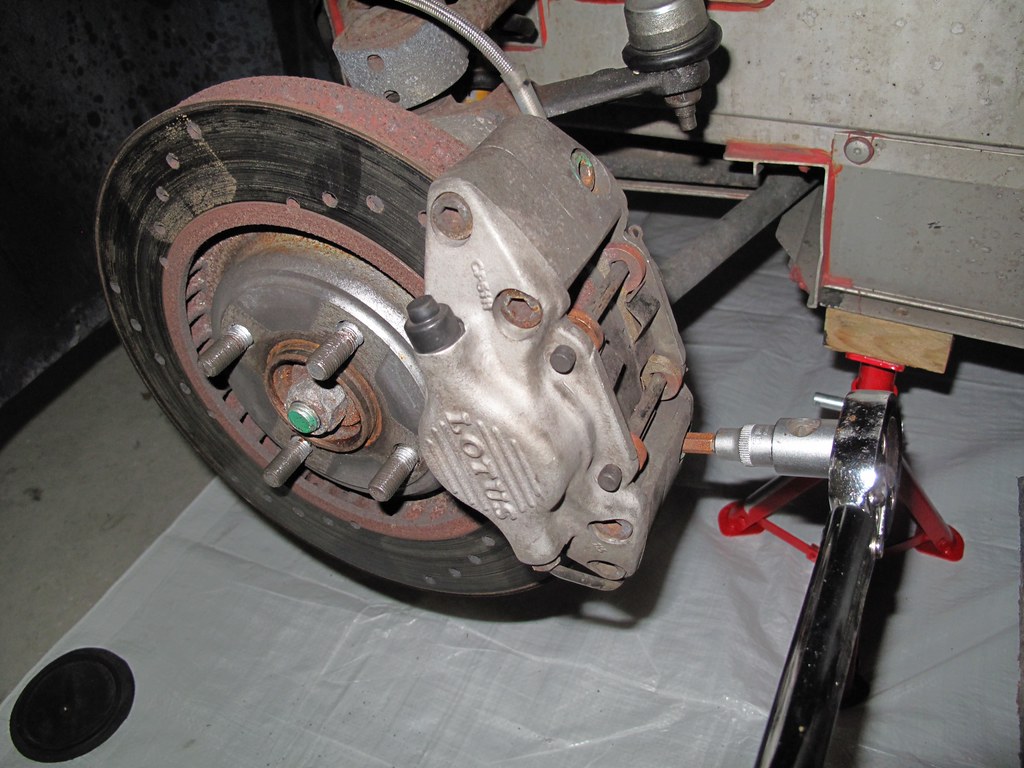
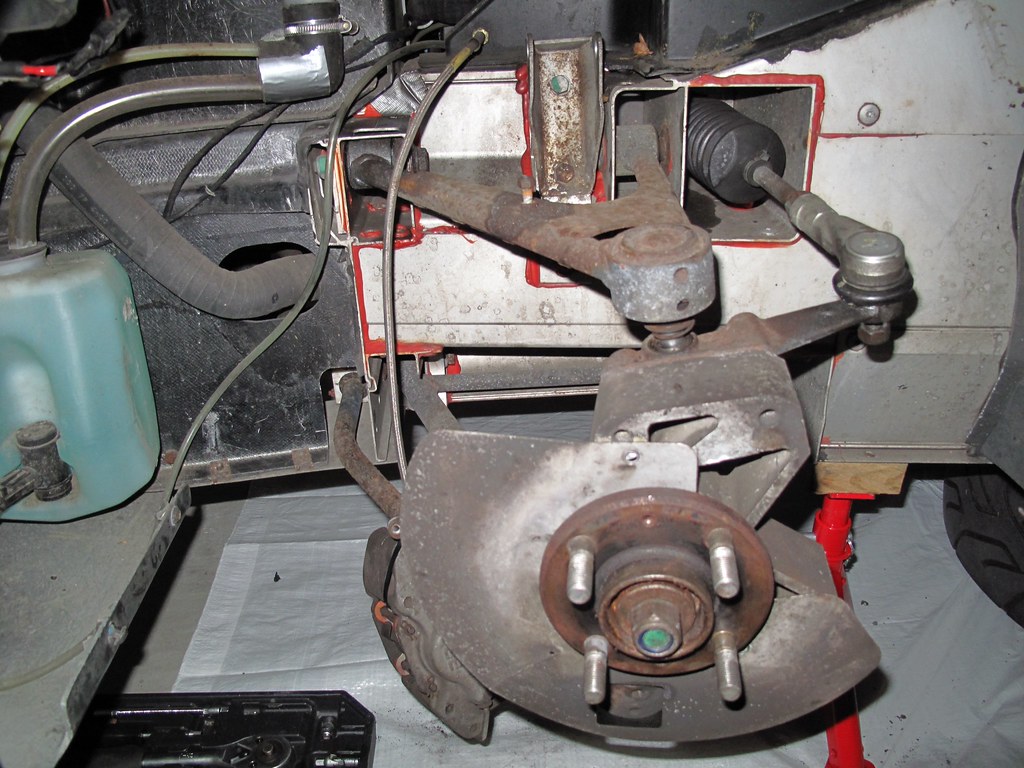
…and using a cable tie secured it to the anti-roll bar for now. I will be removing the anti-roll bar later to clean and replace the bushes and give it the anti rust treatment

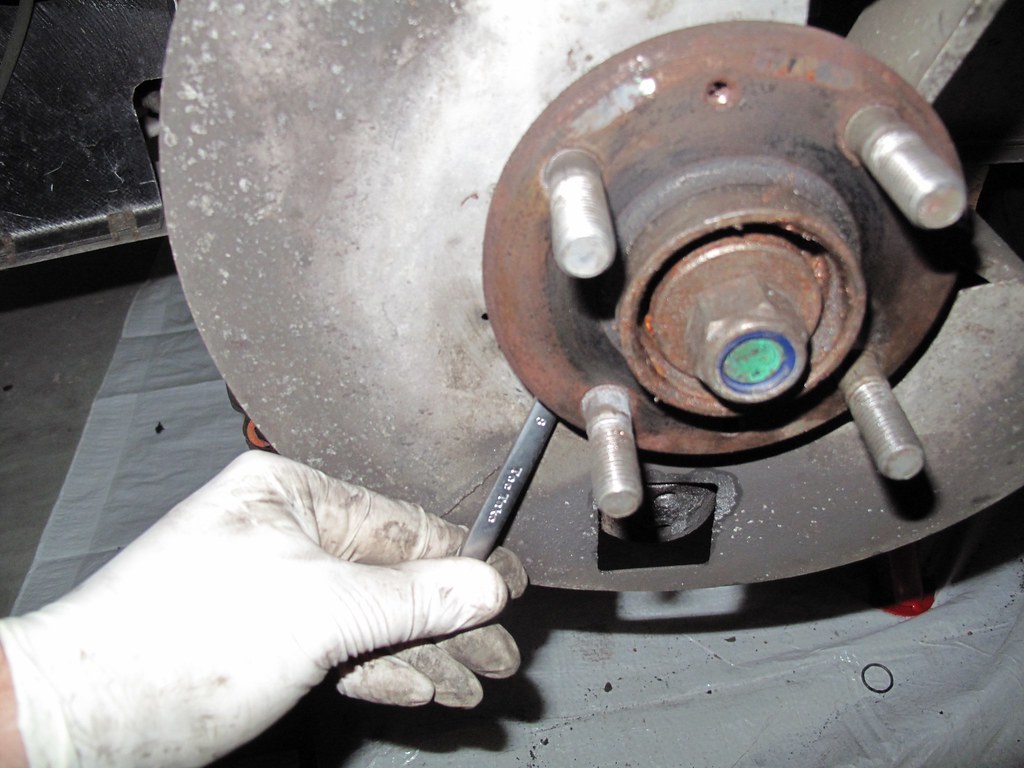
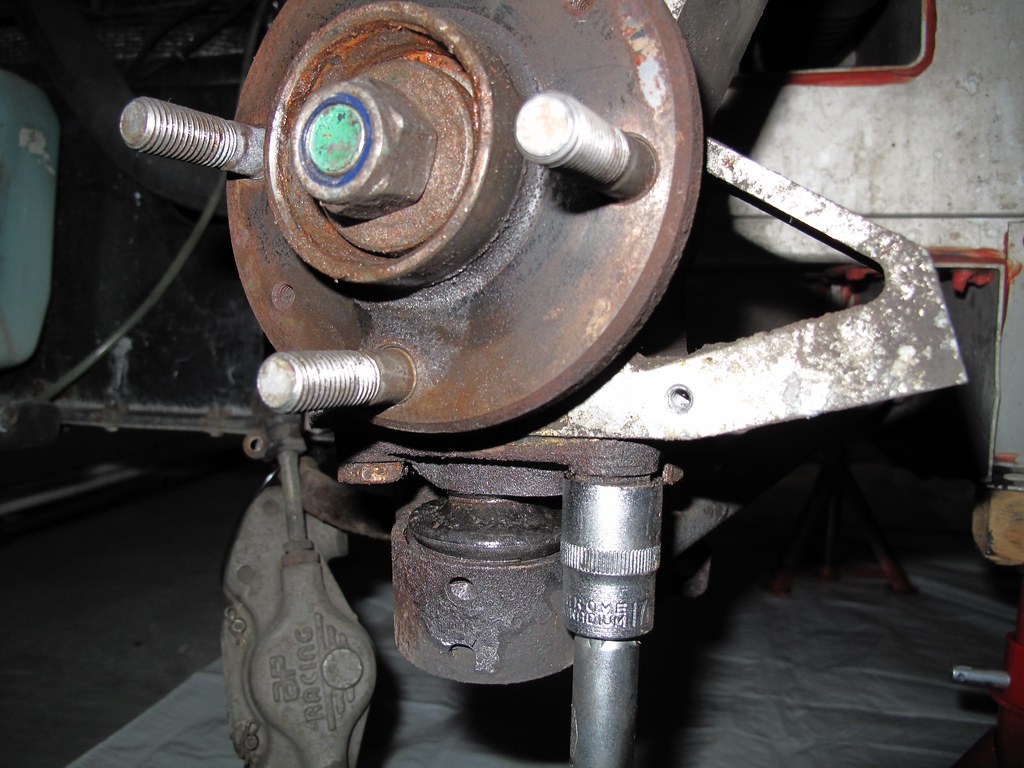
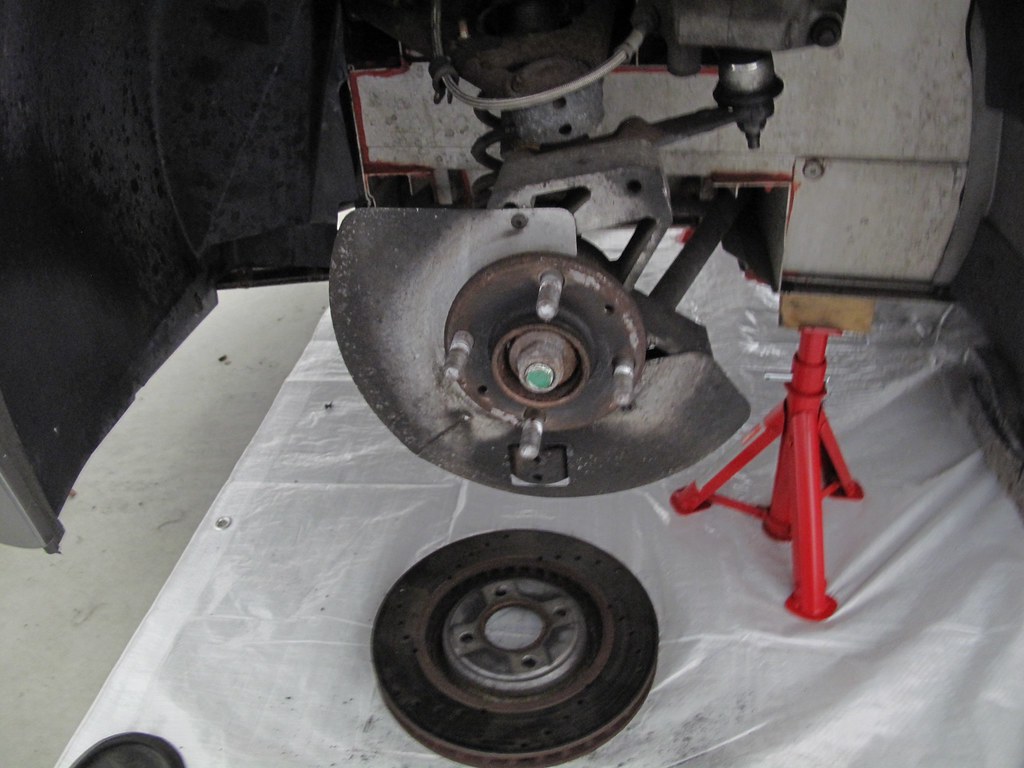
I then removed the brake disc (no further screws/bolts holding it on)

I then removed the upper strut support bolts using a 17mm socket and 17mm spanner

…and then the lower one

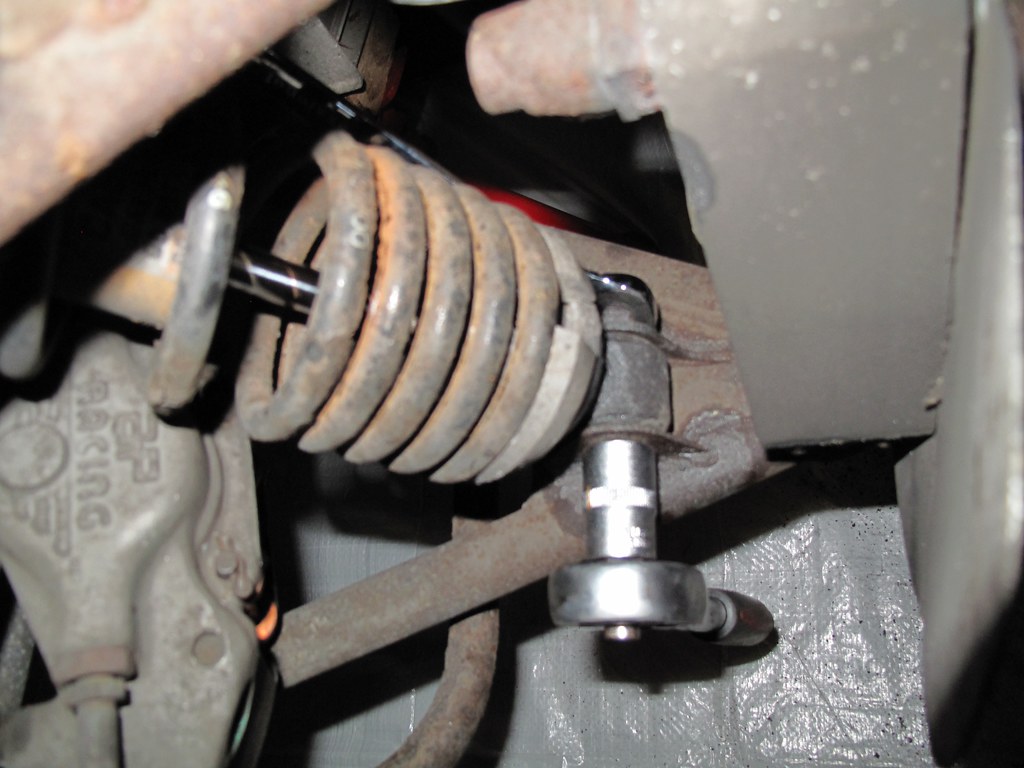
Removed the shock assembly

I then loosened off the front tie rod end bolt using a 17mm spanner and lubricated the dust cover (these were replaced last year and will be reused)…

before freeing off the joint using the joint splitter.

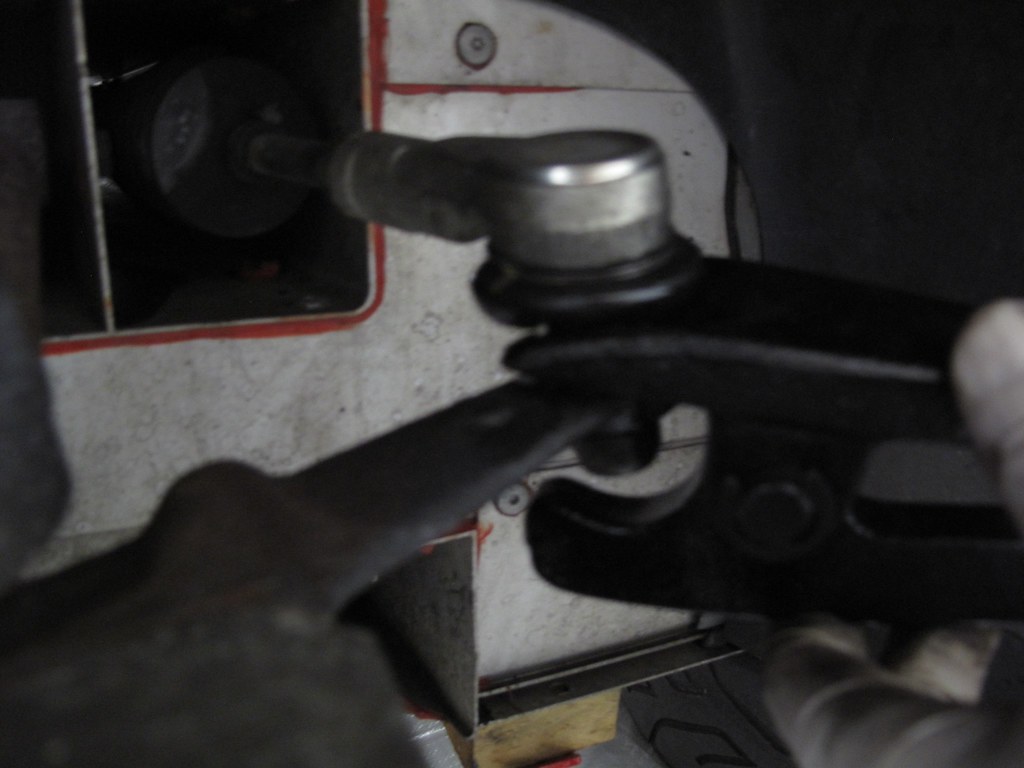
I loosened off the nut holding the upper wishbone to the Hub using a 19mm spanner (wishbone kept in place for now)

…and then the same with the bottom using a 19mm spanner (wishbone kept in place for now)

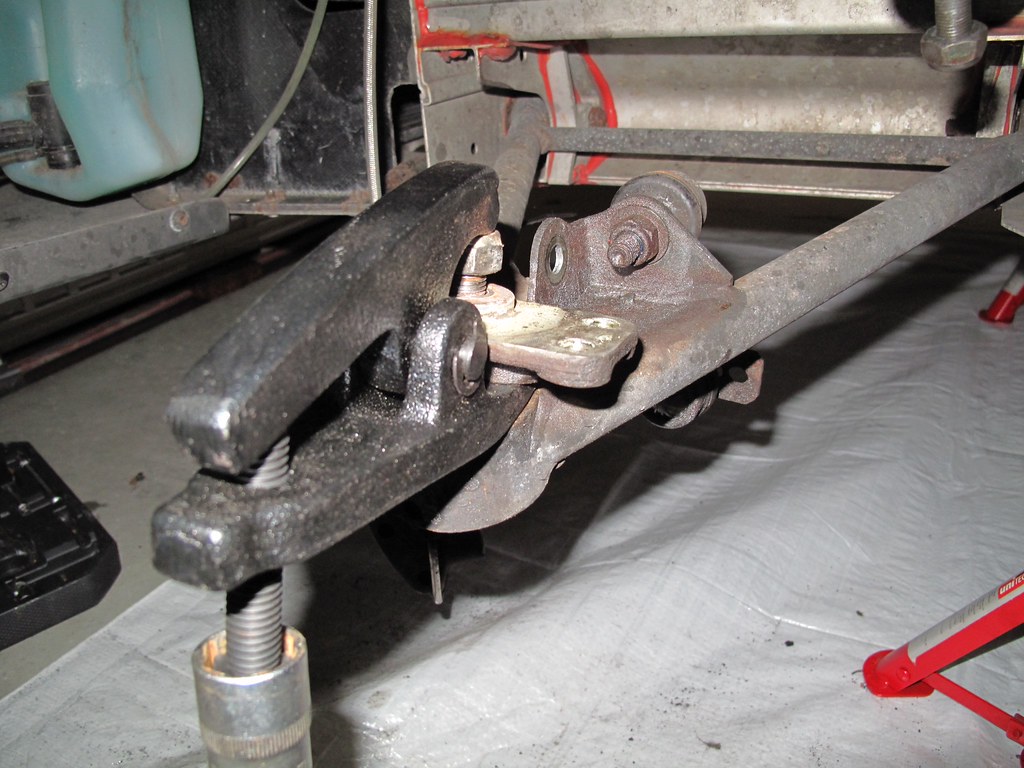
I then tried to loosen/remove the drop link but the threaded bar just rotated with the nut…

So in summary:

Can the upper wishbone bolts be removed without removing the wheel arch liner?
Should there be any castor shims in the aft upper wishbone joint or is that the design to allow movement/deflection in that area?
How can i remove the droplink to the anti roll bar (I could try putting another nut on it and using 2 spanners)?

I have those Nitrons on stock for immediate delivery!!
I can also offer a suspension refresh kit at special rate for a fellow exiger.
Refresh kits include
8 OEM ball joints, 2 TRE, 2 ARB Droplinks, Full set of suspension bushes and a suspension nut and bolt set

Suspension Refresh Kit (special price to be added later if you would like?)
You may also need
Steering Arm / Top plinth Bolt Kit

Dave I’ll be ordering all that and some other stuff next week. Dris doing the same to start with, getting the clams and wheel arch liners off kept my Dremmel busy mate.

Not the Nitrons lol, I’m an Ohlins man…like Benj :slight_smile:

Can’t wait to get the car out and have a go with them on circuit bud. Sat 21/2 at Donny, I think Sean is gonna come and give me a hand hopefully…would be great to see you.

Great build thread Dris. You’re in for a treat when it’s all back together it will be like a new car :sunglasses:

May make that Ben…

Can the upper wishbone bolts be removed without removing the wheel arch liner?

Yes they can, you need to lever it slightly out the way and can be more fiddly than just removing it. Depends on how many of the fixings are seized though!

Should there be any castor shims in the aft upper wishbone joint or is that the design to allow movement/deflection in that area?

There are some castor shims in there. They are normal sized washers though, so it looks like there aren’t any. When you take the wishbones out they will fall out on the floor, stay in the box section or be stuck to the wishbone bush. When you rebuild it all, fit the larger washers to front and rear of the wishbone, or superglue the small washers together to avoid lots of swearing.

How can i remove the droplink to the anti roll bar (I could try putting another nut on it and using 2 spanners)?

There is a pair of flats on the other side of the anti roll bar that you can hold the threaded part with. There is no guarantee that this will be of any use as the thread is a finer pitch than standard and rusts quite happily. Be prepared to cut them off and replace them.

John just so you know, I’m going to take everything apart and YOU owe yourself to build it back up again…know what I mean lol.

Cheers Dave, I already have everything on order but if I need anything I’ll give you a shout.

Cheers for the tips, I’ll try the fasteners on the wheel arch to remove it first, didn’t look like too much flex in the linner to work with.

This is good Dris, I’ll be doing this with mine soon. I’d like to make Anglesey too!

I’m in the middle of doing this too. My wishbones are at the zinc platers having the yellow zinc and de-embrittlement treatment. I was going to go with a clear coat of por-15 as well but have just bought some epoxy mastic chassis paint from these guys http://www.rust.co.uk

Also going the bearing route too. I went for the elise-shop kit which arrived last week. I see elise parts now do a kit as well.

Keep up the good work and write up :slight_smile:

Just a gentle reminder there is a little under 11 weeks to Anglesey! Time slips away quickly.

Original Konis?
Just like mine.
Maybe it’s time for me to “refresh”

Maybe Steve lol

I did consider Benja’s kit but havered for too long.

Nitron Track Day Pros transformed my S1 - but I did get JDS to fit them!

Dave - not seen the website before, but I do like it. Will be working up in Hull for a few days in March so may well pop in.

Cheers

Mark

Would be great to see you…
Really must get the workshop and stores finished/painted and organised then have an open day one Saturday…

Day 3

Taking onboard the advice (cheers Dave-JDC) I decided to remove the wheel arch liner and hopefully save some skin/swearing in the meantime.
I needed to first remove the 2 bolts and 2 screws (1 screw hidden in photo) holding the fuse box assembly:

Then the 2 bolts holding the forward side:

…and the 3 plastic screws/washers to the rear. These where quite difficult to get out but using a flat headed screwdriver combined with a Philips type screwdriver and pliers managed to get them out

Then I could peel back the wheel liner allowing better access to the upper wishbone bolt which I will remove later on.

To remove the shock absorber bracket was fairly straight forward (I’m removing to clean everything) using a 13mm spanner and socket.

Now i carried on with the hub dis-assembly…
Next was to remove the brake disc shield. First removing the 2 visible hex cap head bolts (one top one bottom)

and then the hidden bolt, which just needed to be loosened before the shield could be worked loose in the direction towards the front of the car.

The 4 bolts holding the plinth to the aluminum upright where loosened but the 2 at the forward end couldn’t be removed.

With the top and bottom wishbone joint nuts now loose I used the ball joint splitter to pop the top joint out.

…and then slide out the hub/upright (removing the tie rod end nut beforehand) leaving the plinth to be removed by using the ball joint splitter

Then with the 8mm hex Allen socket removed the steering arm from the hub (this could have been done much earlier)
Here you can see the 3 camber shims.

Now back to that drop link (cheers again Dave-JDC)
Using a 19mm spanner on the flat part of the drop link and a 17mm spanner I was able to release the nut without the need to cut or use a nut buster.

The wishbones are the last to be removed but for now I was done.

Day 4

Removal of the front top wishbone joint was relatively straight forward with 17mm spanner and socket

To remove the upper rear bolt proved quite tricky as with the steering on full right lock I still wasn’t able to get the bolt out without fear of damaging the cover.
First I loosened off the joint using 2 x 17mm spanners as getting a socket on the forward end proved impossible (the support for the damper bracket being in the way)
Then I decided to cut the tie clip (I can replace a tie clip but would be annoyed to damage the boot)
…and push it back for enough space to get the bolt out using an Allen key to push the bolt out.

For the bottom front wishbone joint i used a 17mm spanner through the gap where the anti-roll bar goes (I since removed the front under tray which may have made it easier to access) and a 17mm socket on the aft side

Now for the last joint which involves removing first the passenger foot rest (mine was just Velcro in place) to access the head of the bolt.

and a 17mm spanner at the other end. I tie clipped the spanner to the wishbone to stop it falling off (sorry no photo)

With the bolts out I worked loose the upper wishbone and was ready to catch the small camber washers.

There’s a gap in the chassis where a screw driver could be used to help work the front joint loose.

This is the upper wishbone with the washers, the 3 large washers (all stuck together) are on the forward joint are all on the aft side with the stubber washer.

a view of the condition of the bushes

And the lower wishbone

So that’s on corner off the car…all the parts went into one box so I don’t mix them up.
I’ve colour tie clipped the parts that will go for sandblasting so they don’t get mixed up with the offside parts (not sure if the tie will survive the process though)

I struggled earlier to get the front under tray off but finally after finishing the wishbones managed to do it.
This will give easier access to the anti-roll bar support brackets.

Here shows the screws loosened off, 3 at the back, 2 either side and 5 along the front.
The tray needed pushing forward then back to be lowered.

Before starting yesterday (day 4) I discovered a really good guide here: tadts.com/instructions/suspension - Replace wishbone bushes and wishbone ball joints (wishbones removed from car)
I will edit my first post to include this link so this helps anyone in future.

Now I will do the off side now (hopefully quicker)

Edit: Link to clearer photos

nice work

is that panel on the wrong way around, thought the holes projected inwards

I’ll have a look later, i cant really remember the holes pointing in a particular direction.

Do consider the epoxy mastic,as suggested. Personally, I preffer it to Por as its just less faffy to use.

You might want to consider that ARB, you’ll have some lovely shiney wishbones then a rusty arb.