2006 Exige S

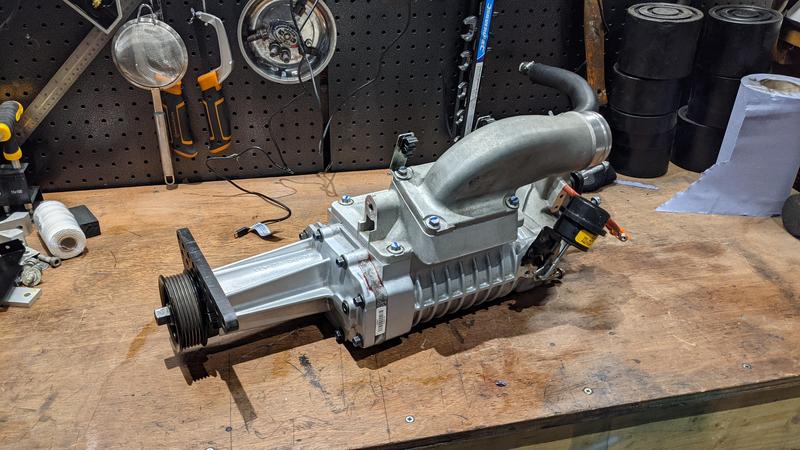
Whilst waiting for my suspension to return, I got on with the next job on the list… the supercharger.

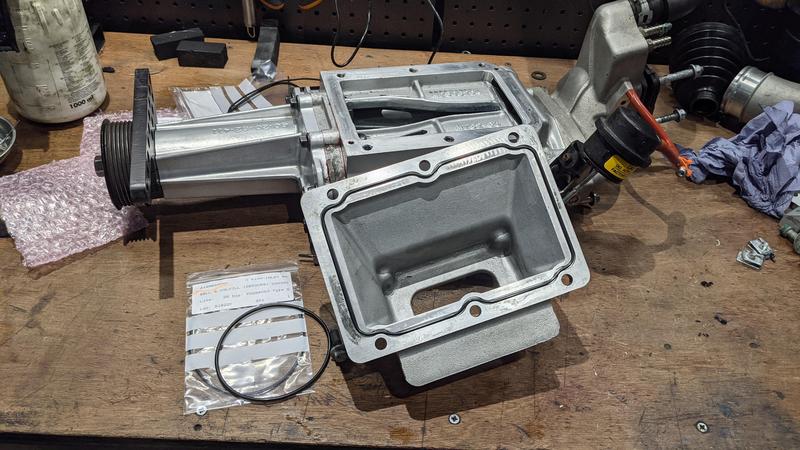
I’m not doing anything major, but since I’ve discovered a few broken brackets/incorrectly mounted bits I wanted to get it off the car completely - inspect everything and then bolt it back together properly. It also gives me better access to stuff like the starter motor, so there was a nice bonus there when putting the gearbox accessories back in place.

Getting the unit out isn’t that hard with the clam off, with the clam on it’s still possible but you’d need a pretty intimate knowledge of where all the bolts are I think. Inlet manifold comes off first, then the main blower unit can be just pulled out.
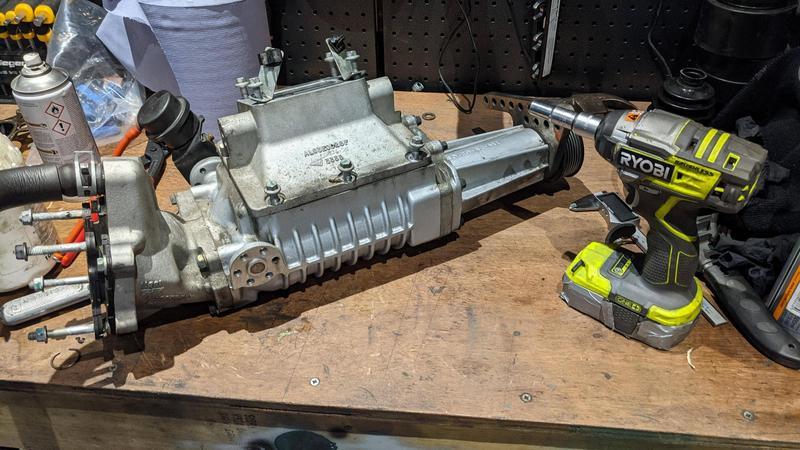
The oil inside the supercharger nose has no published service interval that I can find, but some people have found that they can leak either externally (making a mess) or internally causing invisible damage so it’s worth at least checking levels occasionally. With the supercharger on the car your only way to gauge oil level is to stick a syringe in the fill hole and suck it out, but it’s notoriously difficult to get all of it out so you never really know how much oil you’ve got. I’ve tried multiple times and each time can only extract 60ml or so of oil (it should have 110ml), but with it on the bench I could pour it all out and sure enough the full 110ml came out - so there’s a lesson there, I imagine a fair few people overfill theirs as they incorrectly believe they extracted it all first.

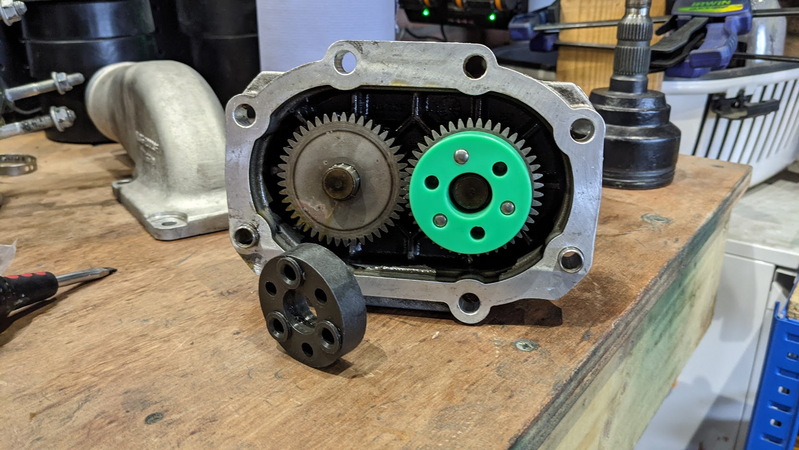
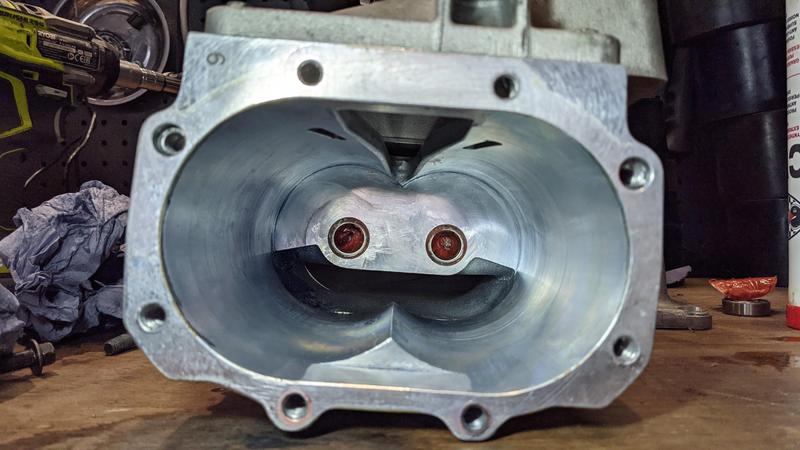
Obviously I then couldn’t help myself having a proper nosey inside.
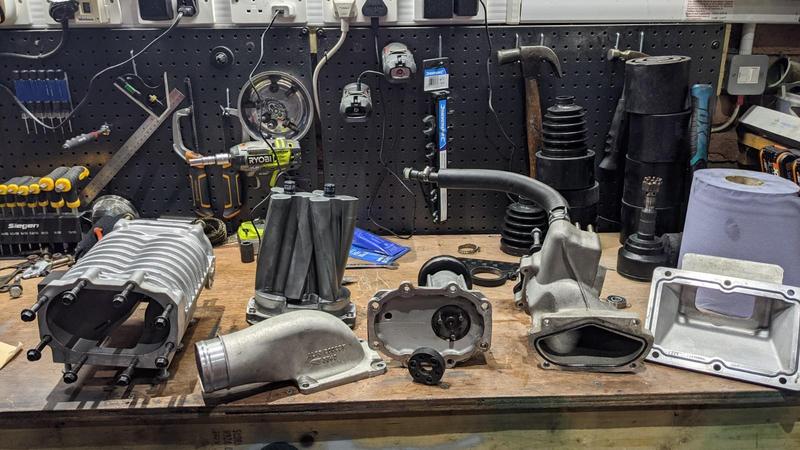
All looks well, as it should considering I’ve done 90% of the mileage on it (it was replaced in 2012 by a previous owner). I’ve ordered some new o’rings for the various air/inlet adaptors as they’re all a bit crusty and the service kit that I’ve ordered includes the correct oil and a replacement coupler. My coupler is absolutely fine, but they are a wear component that eventually can make for a noisy supercharger (clacking at low RPM) so I’ll stick the replacement in anyway.

Rotors look in fine fettle, the teflon-like coating they have is intact which is better than most pictures I’ve seen of higher mileage units. The needle bearings in the rear of the casing cannot really be serviced, so will just repack them with high temp grease and be on my way.

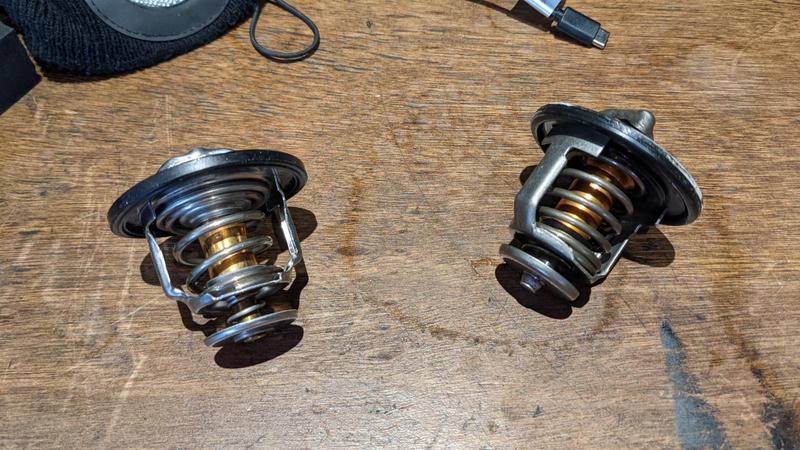
Removal of the SC also gives easy access to the engine thermostat, so I’ve thrown a new one in whilst in the area. Very cheap part, so just a case of swapping out whilst it’s accessible.
The knock sensor is also right in that region so I took a minute to remove that, clean and refit with the correct torque setting (which can apparently have a big impact on knock detection). For what it’s worth it felt like it was over torqued, but it’s hard to gauge really.

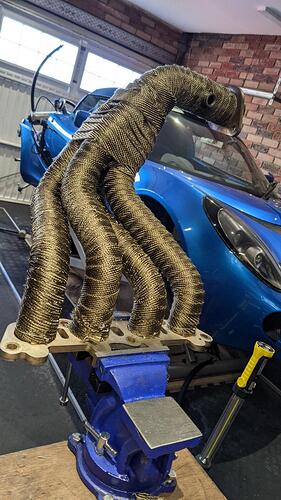
I’m still awaiting the service kit for the SC so I can’t put this part of the car back together yet, so whilst twiddling my thumbs I got the manifold wrapped. Hateful job, and after a summer of running the 2bular manifold I would say it’s not quite mandatory - but the contents of your boot do get a bit toasty.
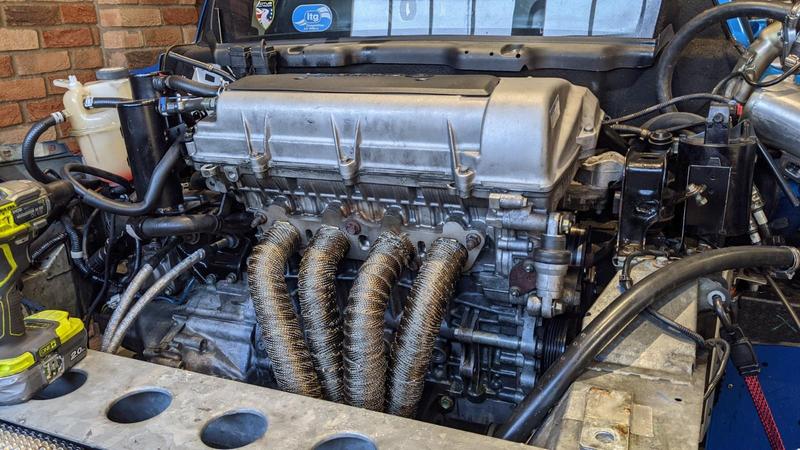
I’d quite like to get this ceramic coated at some point but budget creep has already gone a bit mental. Maybe one for next year.

There’s been loads of other small activities going on, barely worth writing about but it’s all slowly starting to come together. I expect the wishbones back soon, they’re the main bottleneck now as they prevent me from firing the car up to test whether my gearbox/clutch actually works…
Great progress as always ! Any more thoughts about a smaller pulley whilst it was all apart?

Kyle knows someone with a smaller pulley setup and despite this person telling Kyle to do the sensible thing for some reason they are sticking to their guns.

Yes it’s something I’m fighting off temptation for daily. It would be a literal 5minute job to swap the pulley and the injectors with the car in its current shape, but I’ve convinced myself to get a few miles/trackdays under the belt of the new gearbox setup first before pushing my luck. In all probability I’ll have a smaller pulley on by Summer though…

:laughing: :laughing:

Great updates Kyle, I’m enjoying this. I’m sure you’ll love the LSD and new ratios.

Way back in your thread you talk about oil cooler o rings. A fascinating subject, did you ever get to the bottom of the differences between the pipes? On mine the pipes ends from the sills to the coolers look like yours. But the crossover pipe between coolers has different ends. One of mine might be leaking a tiny amount after reconnecting it but I don’t know if there’s an o ring in there I could replace which would help.

:thumbup:

All we really concluded is that Lotus seemed to use a mix of fixings, some used o-rings and some used a metal to metal cone compression fitting. It’s easy enough to find out if you pop the crossover pipe off. Mine too has different connectors for the cross-over pipe, seems strange - but all cars I’ve seen up close are the same, they use one type for the sill pipes to filter, and another type on the crossover despite the actual fitting threads being identical.

One thing I would do, is make sure you’re leaking before wasting too much time on it. Easier said than done, but if there’s any oil on the threads or in the fitting when you screw it all together - it’ll slowly seep its way out, it’s not necessarily oil coming out from the pressurised side. Just making sure everything is uber clean when putting it back together is a good start.

My o-rings were shagged on inspection, it really did feel like they weren’t up for the job of exposure to oil because they were so brittle.

This is a good point thanks - I suspect it may be the cause then because the pipe still had some oil in it, when I connected it back up it was pouring out everywhere so maybe it’s just the remains of that seeping through. I’ll keep an eye on it. I can’t remember, are these crossover pipe connections only accessible with the clam off or can you get to them with the clam on? Sorry for the derail.

No problem on the derail, I write these posts on the half chance they’ll help somebody in the future.

The crossover is half-accessible with the clam on. I can just about get a spanner onto the unions to nip them up, but I wouldn’t want to do anything more involved than that (such as removing, changing o-rings and then trying to refit…).

Take your time, run the car up to temp on the driveway and just give it ample chance to leak (if it does). Otherwise you’ll be back in a month or two removing the clam again, as I found out :lolno:

Every project or big bit of work comes with a disaster, as far as disasters go this wasn’t a particularly bad one - but it annoyed me and cost me some money, all self inflicted.

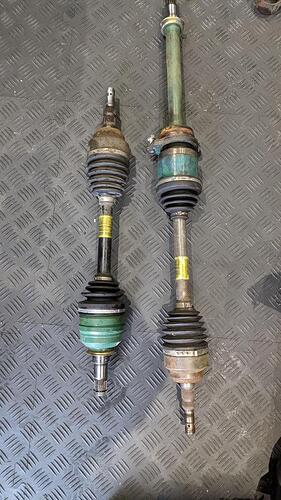
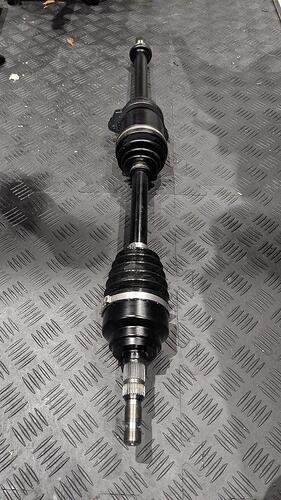
One of the first parts I took off the car when removing the gearbox was the driveshafts, I wanted to paint them up - I’d usually just mask off, paint them with a bit of hammerite - job done, but I wanted to do it “properly”.

This ended up being a world of pain, issues included but not limited to:

  • Painted them the wrong colour, due to a can mix-up at Halfords they initially ended up metallic green :laughing:
  • Attempting to split the CV’s and clean them/regrease them was a nightmare, circlips got broken and were hard to source
  • I managed to jam the bearing mechanism in one, got really frustrated and battered it with a hammer which then wrote off that particular CV joint.
  • The “good” CV joint I had got nicely rebuilt, then the driveshaft fell over and the thread for the hubnut got mashed right on its end… Luckily Chris Type116 fixed the thread for me.

So just for the sake of painting my driveshafts I ended up £120 down on a new CV Joint (luckily you can still source the NTN original items for a Vauxhall for much less than Lotus prices) and £30 down for a kit of 280 assorted circlips (yes, really!) to get the size I needed.

I gave up on green and used some satin that I had lying around. Luckily the end result is OK, but I really, really wish I never bothered. :unamused:

As of this morning both shafts are fitted back into the gearbox in which I sincerely hope they’ll stay.

At least you had fun doing it :rofl: And you’ll find CV grease all over the place for the next few years!

Jobs to do on Andys car

Paint drive shafts
Everything else

_"This ended up being a world of pain, issues included but not limited to:
\

  • Painted them the wrong colour, due to a can mix-up at Halfords they initially ended up metallic green :laughing:
  • Attempting to split the CV’s and clean them/regrease them was a nightmare, circlips got broken and were hard to source
  • I managed to jam the bearing mechanism in one, got really frustrated and battered it with a hammer which then wrote off that particular CV joint.
  • The “good” CV joint I had got nicely rebuilt, then the driveshaft fell over and the thread for the hubnut got mashed right on its end… Luckily Chris @Type116 fixed the thread for me.

    So just for the sake of painting my driveshafts I ended up £120 down on a new CV Joint (luckily you can still source the NTN original items for a Vauxhall for much less than Lotus prices) and £30 down for a kit of 280 assorted circlips (yes, really!) to get the size I needed."_

Forgive me, but this brightened up an otherwise dull day :laughing:

It also made me feel not as bad about the work I’ve been screwing up on mine lately!

Cant beleive your not keeping it std :rofl::rofl: colour change :anguished:

I’m glad you all found entertainment for it.

These sort of things usually happen on projects, just not many people post about it on the internet.

I know, I’ve crossed the line. Purists will never want to buy this car now.

My Supercharger service kit and o-rings all arrived, so I got to work putting that back together.

Old Coupler didn’t have any notable play in it, but the new one was a much tighter fit… so I guess wear had started, no matter how slight.

Lotus (Bell and Colville) still had the O-Rings in to order, old ones seemed ok but they were only pennies.

Rear needle bearings cleaned out, then re-packed with high temp grease.

Nose was refitted with anaerobic gasket maker, and filled up with the 110ml spec oil.

The completed unit got a wipe down ready for reinstall.

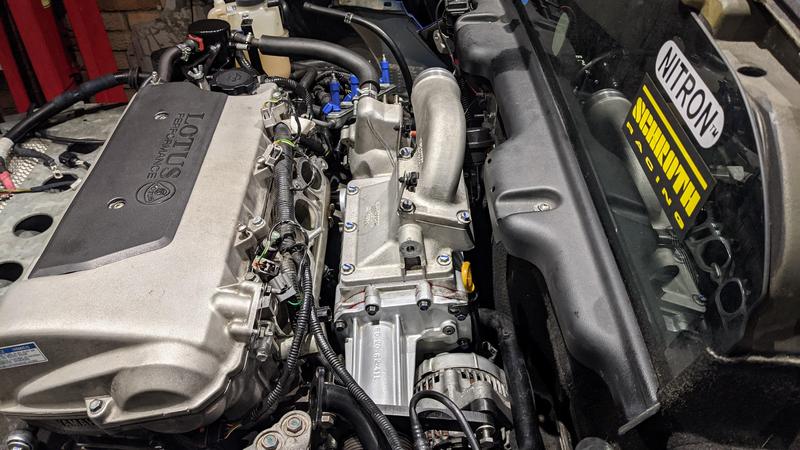
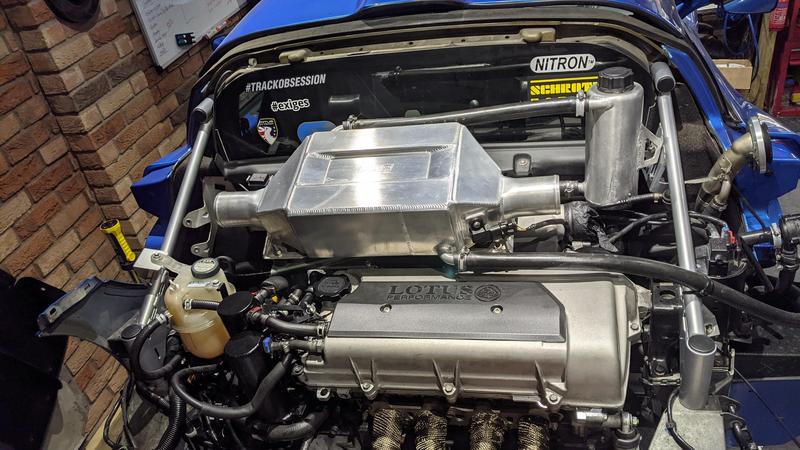
Installing is pretty much a case of just lobbing it into the void in the engine bay, then trying to line up a number of different brackets along with fitting the inlet manifold.

One of the main reasons I removed it was to check all of the mounting points and see if I could find any clues as to why I had 2 broken brackets and one missing one previously (basically the SC was hanging purely by 2 pinch bolts to the inlet manifold, and the silicone joiner to the intercooler) and nothing was obviously amiss.

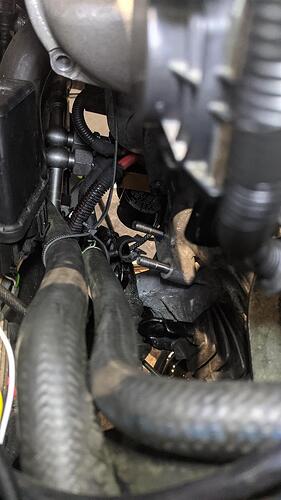
I did have a scare with the stay mount that Chris Type116 welded for me, I went to put one of the bolts in (through the clutch slave cylinder and into a threaded hole on the gearbox) and stripped the first couple of threads. Luckily this cleaned up reasonably well with a tap, and I made an attempt to avoid further damage by converting it to a stud arrangement instead:

The studs make it much easier to line everything up, as you need to push the clutch cylinder in against the pressure of the fluid/system whilst lining up the bolt holes. Now I can just slot it all over the studs with the SC stay bracket, and do the nuts up afterwards.

It’s now fitted with the TB bracket, stay bracket and nose brackets all done up properly - possibly for the first time in the life of the supercharger! My best theory is that the nose/alternator bracket was neglected upon initial installation, and the subsequent twisting force on the unit caused the rear two brackets to fail over the years.

With the blower back on, this allowed me to do some much needed rebuilding to reduce the amount of crap I have lying around, and finally start reducing the “loose nuts and bolts” count.

  • New Aux/SC belt fitted
  • Roll bar supports refitted
  • Charcoal canister put back together and re-plumbed
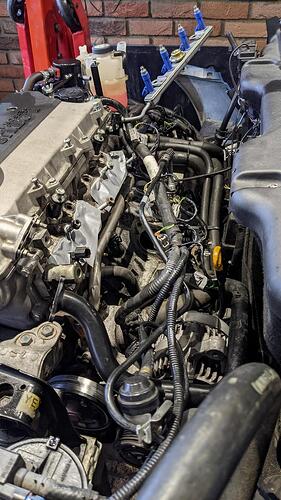
  • Fuel rail and covers back on
  • Charge cooler and plumbing back on

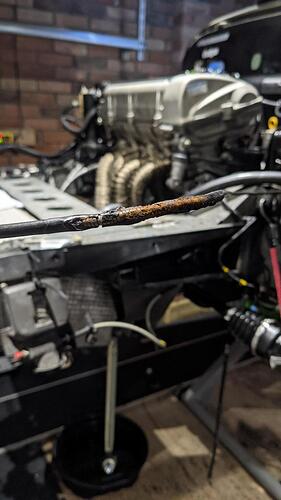
Between all that I had a little side job, my boot release cable had long since had a brush with my exhaust manifold and the sheathing had melted off.

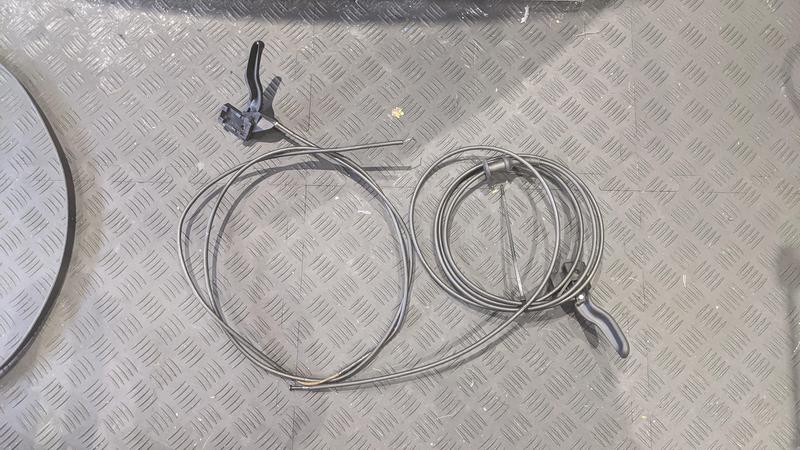
Having this cable snap is a bit of a pain in the arse, so thanks to lotuslee for the hint, I grabbed a new Vectra bonnet release cable w/ handle from eBay as a drop in replacement. Threading the new cable through the firewall, over the top of the fuel tank and back out into the car was a right barrel of laughs - but nothing a bit of endoscope+telescopic grabby thing couldn’t handle.

Astra front hubs
Vectra boot release
Corsa B locks and indicators.

Fantastic! :thumbup:

You can add outer CV to the VX list too, plus plenty more I’m sure!